The beginner's guide to bus processing
Get more out of your mix by processing in groups, and discover pre-master strategies for your master bus
Want all the hottest music and gear news, reviews, deals, features and more, direct to your inbox? Sign up here.
You are now subscribed
Your newsletter sign-up was successful
Signal routing gives engineers and producers a lot of convenience. Mixing desks and studio wiring are – usually, at least – meant to facilitate options. From this expanse of choices, the art and trade of music production has developed a wide variety of strategies for getting the job done – some are useful in certain contexts, others useful in other situations; some have become de rigueur and trusted, while others have fallen out of favour. Others have simply gone obsolete as technology has improved.
It’s with these options in mind that we approach this article. You may have become stuck in a rut with your processing and mixing strategies, you may have just been sticking to the default DAW options, or you could have never known there was another way to do things. In this specific case, we’re going to take a look at bus processing, shining a light on its advantages and how it can shake up your workflow.
What is bus processing?
Bus processing is when we take a number of tracks and apply the same processing to them all in a single channel as a group. A common bus processing tactic that you’ve probably used is the drum group – processing all your drums on a single output channel to make the entire group more cohesive as a unit.
Article continues belowAnother regular use of bus processing that you’ve definitely used? Your mixer’s master output channel. You may have thrown plugins on here for analysis, mastering, or what you hoped would be a reasonable approximation of mastering. We’ll cover this too, distinguishing pre-master bus processing from actual mastering, and explaining how pre-master processing may help.
There are more illuminating tactics behind bus processing that could be fertile ground for ideas when approaching your next mix. We’ll show you some strategies for how – and why – you’d apply bus processing to parts of your project that aren’t just drums or the whole entire row of channels in your project. And we’ll show you how to ensure you’re setting it up right, plus a few variations offered by modern DAWs.
Circuit secrets
Beyond the analogue mixing desk workflow, if these techniques are facilitated by real-life consoles, what processing tactics could be revealed by modern DAWs with their enlarged signal flow and routing options?
We’re thinking of features like Logic Pro’s Folder Tracks, and Studio One’s channel editor, which lets you split off your own signal forks within the insert signal chain. And then there are options like Bitwig, with its flexible modulation across a channel and The Grid. And how about Tracktion Waveform’s infinitely routable mixer, with sends from anywhere to anywhere?
Want all the hottest music and gear news, reviews, deals, features and more, direct to your inbox? Sign up here.
If you use any of that to build entirely custom mixing chains, and not only will it change the way you use a DAW – it’ll change the way you mix, full stop!
Setting up groups and buses in four major DAWs
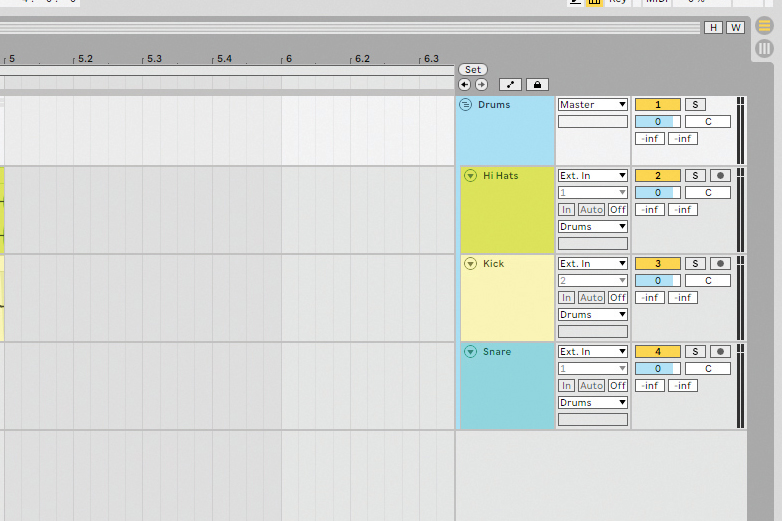
Ableton Live has a very simple workflow for creating groups. Select the tracks you wish to add to the group and press Cmd-G on Mac or Ctrl-G on Windows. You can add more tracks to the group by dragging and dropping the track onto the group.
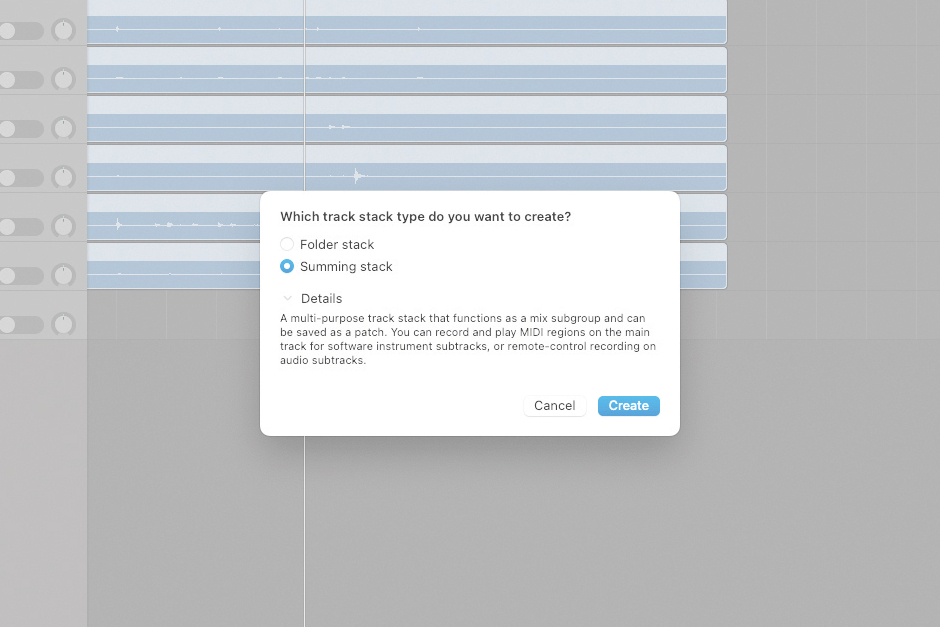
Logic Pro X is slightly more complicated. Apple refer to groups as “Track Stacks”, to create a track stack press Shift-Cmd-D. Logic will present two option: a Folder Stack or a Summing Stack.
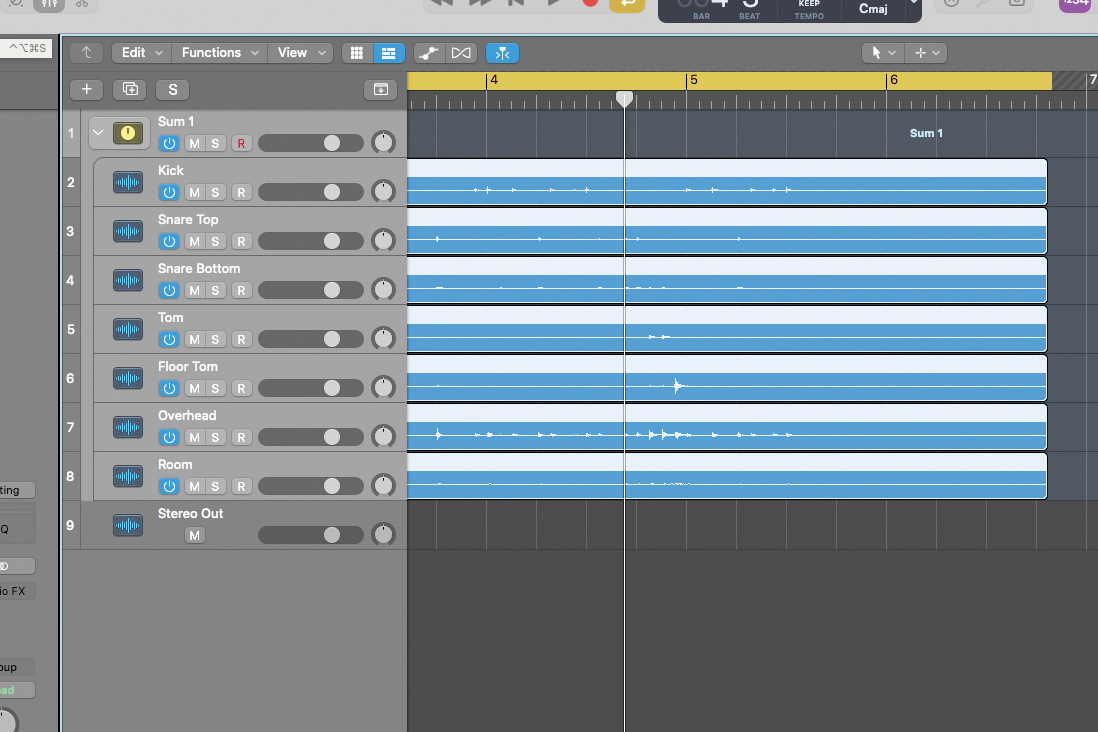
In most instances, selecting Summing Stack is the preferable option. Folder Stacks do not allow group processing, instead you can simply alter the volume or mute and solo the group – it’s more for organisational purposes.
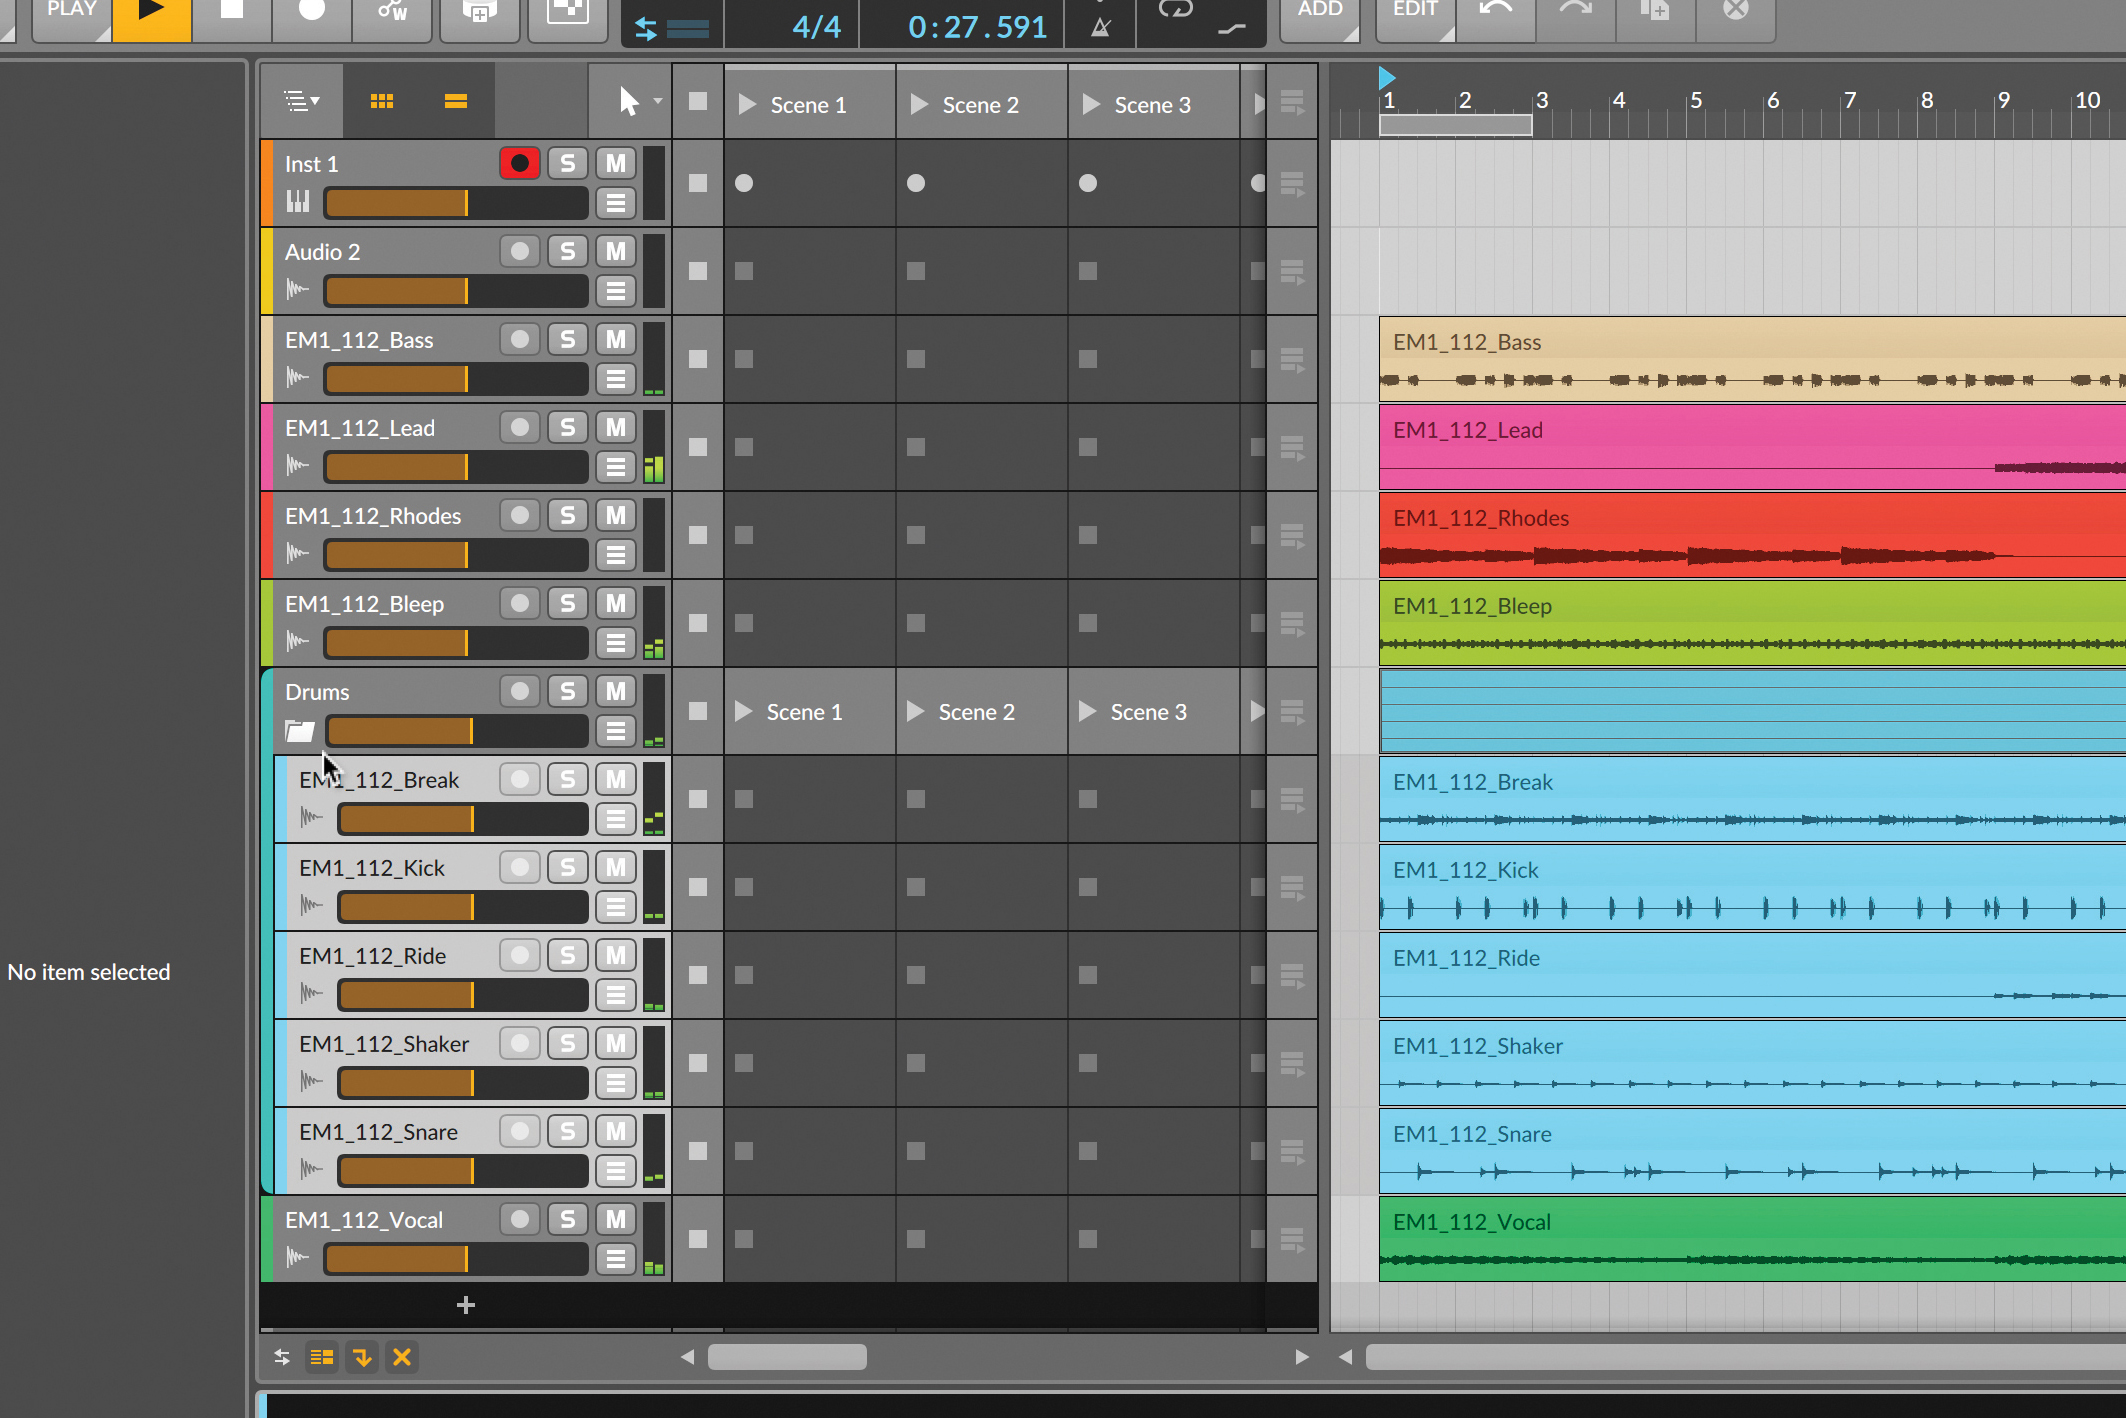
In Bitwig Studio, add a new Group track to the mixer or arrange page (Cmd/Ctrl-Shift-G). Select the tracks you want to put into that group, and drag them onto the newly created Group track. You’ll have to open its ‘folder’ to see them all in there.
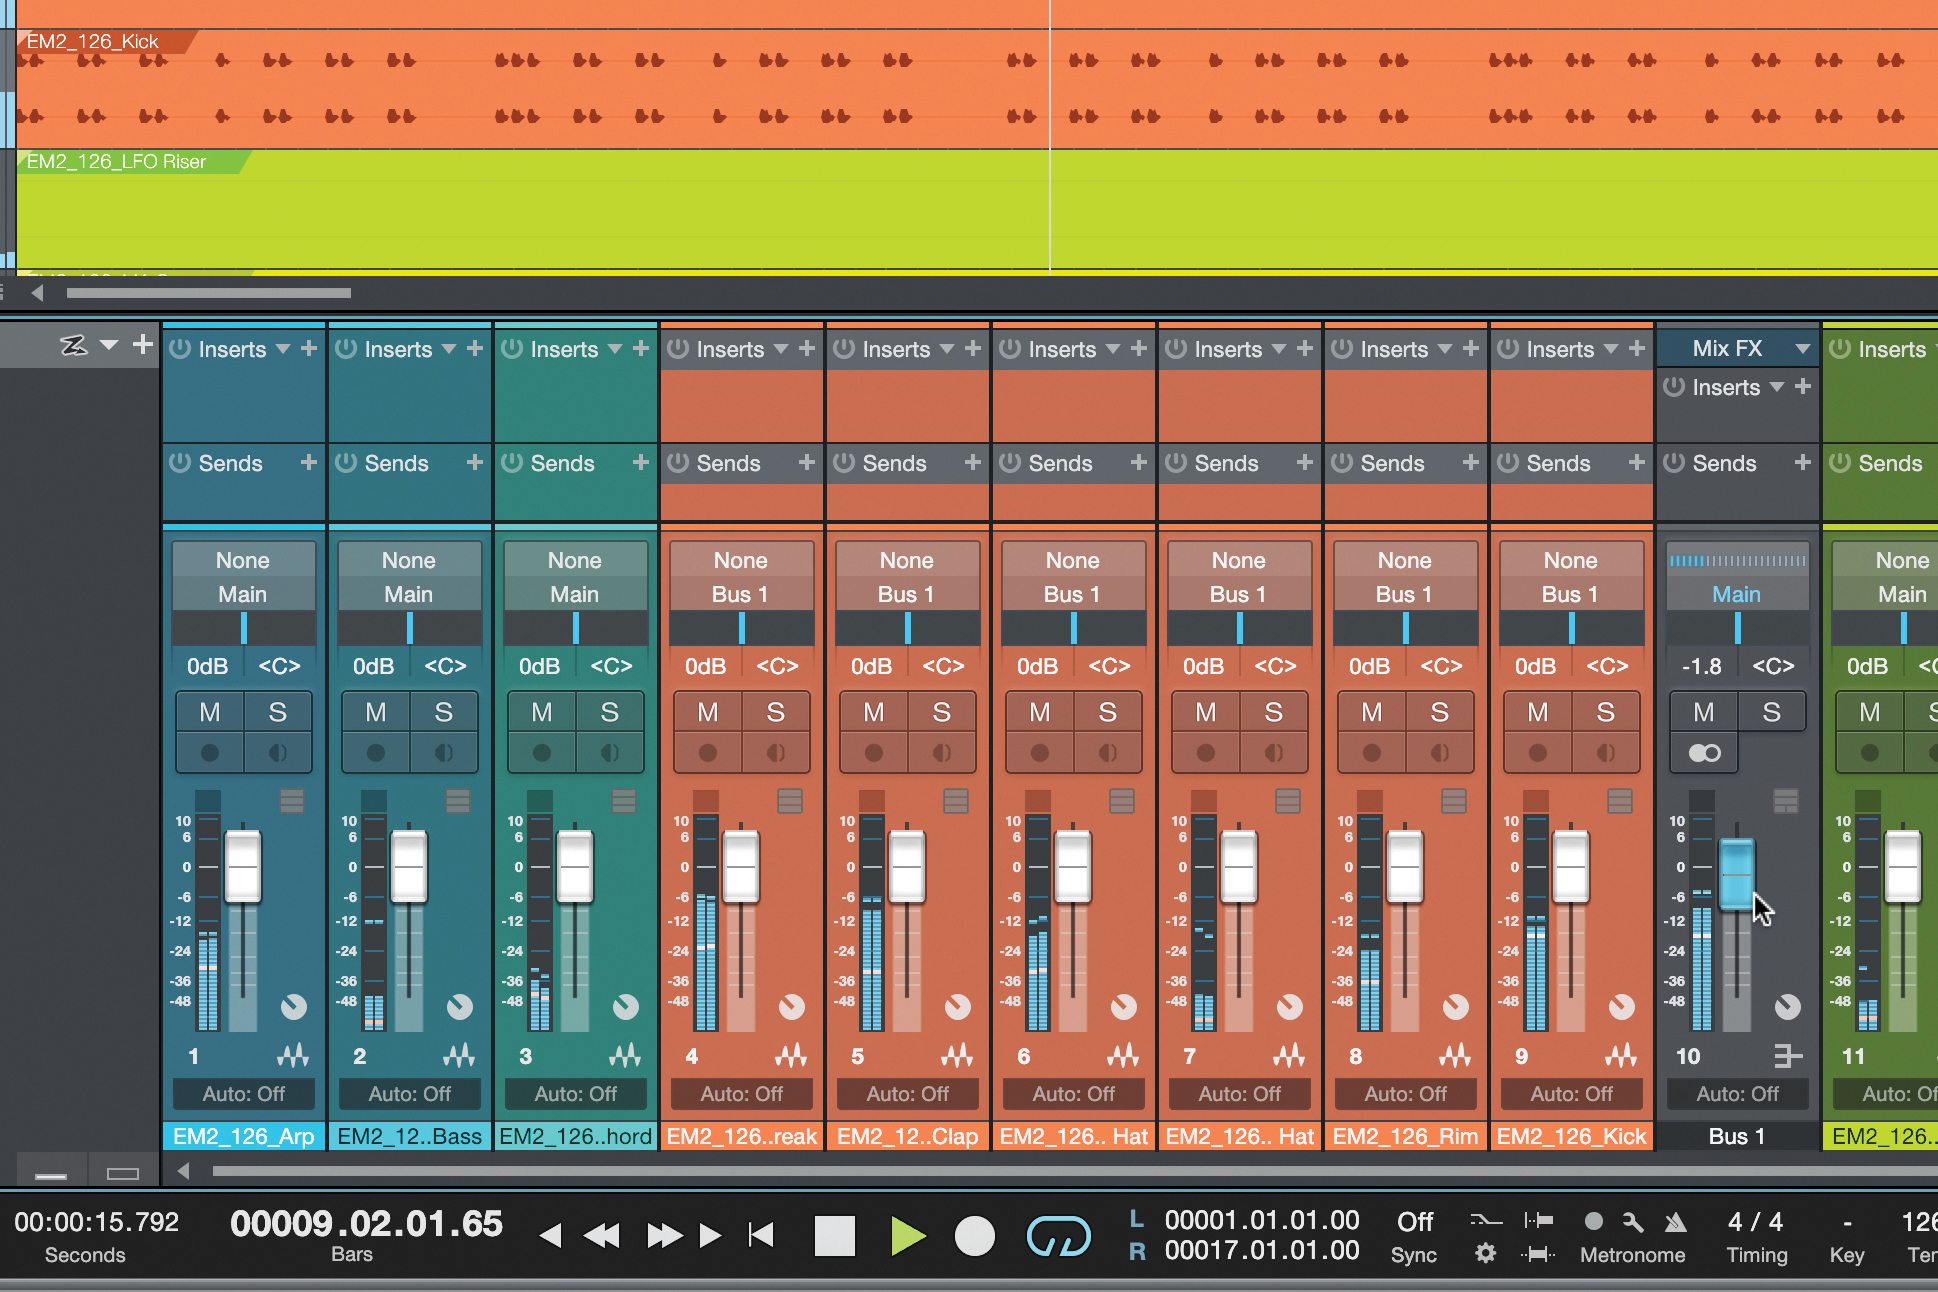
Studio One has two ways to work with groups. After selecting your channels and right-clicking, you can “Add Bus for Selected Channels”. This creates a new channel in the mixer that the other channels flow through.
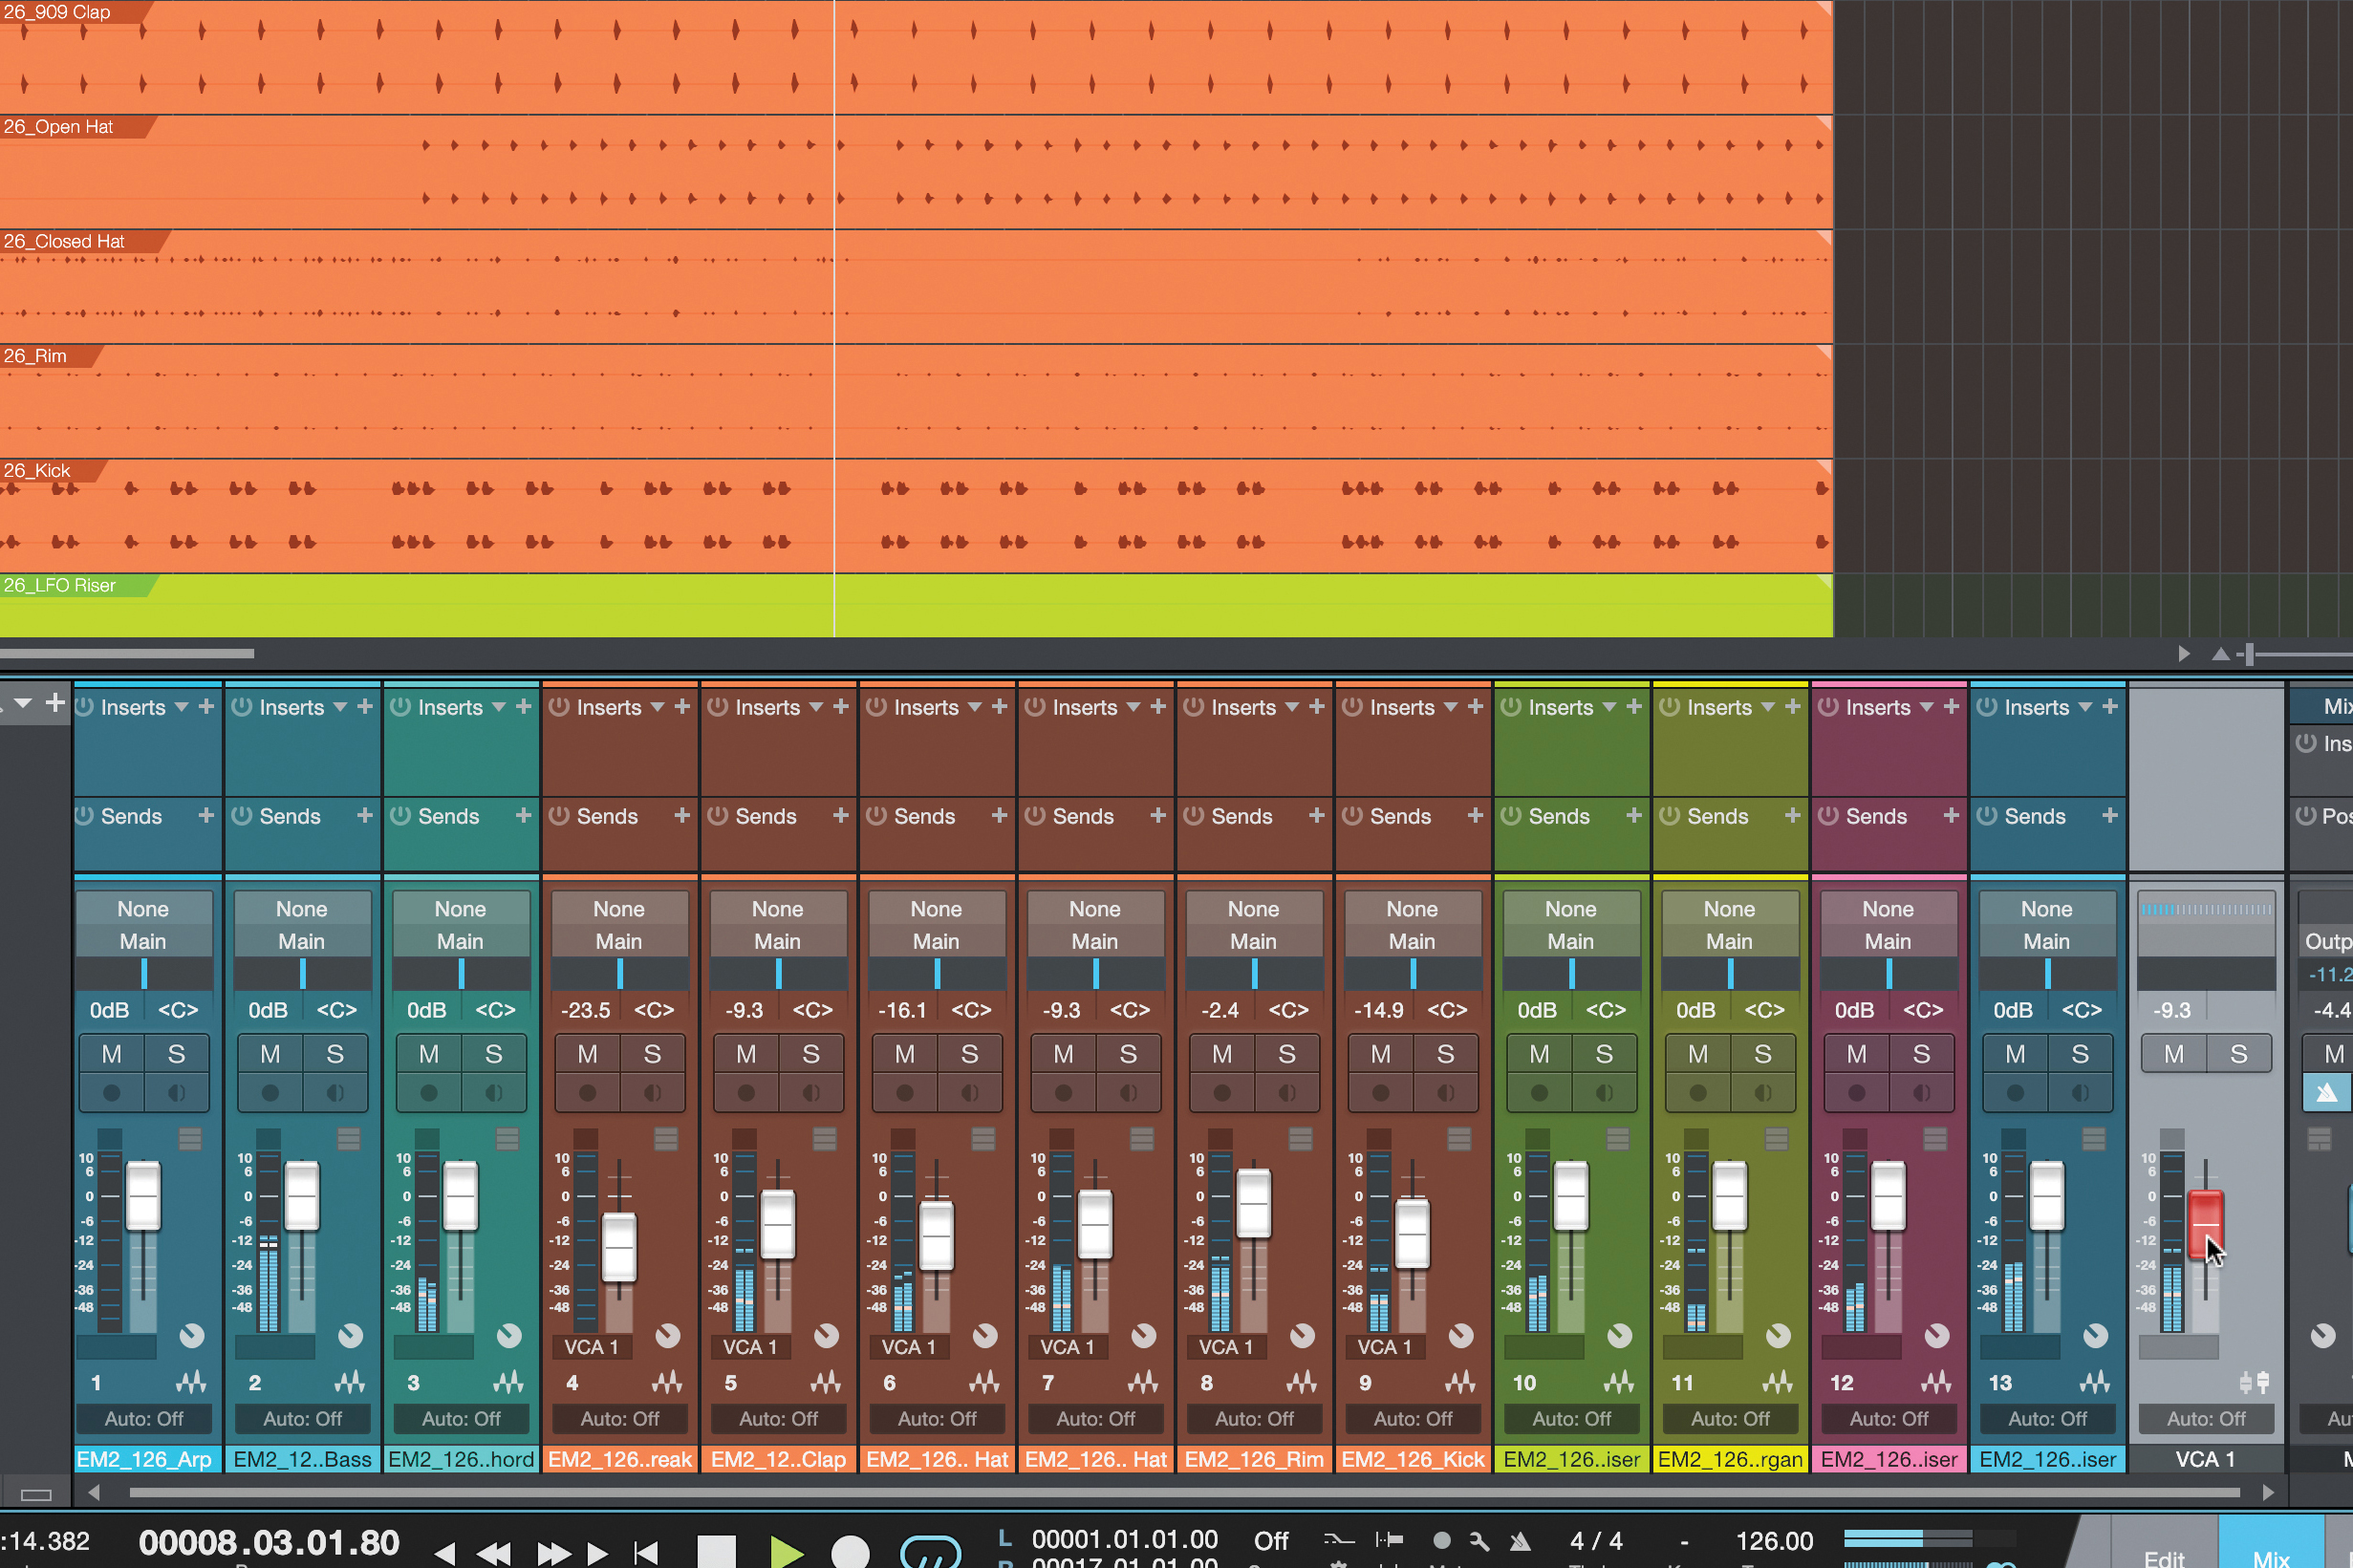
Gluing elements together on a drum bus
What is 'glue'? Psychoacoustics teaches us that our brains are constantly analysing different sounds and grouping them together as ‘things’. Since we can’t shut our ears, we have to pick out environmental sounds, ambience, things we can hear but should ignore, and things we want to concentrate on.
Every bit of sound has to be identified as being part of ‘something’, and there are some factors that determine what makes two elements of sound appear to be coming from the same source. In addition to direction and tuning, one of these things is whether two elements of sound modulate and move together.
By introducing compression, we’re making everything shake its dynamics together, making everything sound more cohesive, like one single ‘thing’. No matter if the hi-hats didn’t trigger your threshold – they’ll be ducked all the same. This is the real root of what’s happening when we talk about the elusive glue.
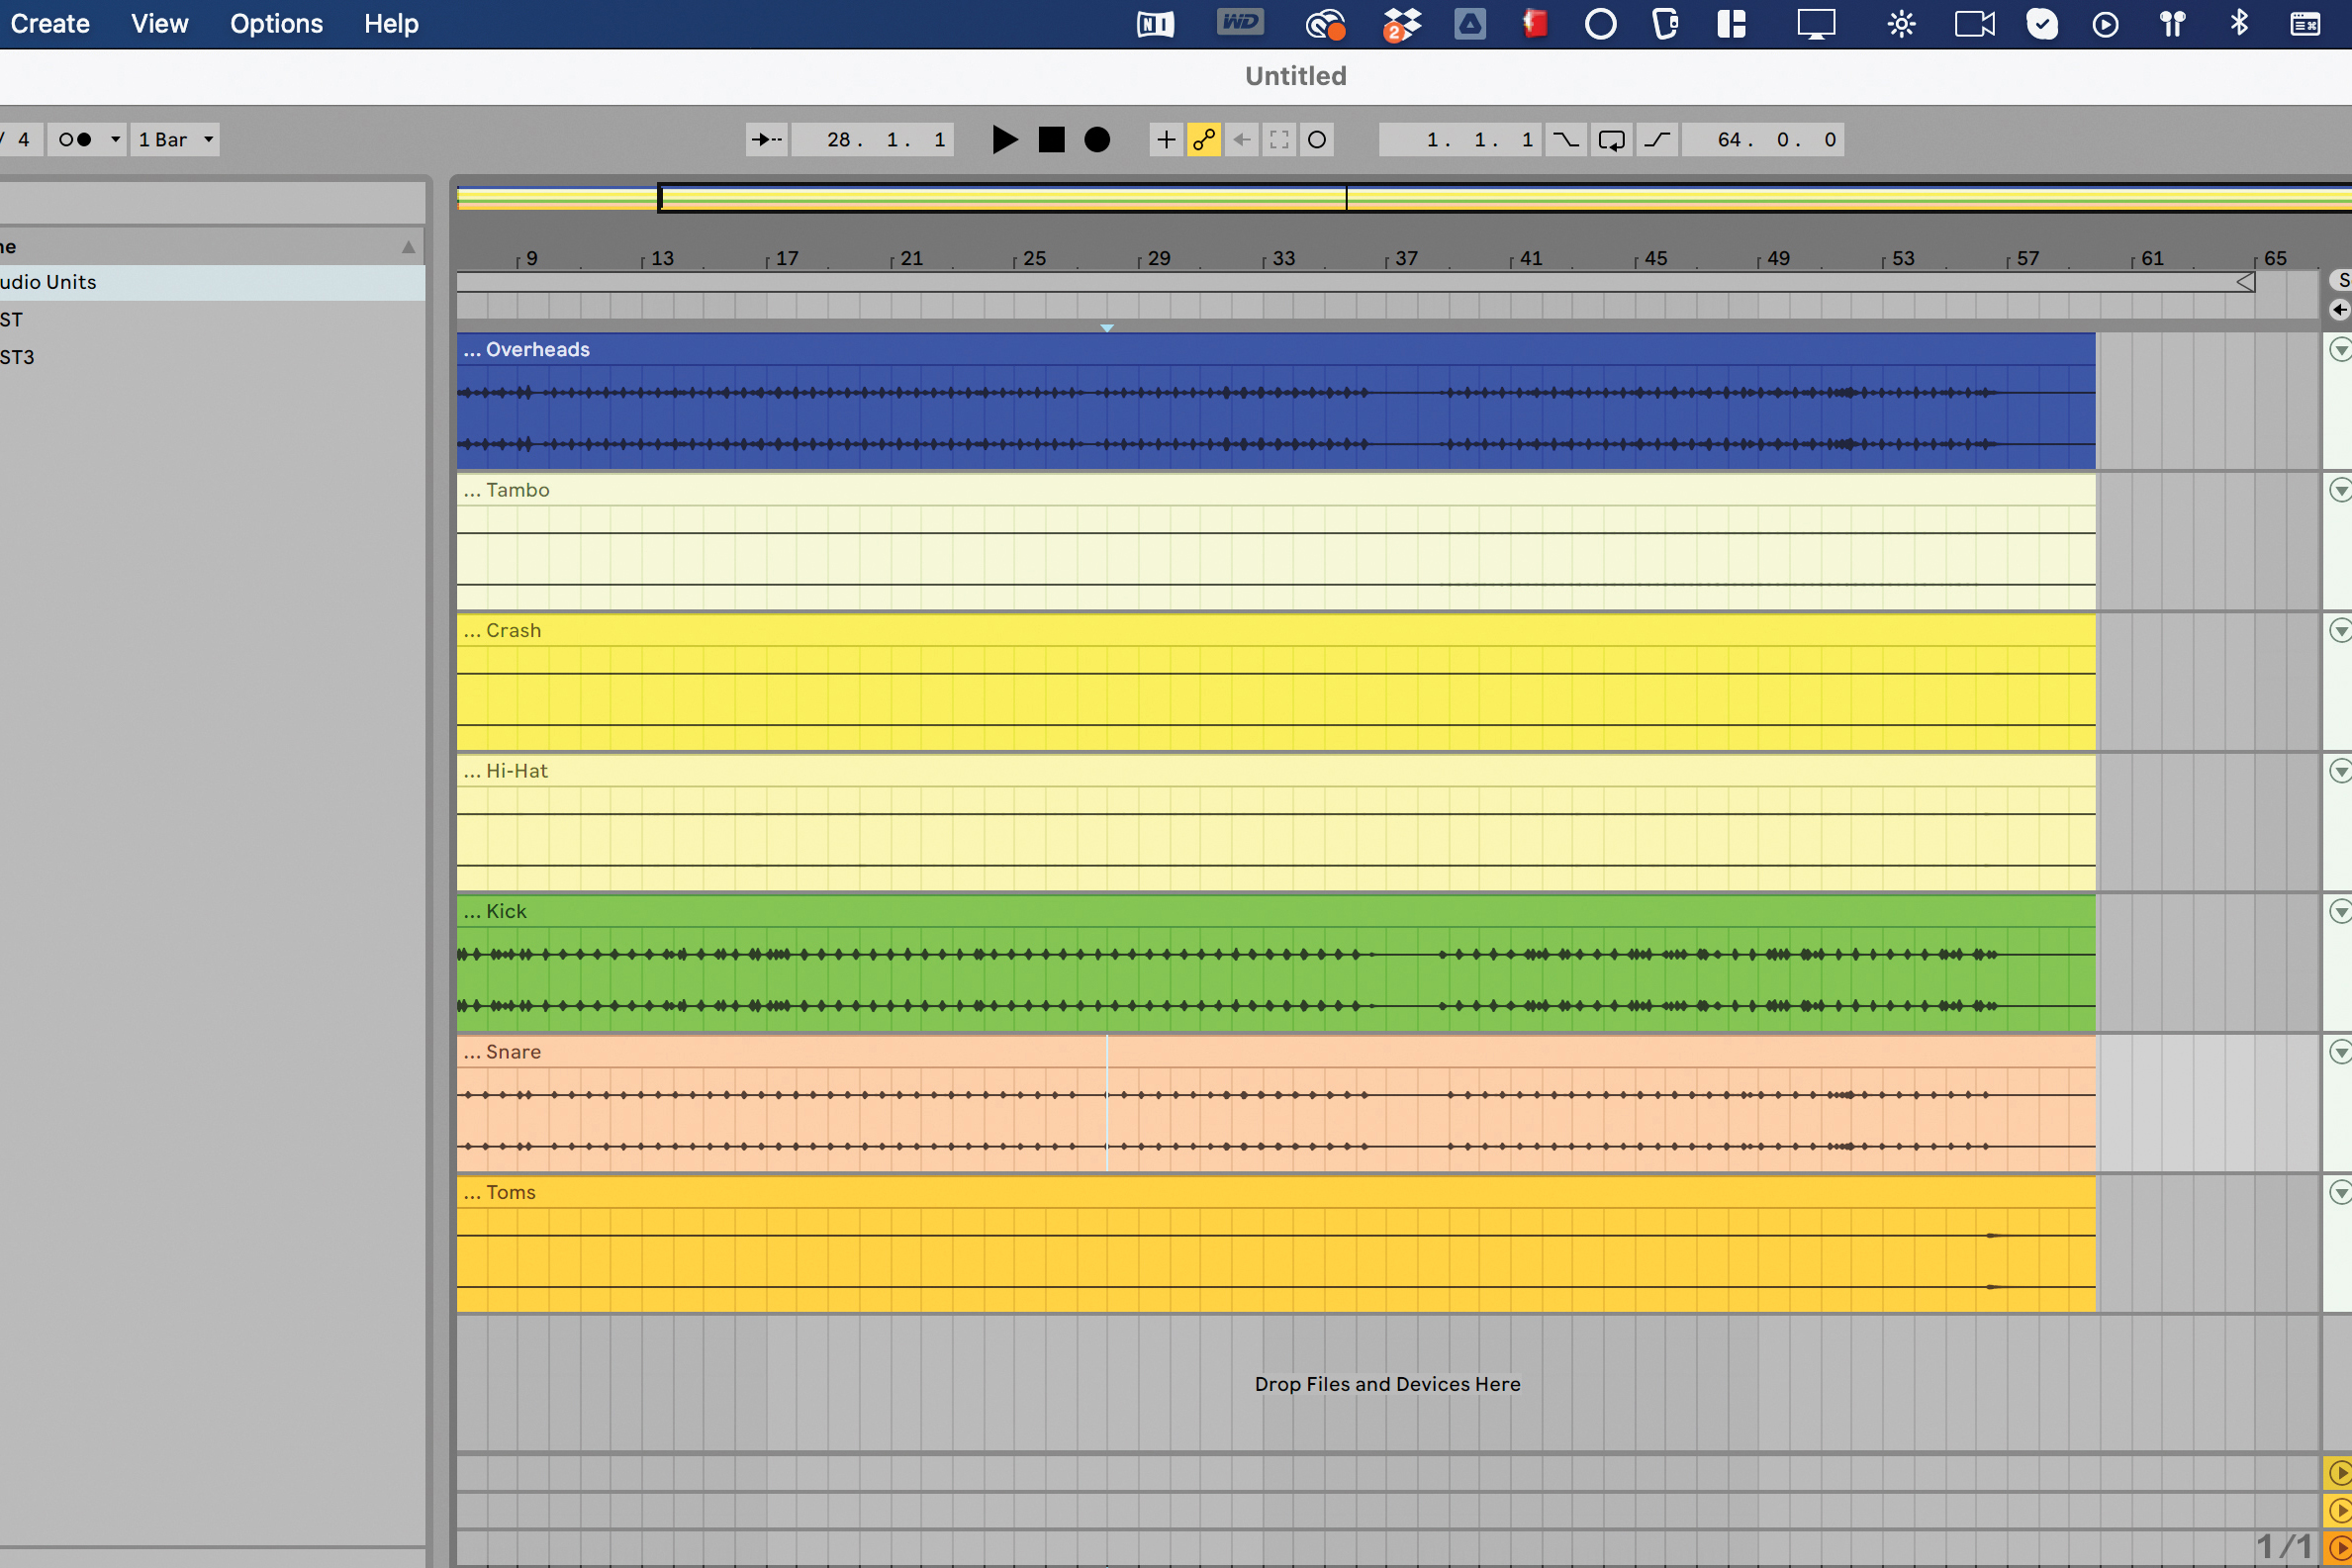
Here’s a drum kit with the usual, time-honoured members in tow. We’ve added the source to download and listen to with this issue’s files. We’re going to take this group and apply processing to make it more cohesive, more ‘glued’.
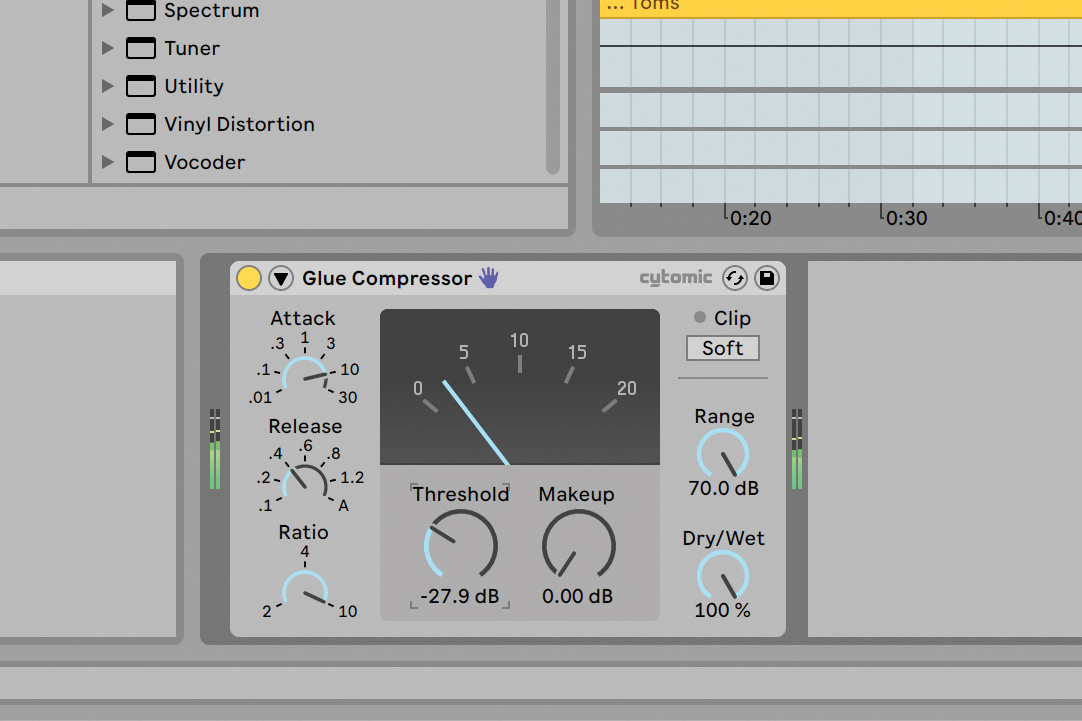
What better way to start than by grouping all of the tracks and adding Ableton’s Glue Compressor device? It’s specifically made for this purpose, and so you’ll notice its settings offer only a few options – it knows why you’re here.
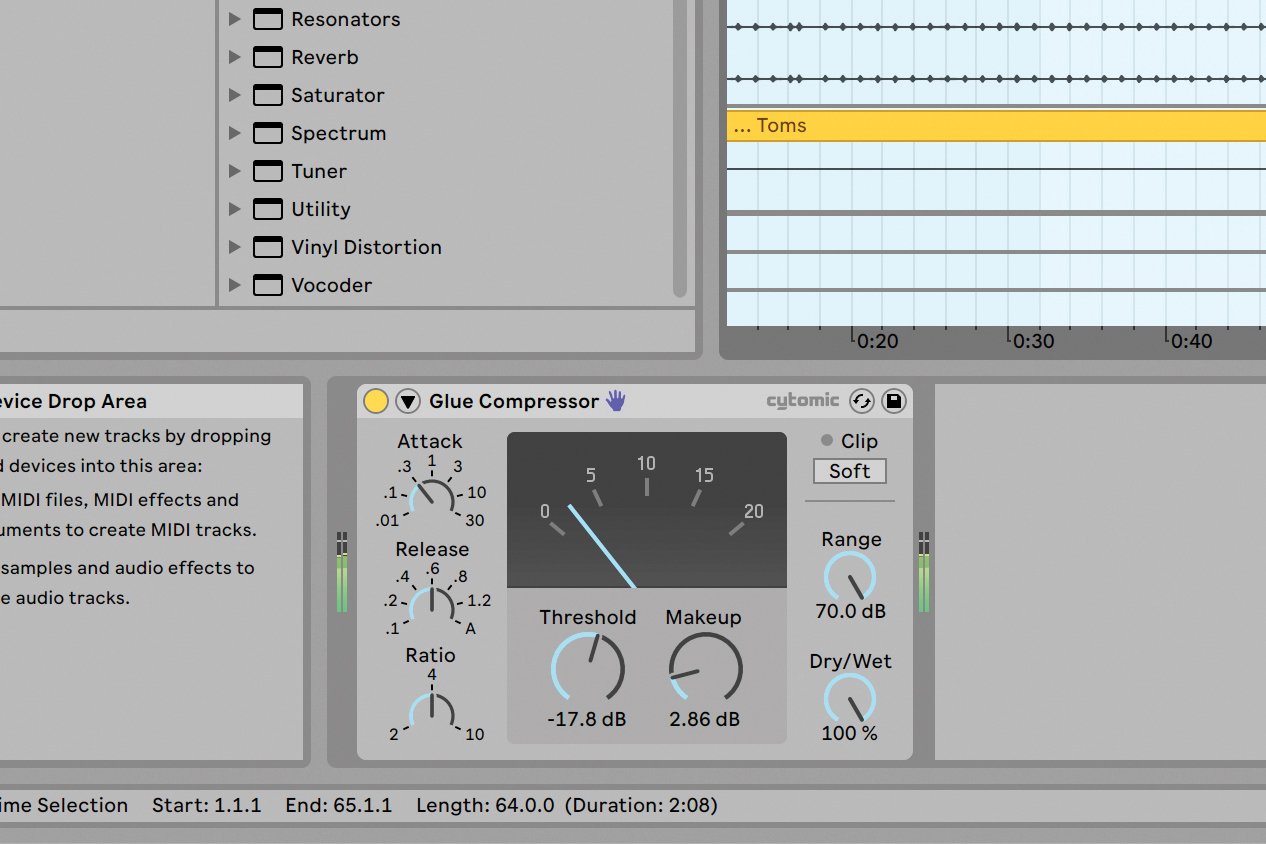
We’ll start with a Ratio of 4, a slightly quick Attack and a medium Release. We bring the Threshold down to just start tickling the gain reduction. This makes the groove pop and its elements sway in time. Audio included.
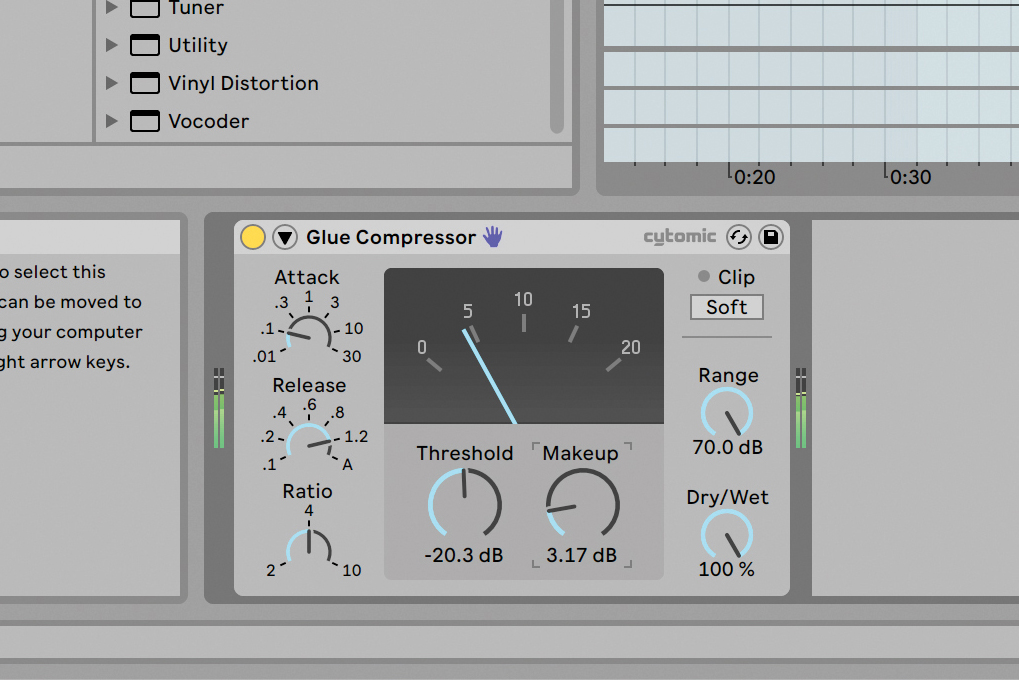
We now get a little harder with things, dialling in an even quicker Attack and making the Release last longer. We’ve also brought the Threshold down for a heavier take. This is more glued, but at what point it gets too ‘pumpy’ is up to you.
Taking care of transients on the drum bus
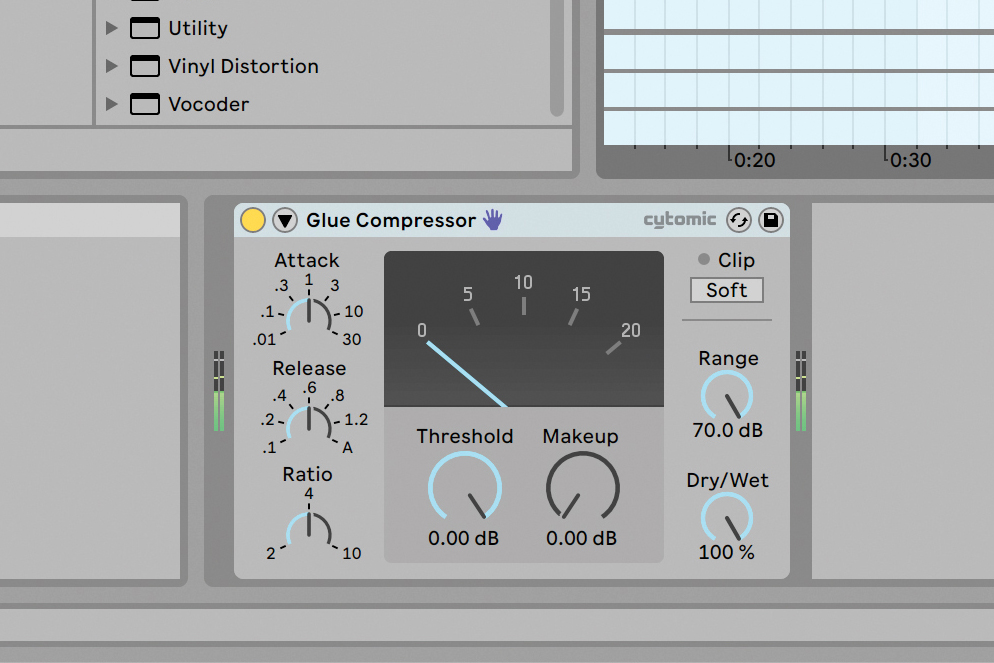
Here’s another way to treat your transients on the drum buss. Glue Compressor is back on, but this time we’ll take another approach to the group’s dynamics, not going for glue necessarily.

This time, we’ll dial in a harder Threshold and higher Ratio, attempting to carve a bigger chunk out of our drums when the transients hit. But we don’t want to compress the transients themselves, so we’ll set a longer Attack time.
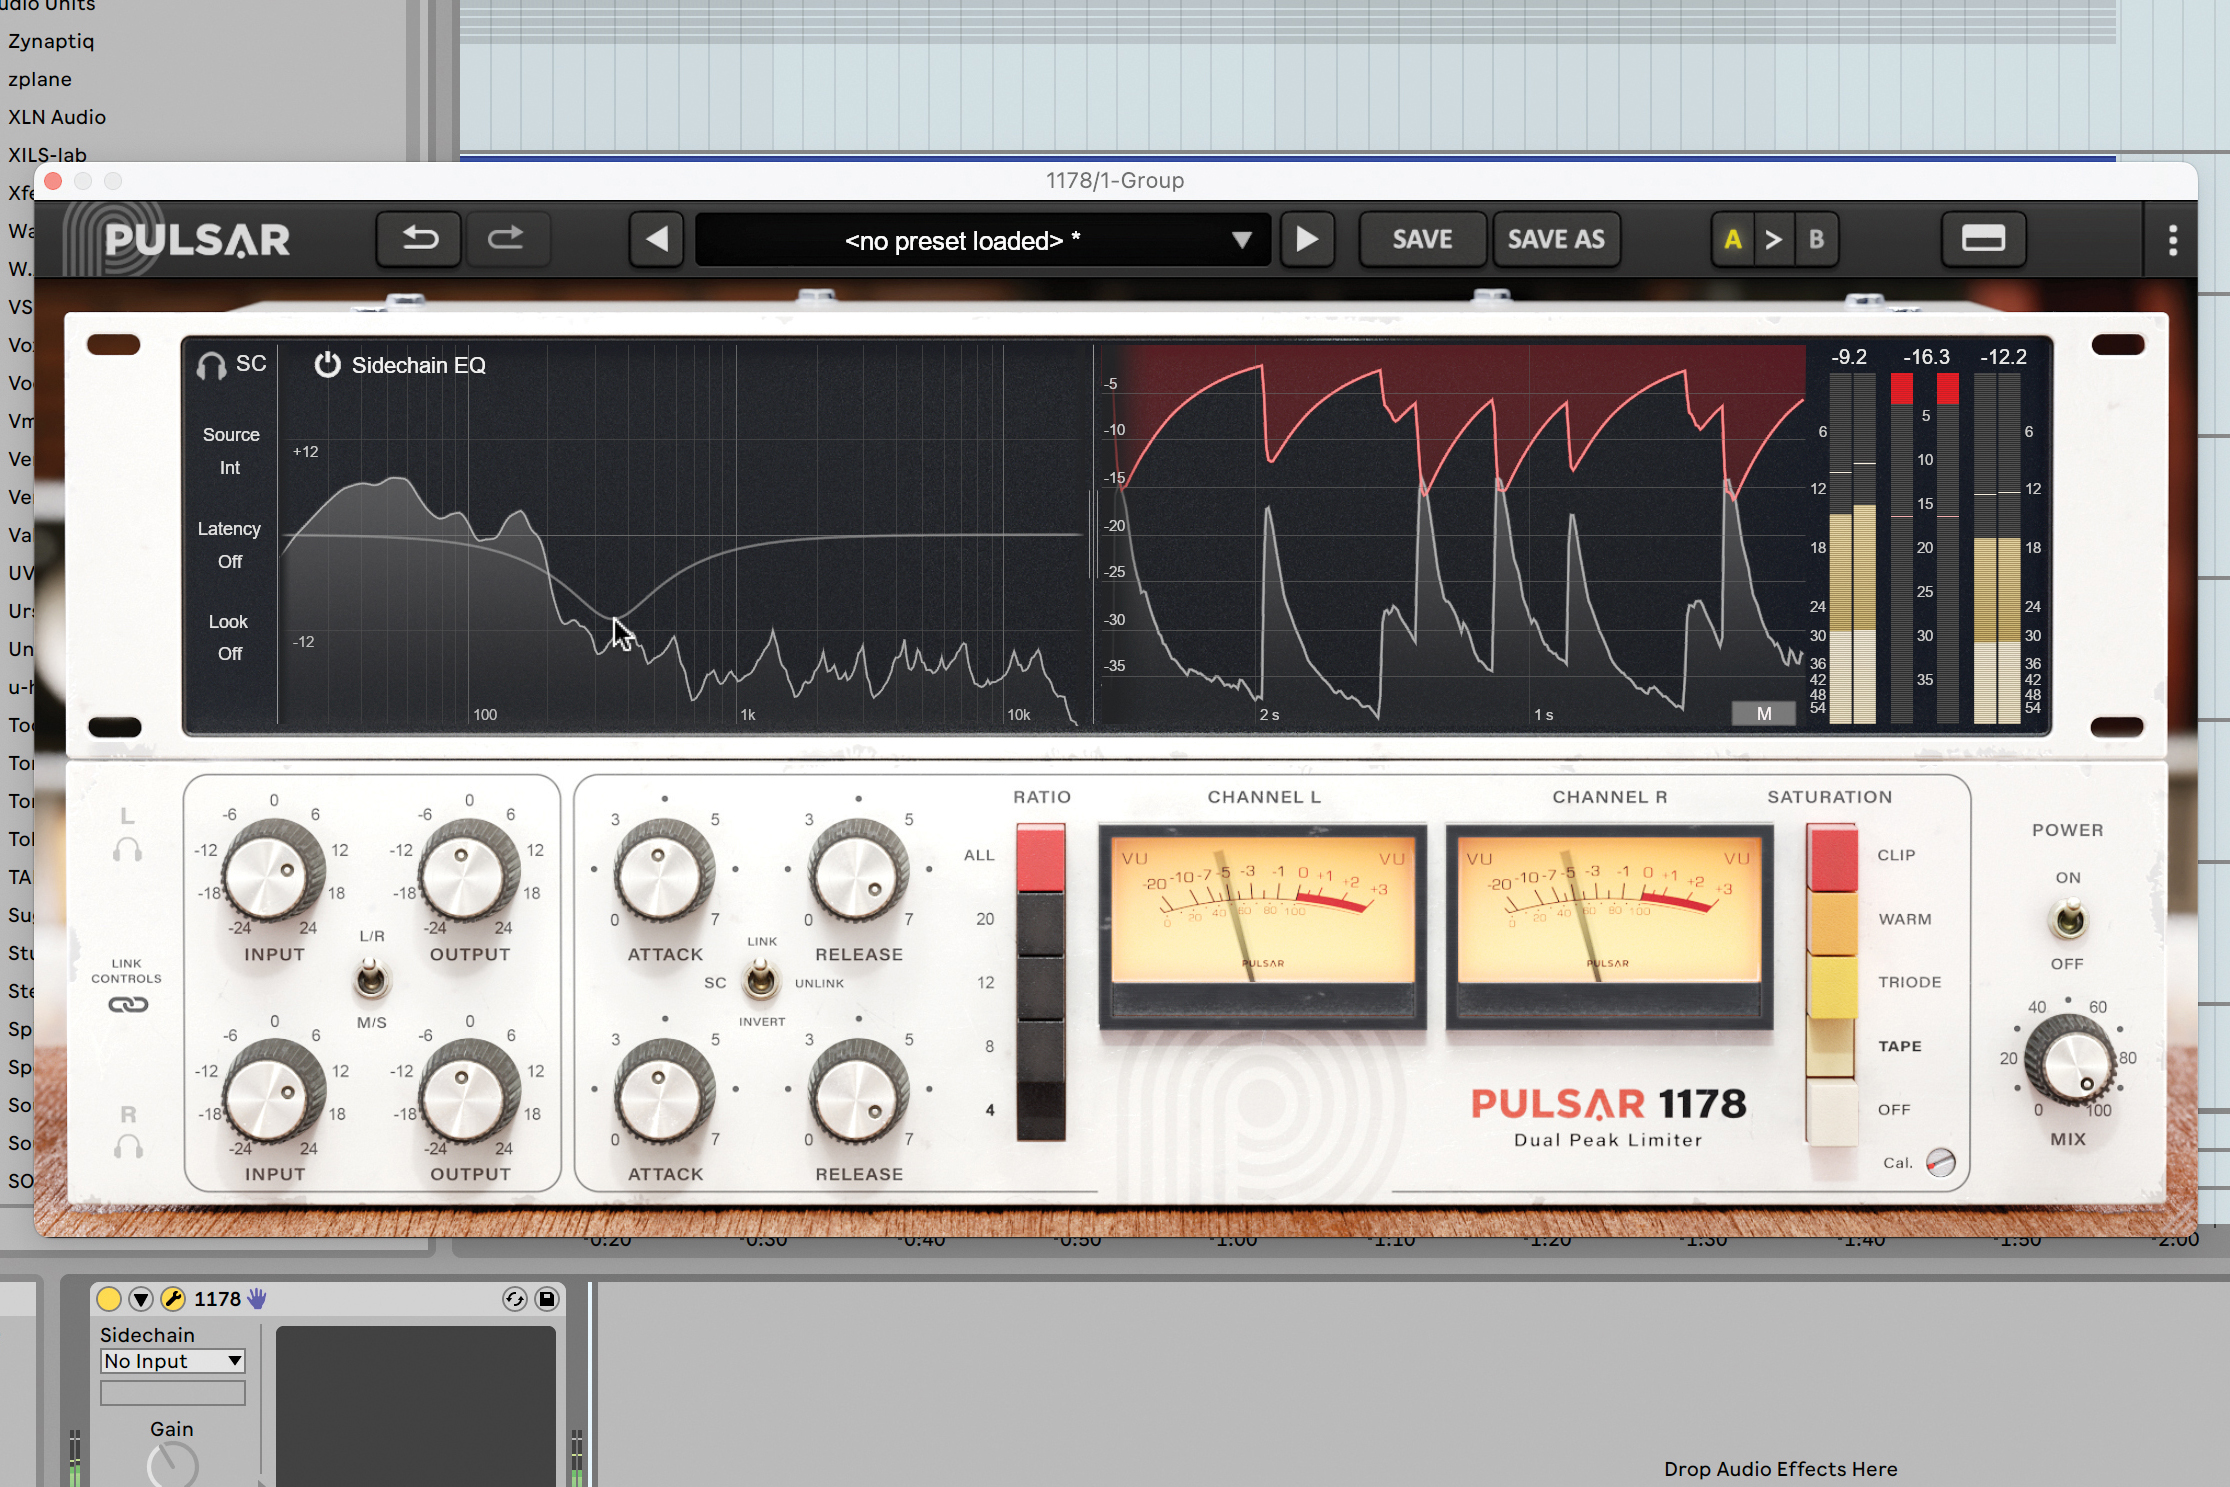
Here we go at it again using Pulsar 1178. This is the sort of flavour we can achieve by dialling in heavy compression from an analogue-style compressor, yet leaving the Attack time to dawdle, letting those transients really snap through.
Group processing strategies
Group and bus processing gives you free rein to process multiple things through one output, but what ‘things’ should you lump together? Remember, this is music, so there’s no one strict set of answers, but there are a few ways to think about things, depending on the outcomes you want to achieve.
We’ve looked at drum bus processing already, but that’s not the only way to slice your percussion. How about splitting them into low and high percussive elements, or putting the crashes onto the FX bus for processing? What about leaving the kick out altogether?
Let’s consider vocals now. Whether your track is constituted by vocal effects and chops, or if you’ve got a ream of backing vocals or harmonies, those are two ways to categorise your elements and fit them into busses accordingly. You may choose to process a backing vocal bus a little differently to the lead vocals, for example reducing higher frequencies to clamp down on sibilance or increase intelligibility when multiple takes of the same lyrics are sung.
You don’t have to group for frequency content or similarity, either. You could quite easily bus ‘wide’ and ‘narrow’ or ‘mid’ and ‘sides’ elements to their own busses, treating different ones in a different way. That processing may include different EQ and compression strategies, or any other creative effects. Let’s have a look at the different ways to slice your busses and groups.
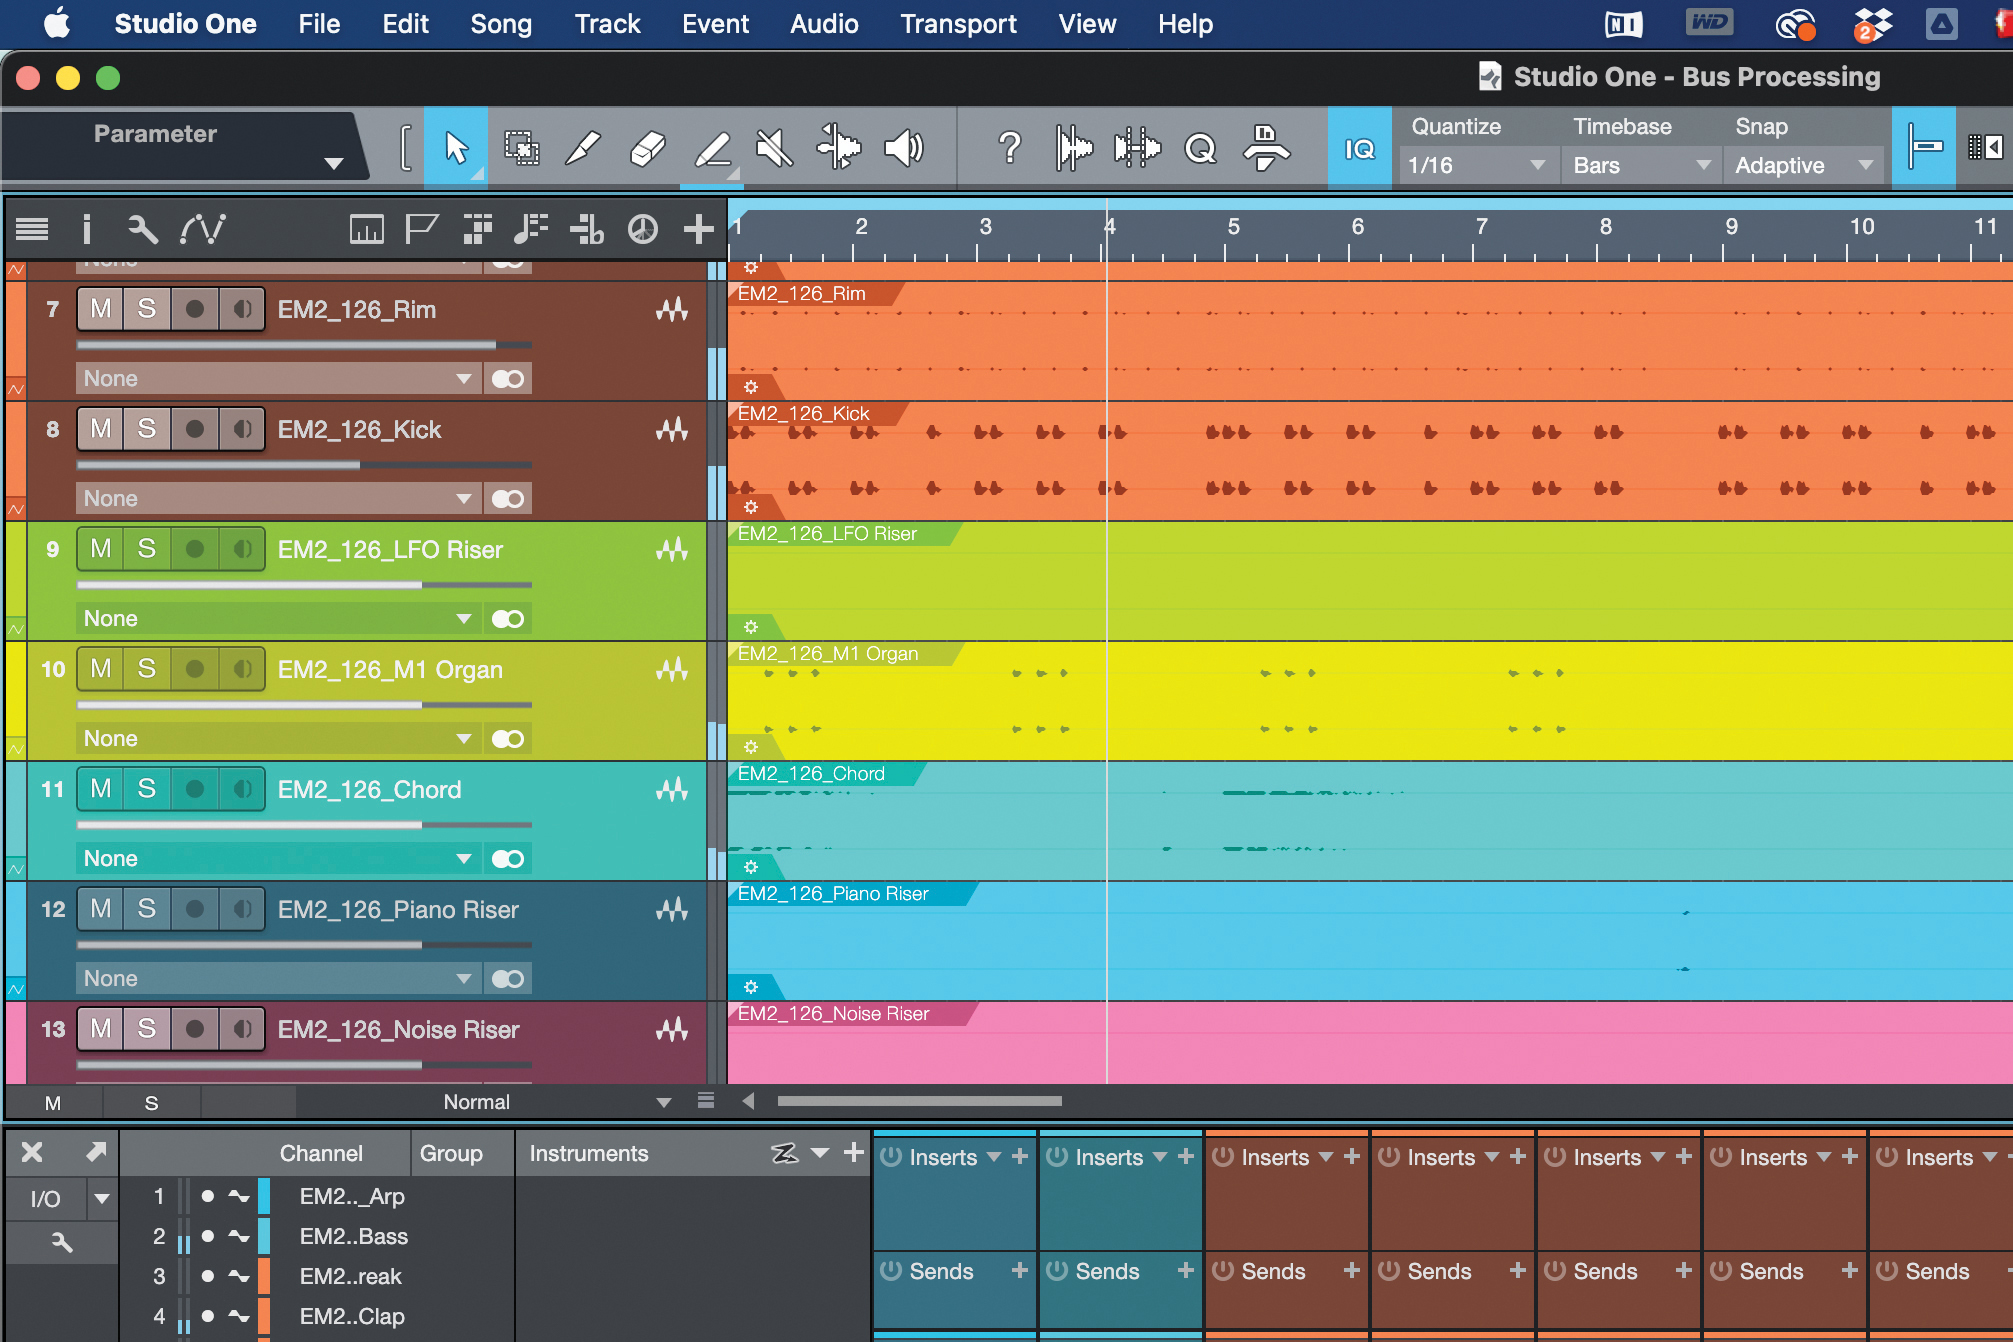
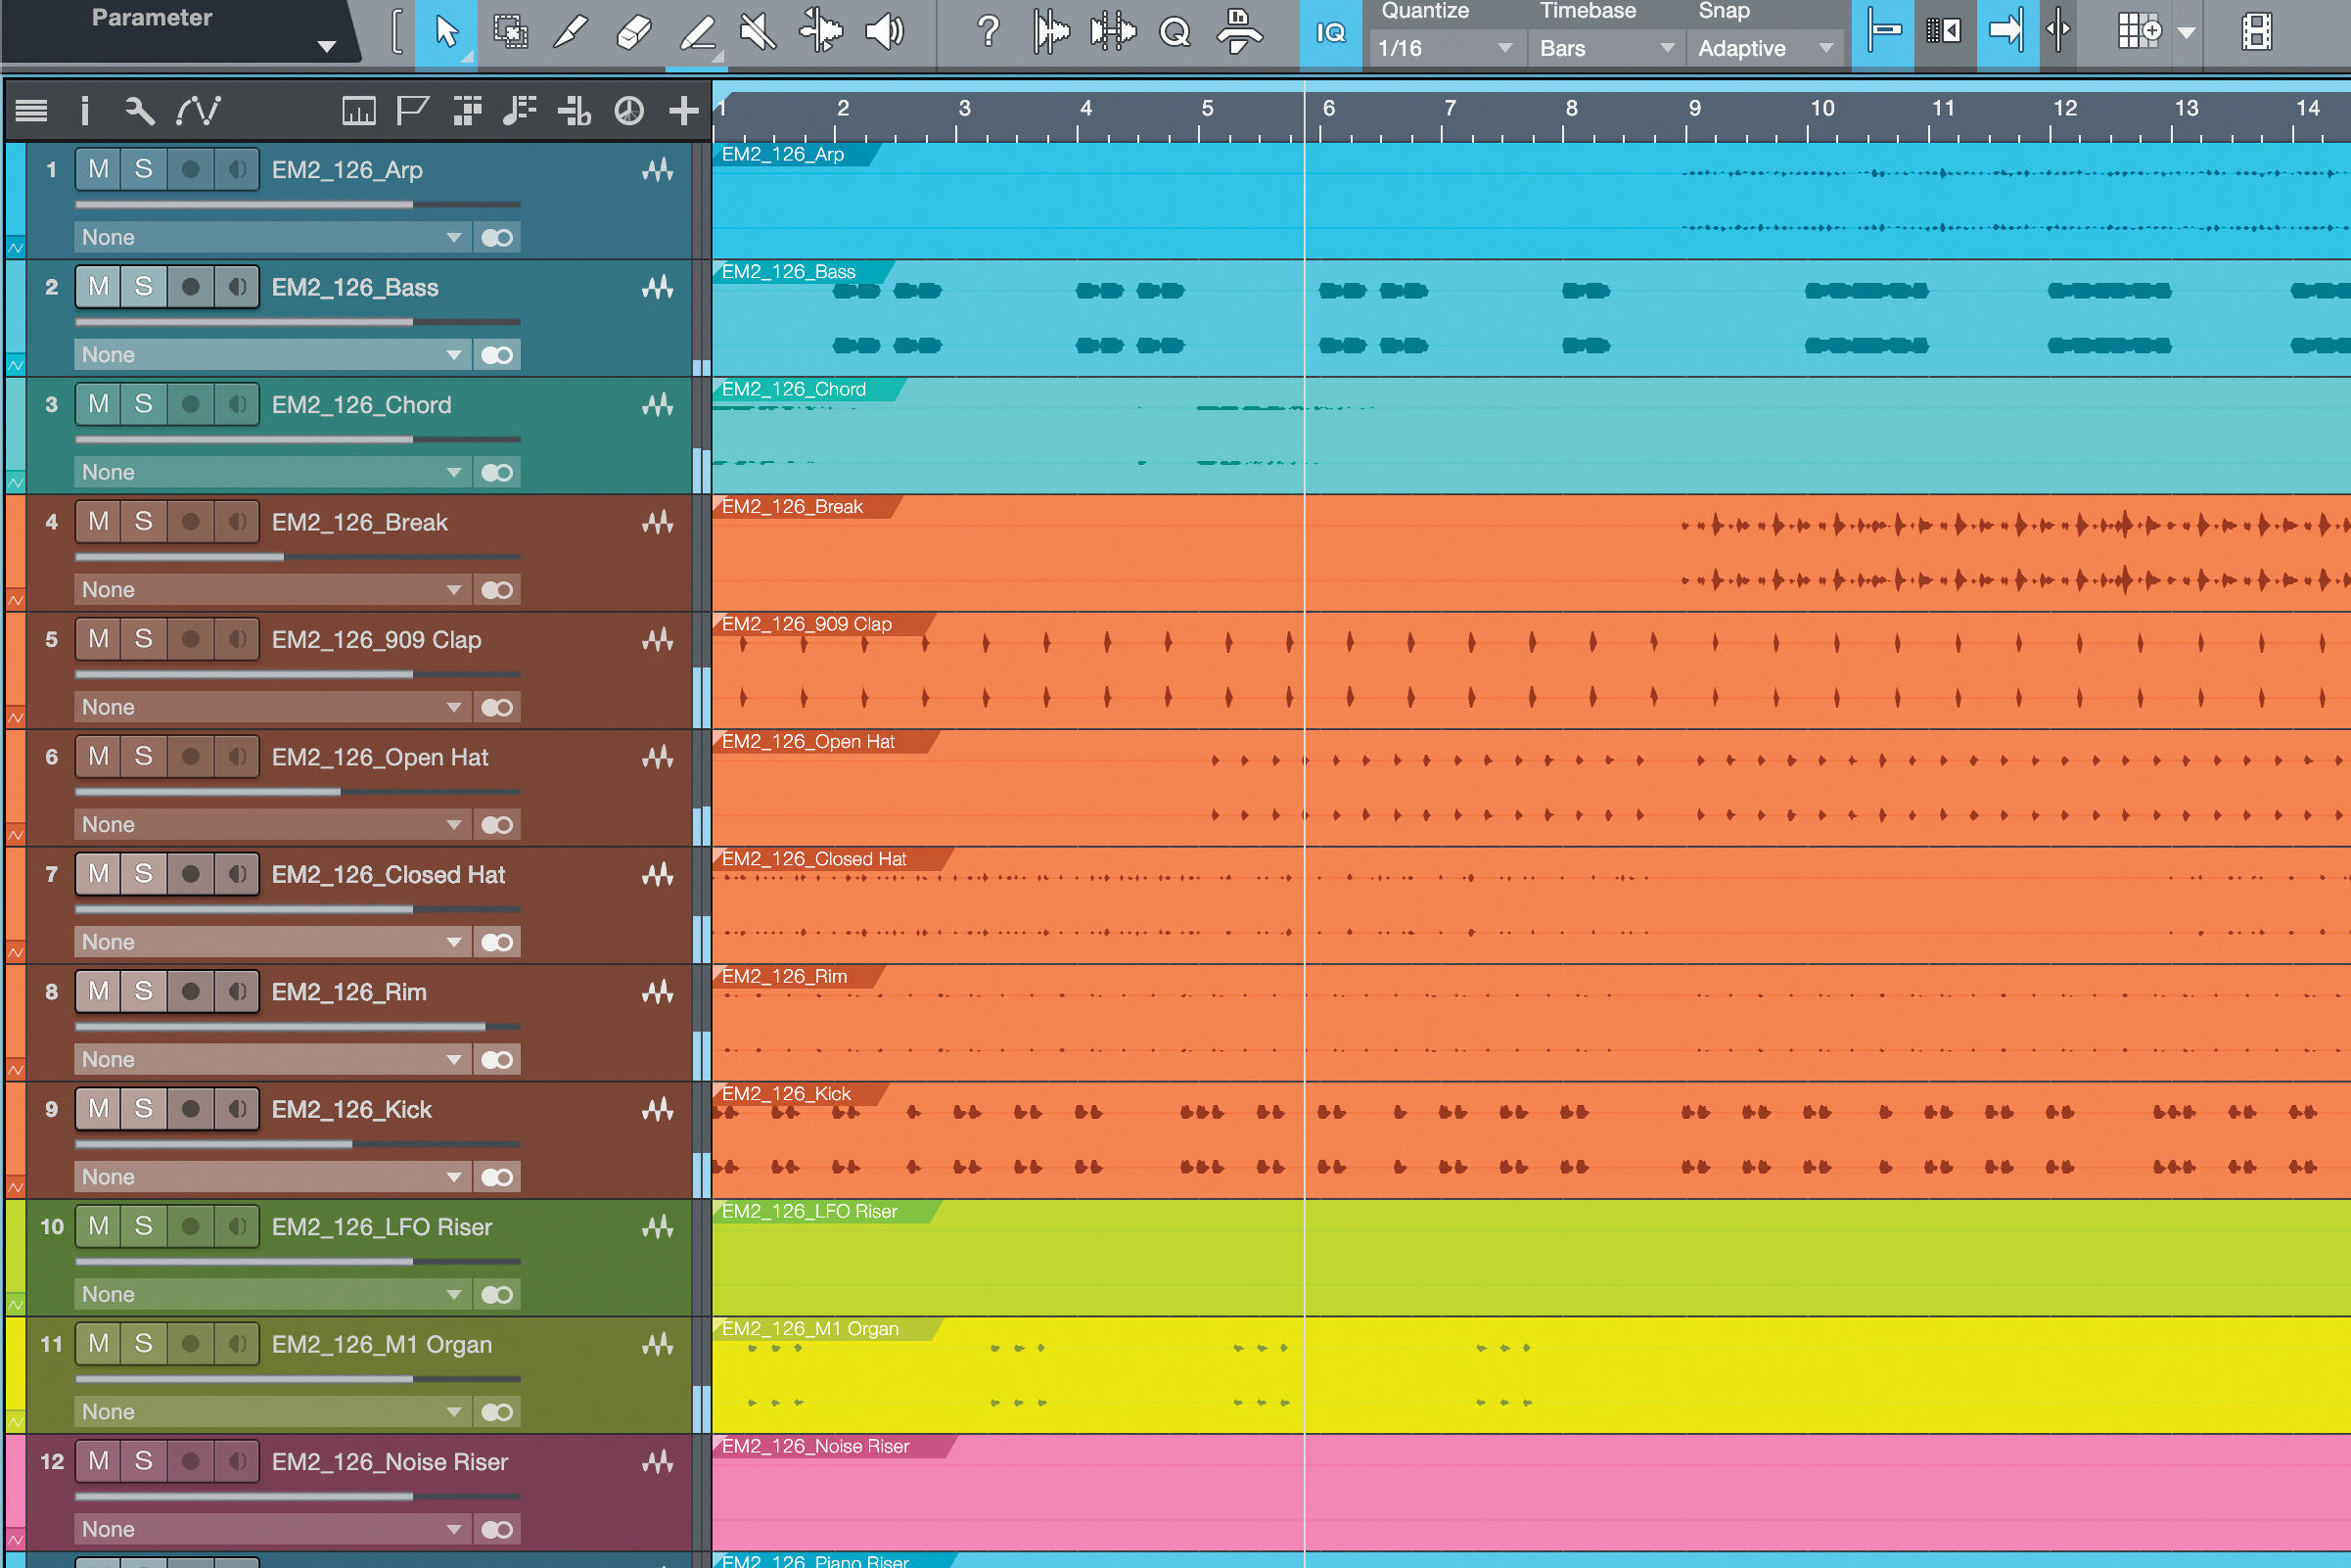
Here we’ve got a track containing three ‘keys’-based elements. There’s an M1 Organ sound, a piano ‘Chords’ channel, and a ‘Piano Riser’. They’re a good candidate for grouping, depending on the processing we’re looking to do to them.
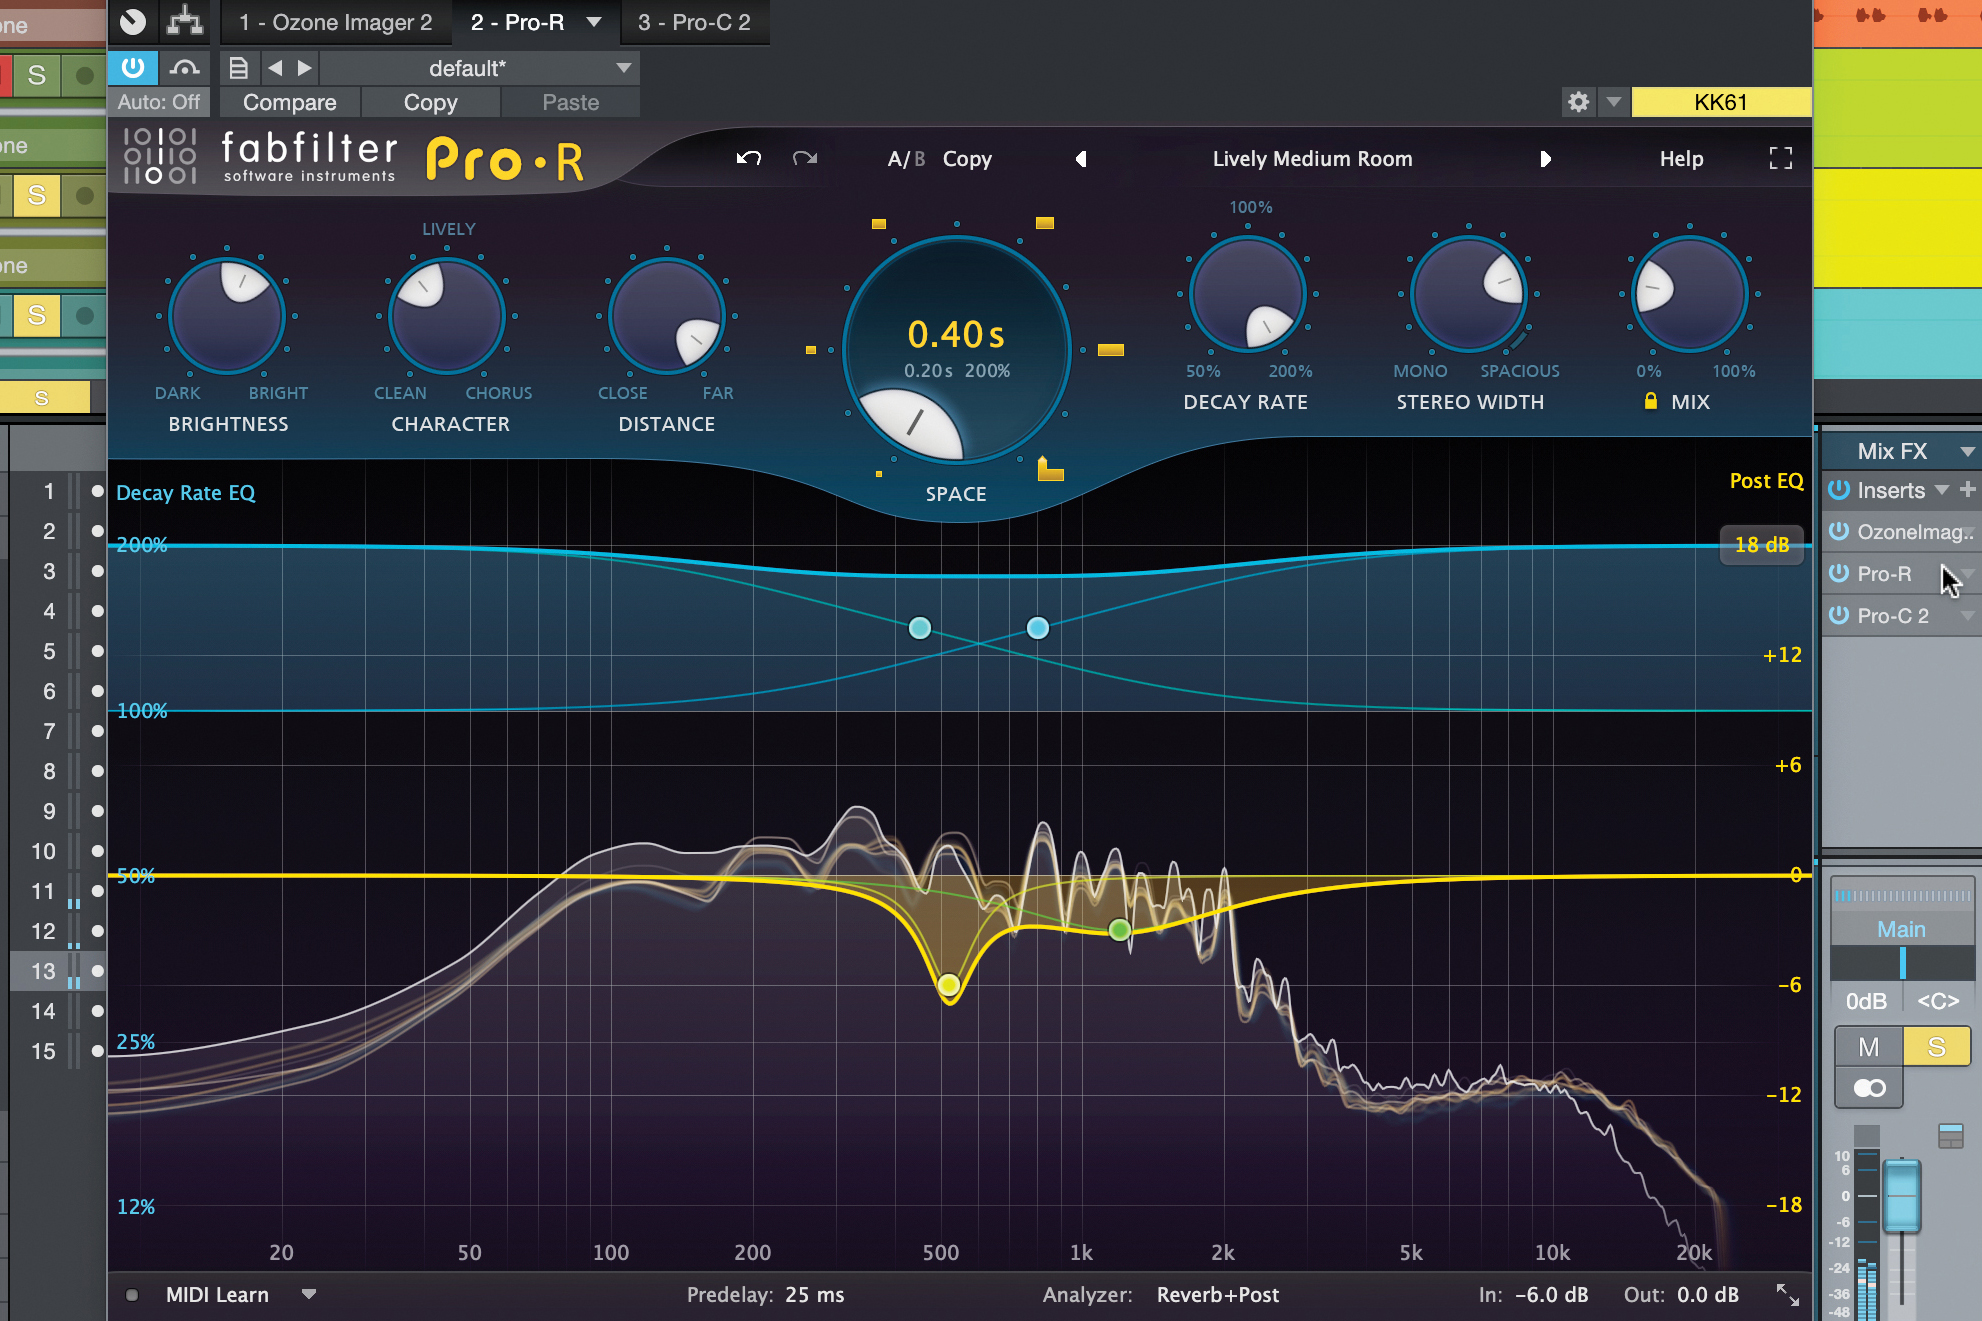
For example, we could add stereo width to all the keys sounds together, giving them a similar effect. Reverb added in a similar way will bring the presence of all the keys into the same ‘space’, and some parallel compression will add weight.
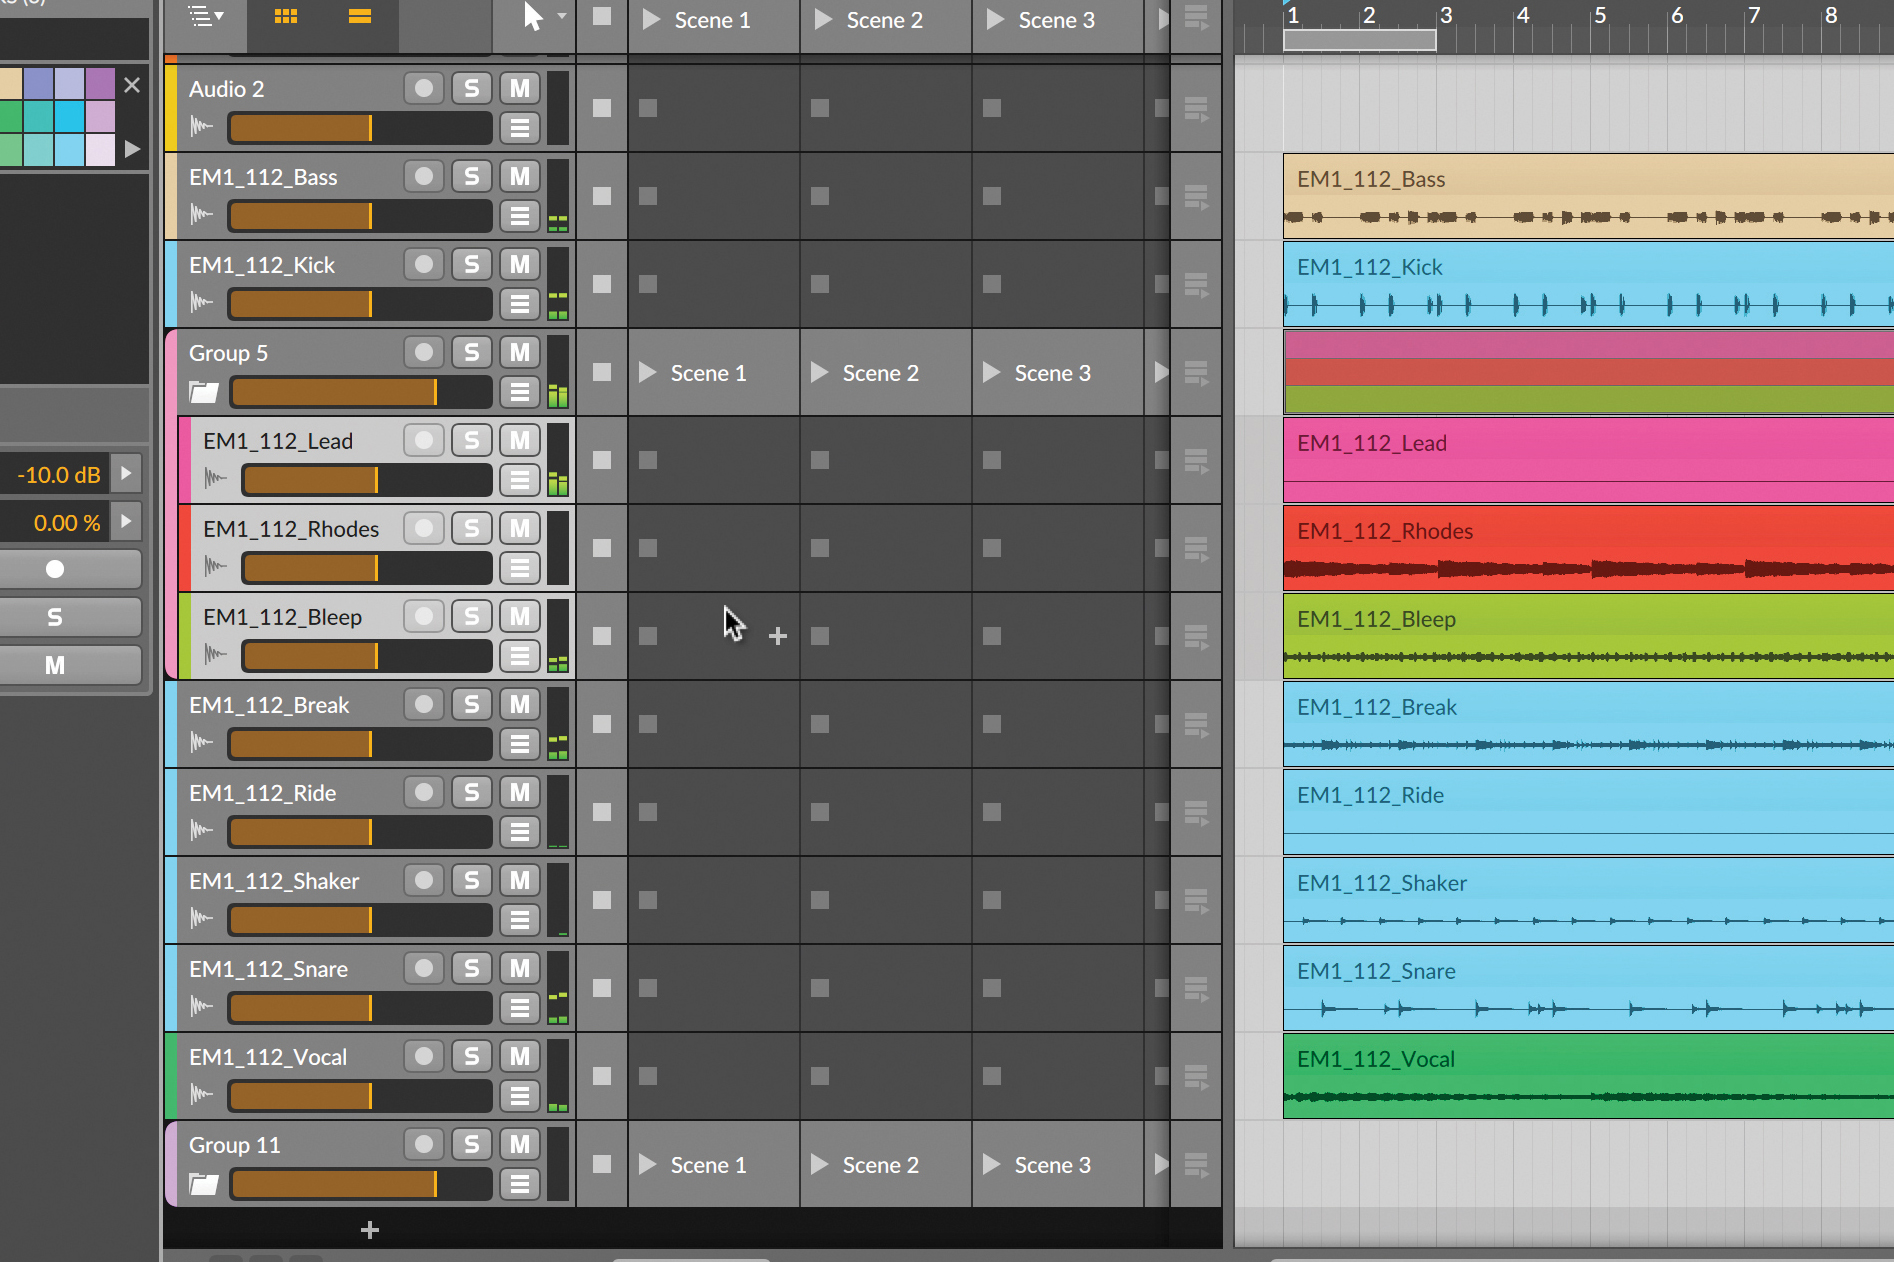
This track is synth-heavy, and there’s also a Rhodes in there doing its thing… but it’s so heavily processed, it would fit well with the synths too. Let’s pop them all into a single group for the mixing stage.
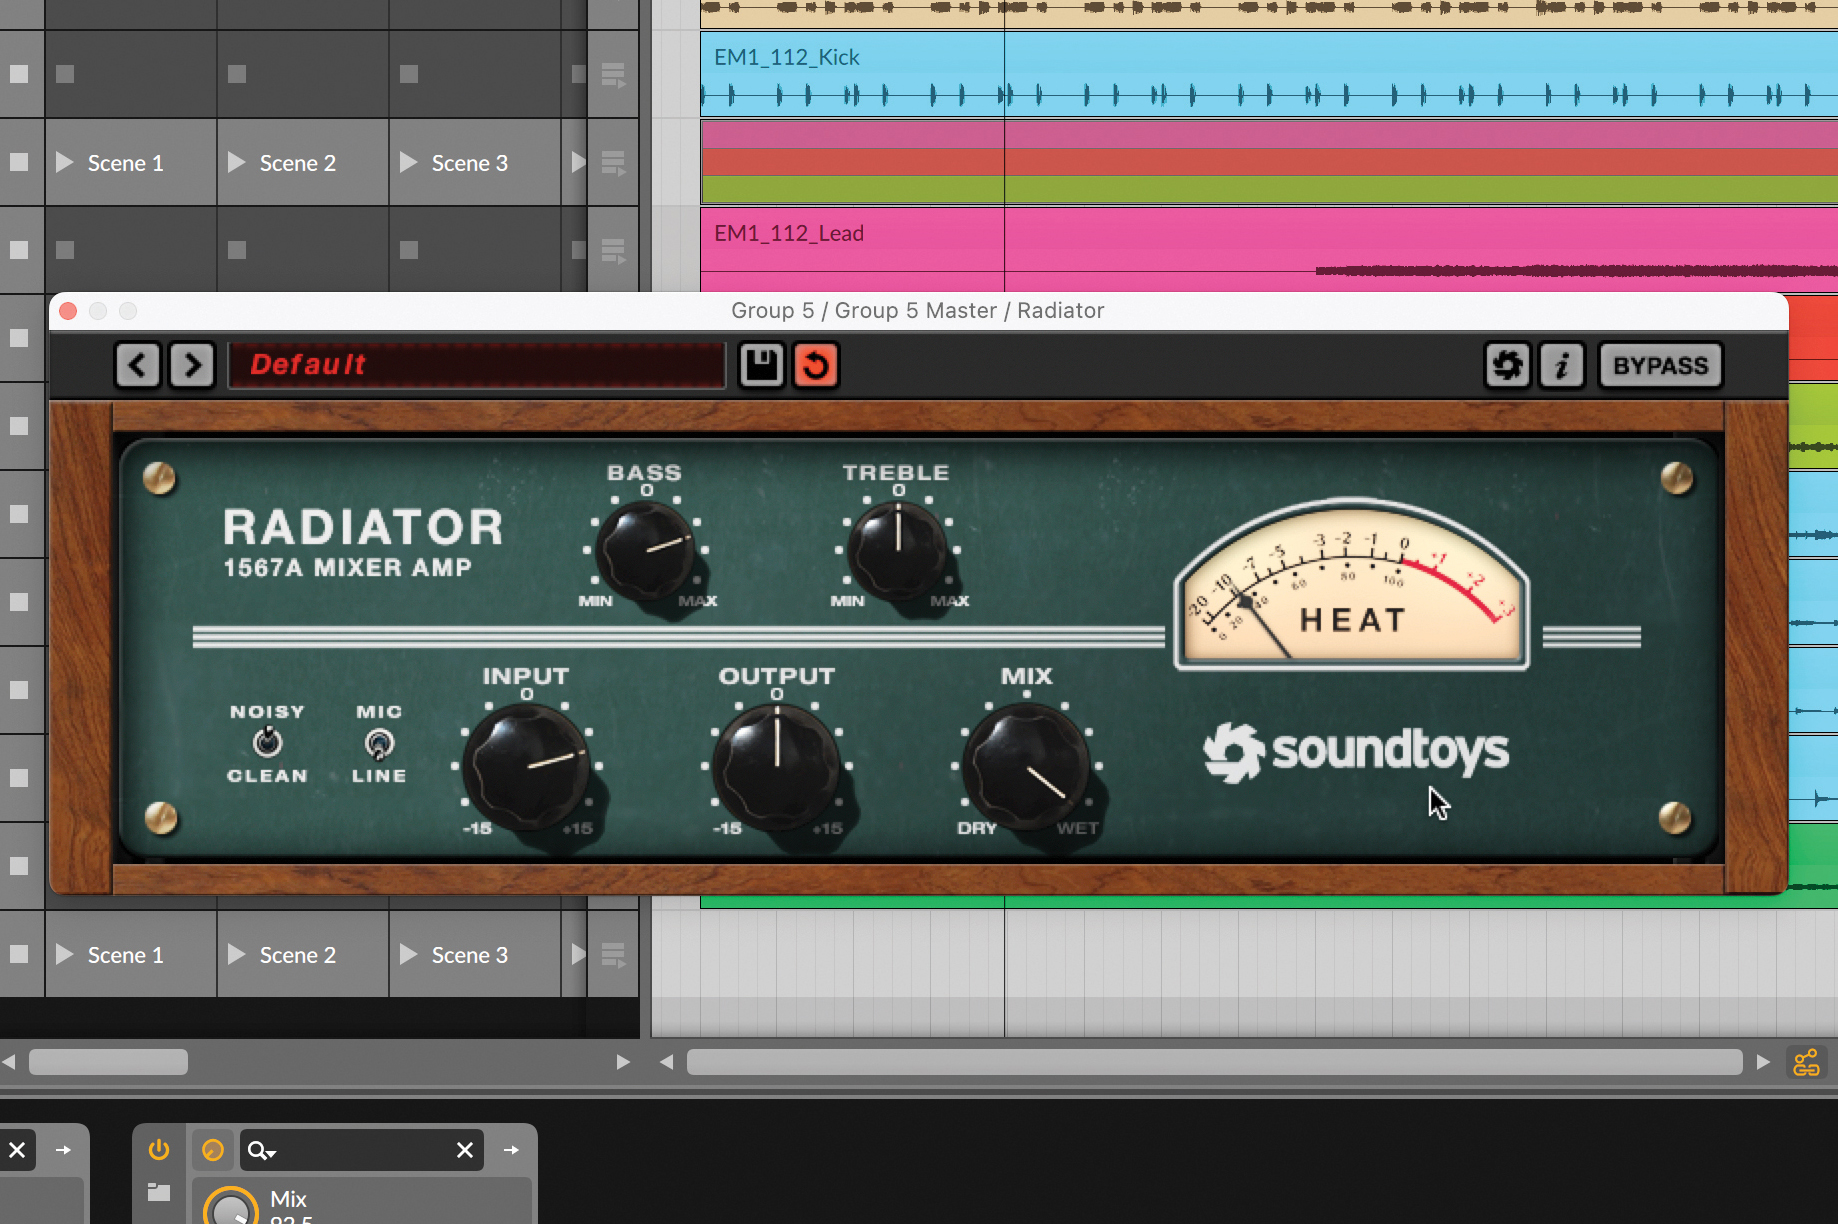
On the group, we’ll add reverb with a small but rhythmic pre-delay, making every synth ring out in time with the track. We’ll also add some saturation to all of the keys together, giving them a bit of a healthy clipping when they get too hot.
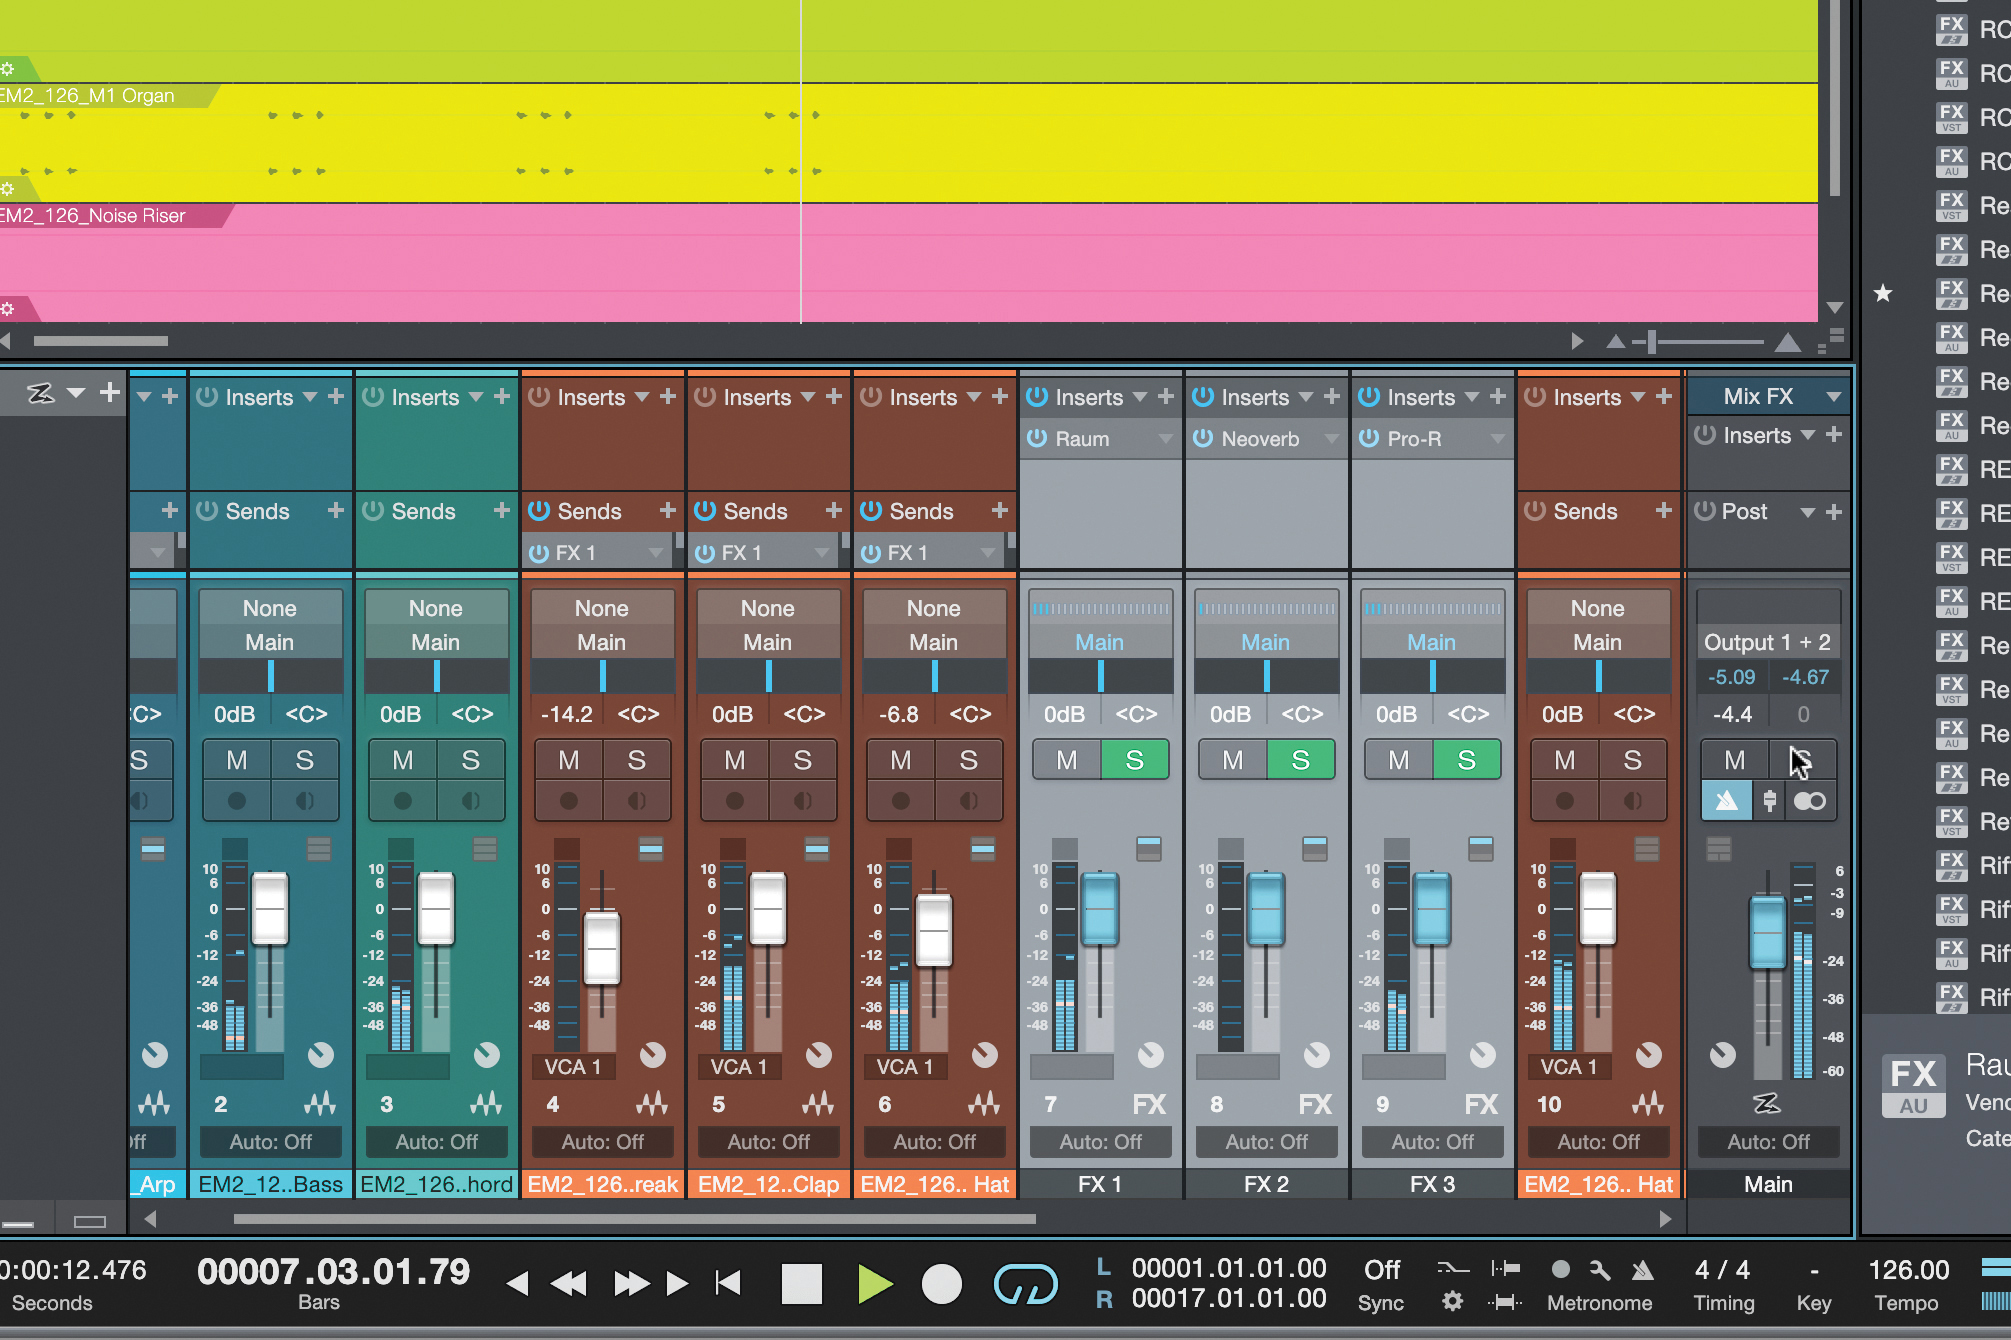
On this track, we’ve ended up with three separate effects channels, each operating as a reverb return. Well, we can actually group those returns and apply processing to them all together. Why would we want to?
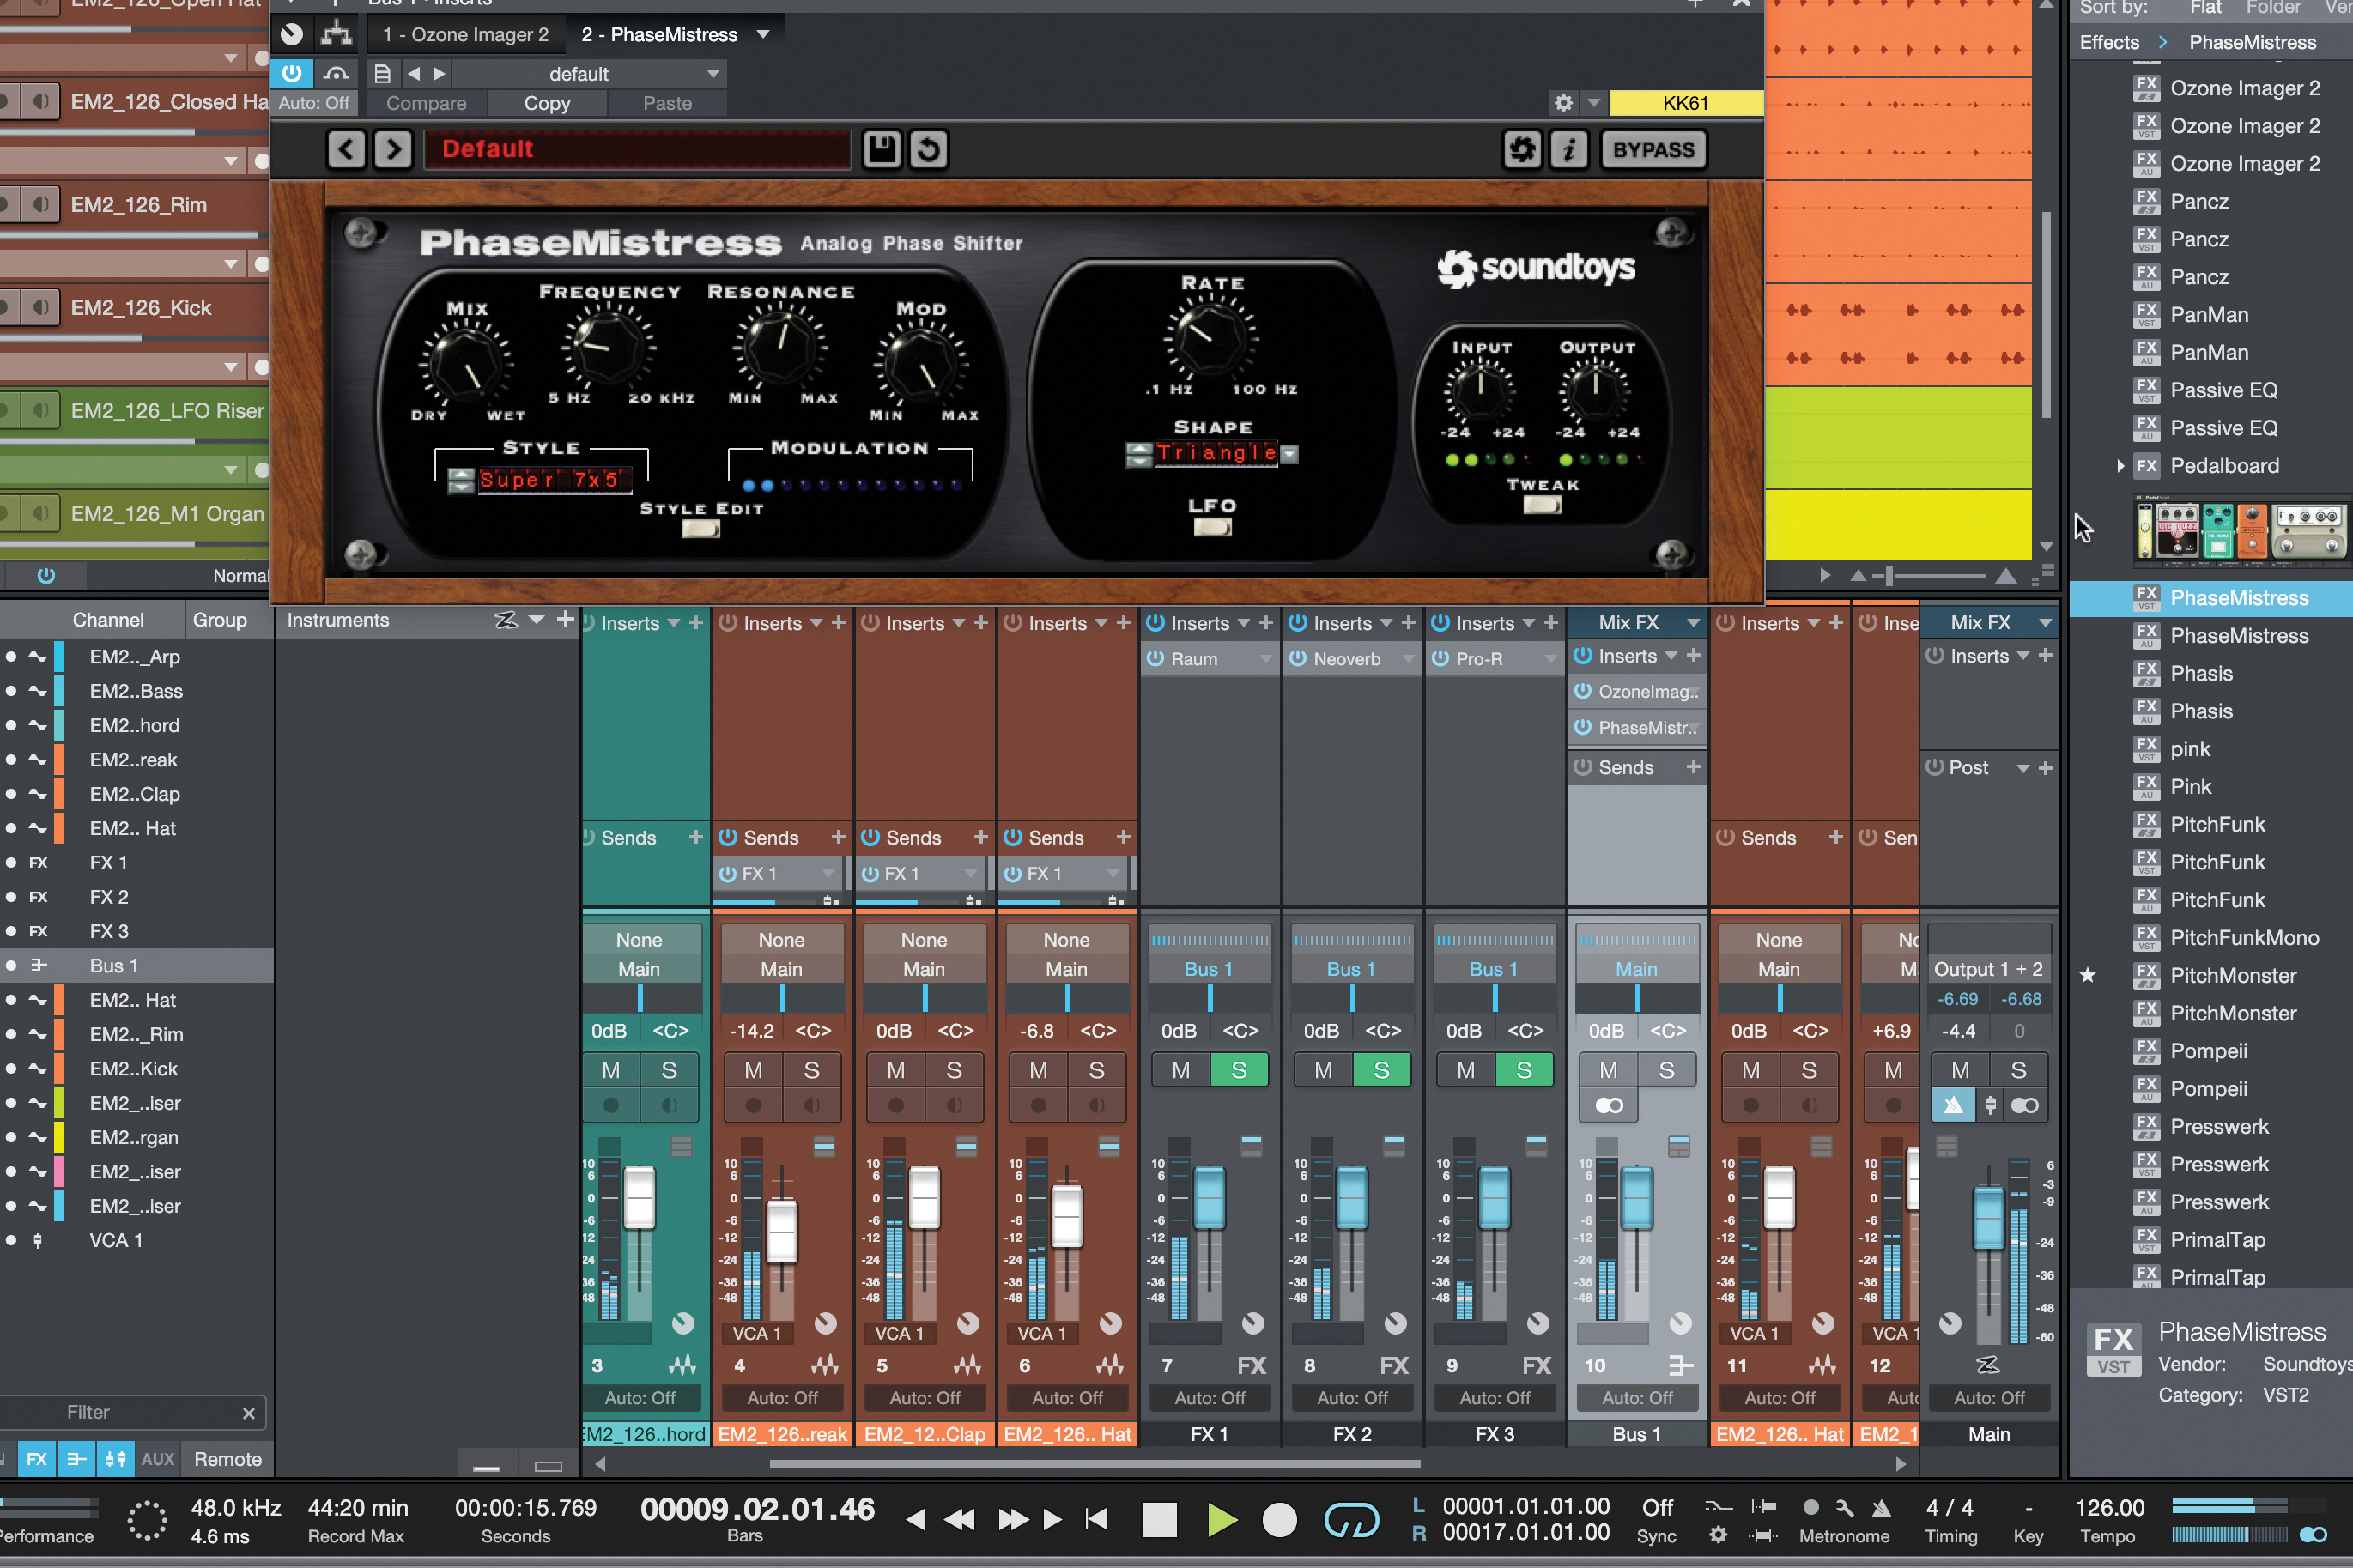
By sending each effect channel to the same bus before that bus is output, we can add stereo effects to widen/narrow all reverb, compression to smooth transients, and even modulation effects to swash out all reverbs at once.
Pre-master processing
There are some tactics we can take on our master bus to create better mixes. But these aren’t mastering processes: here’s the deal with pre-mastering processing and how to implement it.
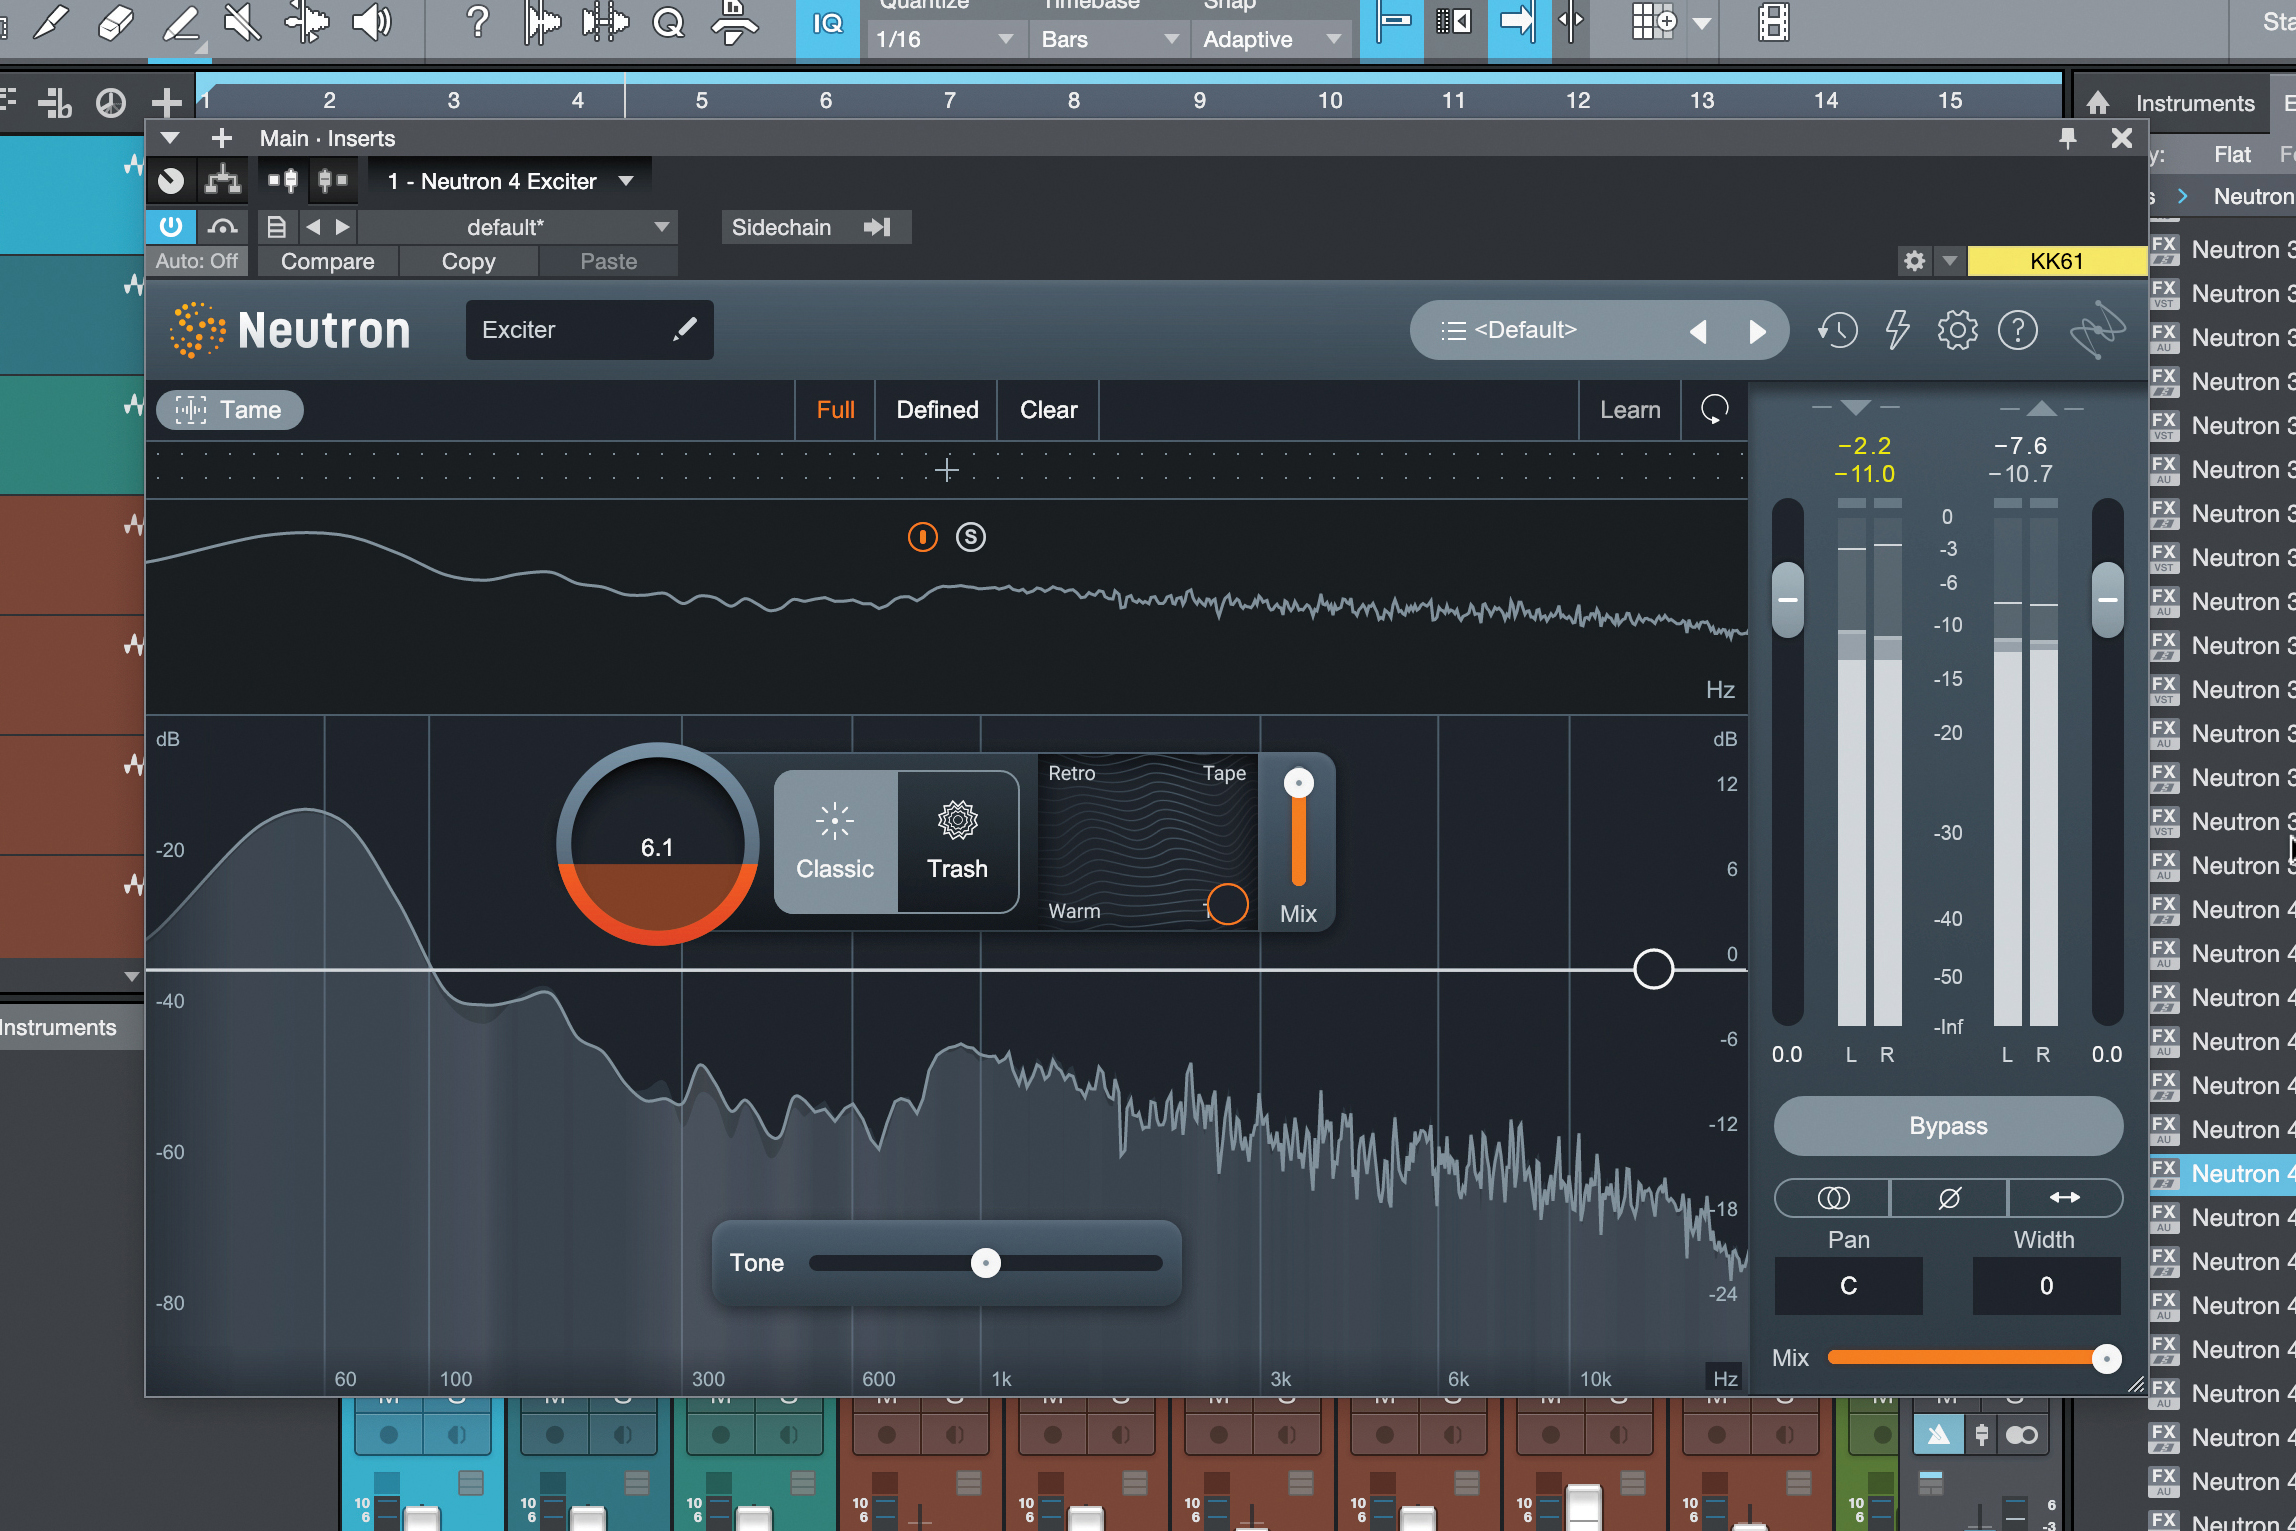
For a pre-master, we’re looking to apply things to the whole track, but unlike what a mastering engineer would add, the processes are more creative and stylistically driven. For example, here’s an Exciter doing its thing on the whole mix.
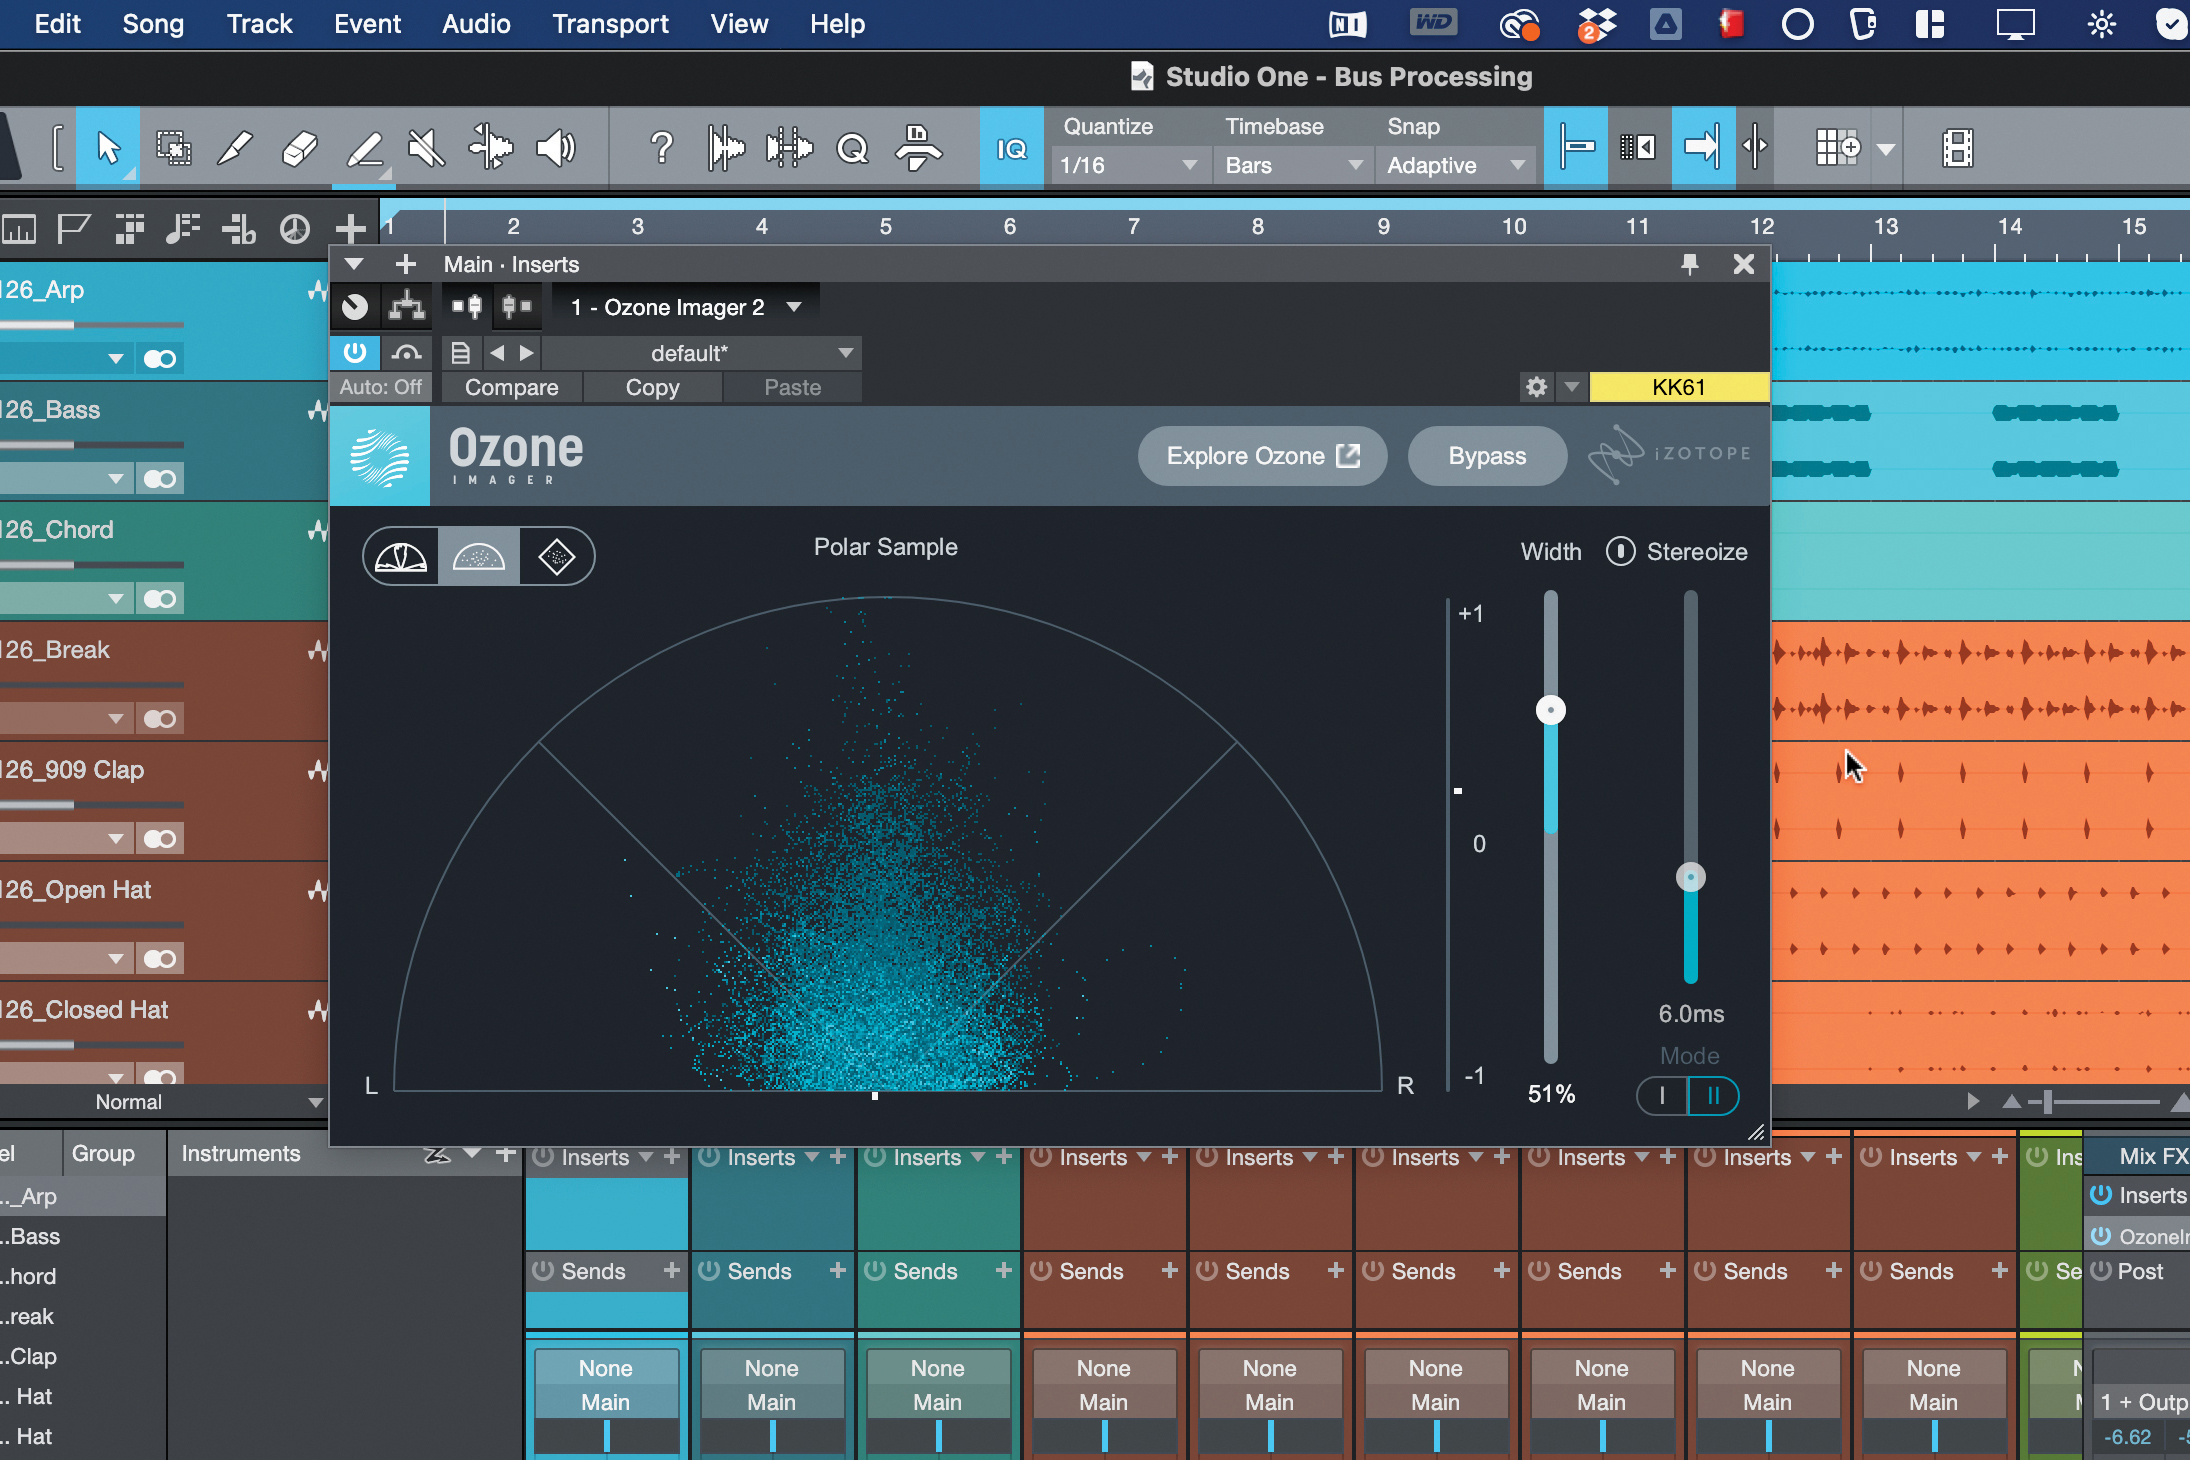
Width is a clear master-capable processor too. With an Imager, we can boost the whole mix, or make a multiband split to narrow the bass and/or widen the mids and highs. For the pre-master, we could also automate the width to change through the whole track.

Another thing we could change through automation is the setup of high- and low-pass filters – or even the strength of an entire EQ curve – as the track moves through its sections.
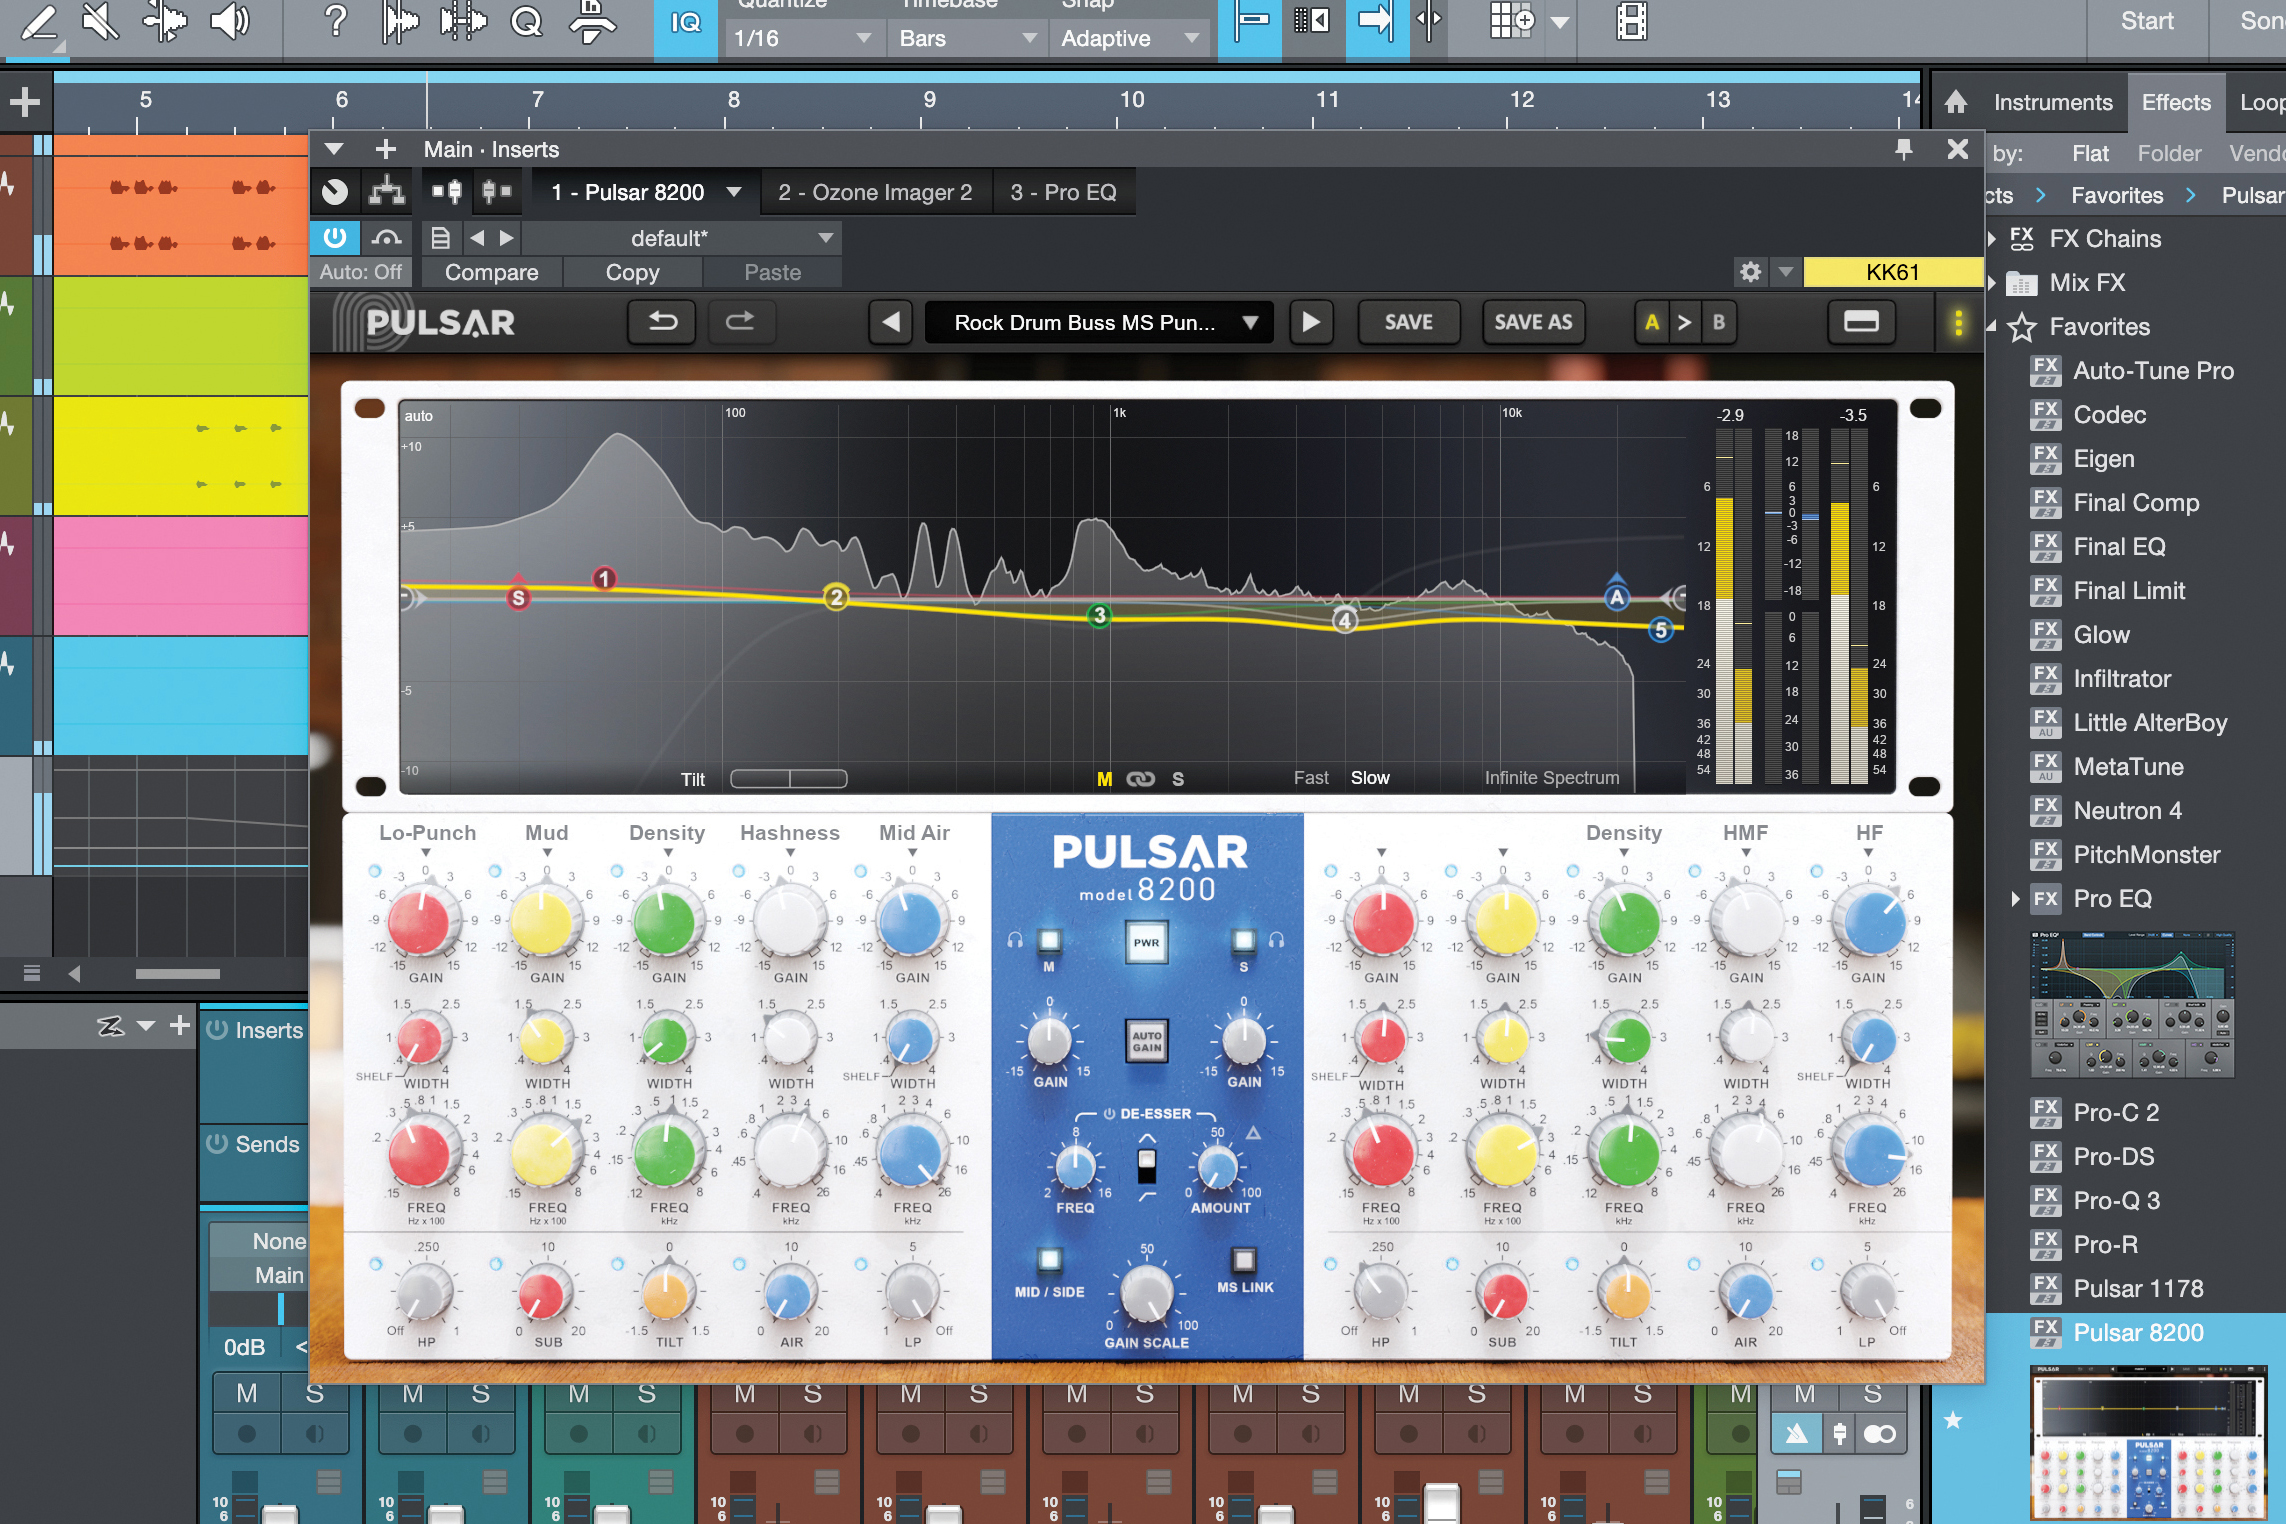
On another EQ tip, making minor adjustments to tonal balance is often the territory of a mastering engineer, but if they’re firmly in the root of the creative, they can arguably be a pre-master process. Using a nice analogue EQ, we can do this easily.
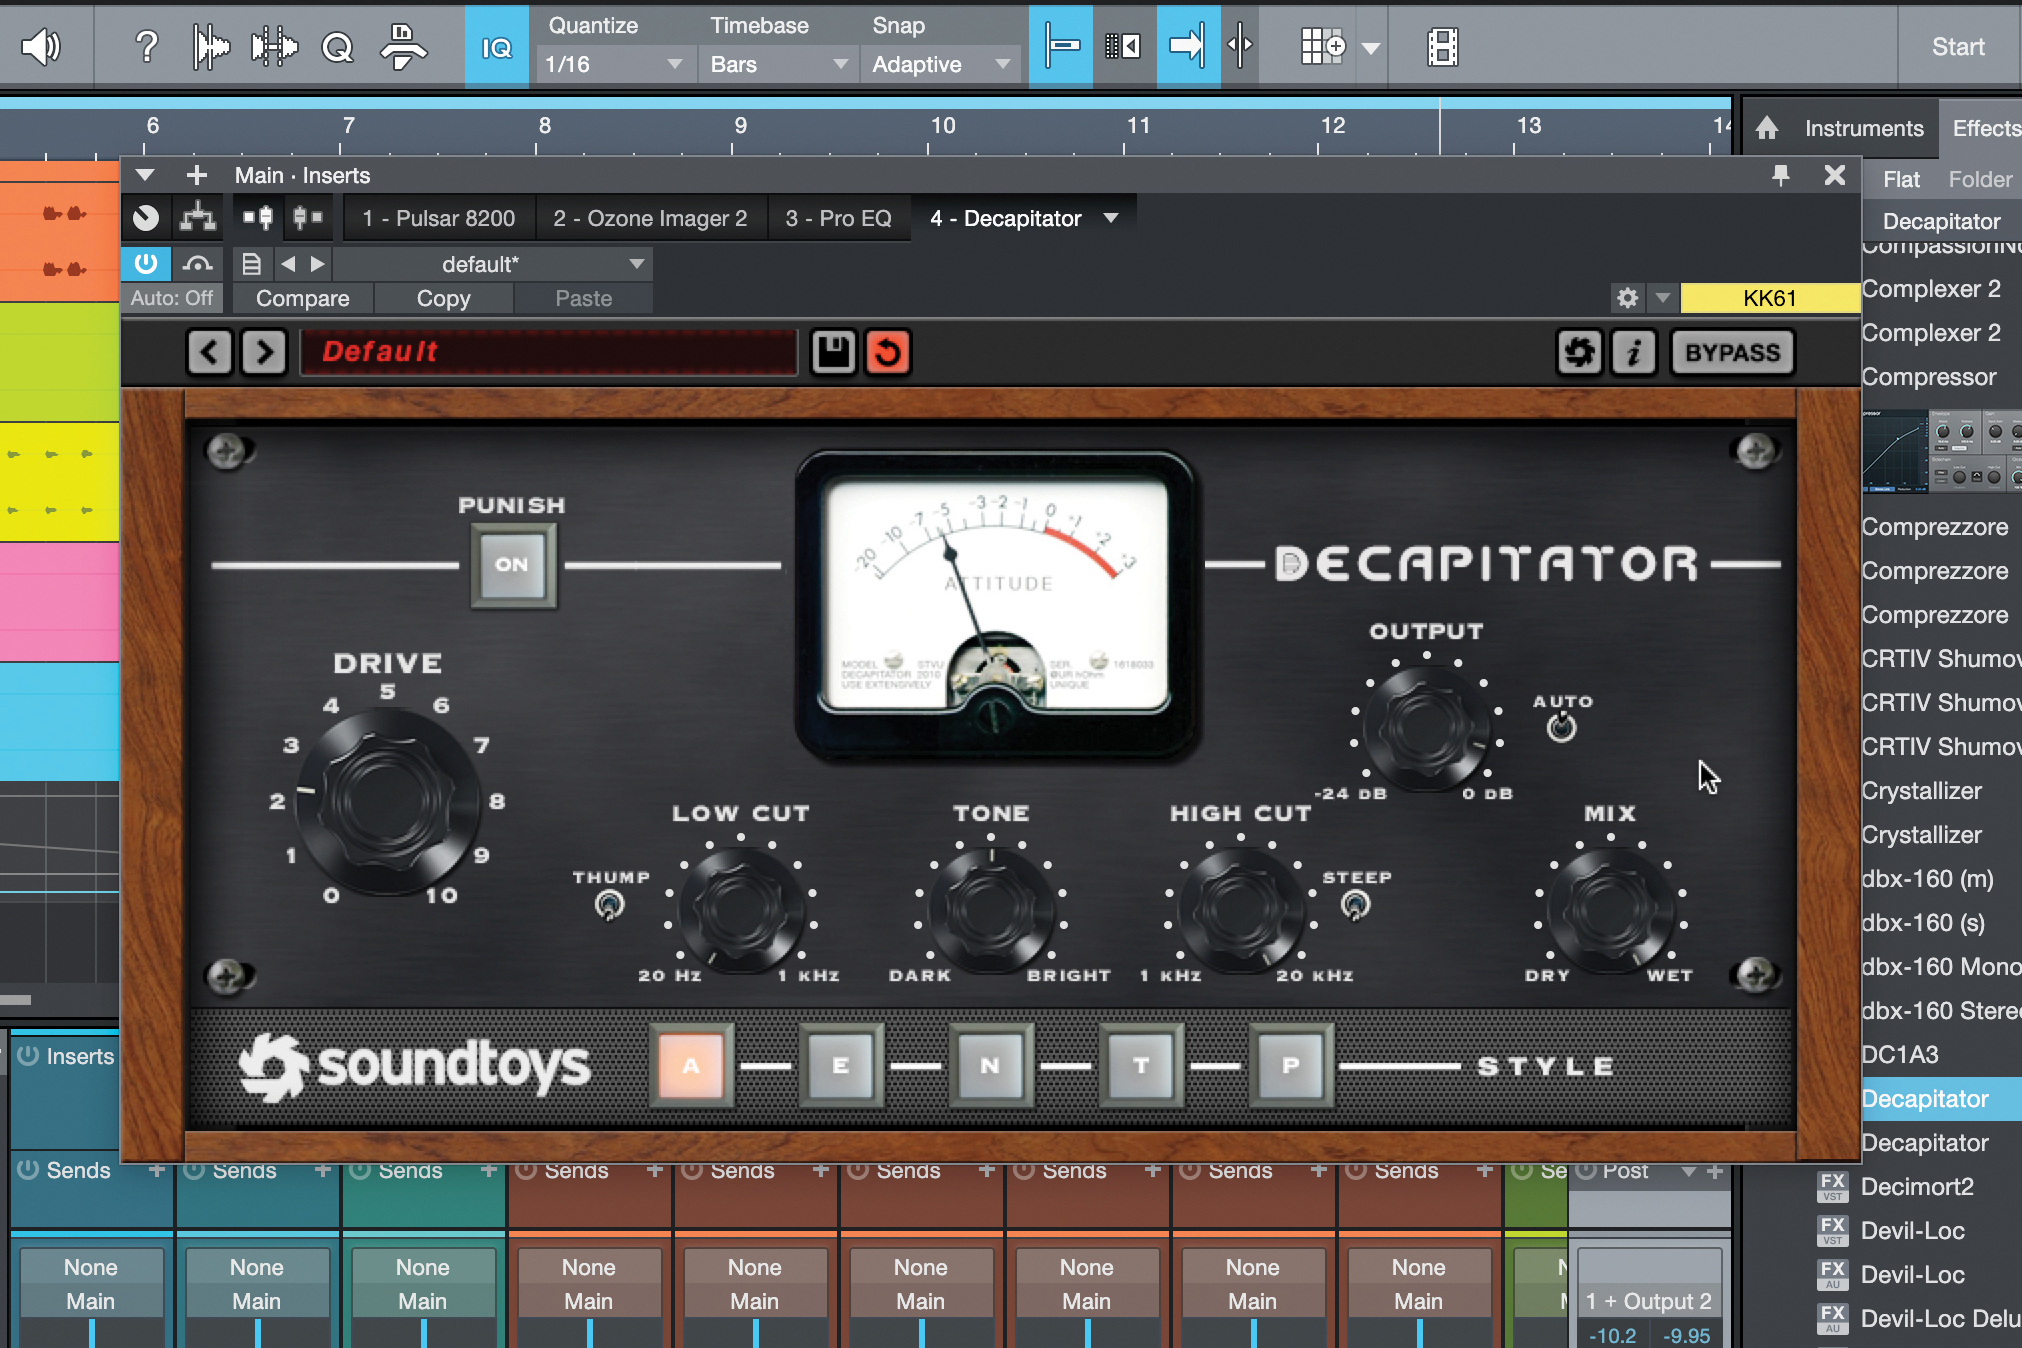
Clipping and distortion: now there’s a debatable pre-master process. But in our opinion, if the process is added for flavour and character – as we’re doing here using Decapitator – then it’s fair game as a ‘creative’ mix bus process.
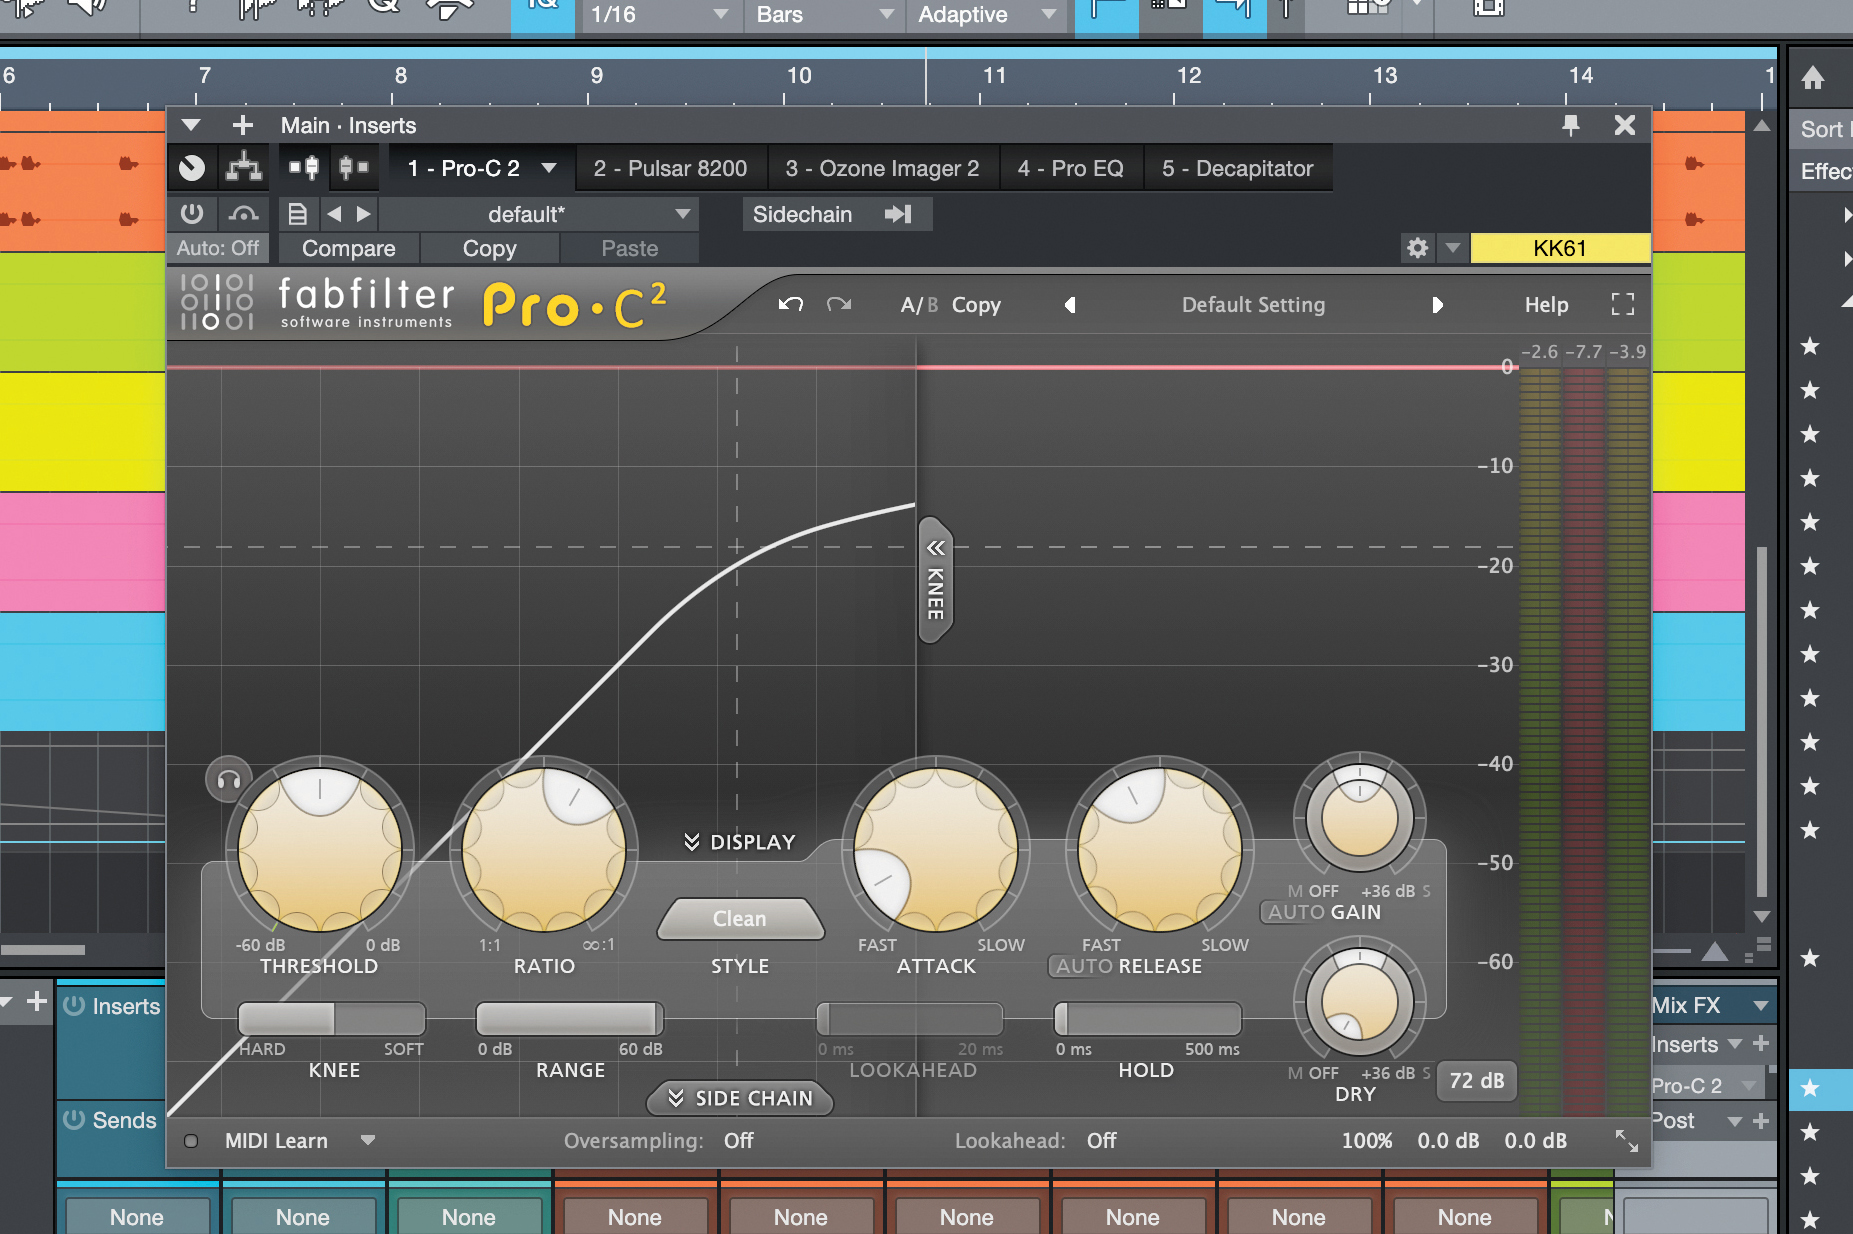
It’s time for some glue again! But while a mastering engineer might apply quick, light compression or even multiband compression, we’re going to get more creative and wide-ranging with our glue compression.
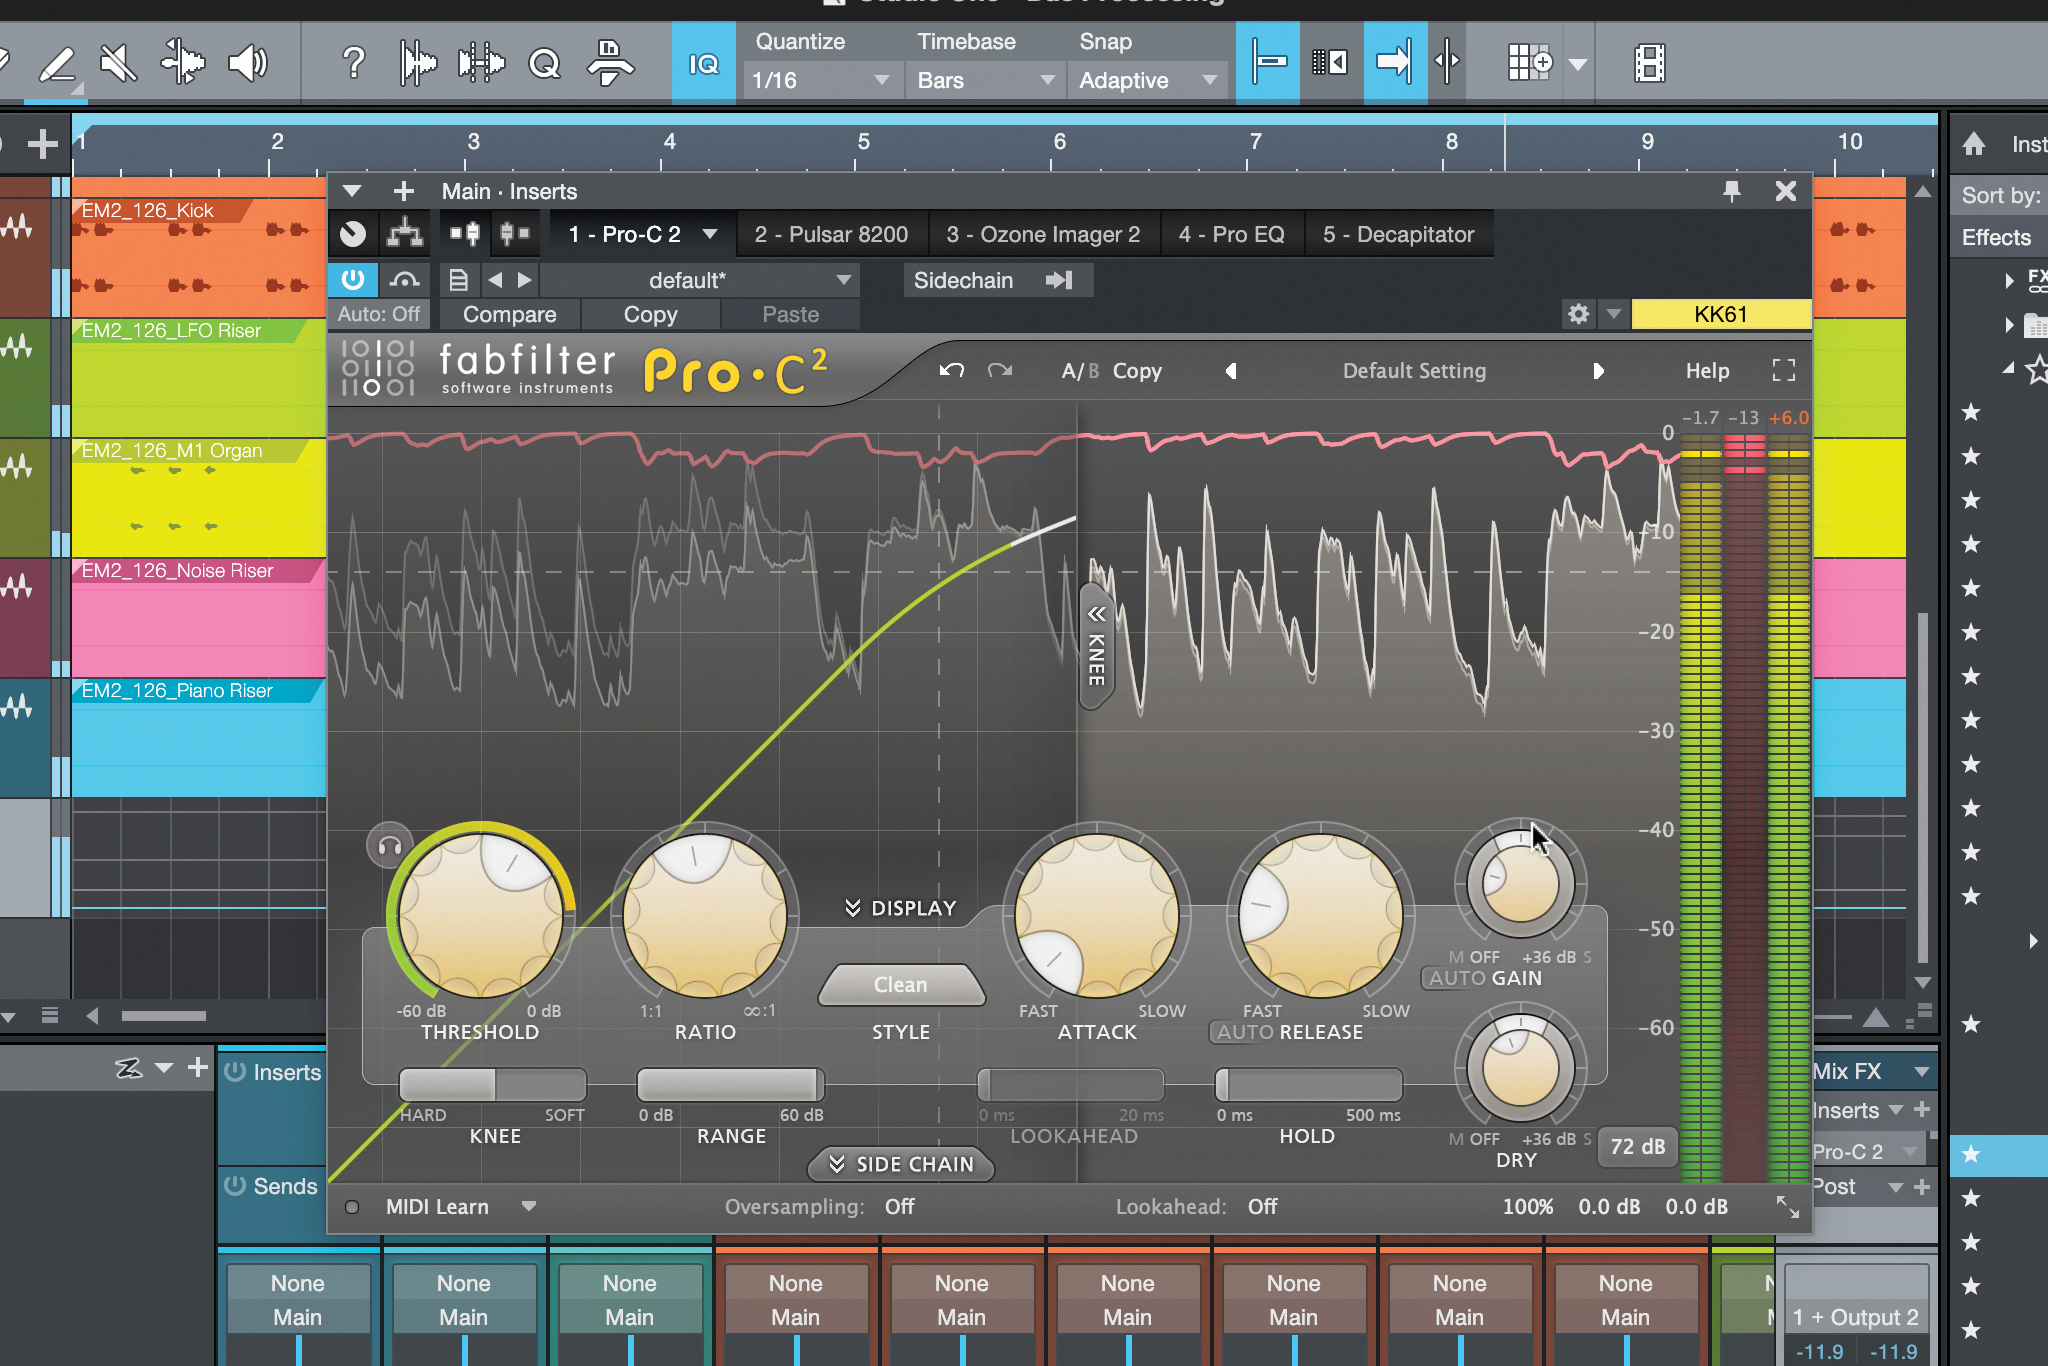
We have to watch it, but with a quickish attack and a slightly slower release, and going easy on the Ratio, adding some dry signal back in, we can provide some weight to the whole track that a mastering engineer might be hesitant to.
Saturation: pre-master or master processing?
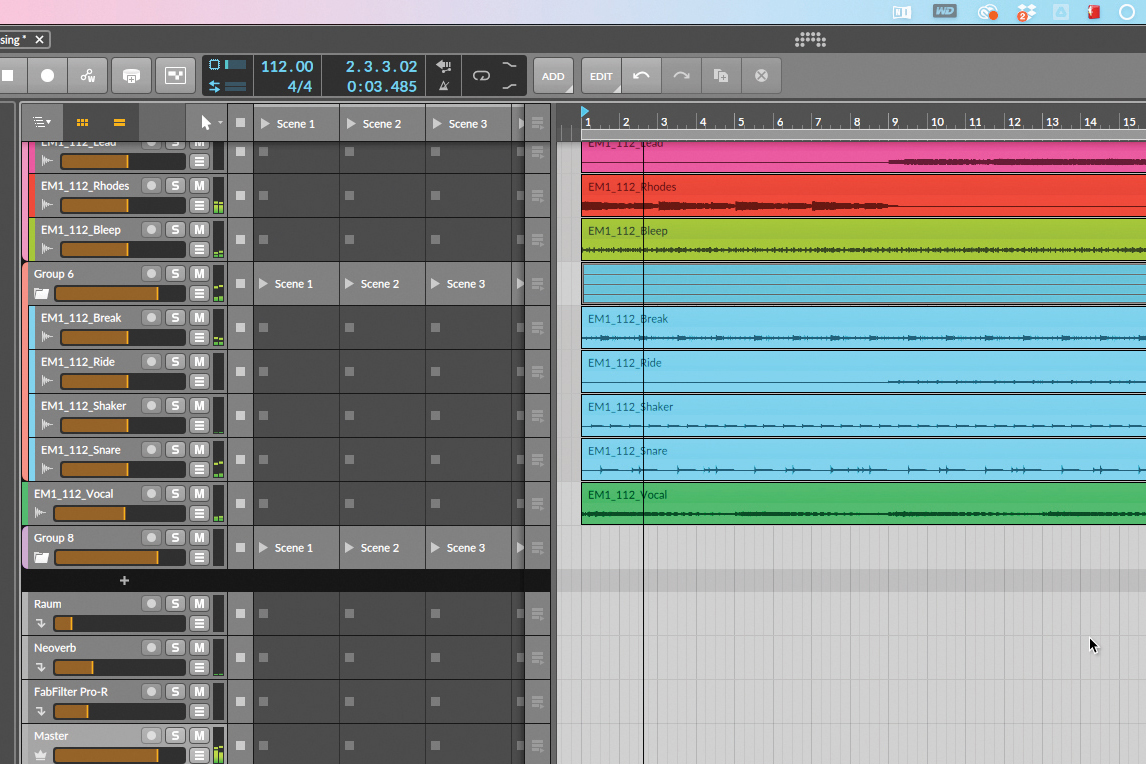
Let’s use saturation on the master channel of our project to get more ‘oomph’ out of our track as it stands. Is this the preserve of the mastering engineer, or a mixing decision? It’s arguable.
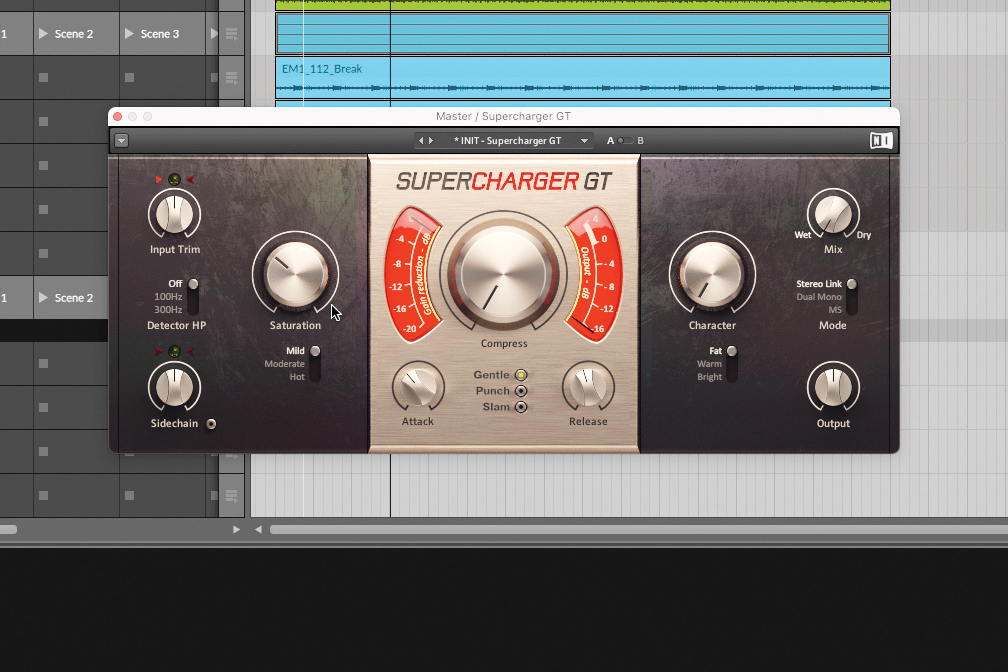
Using Native Instruments Supercharger GT, and keeping its Compressor out of the ring, we can add ‘Mild’ saturation that swells the sound. Average level is increased in a pleasant way, but we’re not clipping or scalping transients exactly.
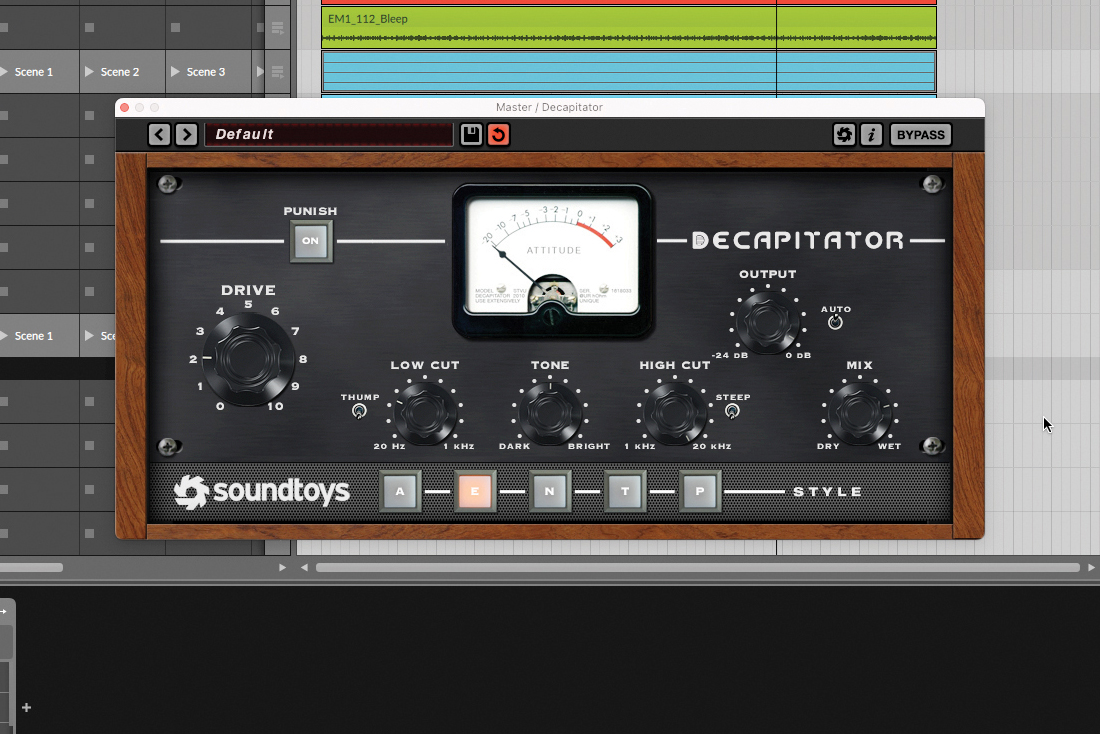
Using clipping distortion like Soundtoys Decapitator, however, we’re starting to reduce dynamic range on purpose, almost limiting those transients. The character introduced would be too racy for a mastering process, though.
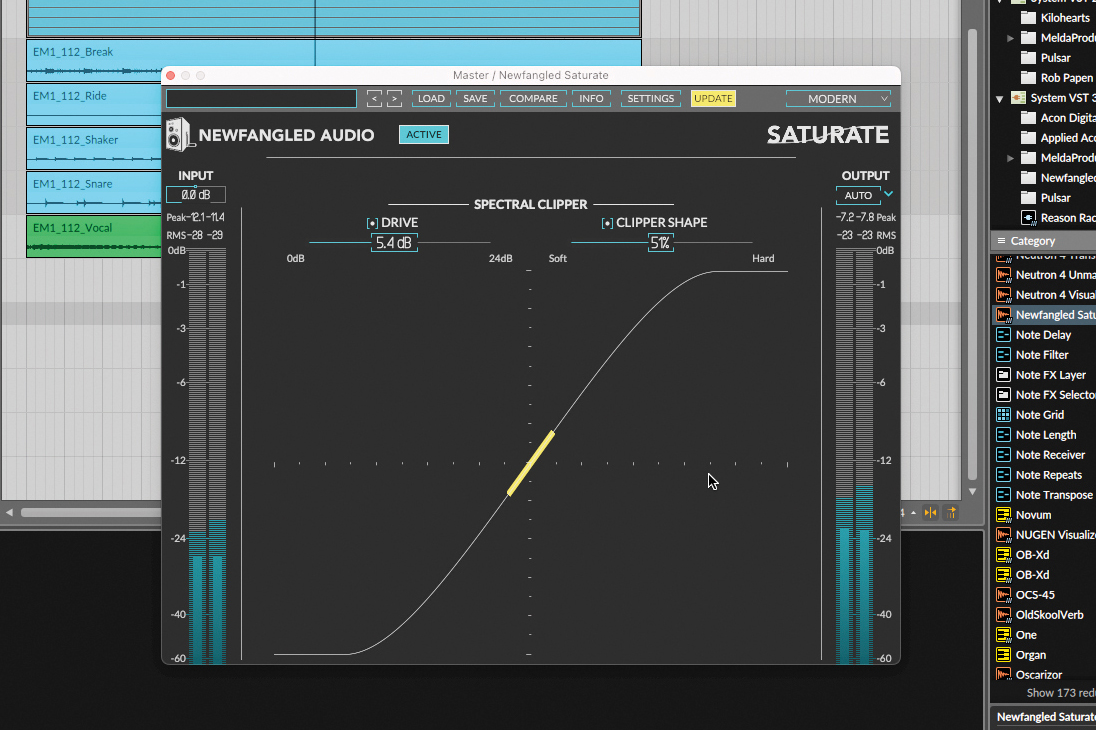
What if we use a saturator that clips the signal based on the spectral profile of what’s going through it? Here’s Newfangled Audio Saturate. Whether it’s a mastering or a pre-master process, it can all depend on the results of the effect.
New signal adventures
If these explorations of bus processing can give you a step up or a new twist on your workflow, then we’ve done our job. There’s one more strategy it’s worth mentioning before we go barreling off into bus processing though: parallel processing is something you may know from parallel compression, but the idea can be applied more widely as well.
By setting up all processing for any given channel on a parallel channel, and blending between the two, you can get a high degree of control over your mix decisions. Increasing or decreasing the processing on one channel is as simple as rebalancing the faders, rather than tweaking individual plugins. When applied alongside bus processing, you can get even more mix flexibility.

A former Production Editor of Computer Music and FutureMusic magazines, James has gone on to be a freelance writer and reviewer of music software since 2018, and has also written for many of the biggest brands in music software. His specialties include mixing techniques, DAWs, acoustics and audio analysis, as well as an overall knowledge of the music software industry.