
SYNTH WEEK 2024: As one of the originators of the genre, at least in its electronic form, it’s hard to argue with Eno’s suggestion that ambient music should be as "ignorable as it is interesting", but several decades on, this definition feels a little narrow.
The various offshoots of ambient music can perform often contradictory functions – it can be beautiful and meditative but also abrasive and ominous, it can be incredibly simplistic or detailed and complex. In the case of the ambient strains of techno that first emerged in the ’90s, it can even be danceable.
In terms of sound design, ‘ambient’ elements aren’t merely the preserve of ambient music either. Ambient or atmospheric synth sounds can be found in cinematic scores, underpinning the performances of modern jazz, filling out the arrangements of pop tracks or in the breakdowns of otherwise hard-hitting club tracks.
However, you intend to use your sounds, there’s a lot that can be learned from the process of designing sounds for ambient music.

Ambient ingredients
Creating synth patches specifically for ambient music – or ones designed to play a background role in a track – is a slightly different process to designing leads or basses.

While other synth patches are often crafted to make themselves known, perhaps through punchy attack stages, bold oscillator choices or bouncy resonant filter sweeps, ambient patches are intended to settle into the background. They should be soft and unhurried, generally making use of slow attack and release envelopes and gentle filtering to remove bright and harsh characteristics. It’s a mistake, however, to confuse this softness for simplicity.
In compositional terms, ambient music is often relatively simple and very slow paced. Progressions often consist of little more than two or three very drawn out chords, or in the case of drones, just a single note extended throughout an entire composition.
The interest, then, comes not from changes in harmony, but in timbre. The real key to creating ambient synth sounds lies in slow and subtle movement – not so much wild vibrato but gradual shifts in the tonality of a sound. Creating modulation routings and oscillator relationships that mean that new overtones rise and fade as a sound sustains, and subtle shifts in pitch and frequency that turn a simple chord into a ‘soundscape’.
Digital vs analogue
Which is better – analogue or digital synthesis? It’s a debate that rages throughout the synth world, with polarised opinions often backed up by questionable claims and shaky evidence. When it comes to creating ambient and atmospheric patches, however, there are distinct benefits to each style of sound generation.
On the analogue front, there are certain characteristics that are ideal for creating drones, the most significant of these being the interaction between analogue oscillators. Using two similar analogue waveforms slightly detuned against one another can create a natural ‘beating’ effect caused by the phase relationship, which can add an inherent subtle modulation to your sounds.

What’s more, the inherent ‘noisiness’ of analogue synths can help add character to ambient sounds, whether that’s through the grit that comes from overdriving an analogue filter, or through boosting an instrument’s output noise via gain, until the electrical hum becomes another part of the overall sound.
There are certain things that only digital instruments can do, however, that are perfect for ambient sound generation. Perhaps the most significant is the ability to combine synthesis and sampling, in the form of wavetable, granular or PCM-based synthesis. From an ambient point of view, this allows us to go beyond the electronic tones of analogue oscillators and incorporate more complex and natural sounds into our synth patches – from orchestral instruments to the sounds of rainfall or unusual digital textures.
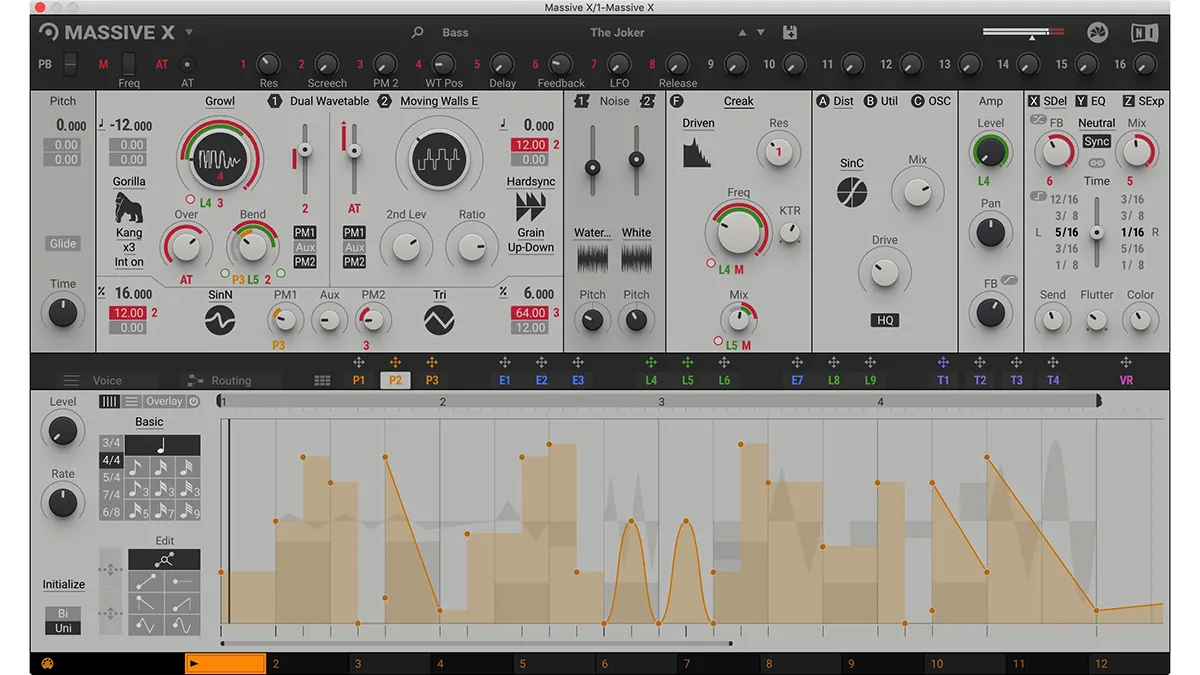
What’s more, digital synths generally offer more flexible modulation capabilities, allowing for more movement. That can be via the audio-rate modulation used for sound generation in FM synths like the DX7, the evolving sample sequences of Korg’s Wave Sequencing synths, or the complex modulation matrixes of plugins like NI’s Massive X.
Arguably the best instruments for ambient synthesis are those that combine the best of digital and analogue; the richness of classic synth design with the avenues of complexity and movement afforded by modern tech.
Synthesising a hybrid ambient pad
Let’s create a patch that makes use of a variety of the concepts discussed on the previous page. To do so, we need a synth – or combination of synths – that allows us to blend both analogue (or virtual analogue) sound generation with digital synthesis techniques.
Here, we’re using Kilohearts’ Phase Plant plugin, which includes VA, sample and wavetable engines. It’s also semi-modular, and therefore offers lots of flexibility for creating multilayered sounds. Similar approaches can be applied in other multi-engine plugins such as Arturia Pigments, Spectrasonics Omnisphere or Logic’s Alchemy.
Best synthesizers 2024: Top analogue, digital, mono and polysynths
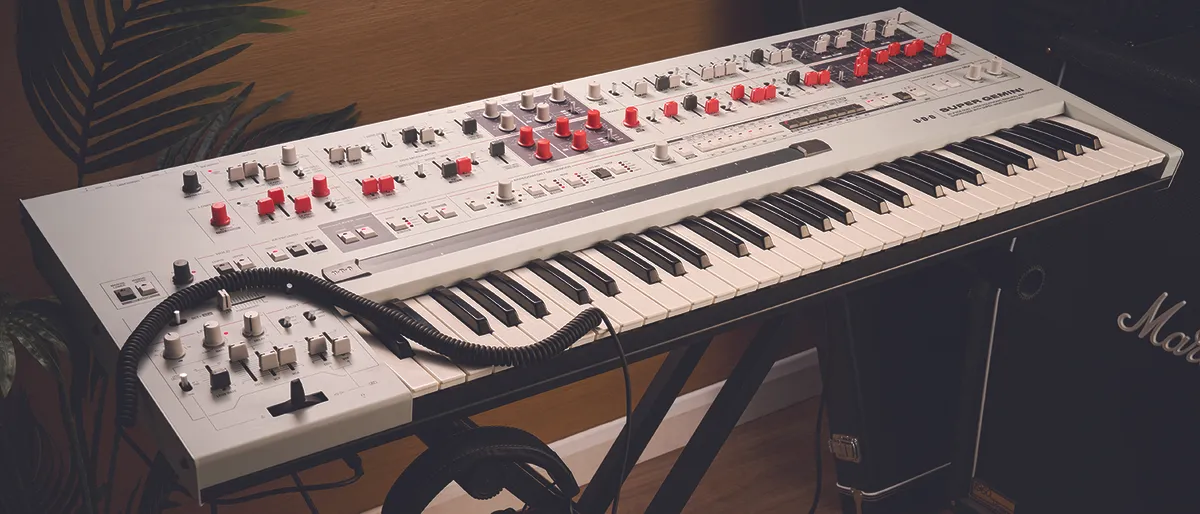
In the hardware realm, multi-timbral hybrid instruments like UDO’s Super 6, Novation Summit or Arturia’s PolyBrute are perfect for these kinds of sounds. Don’t be put off though, if you don’t have access to one of these top end synths or even to third-party plugins. The patch described below effectively treats the analogue and digital layers as individual instruments with their own amp and filter envelopes, and then ties these together using effects.
Because of this, the same approach can be applied by combining individual instruments within your DAW – a rack tool, like Live’s Instrument Rack or Reason’s Combinator, is very effective in this case. If using hardware, you could combine various budget-friendly synths using a MIDI splitter or MIDI thru chain, and then process them together.

Our ambient patch begins with a simple analogue-style layer [Fig 1]. For this we’re using a triangle on Osc1 and a square on Osc2. These are kept at the same pitch, but we add a little detune and use a low-pass filter to remove the brighter top-end frequencies.

The amp and filter [Fig 2] envelopes are set for a soft attack and a long release.


Next, we add an airy-sounding digital layer [Fig 3] using Phase Plant’s sample engine. Here we use a sampled choir sound that has a nice ’90s-ambient feel to it. This layer has its own amp and filter [Fig 4] envelopes separate from the analogue layer.
The filter here is a band-pass that sweeps into the upper frequencies and then back down as we hold a note. We use even longer attack and release times here so that our choir creates an extended digital tail to the sound that lingers after the analogue part has completely faded away.


Next we add another digital synth layer [Fig 5]. This time we’re using a wavetable engine with a woodwind sound loaded. This has a shorter attack time applied to the amp envelope and no filtering. The idea is to create an attack element at the start of our pad sound before the main analogue body fades in. We apply a little glide to the overall sound [Fig 6].

This creates a bendy pitch effect that only applies to our shorter woodwind sound. We also use a relatively slow and smooth random LFO [Fig 7] to modulate the woodwind’s wavetable. The volume of this woodwind element is set fairly low compared to the other layers, so it’s only a subtle part of the overall synth sound.

In the effects lanes [Fig 8] we add a mid-sized reverb and subtle touch of delay across the whole sound, which adds space and depth. For extra width we also add a subtle amount of chorus with a slow rate. If we wanted to add more stereo interest, we could experiment with panning our layers left and right. In doing this, one idea could be to duplicate our digital choir layer and hard pan each version, with slightly different tuning or filter settings to add stereo variation.
Our final effect here is distortion, which further ties the sound together and adds a touch of textural grit. We don’t want this to be too overt – the idea is to set the drive level so our sound begins to break up ever so slightly when it reaches its loudest and brightest point.

Finally, to add evolution to our sound, we add some slow moving sine-wave LFOs to the modulator section [Fig 9]. We can use these to introduce subtle movement to various elements of our sound. In our example we’ve routed one to modulate the filter cutoff of our analogue layer, and another to modulate the rate of the delay, which introduces some variation in both timing and pitch. Other options could be to modulate the pulse width of the square wave, or to vary the volume or pan position of the individual layers.
Creating a glitchy granular synth effect
Granular synths are wonderful for ambient music. They work by sampling tiny fragments of source audio, the capture and playback of which can be randomised for unpredictability and texture. Throw a sample of a vocal or acoustic instrument into a granular synth of your choice and it will immediately turn into an interesting textural sound that’s great for pads and chords.
Increase the number and randomisation of the grains used to create an ambient ‘cloud’ effect, or use fewer grains for stutter effects. One of our favourite ambient tricks, however, is to load a sample of an arpeggiated chord to create glitchy pitch effects.

We’re using Max for Live’s Granulator III. We drag a recording of a simple arpeggiated minor chord into its sample slot. Our track is in D minor, so triggering the synth using a sustained root note D will keep the effect nicely in-key.

Next we increase the randomisation of grain position. This means that each time a new note is triggered, we’re grabbing grains from a different place in the arp sample. We also increase LFO modulation of grain size for further variety.

Finally, by increasing the ‘scan’ parameter, we can make Granulator scroll through the arpeggiation as the sustained note plays. Adjusting the level of this alters the rhythm of the effect. The result is a glitchy and complex take on a standard synth arpeggio.
Creating ambient drones
Although they’re an integral part of ambient electronic music, the use of drones extends much further back than this. The Indian classical tradition makes use of a tambura to create sustained harmonic backing for other instruments, and the use of the didgeridoo in Australia is older still. Modern interest in exploring drones in music was aided by the post-war exploration of tape and oscillator composition. From The Velvet Underground to krautrock and on to shoegaze and even film and TV soundtracks, drones are found in many types of music.
While there’s no one particular method to use for creating a drone, there are a number of ways of approaching the task, whether you use software or hardware. This extends from a simple held synth note, right through to intricate and evolving soundbeds created from a mixture of well-planned technique and happy accidents.

The simplest form of drone is little more than a single held note, but inevitably the choice of sound has a large bearing on whether it sounds interesting or not. For even the simplest of held tones it’s extremely important to convey a sense of change and movement, however small. This keeps the listener engaged, despite often acting only at a subliminal level.
This might explain why some favour the subtle variations inherent in analogue synths when creating pads and drones. This is not to say that drone creation is the sole preserve of hardware (analogue or digital). Software certainly has its place, and in some cases lets you create more complex, unusual textures.
For the time being, let’s agree to be system agnostic; the first step would be to choose a hardware or software-based subtractive synthesiser. A good musical drone requires harmonic interest, so a sawtooth waveform is a good place to start, containing as it does both odd and even harmonics of the fundamental frequency.
Set up your synth so that the amp envelope has maximum sustain, allowing the sound to continue as long as a note is held. The oscillator’s octave switch should be set so that you get a low (but not subsonic) tone when playing towards the lower end of the keyboard.
On its own, the sawtooth wave will be too bright, so you will need to apply a low-pass filter to soften its overall timbre. Dialling in some resonance on the filter will help emphasise any changes to the cutoff of the filter, which will come in handy later.
This is a good start, but there’s little movement. Adding a second oscillator set up in a similar way helps add some subtle movement. Adjusting its tuning relative to the first oscillator initially introduces a slowly changing ‘beat frequency’. Push this a little further and obvious detuning occurs, that eventually leads to more dissonant results.

Further variation can be introduced by switching the second oscillator to a square wave (which has only odd harmonics). Keeping it slightly detuned, we can add another layer of interest by using pulse width modulation. This is achieved by using an LFO to control the width of the square wave (pulse). As the waveform narrows, the tone becomes thinner and more nasal. Setting the LFO speed quite slow gives you a less obvious tonal change, with faster settings providing an overall thickening to the sound.
Some synths allow you to select multiple wave shapes for each oscillator – a combination of saw and square works well here. If you’re also lucky enough to have a second LFO spare then this can be set up for PWM on the first oscillator, but using a different LFO rate (throwing further evolving elements into the mix).
Additional LFOs can be employed independently to add subtle pitch variations to each oscillator and a small and slow-moving alteration to the filter cutoff. Creating two similar versions of the sound and panning them left and right, or harnessing a synth’s detunable unison mode, builds on these techniques to fill out the sound still further.
Quick drone creation tips
A good drone helps set and underpin the mood of your track, while allowing harmony to move freely above it. Drones are generally characterised by a long, sustaining single note or chord (often on the root note of the track) and technically speaking (in musical terms), a drone is a ‘pedal note’.
If your drone is just a single oscillator with no movement/modulation it’ll soon get boring
Of course, if your drone is just a single oscillator with no movement/modulation it’ll soon get boring, so in these next steps let’s use a few tools to inject some movement into our drone. Note: 12dB (2-pole) filters are usually good for drones as they have a solid low end but still let some high-frequency harmonics/energy through even at lower cut-off settings. Here are a few ideas…

Use two oscillators and detune one to add movement. Add a sub-oscillator for low-end depth. If your synth has an oscillator drift or vintage function, cranking this up, otherwise try a shallow and slow LFO routed to oscillator pitch to add harmonic movement.

Above a low-pass filtered saw or square wave, try layering pitched-down samples of string, woodwind or brass instruments for an earthy vibe. The original bowing or blowing noises within the samples will sound more exaggerated and add a more human feel.

Split your drone into three frequency bands (low/mid/high) and process each layer separately within your synth/sampler or on separate tracks in your DAW. Experiment with different filter types or effects on each layer, then automate using slowly pulsing LFOs.

Who Wants To Live Forever? The composer still creating music from beyond the grave
“How daring to have a long intro before he’s even singing. It’s like psychedelic Mozart”: With The Rose Of Laura Nyro, Elton John and Brandi Carlile are paying tribute to both a 'forgotten' songwriter and the lost art of the long song intro


