Ableton Live Simpler masterclass
Get the most out of Live's sampling instrument
How to make a smooth, sweeping pad with Ableton Simpler and Auto Filter
The only real negative with Ableton Live's Simpler is that the interface requires a bit of legwork to get around.
For example, to properly tune samples you have to be on the Controls page, and to adjust the filter envelope you have to be on the Controls page with the Envelope screen selected. This makes it slower to use than the original version - we'd love it if Ableton added another tab displaying the 'classic' interface.
Anyhoo, in this part of the masterclass we're going to take advantage of some of Simpler's filtering features in combination with Auto Filter to make a luscious pad sound.
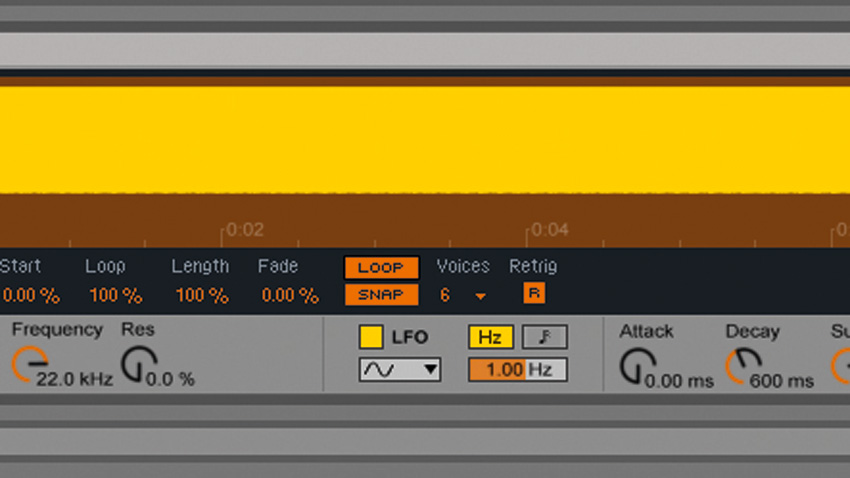
Step 1: Drag Raw saw.wav onto a MIDI track's Device View to create a Simpler. We want our sample to be able to play indefinitely, so click the Loop button below the waveform to activate looping. It doesn't sound too smooth when it loops: the start of the sample has a definite punch.
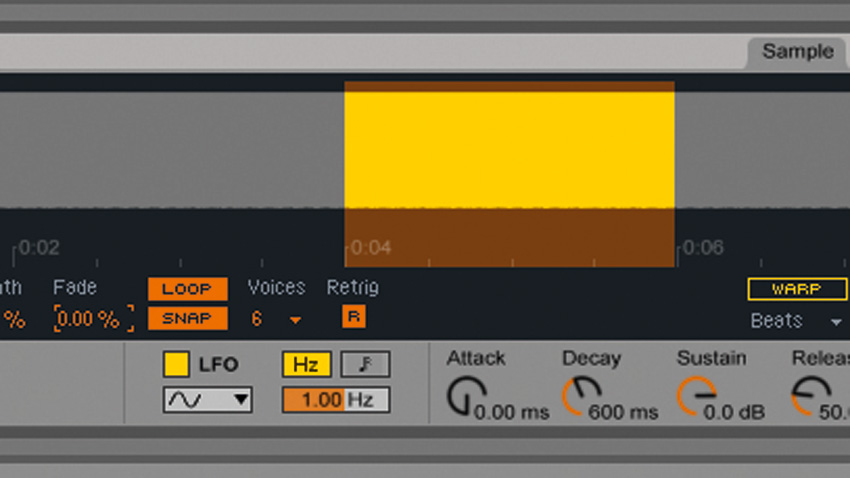
Step 2: Turn the loop's Start parameter up to 50% and Length to 25%. Because Simpler's Snap is turned on by default, the loop start and end are automatically positioned where the waveform crosses the zero crossing line, giving a smooth-sounding transition. If you have trouble looping more complex sounds, try turning up the Fade (crossfade) parameter.
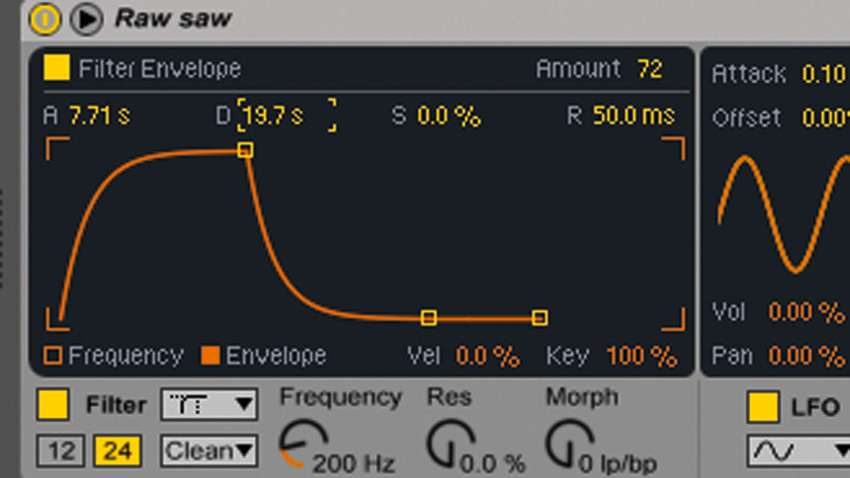
Step 3: Click the Controls tab and set the Filter Type to Morph SVF. Set the Frequency to 200Hz, then turn on the filter envelope and turn the Amount up to 72. With the current filter envelope settings, this gives us a percussive lead tone. Set the filter envelope's A (Attack) and D (Decay) to 7.71s and 19.6s.
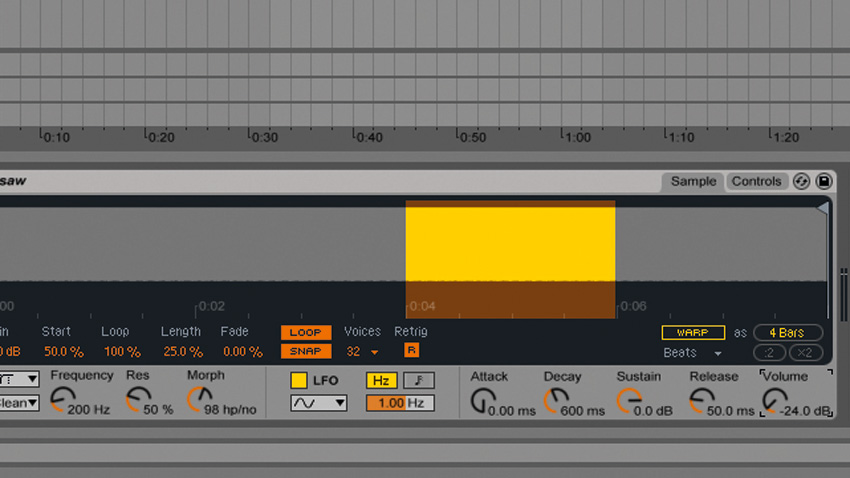
Step 4: Set the Res to 50% and Morph to 98 hp/no. This gives a long, rich filter sweep that sounds great with chords. Click the Sample tab and set the number of Voices to 32 for maximum polyphony, then turn the Volume down to -24dB to give yourself some headroom. Let's use another filter to further articulate things.
Get the MusicRadar Newsletter
Want all the hottest music and gear news, reviews, deals, features and more, direct to your inbox? Sign up here.
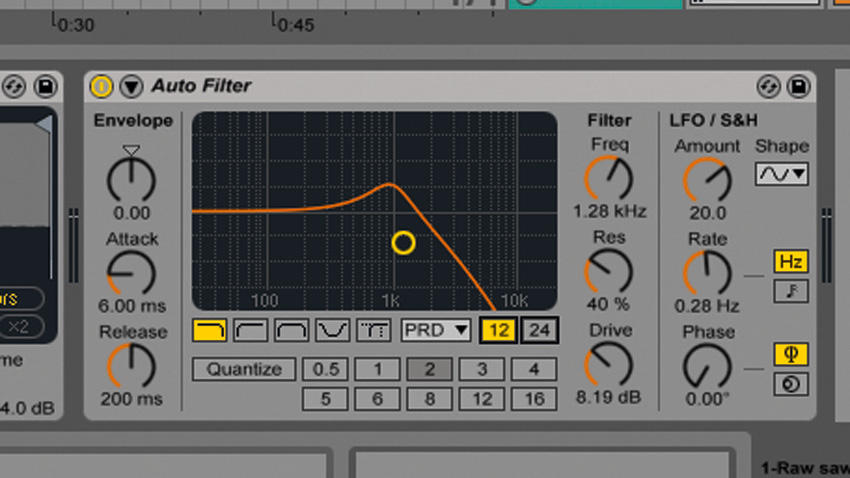
Step 5: Drag Auto Filter from the Audio Effects folder onto the Simpler track. Auto Filter features the same new filter modes as Simpler. Turn the Res up to 40% and Freq down to 1.28kHz, then turn the LFO/S&H Amount up to 20.0 and set its Rate to 0.28Hz. Change the Circuit Type to PRD, set the Drive knob to 8.19dB, and switch the Slope to 12dB.
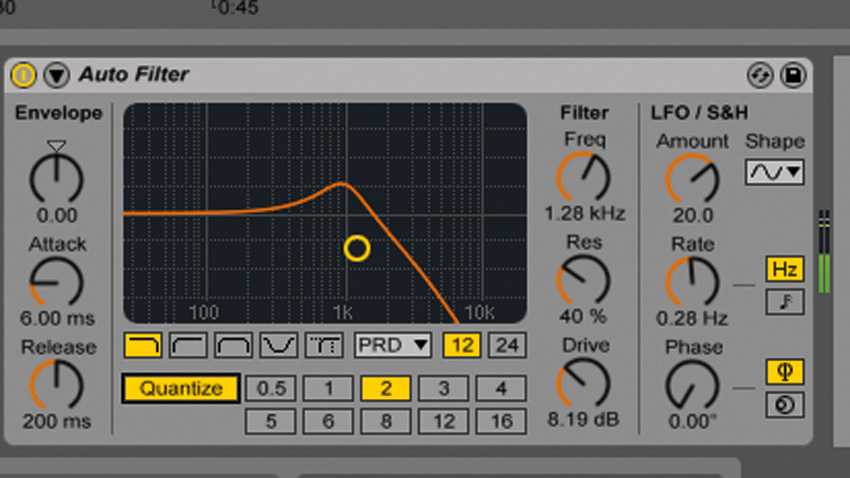
Step 6: This gives us a gently rising and falling cutoff frequency, which we can make more interesting by quantising its movement. Click the Quantize button at the bottom of Auto Filter's interface. The Beat Division is already set to 2 16th-notes, which is perfect for this patch. Quantize only affects the cutoff frequency when the project is playing, so start playback and play a chord to hear how it sounds.
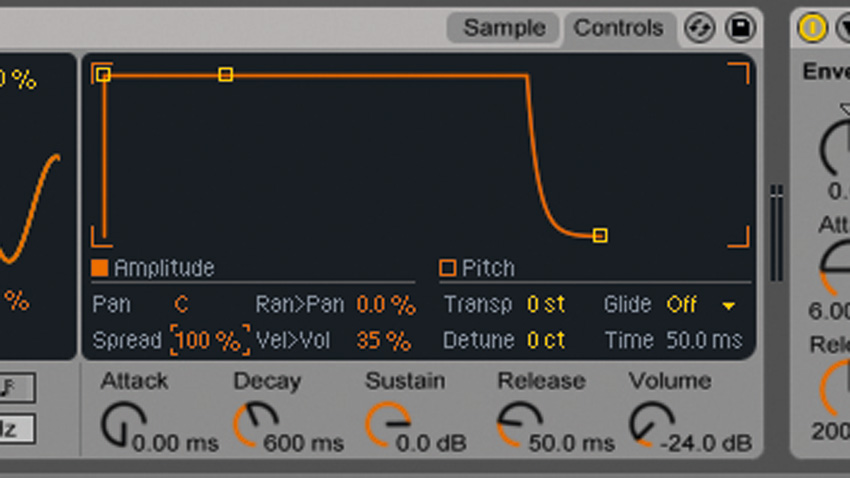
Step 7: The two types of filter modulation used here - envelope-driven HP/NO and quantised LFO-driven LPF - create a rich, rhythmic texture, but it still sounds rather one-dimensional because it's in mono. Click Simpler's Control tab, and turn the Spread parameter under the amplitude envelope to 100%.
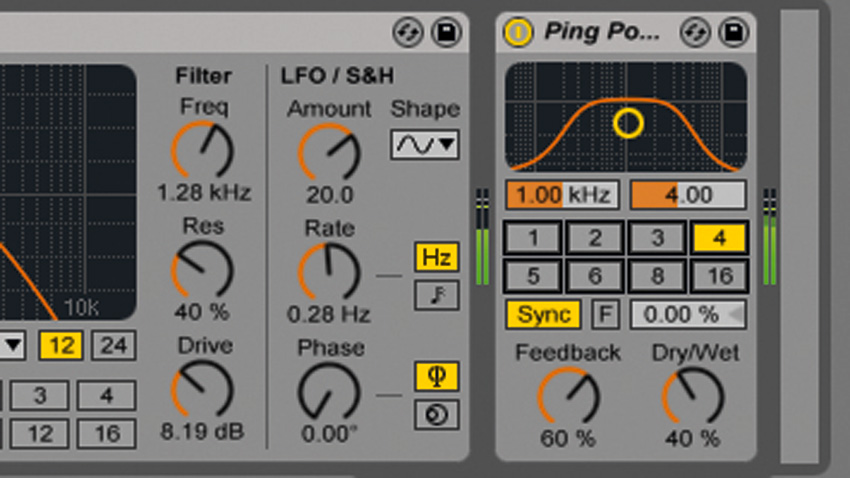
Step 8: This generates two panned and detuned voices per note, for a wide stereo sound. The sound is still a little dry, so add a Ping-Pong Delay after the Auto Filter, and set its Dry/Wet level to 40% and Beat Division to 4 16th-notes. This complements the Quantize's 2 16th-note resolution, resulting in a lush, fluid sound.
Current page: How to make a pad with Simpler and Auto Filter
Prev Page How to chop beats with Simpler's Slice mode Next Page How to make a punchy bass with Simpler's filtersMusicRadar is the number 1 website for music makers of all kinds, be they guitarists, drummers, keyboard players, djs or producers...
GEAR: We help musicians find the best gear with top-ranking gear round-ups and high- quality, authoritative reviews by a wide team of highly experienced experts.
TIPS: We also provide tuition, from bite-sized tips to advanced work-outs and guidance from recognised musicians and stars.
STARS: We talk to musicians and stars about their creative processes, and the nuts and bolts of their gear and technique. We give fans an insight into the actual craft of music making that no other music website can.


