8 Ableton Live tips that you need to know about
Tips and techniques for Live users hoping to make the most of their DAW
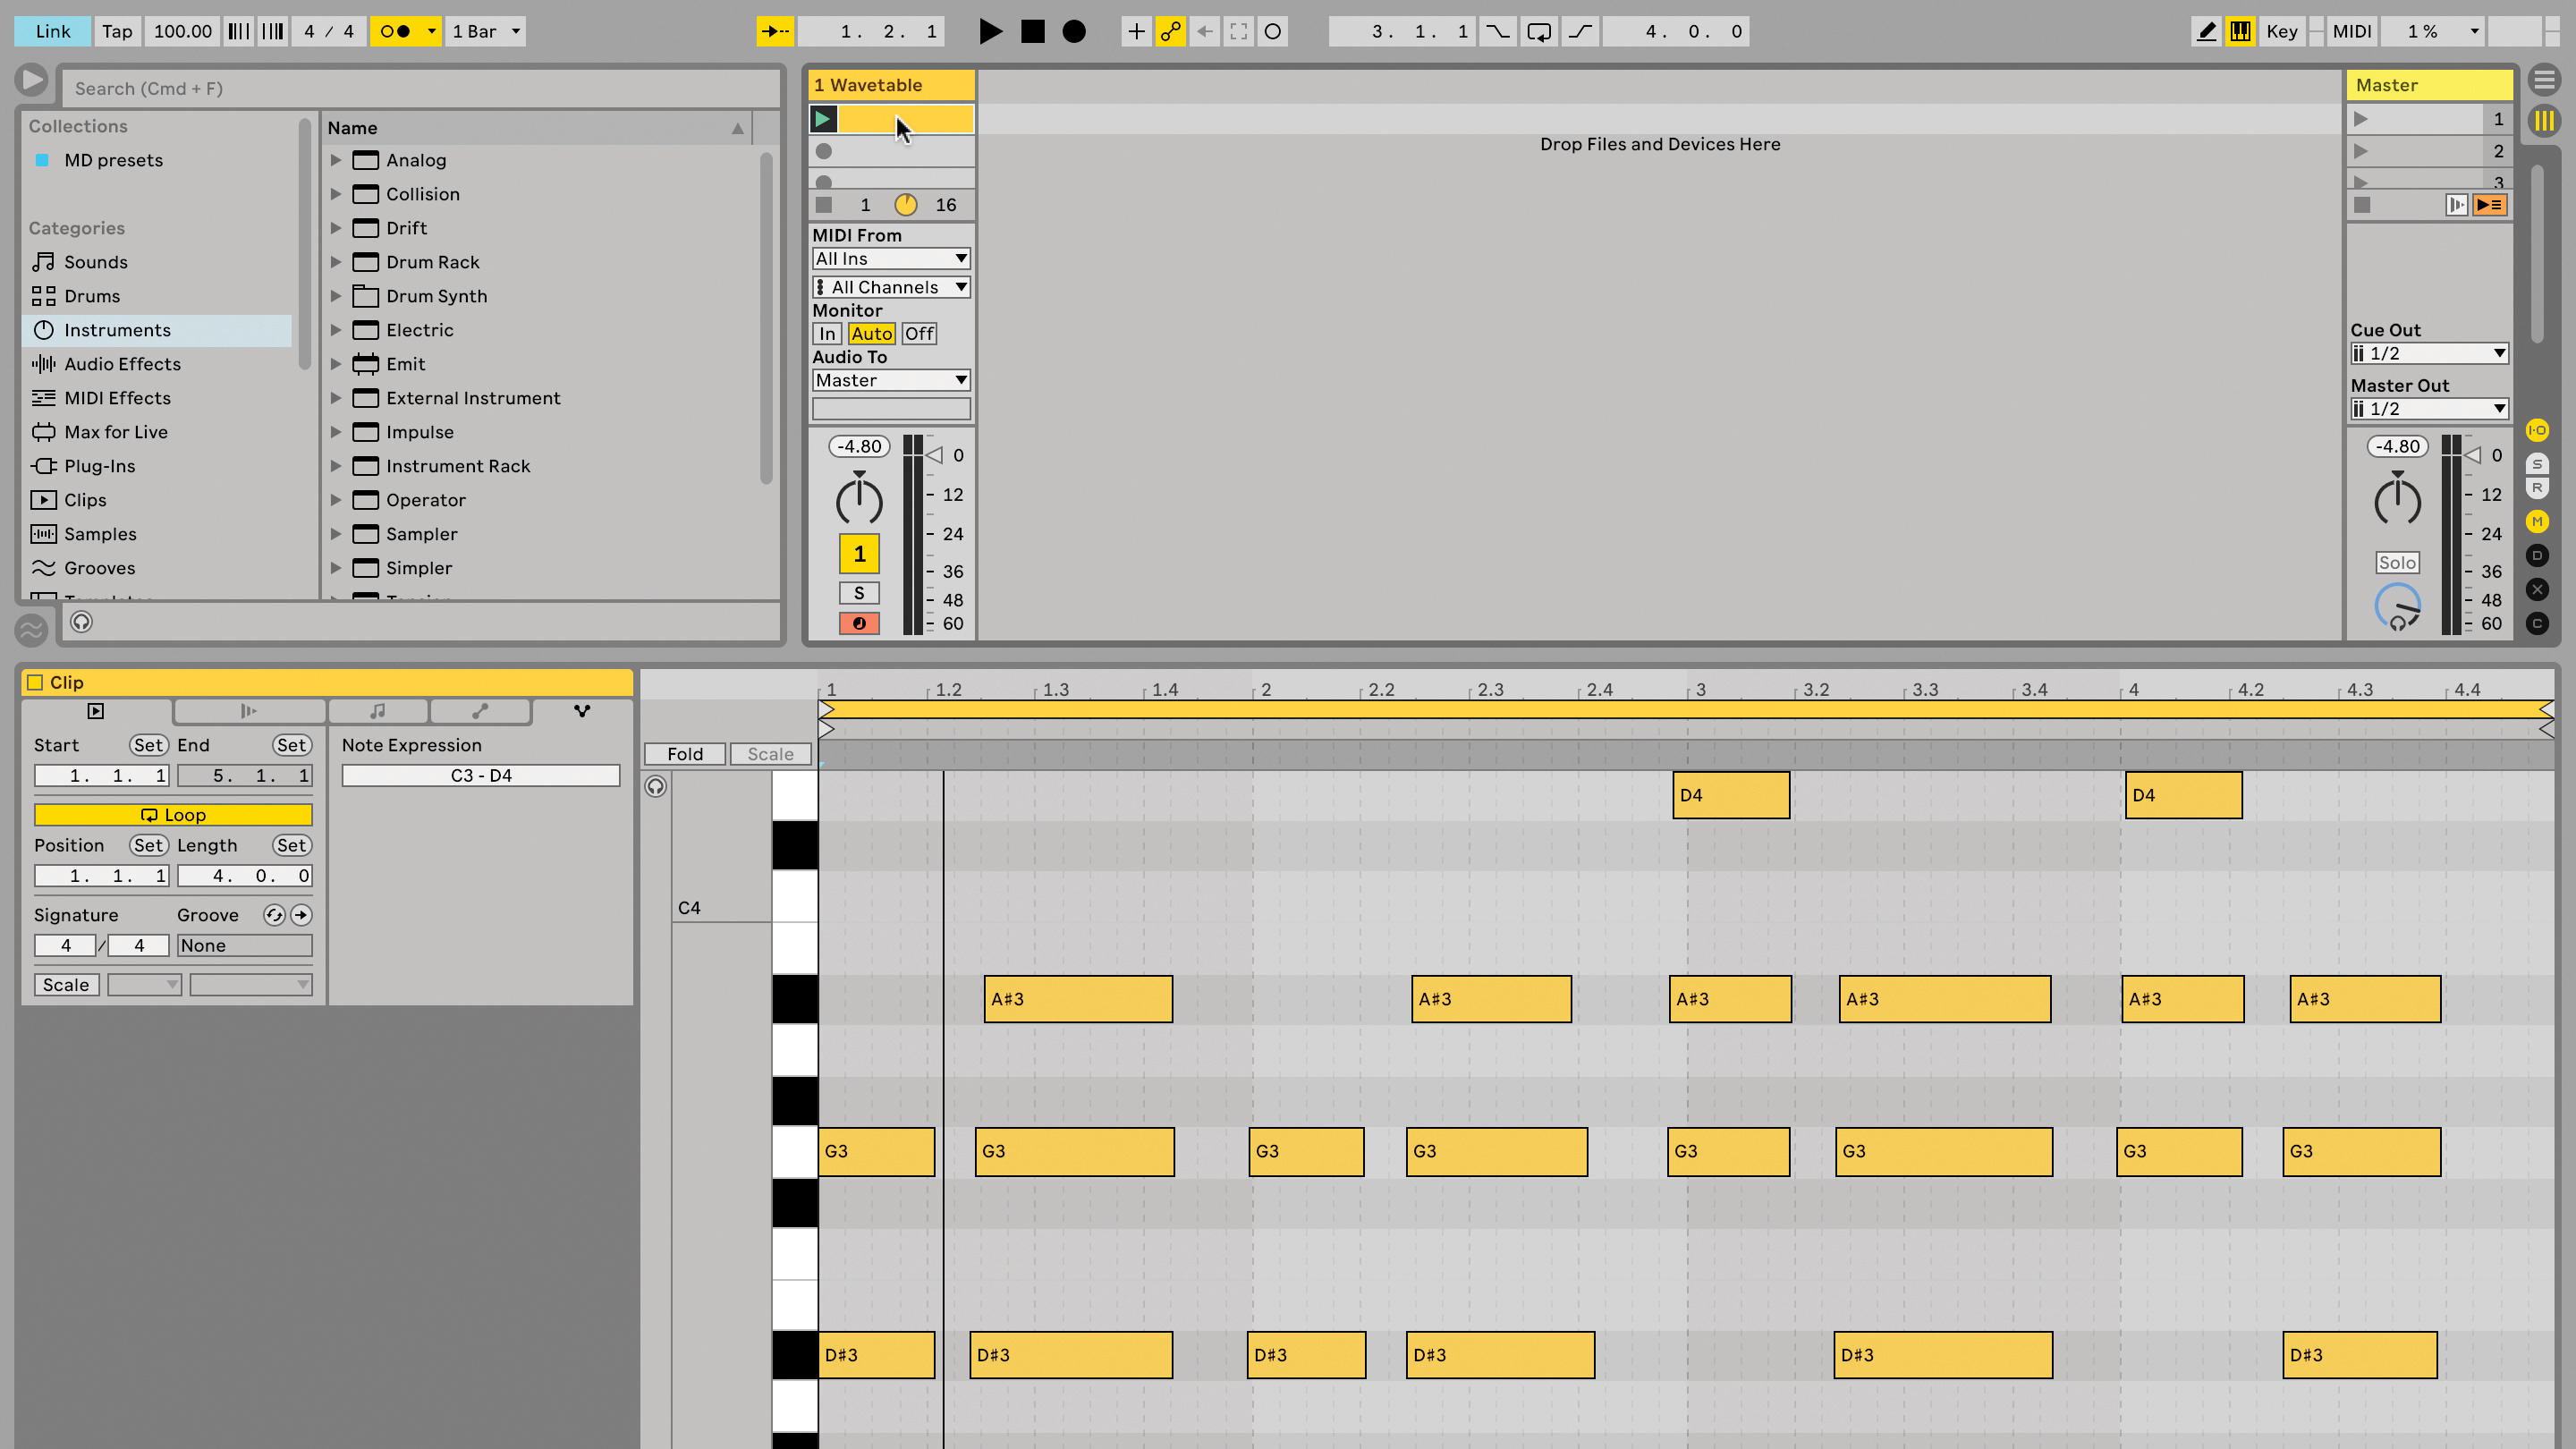
Here are some of our favourite (and more recent) Ableton Live 11 tips, tricks and ideas, ready to go no matter which version of the DAW you have.
1. MPE envelopes
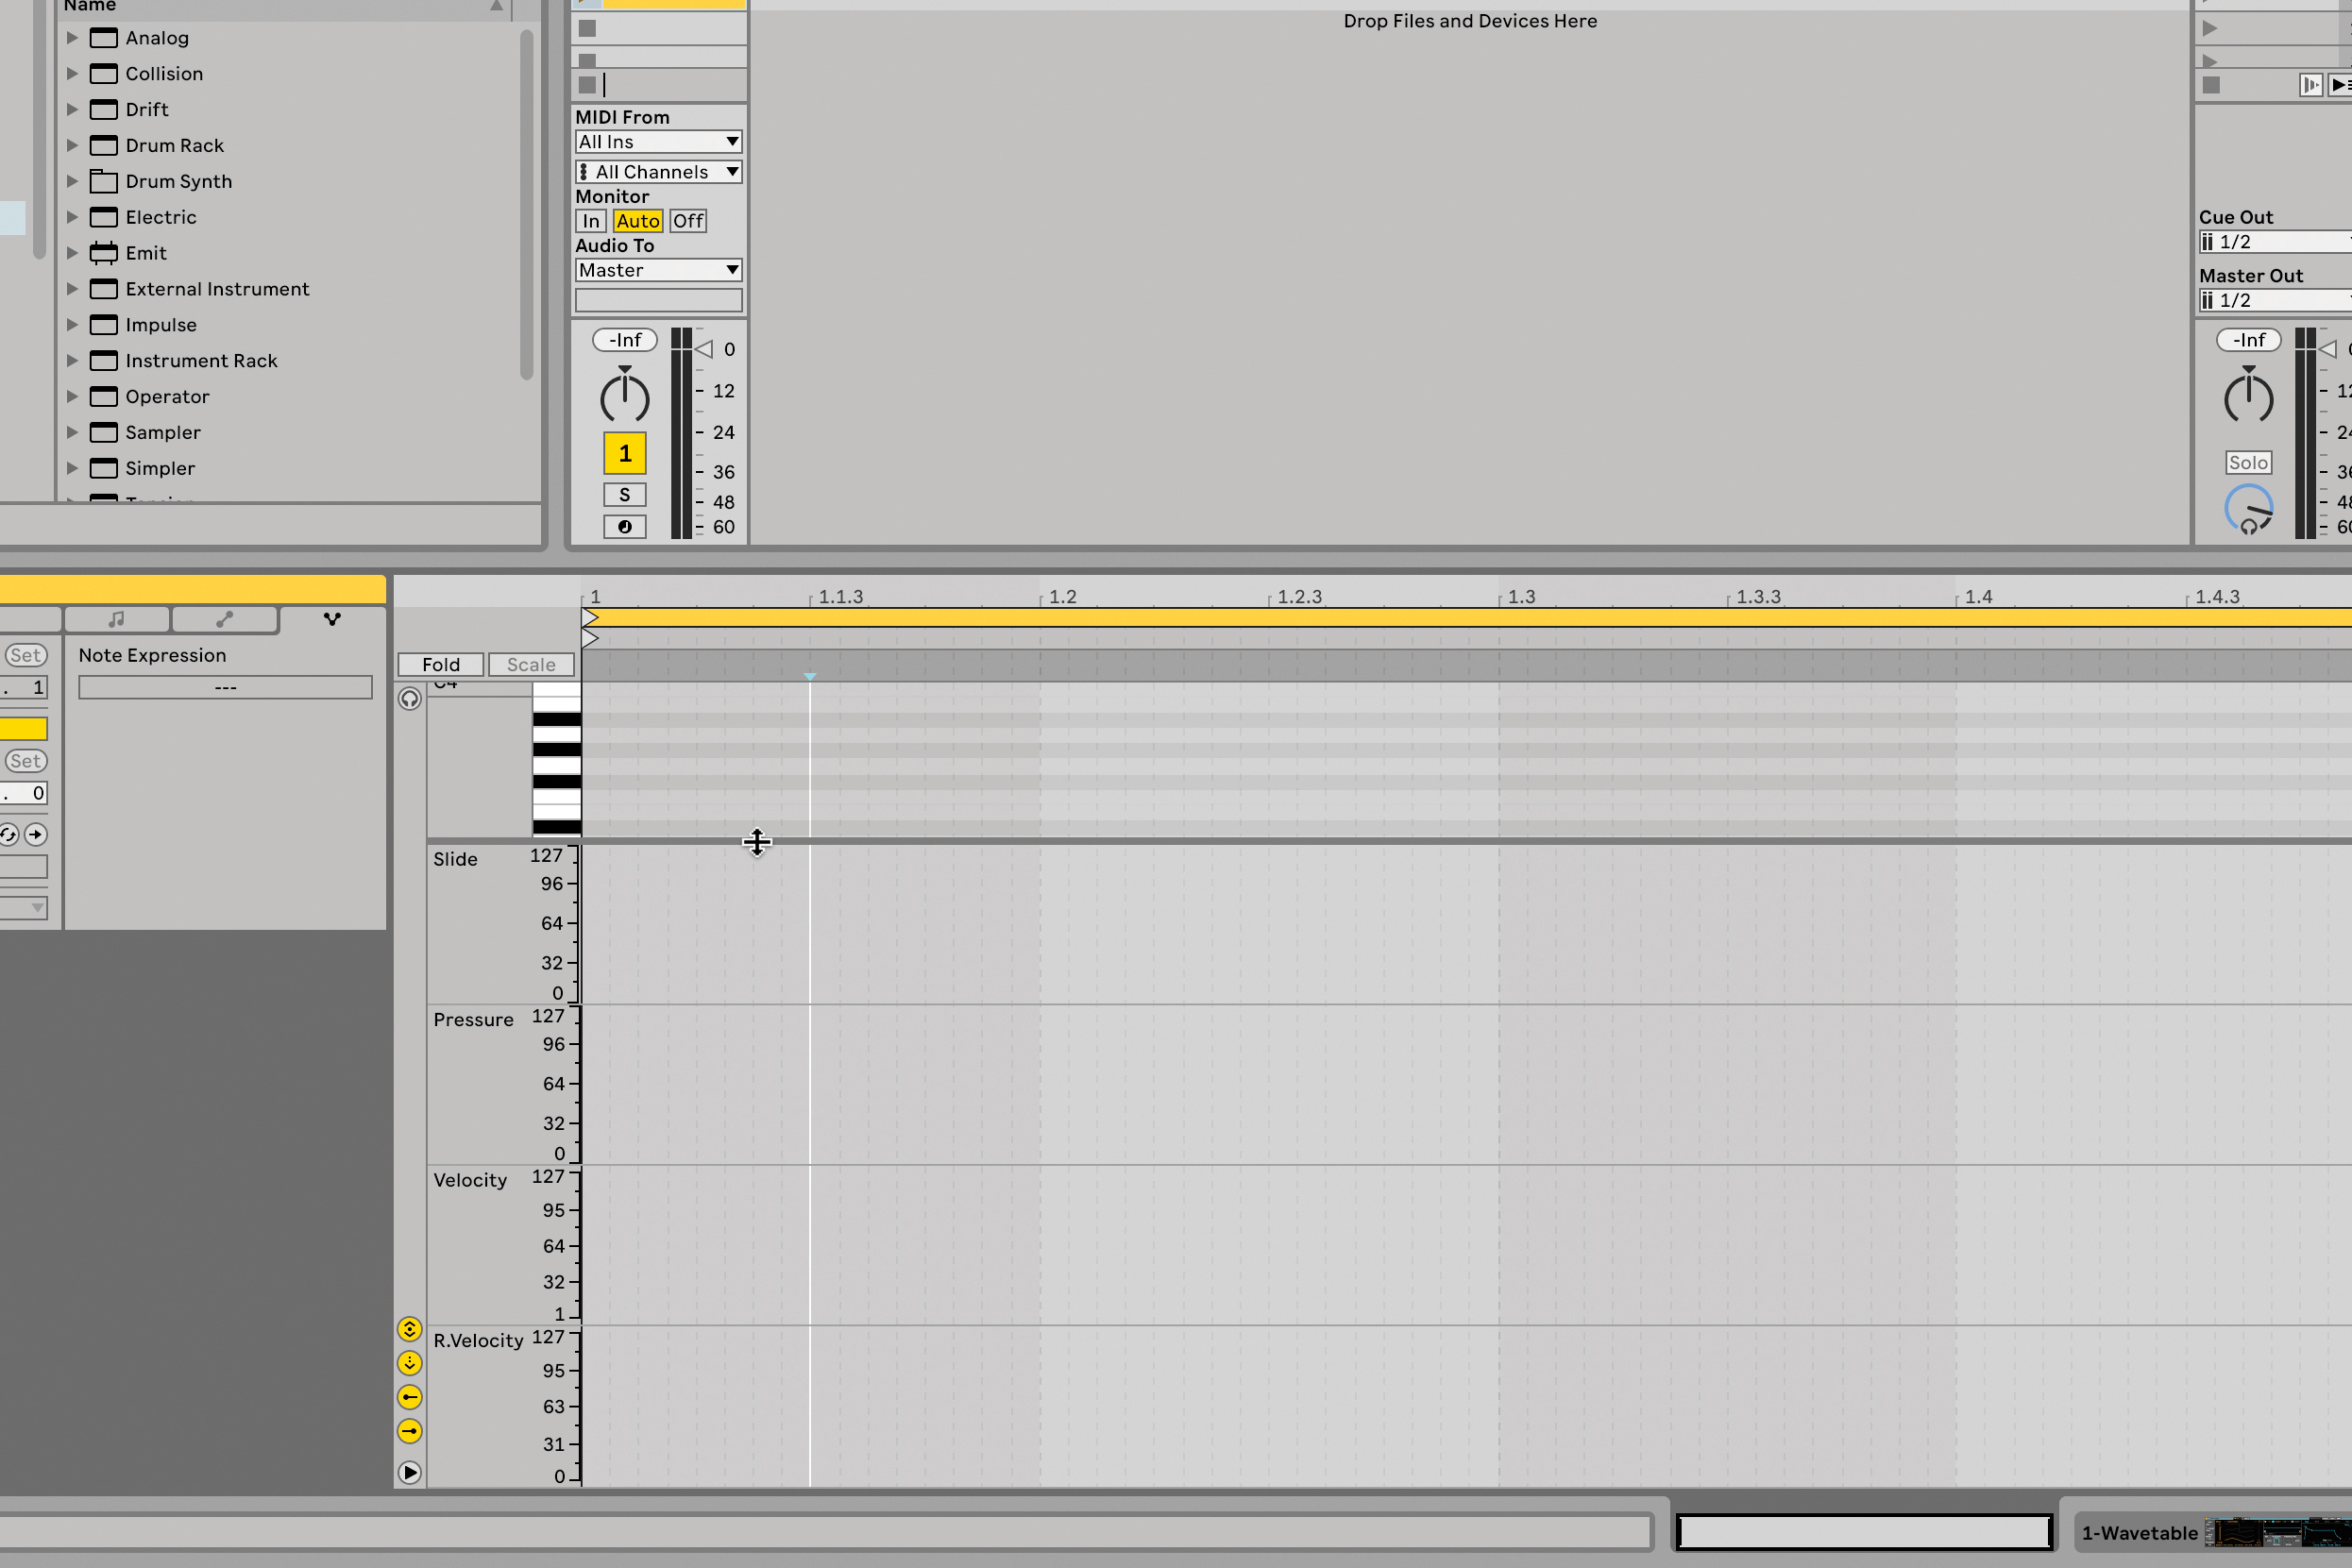
MPE (MIDI Polyphonic Expression) updates the standard MIDI protocol that we use to send notes and control messages between music software and hardware, offering more detailed and expressive control, via dedicated hardware controllers. If you don’t have one, good news is that in Live 11 it’s possible to automate MPE inside any MIDI clip that contains notes.
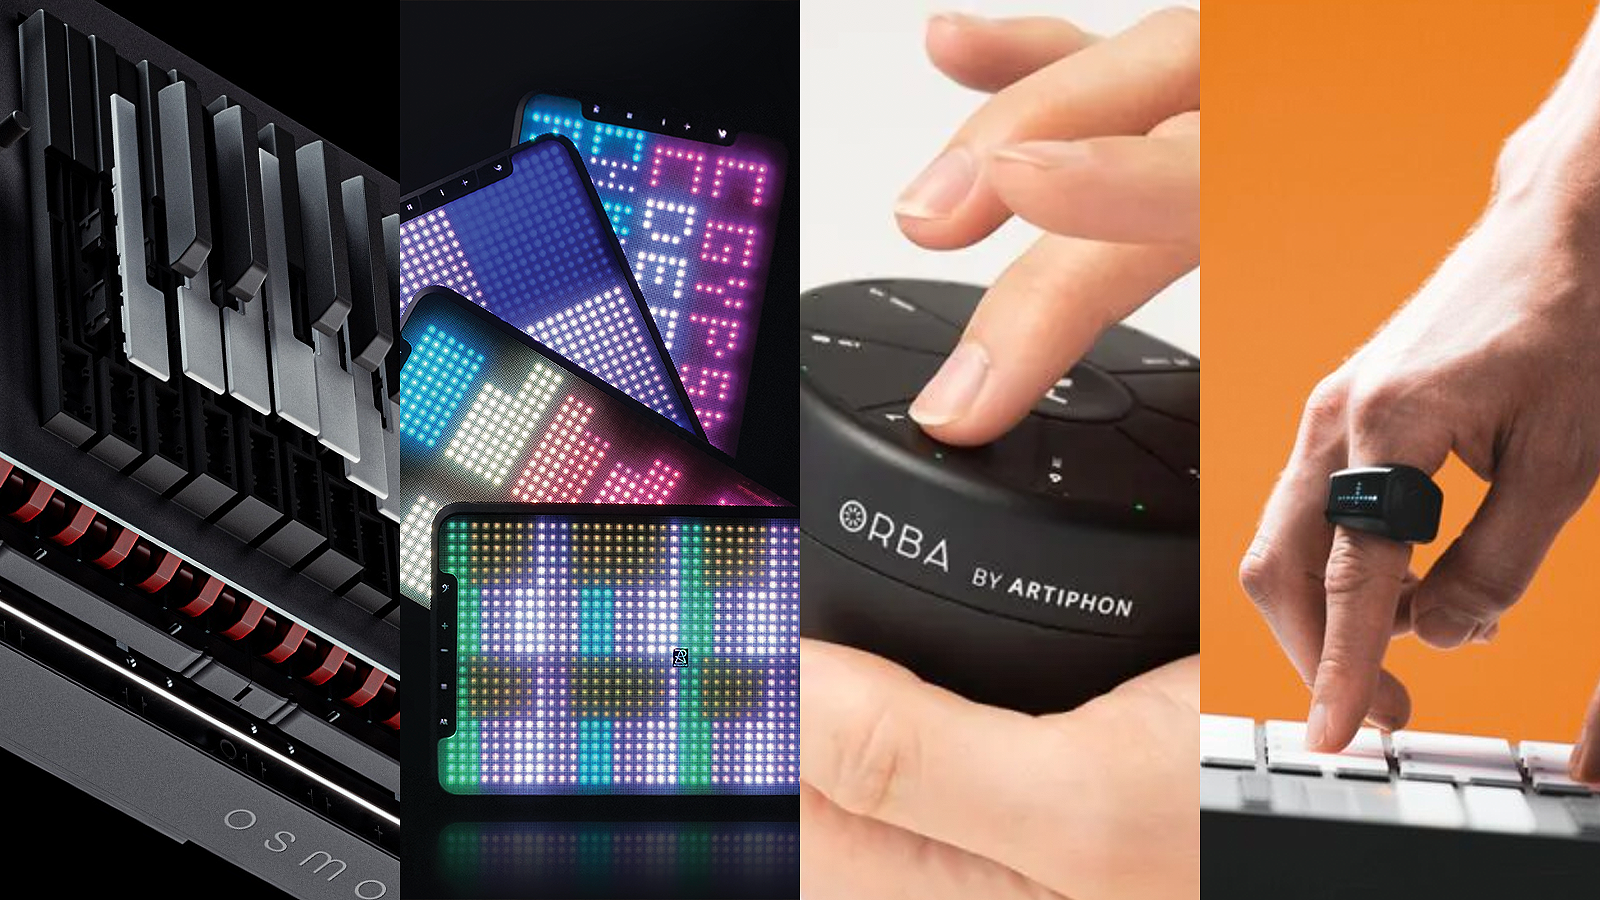
Load an instrument that supports it, such as Wavetable, then go to the clip editor, click the Note Expression tab, and click the four buttons at the bottom left, to show lanes for Slide, Pressure, Velocity, and Release Velocity. Now you can drag the handles below each note up/down to add some MPE expression. What effect they’ll have depends on how you’ve assigned MPE inside the instrument.
2. Ableton Link start and stop
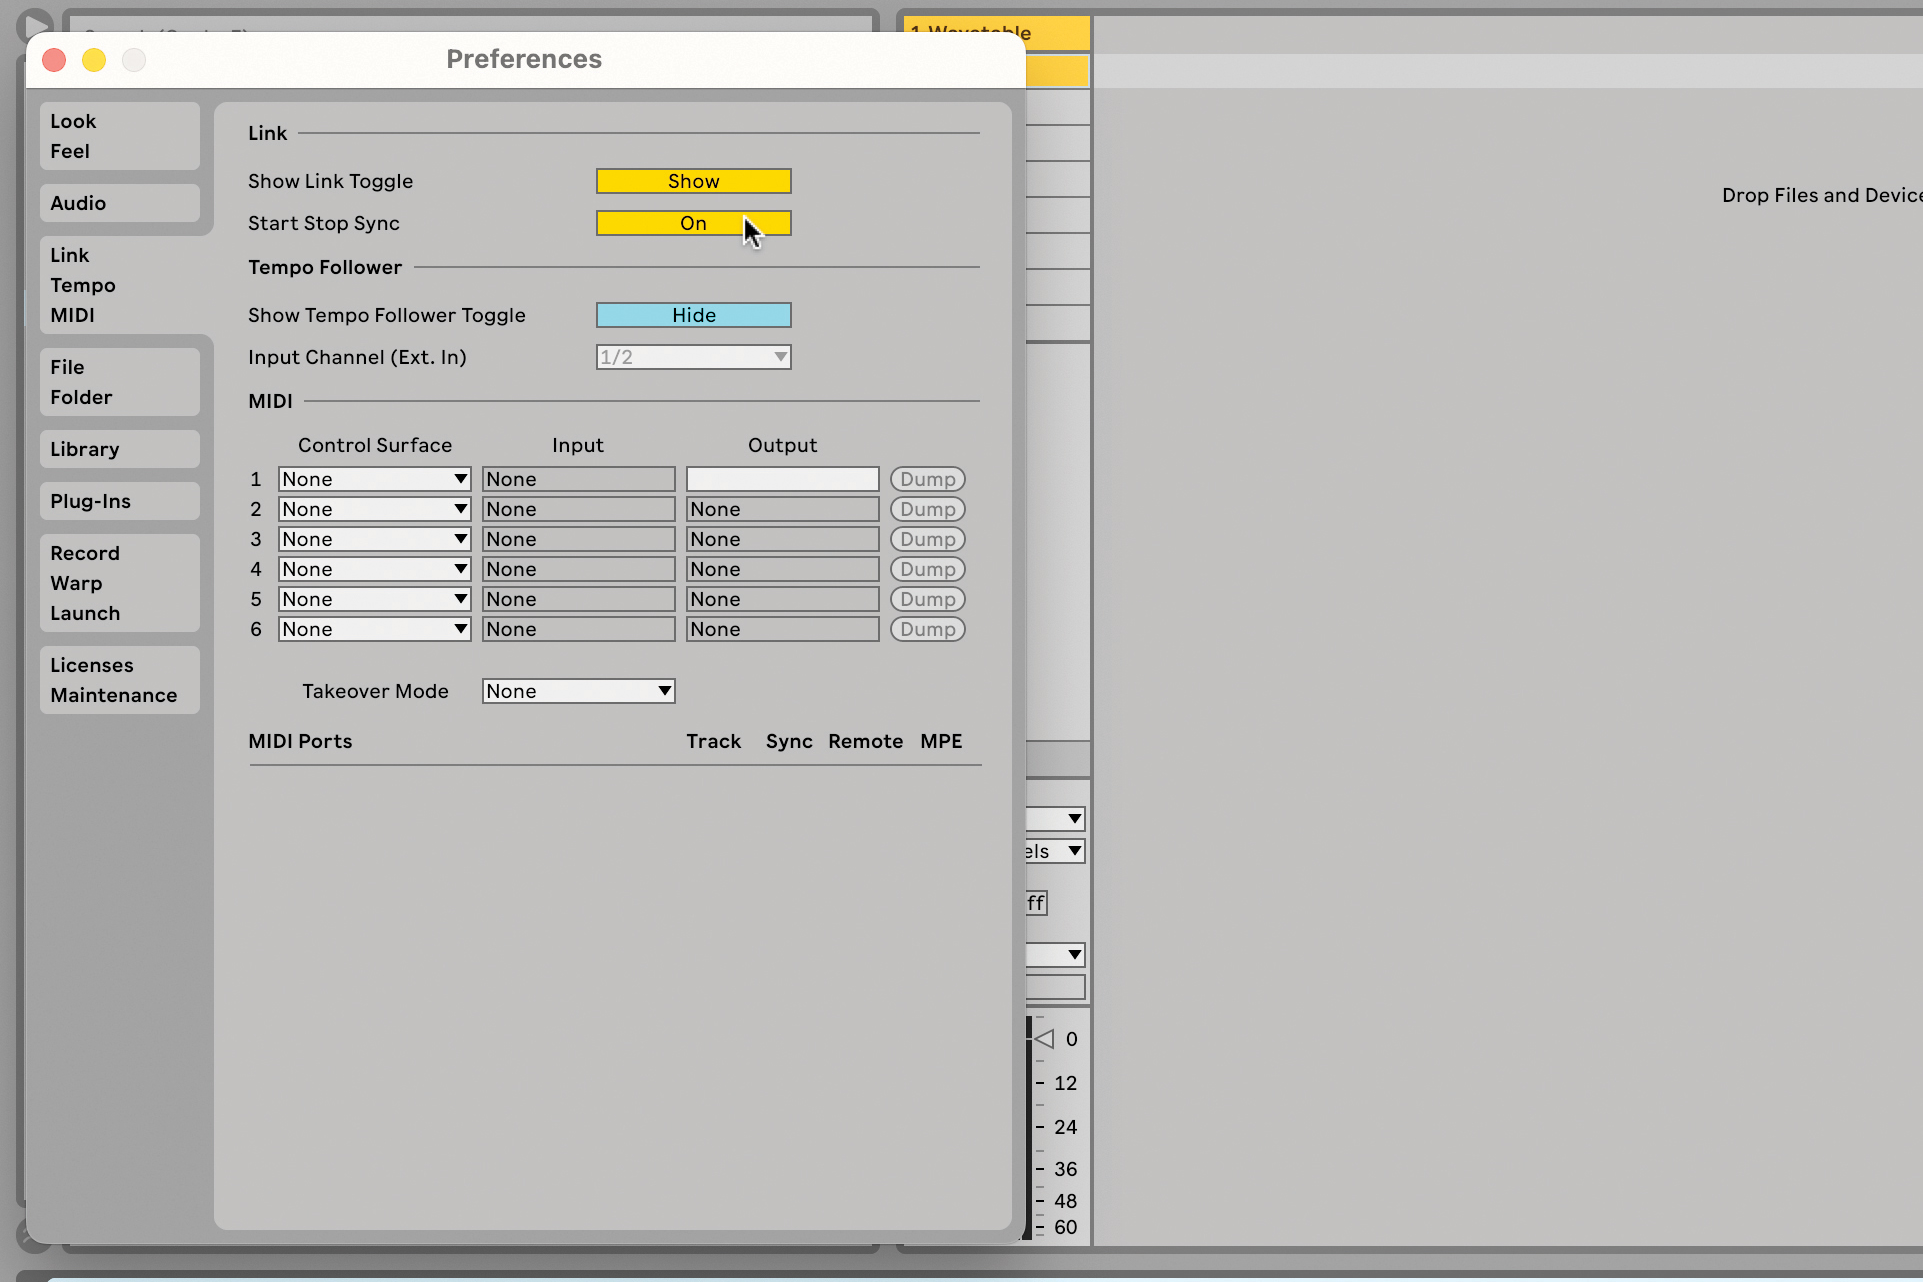
Link is an ideal way to sync tempo across different software and hardware, using WiFi or Ethernet. In Live, go to Preferences/Link Tempo MIDI tab. Enable Show Link Toggle, and the Link button appears at the top left. Enable Start/Stop Sync as well. Open your other Link-friendly app, on whatever device it’s on.
Somewhere in that app, you can enable Link too. Each app should show a progress bar, and a number indicating how many other devices are on the network. Start Play on either device, and the other starts too. Change tempo, and all devices on the Link network follow. Link doesn’t do song position, only tempo and start/stop.
3. Set arpeggiators to hold
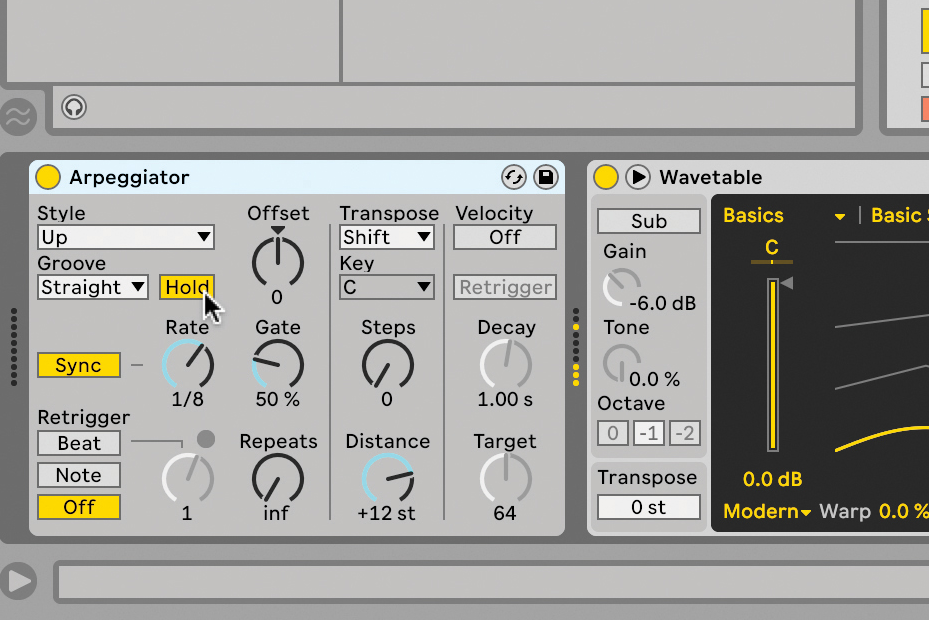
Arpeggiators have been with us forever, it seems, based on the musical technique of arpeggios, where a musician plays the notes in a chord in sequence instead of all together. Load Live’s Arpeggiator MIDI effect device, then hold down a chord and hear the pattern unfold. Arpeggiator can be synced to project tempo, which is probably the most common method, or set to a specific millisecond value, which might be more authentic if you’re trying to emulate older analogue hardware types.
Arpeggiators sound surprisingly musical given how basic they are. Turn on the Hold switch; it’ll keep repeating that last chord forever, or until you play another one, very useful if you need your hands free to tweak other controls in a live situation.
Want all the hottest music and gear news, reviews, deals, features and more, direct to your inbox? Sign up here.
4. Capture is always listening
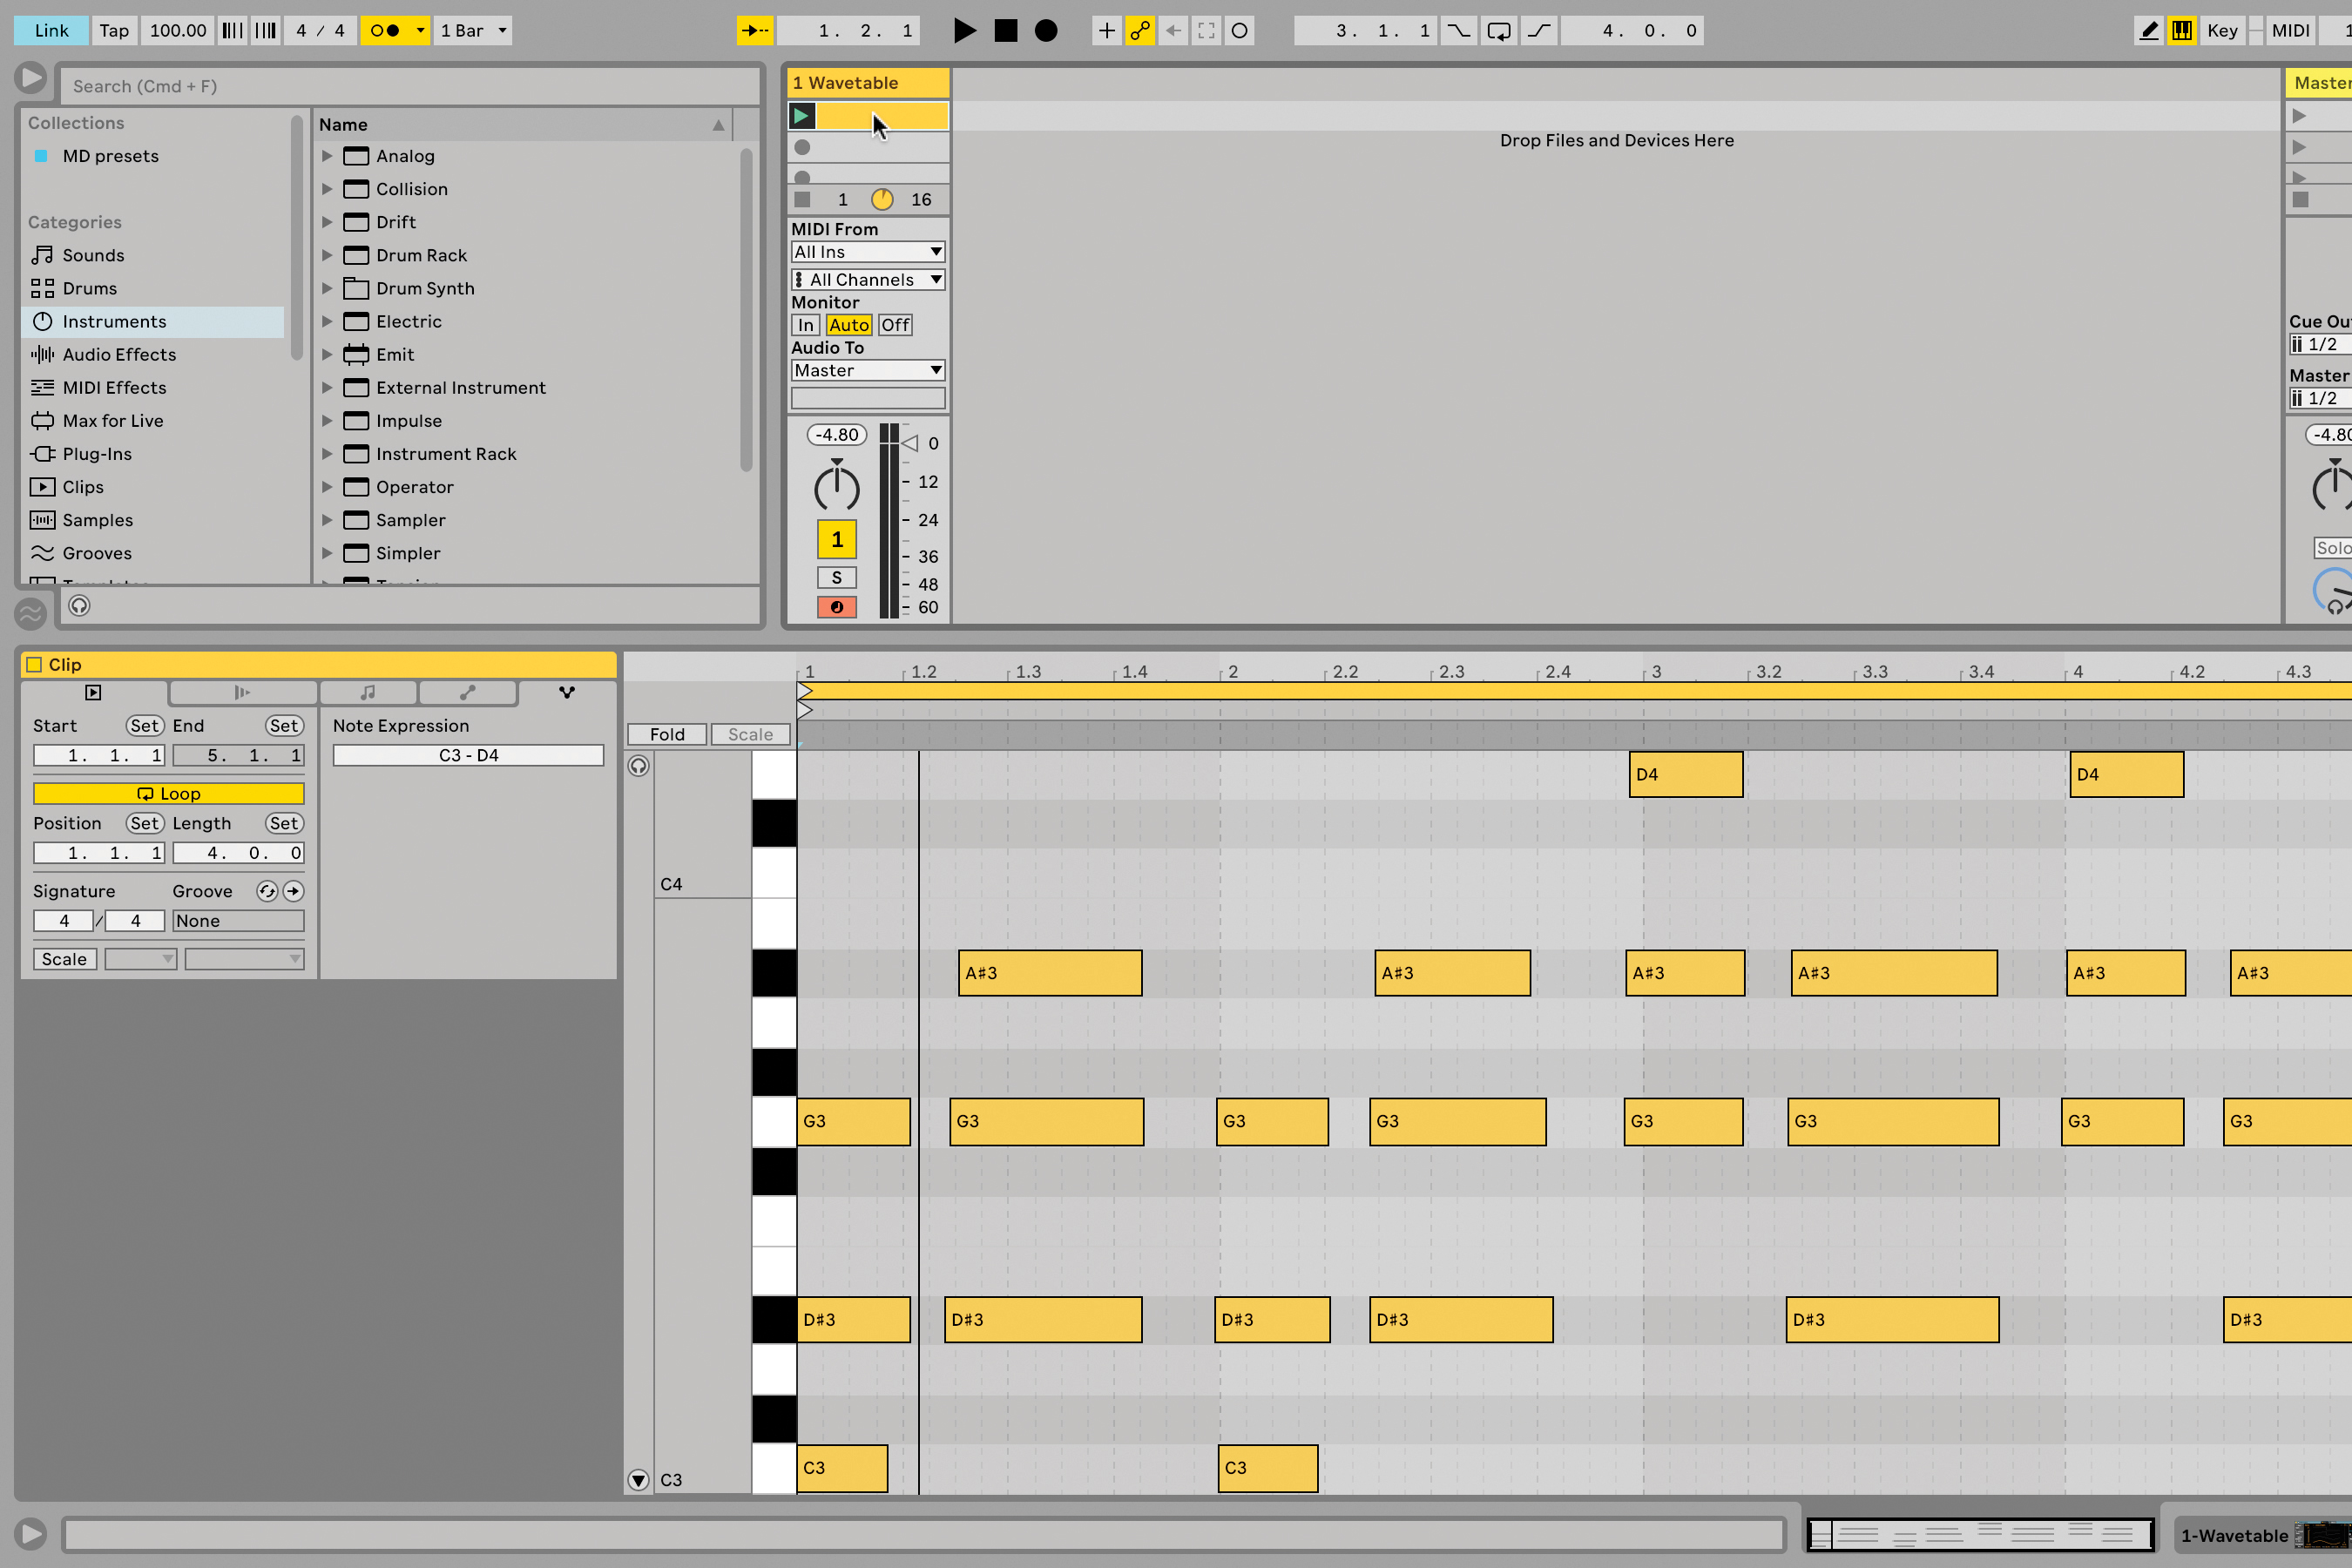
Capture is a solid gift for keyboard or pad players – anybody who’s feeding real-time MIDI notes into Live. If jamming on your MIDI instrument, and there’s a part you wish you’d recorded, hit the Capture button and the last few bars of what you played will appear as a MIDI clip (it won’t work with incoming audio).
Even better is that if jamming with a new Live set with no other material in it, Capture changes the project tempo according to that of your played performance. You may never have to hit ‘record’ again. Capture is also found in Ableton’s Note app, as the main method for creating new instrument parts.
5. LFOs are all around us
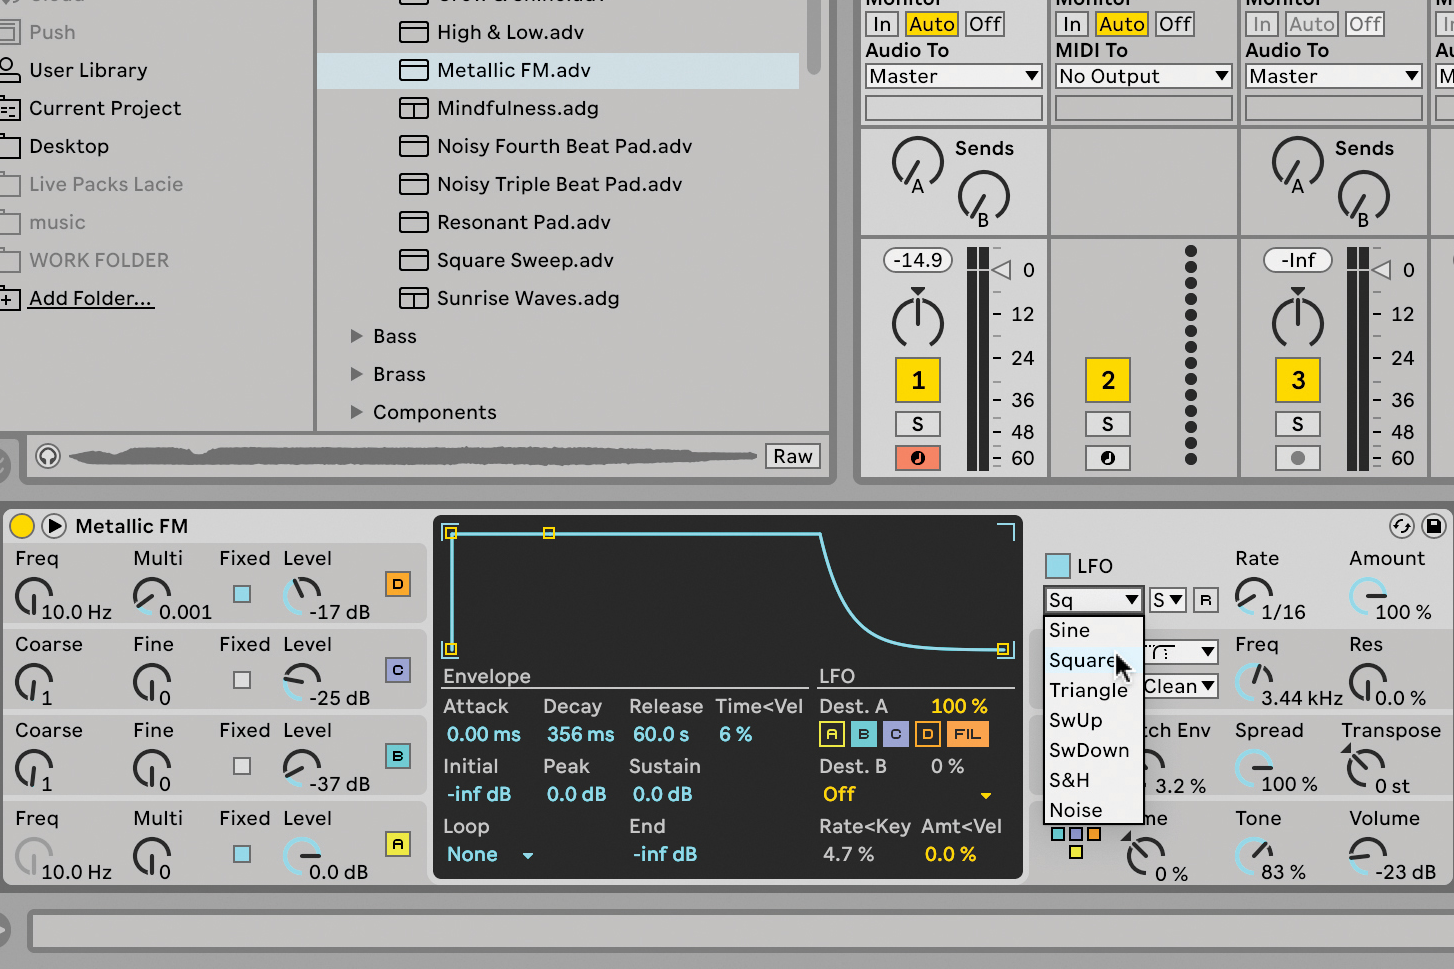
LFOs are really important to us Live users. They add movement to any parameter, and reflecting their versatility, they’re all over the place in Live: look at a few devices and you’ll see LFOs in there, like Operator, Simpler, Auto Filter, and Corpus; there’s also a MIDI and audio LFO.
LFOs are effectively waveforms that can be applied to other parameters, so you never hear the LFO itself, you hear how it affects the target parameter. They can be rhythmic or melodic, depending on your choice of waveform and amount setting. What we suggest you try today is targeting a square LFO at filter cutoff, then maxing out the amount, so you get a really strong on/off rhythmic blocky effect.
6. MIDI note randomisation
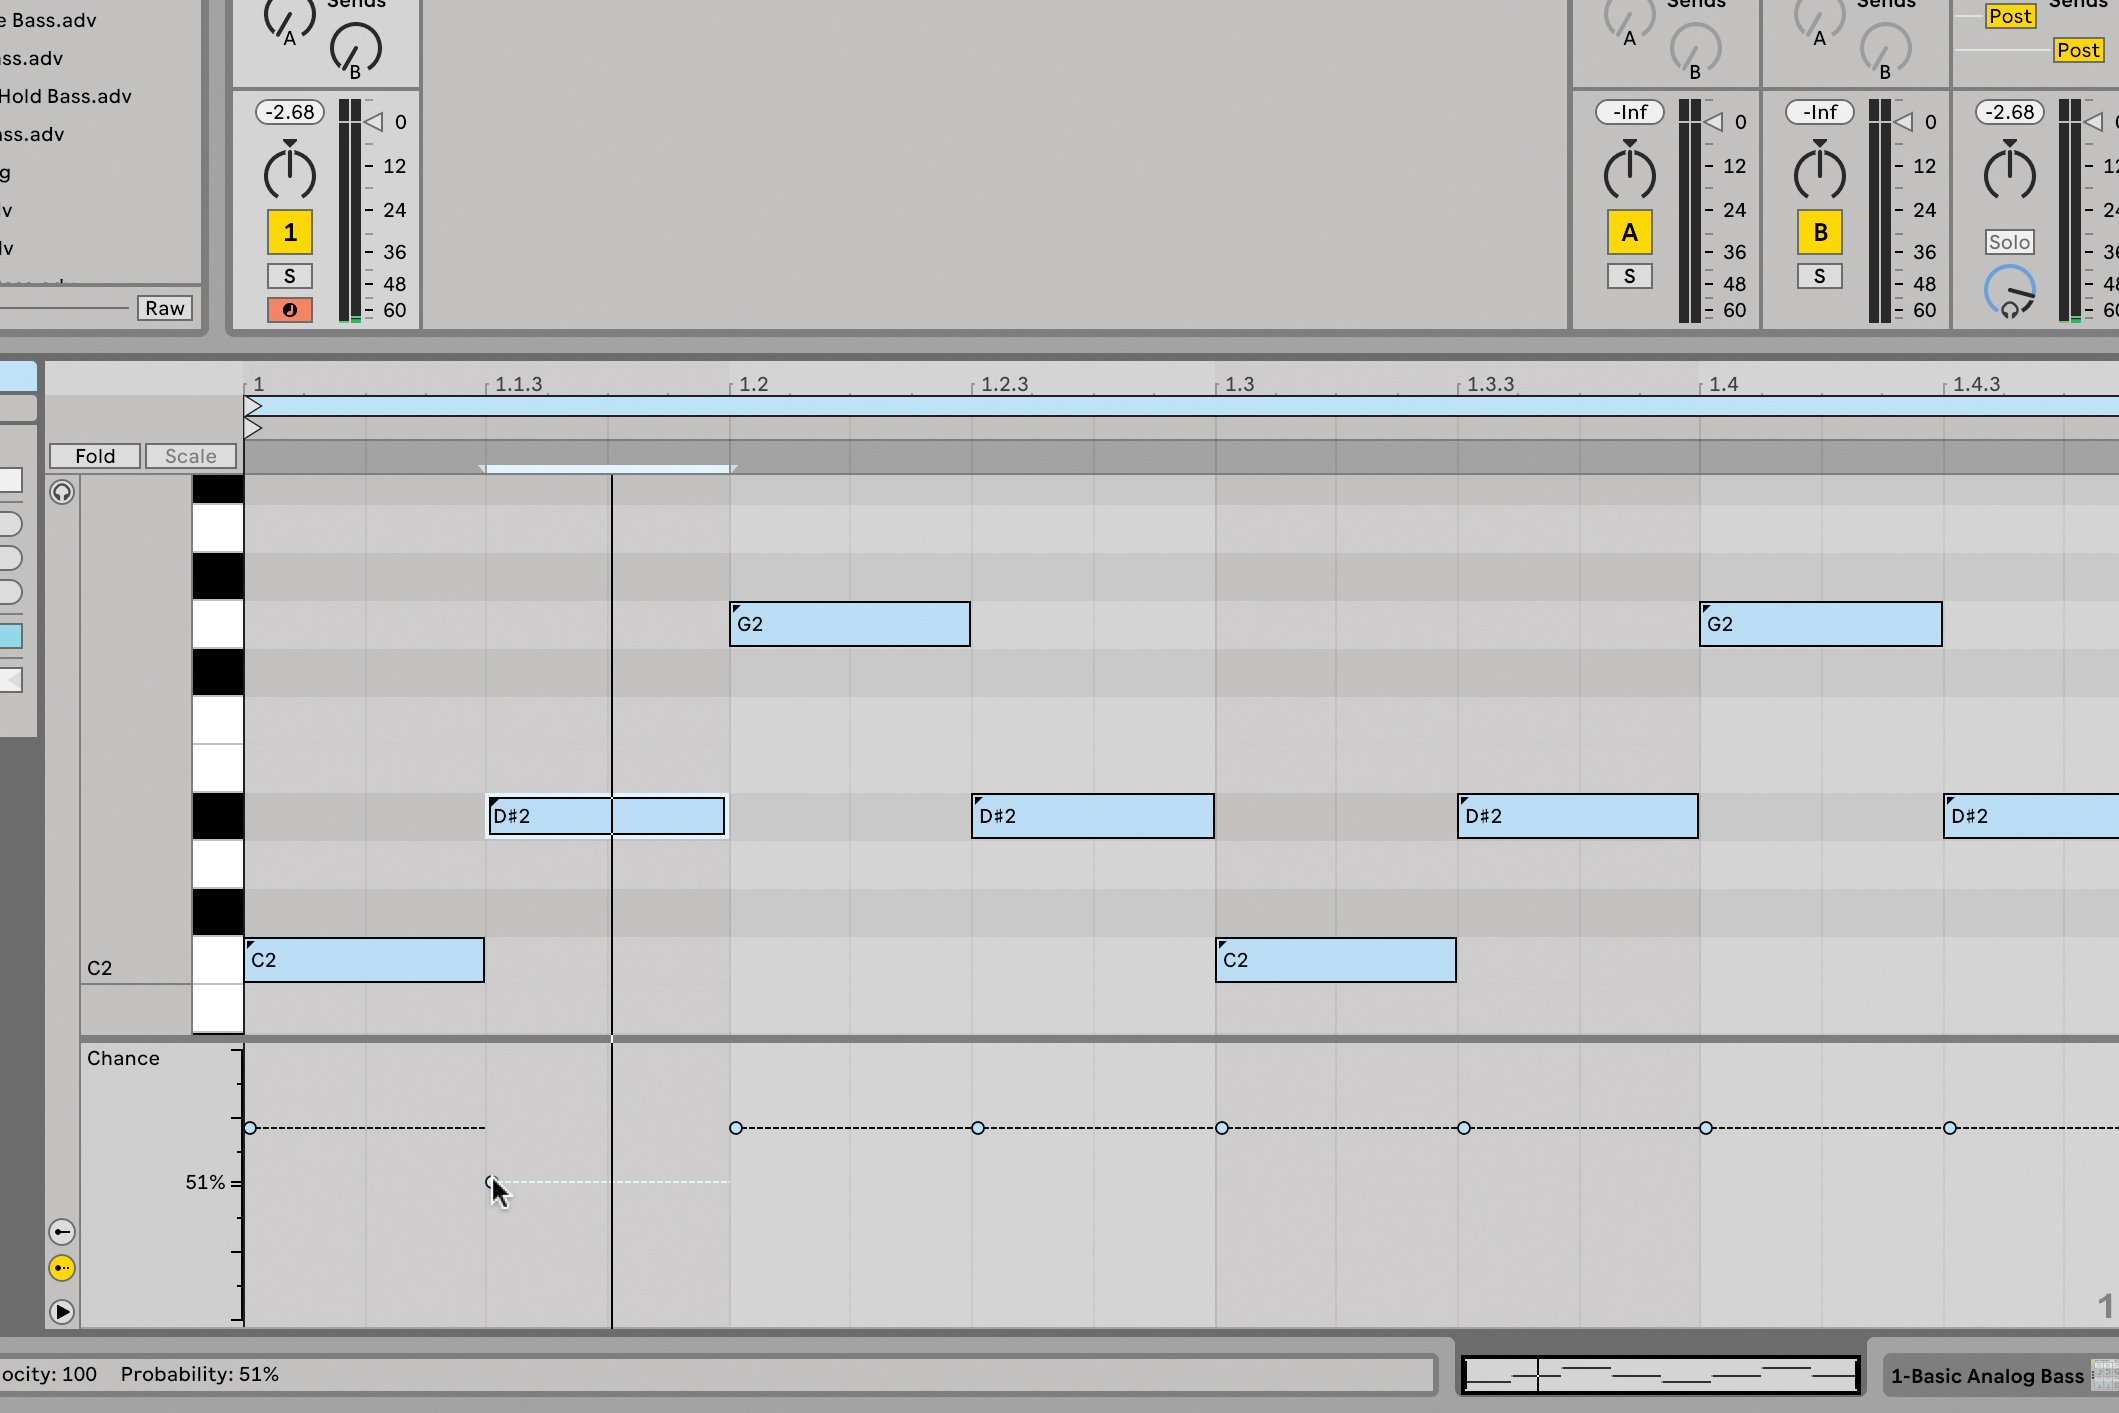
The Live 11 MIDI Note Editor includes the new Probability Editor, giving us a way to introduce some further randomisation to our music. Use the little buttons at the lower left of the Editor to reveal the Probability Editor and the Velocity Editor.
If you have a MIDI clip with a few notes, highlight one or more of the notes, and grab the tadpole-shaped chance markers for those notes, and drag them to a value lower than the full 100%. As the clip loops round, the notes won’t play every time. Make sure the chance value is low enough for this to take effect occasionally. You can also do this with the Randomize button and Range in the Notes tab. It works with Velocity too.
7. Macro Racks and variations
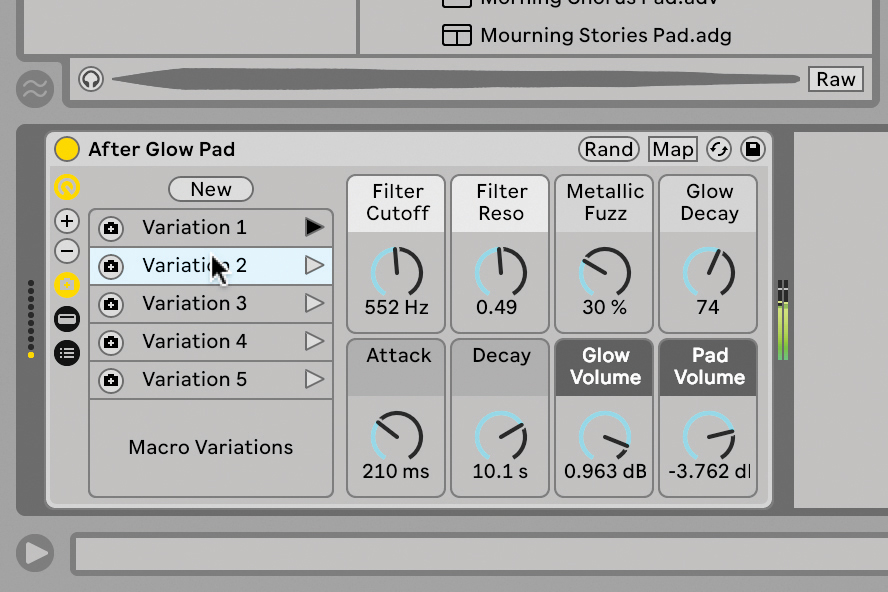
Racks are collections of devices that can be saved and recalled, with controls at the left called macros, for mapping of parameters deep inside the rack, and a new feature called Macro Variations. Load an instrument rack from the library, and at the far left, click the Show/Hide Macro Variations button. A box labelled Macro Variations appears, with a New button. When you click that, a new combination of macro values is saved.
If you like randomisation, click the Rand button above the macros, and it’ll ‘shuffle’ them into new combinations for you to save. You can load one at any time by clicking the little ‘play’ buttons, or use midi map mode to access the ‘hidden’ mappable navigation buttons.
8. Drift synthesizer loops
Fantastic (stock) plugins and how to use them: Ableton Drift
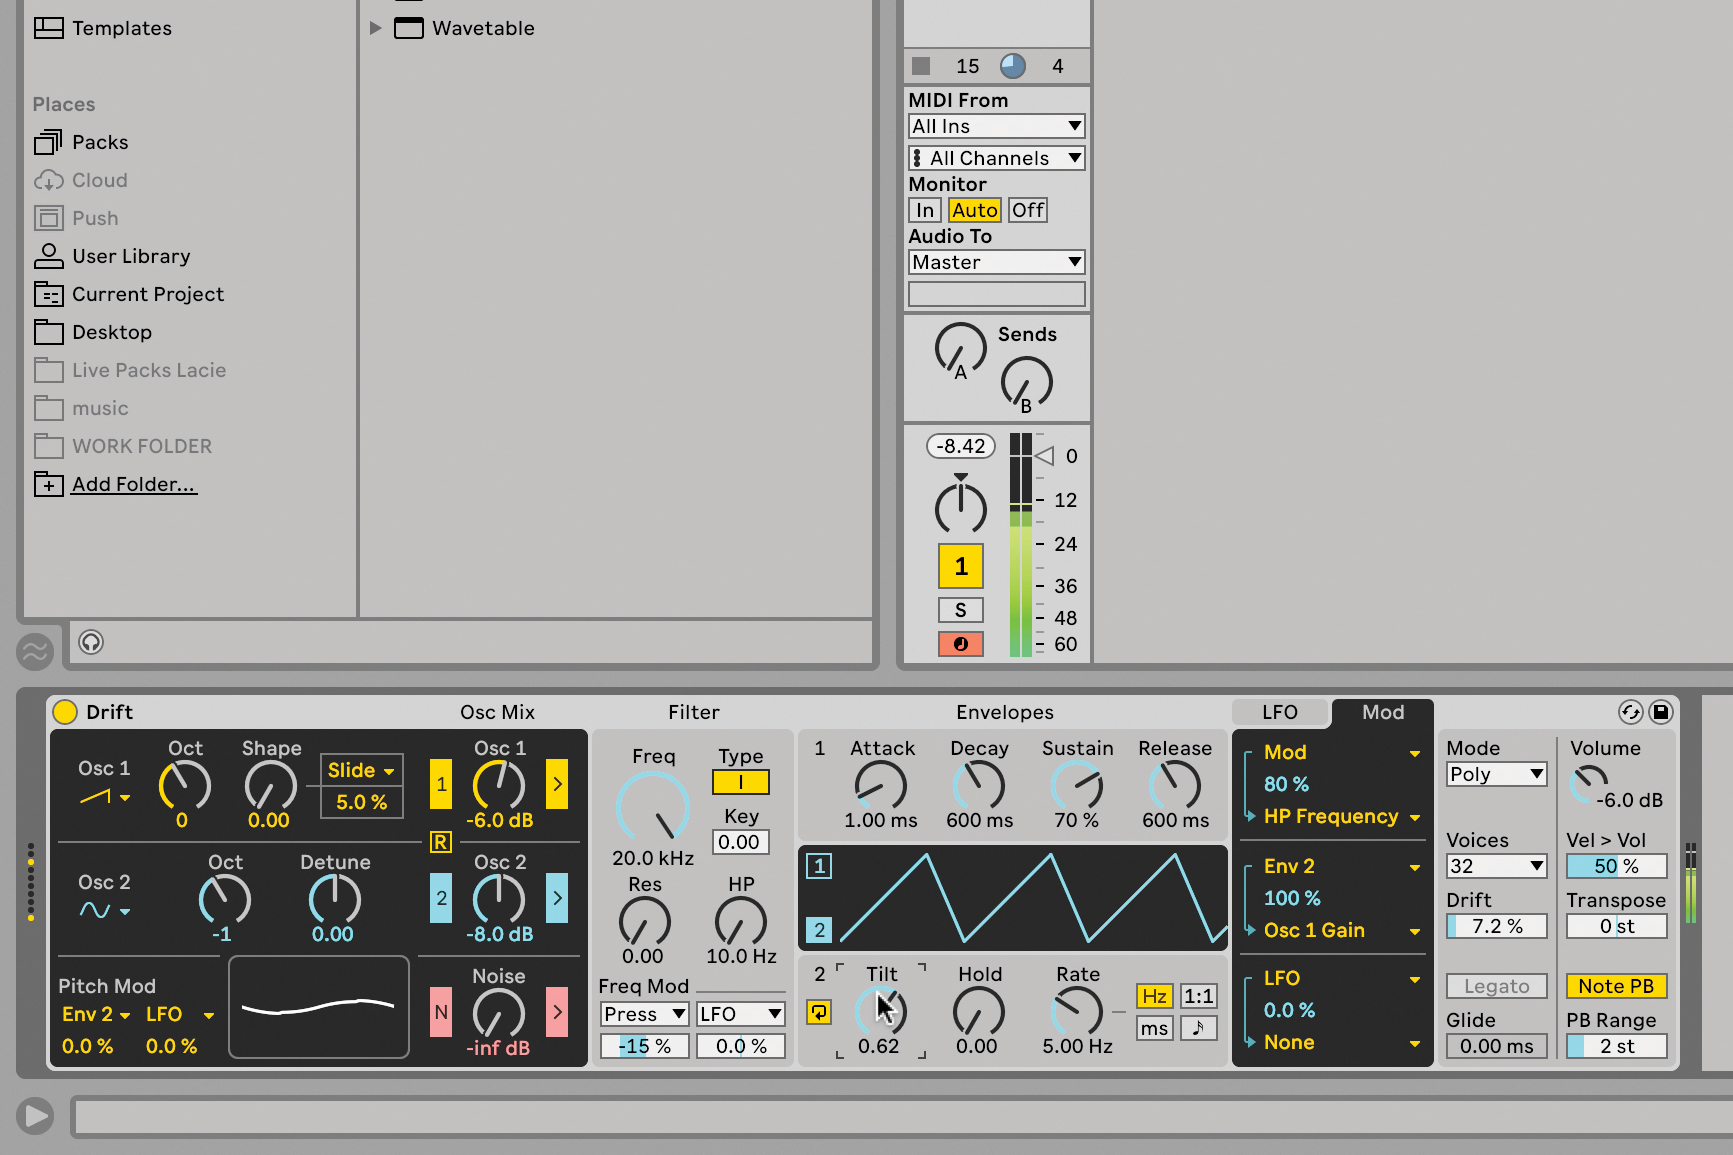
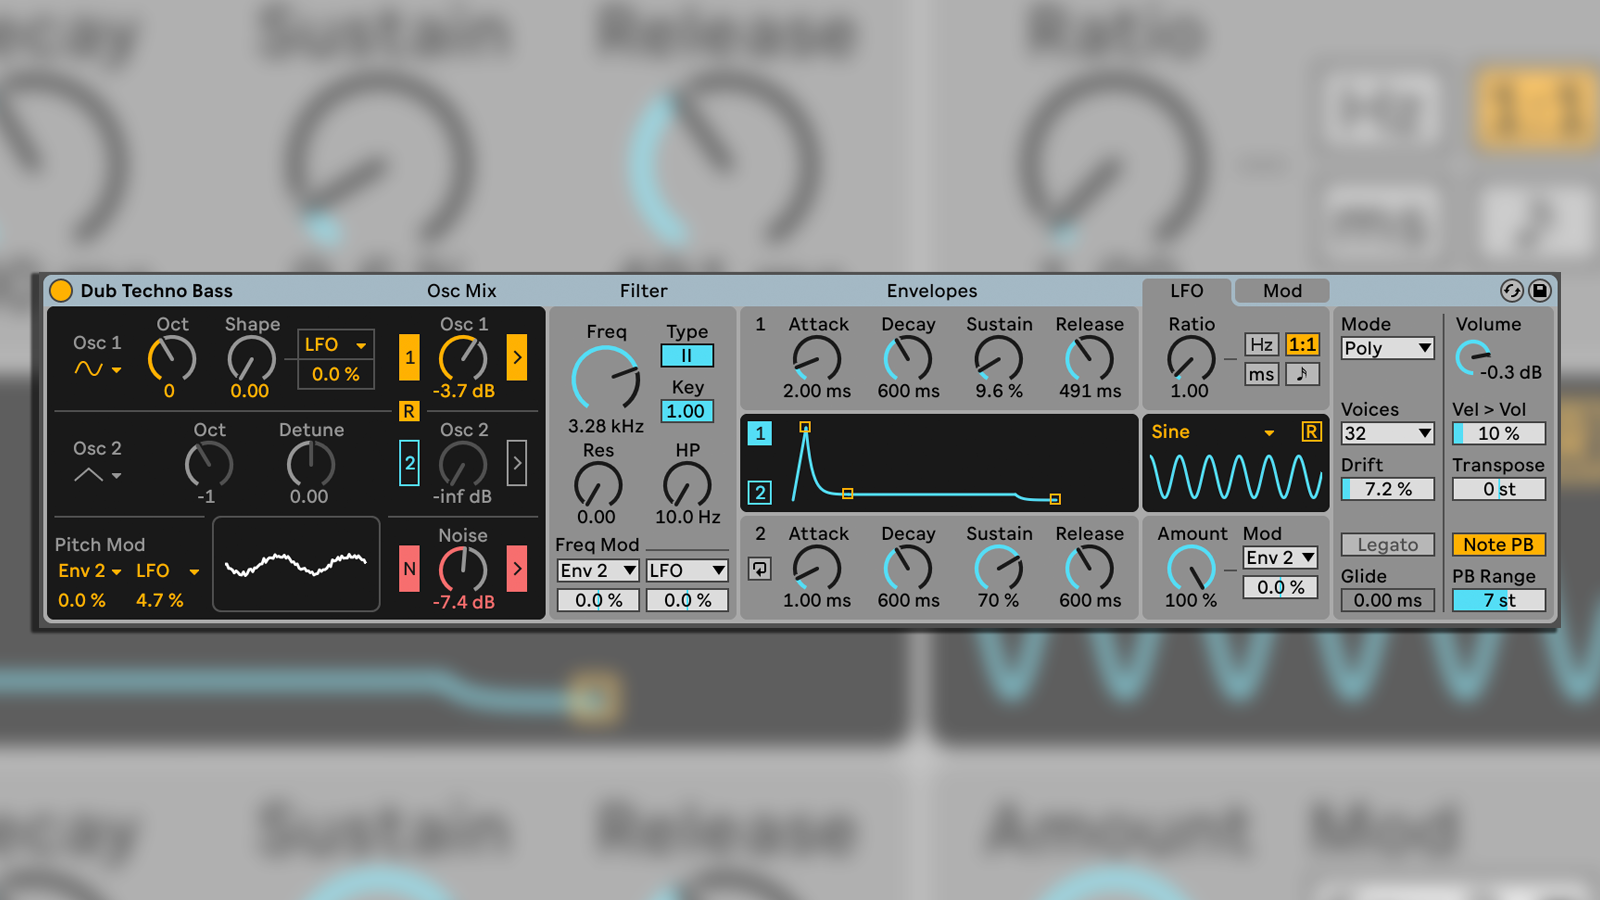
Drift is the synth introduced in Ableton Live 11.3. It’s included in every version of Live. Open the default Drift preset, and you’ll see that it features two ADSR envelopes, but Env2 can be set to cycle. Activate the Cycling switch below the envelope display, and you’ll see controls for Tilt, Hold, Rate, and time, for interesting ways to re-shape the envelope. Click the Mod tab to assign Env2 to a target. Try it by setting Modulation Amount to 100%, pointed at the Osc 1 Gain value. You’ll hear it immediately, as the overall instrument volume rises and falls. Experiment with shape controls at the same time.


Martin Delaney was one of the UK’s first Ableton Certified Trainers. He’s taught Ableton Live (and Logic Pro) to every type of student, ranging from school kids to psychiatric patients to DJs and composers. In 2004 he designed the Kenton Killamix Mini MIDI controller, which has been used by Underworld, Carl Craig, and others. He’s written four books and many magazine reviews, tutorials, and interviews, on the subject of music technology. Martin has his own ambient music project, and plays bass for The Witch Of Brussels.