20 speedy synth and synthesis tips
Make waves fast with our quick and easy guide to speedy synthesis
SYNTH WEEK 2024: Because we all can go a little synth-blind from time to time… Spent too long staring at a bunch of parameters with no idea what to try next? Never fear. We're here with 20 quick tips and fun things to try that'll get your next monster sound moving.
1. Tune up
If your synth patch is tuned to a chord in major thirds, take a close look at the fine-tuning because small changes here can make a real difference to the timbre of the voice. The standard tuning we use for Western music is actually slightly out of tune, so if you flatten the major third, it will become justly intonated, reducing the shimmering, detuned effect usually heard.
2. Take a closer look
Some synths have ‘hidden’ parameters that don’t have a control on the front panel but that can be accessed via the synth’s modulation system. For instance, Dune CM does not have phase controls for the oscillators, seemingly, but you can access the phase as a modulation destination in the mod matrix.
3. Attack!
Are your synth sounds clicking at the start or end of notes? This can be noticeable on pure tones like sine waves, but there’s an easy way to sort it: turn up the envelope attack and release very slightly until the problem goes away.
4. Punch it up
Add punch to any sub bass sound by using an envelope to modulate its pitch by about +24 semitones. With the envelope set to an instant attack and fast decay, you’ll get a kick drum-esque thump to the start of your sub.
5. Get even
Unison detune can create gnarly bass noises, but you could find that there’s noticeable variation in the level of the lowest harmonics, leaving the sub bass uneven – most undesirable for modern dance productions.
Solve this by using high-pass filtering to kill the low end of your sound, then add another track playing the same notes using a super-solid sine wave sub bass to supply the missing low end.
Get the MusicRadar Newsletter
Want all the hottest music and gear news, reviews, deals, features and more, direct to your inbox? Sign up here.
6. Oy yoi
The robotic ‘yoi’ bass heard in countless dubstep tracks is still great fun to play with and very easy to synthesise.
Set up a square wave patch with a high-resonance low-pass filter swept by an LFO or envelope. Add a bitcrusher effect after the synth and reduce its sample rate until you get that vowel-like texture.
7. Duplicate
Rock productions get super-wide guitar sounds by recording the same parts twice – or more! – and panning these subtly different (in performance and, sometimes, timbre) parts hard left and right.
You can mimic this approach with synths, giving girth to any sound. Duplicate your synth track, pan the original hard left and the copy hard right, then make a few tweaks to the patch on one – keep it subtle, though, unless you specifically want a lopsided effect.
8. Ring your bell
Do you want that classic FM bell sound? Get started by setting up two operators, both sine waves, using the first to modulate the second. Offset the first operator such that its ratio is around 0.3 (or about -20/-21 semitones). Increase the modulation amount until you hear a bell-like ‘gong’, then program a suitable amplitude envelope. Add chorus and reverb for further effect, and then play the patch in the upper octaves for a glassy DX7-esque bell tone.
9. Get organ-ised
Synthesise a Hammond-style organ by stacking sine wave voices tuned to the harmonic series. Adjust the level of these voices as you would drawbars on a real organ. Add some chorus (or even better, a rotary speaker simulator) to mimic the ‘swimming’ effect of a Hammond organ’s Leslie speaker, a dash of room reverb, and you’re done!
10. Get the guitar
The distinctive sound of an electric guitar can be mimicked by running a synth into a guitar amp simulator plugin. For the best results, though, you’ll need to dial in a suitable patch and use appropriate MIDI. Here’s how…

Step 1: Initialise your synth and start with a plain saw wave patch with little or no filtering. Add a guitar amp simulator plugin to its track – we’re using NI Guitar Rig 5, but any will work. You should already be getting a decidedly guitar-like tone at this point.

Step 2: The saw wave sounds too static and lifeless, so use a tiny amount of unison detune on your synth to give a subtly wavering, thinner texture approximating a guitar string. Try using a second synth voice to add a high-pitched burst at the start of each note, mimicking pick noise.

Step 3: MIDI programming is vitally important when it comes to faking realistic guitar performances. Research a little into the limitations and typical playing habits of some real guitarists, or get hold of some MIDI of real guitar parts in order to analyse the notes.
11. Make FM easy
FM (frequency modulation) synthesis can be complicated, but some virtual analogues, such as u-he’s Diva, will allow you to modulate one oscillator using the other via a single simple knob. Automating this interaction using an LFO or envelope can give you evolving FM textures without any difficulty.

12. Master mono playing
Synths either play in a monophonic or polyphonic capacity, meaning they will either play one note at a time, or more than one (chords). Being limited to one note might sound restricting, but it can open up the ability to create a range of textures.
Try creating trills by placing a long MIDI note and then peppering very short notes on top. This will usually create a very fast sliding legato sound that can spice up any melody.
13. Get init
lf you want to design your own sounds from scratch, starting from a complex preset may well make doing so more difficult than it needs to be (unless it’s already in the ballpark of the sound you’re looking for, of course).
Loading a synth’s initialisation patch, often named Init, is a shortcut to a blank canvas. If your synth doesn’t have such a patch, set one up and save it: dial in a single sawtooth oscillator, open the filter right up, create a basic amplitude envelope, and disable/turn down all modulation and effects.
14. Put a ring (mod) on it
Synths often feature a ring modulation control, which works by multiplying the signal with another. This can create weird digital sounds or even strange, bell-like tones.
This can be great in pads if it’s a per-oscillator control, as linking a second or third oscillator’s ring mod control to a slow, sweeping LFO can create movement and texture within pads. The effect can get overpowering, so experiment with how much modulation it’s receiving to create interesting sounds.
15. Master vibrato
When making a lead sound, you’ll often want to give it an evolving quality to keep it engaging. It is, after all, often doing the job of a vocal.
Vibrato can further enhance the expressive, lyrical quality of a good synth line, but consider using an envelope to control the vibrato amount so that it’s introduced gradually to the sound, gradually ‘wobbling’ more as the note is held. This gives an effect more in line with a real vocalist or instrumentalist, where vibrato is often introduced over time.
As well as sounding cool, this approach has the added benefit of making sure every note is initially on-pitch, making it great for melodies that combine fast runs and sustained notes.
16. Quick synth strings
You can make vast-sounding synth strings by using saw waves, your synthesiser’s unison control with a fair few voices, and a splash of spacious reverb.
Unison, which stacks copies of the oscillator to create a bigger sound, should be turned up above 2 on each of the oscillators you’re using, with the voices across the stereo field using the spread, pan and detune controls, or whatever the equivalent is on your synth. EQ the low end out if needed, and you’ve got quick synth strings.
17. Link up
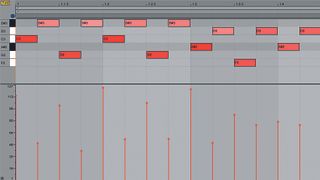
Velocity and aftertouch are commonly used to control the volume of a synth patch, but consider linking them to other parameters. Linking velocity to, say, a filter’s cutoff will open the filter more the harder you press keys. This can lead to much more expressive, playable patches than simply using velocity to control volume.
18. What's that noise?
The white noise oscillator is easily forgotten, but it is a very practical tool that’s hugely important in modern synthesis.
For synth chords, layering white noise with the lows/mids cut and the top end boosted can add the frequency-filling grit that brings them to life. It’s also very popular to layer noise with a snappy envelope on snares. Finally, don’t overlook noise as a potentially powerful modulation source.
19. Use your FX
Many synths have effects built in, and it would be a crime to forget them, as they can transform your patches from forgettable to ear-catching.
Typically, you get reverb, delay and, importantly, chorus, but some go beyond these staples. For instance, NI’s Massive has a sample-and-hold effect that can transform the timbre of your synth patch.
20. Get plucky
If you’re after a plucky trance sound, you can use the amplitude envelope to give it a quick attack and short decay, but an alternative way would be to use a filter envelope to rapidly close the cutoff as the sound plays. This creates a similar dynamic while maintaining low-end warmth.
Computer Music magazine is the world’s best selling publication dedicated solely to making great music with your Mac or PC computer. Each issue it brings its lucky readers the best in cutting-edge tutorials, need-to-know, expert software reviews and even all the tools you actually need to make great music today, courtesy of our legendary CM Plugin Suite.
