10 more things you didn't know Ableton Live could do
Are you making the most of Ableton? We explore ten more lesser-known features of this powerful DAW
Want all the hottest music and gear news, reviews, deals, features and more, direct to your inbox? Sign up here.
You are now subscribed
Your newsletter sign-up was successful
In our previous round-up of Ableton's lesser-known features we mentioned Capture, movie editing, AI, colour coding, and more - but there are a few more things we want to talk about.
Live continues to evolve, and one thing (not the only thing) we like about the DAW is that its makers aren't shy about adding significant features in between major version updates as well, so the new items keep on coming.
1. MPE and MIDI routing
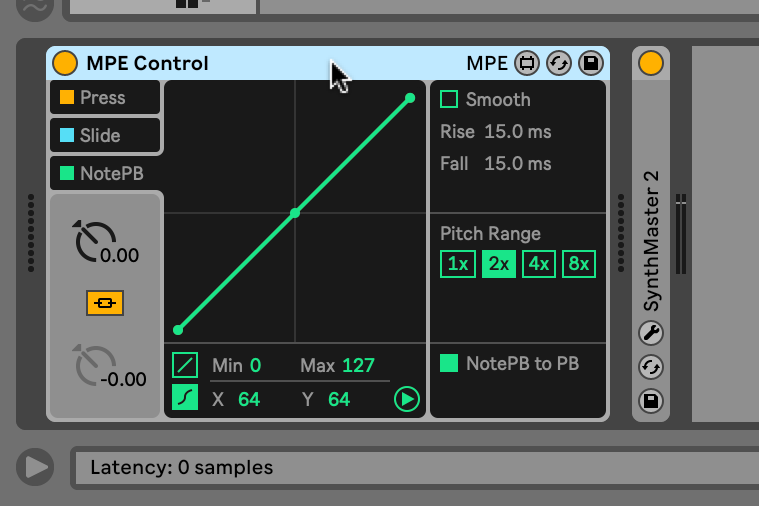
Ableton’s Push 3 has placed MPE (MIDI Polyphonic Expression) firmly in the mainstream of music control. However, it’s not compulsory to own Push - other MPE controllers are available, such as Joué Play, Roli’s Seaboard, and the Roger Linn Designs Linnstrument. And if you don’t have an MPE hardware controller, you can still add and edit MPE parameters in Live’s Expression Editor.
Article continues belowBut maybe we can flip this around - maybe we do have an MPE controller, but we want to use it in an interesting way with ‘normal’ software instruments - not everybody in electronic music wants to play expressive leads, after all!
MPE sends Pitch, Pressure, Velocity, and Bend, and all of these parameters can be redirected to perform other tasks in Live, courtesy of the Max For Live MPE Control MIDI effect device. This device and the MIDI Monitor device are your new best friends for MPE configuration and troubleshooting.
2. Use MPE to f*ck sh*t up
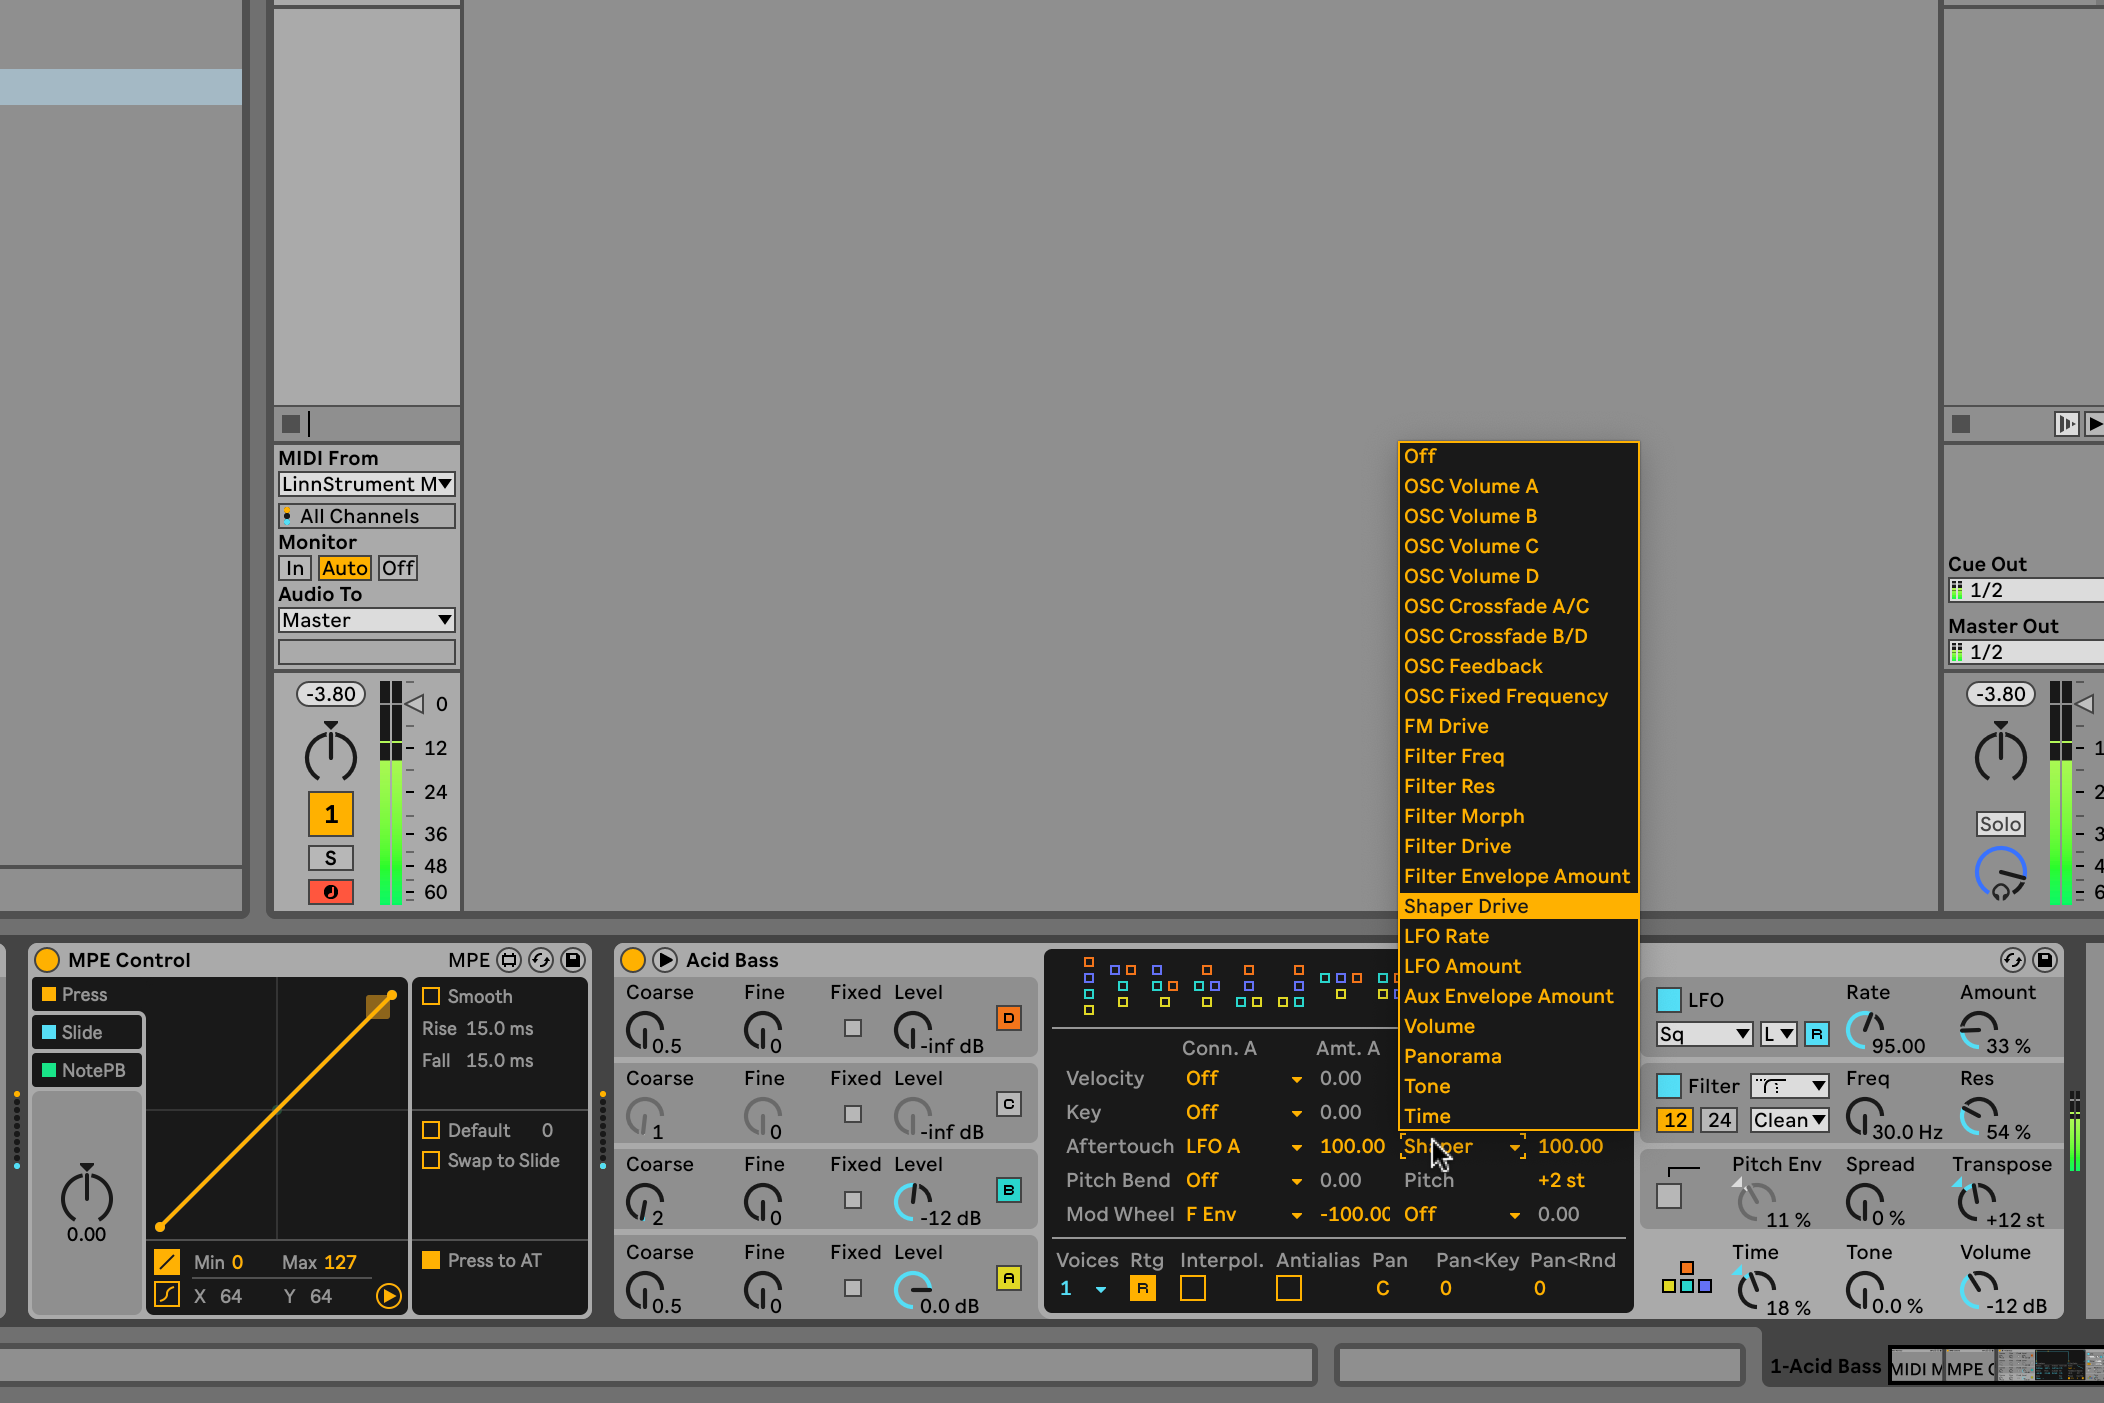
We can try this with Live’s Operator synth, which doesn’t feature MPE support. Load MPE Control and Operator’s Acid Bass preset into a MIDI track. Click the triangle at the bottom right of MPE Control.
By using this and the tabs at the left, you can redirect incoming MPE messages. Take Pressure - click to enable Press to AT (aftertouch). Inside Operator, click the bottom right pane, so the central display lists MIDI sources and destinations. With the Acid Bass preset, aftertouch is already assigned to LFO A, so all you need to do is apply pressure on your controller, and you’ll hear the LFO depth change.
Want all the hottest music and gear news, reviews, deals, features and more, direct to your inbox? Sign up here.
There’s also a B list of assignments, so turn on Operator’s Shaper effect, then apply B to Shaper Drive, to enjoy some distortion as the LFO amount increases. You could use a similar setup to use Pressure to crossfade between chains in a rack - that can get really interesting.
3. Use Ableton Link with hardware
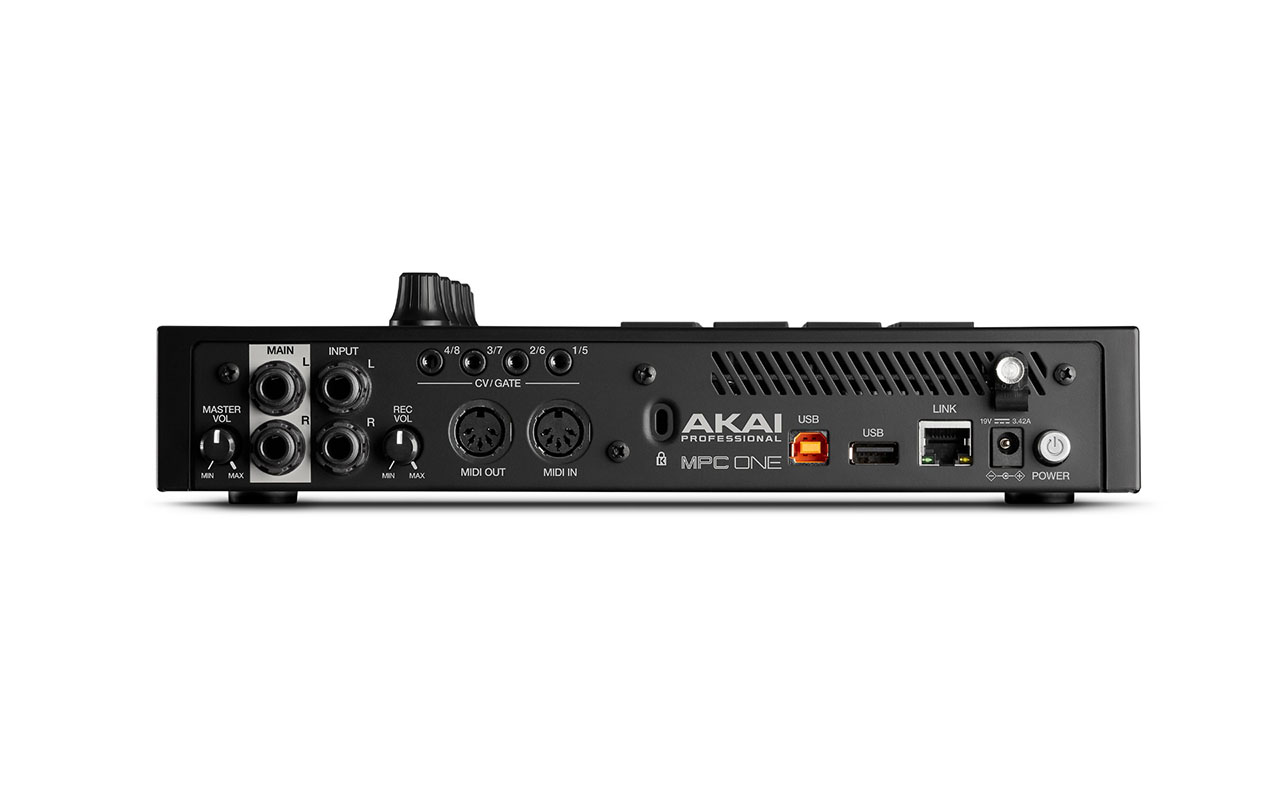
Link is a simple way to wirelessly sync music hardware and software. We said ‘wireless’, but touring professionals will appreciate that Link works over Ethernet too, so you can take it to the big stage and not worry about losing your signal.
Some hardware instruments have an Ethernet connection built-in, specifically for Link - see Akai Pro’s MPC series, and Force (they have wireless Link as well), and there are hardware sync devices such as Circuit Happy’s Missing Link, which does a good job of combining USB MIDI, Link, and CV connectivity in one box.
This is part of Link’s democratic nature - nobody is the sync ‘master’ or ‘slave’, everybody’s on an equal footing, and most hardware can be connected one way or another. You could start with Ableton Live on your computer, send Link over Ethernet to your hardware sampler, then send MIDI clock or CV from that to your vintage machines. This will work even in big jamming scenarios - there’s no stated limit to how many devices can be Linked at the same time.
4. Make the most of your macros
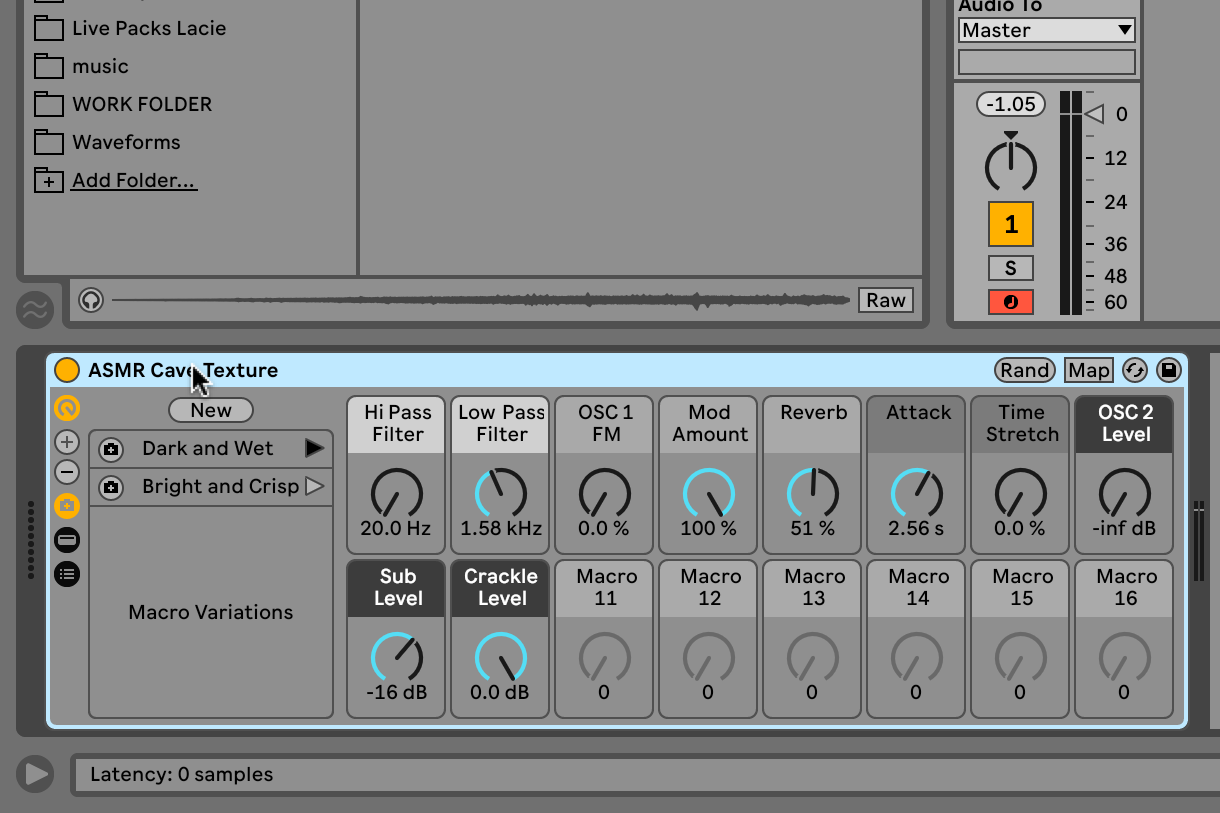
Whenever you collect together an assortment of live devices in one rack, you will see macros appear at the left hand edge of the group. click the Show/Hide Macro Controls button if you can’t see them. If you’re looking for racks in the Browser, watch out for the little vertically-split icon, which denotes a rack as opposed to an individual device preset.
There have always been eight macros available with Live racks, and many hardware controller products and apps reflect that, offering banks of eight knobs. Why eight instead of ten, or whatever? Don’t get us started. But we have more options now, because we can keep clicking the little ‘+’ button until we reach a maximum of sixteen macros.
This might seem a lot to the uninitiated, but there have been situations where we’ve used them all and still wanted more. These macros can be assigned, renamed, coloured, and randomised. Sixteen macros and twelve sends? They’re the power tools for knob-crazy control freaks and we are here all day for that.
5. Use Arrangement and Session views simultaneously
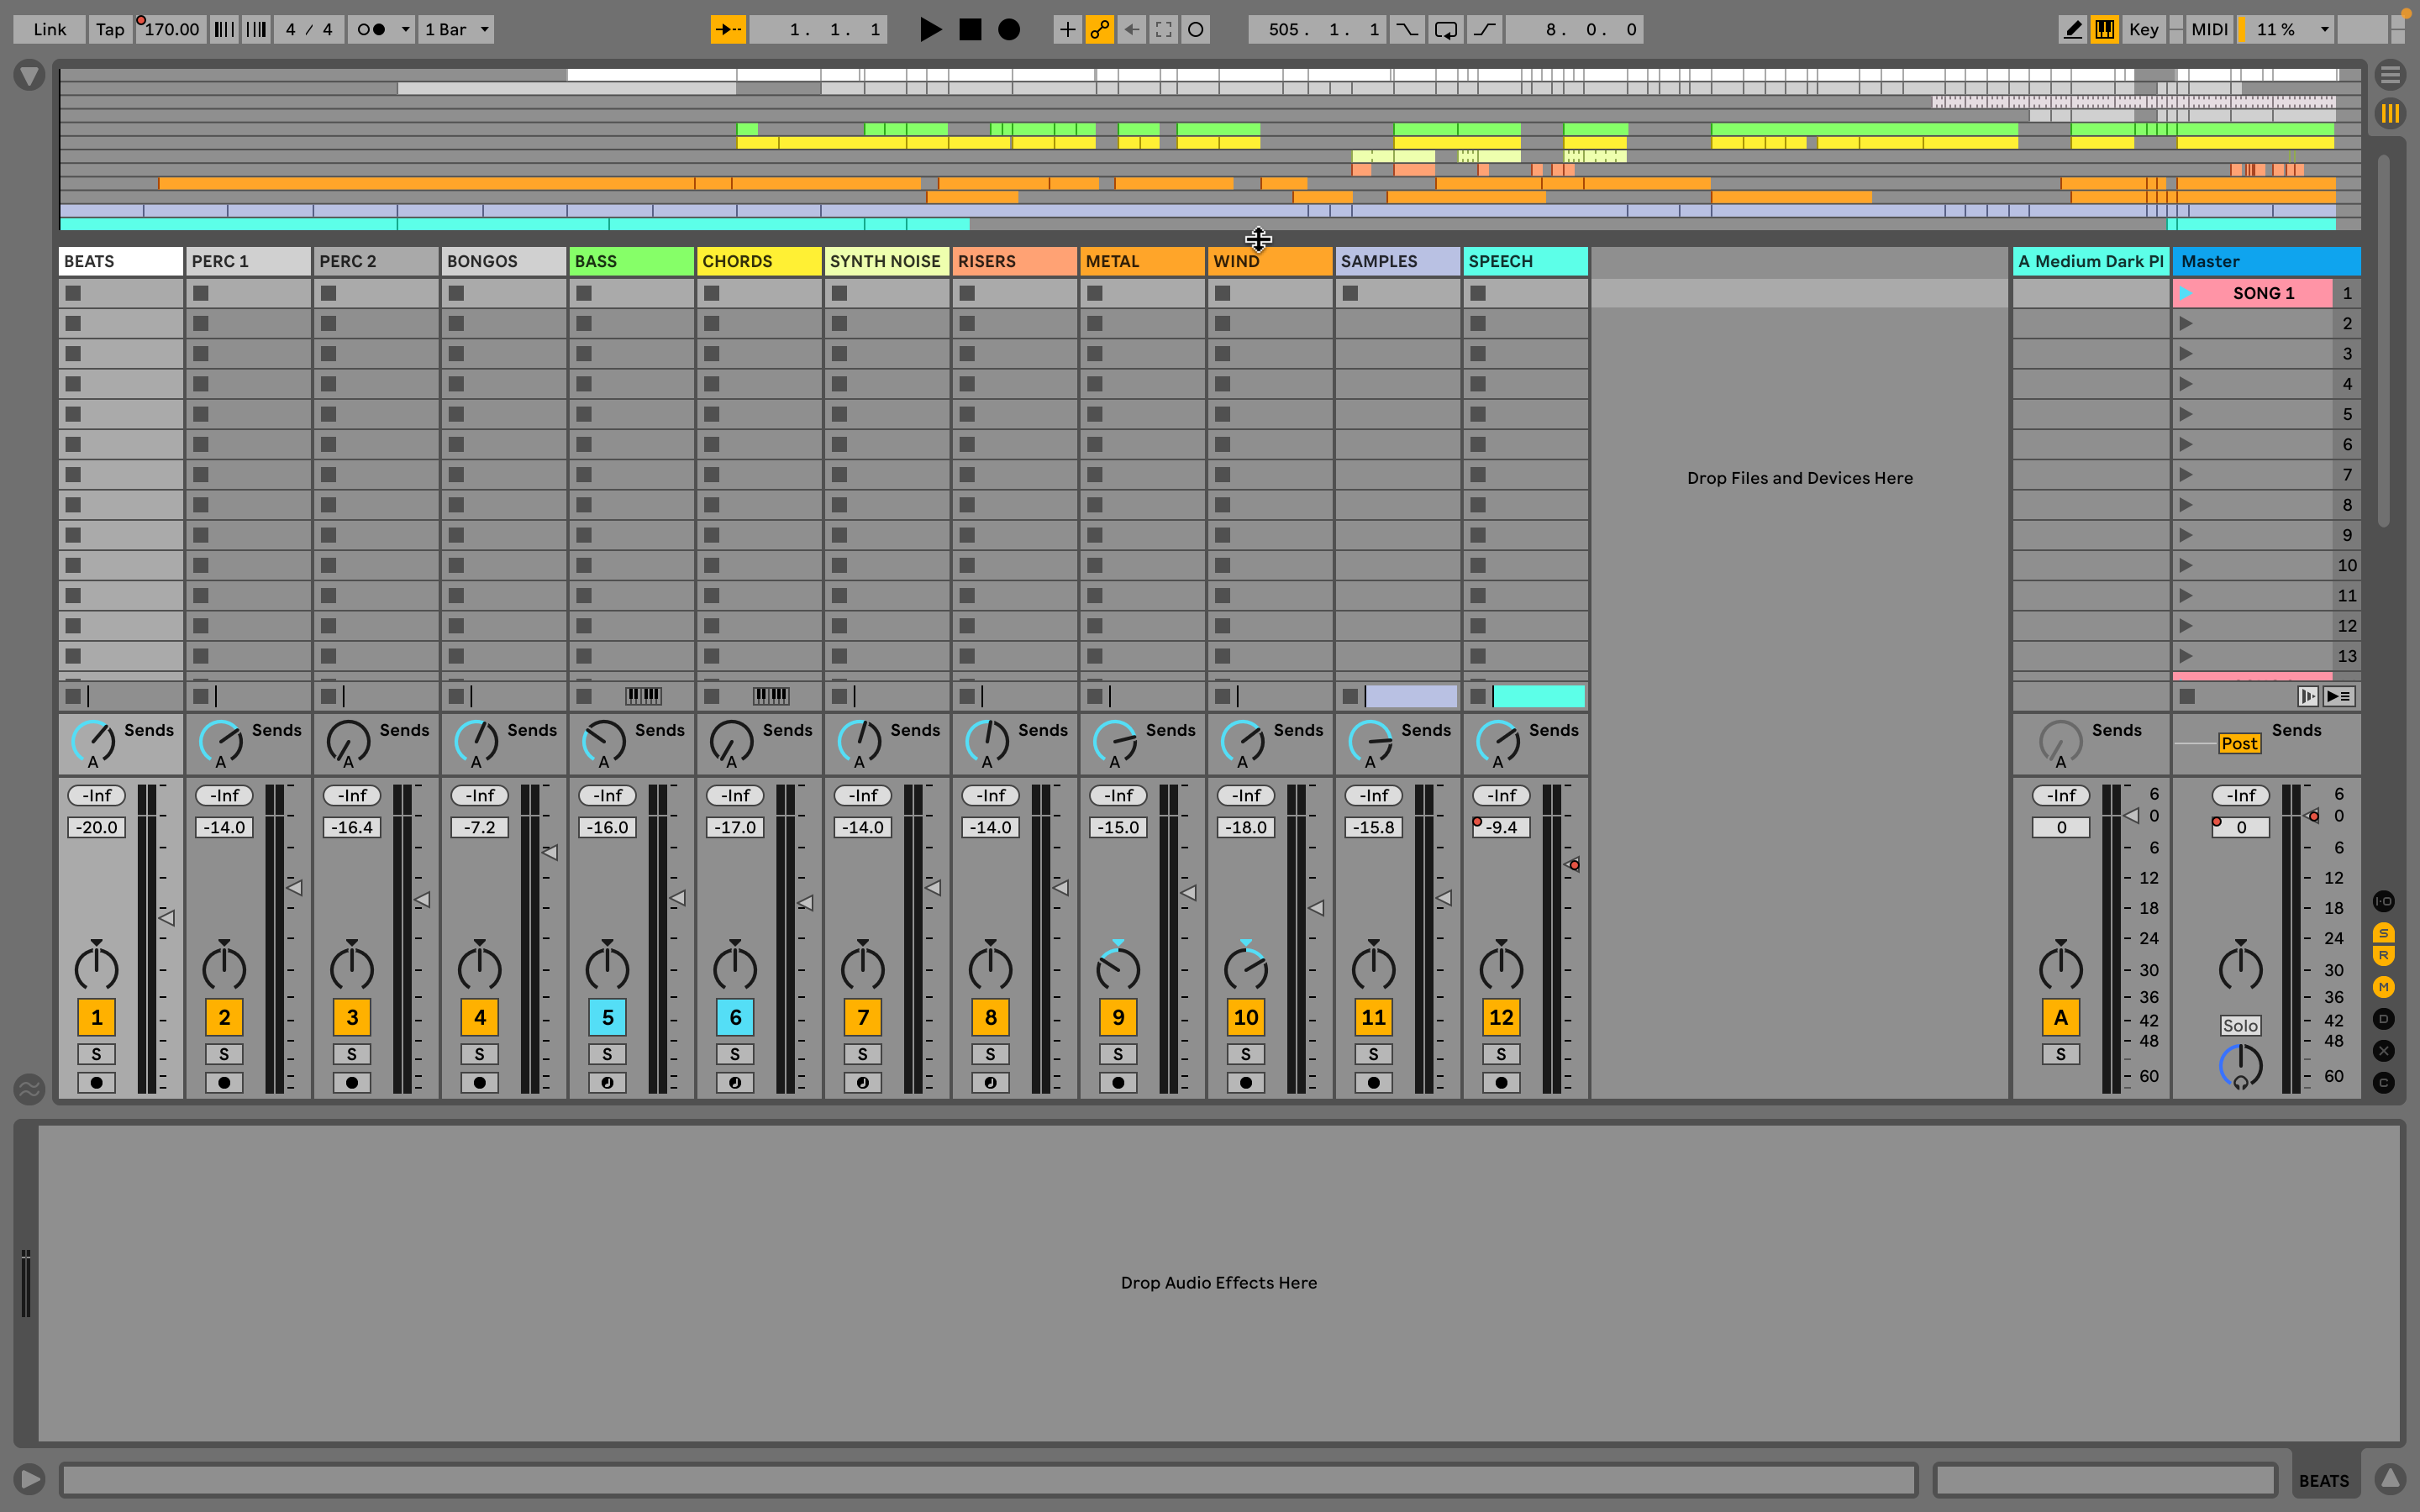
If you’re coming back to Live after a few years off, and if you’re a power user who likes to work in Arrangement and Session Views at the same time, you’ll be pleased to know that you can view both at once using the open in second window menu command.
This will of course work with an external display, even an iPad, if you’re using macOS, but you can also see both Views on the same display if you have enough space. Sometimes it really helps to get that full overview of your project.
If you don’t have enough screen space to see both Views together, bear in mind that the Overview, which is available at the top of both Session and Arrangement Views, can be dragged and expanded downwards for a wider perspective, which is a feature we use often, especially during live sets where we might be playing or jamming on top of a pre-organised Arrangement.
6. Resample your entire mix
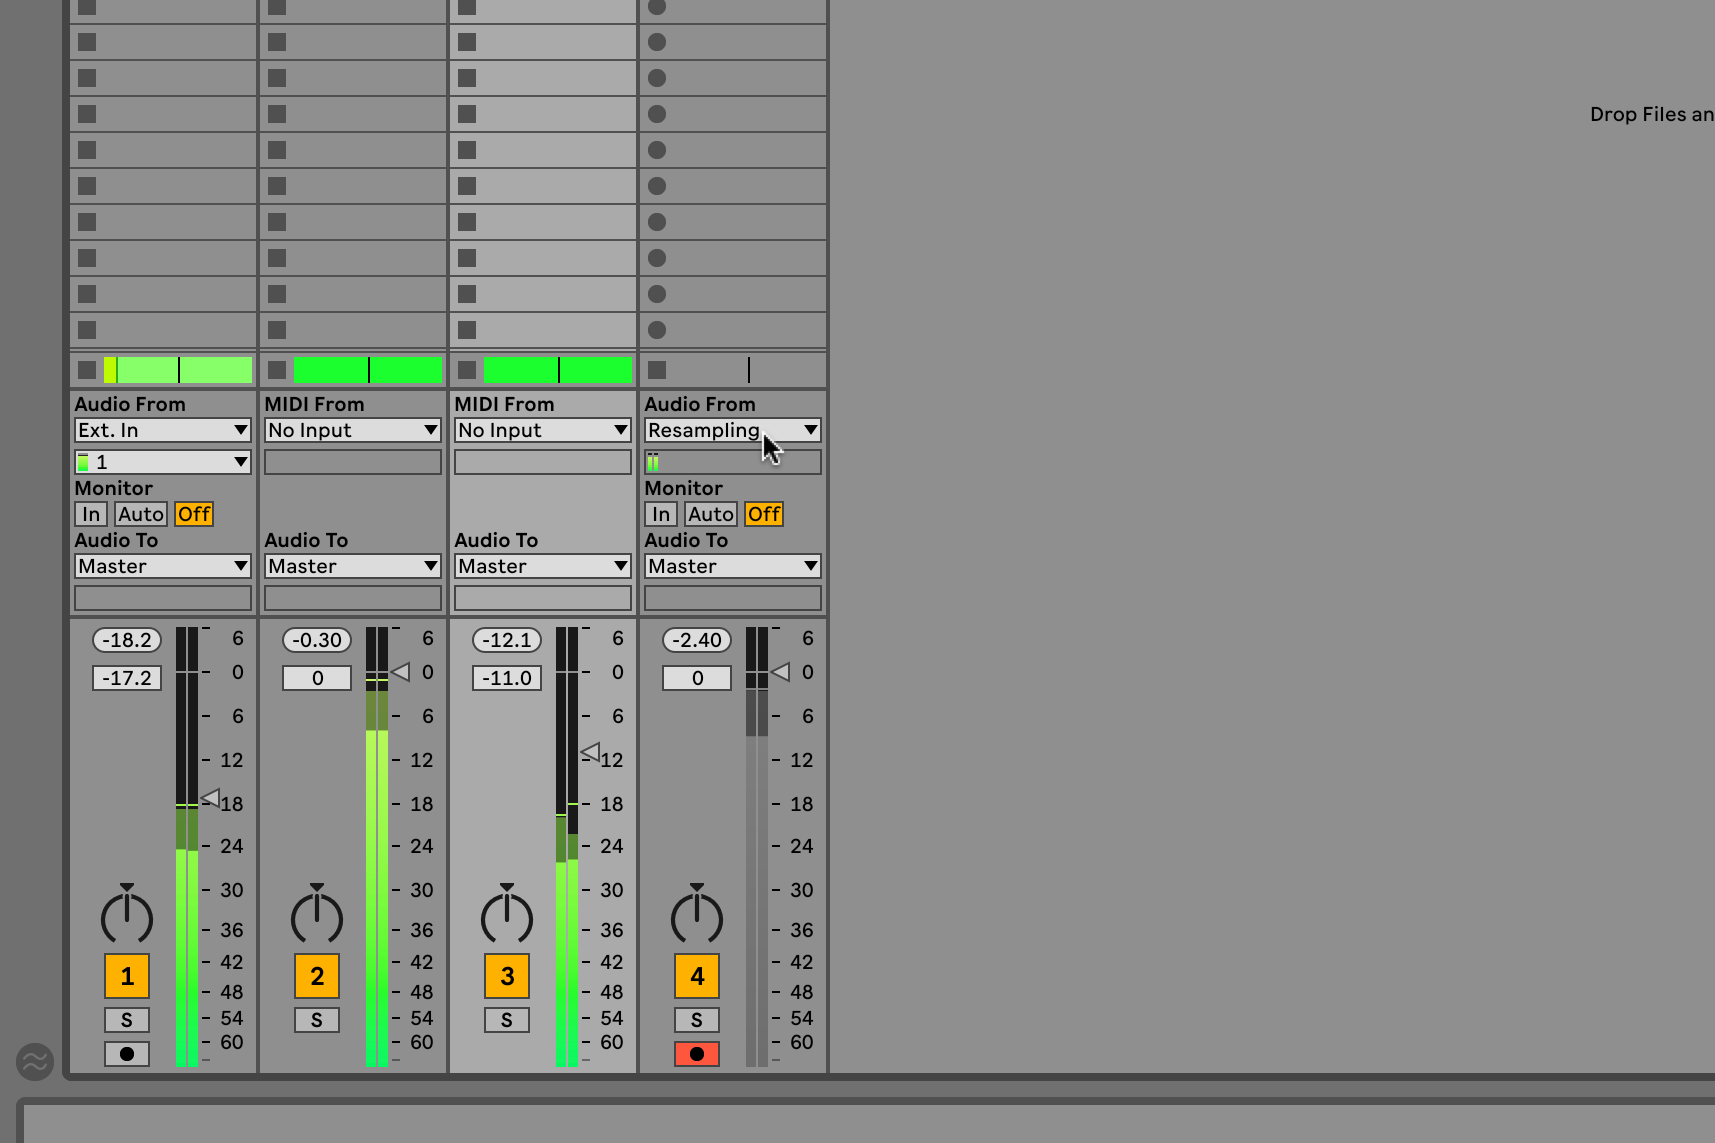
This one’s right in your face, if you have In/Out View open, and it works in both Views. When you create an audio track, you can choose Resampling as an Audio From source to record into it. This means that everything in your project, after the mixer, can be recorded into this track - you’re literally sampling yourself.
We use it in Session View during live performances sometimes - it’s a very immediate way to capture a few bars of what’s coming out of the mixer, back into another clip to be looped, processed, even reversed, while the rest of the song moves on. Very effective.
Resampling is a much safer option than choosing audio from Master, because by default a track set to Resampling is muted, while audio is coming in, to avoid feedback - that’s why the audio input level appears greyed-out.
7. Reverse clips
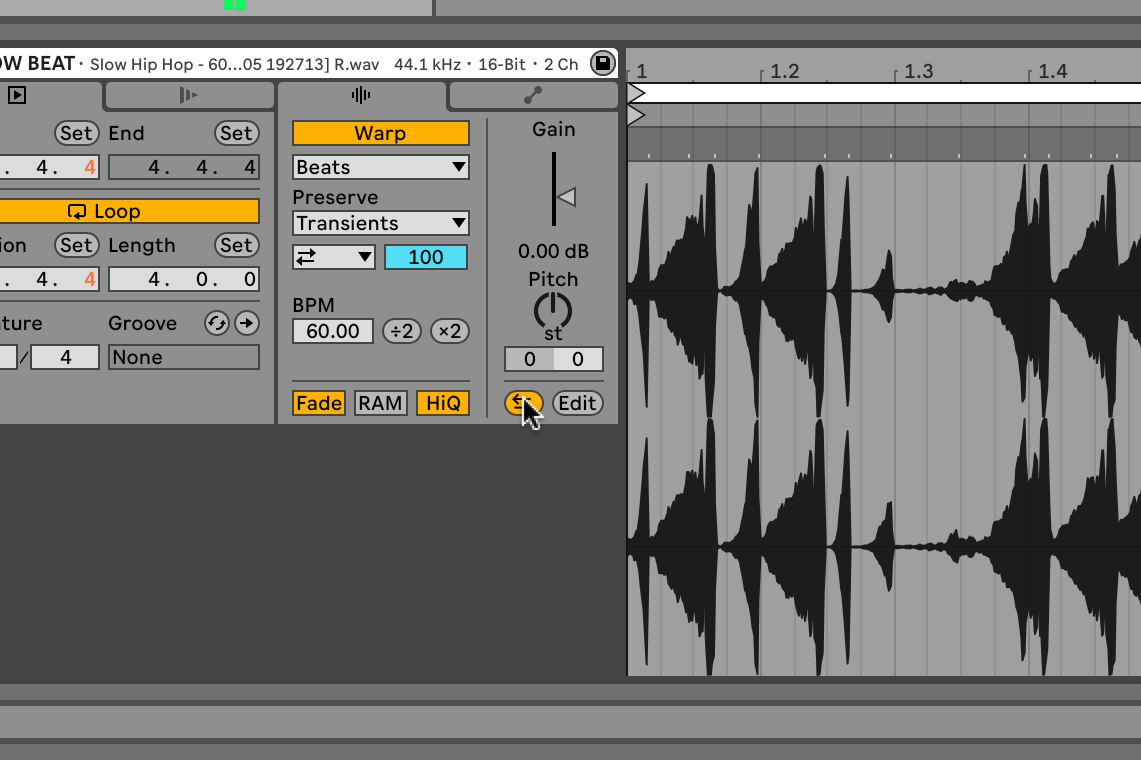
Backwards audio sounds cool, we all know it. It always has - listen to a vinyl record being scratched by a DJ, listen to tape machines playing backwards (sinister demonic messages notwithstanding), or just ask David Lynch. And reversing audio is so easy to do in Live. Any audio clip can be reversed using the Reverse button in clip view.
This process makes a new audio sample, so the first time you do it, there can be a brief delay, especially with longer clips, but after that, flipping the Reverse switch is fast. For samples loaded in the Simpler instrument, you can right-click on the waveform and choose Reverse Sample, and for Simpler, you can use the lower left Reverse button - for this one the waveform won’t change, but playback direction will reverse.
You can try reversing with any type of material - even with noise and field recordings, it gives a different perspective. And let us not forget that MIDI Note Editor also includes a Reverse button, so you can flip your MIDI parts too.
8. Sampling shortcuts
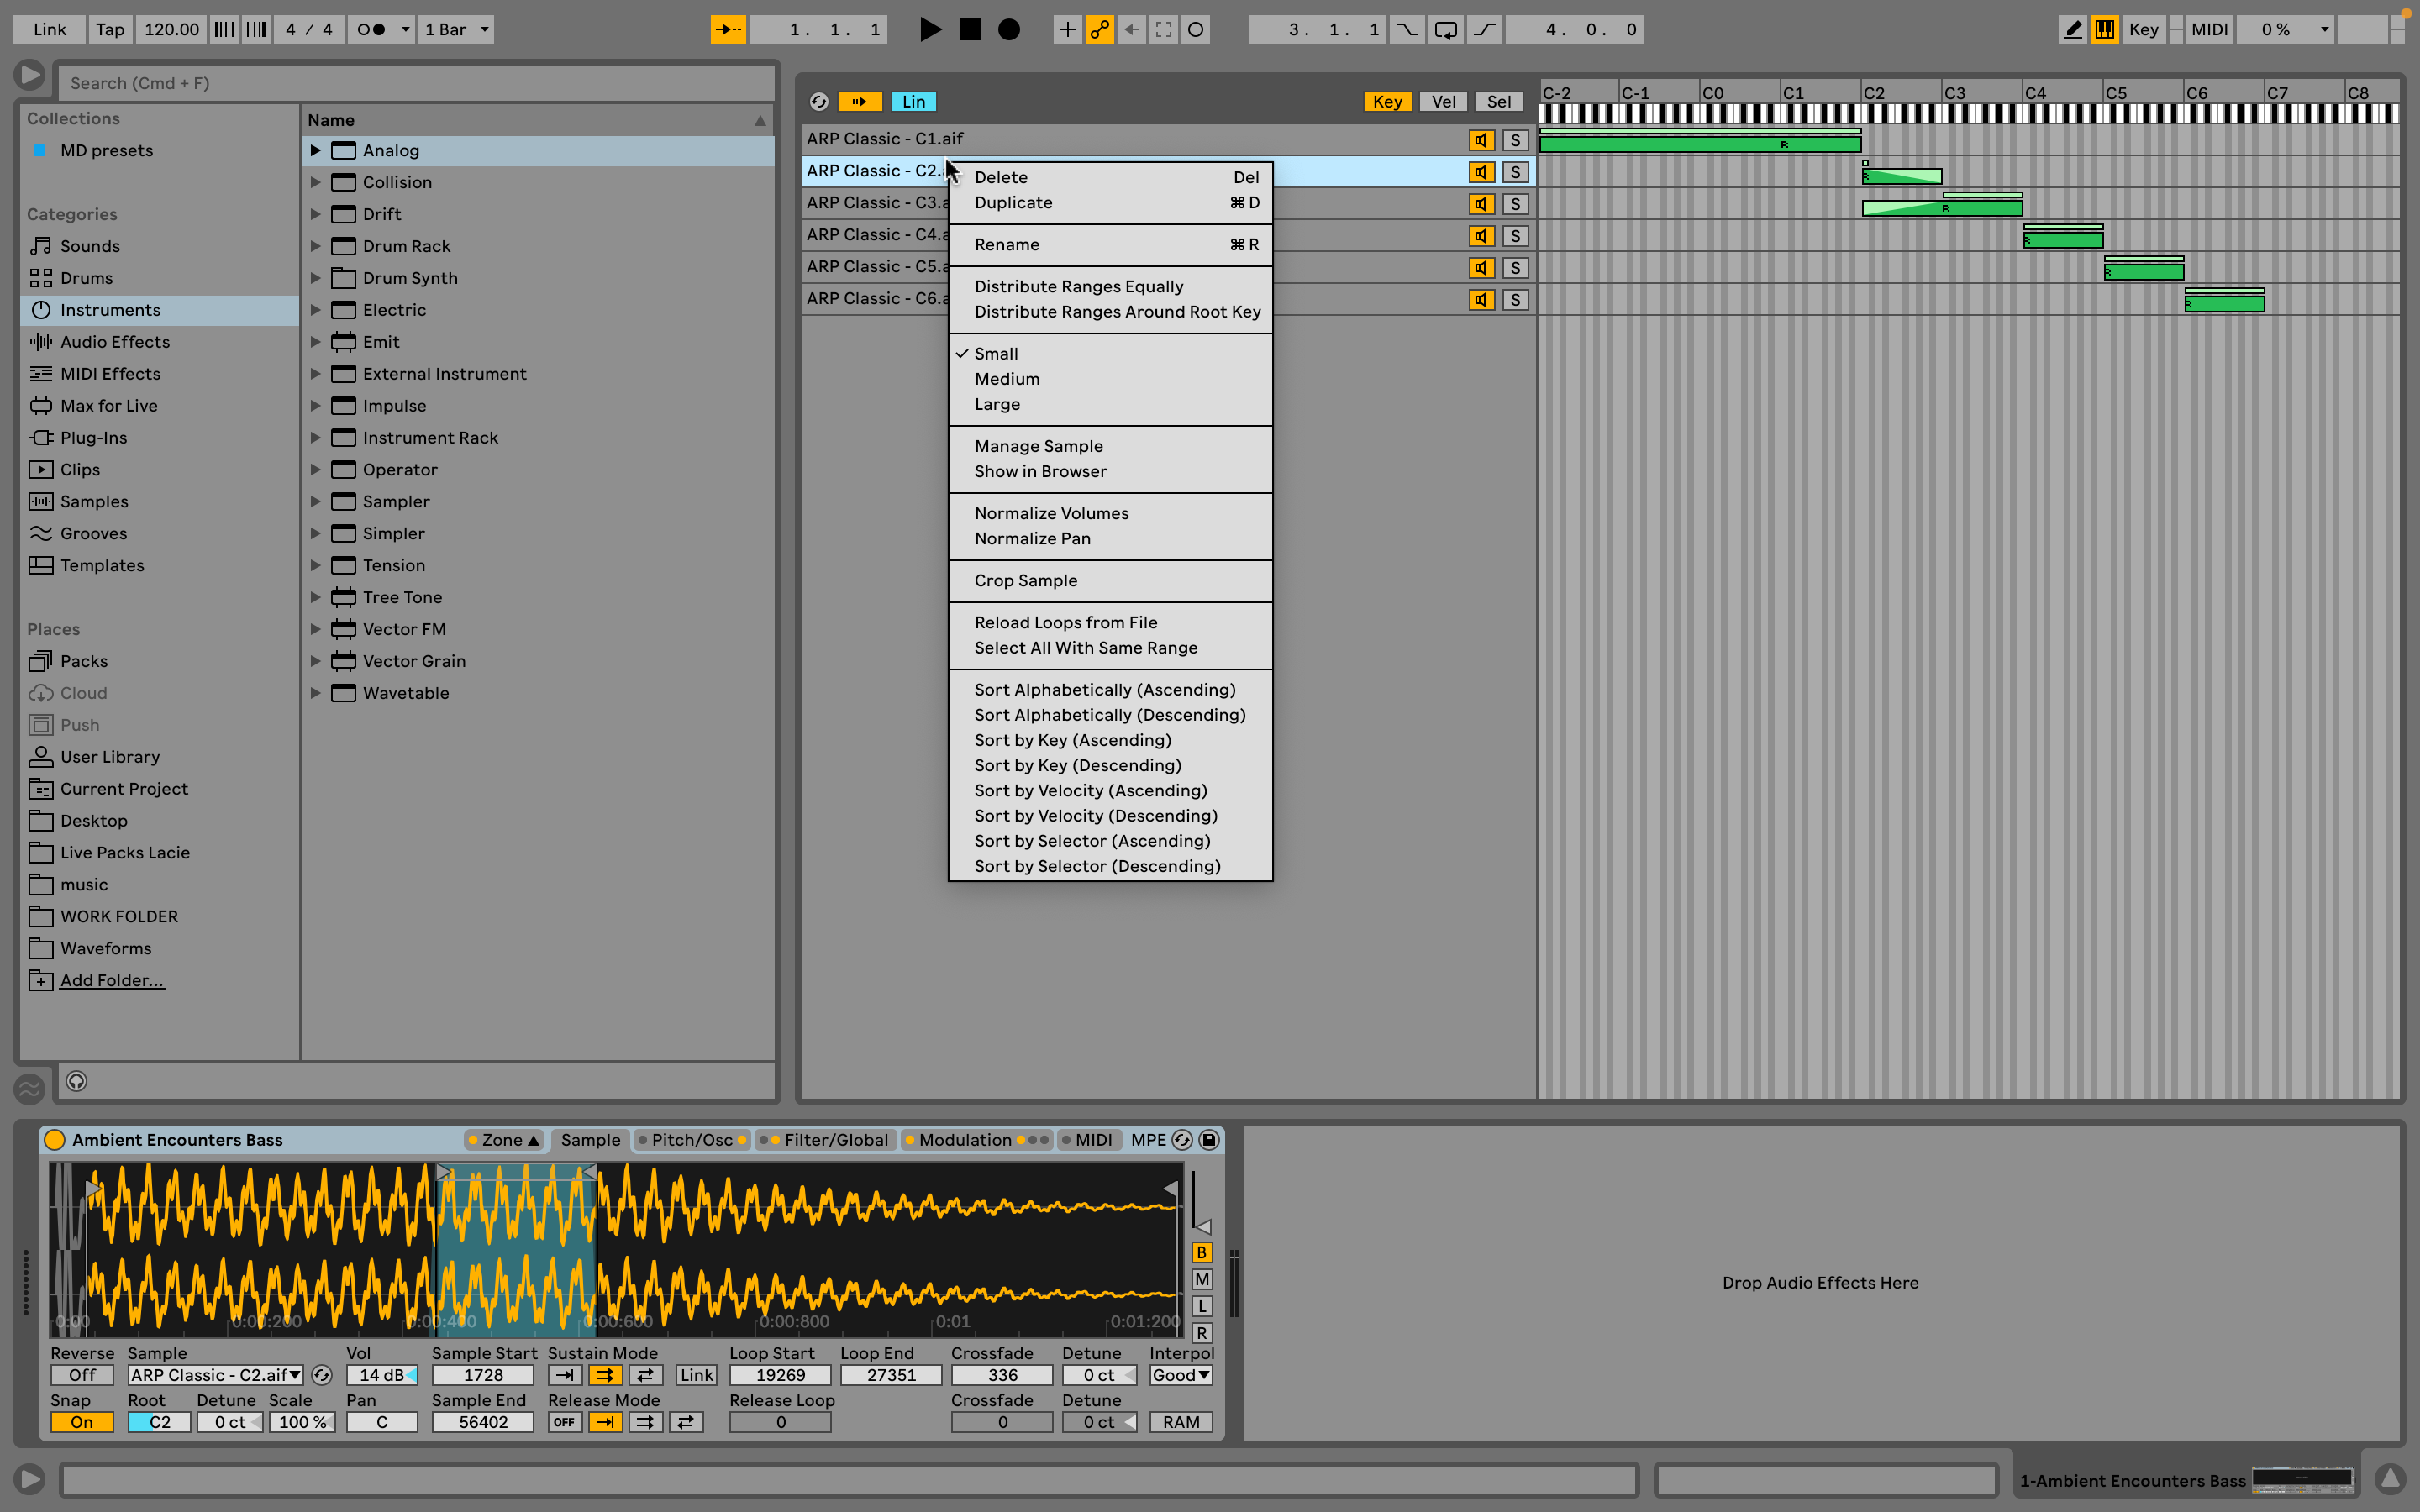
Just a little one for samplists. The Context Menu contains a number of excellent time-savers when you’re working with multiple samples in Live’s Sampler instrument.
Load a factory preset like Guitar Open or Ambient Encounters Bass, and click on the Zone button so you can see all of the samples used in the preset. Right-click on the sample layer list - the list of sample names at the left and you’ll see many useful little shortcuts (if you click on the zone editor adjacent to that, you’ll see a shorter list - these items are also included in the longer list).
The ones we probably use most are the Small/Medium/Large zoom selector, Distribute Ranges Equally, and Normalize Volumes - so useful when working with a large number of samples.
9. Create feedback loops (deliberately)
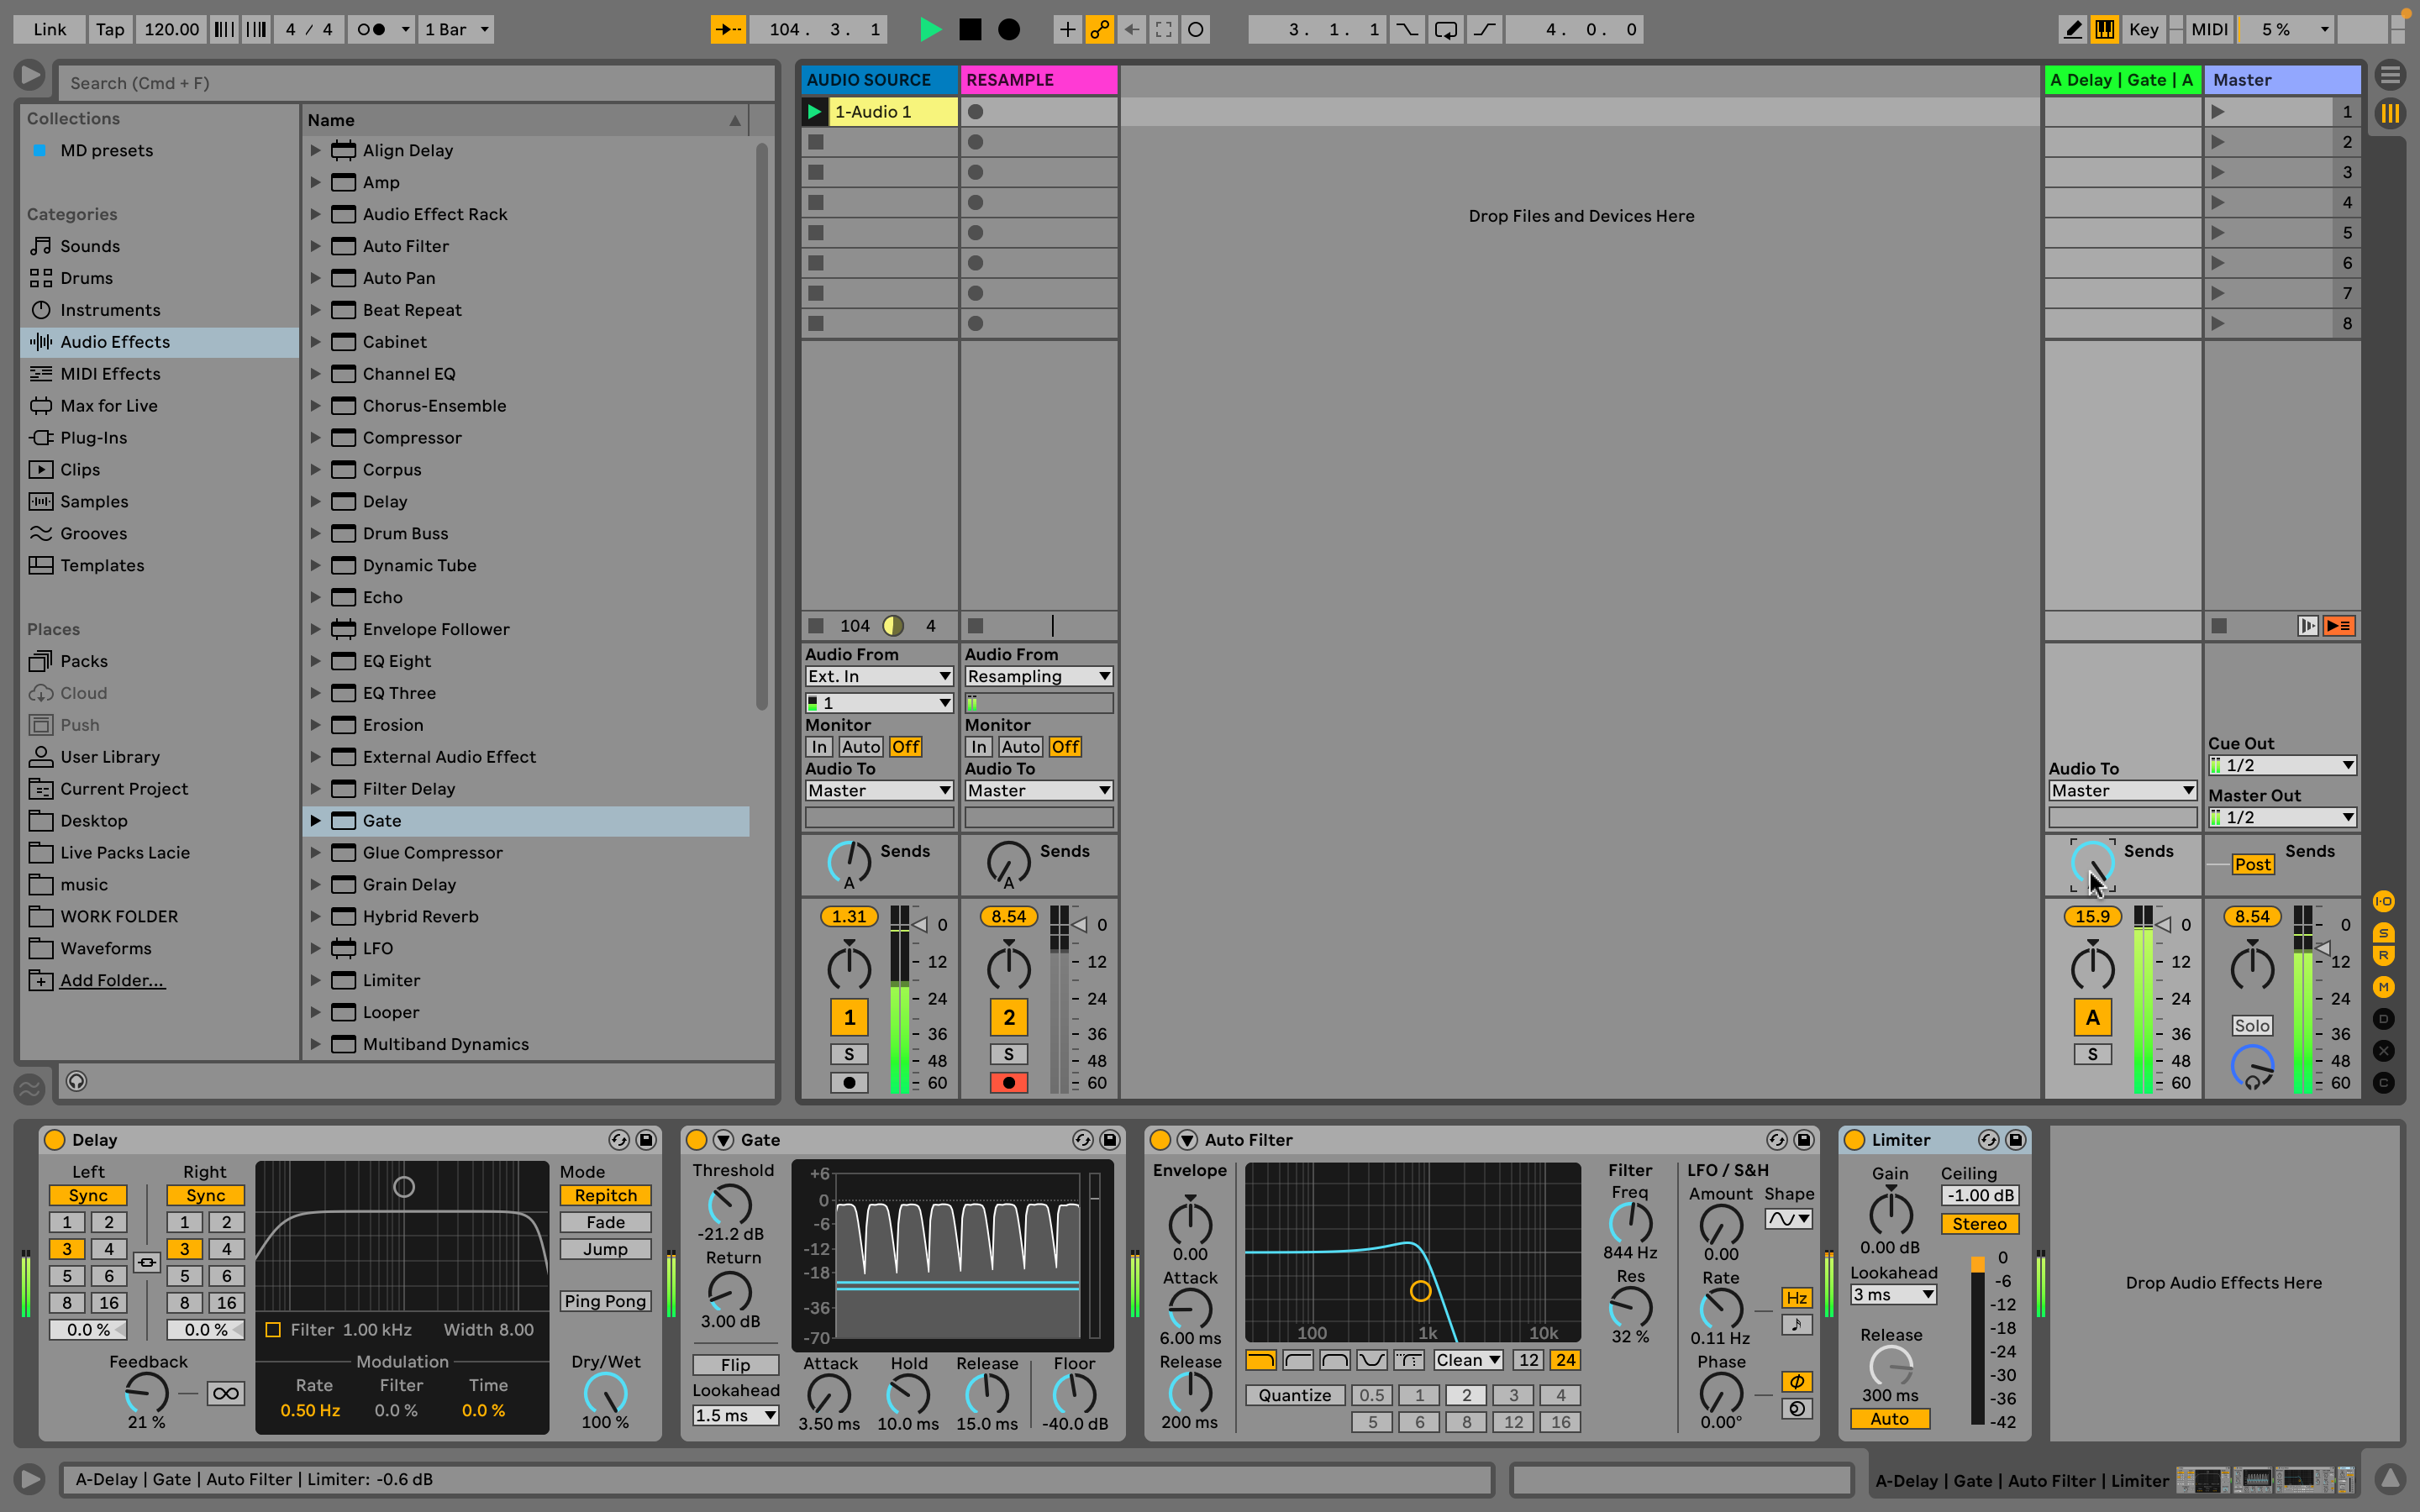
Feedback should always be avoided, right? Wrong. The no-input-mixer is a thing, really. Somebody goes on stage with a mixer, but without any hardware connected, and they proceed to use the mixer’s faders and inputs, and maybe effects, to create noise and feedback. Riding that potential for disaster and discomfort as part of a performance, can turn something that’s usually annoying and painful into sonic art. There’s even an input-less mixer iOS app (NoInputMixer) which replicates the experience.
To do this in Live you need one audio track and at least one return track. Beware - uncontrolled feedback gets very loud; make sure your volume controls are way down. Right-click on the return track send and choose ‘Enable All Sends’. Launch your audio clip, or enable incoming audio. Raise the send in the audio track, and slowly bring up the send in the return - you are sending the return to itself. At some point, feedback occurs. Add a Limiter to control the level. Then experiment with audio effects in the Master track or route to other audio tracks, and try Resampling.
We repeat - you absolutely have to be in control of your levels and your monitoring for this exercise!
10. Reset individual arrangement tracks
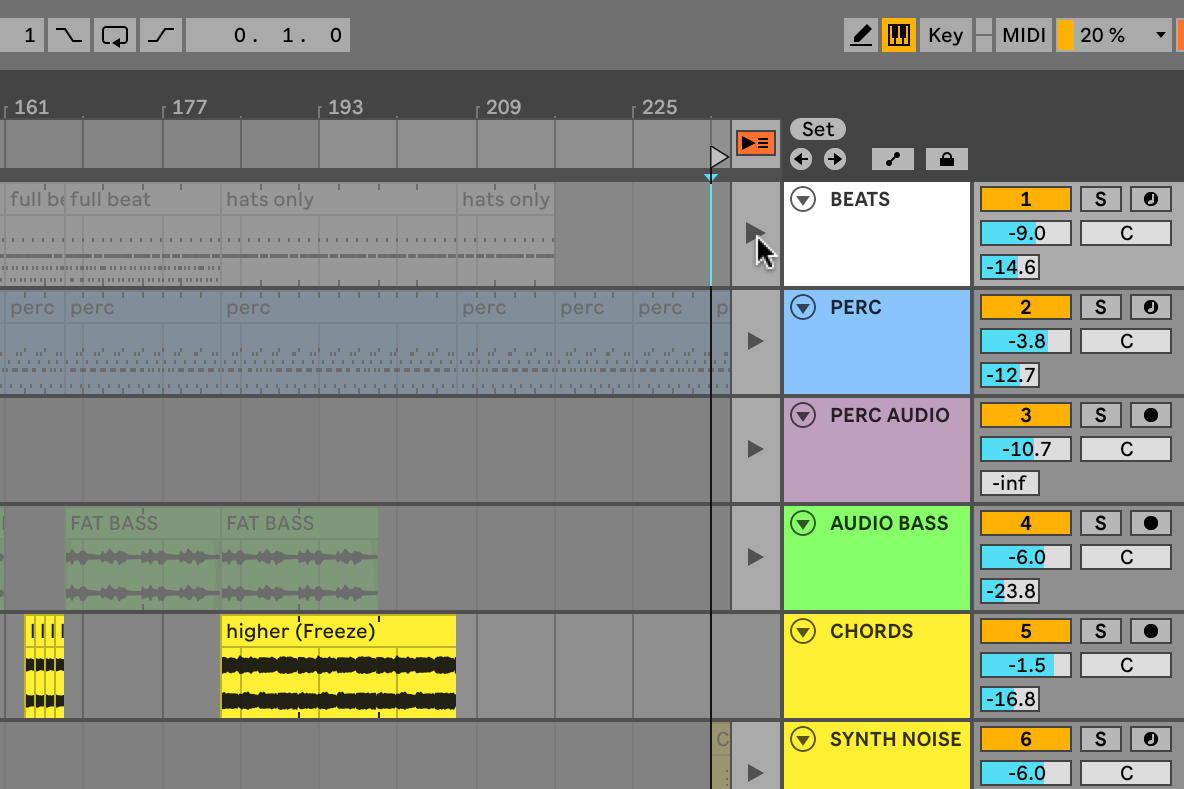
This could follow on from our mention of using both views at once. When you have a few audio or MIDI tracks laid out in a linear fashion in Arrangement View, and then you flip to Session View and start something playing clips or even entire scenes, the Back To Arrangement button lights to show that you’ve ‘broken’ your arrangement - Live will not play different material in a particular track in both views at the same time, so it defers to the Session View.
Go to the Arrangement View, and you’ll see one or more greyed-out tracks, and next to each one is a separate Back To Arrangement button. You can either click the main Back To Arrangement button at the top right of the timeline, or these small individual ones, depending on whether you want to reset the entire arrangement, or just individual tracks.
Once again we’ve tried to bring you a mixture of old and new Live tips - our favourites might be the feedback capture (an old one), and the expanded macro features (a new one) - sixteen macros? That sent us into a frenzy of looking for suitable hardware MIDI controllers, and helped us to achieve setups that we hadn’t been able to before - that’s all we can ask for from a new feature.

Martin Delaney was one of the UK’s first Ableton Certified Trainers. He’s taught Ableton Live (and Logic Pro) to every type of student, ranging from school kids to psychiatric patients to DJs and composers. In 2004 he designed the Kenton Killamix Mini MIDI controller, which has been used by Underworld, Carl Craig, and others. He’s written four books and many magazine reviews, tutorials, and interviews, on the subject of music technology. Martin has his own ambient music project, and plays bass for The Witch Of Brussels.