10 innovative plugins pushing synthesis forward
Discover the latest features from today’s forward-thinking software instruments, and keep up to date with the newest sound generators
Ever since they arrived in popular music in the ’70s, synths have always seemed new and otherworldly. Bristling with strange knobs and controls and emitting weird electronic noises, many synths might seem more at home in the bridge of the Nebuchadnezzar than in your studio or bedroom.
Initially, musicians responded with horror at the arrival of these newfangled music-making machines, fearing being replaced entirely (a sentiment echoed in some of the scepticism surrounding AI’s role in music today).
First came the analogue synths: brutish modular systems with cables and real circuitry. These gave way to more portable and playable models like the trailblazing Minimoog. Then came their digital ancestors, which used mathematical representations of audio waveforms. Wavetable, additive, FM, physical modelling and sample-based synths took grip on the global music market, with releases like the Yamaha DX7 and the Roland D-50 possessing previously unseen universal appeal.
Digital synths had been communicating via MIDI since the ’80s, but as the 20th century drew to a close they made the leap into the computer world proper with the introduction of the first software synthesizers. Steinberg’s VST protocol integrated software synthesizers into DAW applications, and the stage was set for third-party manufacturers around the world to code instruments for a fully digital environment, without having to develop expensive hardware.
A whole new wave of electronic music emerged, along with a generation of music producers who could fashion chart-topping hits equipped with nothing but a laptop and a pair of headphones.
If analogue models are the original instruments in the synthesiser family, and digital titles their offspring, soft synths are the grandchildren. Time waits for no man nor machine though, and the reality is that software synthesisers have been around for over 25 years at this stage. That’s more than enough time for hot releases to become classics, and it’s easy to point to blockbusting synths like Sylenth1, Serum and u-He’s Diva as belonging to this category. Although there’s nothing wrong with relying on a classic, some of these golden oldies are showing their age somewhat, and a space is opening up that’s ready to be filled by a new breed of futuristic soft synths.
The latest synths in today’s market sport cutting-edge features that befit the powerful machines and programs on which they run. Modern CPUs can handle a huge powerhouse of sound and synthesis, and new synth releases feature a dizzying array of synthesis and modulation engines that push the limits of what you can achieve creatively.
Get the MusicRadar Newsletter
Want all the hottest music and gear news, reviews, deals, features and more, direct to your inbox? Sign up here.
MIDI is expanding with the introduction of MPE, and synths like Audio Damage Quanta 2 and Arturia Pigments 4 show what’s possible with full MPE support. That’s not to mention the vintage synth emulations that revive powerhouses from the past in jaw-dropping digital detail – these are modern in their own way.
In this feature, we’ll take a look at all of the above and more, shedding some light on the futuristic synths that are leading the way across new frontiers. Expect slick innovations like cloud-based sample libraries and 3D output, as well as AI-powered engines and ultra-modern architecture.
Vital: free and forward-looking
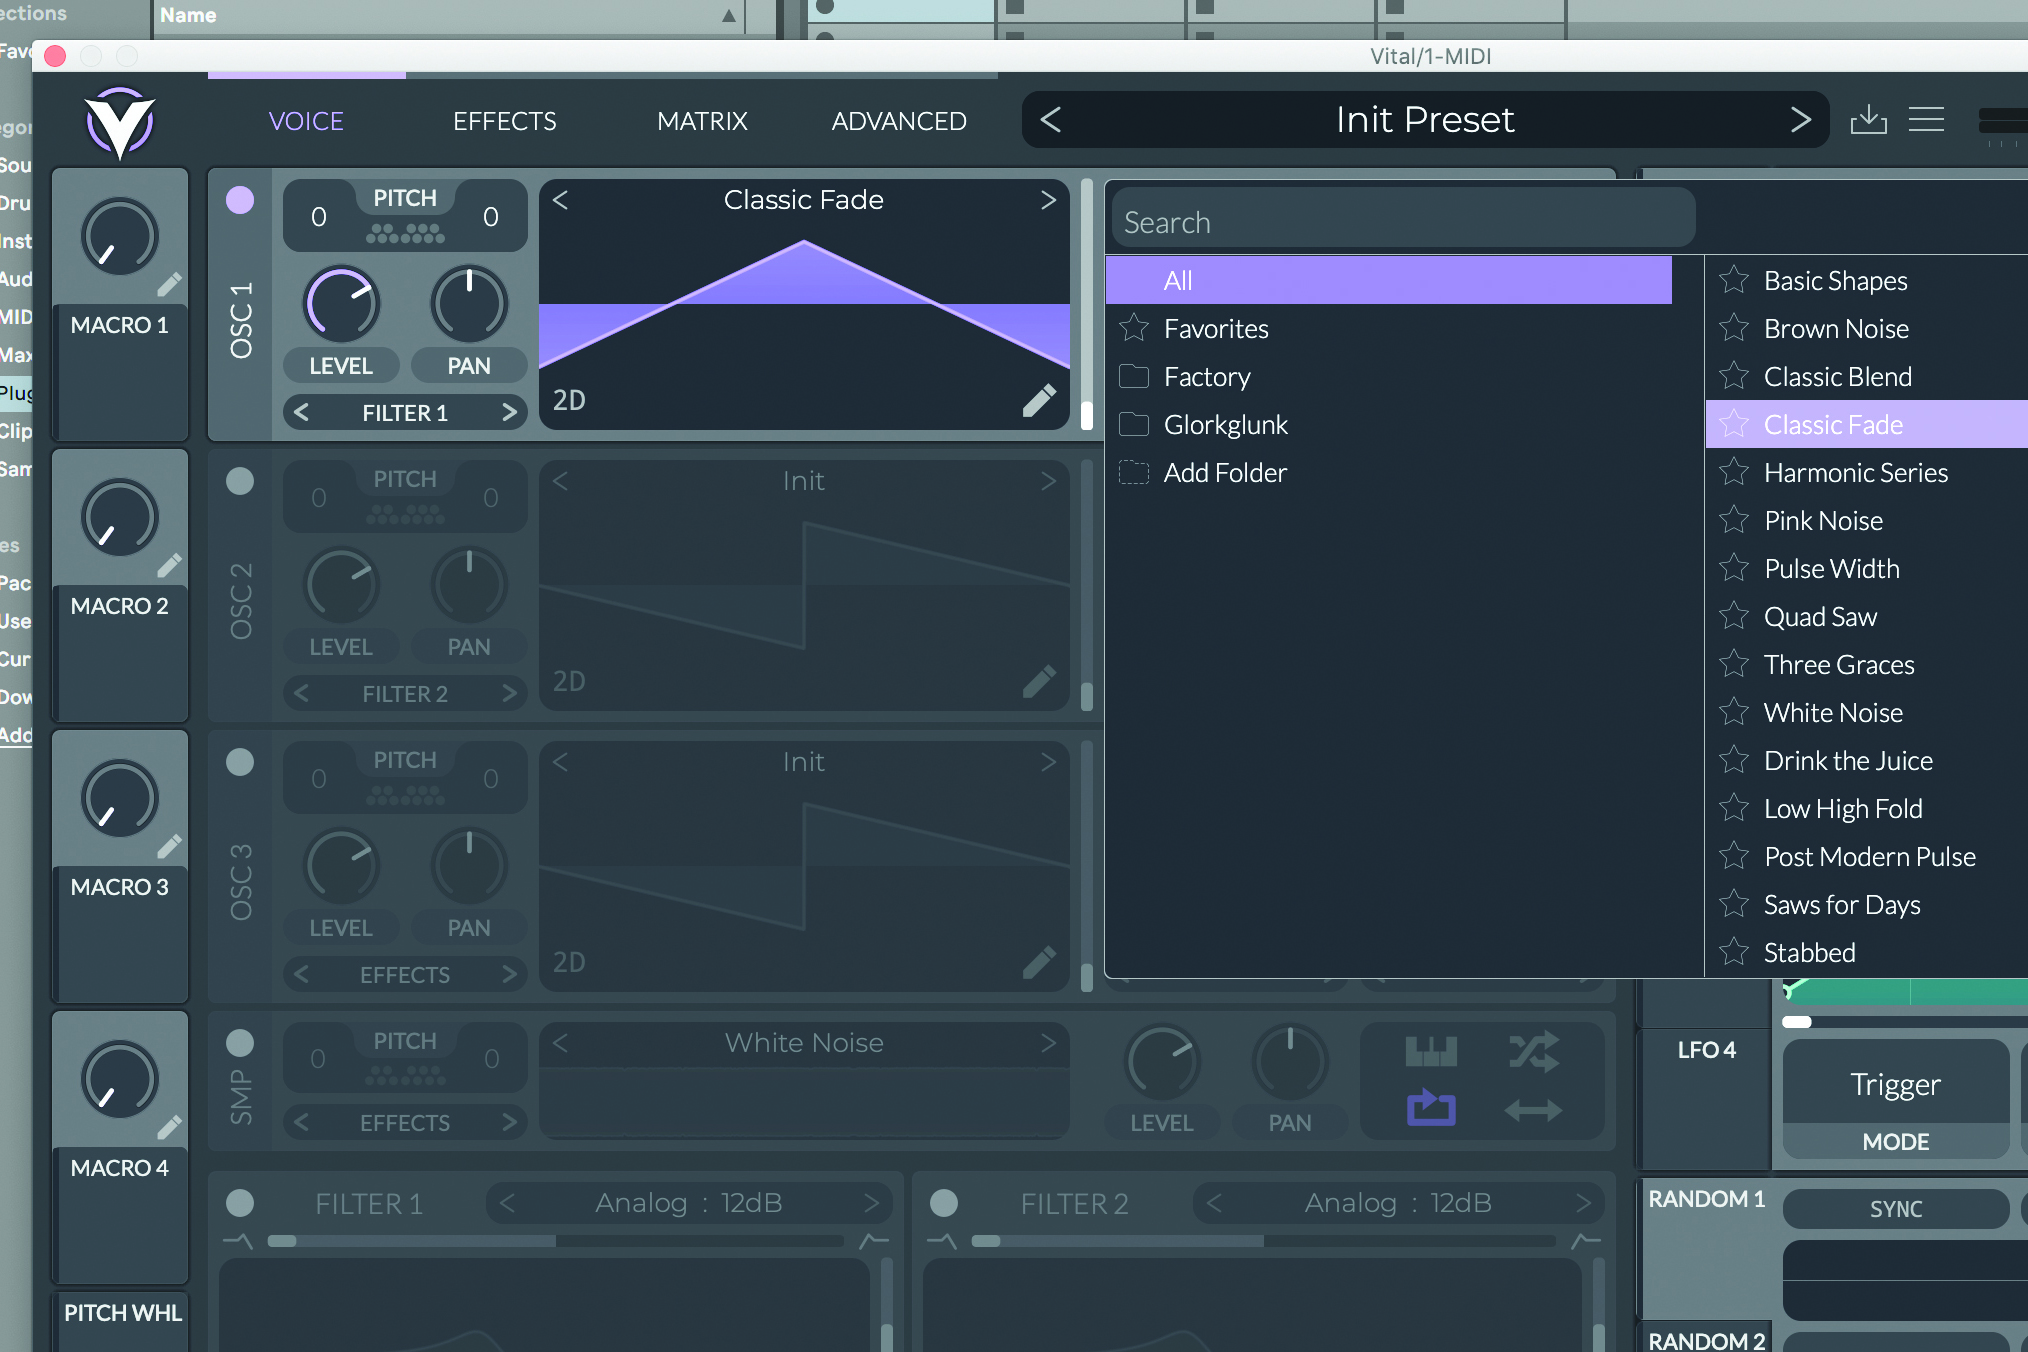
Vital may be one of the best free synth plugins, but it still has a modern feature set. In Voice view, you can access the three oscillators, along with a sampler and two filters. Switch to 3D view to see the different slices of the wavetable.

On the left of each oscillator are basic settings like Level, Pitch and Pan. On the right, you can adjust detune and increasing the number of voices in the Unison section, and change the waveform start point in the Phase section.

The Spectral and Wave Morph dials make drastic changes to the waveform. Choose a Spectral Morph mode to affect harmonics in unusual ways, or a Wave Morph mode to morph the shape of the wave.
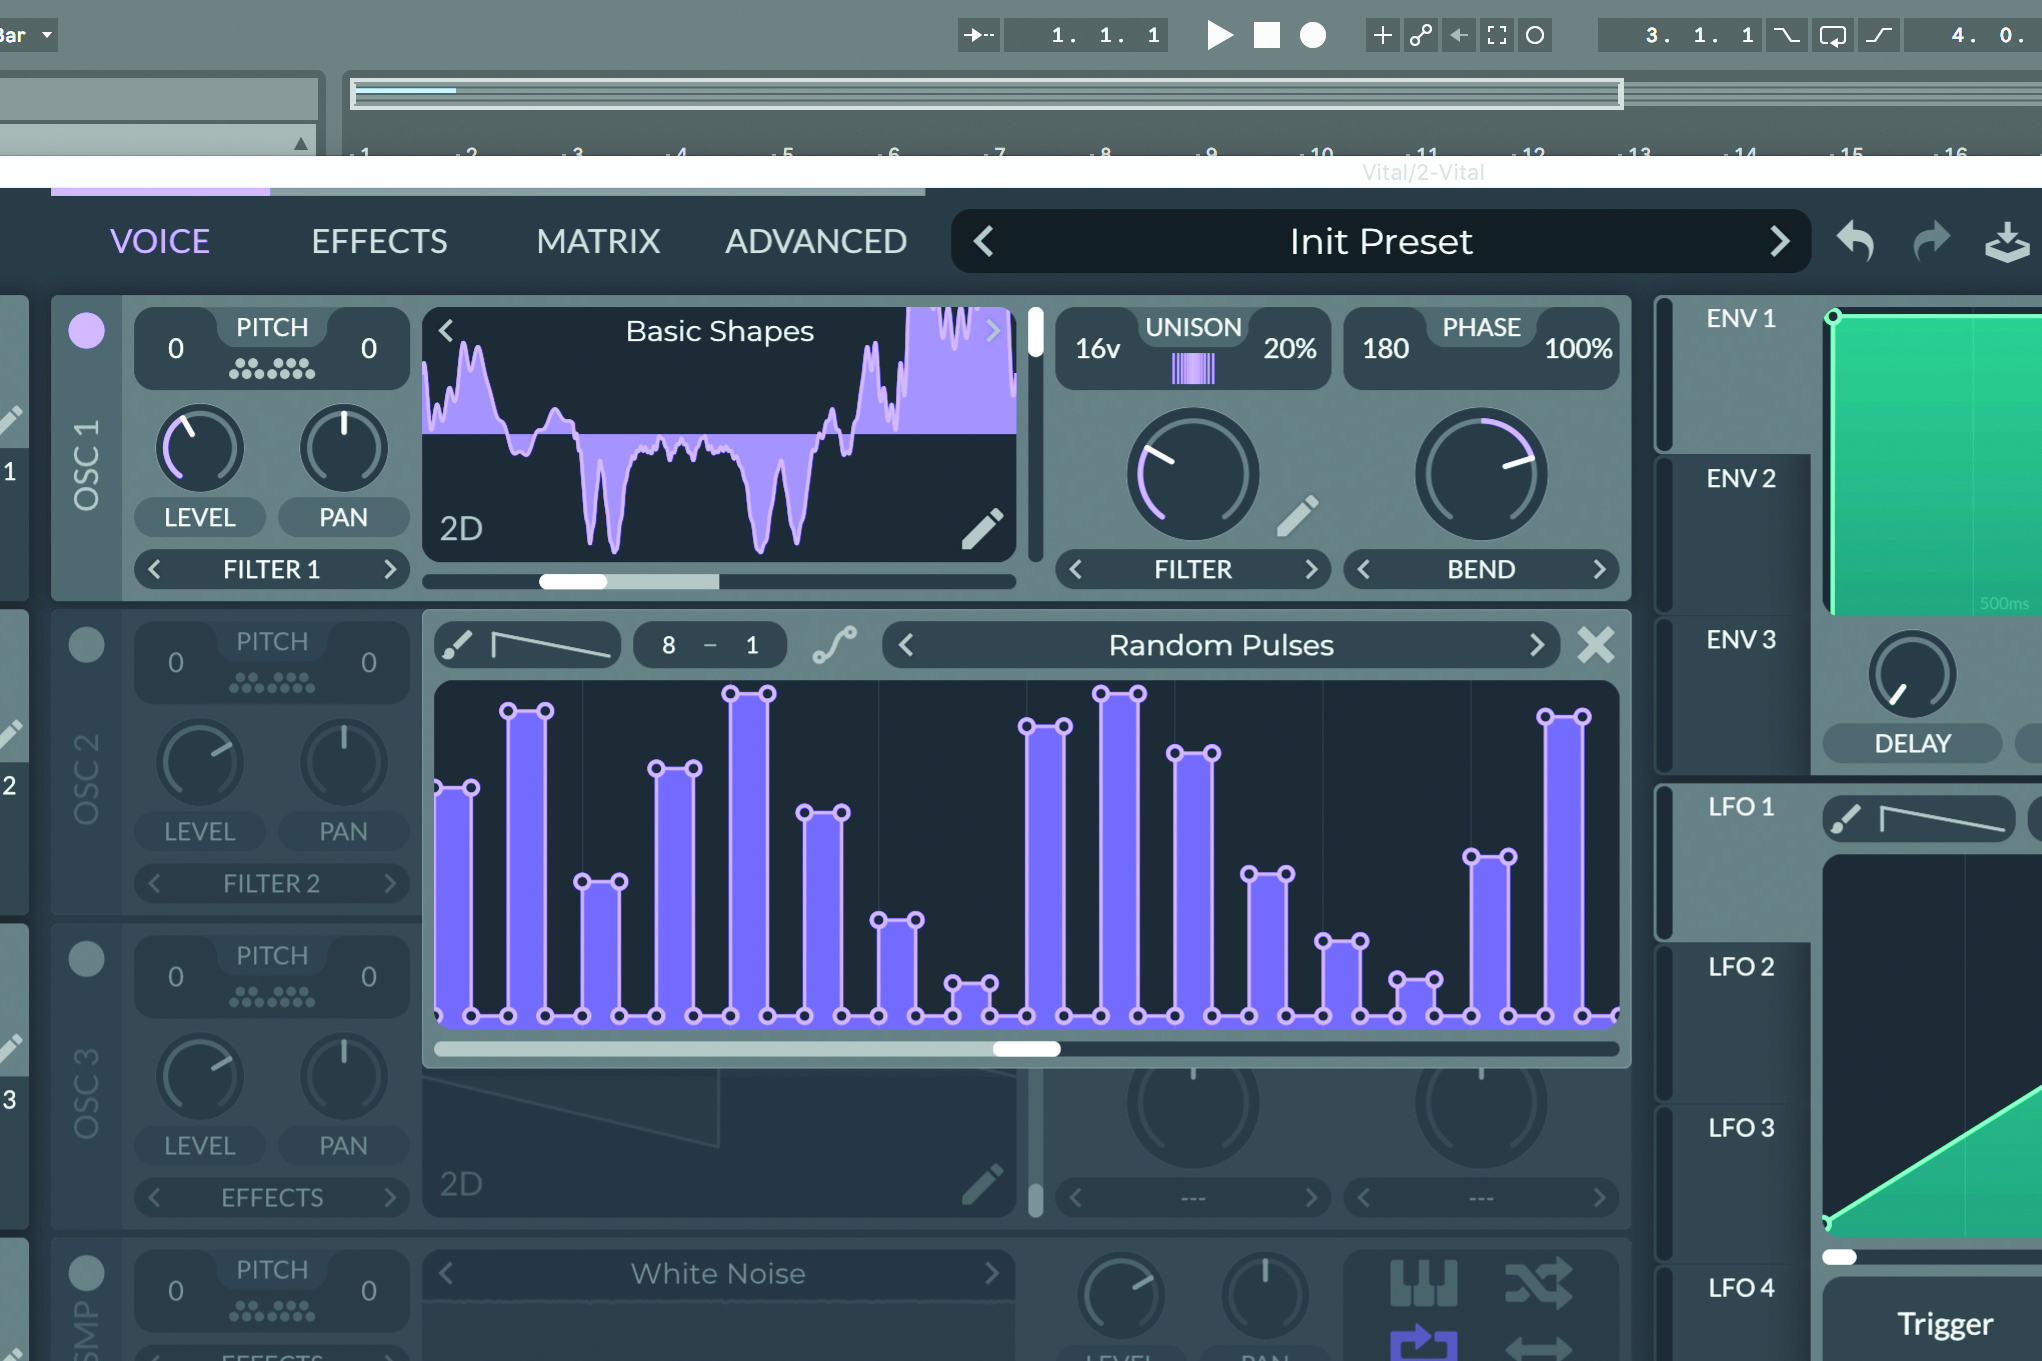
Vital sports drawable filters that you can apply to the waveform. Click the Spectral Filter, Phaser or Flanger mode and hit the pencil icon to bring up the filter. Experiment with basic or complex filter shapes to alter the effect.

The Text to Wavetable preset allows you to input text that plays like a vocoder. Click the frame and enter text, then affect pitch using your keyboard. Reverse the waveform by pushing the slider to the top and dragging the circle backwards.
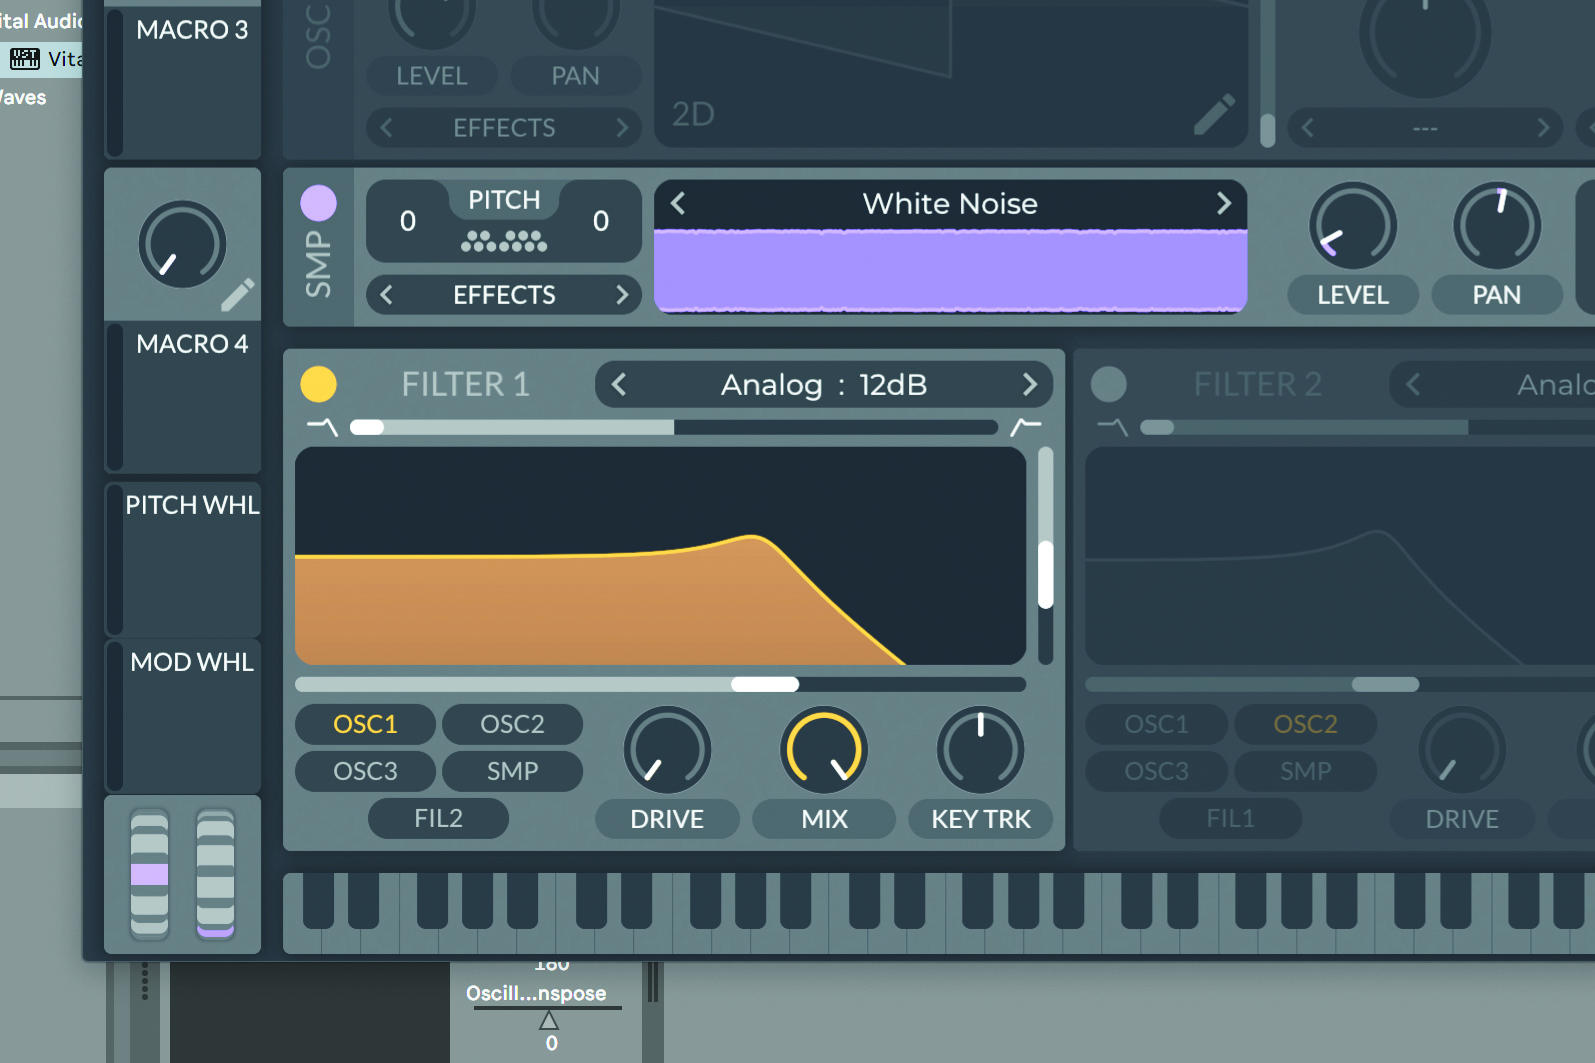
Layer in some noise or other organic sounds using Vital’s Sampler. Just like the oscillators, you can change the pitch of the sample and where you want to send it, as well as controlling whether it loops, reverses or pitch syncs to the keyboard.
Setting up MPE as a modulation source in Phase Plant
MPE – or MIDI Polyphonic Expression – is a recent development in the MIDI spec, allowing for more expressive note input, and a whole new breed of MIDI controller hardware.
With MPE as your input, and a specialist MPE controller, you can hold a note and move your finger up and down through different notes, generating a slide on the keyboard that the synth will respond to.
There’s extra room for modulation, too, as the ‘height’ at which your finger contacts the note, as well as the pressure you apply to it after the initial contact, can be accessed by MPE-enabled synths as modulation sources.
Going even further, since MPE is ‘polyphonic’, these modulation sources are generated by – and applied to – each note separately. You can modulate different notes in a chord separately, creating much more interesting results on the fly.

Last year, Kilohearts’ Phase Plant received its version two update which – amongst many other things – added MPE functionality to the synth’s already very heady mix of features.
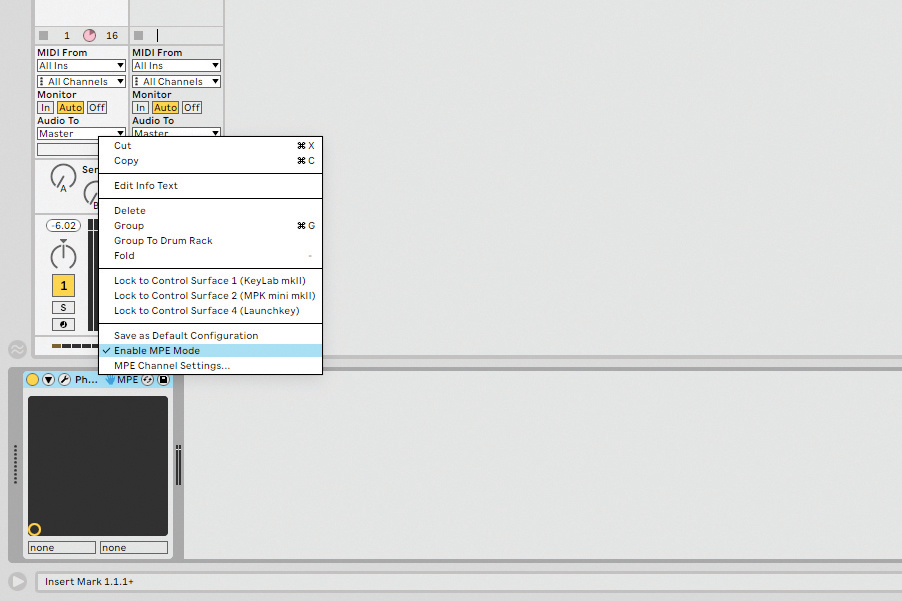
Here we have a MIDI chord loop with MPE data automation. In order for Phase Plant to be able to receive that data in Ableton Live, right-click on the plugin in the Device View and select Enable MPE Mode from the dropdown menu.
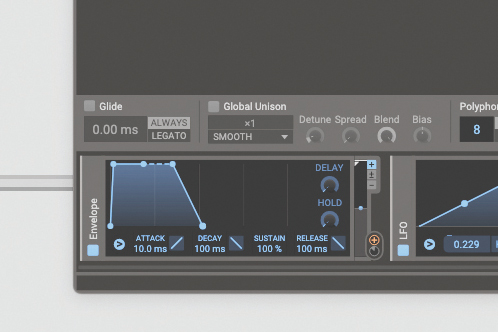
Next within Phase Plant, add Pressure and MPE Timbre modulation units. These will pick up the MPE data in the MIDI clip and can then be assigned to modulate any parameter within Phase Plant.
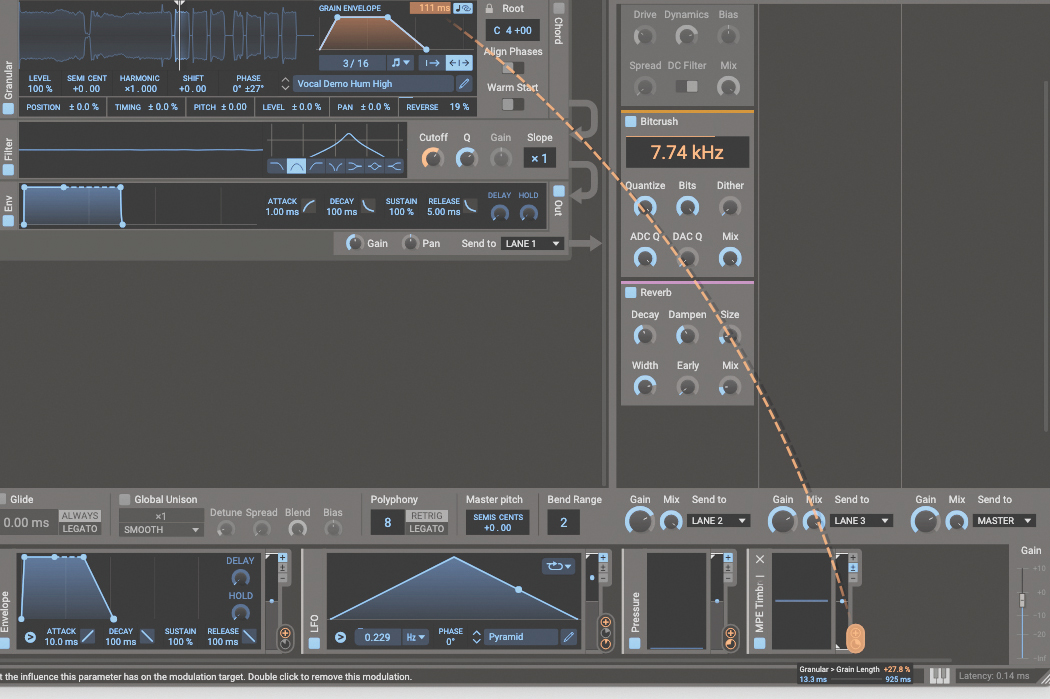
We’ll assign Pressure to the filter cutoff on the oscillator, and MPE Timbre to the Grain Length of the granular oscillator. Our chord loop now has a lot more interesting rhythm, variation and texture going on throughout the clip.
Hooking up MPE in Arturia Pigments

Once again, to use MPE with Arturia Pigments 4 in Ableton Live, right-click on the Pigments device (in Device View) and select Enable MIDI Mode. This will work differently in all DAWs.
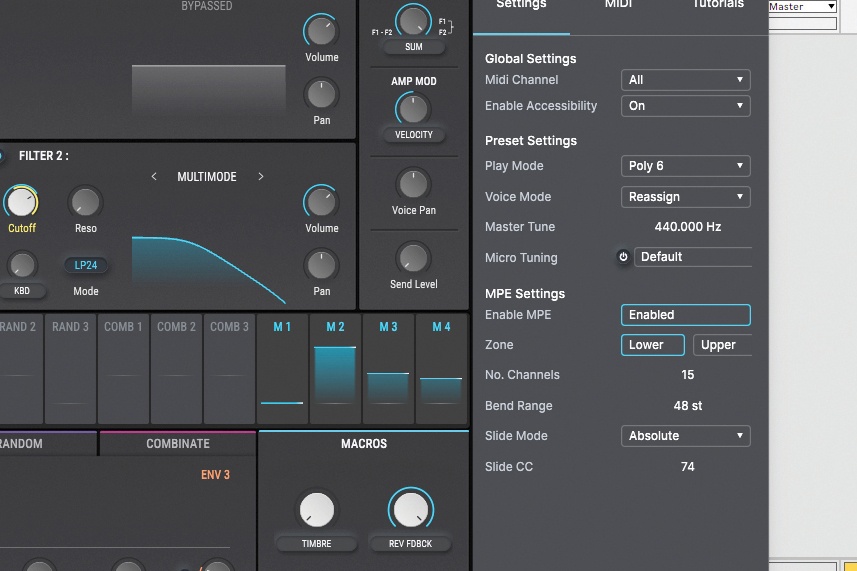
Next, enable MPE within Pigments. To do this, click the cog icon in the top right-hand corner of the synth and then click the button next to ‘Enable MPE’.
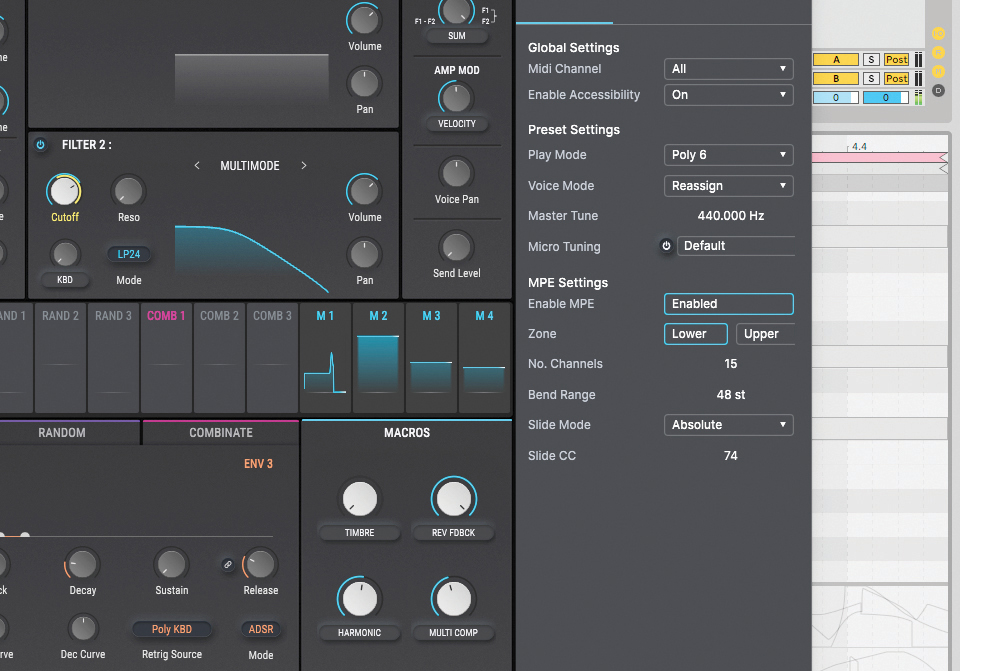
The MPE slide data will now be mirrored in the modulation source M1. You can assign this modulation source to any parameter within Pigments which you would normally be able to modulate with an LFO or envelope.
What's next for sampling?
Sampling was one of those key technologies in the history of music. So much became possible when instruments like the Fairlight CMI, the Akai MPC and the E-mu SP-1200 were unleashed on the world, leaving new genres in their wake; many that are still around today.
Like any technology, sampling improved in its early years – there was a huge amount of variation even between those early instruments we just mentioned – but as time moved on, developments in samplers were often parallel with the same developments in other instruments.
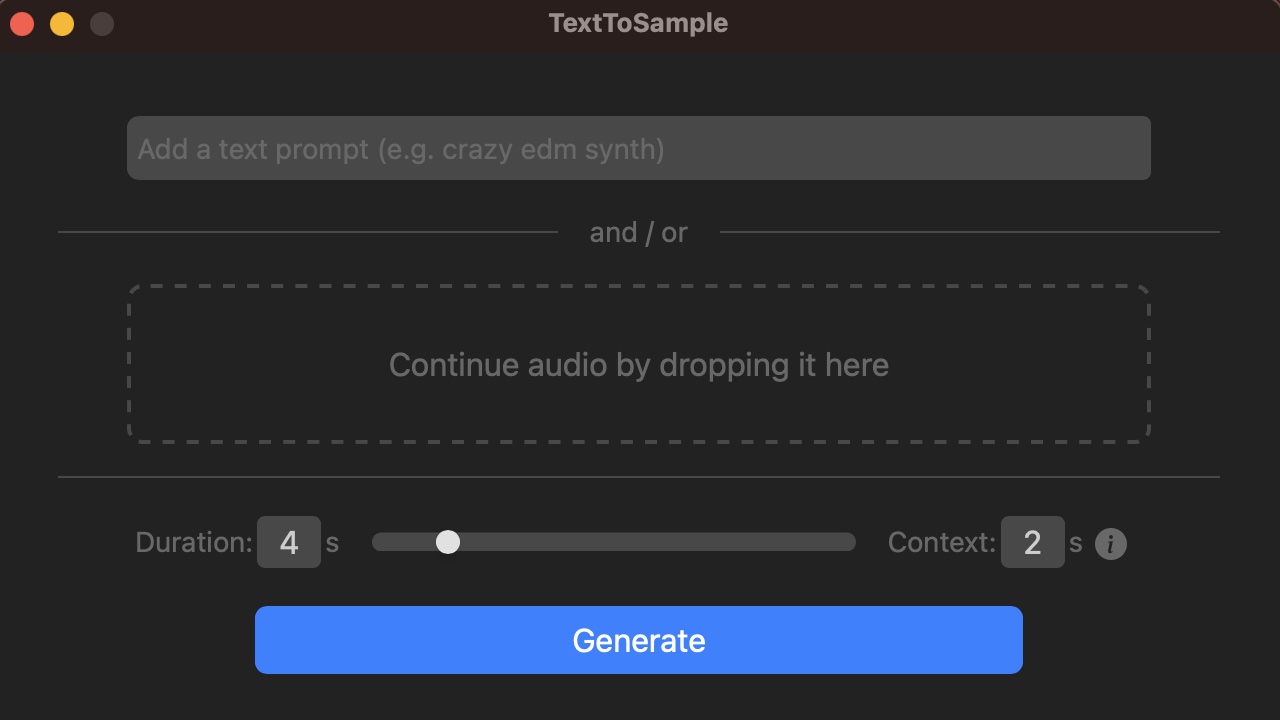
TextToSample is a free VST3 plugin that puts an AI-powered sample generator inside your DAW
Plugin samplers like Kontakt moved sampling forward with the possiblities of software, but perhaps what they changed most was the distribution model. People could work on their tracks on the computer, and keep their cherished collection of samples there too. At the same time, third-party creators of sample packs and instruments gained a new way to make a living, selling their creations around the world to anyone who had the same software they’d used to build it.
Today, the internet and cloud storage let us grab samples even more quickly and easily, and for Plugin Alliance’s new Mega Sampler instrument, browsing for new musical fodder doesn’t even mean you have to leave your DAW!
With this instrument – free to anyone with a Plugin Alliance subscription – you can access a huge range of samples right inside the plugin, and only download those that you actually want to use.
And of course, there are the sampler functions you’d expect from today’s software samplers: playback controls and looping options; filters, envelopes and LFOs; tuning, stereo modification, and even a suite of effects thanks to Plugin Alliance’s hard-earned DSP heritage.
Let’s take a closer look at how you can use Mega Sampler to browse for samples, load them up, and start processing them in ways that would make an early-’80s music producer drop to their knees and weep.
Keeping it in your DAW with Mega Sampler
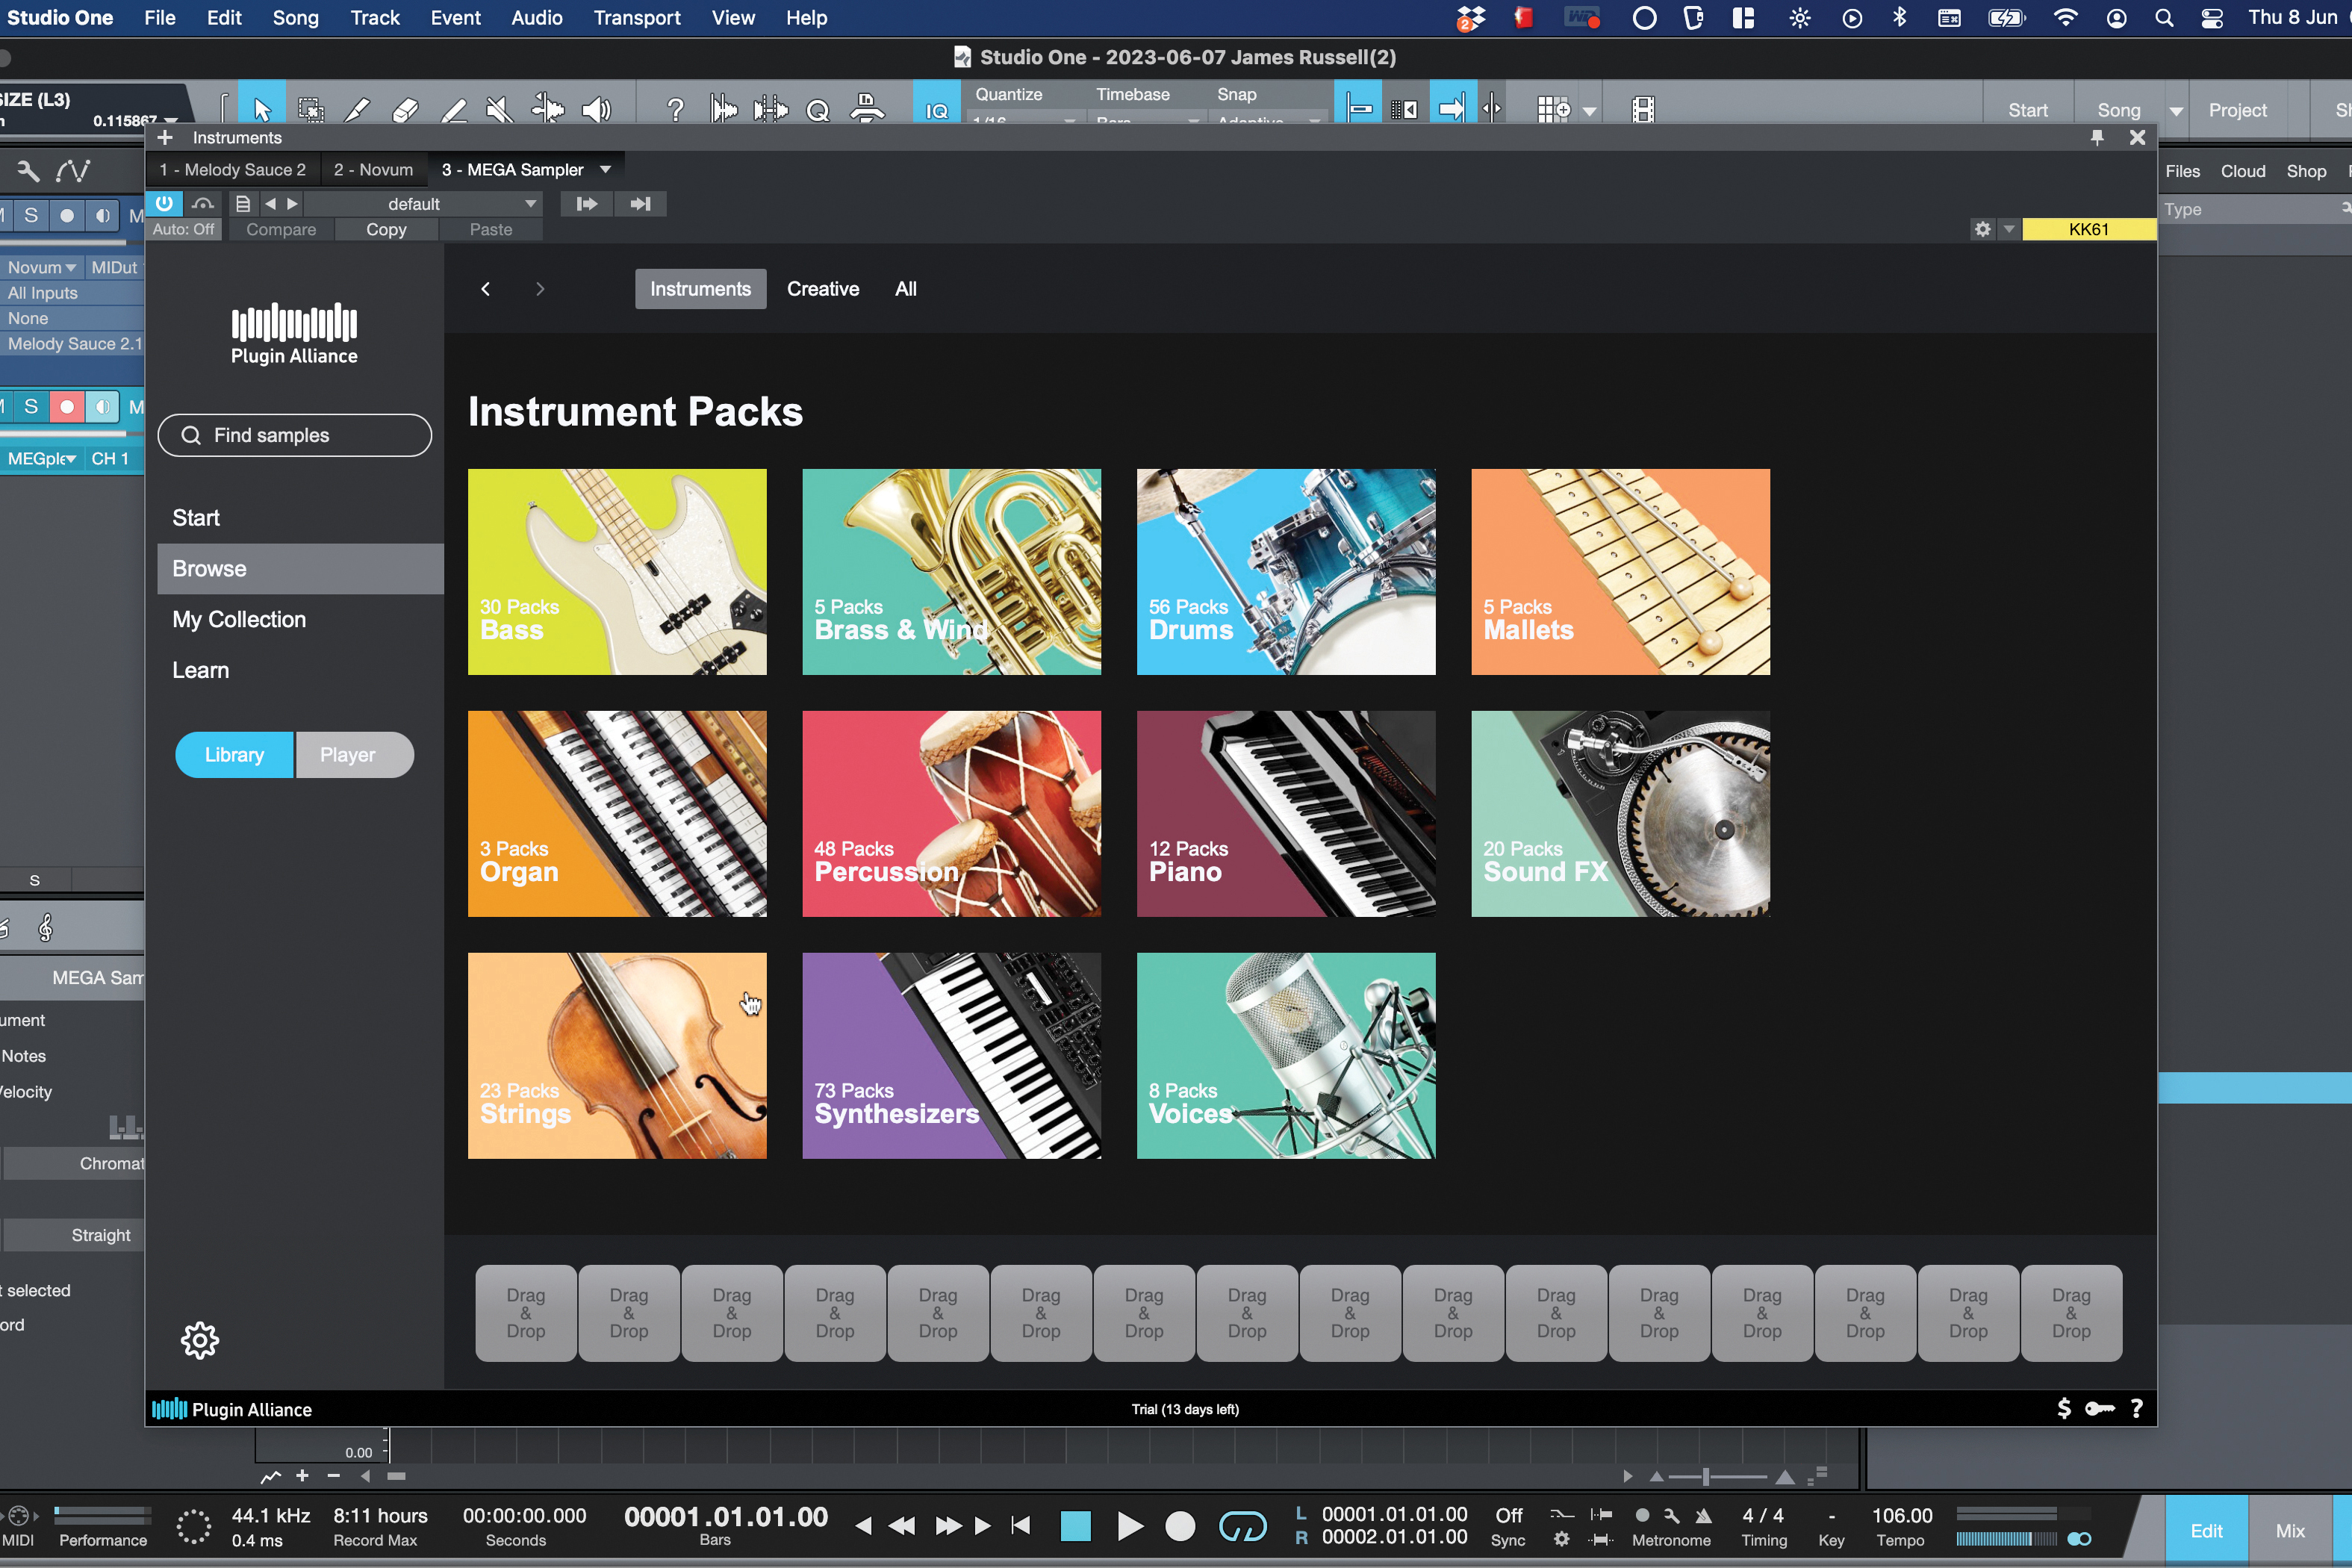
Mega Sampler doesn’t need you to deal with your OS file explorer; instead, samples can be browsed, downloaded and loaded into one of 16 slots, right from within the plugin. There are Instrument packs to give you more acoustic sounds…
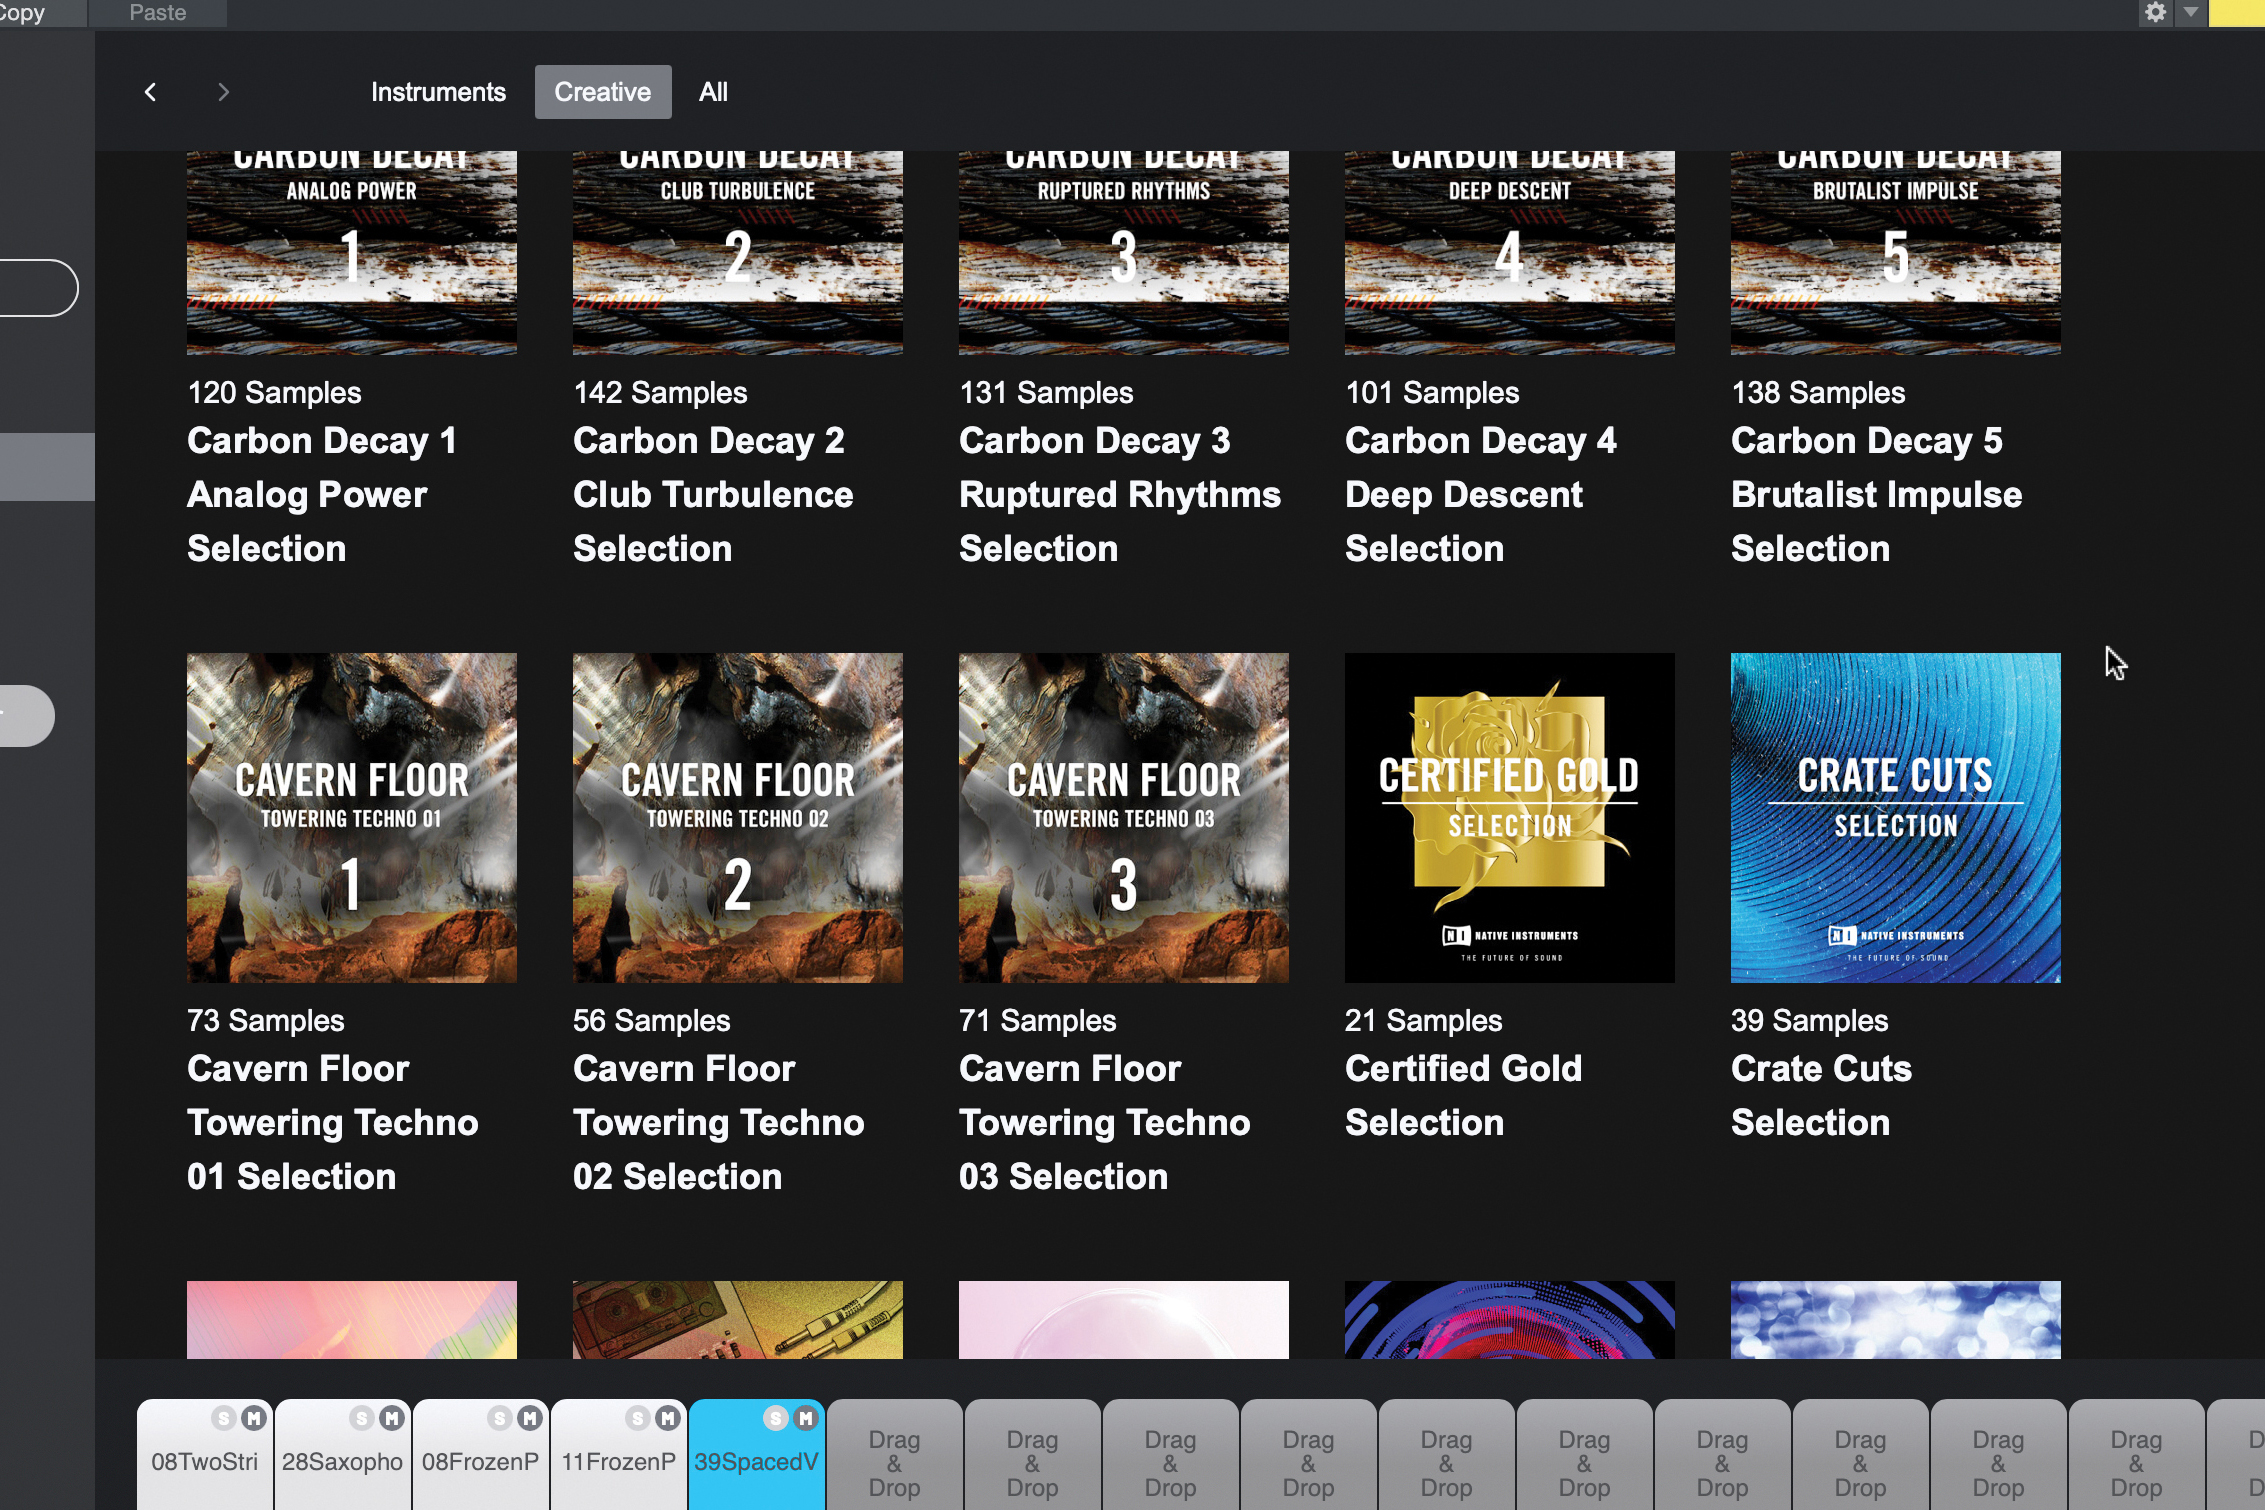
…and there are Creative sounds that offer more electronic-focused and less acoustic ideas. These are sourced from Native Instruments Expansions, thanks to NI and PA’s grouping as part of Soundwide.

Auditioning samples happens right from the plugin, not in your web browser. You can play any sample back here to audition it, download it to make it yours, then drag it onto one of the 16 slots to get started.
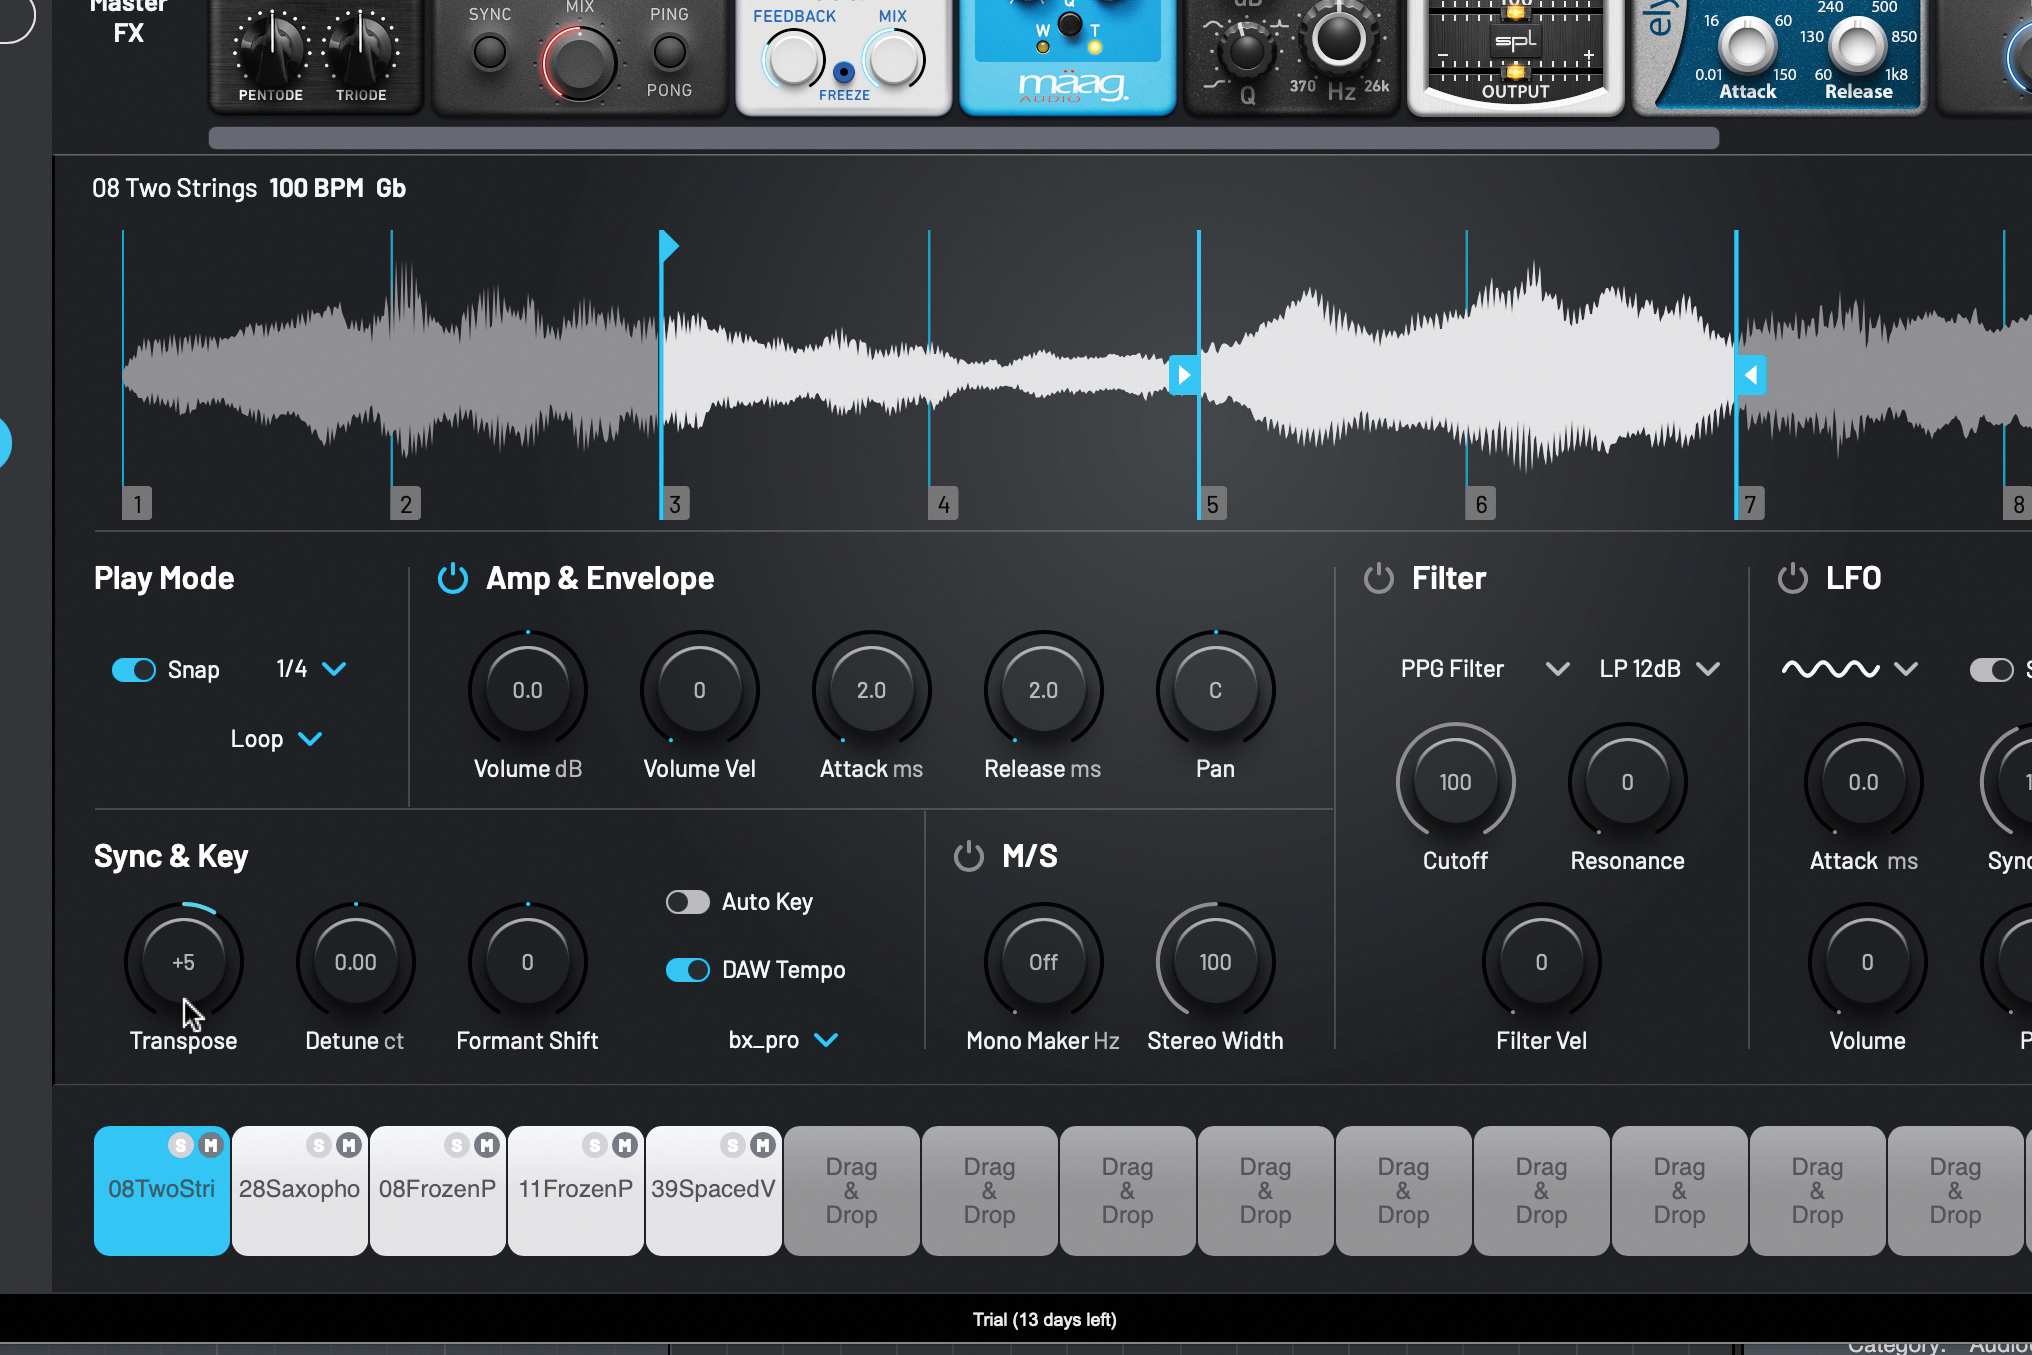
Your samples can now be played with MIDI, through your controller or your piano roll. Let’s start by setting the sample start point and the two loop points, and changing the tuning of the sample with the Transpose control.
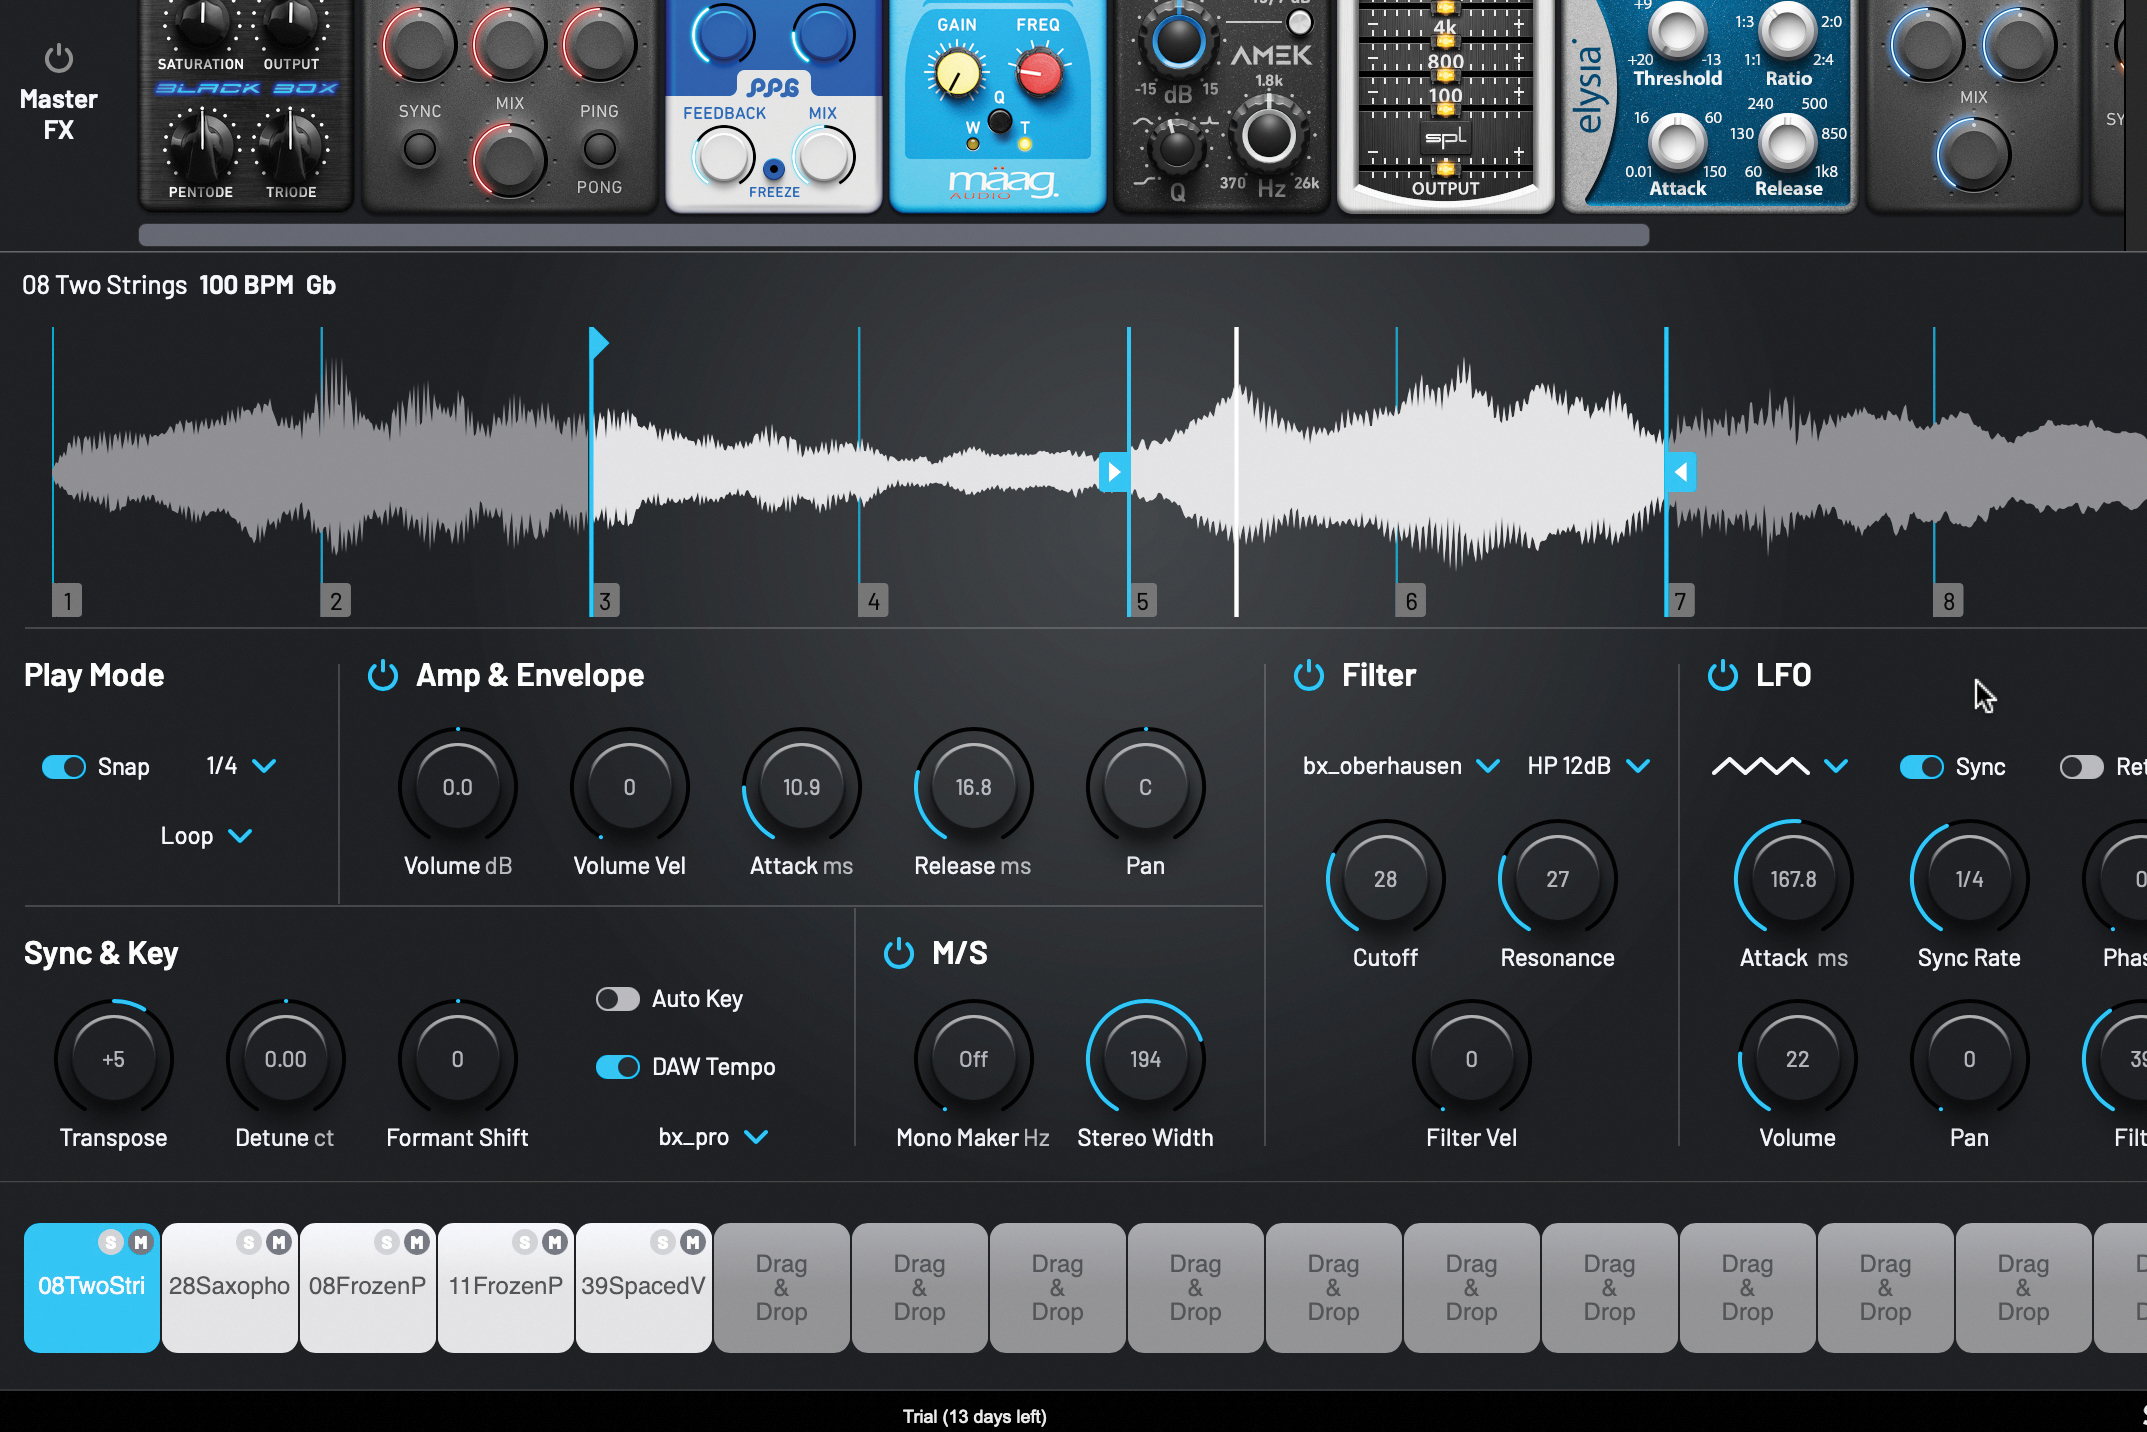
There are LFOs, envelope controls and a filter with three very juicy models to choose from. That LFO gives you an Attack time to get its signal to kick in after notes start. Elsewhere, there’s a Stereo Width enhancer, plus a mono-iser.
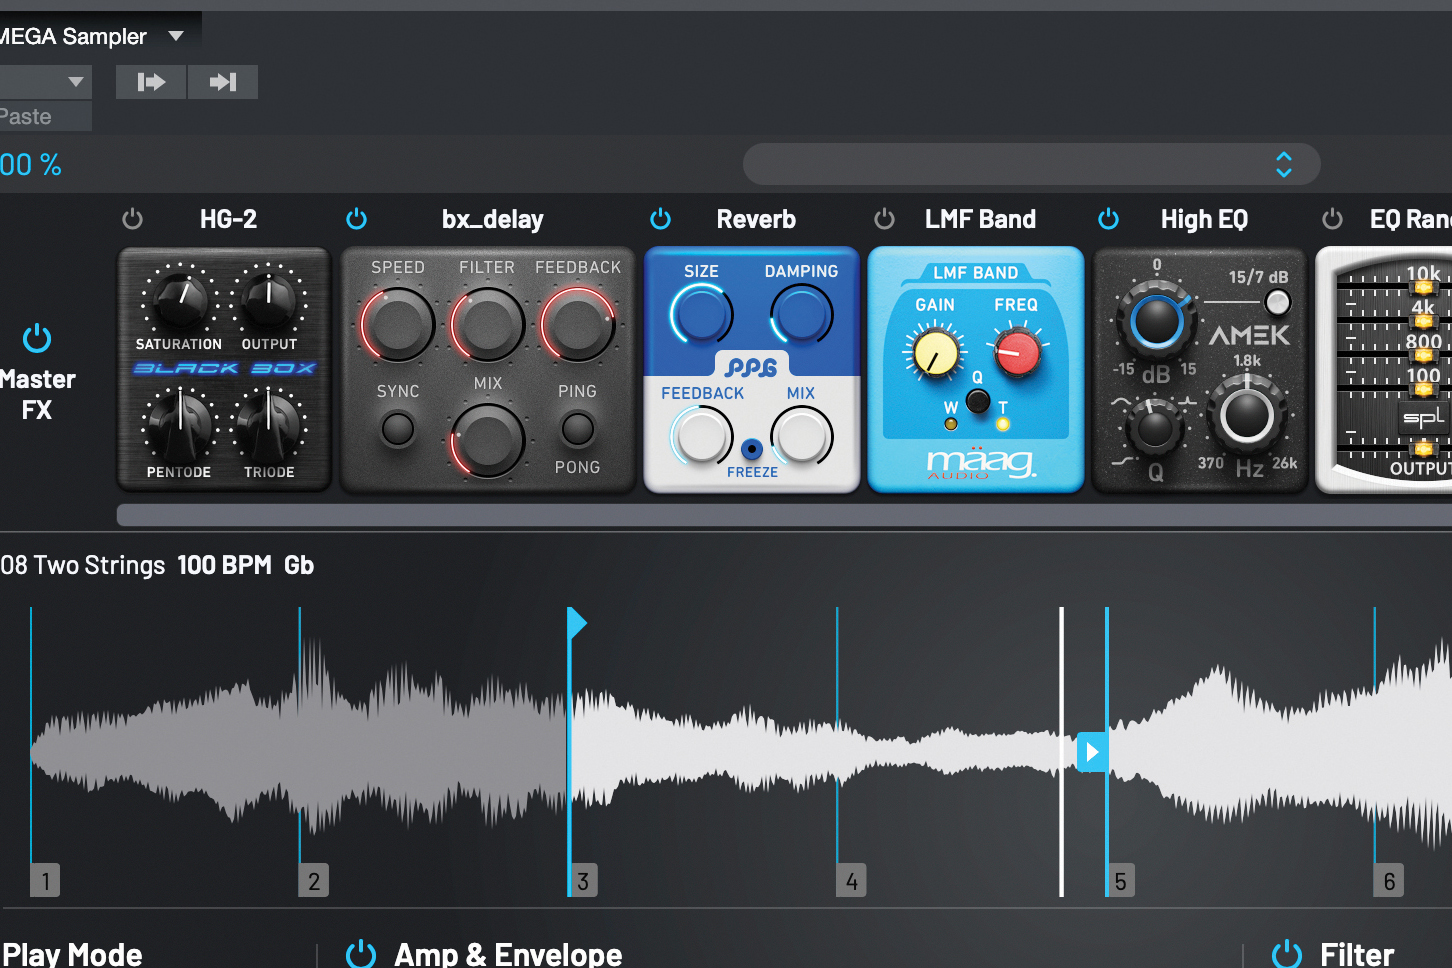
To get even more creative, the top row of the instrument gives you a strip of PA effects to round out the sound and add finishing touches. These are applied globally and include delay, reverb, EQ, compression, modulation and distortion.
Granular synthesis with Dawesome Novum
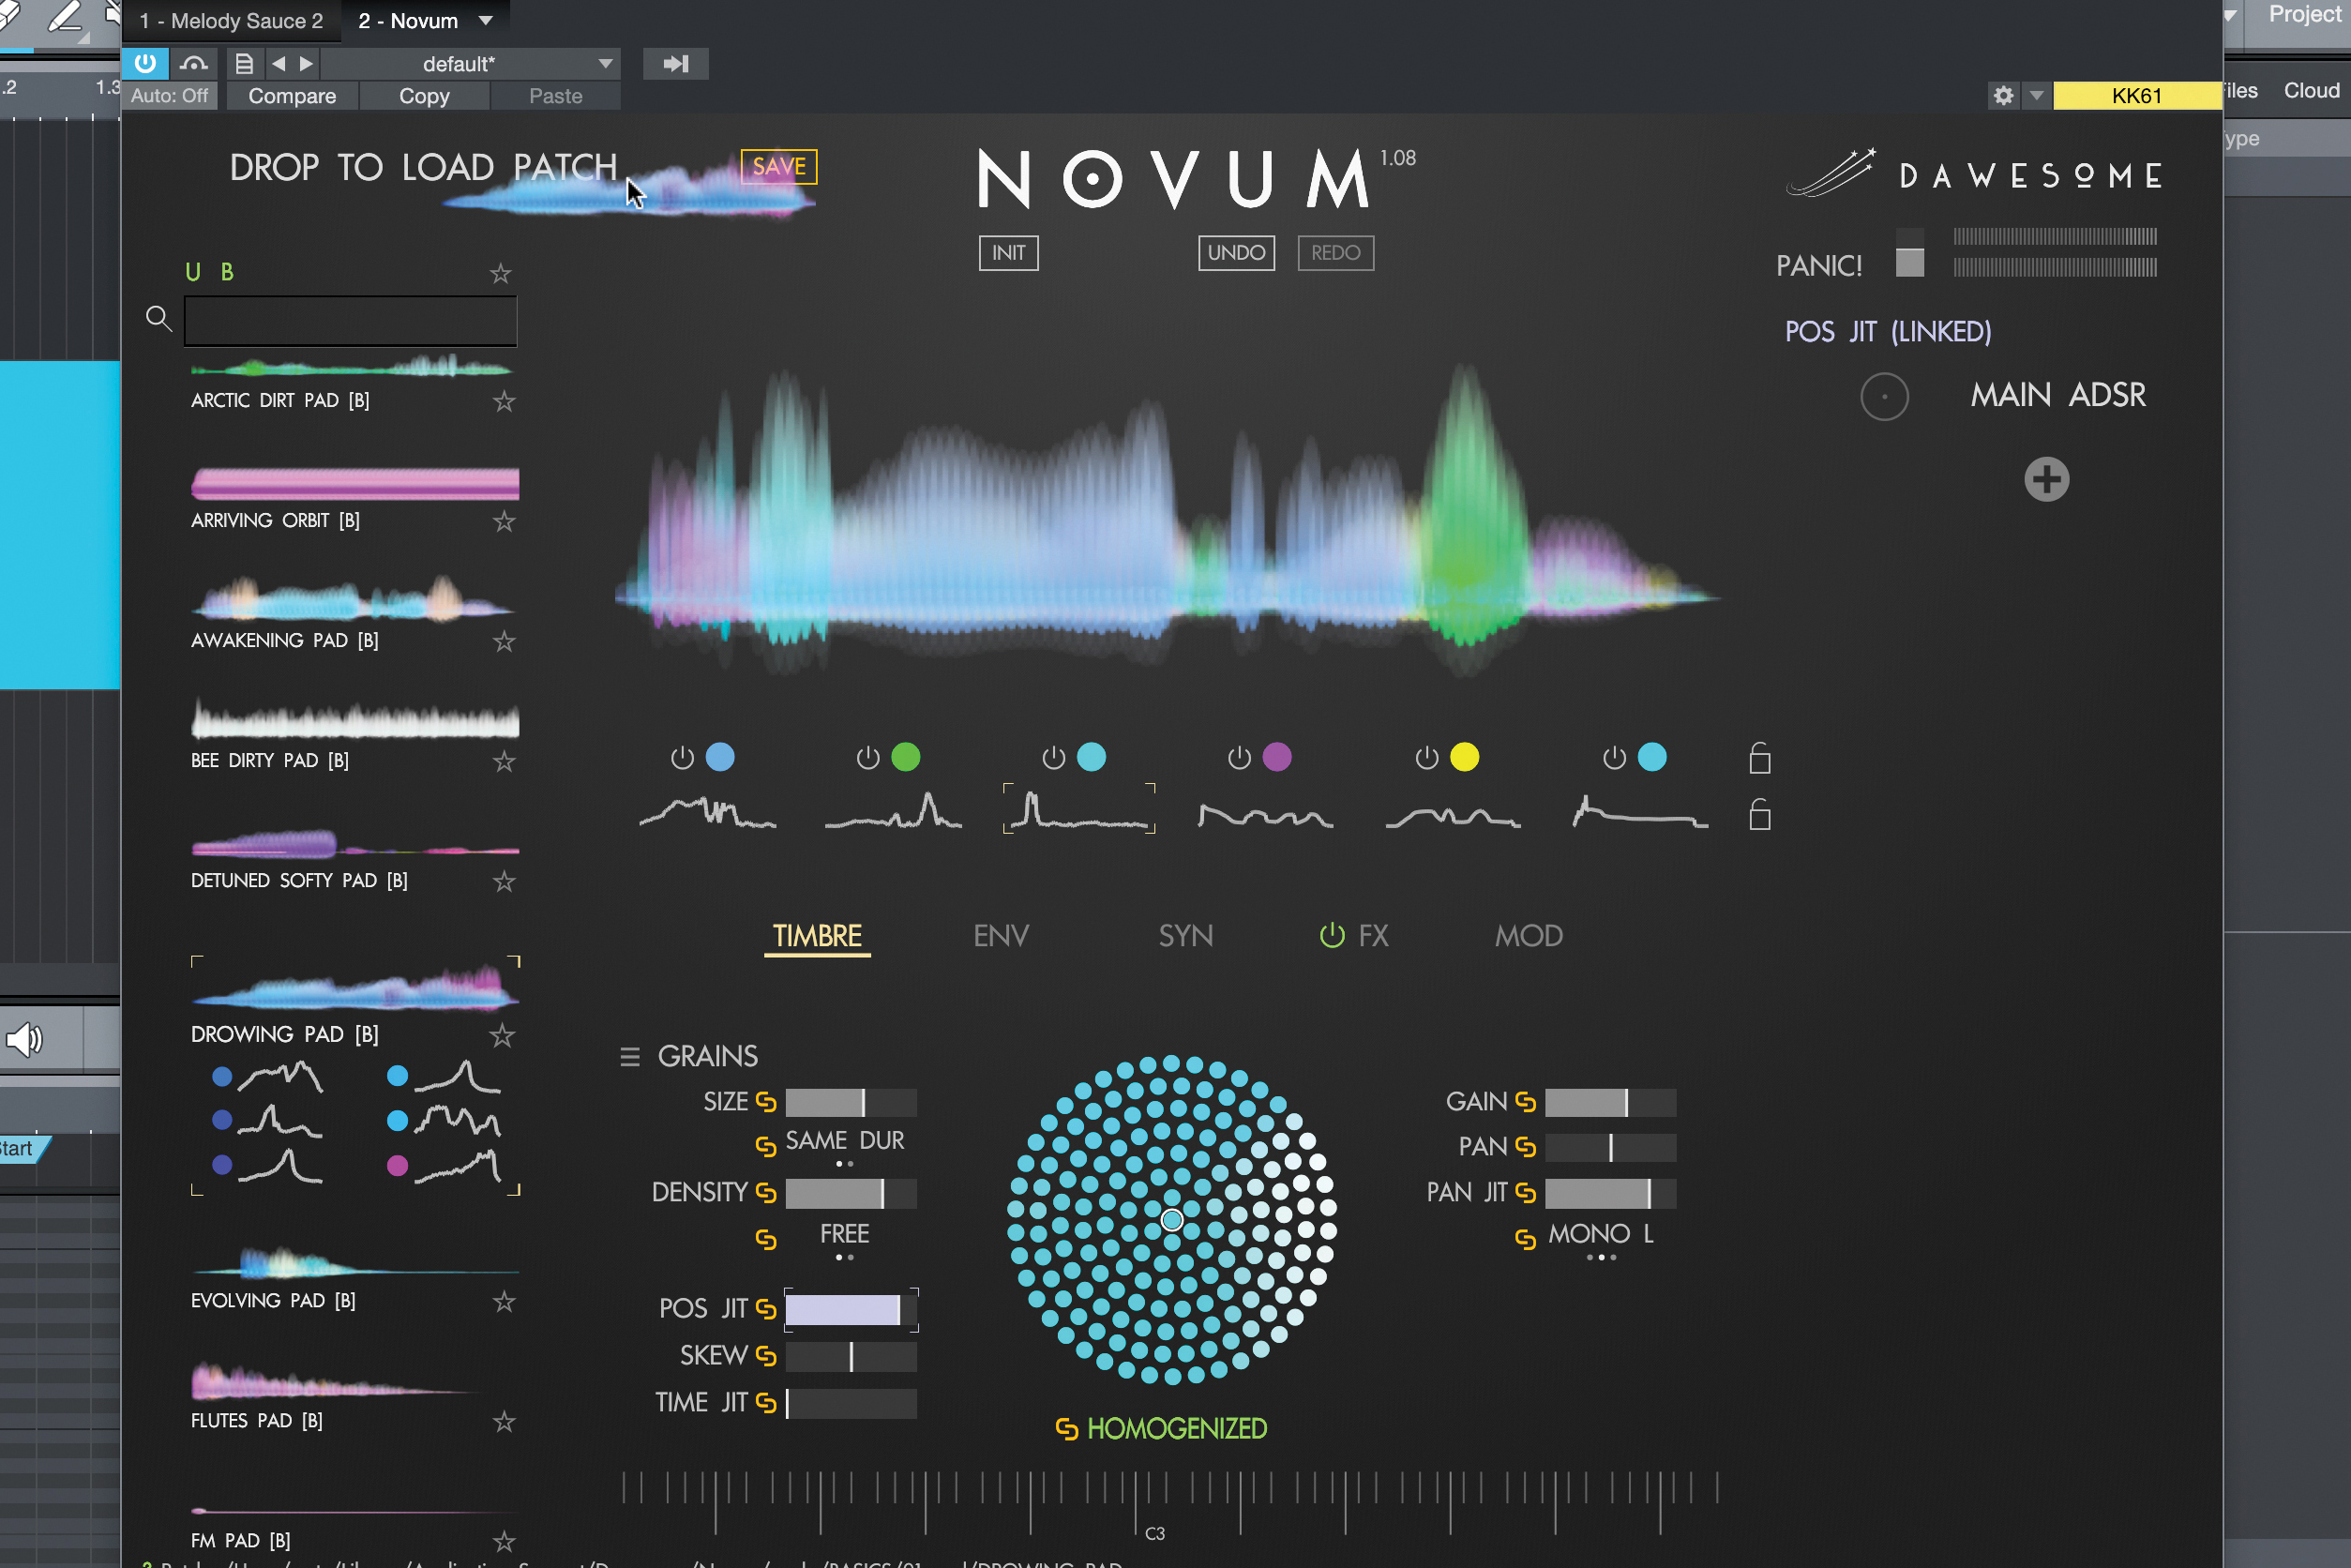
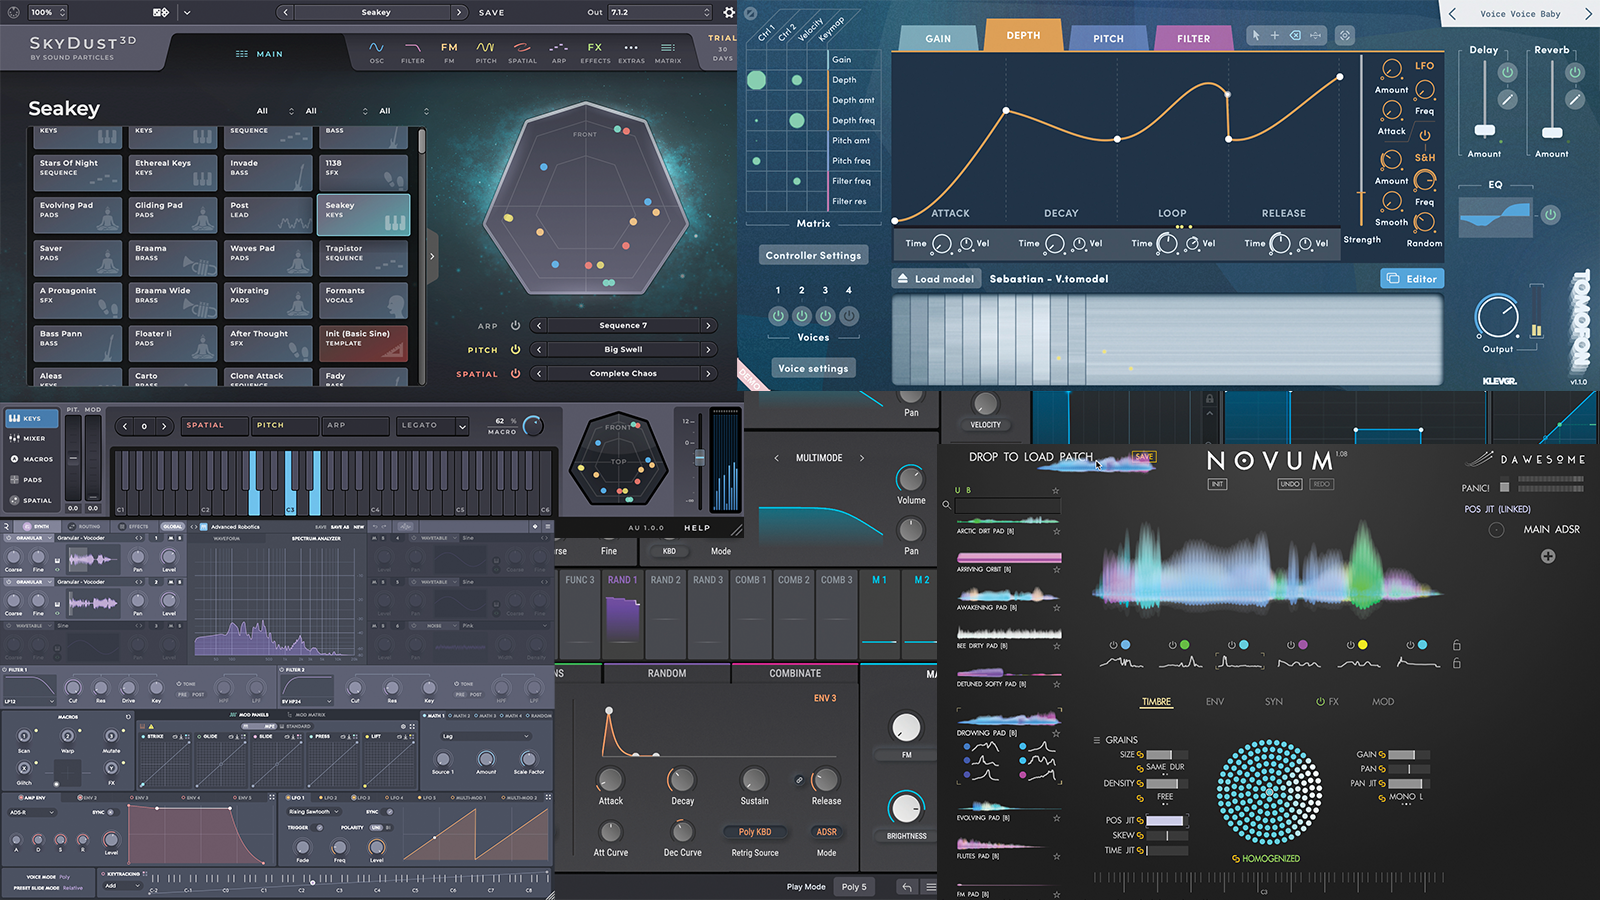
Granular synthesis has been in vogue for a while now, but one modern application of the technology goes further to use the granular advantage in creative ways. You can get started with Dawesome’s Novum by dragging one of its patches to the top-left area to load it.
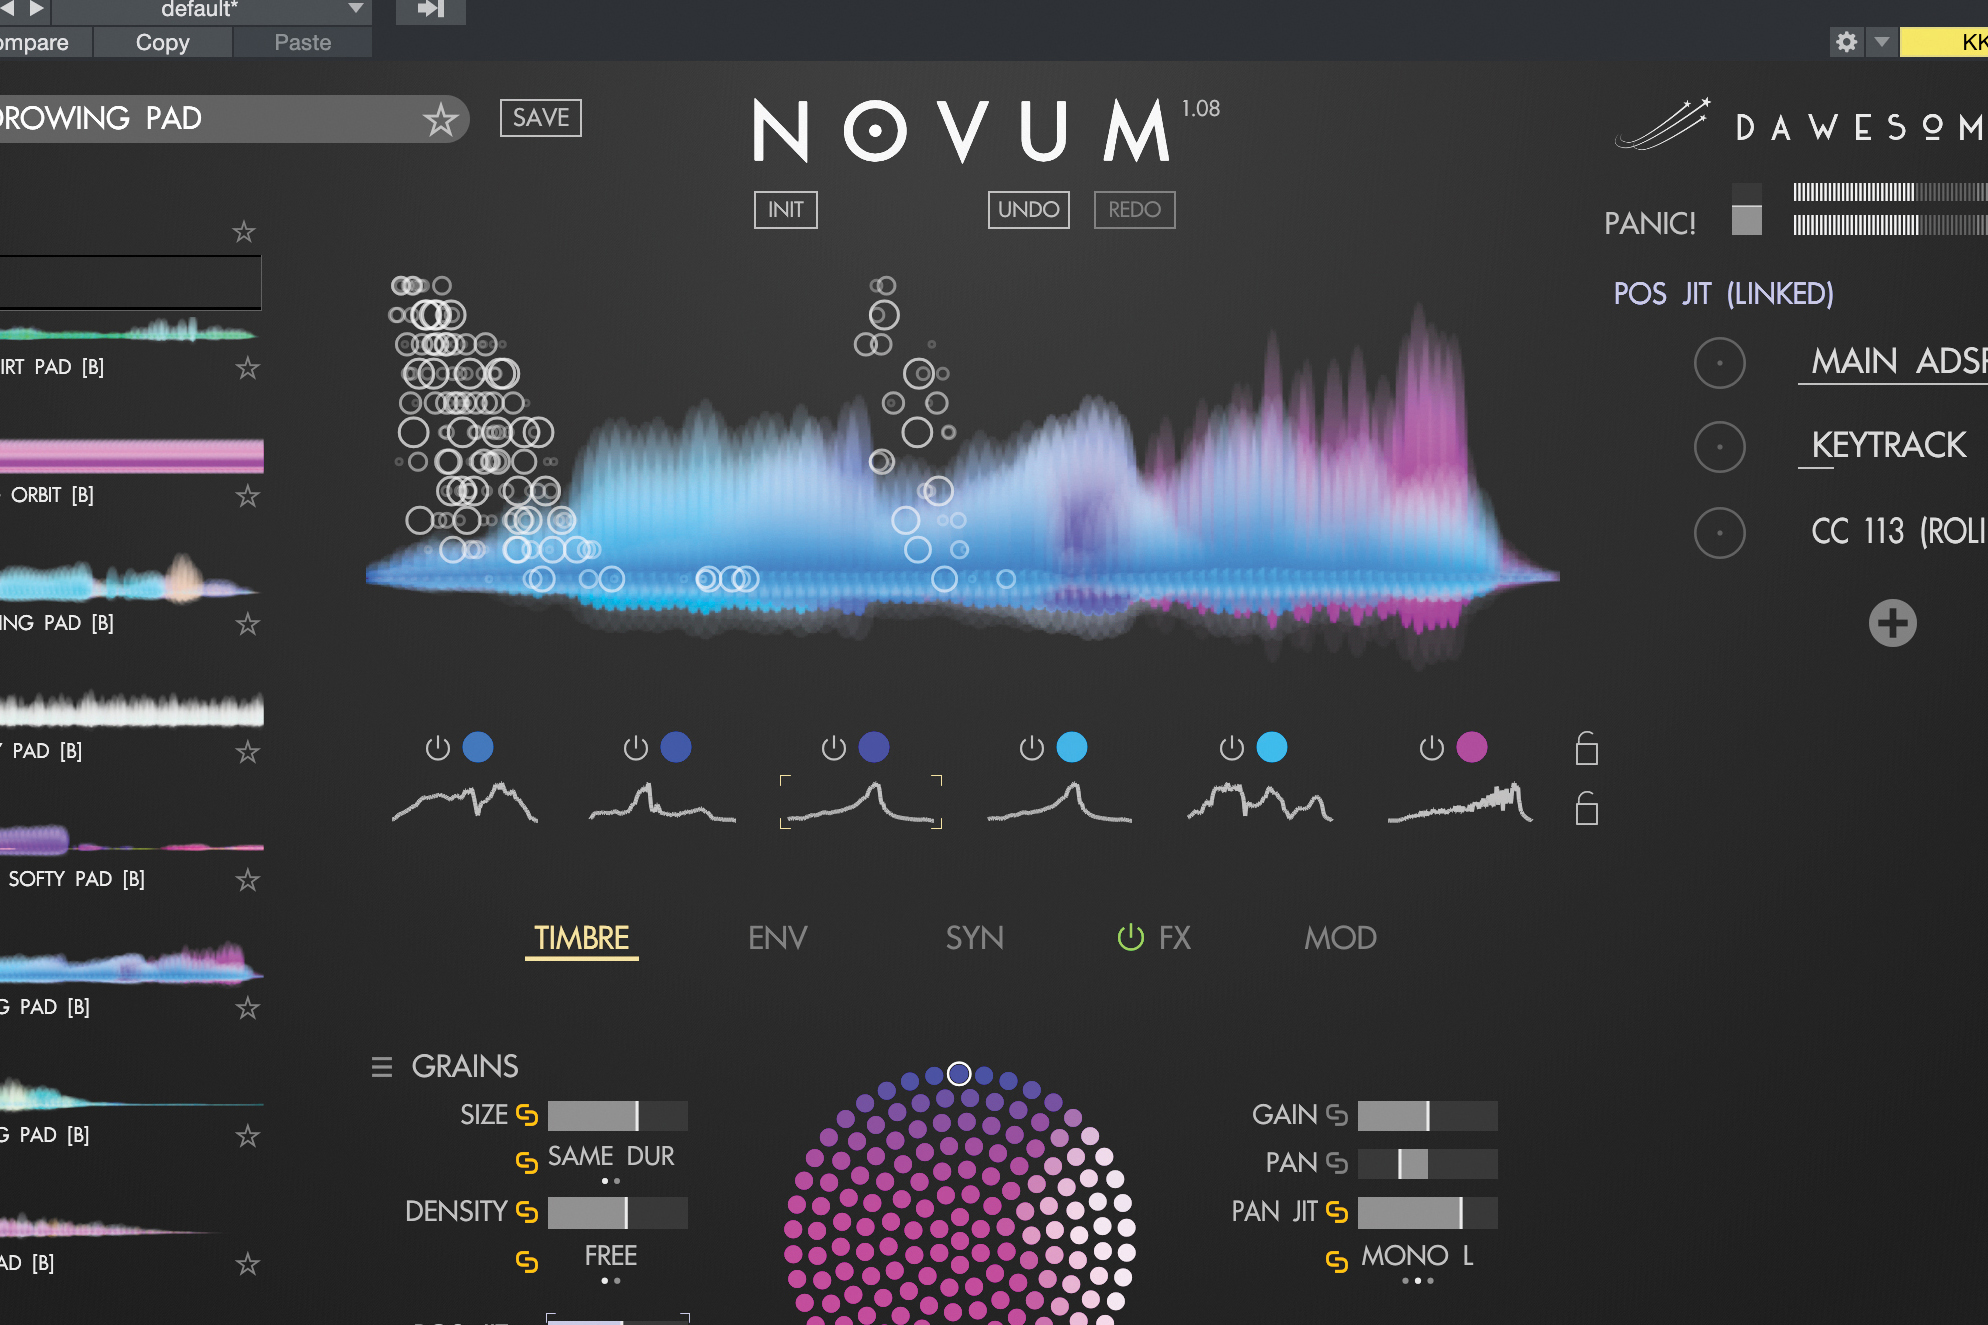
The instrument is highly MPE-compatible. Once you start playing something, you’ll see the grains (representing many voices) move across the waveform, representing their playback. They start somewhere then loop when held, and you can change the exact behaviour in the Timbre tab.
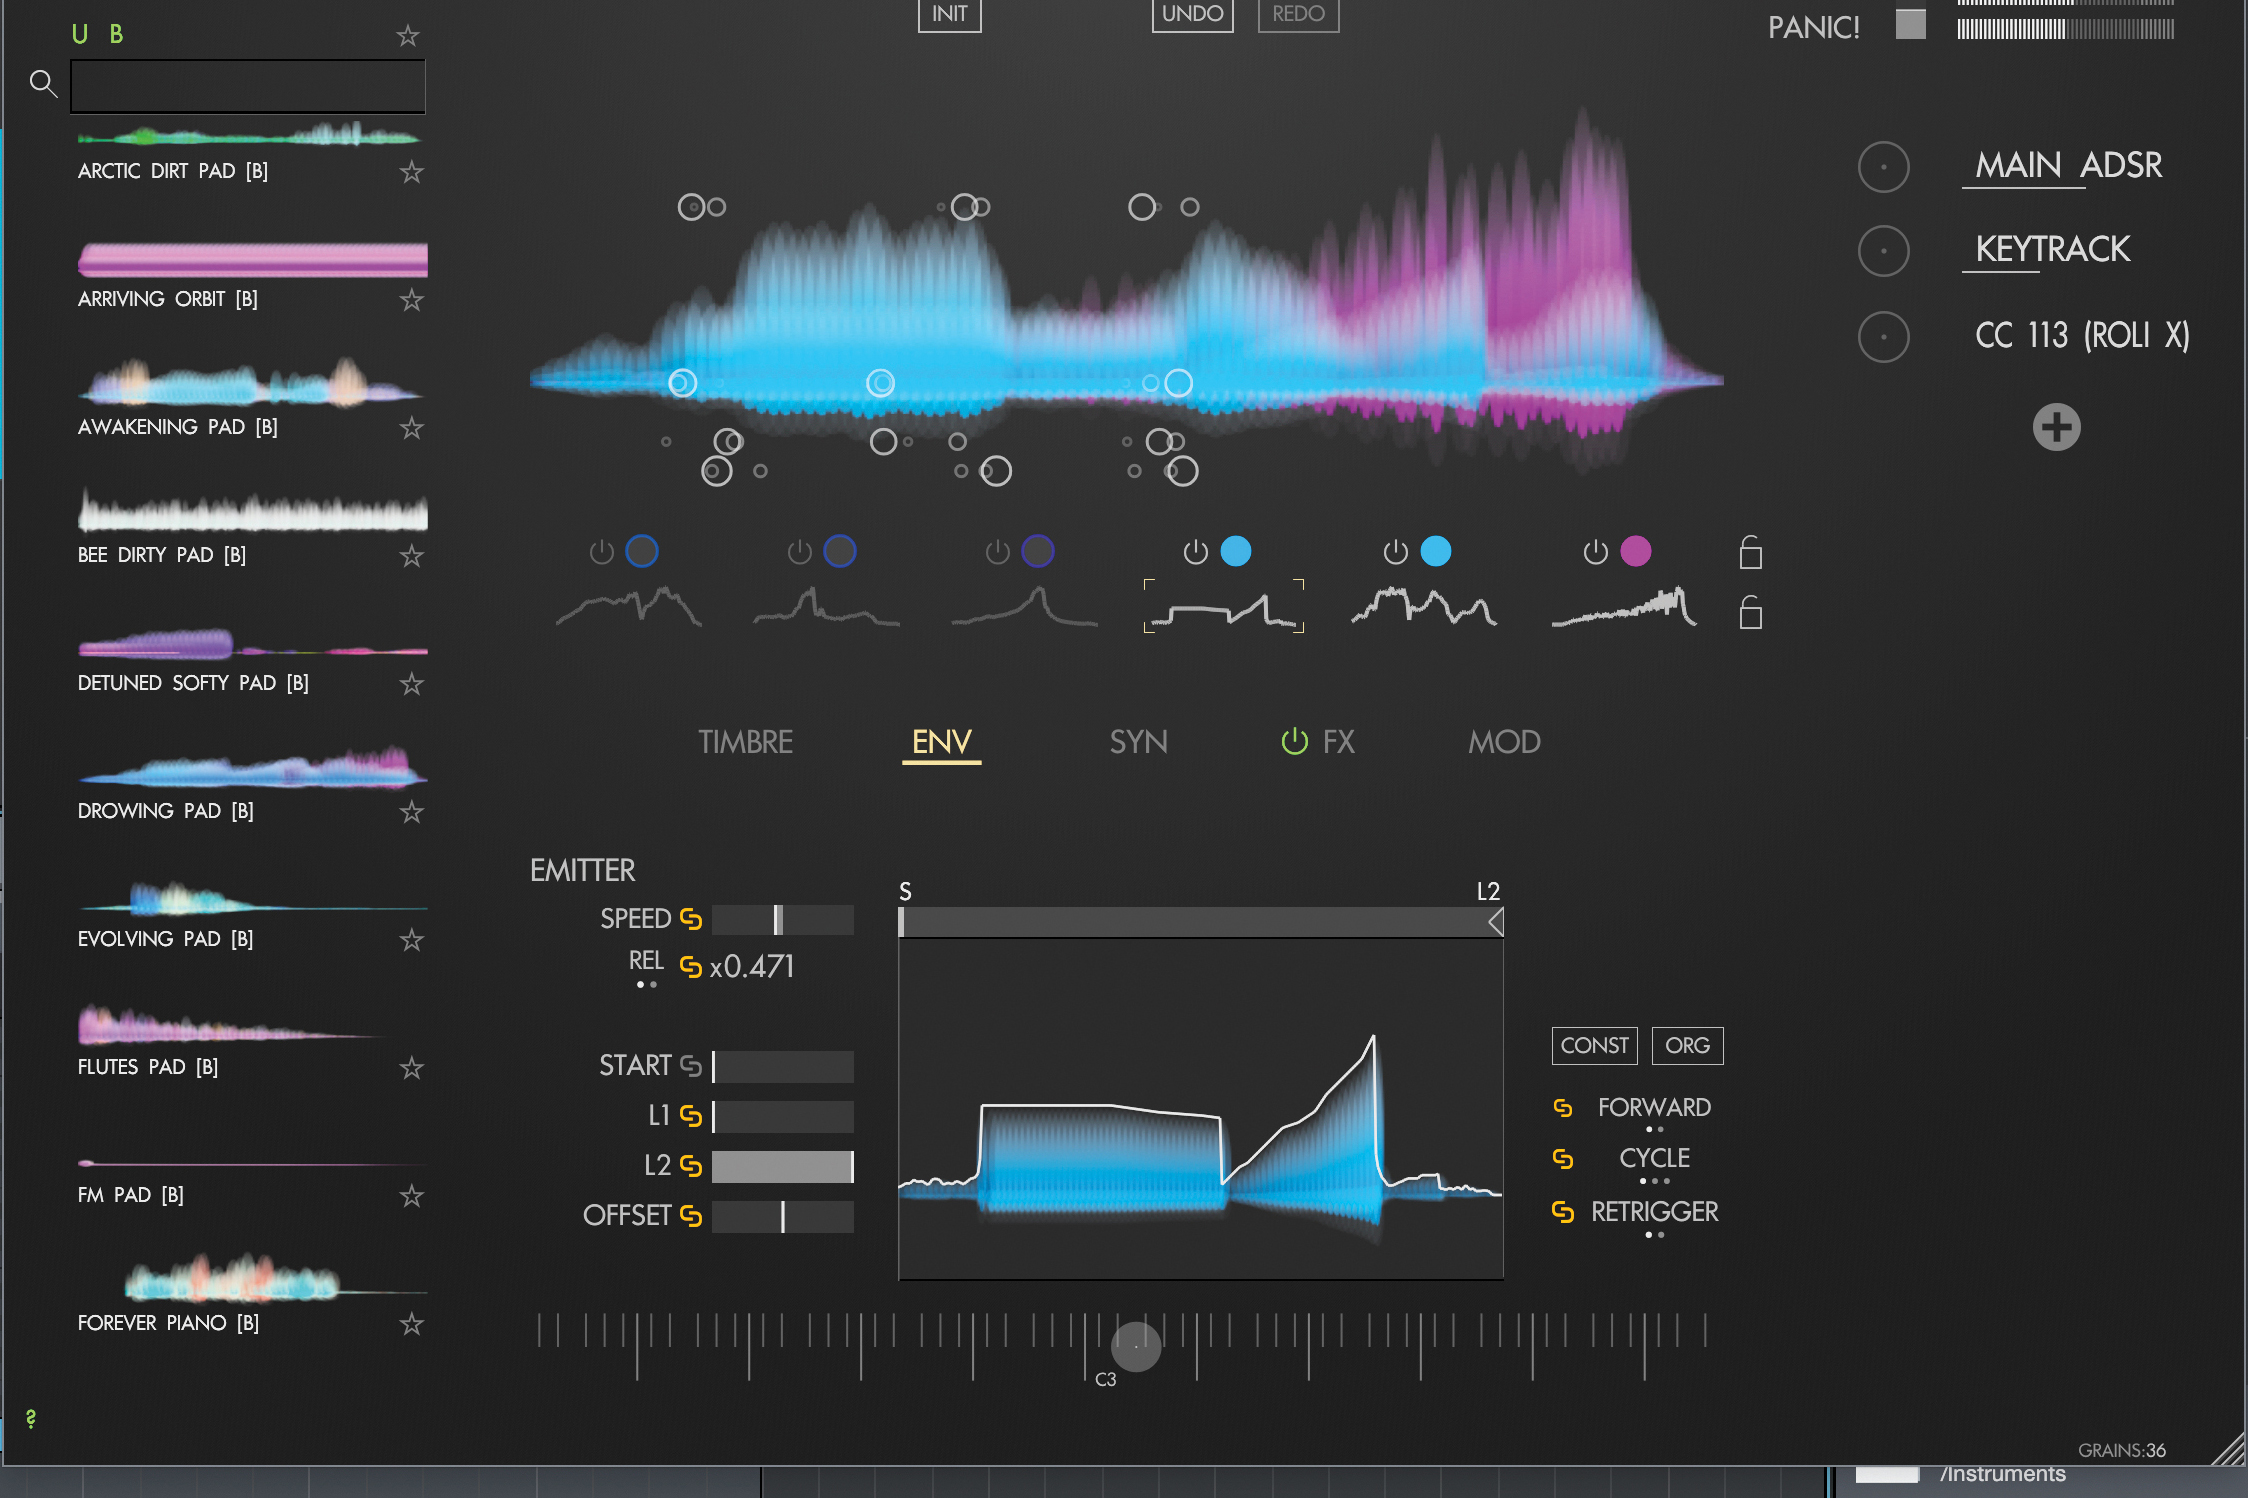
But Novum is doing things on a deeper level here. As a sound is loaded, it’s deconstructed into six layers, represented by waveform colours. These layers can be switched on and off, and each has its own envelope that can be altered and redrawn in the Env tab.

In a very cool twist, you can take one of the other presets from the browser, and drag it onto the layers, or the envelopes, or both. This can replace a single element of the previous sound, so we can imprint one timbre onto the envelope response of a completely different sound.
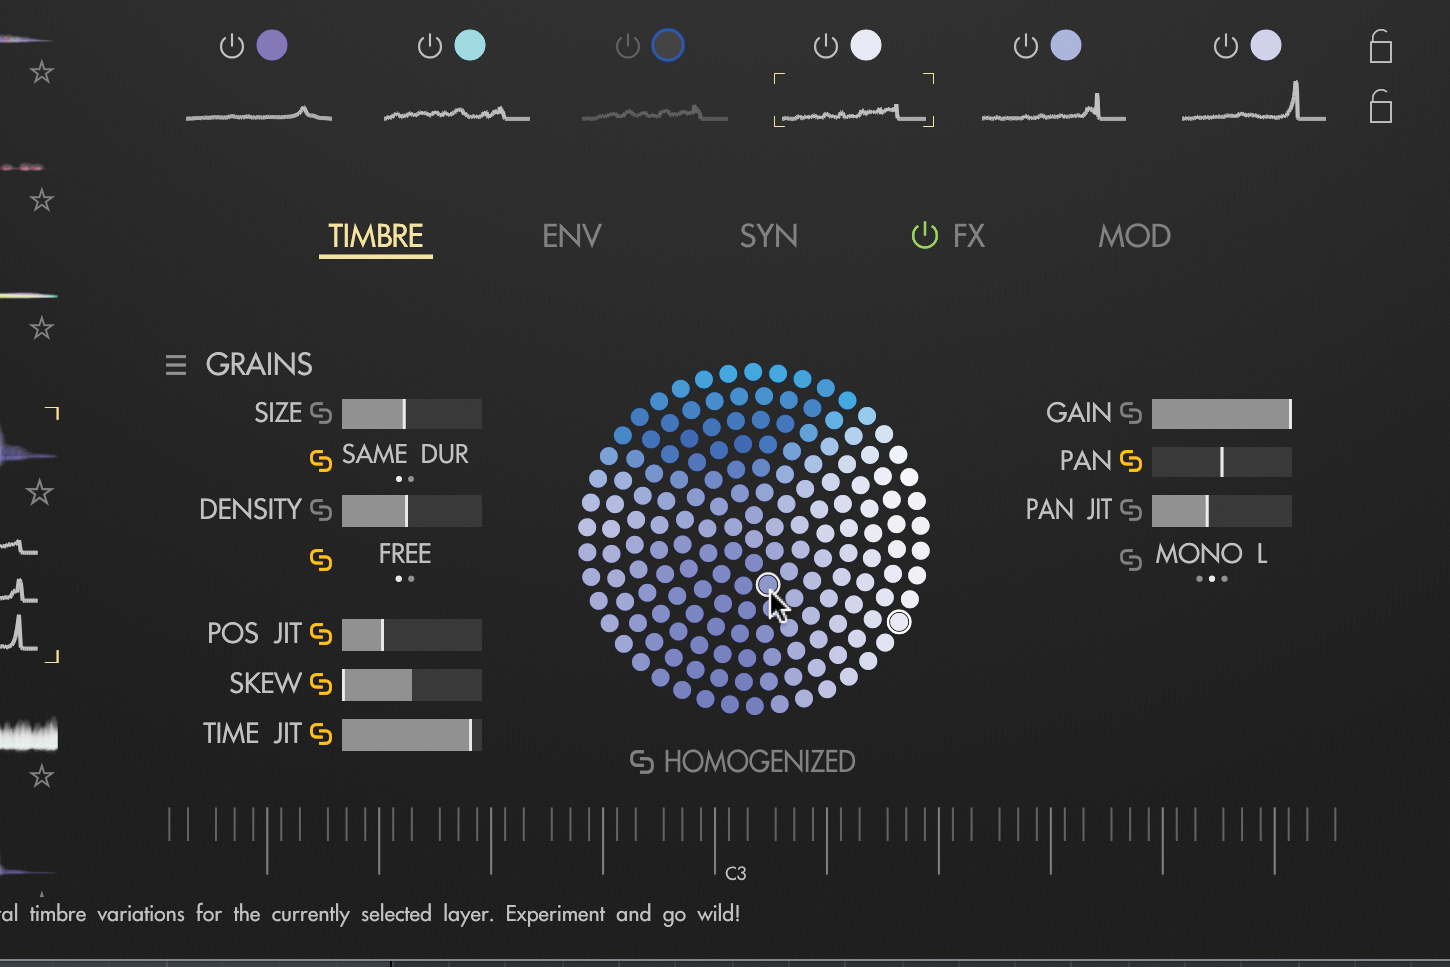
That’s the overview of Novum’s key features, but there’s more versatility to discover. The ‘Timbre flower’ lets you select variations of a layer’s deconstruction, and the granular controls let you thicken grains and customise their definitions, while their paths and playback can be tweaked in the Env tab.
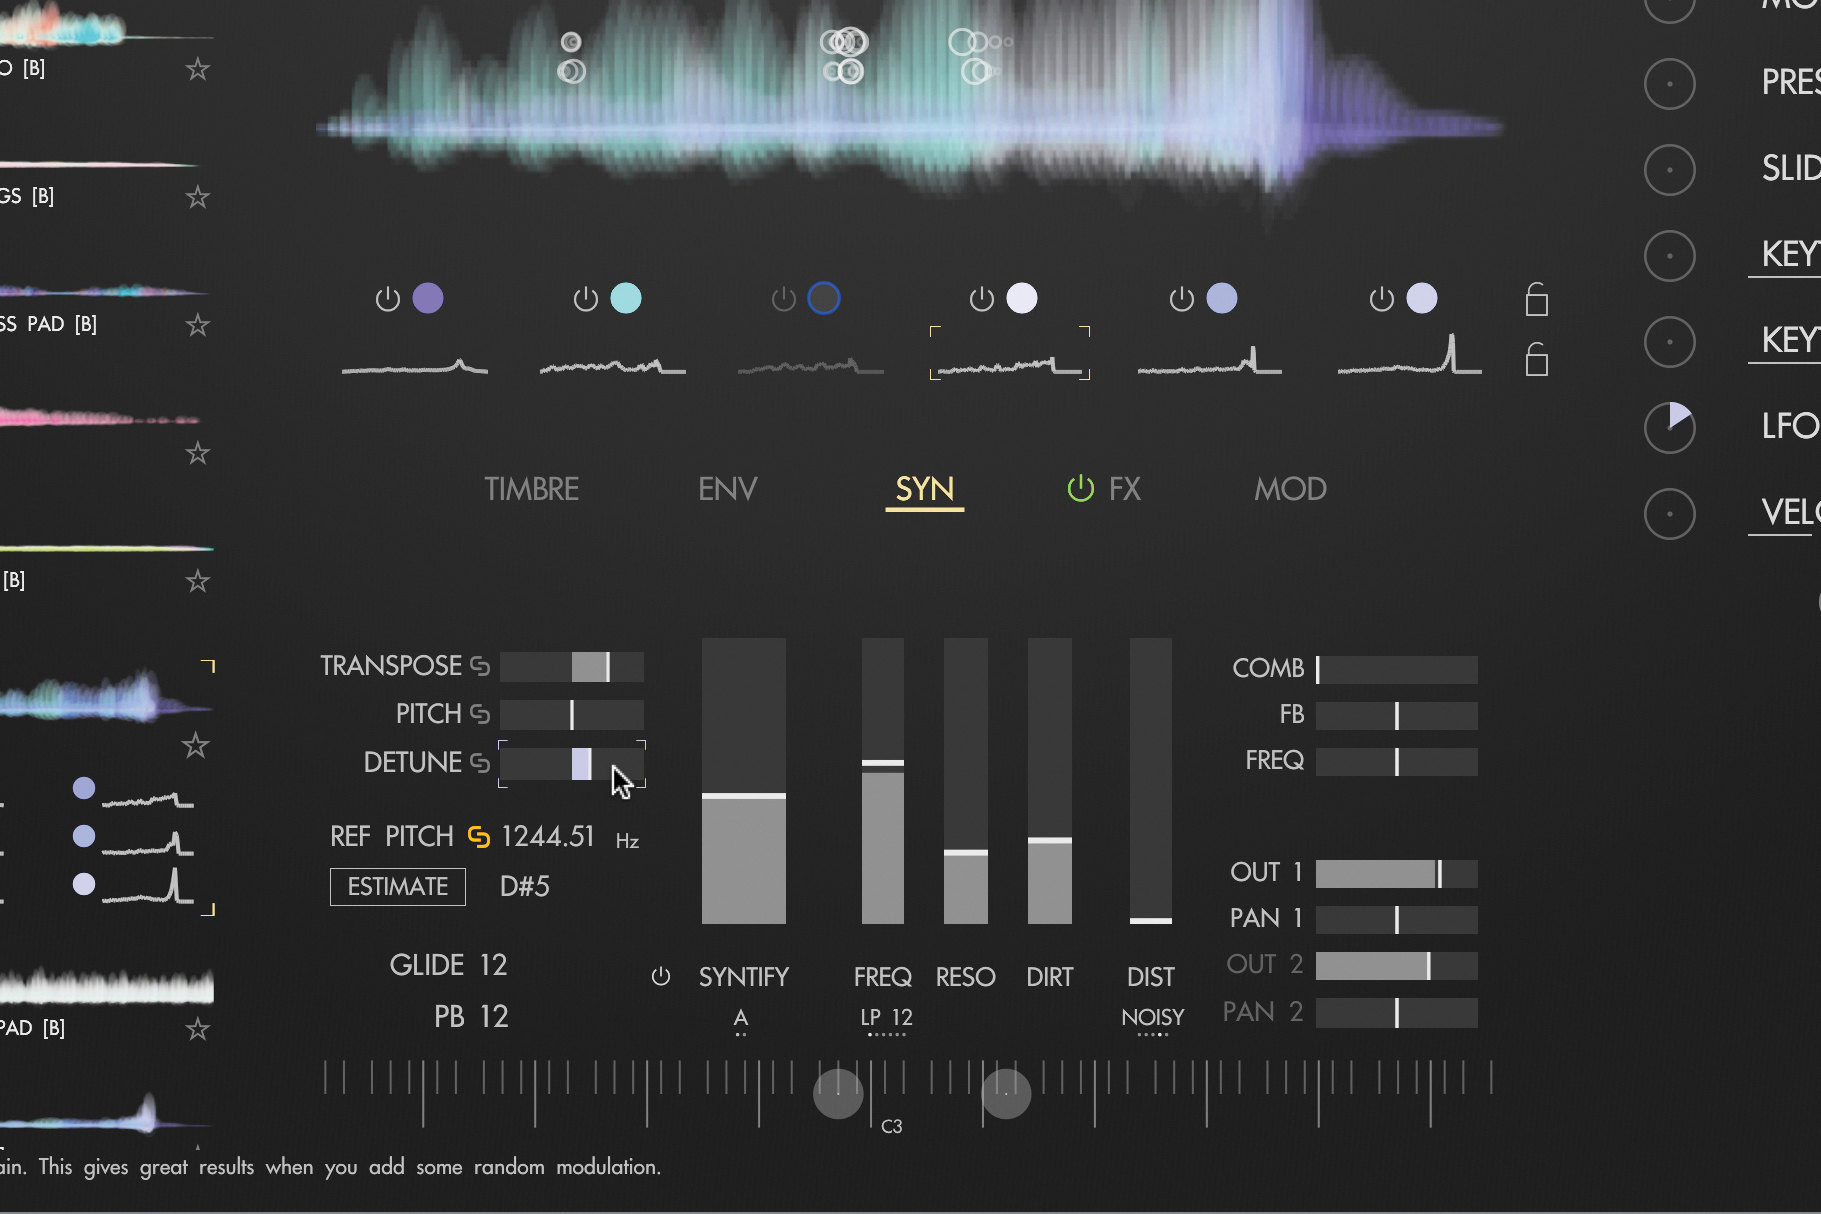
Over in the Syn tab, some controls bring us back to classic synthesis territory: there’s a filter with cutoff and resonance, and Dirt and Dist(ortion) controls help to drive things harder. The Syntify control is interesting, adding higher frequency information to the global sound.

Then there are six effects, which can be stacked into two busses. The effects can be repeated in the chain if you wish, and each provides four to six controls to customise the processing.

Modulation is also a big deal here; as you’d hope in any granular synthesis context. Select a parameter, and dial in a modulation strength from one of the modulation sources in the right-hand panel. There’s a bevvy of MPE sources, as well as the usual suspects.
Granular synths are great for modulation. Targets like grain size and density are obvious, but there’s also panning, position and more on offer. In combination with the Jitter controls in Novum, which vary those parameters already for a smoother sound, modulation can be applied in subtle or extreme ways, and can be sourced from almost anywhere.
Getting spatial with SkyDust 3D
Formats like Dolby Atmos and Apple Spatial Audio may be seeing some recent popularity, but most synths are still resolutely stereo. If these 3D playback formats take off among consumers, will we start to see our plugin synths rise to meet the challenge?
One synth that has arrived there first is SkyDust, a recently released plugin from Sound Particles. With two versions – SkyDust Stereo and SkyDust 3D – you can choose to take the whole spatial hog, although you may find that it will cost more.
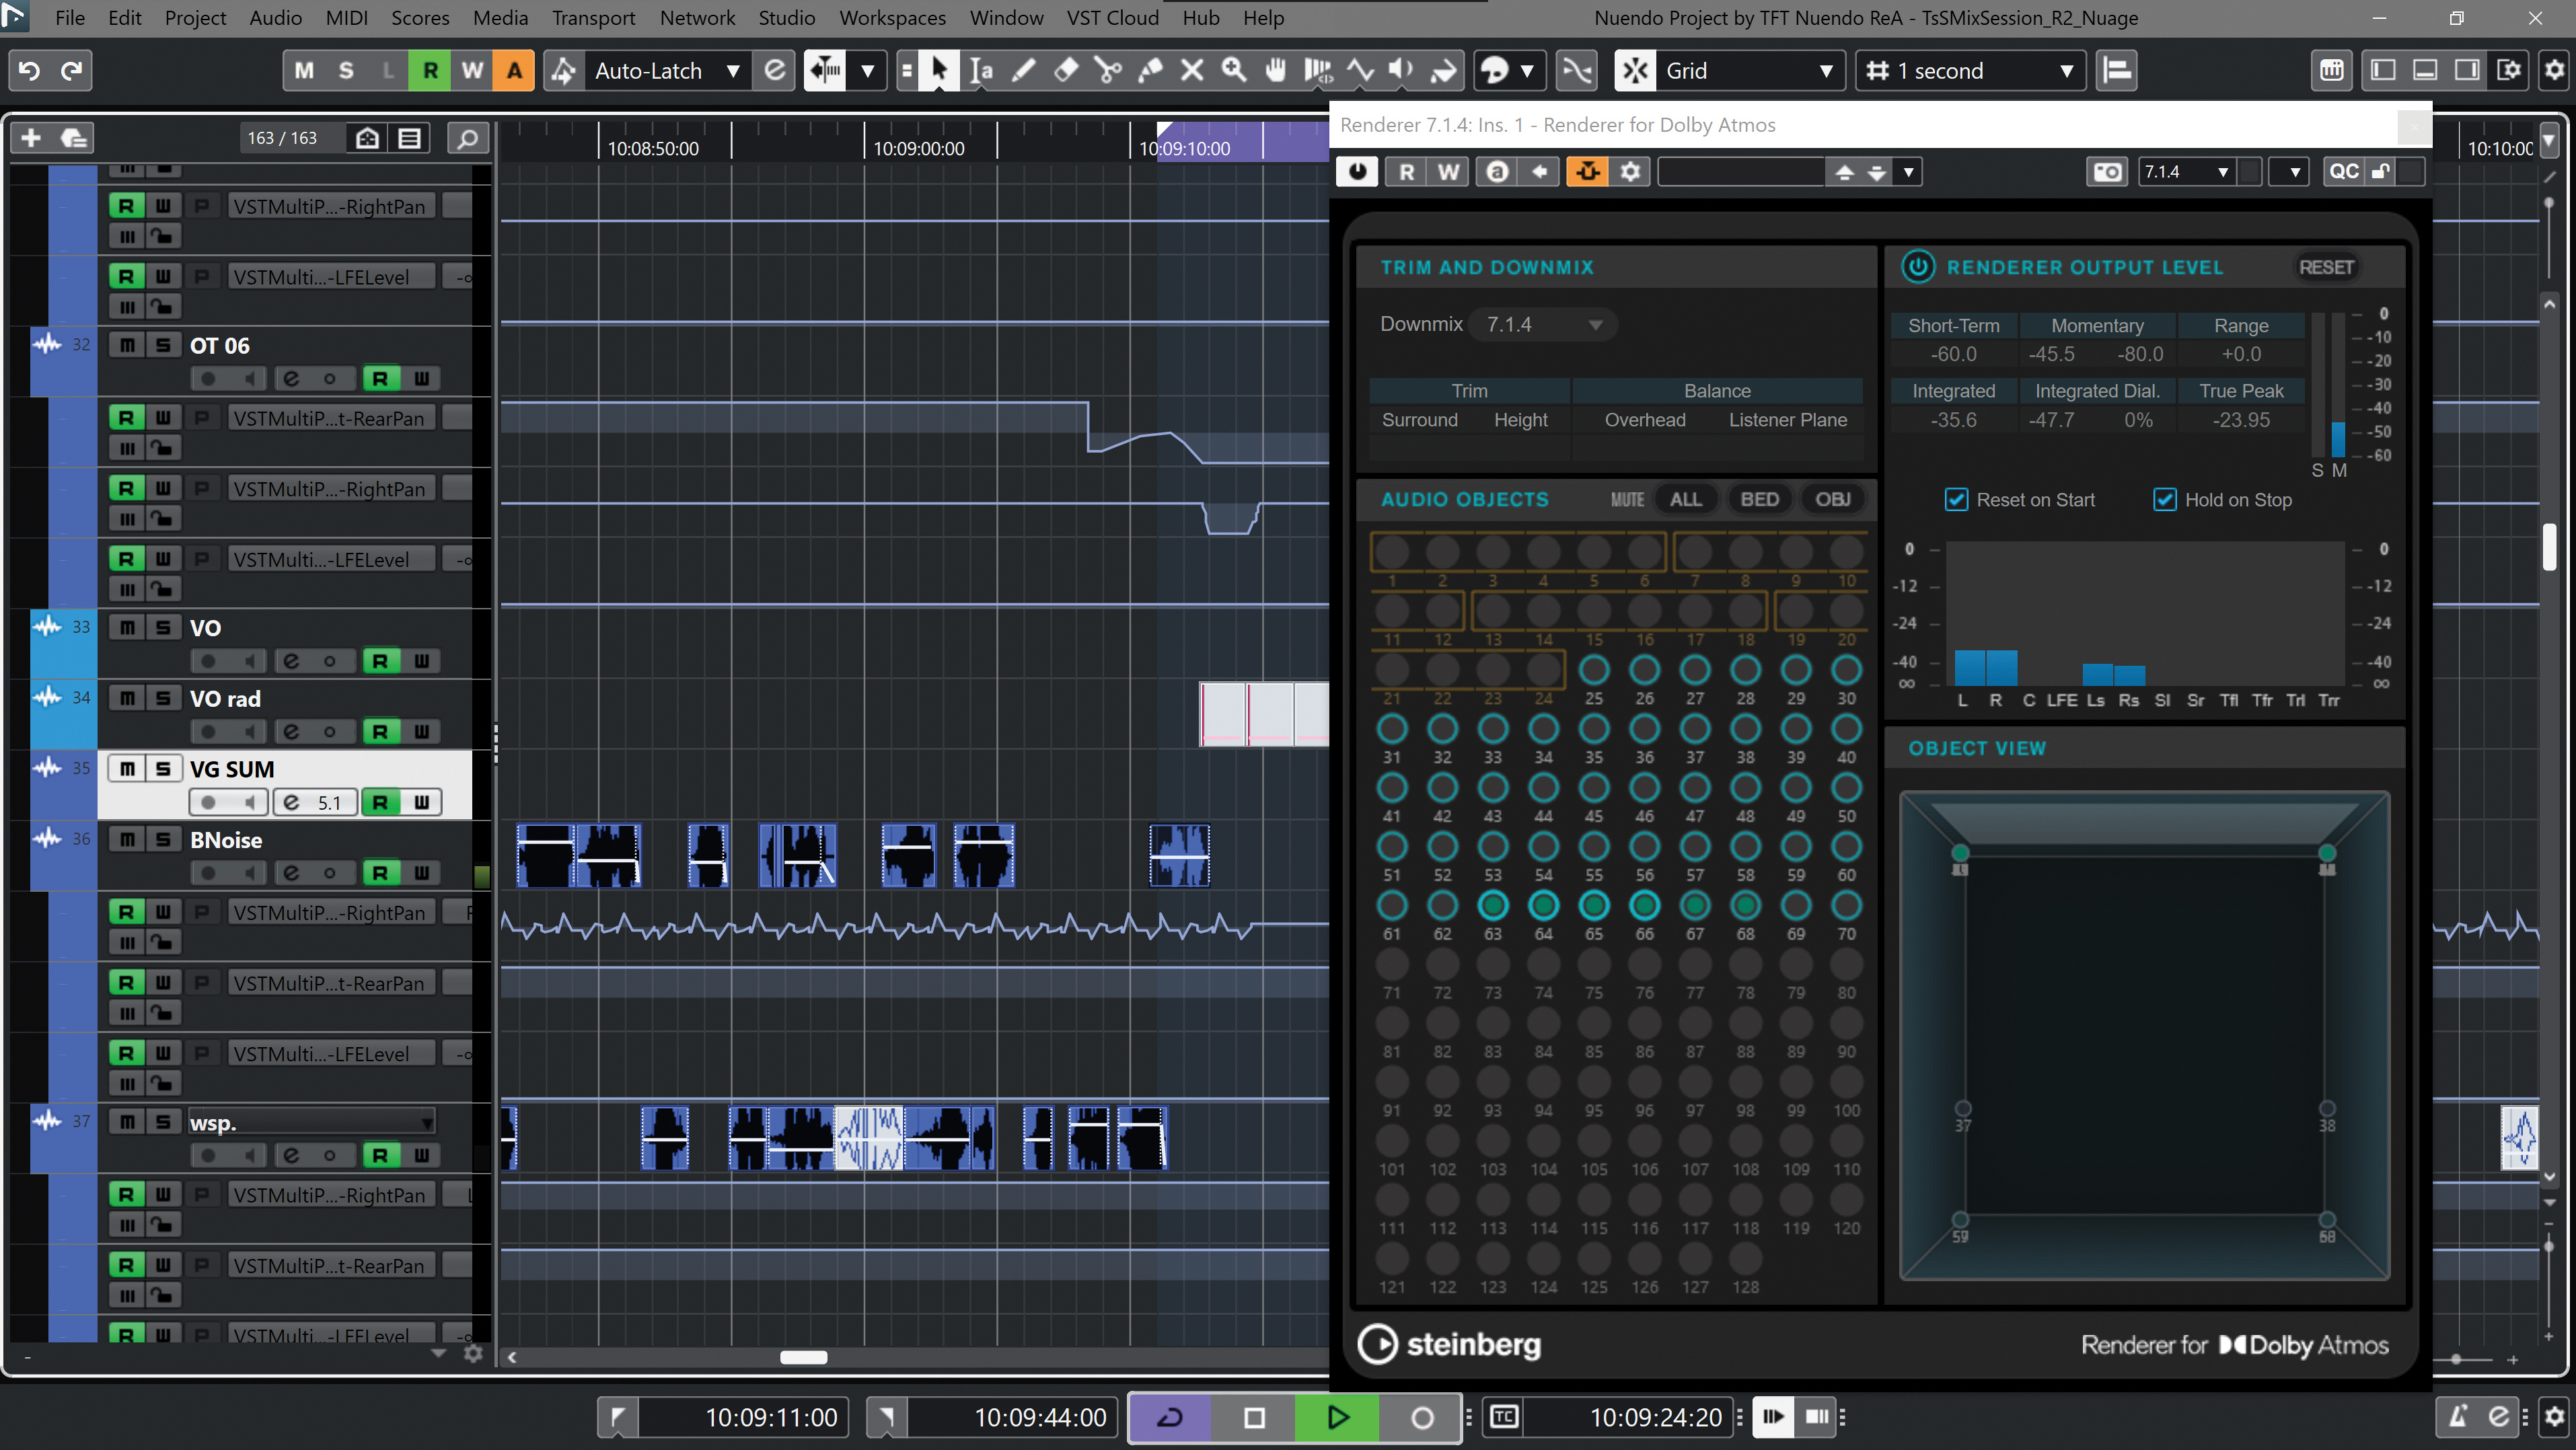
SkyDust 3D gives you spatial envelopes, spatial LFOs and even an entire spatial sequencer to facilitate moving your sounds around the virtual space. Notes in the sequencer can move either subtly – or drastically – around the spatial field with each step that you encounter.
Envelopes let you define a position for a sound to travel towards when each envelope stage begins. LFOs take on a new dimension – no, literally – as they can move sounds across a more immersive stage.
Moving our focus back to the traditional synth controls, SkyDust touts eight oscillators, and can run as a standard subtractive synth or an FM synth. There’s also a pitch envelope and a set of effects.
However, it’s when all of this is used in conjunction with the 3D setup that it starts to gain its most intriguing potential…
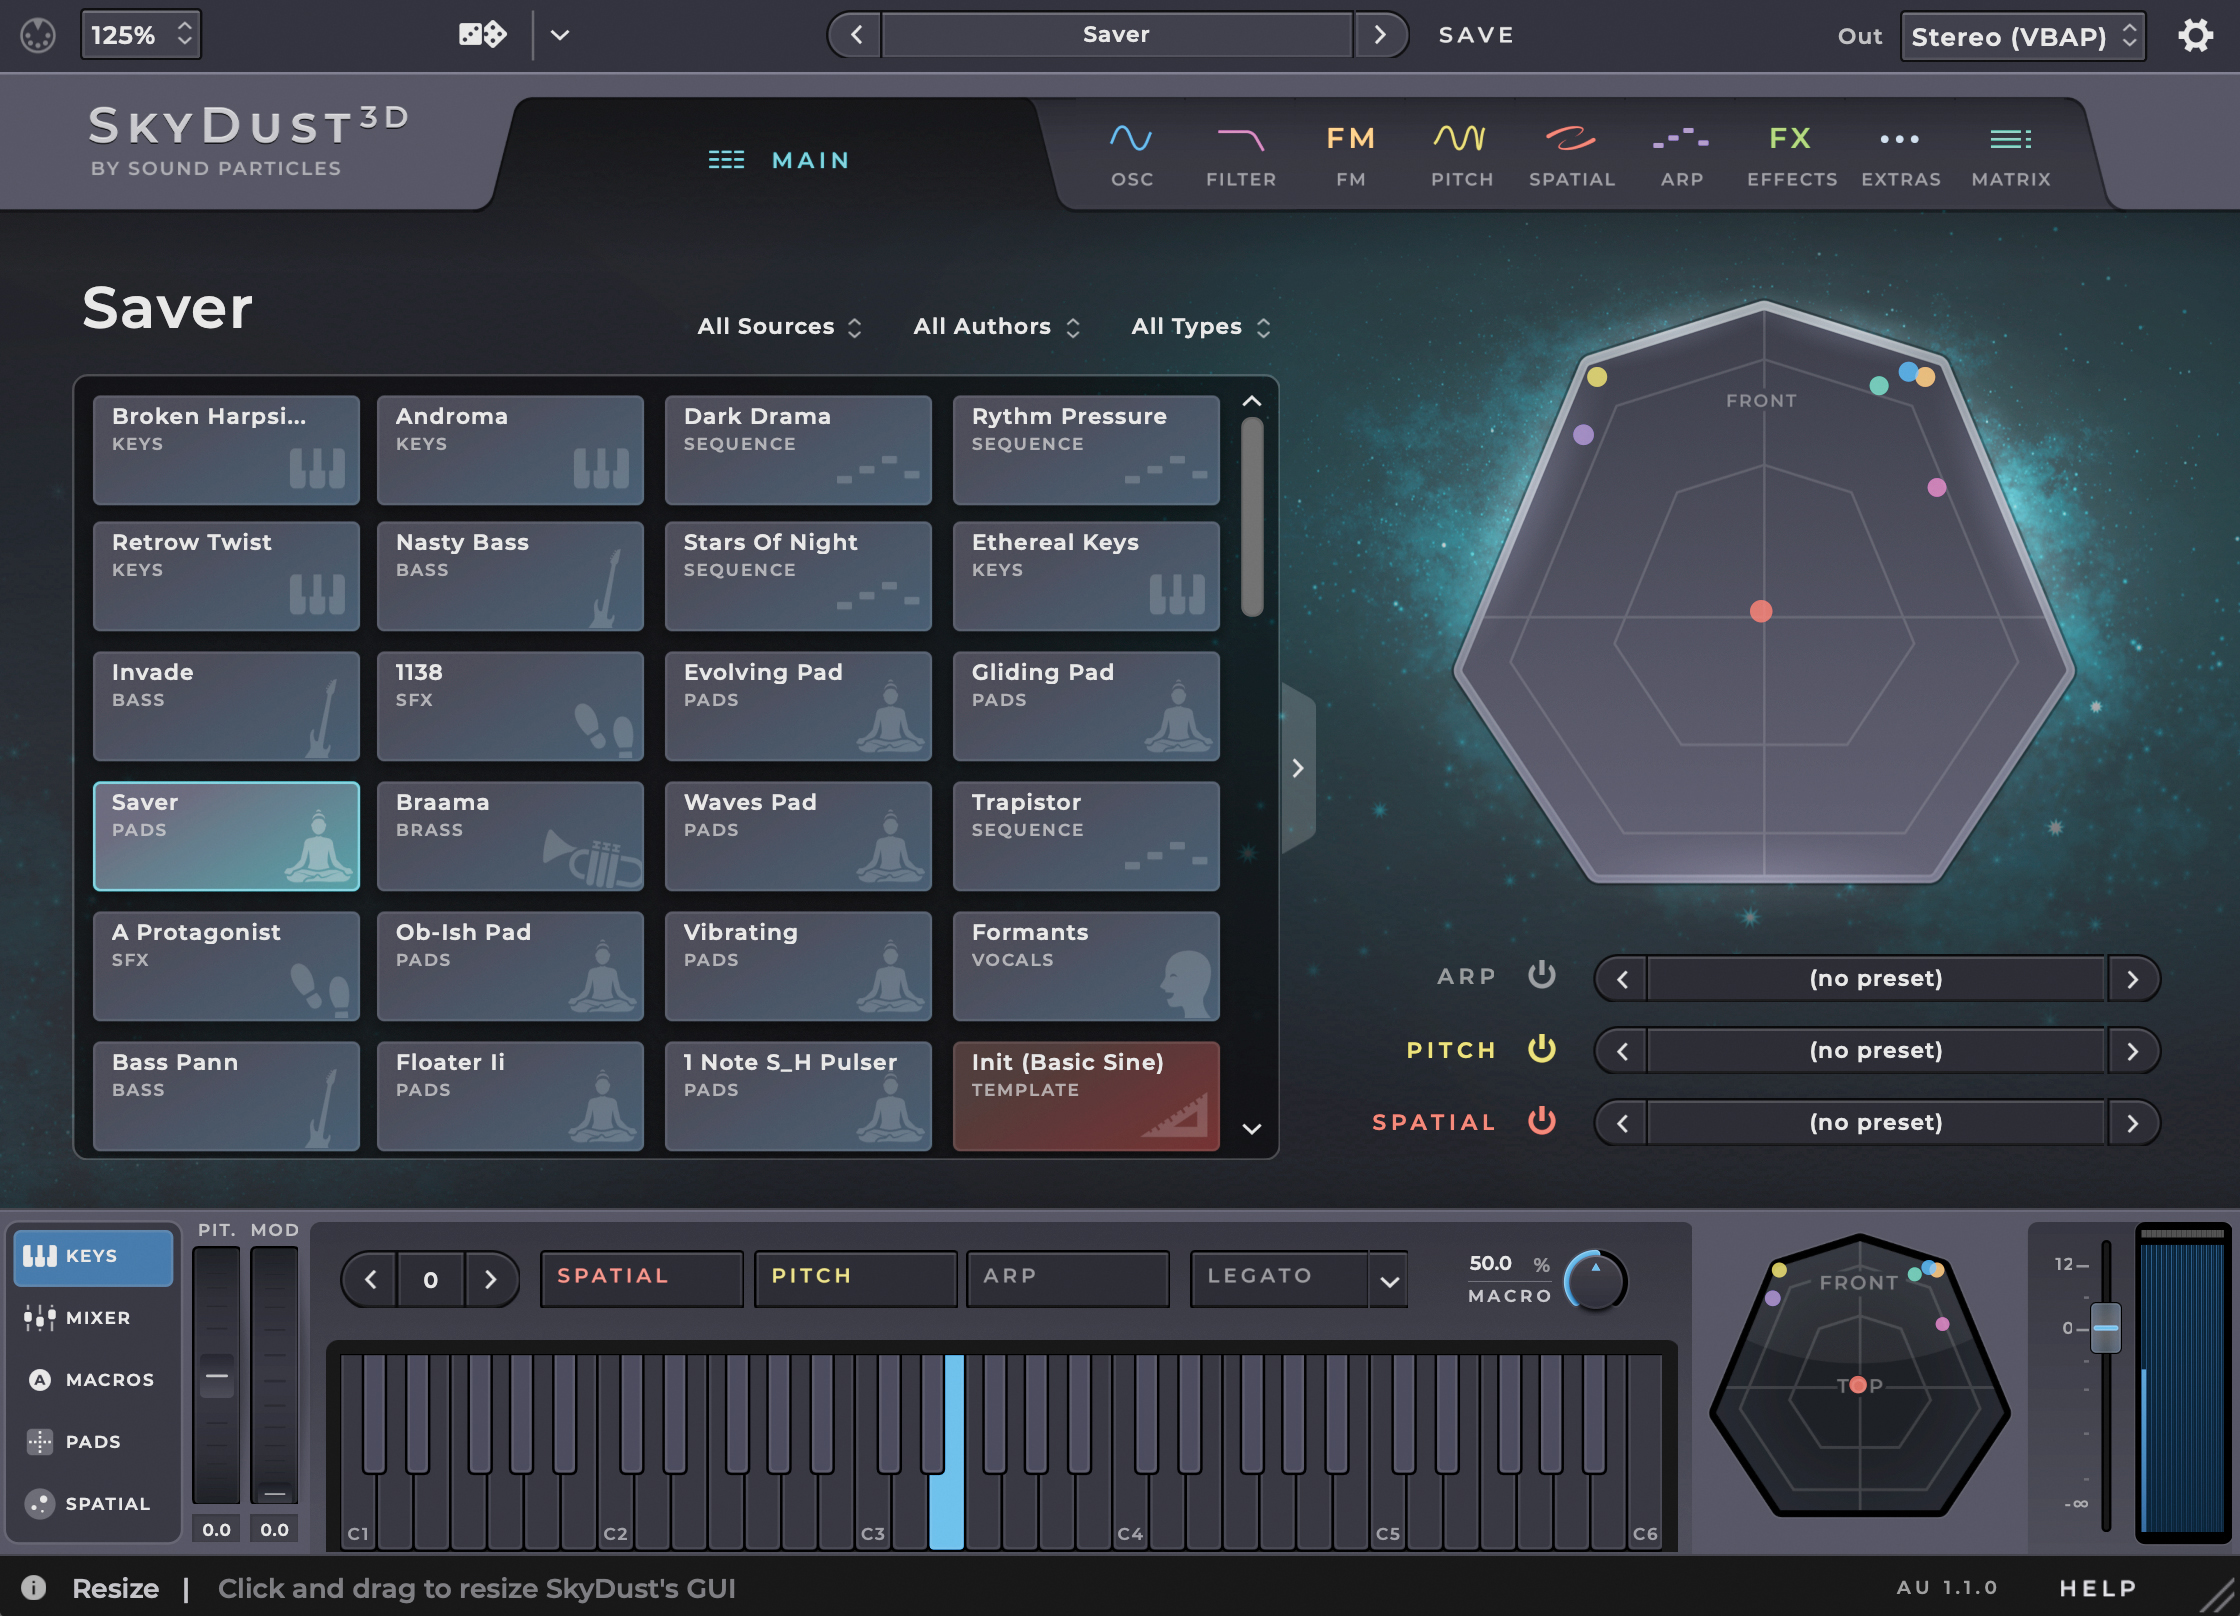
In the Main view, each coloured dot represents the position of all sound elements within the 3D view. The spatial view is a bird’s eye view of the position of each sound. Try switching between a few presets to hear and see the spatial possibilities of SkyDust 3D.
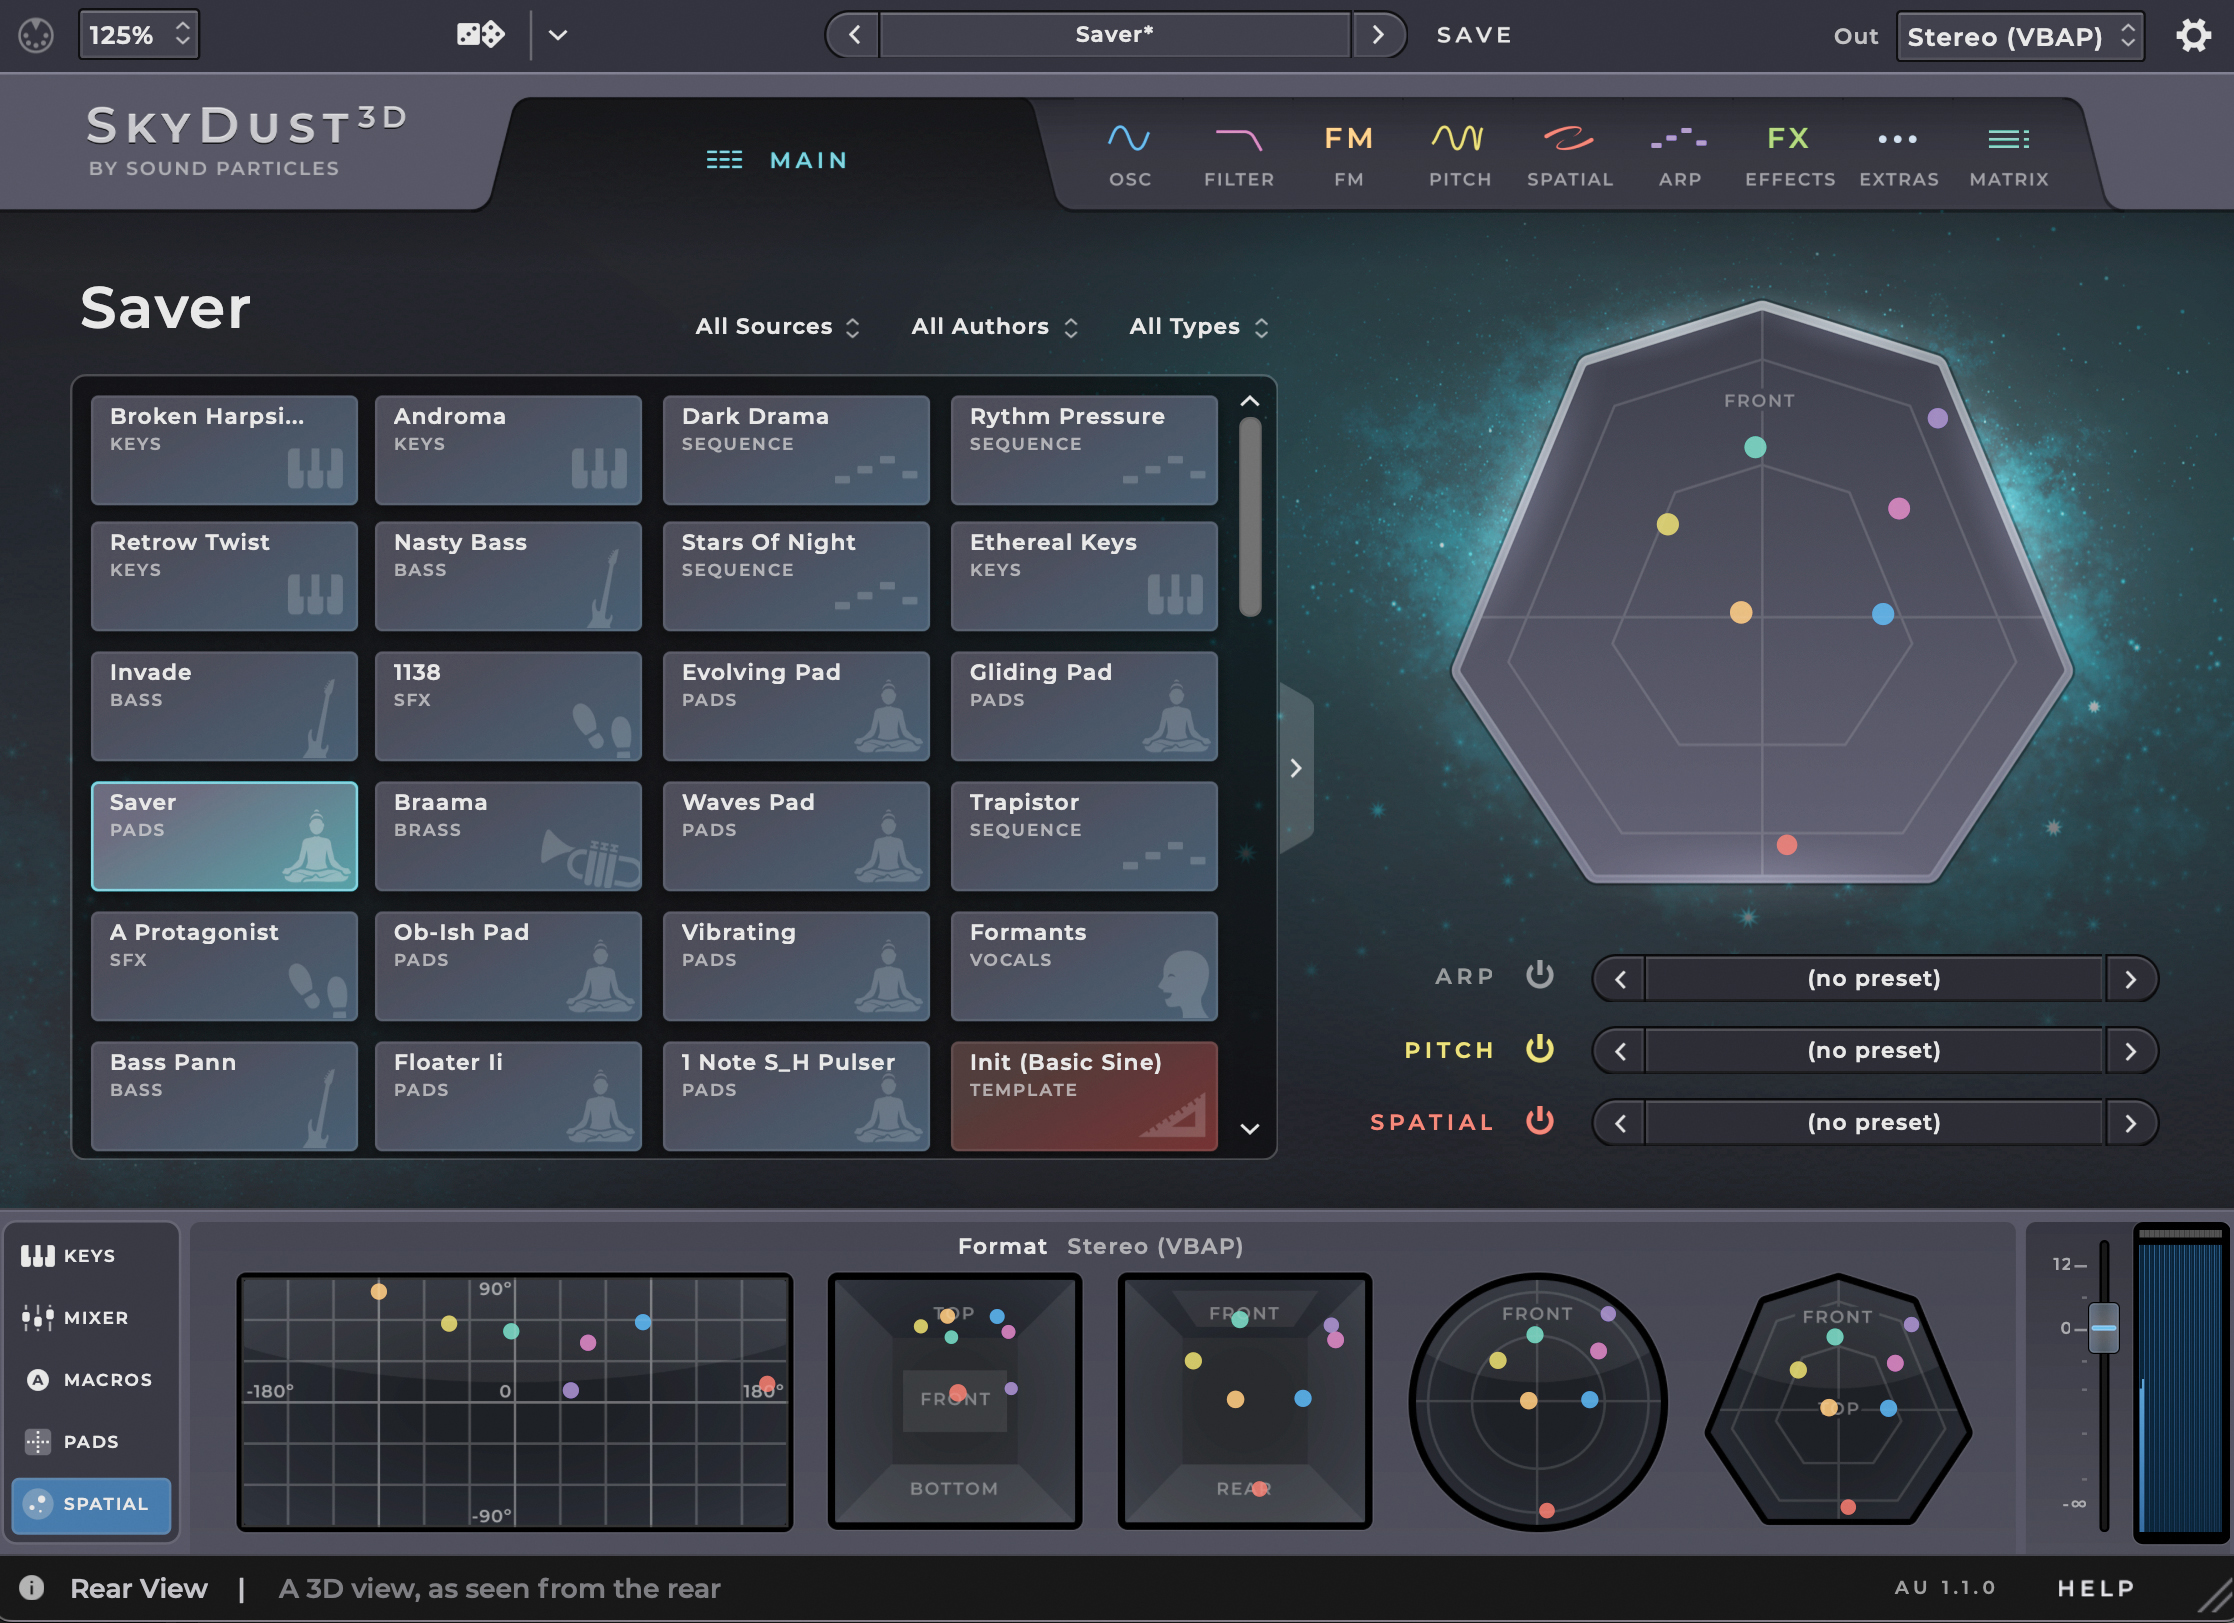
For more info on a sound’s position, select the Spatial tab at the bottom of the plugin. To see what each viewer represents, hover your mouse over it and see the bottom bar. You can also see your output channels with the bottom-right visualiser.

Select the Spatial tab from the top of the plugin to alter the spatial properties of each oscillator, or even on a global level. You can control the spatial properties with envelope generators, movement modifiers, or switch off movement entirely.

By default, SkyDust 3D outputs a VBAP format stereo signal. If you want to take the plugin further, you can select a different output format in the Out dropdown. This is reflected in the output meter at the bottom right of the plugin.
Four more to consider...
Klevgrand Tomofon

Klevgrand’s ‘real audio synth’ delivers a fascinating take on wavetables and sampling to create something pretty unique. Source audio is analysed and split into multiple waveforms which are then organised into multiple wavetables mapped across the keyboard.
On playback you can then move freely across this overall audio model tailoring the sound using four envelopes (gain, depth, pitch and filter), effects and EQ. Naturally it comes with its own library, but the real fun starts when you import your own samples.
Delta V Audio Spacecraft
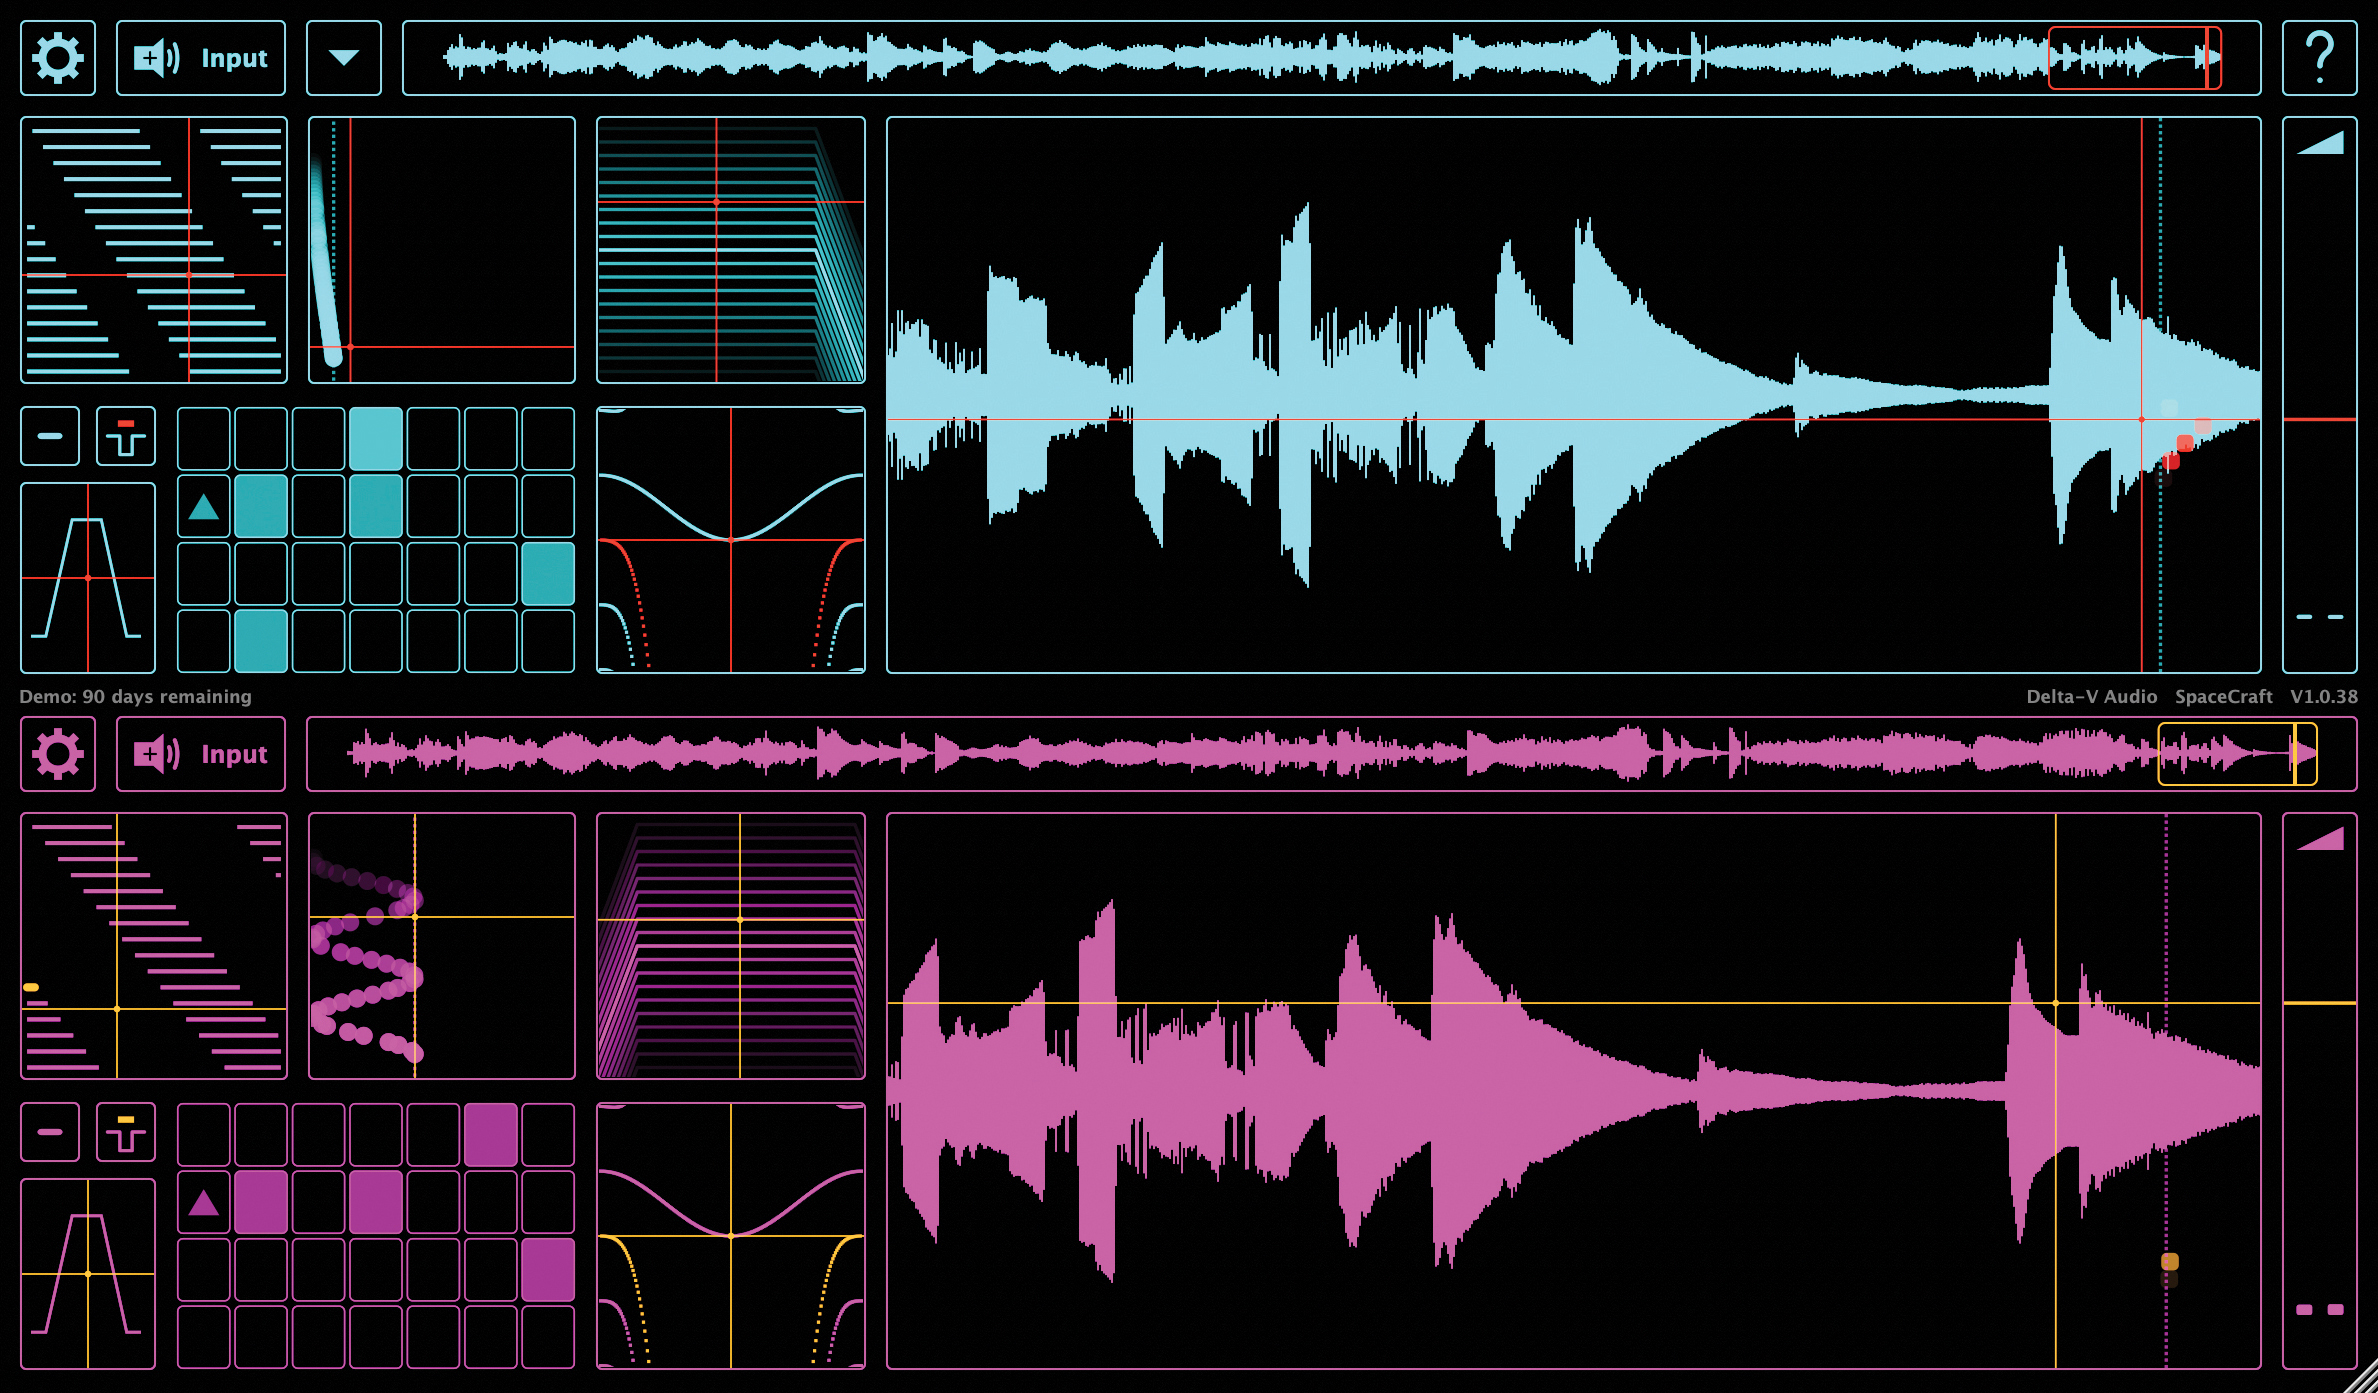
Whether you’re loading your own samples, recording directly into SpaceCraft using the live sampling mode or utilising the extensive library, this granular design is one of our absolute favourites.
The multiple X/Y-style panels are hallmarks of its iOS heritage and the arpeggiated note/grain sequencer grid allows you to morph between chords, drones and arpeggiated rhythmic sequences. Other panels provide further sound manipulation, and MPE support includes grain position modulation for an excellent playable experience. www.tracktion.com
ROLI Equator2

ROLI are best known for their innovative Seaboard MPE-equipped controller keyboards, so it should come as no surprise that they also produce a companion synth plugin, Equator2.
With a whopping six sound generation slots and a choice of four synthesis types including wavetable, granular and multi sampling, plus extensive modulation, multiple effects and flexible signal routing Equator2 is clearly powerful. But it’s the almost 600 MPE equipped presets (and over 1400 presets in total) that indicate where it’s really at.
Xfer Records Serum
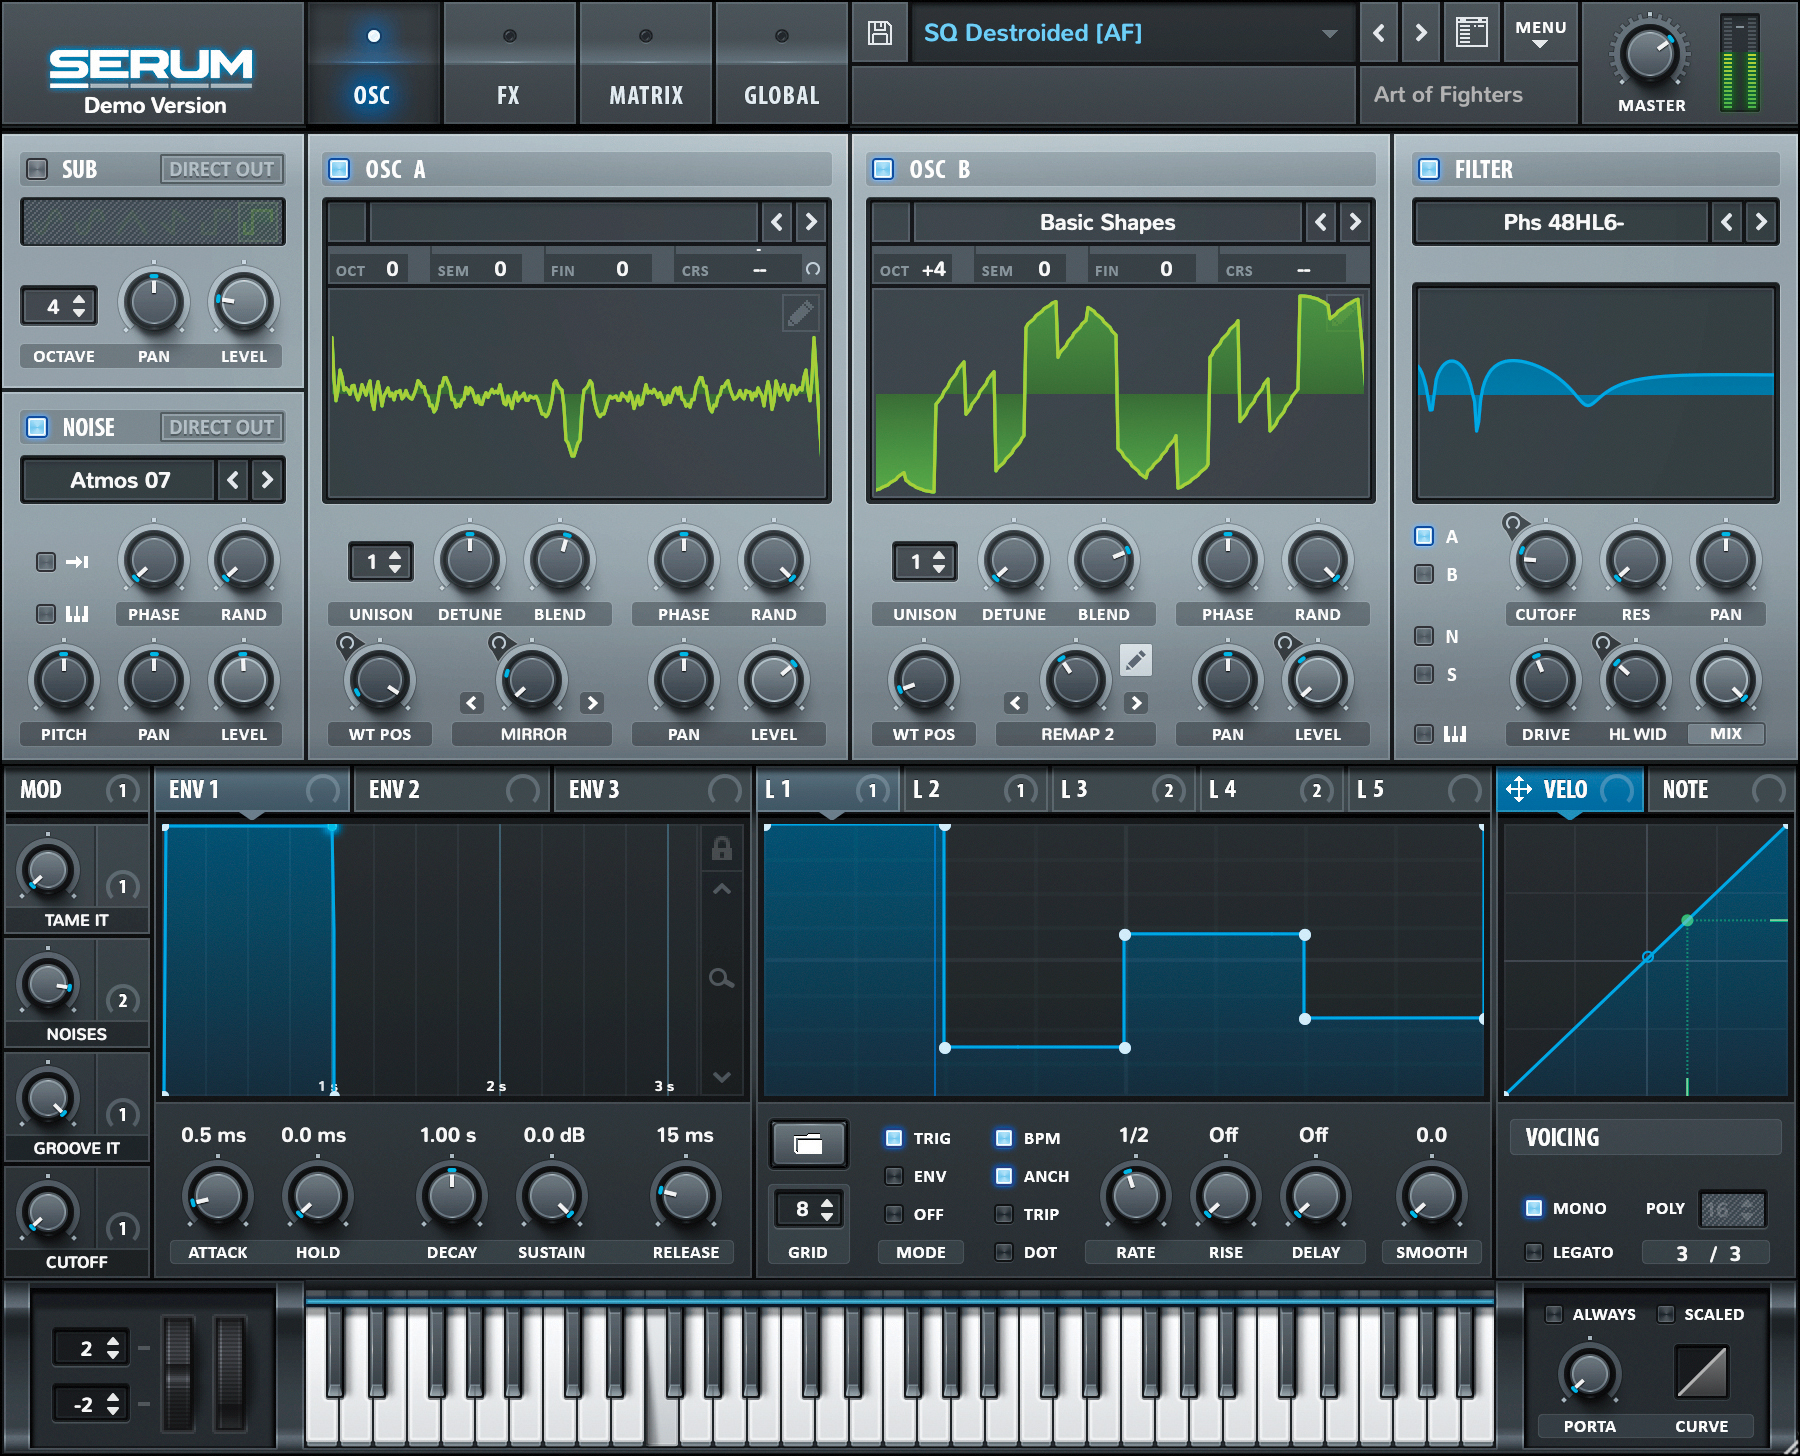
Serum continues to be one of the most recommended synths, and for good reason. Its wavetable design employs a high-precision resampling engine so the sound is excellent from the outset.
This is then supported by a host of powerful options including wavetable warping, morphable dual filters, advanced unison and drag and drop modulation. Serum is not only powerful but incredibly intuitive to use, leaving you free to be creative.

I'm the Managing Editor of Music Technology at MusicRadar and former Editor-in-Chief of Future Music, Computer Music and Electronic Musician. I've been messing around with music tech in various forms for over two decades. I've also spent the last 10 years forgetting how to play guitar. Find me in the chillout room at raves complaining that it's past my bedtime.
“The included sample content is not only unique but sonically amazing, as it always was”: Spitfire Audio BBC Radiophonic Workshop review
“We were able to fire up a bass sound that was indistinguishable from the flavour of New Order’s Blue Monday in seconds”: EastWest Sounds Iconic review


