10 Cubase tips you need to know about
Work smarter, not harder when it comes to using Steinberg’s multi-faceted DAW
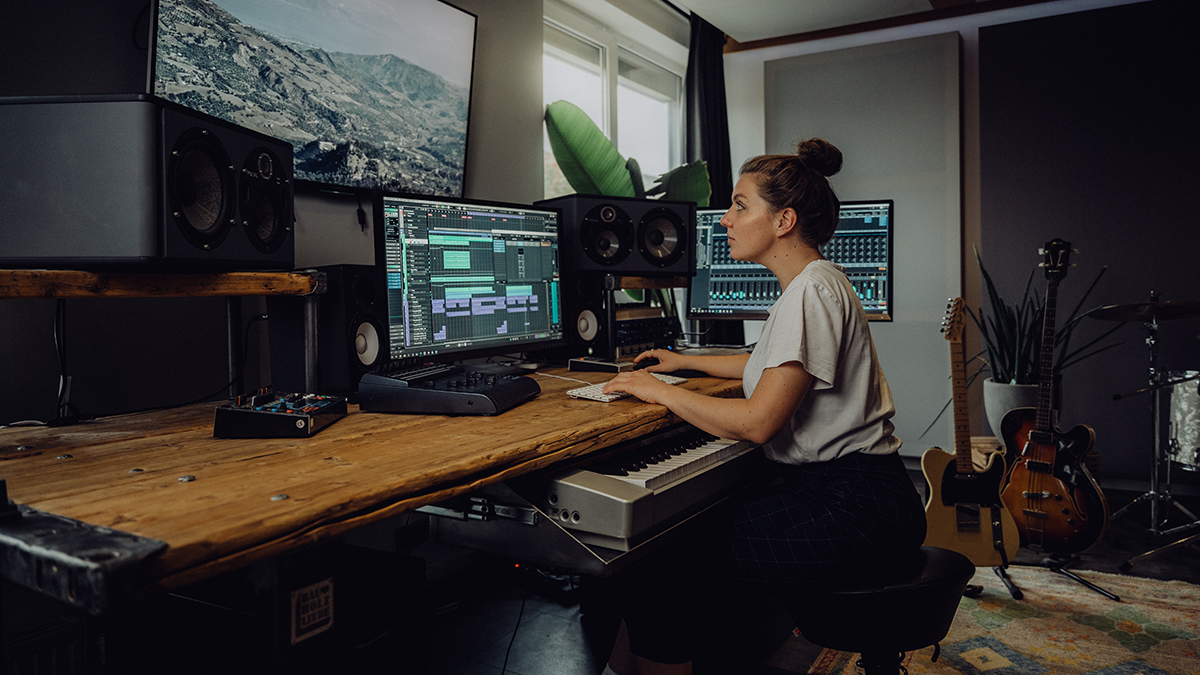
Last week, Cubase announced the 13th iteration of its much-loved digital audio workstation, unveiling a raft of updates that includes a streamlined interface and some intriguing vocal processing plugins.
With that in mind, we've knocked up ten tips and tricks for Cubase users, detailing some hidden workflow gems applicable to users of both the latest version and its little brother Cubase 12.
1. FX Modulator
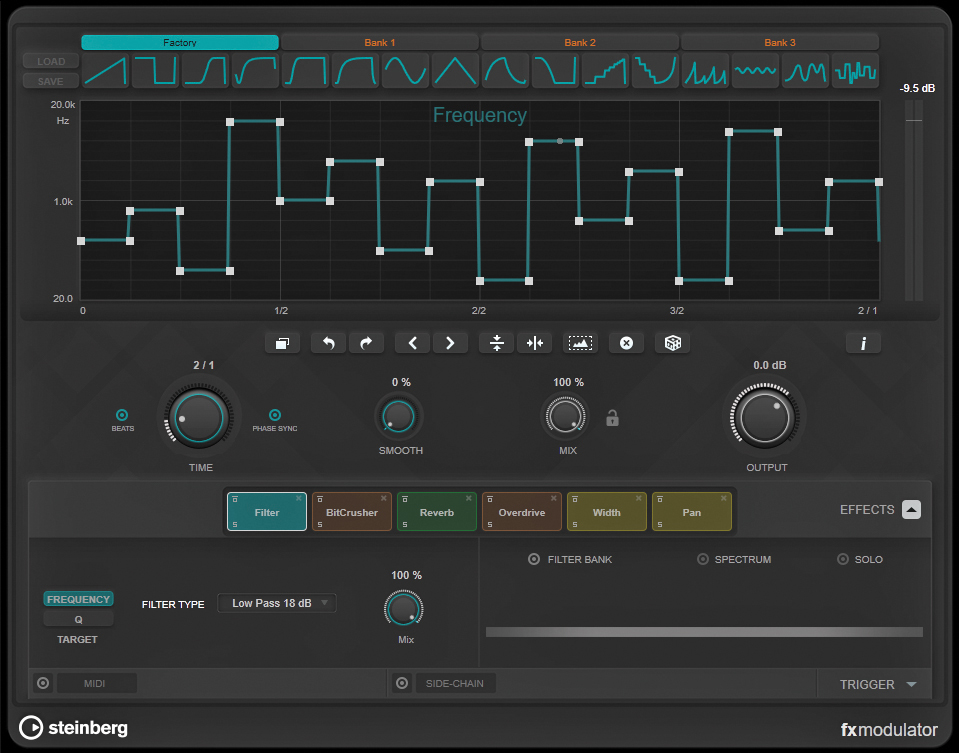
Given the huge range of excellent 3rd-party plugins out there, it’s easy to be a bit dismissive when new ones are added to your favourite DAW. After an initial look you might well have skipped past the FX Modulator when it was introduced in Cubase 12. However, it really is worth a second look – even if you only use it for help in creating the perfect autopan!
2. Import tracks from your existing projects
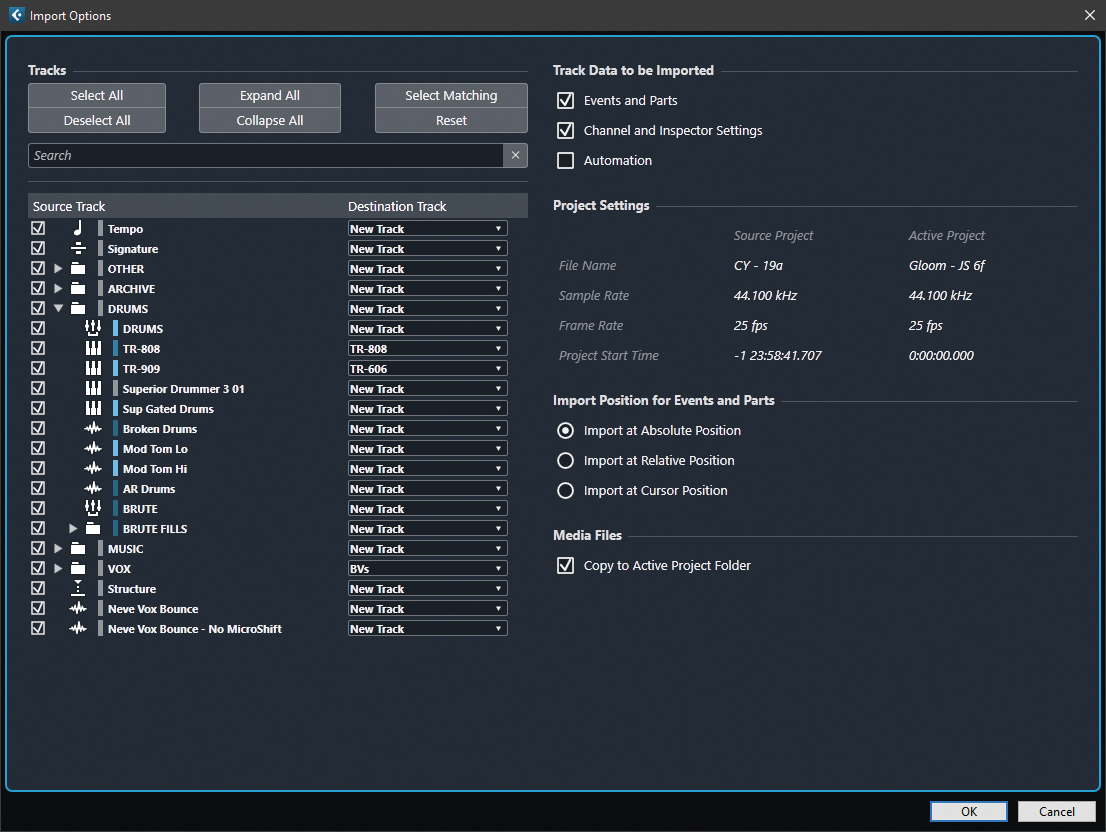
This functionality has seen incremental tweaks (the latest being the ability to import tempo and signature tracks). A simple use might involve digging out an old MIDI drum part, but it can also be used for audio.
The key here is that it should be done at the track level, so tracks can also be imported (and directed to new or existing tracks) without data but with all their settings intact (plugins, EQ etc.) So that great vocal chain you created six months ago involving complex individual channel and group processing can easily be reused in a new project.
3. Born Slippy
When it comes to detailed audio editing, there’s one feature we couldn’t live without: ‘Slip Event Content’. Using the Select Tool with [Ctrl/Cmd} + [Alt/Opt], and dragging an audio event left or right slides the audio, but keeps the event start and end points in place. This is a great tip for adjusting the timing of edited drums, vocals, bass, whatever your track requires…
4. Use Cubase on more than one computer
This is more of a reminder than a tip. Since the introduction of Steinberg’s dongle-free licence manager, Cubase can be used on up to three computer with one license. This is great if you regularly move between desktop and mobile systems.
Get the MusicRadar Newsletter
Want all the hottest music and gear news, reviews, deals, features and more, direct to your inbox? Sign up here.
5. Use multiple MixConsole windows
The Cubase MixConsole is not without its issues, but it’s highly customisable and flexible. Like any large piece of software, users will find their own way of doing things in Cubase, and how you use the mixer (with its myriad of options) is one such example.
Although there are a range of ways to alter what the mixer windows show (via drop-down menus and the comprehensive Cubase key command catalogue), for larger projects it can be helpful to embrace the ability to access four different mixer windows, with each configured to show a different set of tracks: audio tracks on one, instruments on another, Input, Output, Group and Effects track on the third, with the fourth reserved for custom choices.
The main thing is that they’re easily accessible, which means that adding or reprogramming key commands to open each of the mixer windows makes for a speedy workflow. Assigning a keyboard shortcut to ‘Project / Bring To Front’ gets you back to the main project window quickly.
6. Raise hell
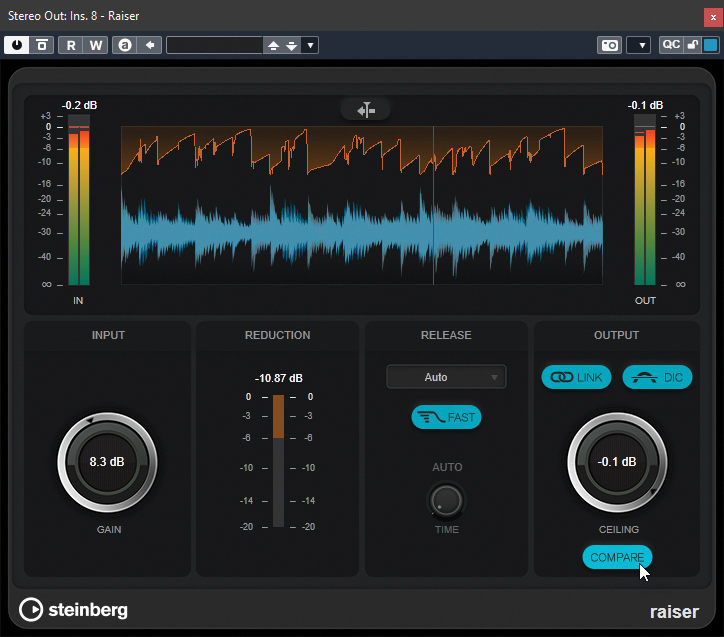
Raiser is a great limiter plugin introduced in Cubase 12 that’s easy to use and very effective at making stuff sound loud. For ‘no-brainer’ squashing, you can’t go wrong with release set to Auto and Fast. Pressing the Compare button will give you a really easy way to check how the limiter is changing the sound beyond its loudness-imparting qualities.
7. Get to know the Logical Editors
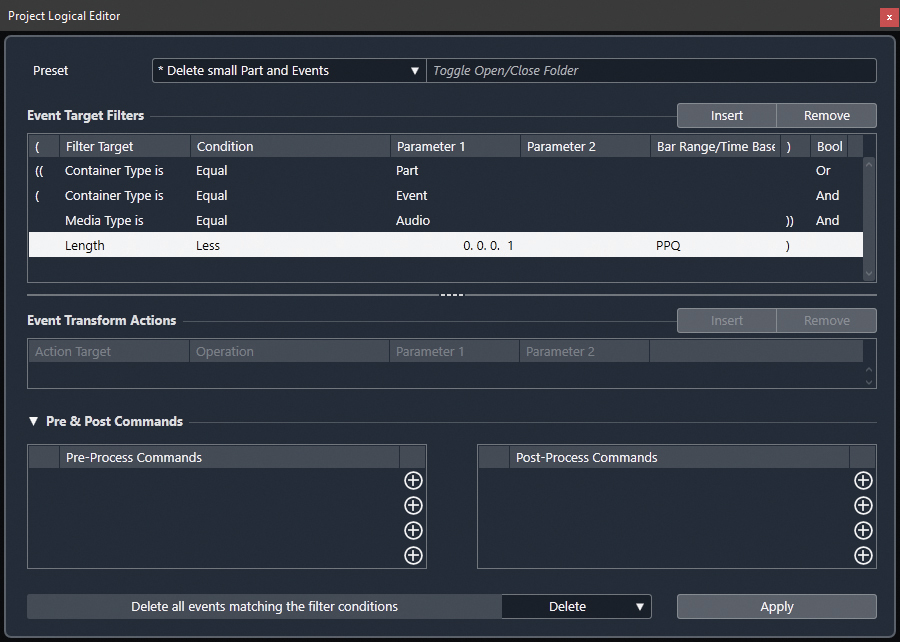
They’re not glamorous and take a bit of working out, but the Cubase Logical Editor (MIDI) and Project Logical Editor (everything else) are very powerful. They can be used to carry out some quite complex functions, and are fully programmable, although this can appear quite daunting (and it’s a classic case of there being no easy shortcut to learning it, aside from reading the manual!).
However, Cubase comes with a host of presets (expanded in Cubase 12) and tweaking these for your own purposes is a great place to start. We successfully created one in order to delete the tiny events that can sometimes lurk in a project after making a lot of global edits to the arrangement. And don’t forget that each preset can potentially be assigned a key command or even run as part of a complex macro.
8. Divide track list
This simple feature is a great way of optimising screen real estate. All it does, in basic terms, is divide the track area of the project window into upper and lower sections, but the cool bit is that they each get separate scroll and zoom controls. If you use markers, multiple rulers or work with video regularly, it’s a really great way of keeping specific tracks on screen whenever you’re navigating projects with larger track counts.
The quickest way to access this is by clicking on the Divide Track List icon on the top right corner of the Project window or assign it a key command for quick switching.
9. Direct offline processing presets
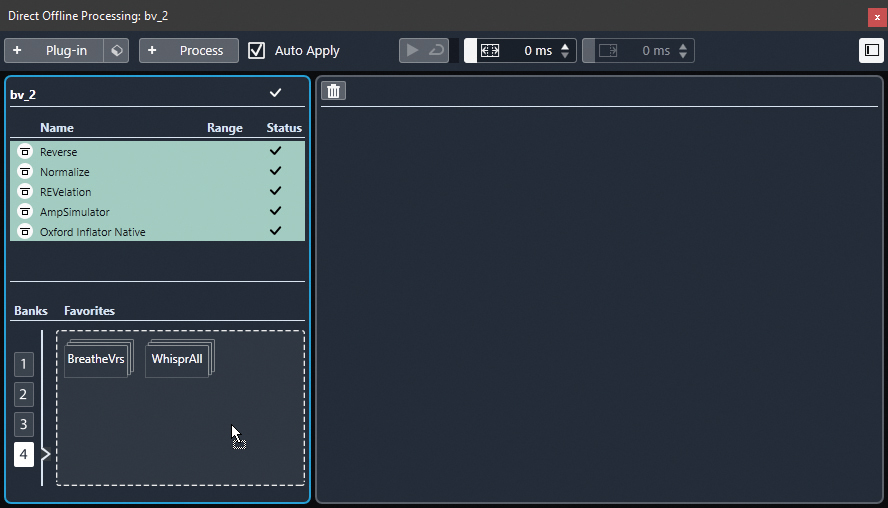
The extremely glamorously named Direct Offline Processing windows (accessed from the Audio menu or [F7] key), is a super speedy way to apply processing to an audio event (or even just a small selected part of it).
The really neat bit is that you can apply both built-in functions (Reverse, Pitch Shift etc) as well as any plugin process. Not only that, but you can also create and apply a series of processing steps and save the whole configuration as a preset for later recall and application to any other audio.
10. Use ARA at track level
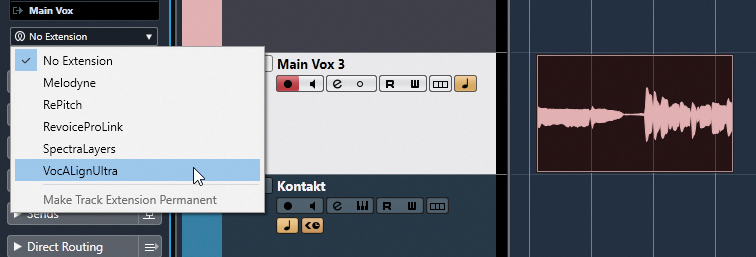
ARA (Audio Random Access) allows you to easily access external editors from within Cubase, and this feature has completely transformed the way that we would usually use some of our favourite tools (such as Celemony’s Melodyne, Synchro Arts’ Vocalign Ultra and Revoice Pro).
ARA makes the overall workflow pretty seamless, but the ability (introduced in C12) to apply changes at the track level has been an excellent addition.
Using this alongside ‘Audio > Make Extension Permanent’ or ‘Edit > Render In Place’ (using the ‘Keep Source Events Unchanged’ option, so that you can keep the original intact for safekeeping) has been a game changer when it comes to working with vocals.

"If I wasn't recording albums every month, multiple albums, and I wasn't playing on everyone's songs, I wouldn't need any of this”: Travis Barker reveals his production tricks and gear in a new studio tour
“My management and agent have always tried to cover my back on the road”: Neil Young just axed premium gig tickets following advice from The Cure’s Robert Smith


