10 power tips to help you get more out of Cubase 11
Tips, hacks and shortcuts for the most flexible DAW on the market
Cubase is the most flexible DAW available, which means that it works well whatever the genre. There are often discussions/arguments about why one specific DAW is good for dance music and another is the best choice for rock, and yet another suits mixing, with composition handled elsewhere.
The truth is that this is largely down to heavily-embedded users stating what they’re used to, rather than a well-balanced analysis of the options.
The fact is, Cubase defined the look, feel and functionality of what a pro creation environment should be decades ago. This began with its approach to MIDI – and Cubase is largely seen as the queen of MIDI-based music creation (including both external and plugin based instruments) – but also audio integration.
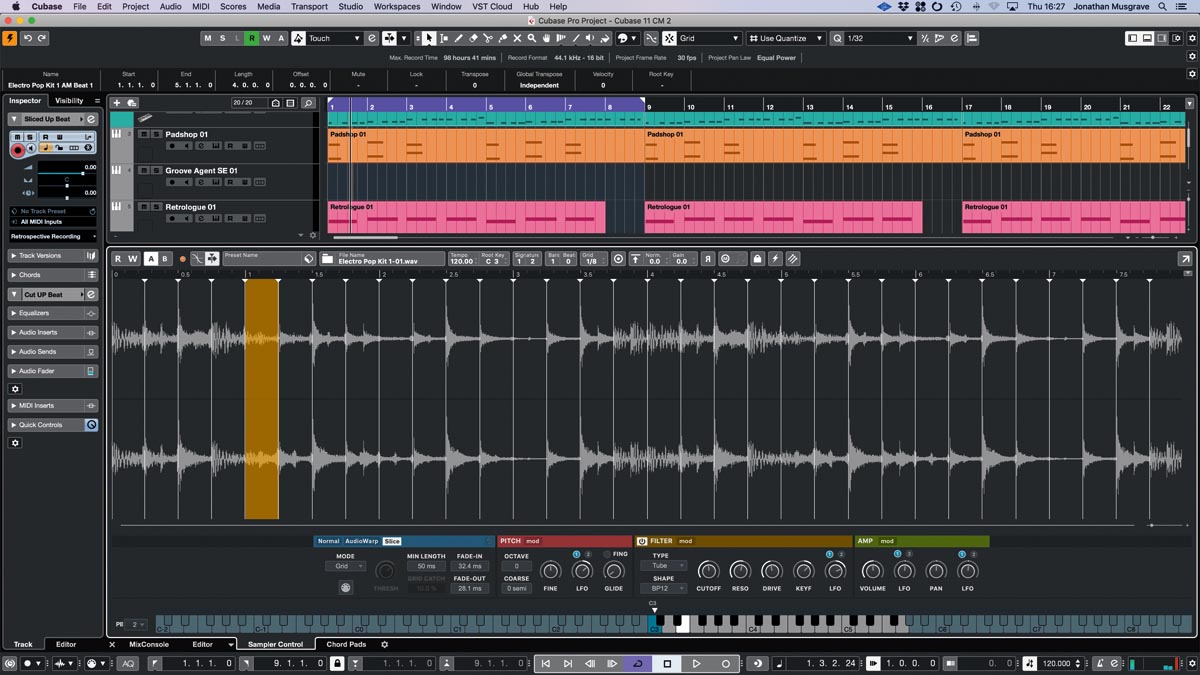
The numerous ways in which audio events can be viewed, combined and edited (such as lanes, parts and folders) allows you to choose your own way of managing material, rather than battling with only one approach. Flexibility is the key here, with focus being on creativity.
This flexibility extends to the ability to customise the program to your own needs, making it work well on projects both small and large in scale. The fact that it can handle, and makes easy work of, large projects means that both complex multi-instrument composition and recording is straightforward – and with the Logical Editor, Logical Project Editor and Key Command Macros providing a degree of customisation whatever the genre.
1. MixConsole
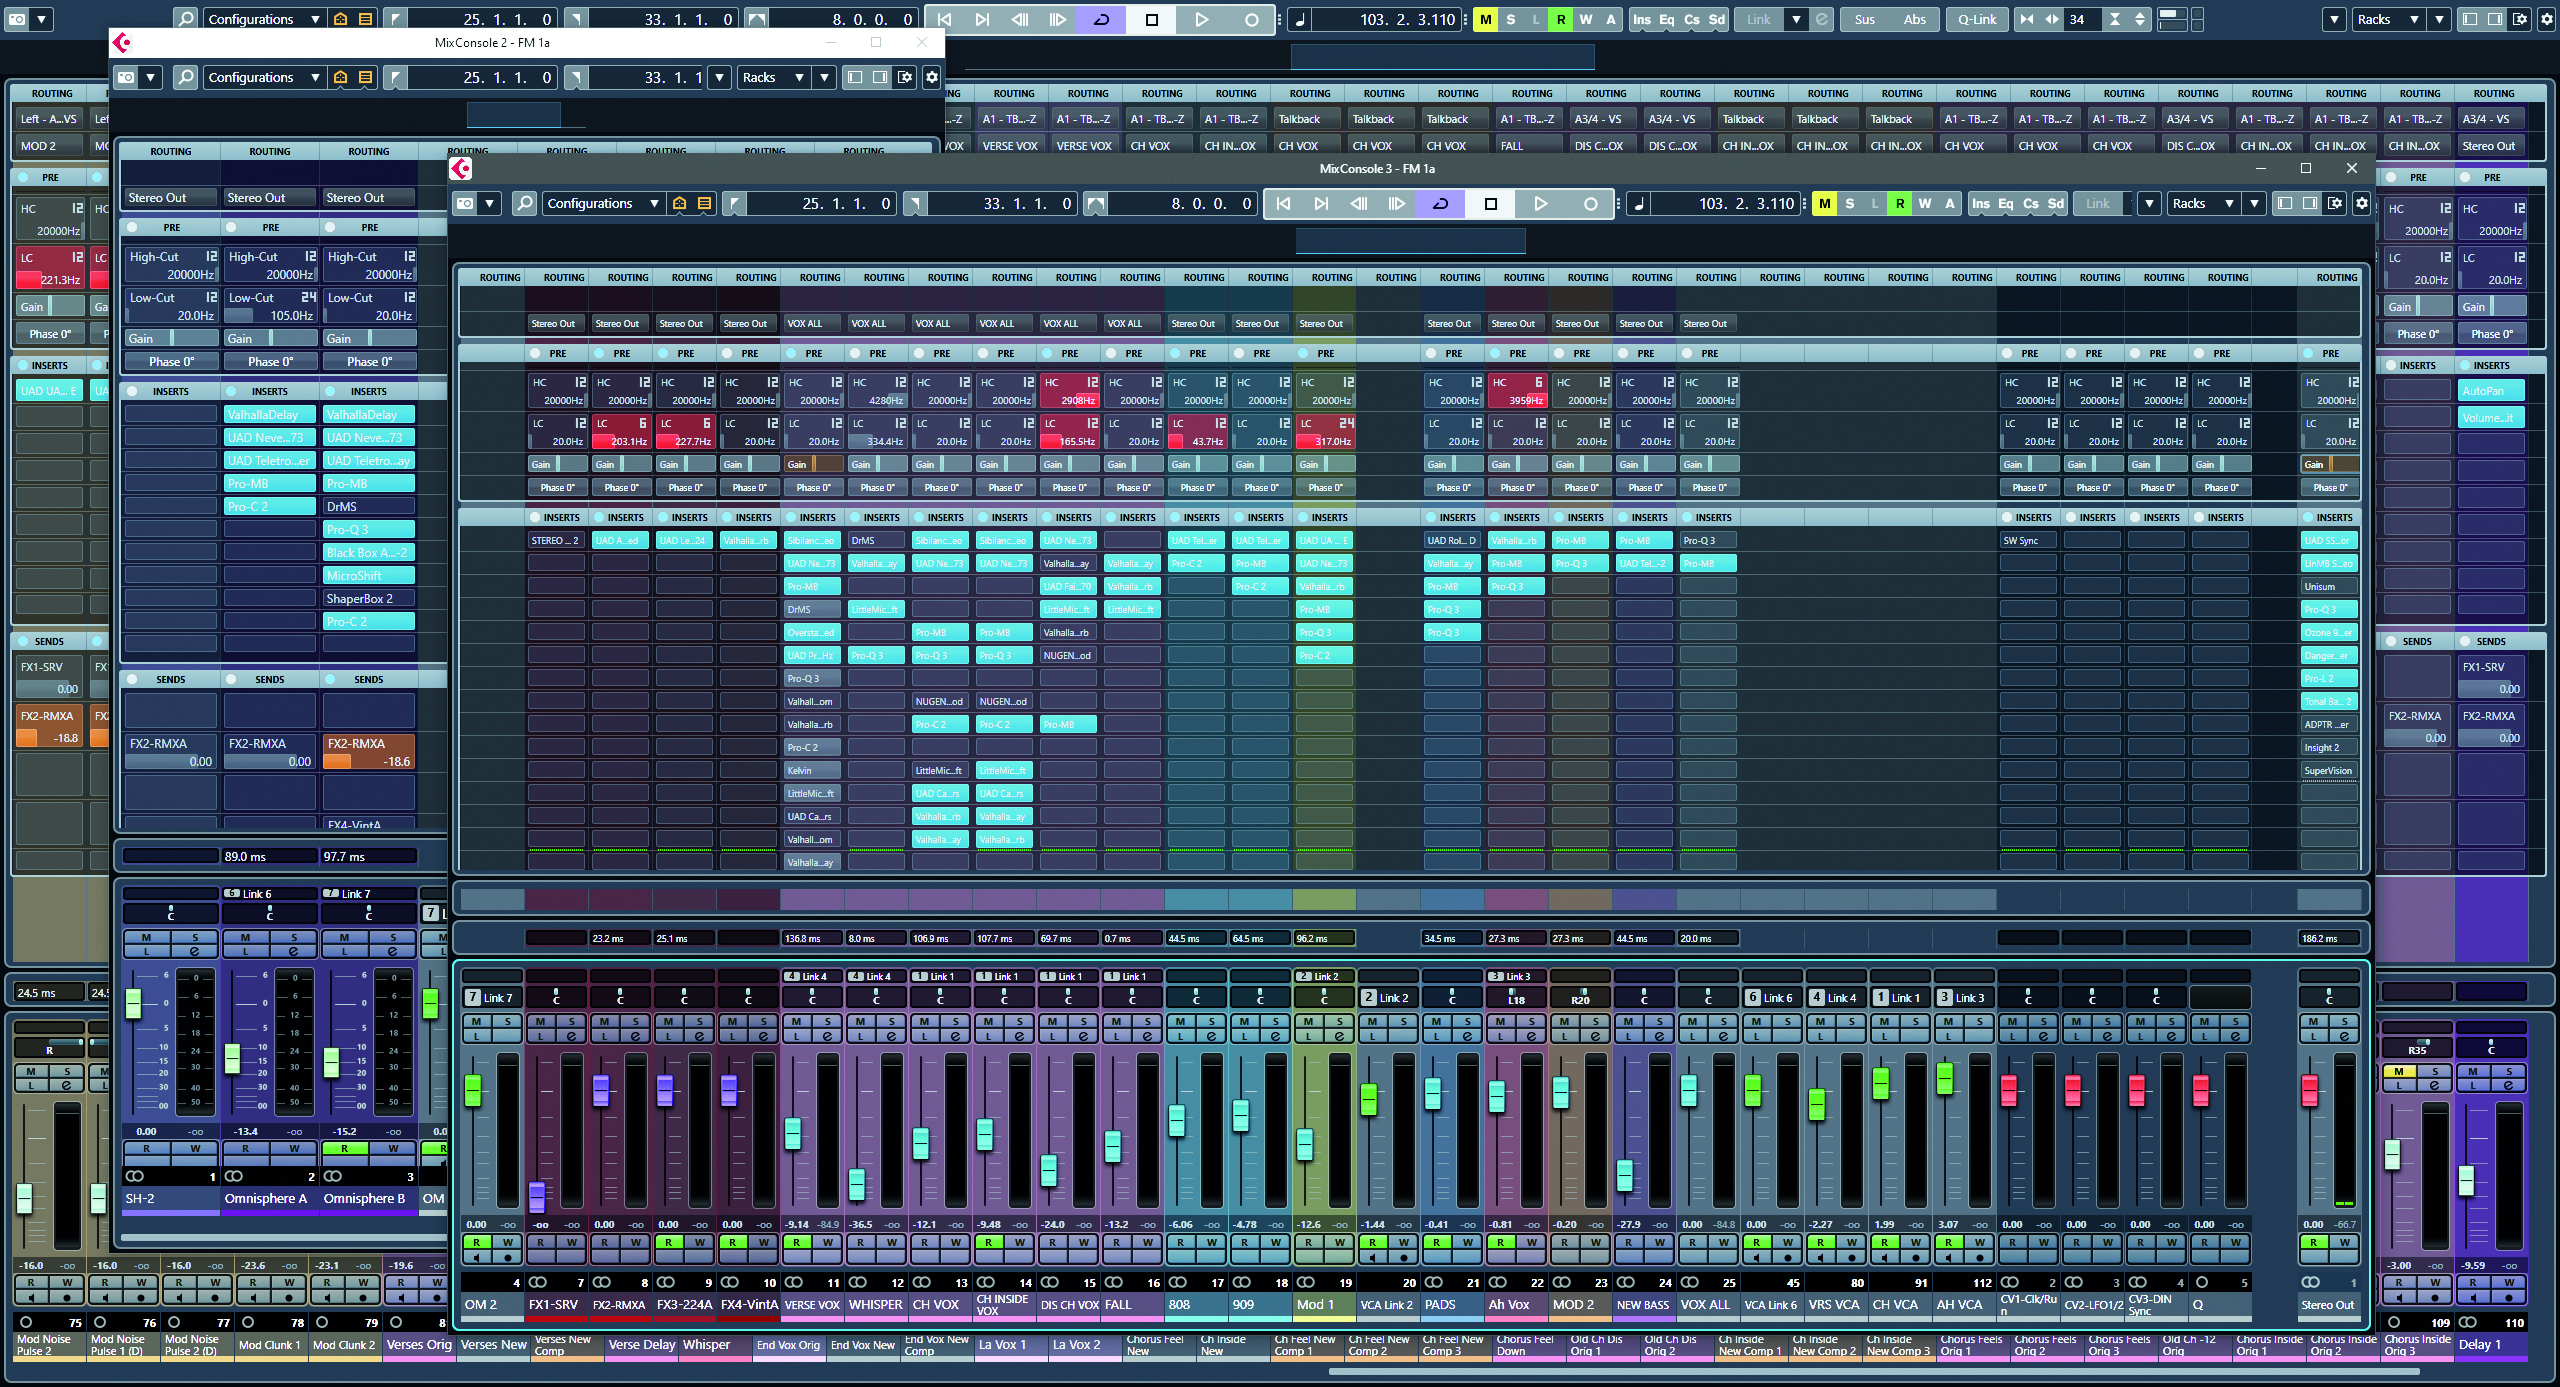
The Cubase mixer (MixConsole) is highly configurable and can be viewed in a standalone window or in cut-down form in the main Project. What often gets missed is the fact that Cubase actually has three independent mixer windows, which can each show a different set of tracks.
An effective approach to making full use of them is to assign a different key command to access each one, and then configure them for different track/channel types, eg Mixer 1 – Audio; Mixer 2 - Instruments & MIDI; Mixer 3 – Inputs, Outputs, Effects and Groups.
Get the MusicRadar Newsletter
Want all the hottest music and gear news, reviews, deals, features and more, direct to your inbox? Sign up here.
2. Shortcuts and handy time-savers
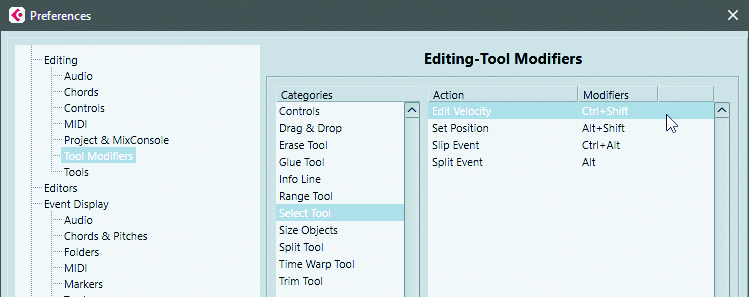
Get to know modifier keys as they can speed up workflow considerably. For example, holding the ALT while clicking an event with the Section Tool will switch you to the Scissors tool, whereas CTRL+SHIFT allows adjusting of Velocity. Some tools even have their own modifiers. They’re all listed in the Cubase Preferences tab.
3. Auto Fade
Auto Fades are a very useful feature in Cubase, but there are subtleties to how they work that can impact their effectiveness. Accessed from each track’s inspector, Auto Fade settings determine how each audio event on that track employs an automatic fade-in or fade-out.
4. Preview edits

SHIFT+BACKSPACE deletes everything between the Left and Right locators. However, before you delete, you can preview what effect this will have by swapping the locator positions so that playback skips that section.
5. Fine-tuning
If you need to make fine adjustments in Cubase, then pressing SHIFT while moving parameters with the mouse will switch to smaller changes. This works in the mixer for fader and parameter changes.
6. Make your Marker
Use a Marker track to help navigate a project and provide a clear overview. Set the locators at the start and end of different sections and click Add Cycle Marker. You can then Locate, Cycle or Zoom to that section using the relevant track buttons. Colour coding the markers also helps.
7. Override
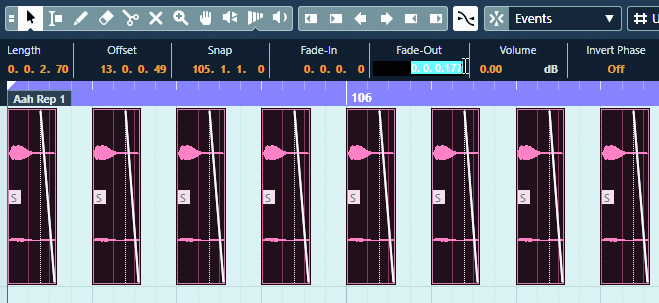
When editing numeric fields in the Infoline of the project or editor windows, holding CTRL plus RETURN sets all selected events to the same updated value. This is a nice – and quick – way of overriding multiple events with different settings (volume, fade-in etc.)
8. Key Commands
Not all functions in Cubase have a keyboard shortcut assigned to them, which means you might be missing some features that are almost hidden from view. The Key Commands window will give you the full view over what is on offer.
9. Try a new Lane
The Lanes functionality on each audio track is commonly used when comping multiple takes. However, it can also be a fantastic way of trying out different edits without resorting to Track Versions.
10. Project Logical
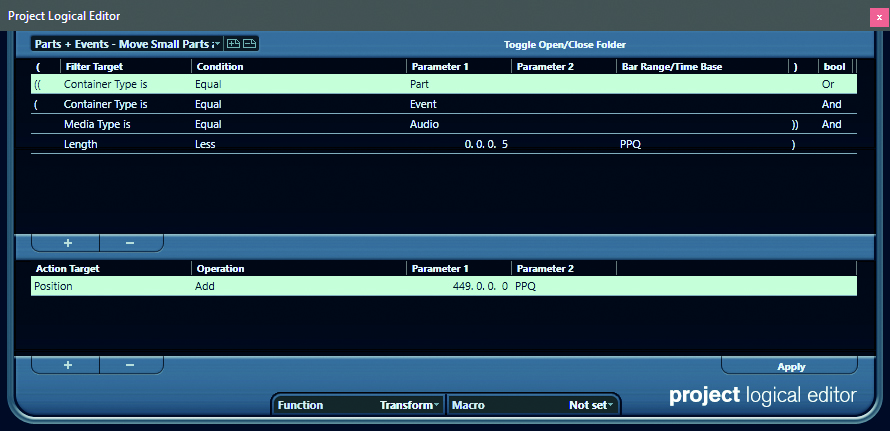
The Project Logical Editor is immensely powerful and seemingly quite complex. However, there are a great set of presets to get you started, which make a good starting-point for creating your own. Here’s one for moving all small, orphaned events caused by extensive editing to later in the project (and subsequent deletion).


Future Music is the number one magazine for today's producers. Packed with technique and technology we'll help you make great new music. All-access artist interviews, in-depth gear reviews, essential production tutorials and much more. Every marvellous monthly edition features reliable reviews of the latest and greatest hardware and software technology and techniques, unparalleled advice, in-depth interviews, sensational free samples and so much more to improve the experience and outcome of your music-making.


