How to build a complete mastering chain in Ableton Live using only stock plugins
There's no need to draw for expensive third-party plugins when you're DIY mastering. Here's how to build a versatile mastering chain using Ableton's ample selection of processors
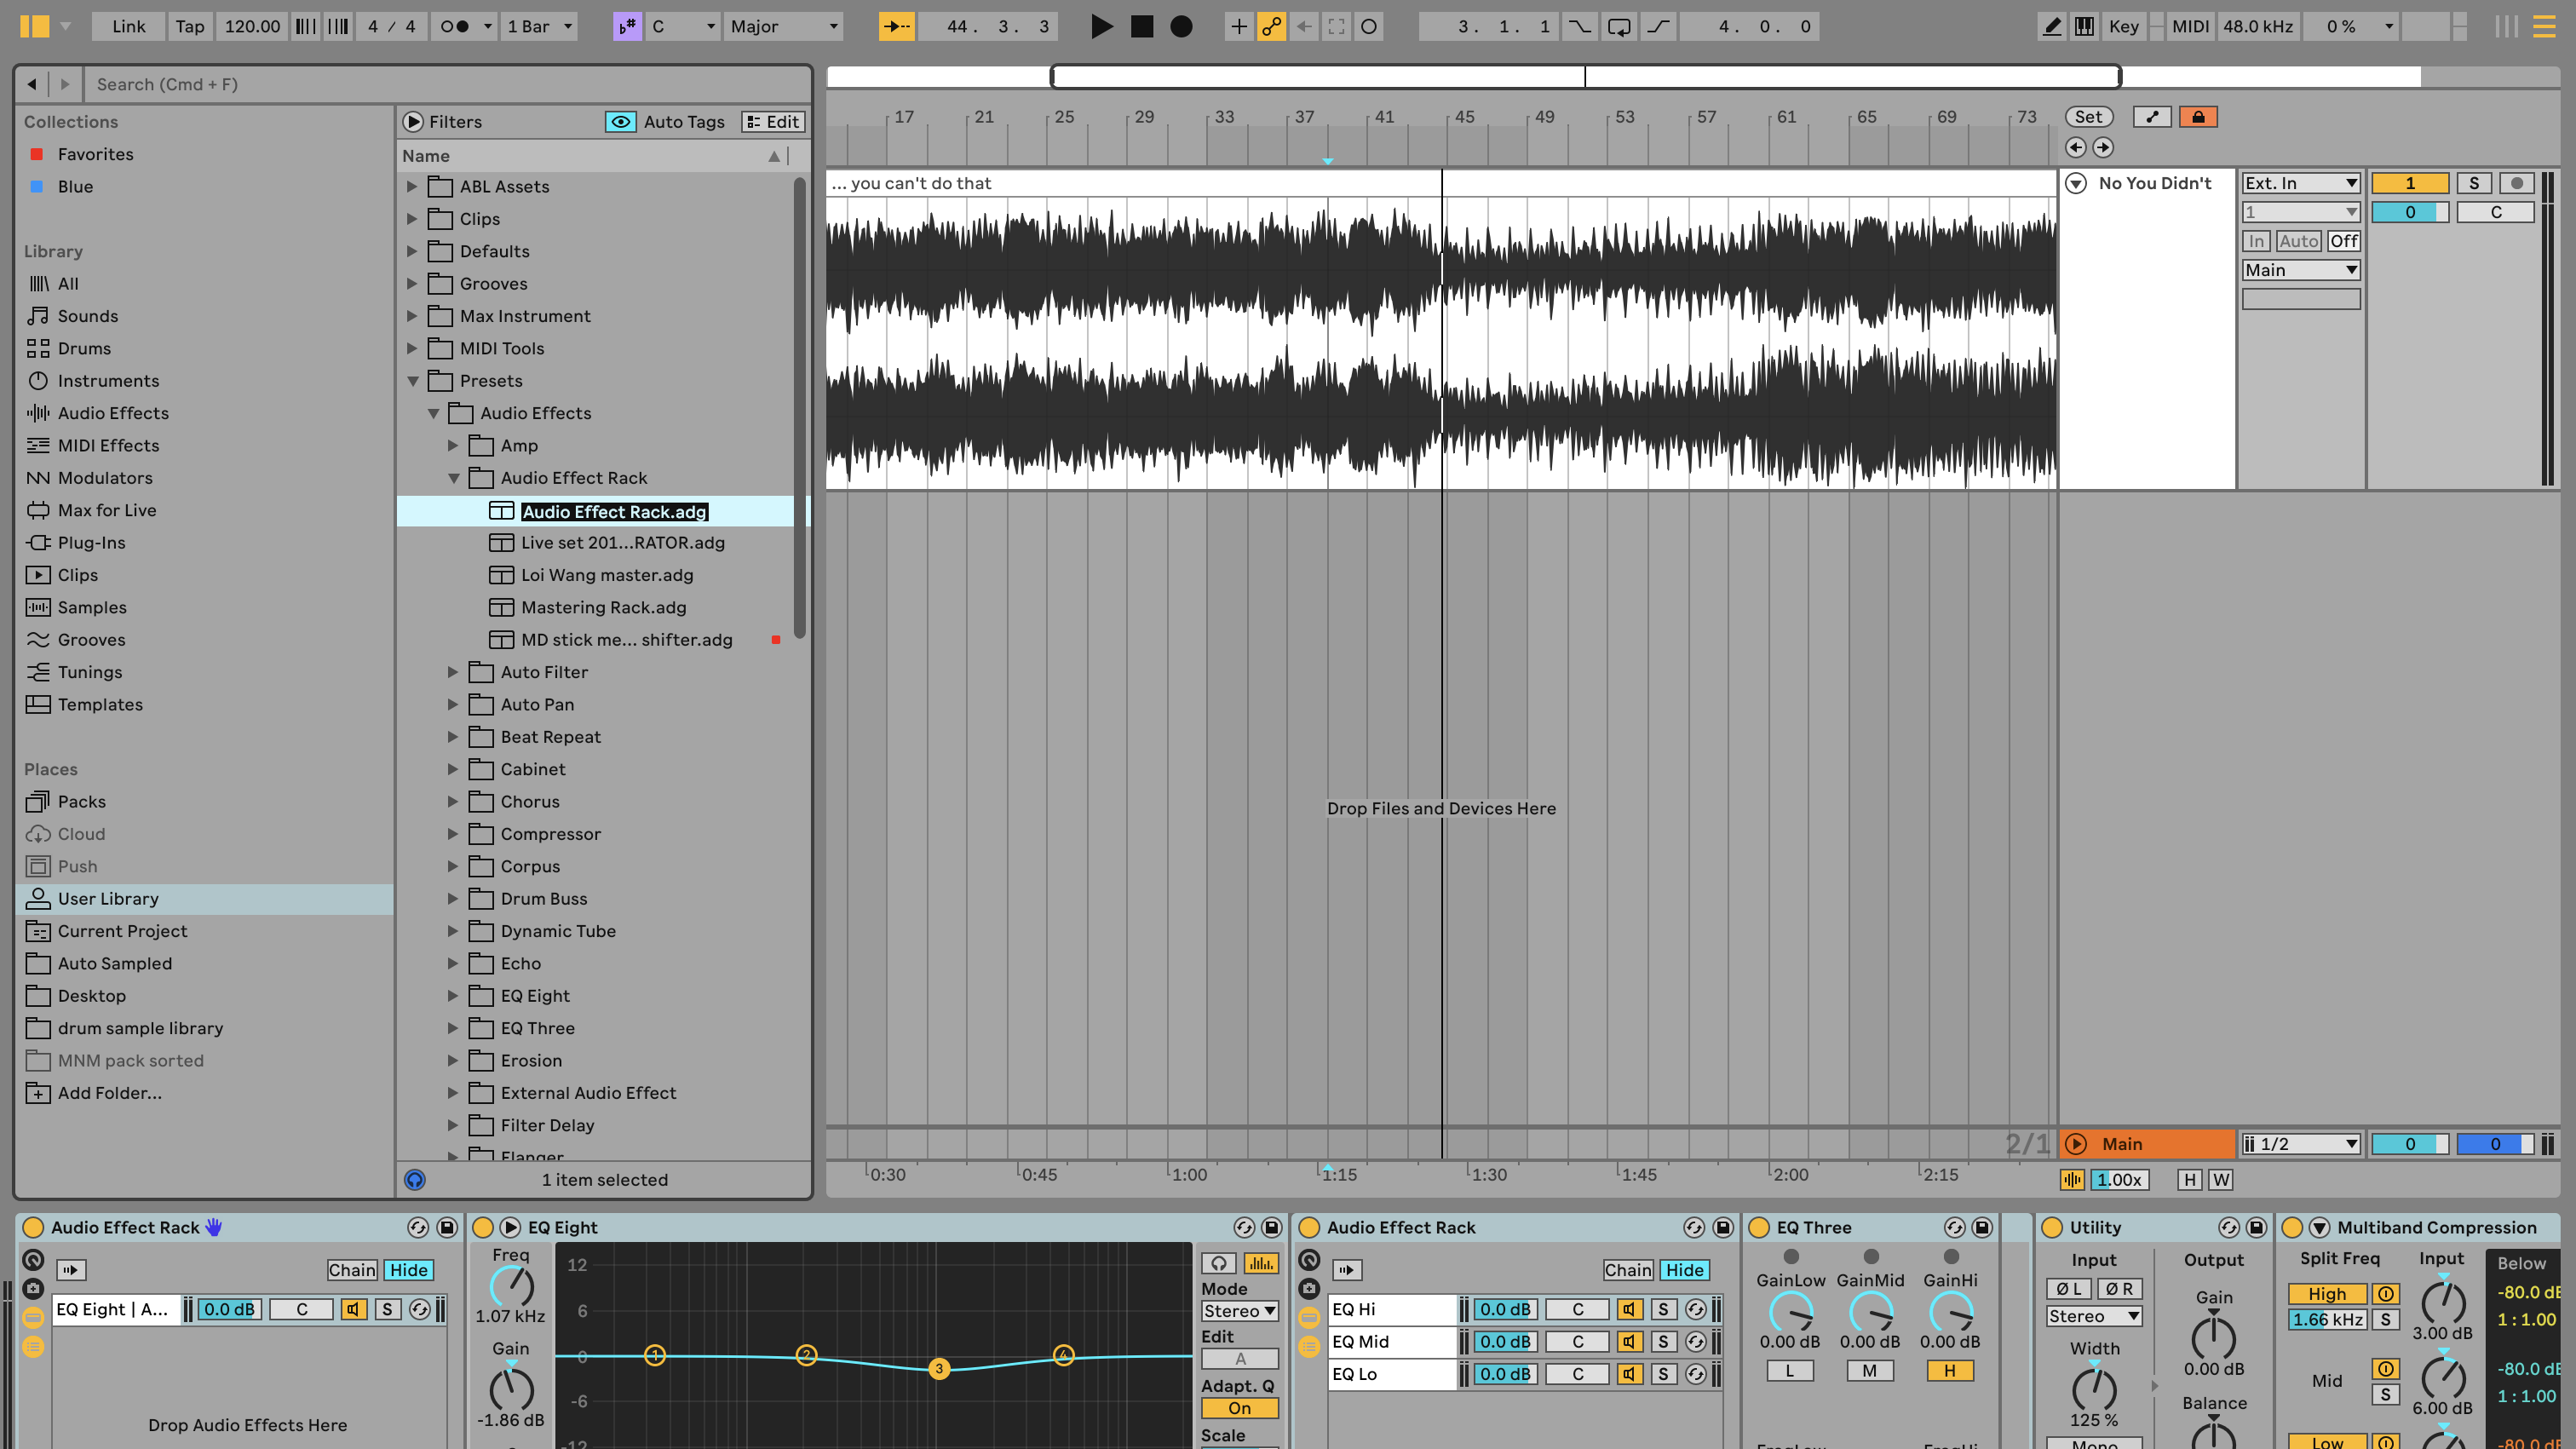
As Ableton Live has matured over the decades, it’s now possible to mix and master projects using only Live’s native effects. Let’s look at how we can create a mastering chain that’ll work across many different projects.
It’s just an example - there’s no ‘one size fits all’ mastering solution, but it’s a good starting point, and the simple exercise of building this will give your new insights into how mastering works. We use this approach for mastering, and for fixing or adjusting stereo files such as field recordings or live recordings, where it’s not easy to access the separate parts.
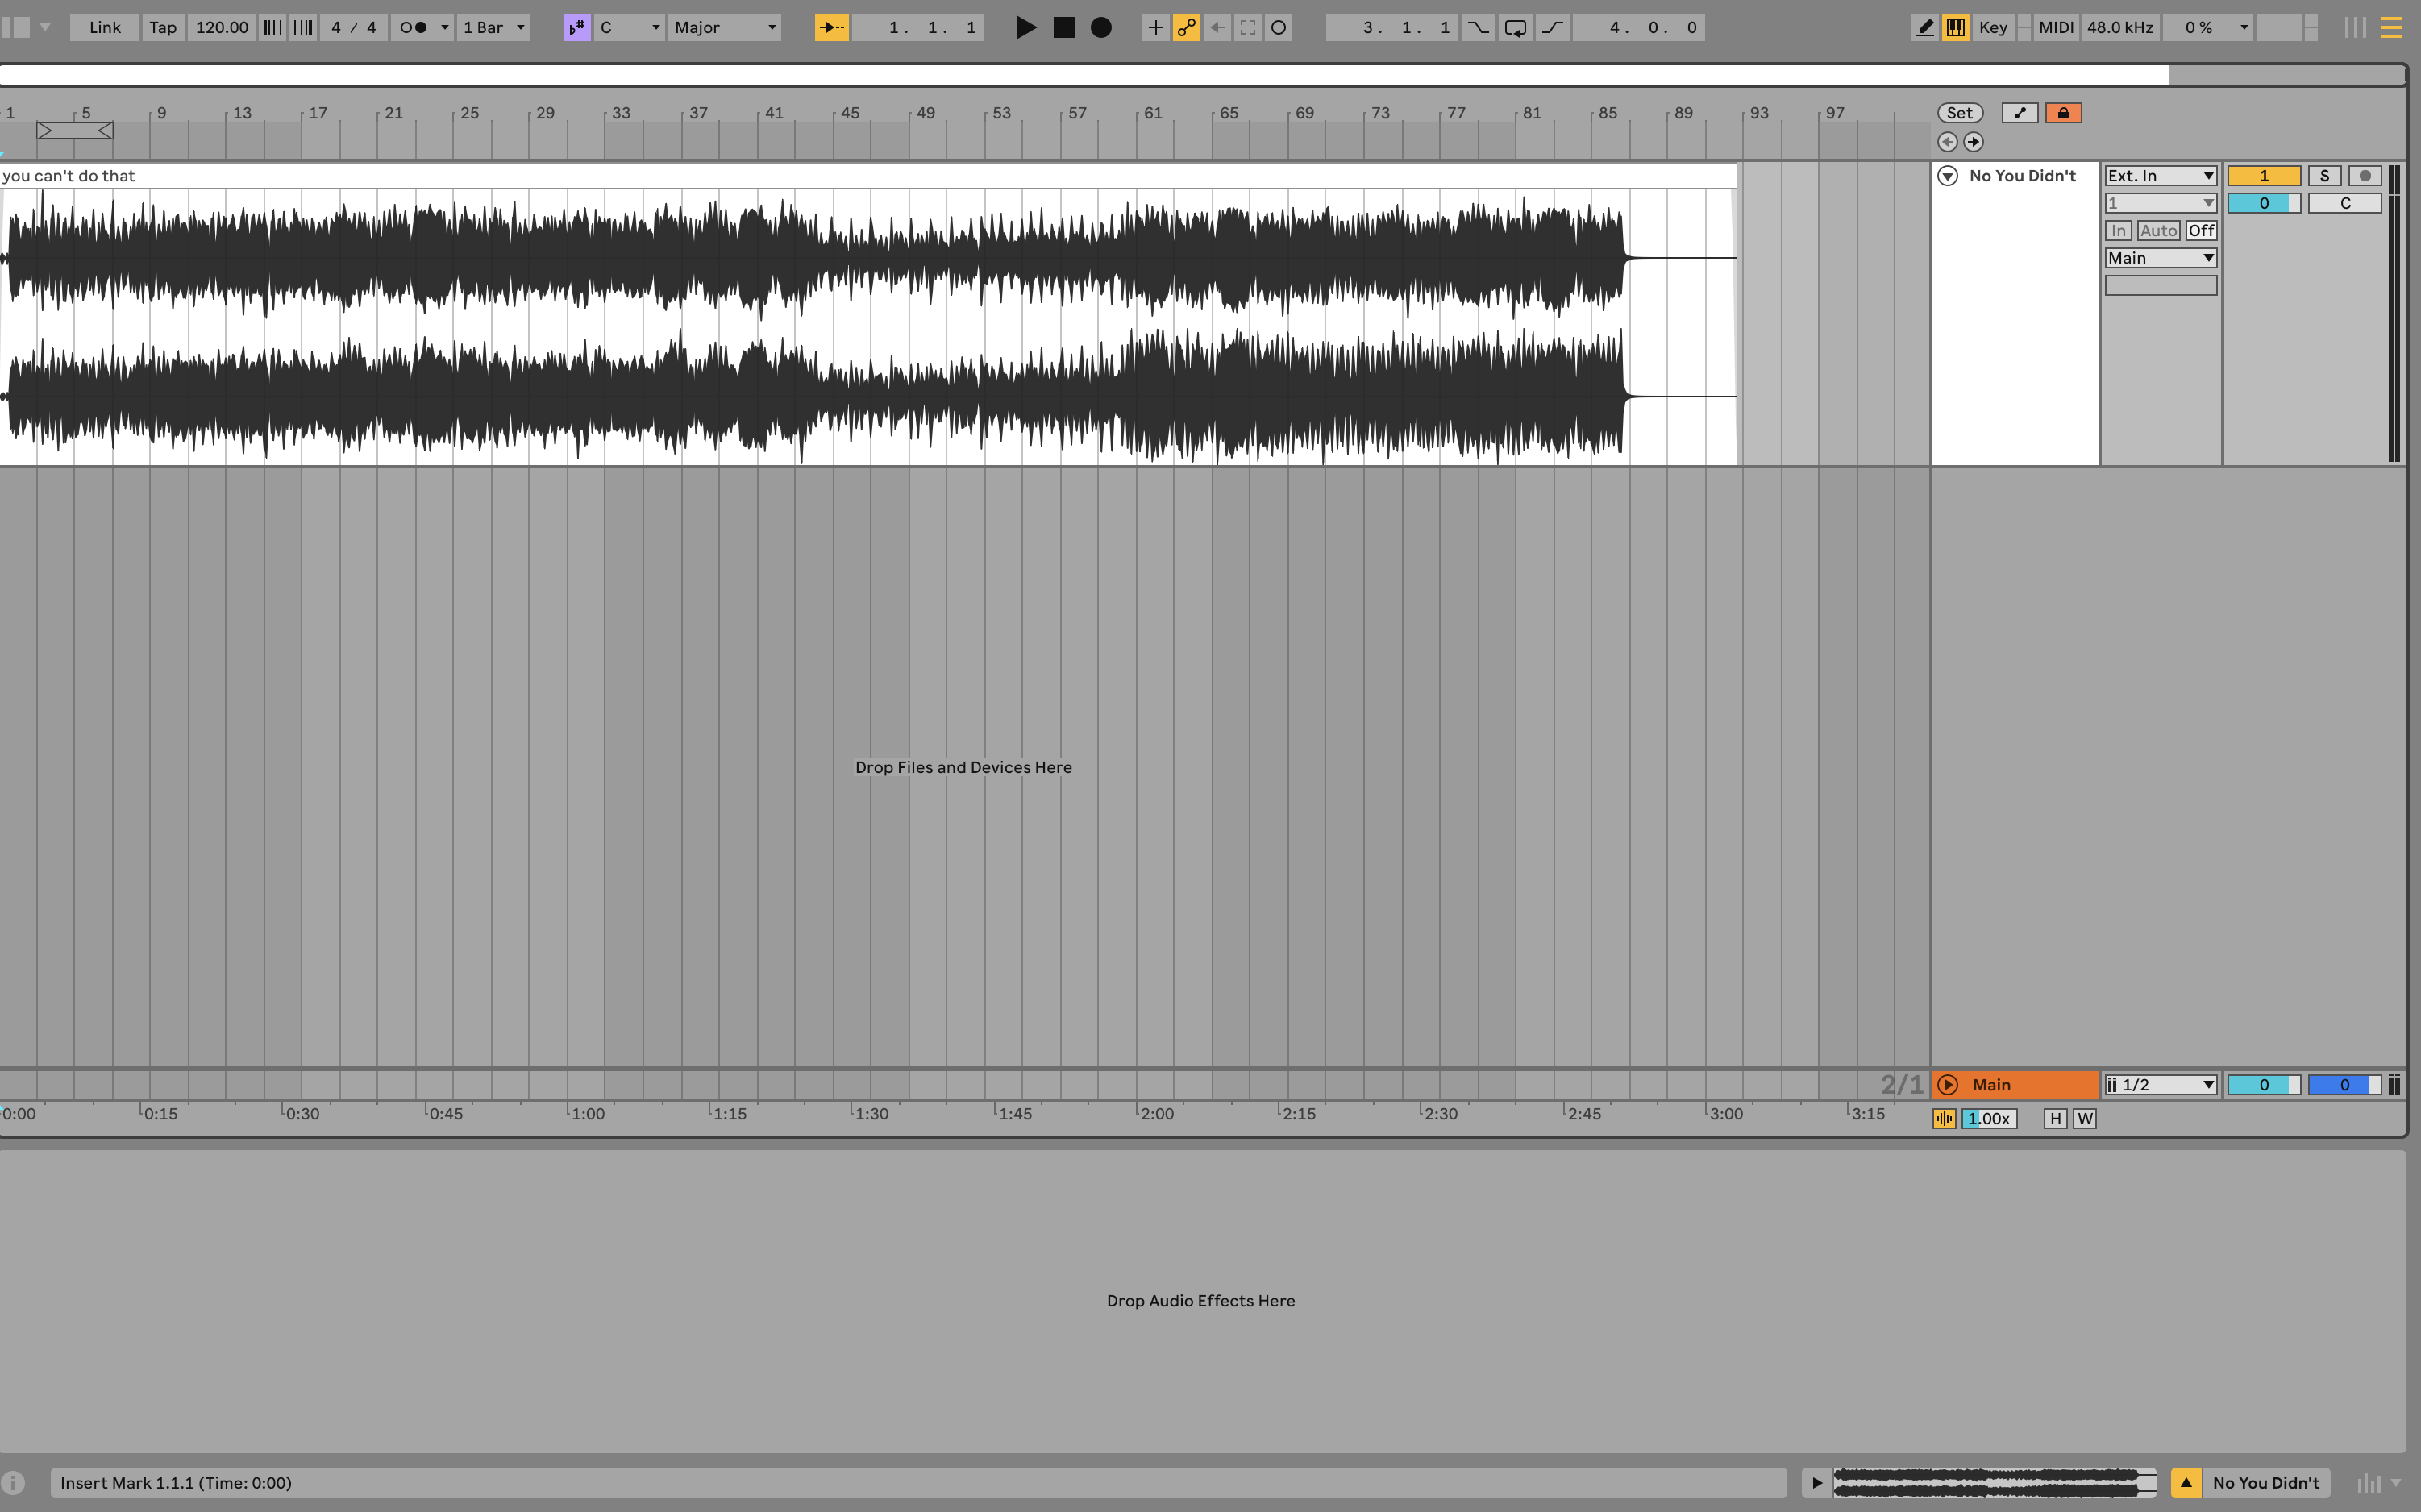
Go to Arrangement View so we can see the timeline. This is recommend for working with longer stereo files, while Session View is recommended for earlier in the creative process. Drop your chosen stereo file into an audio track in Live. Delete any unwanted audio and MIDI tracks, let’s keep things clear.
Because this is the only file in this project, we can add any effects directly to this track instead of on the Main track. We like to set the clip colour to white, so there are no visual distractions, we don’t use colour unless there’s a good reason.
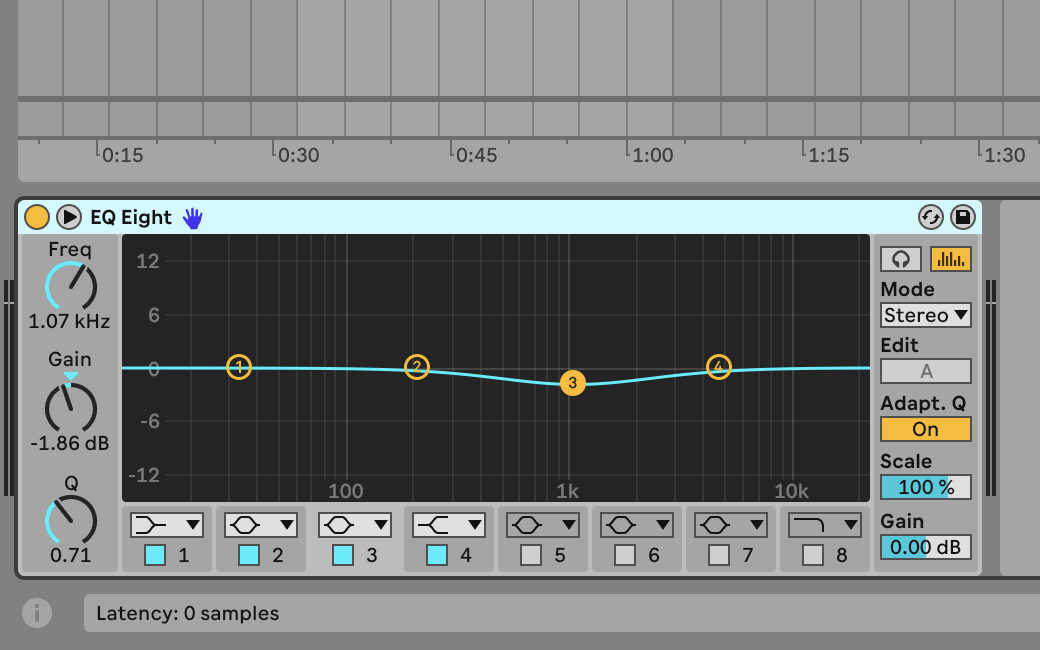
EQ doesn’t always have to be part of mastering, unless you identify a problem area in the mix. This is an opportunity to stress how important monitoring is, on speakers and headphones.
It doesn’t have to be the swankiest rig in the world, but you need to be familiar with it, listen to other music on it, and recognise how your work will transfer to other listening setups. We listen to our mixes and masters on as many different setups as possible. When we do make adjustments, it’ll be for very specific areas that we’re sure need some tweaking.
- Read more: Best EQ plugins: Mix, create, repair, and master with these 13 amazing equalizers
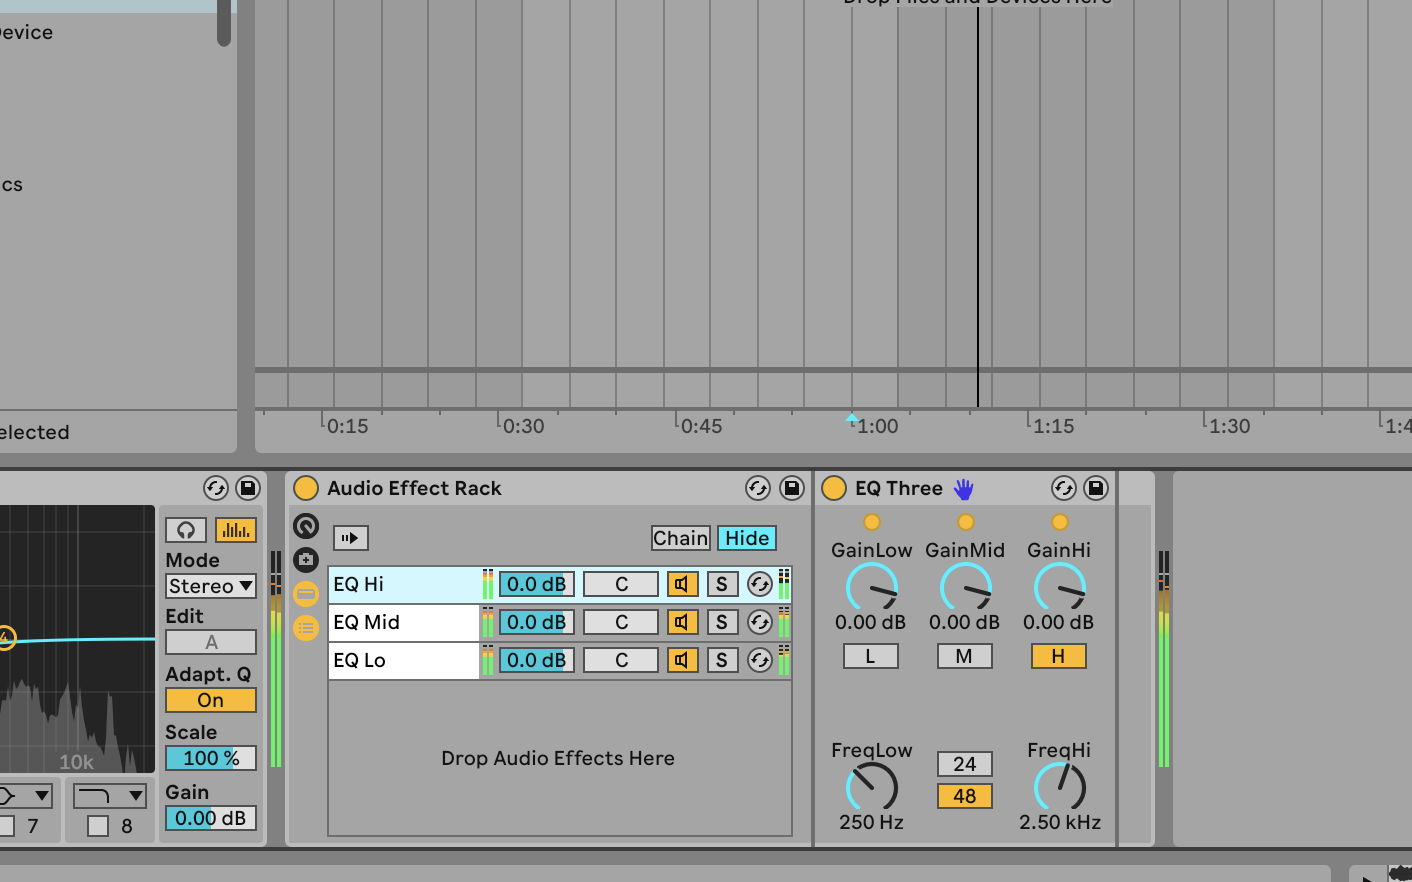
If necessary, we can use racks and EQ to split a song’s frequency range. Do this by loading an EQ Three, clicking on it and typing Cmd+G to make a rack, then opening the chain view and duplicating the chain twice, so you end up with three chains, each containing EQ Three.
Get the MusicRadar Newsletter
Want all the hottest music and gear news, reviews, deals, features and more, direct to your inbox? Sign up here.
On the first instance, turn off mid and high, the second, turn off low and high, the third turn off low and mid. Now you have all the bands of your song intact, but spread over three chains, so you can apply processing separately to each chain, if you so wish.
- Read more: The ultimate guide to modern EQs
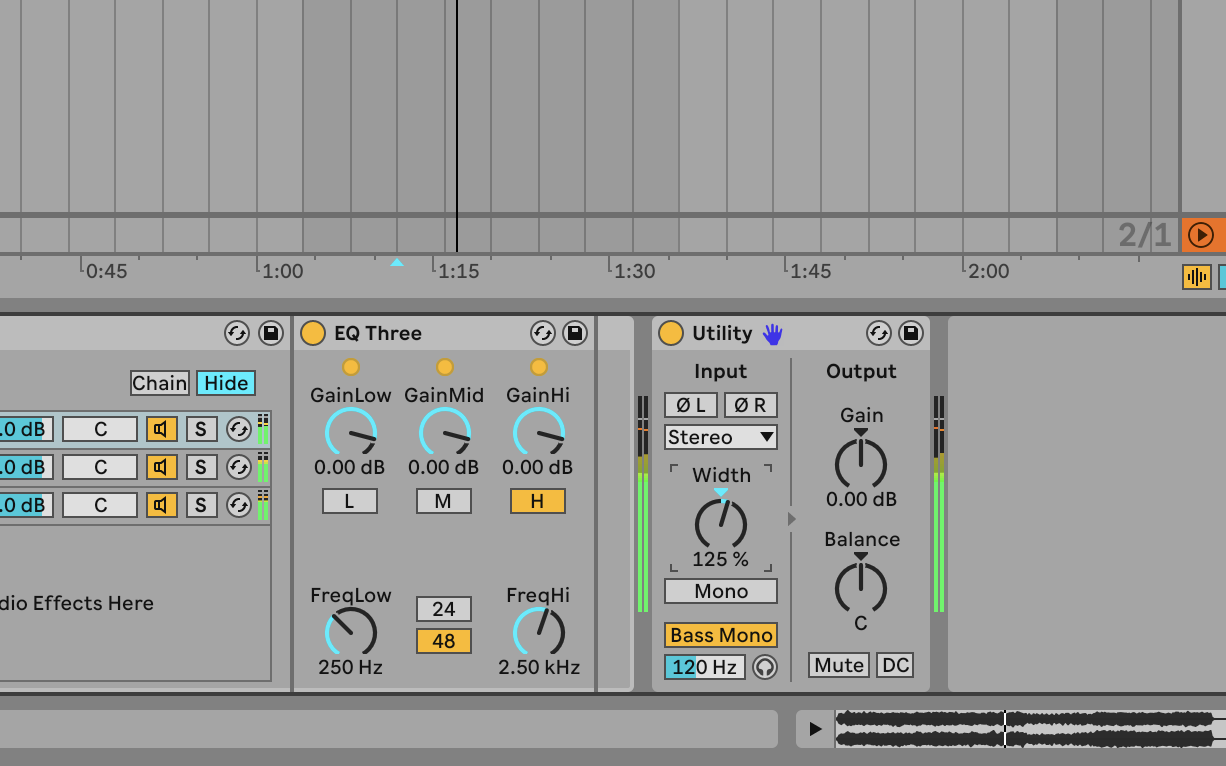
It can happen that a stereo mix needs a bit more, uh, stereo. We can achieve this with Live’s Utility device, adding it before compressors or limiters. Activating the Bass Mono switch is very effective for firming up the low end; we typically leave it set at 120 Hz, but see what works with your mix, there’s nothing wrong with adding more mono.
Above that is the Stereo Width control - usually for this we rarely venture above 125%. There are no absolutes for this, and we certainly take time to experiment with these tools - don’t underestimate their value.
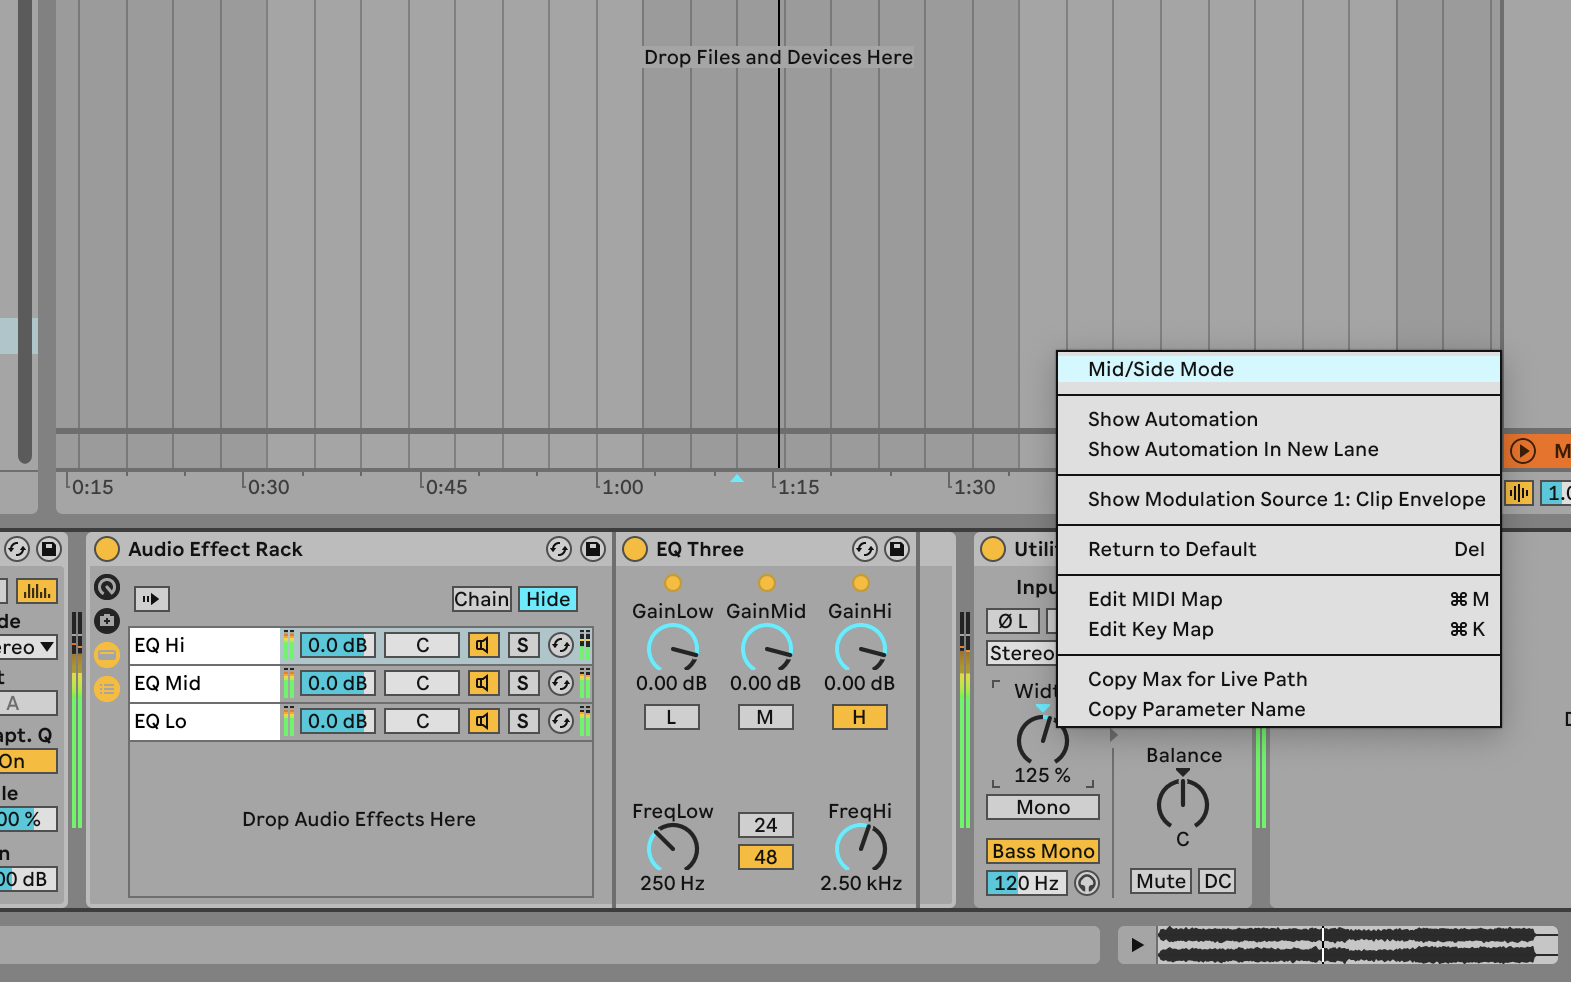
Let’s take a minute to talk about Mid/Side processing - this is where we can cut or boost the centre or sides of the stereo image independently of each other. If you right-click on Utility’s Width rotary control, you can enter Mid/Side Mode, and it will change the blend between centre (turn left), and sides (turn right), in values from 0 (default centre) to 100, at 100 you will only hear the selected channels.
It’s a very useful, yet easy to use, tool for re-emphasising stereo balance, and we have used it particularly on live recordings and field recordings.
- Read more: How to use mid/side EQ for mastering
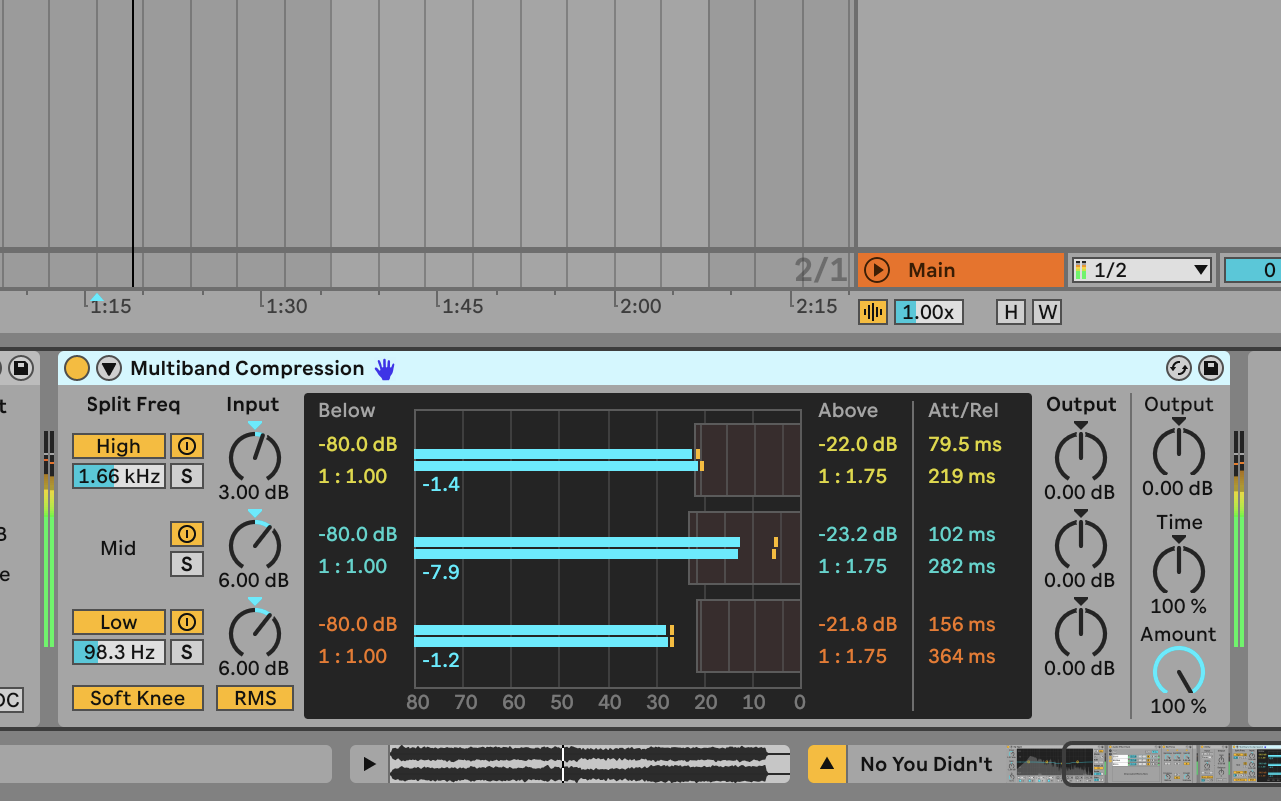
If you have a well-balanced mix, sometimes you can simply drop Live’s Multiband Dynamics/Multiband Compression preset straight onto the track. By default, this preset will give things a little boost and make everything sound louder, without affecting the overall balance.
If you do want to tweak this, an easy start is to adjust the low, mid, and high, levels, if you think one of those needs a little boost or cut. Sometimes that’s all it takes. Beyond that you could reduce the threshold for any of those bands to compress it a little more and make it more punchy.
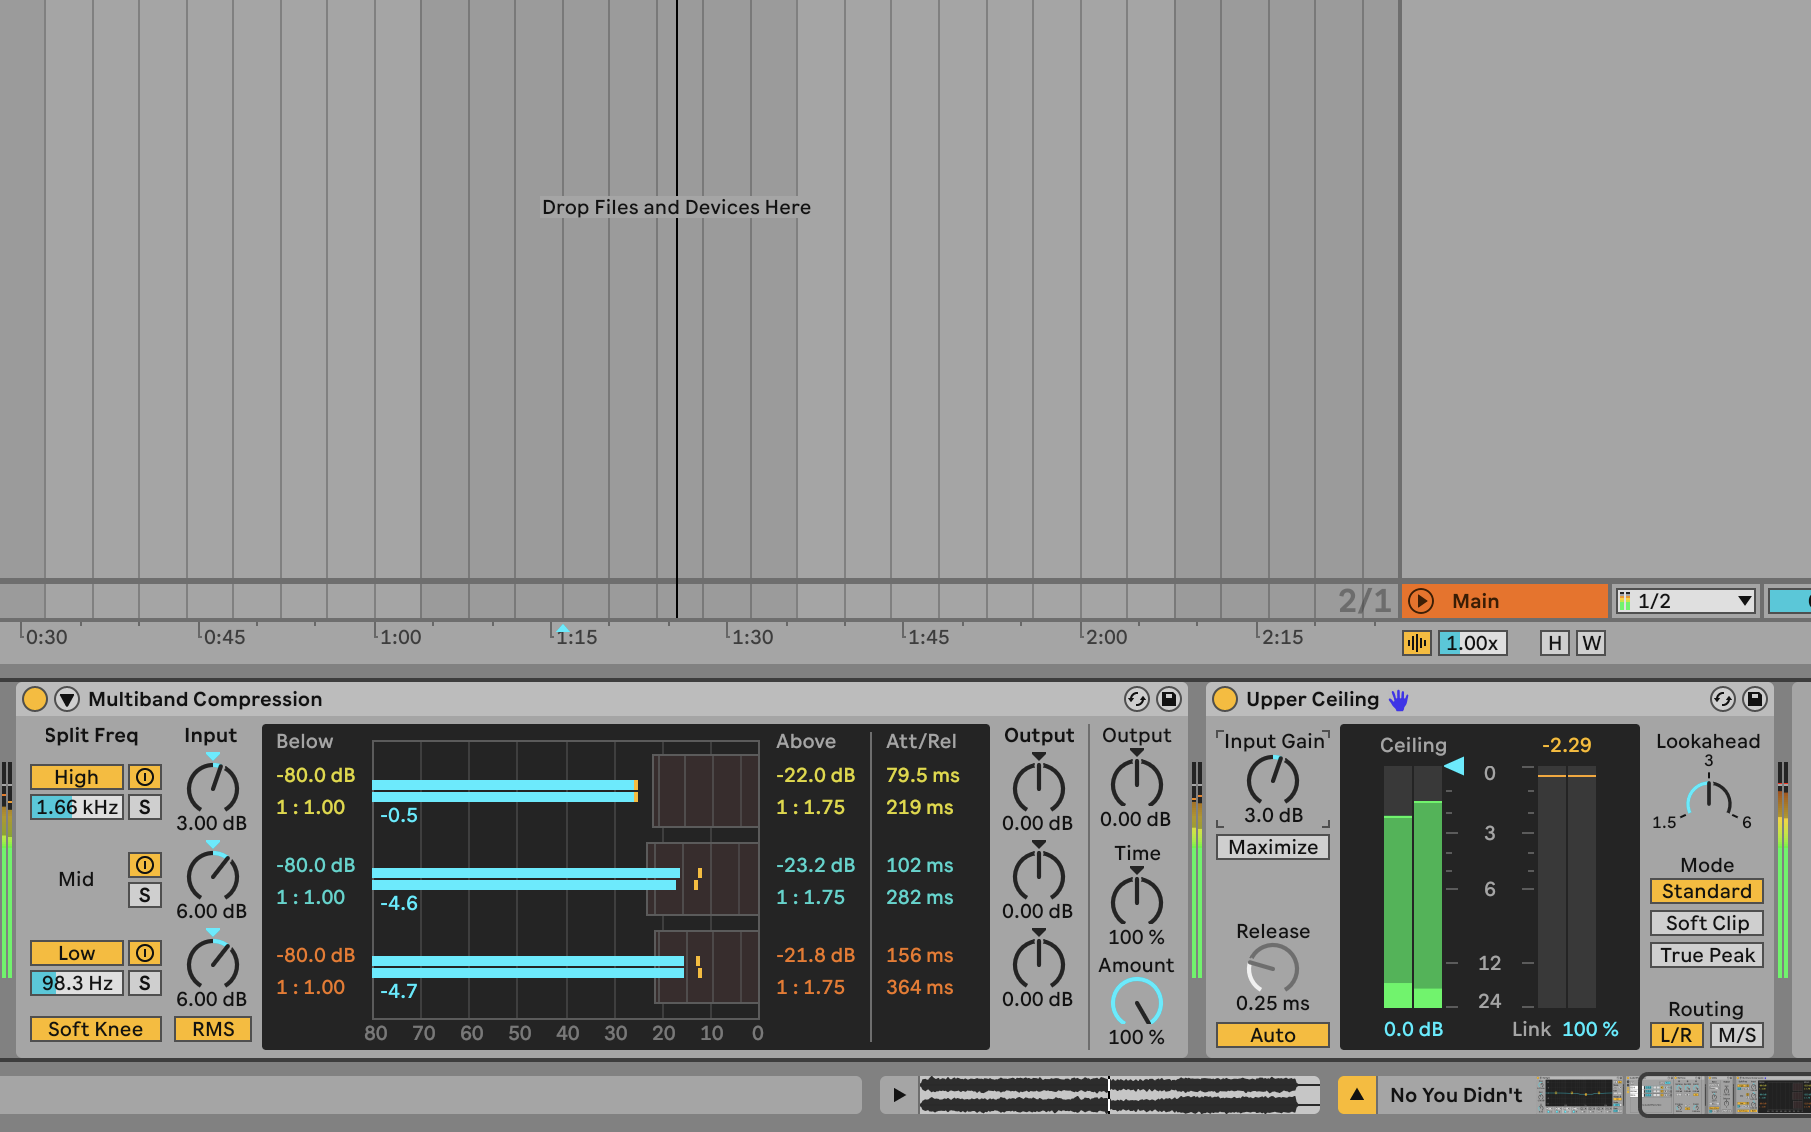
Load Limiter after Multiband Dynamics. This lets you manage overall loudness, letting you boost it all, while still capping it off around the ideal -1db mark. If you crank the gain, you’ll definitely hear the limiter working. We prefer when we’re seeing just a little gain reduction in the meter.
Limiter includes a Maximise control - with this on, Input Gain becomes an Output level control, Ceiling control becomes Threshold, and further adjustments will reduce the overall dynamic range, the difference between quiet and loud parts. This has a pronounced effect, you may need to adjust other parameters as a result.
- Read more: The beginner's guide to limiting
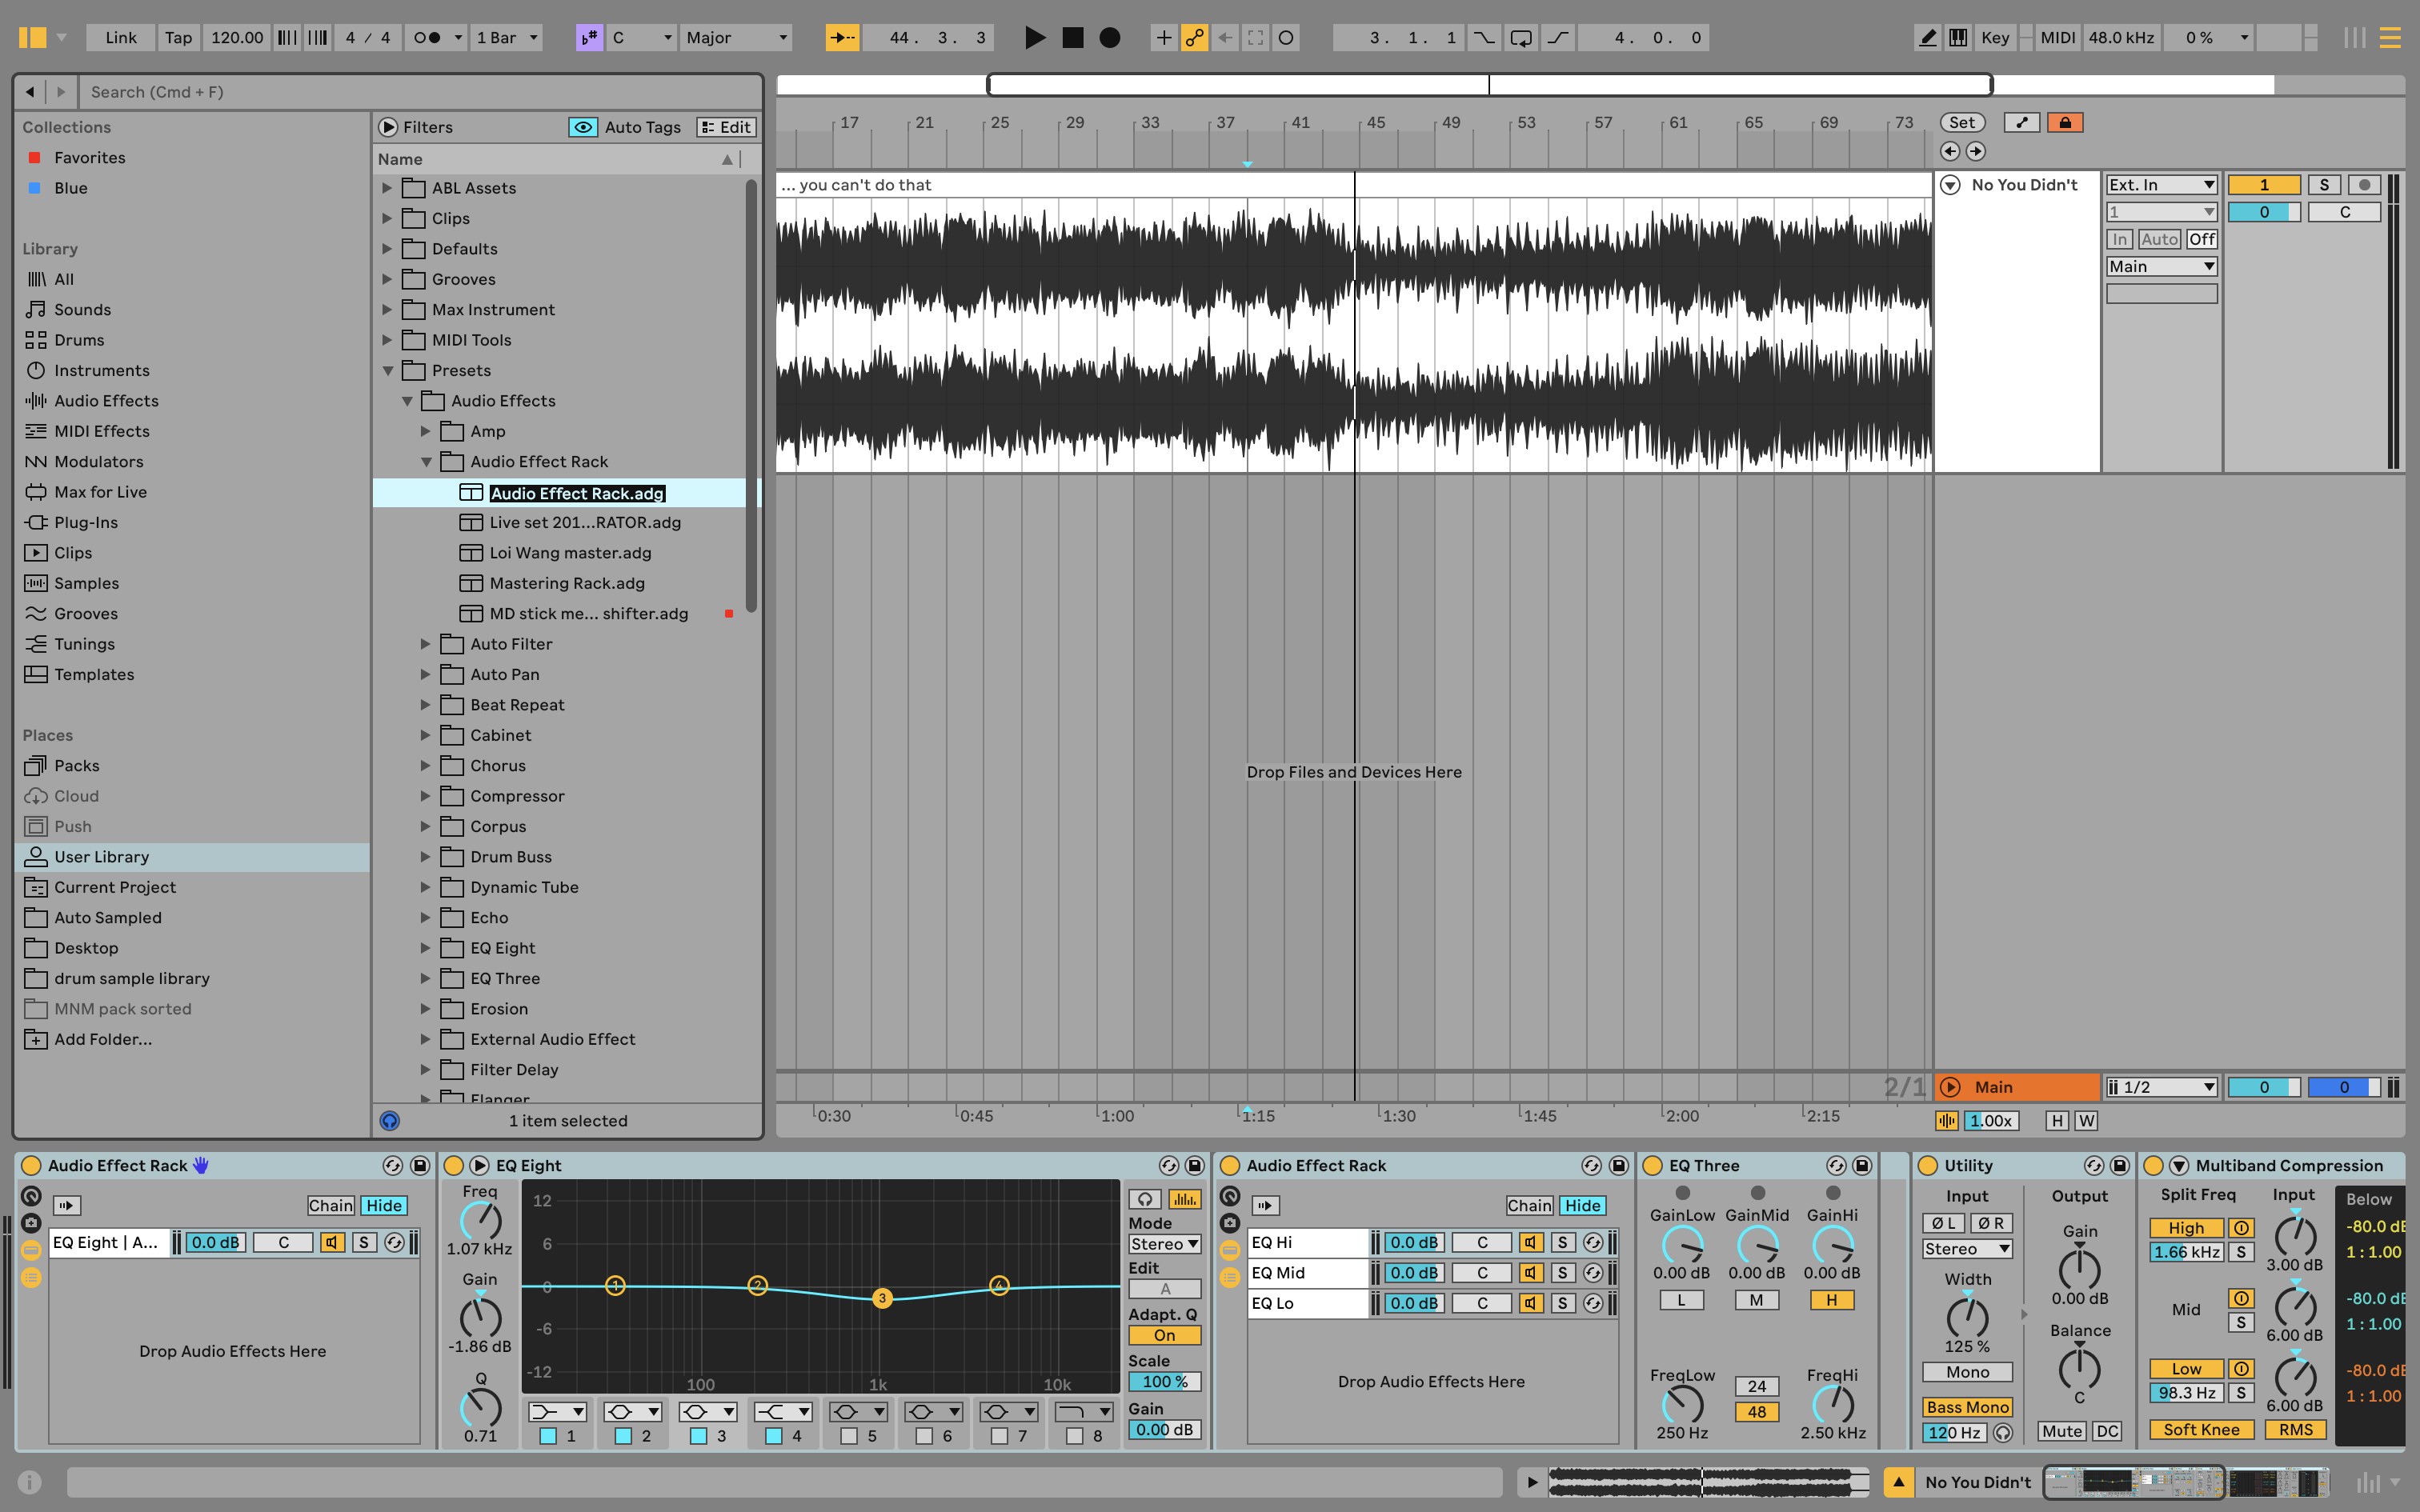
Click on any device in the finished chain, and use Cmd+A to select all the devices. Hit Cmd+G to commit all of these to a new audio effect rack. At this point, if you’re using a hardware controller with some knobs on it, you could assign the rack’s macro controls to your most-wanted parameters.
Hit the Save Preset button, at the top left of the new rack, and enter a name for your rack. We’d also suggest marking it as a favourite, so you can always grab it from the favourites section at the top left of the Browser.
This is a ‘mastering’ chain, but you don’t have to wait until the end before using it, especially if you’re working with a single piece of music. Insert it early, and maybe you’ll save yourself from a separate final stage - sometimes the whole chain from composition to mixing to mastering can be handled in one project.
However, if you’re working with an EP or album, you might be advised to save what we’d strictly call ‘mastering’ until the end, where you can adjust all songs together in a new project, making it easier to compare levels and apply any other processing.

Martin Delaney was one of the UK’s first Ableton Certified Trainers. He’s taught Ableton Live (and Logic Pro) to every type of student, ranging from school kids to psychiatric patients to DJs and composers. In 2004 he designed the Kenton Killamix Mini MIDI controller, which has been used by Underworld, Carl Craig, and others. He’s written four books and many magazine reviews, tutorials, and interviews, on the subject of music technology. Martin has his own ambient music project, and plays bass for The Witch Of Brussels.


