Playing your first gig with CDJs? Here are 10 essential features you need to know about
New to CDJs having learned to DJ at home on your controller? We've got you covered for your next live show…
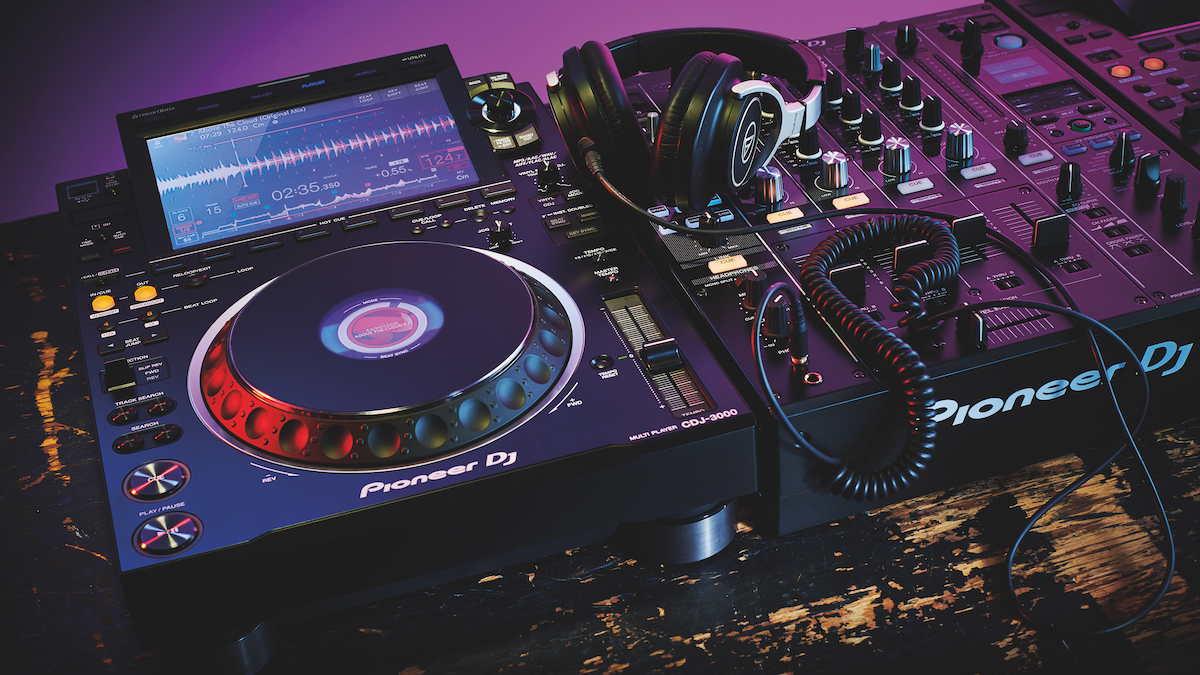
Since its introduction in the mid ’90s, Pioneer’s CDJ range has become the industry standard in digital DJ decks, with flagship model the CDJ-3000 along with CDJ-2000s and XDJ-1000s found in clubs, raves and festivals the world over.
CDJs have proved to be a complete DJ game changer, setting the standard other tech companies would have to live up to, defining the nature and functionality of the new DJ technology, and causing a seismic change to the craft of DJing in the process. DJs could now bring way more music with them to gigs than before without carrying heavy record bags. And not only could 1994’s CDJ-500 play CDs but you could also scratch, change tempo with or without changing the pitch, and make loops and drum rolls on the fly.
The technology has moved on substantially over the last three decades and there’s no doubt that the controls and functionality of a pair of CDJ 3000s can be a little daunting the first time you use them. With many DJs learning their craft at home on controllers, we’ve put together a list of ten basic CDJ functions/controls that you’ll need to be familiar with from your controller and that you’ll need to know about to successfully play your first CDJ gig with just a pair of DJ headphones and your USBs. And we’ve even put them in the order that you’ll probably encounter them.
Note that to write this piece we used a CDJ2000NXS2 and a CDJ3000 as you’re likely to encounter both machines if you gig regularly. We’re going to assume that you’ve selected your music and put it onto USB drives, and that your music library has either been analysed with Rekordbox or you’ve converted your Serato or Traktor library to Rekordbox.
1. USB Stop
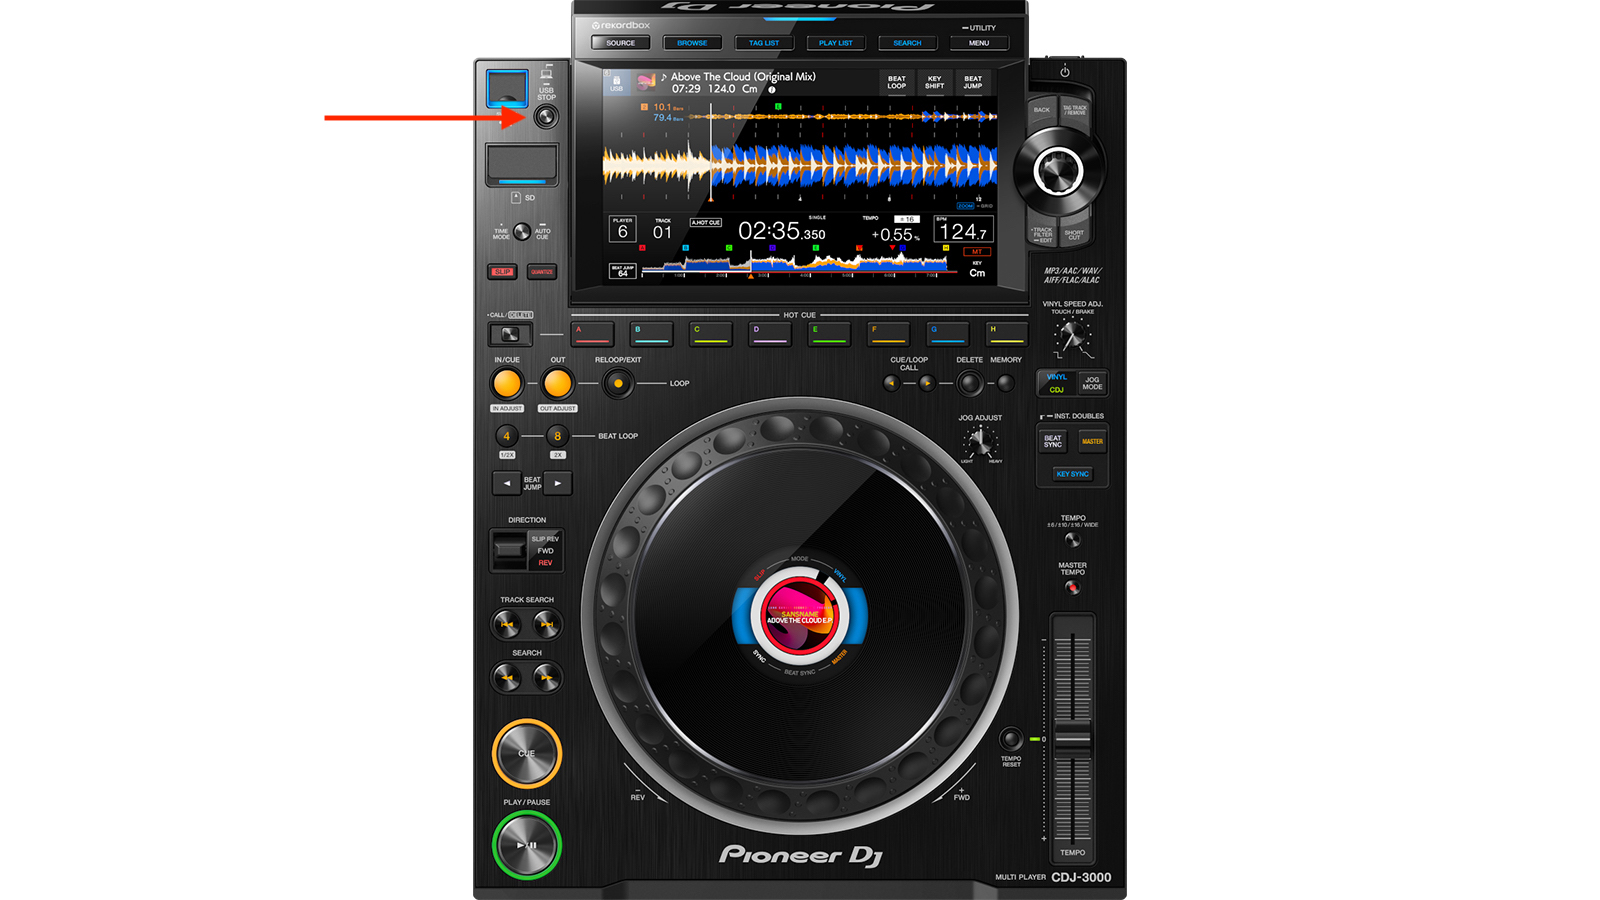
The USB port on CDJs is right in the top left hand corner of the front panel and next to it is the circular USB Stop button. You press it before removing USBs to avoid damaging the data. The USB port has an indicator light which will stop blinking after you press the button, indicating that it’s now safe to remove the previous DJ’s USB and put yours in.
2. Link
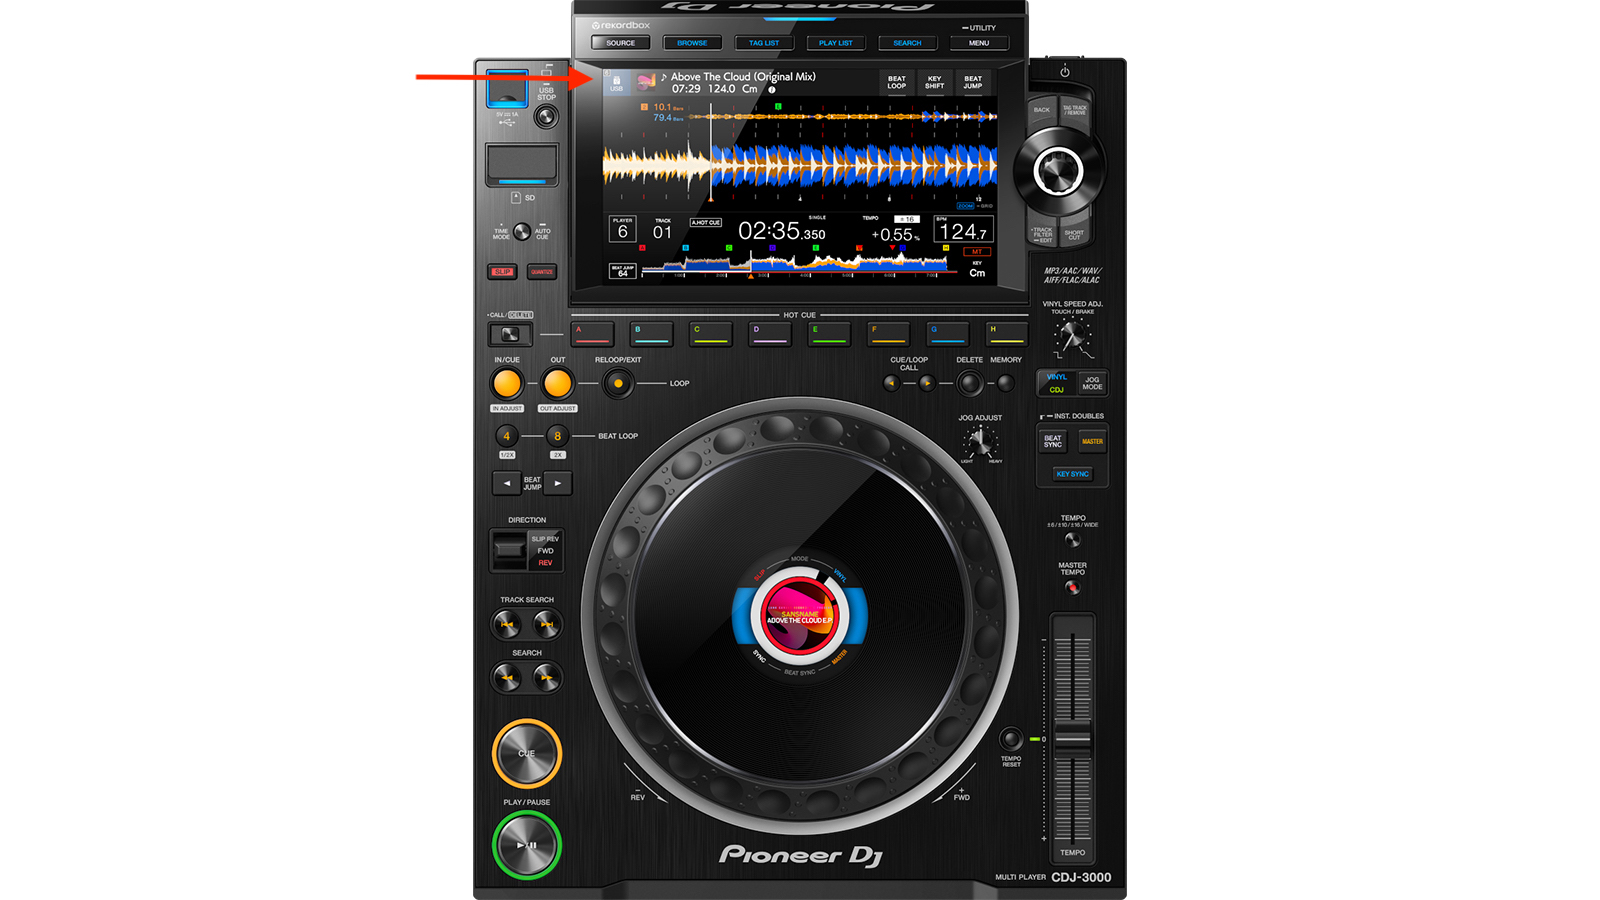
Directly to the right of the USB indicator light is a column of five rectangular buttons where you select the source of your music – Rekordbox, Link, USB, SD or (on older models) Disk; on the 3000 the buttons are in the same place but on the touch screen, below the Source button. Press the Link button and (assuming the CDJs are linked), you can access music from a single USB on both decks. You plug in your USB, select USB as the source, then hit Link on the other drive, the one without a USB plugged in, and you can then access all your music on both decks.
3. Rotary selection knob
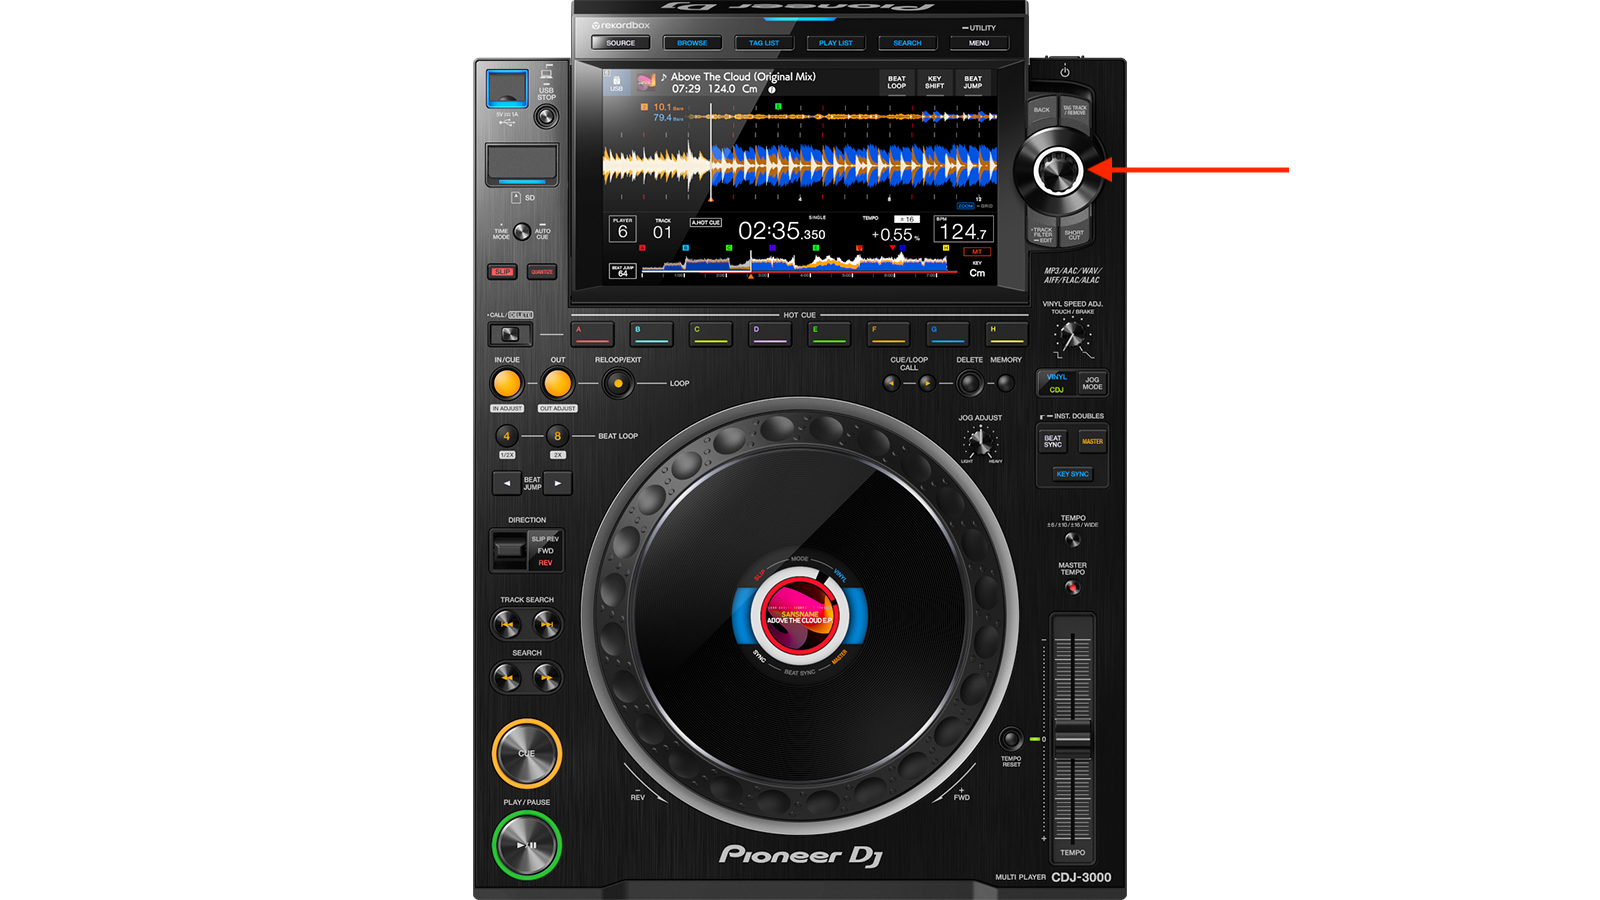
This is the large knob to the right of the main screen. Turning it moves the cursor on the screen, allowing you to scroll through playlists, artists or tracks and so on, while pressing it selects the playlist or track etc. Directly above the Rotary Selection Knob are two buttons – the left one is the Back button which takes you back from, for example, your playlist to the main screen.
Want all the hottest music and gear news, reviews, deals, features and more, direct to your inbox? Sign up here.
4. Cue & play/pause
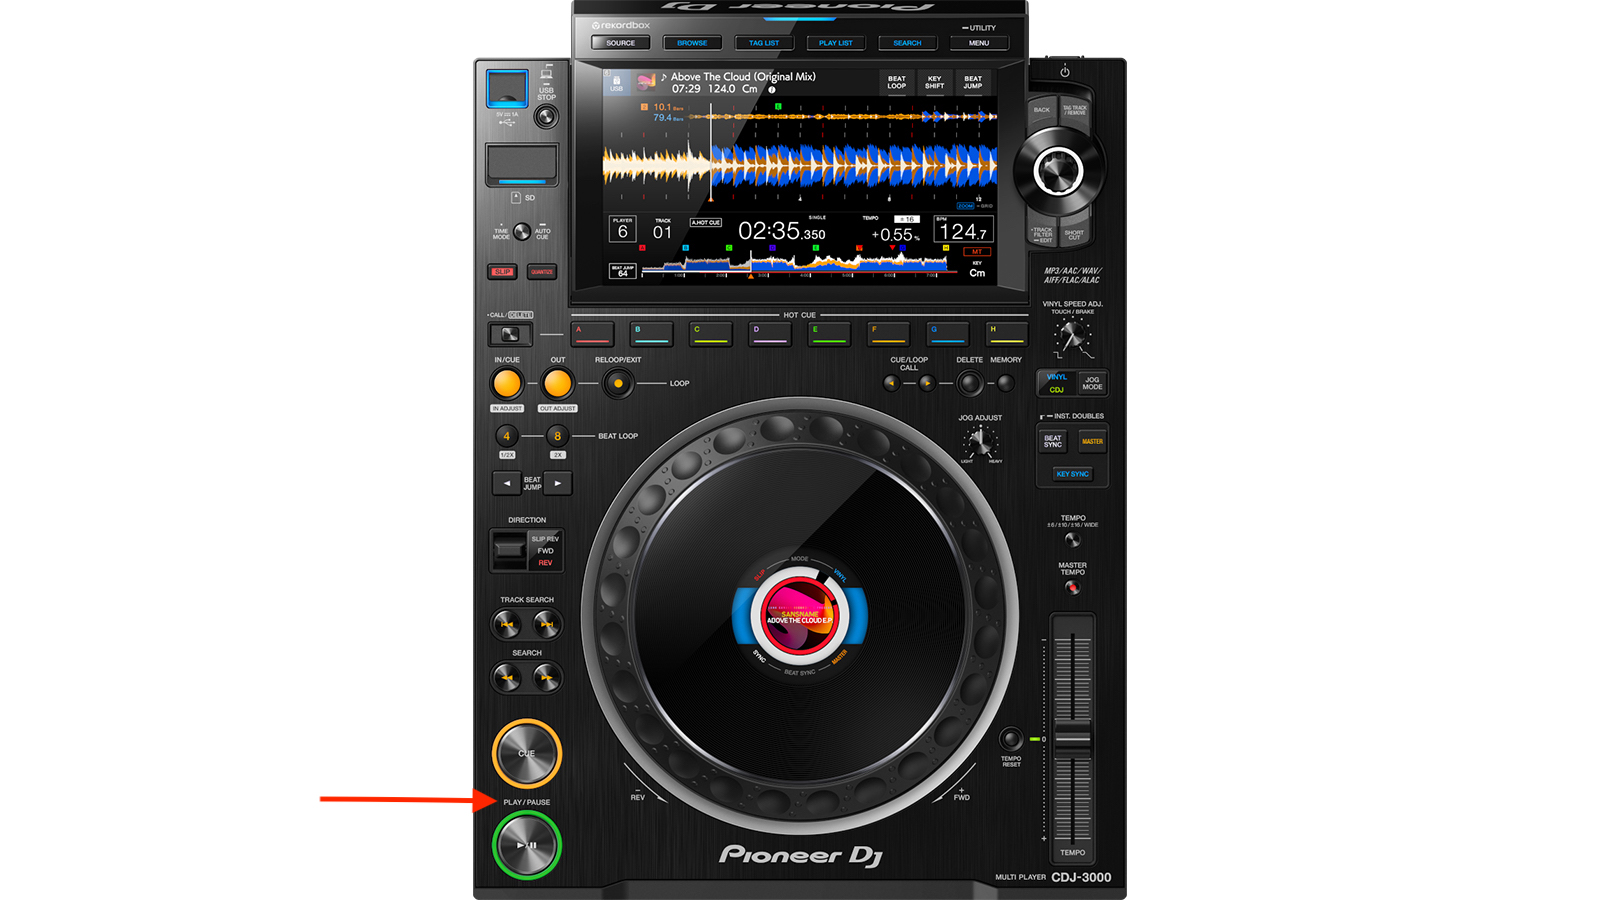
These are where you’d expect to find them, at the bottom left hand corner of each deck – they’re a pair of large, lit up circular buttons which do just what you’d expect them to. Play/Pause either plays or pauses the track, while Cue either sets or returns to a cue point. To set a cue point press Play/Pause to stop the track at the point you want to set it; you can make minor adjustments by ear with the jog wheel to get to the exact spot, then simply hit the Cue button and it will set the cue point, replacing any previous cue point. Then whenever you hit the Cue button the track will automatically return to this point.
5. Quantize
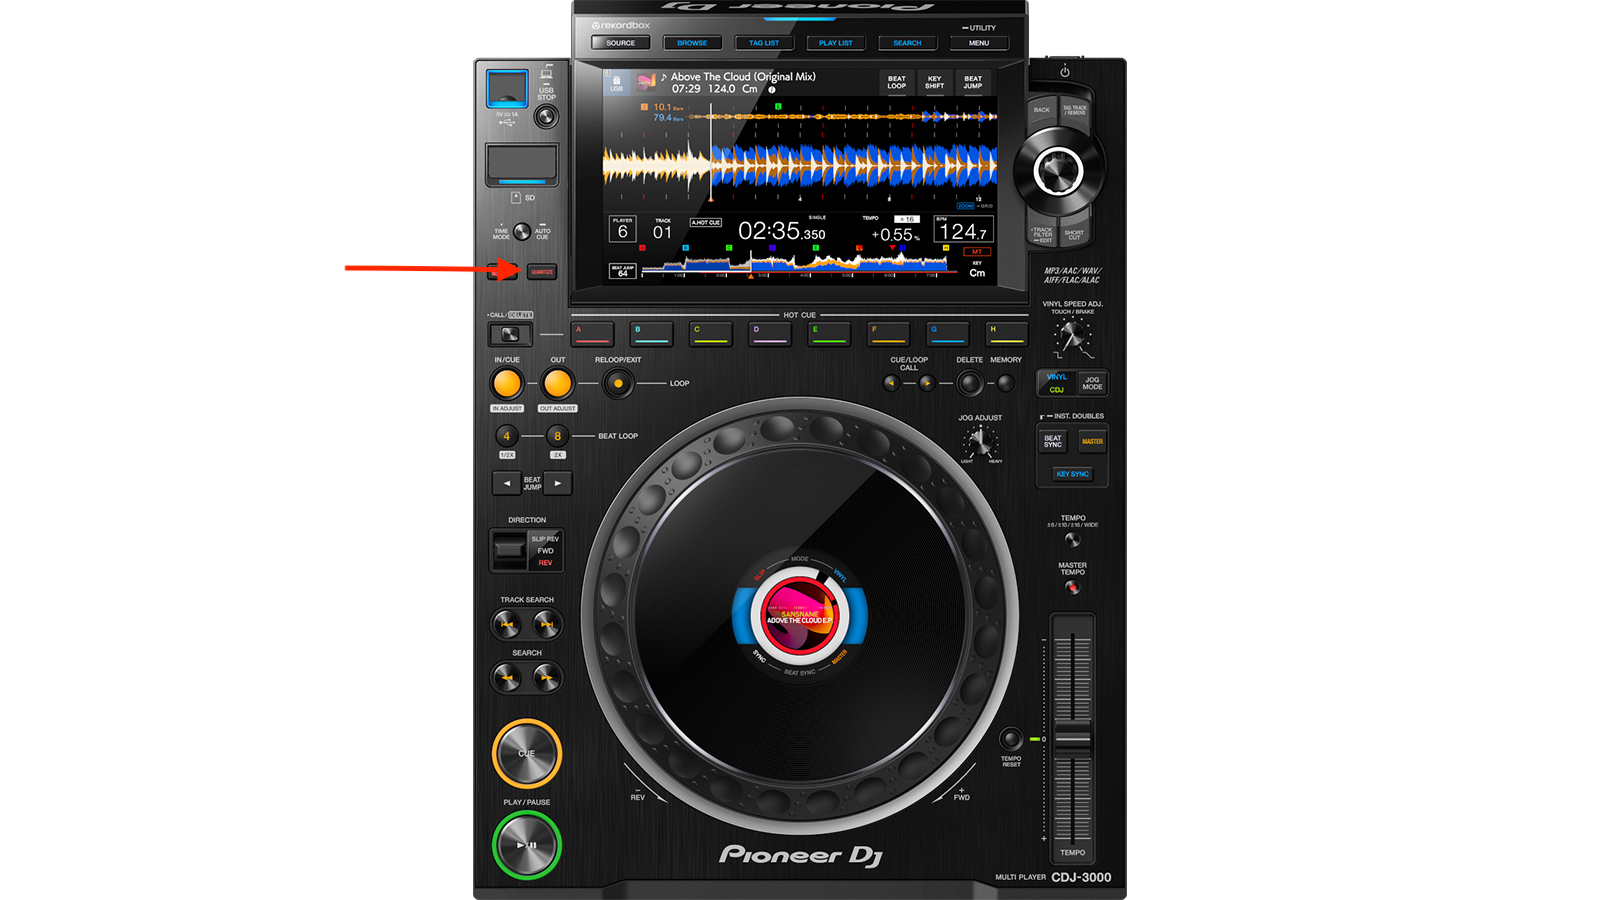
If you’re trying to create a Cue point and it keeps jumping to a slightly different point in the track, it might be because you have the Quantize function enabled, which will pull any Cue points to the nearest beat location. The Quantize button toggles between off and on and is located in the same area on both CDJ models, at the bottom of the Source buttons row on the 2000 and to the bottom left of the screen on the 3000.
6. Time mode/autocue
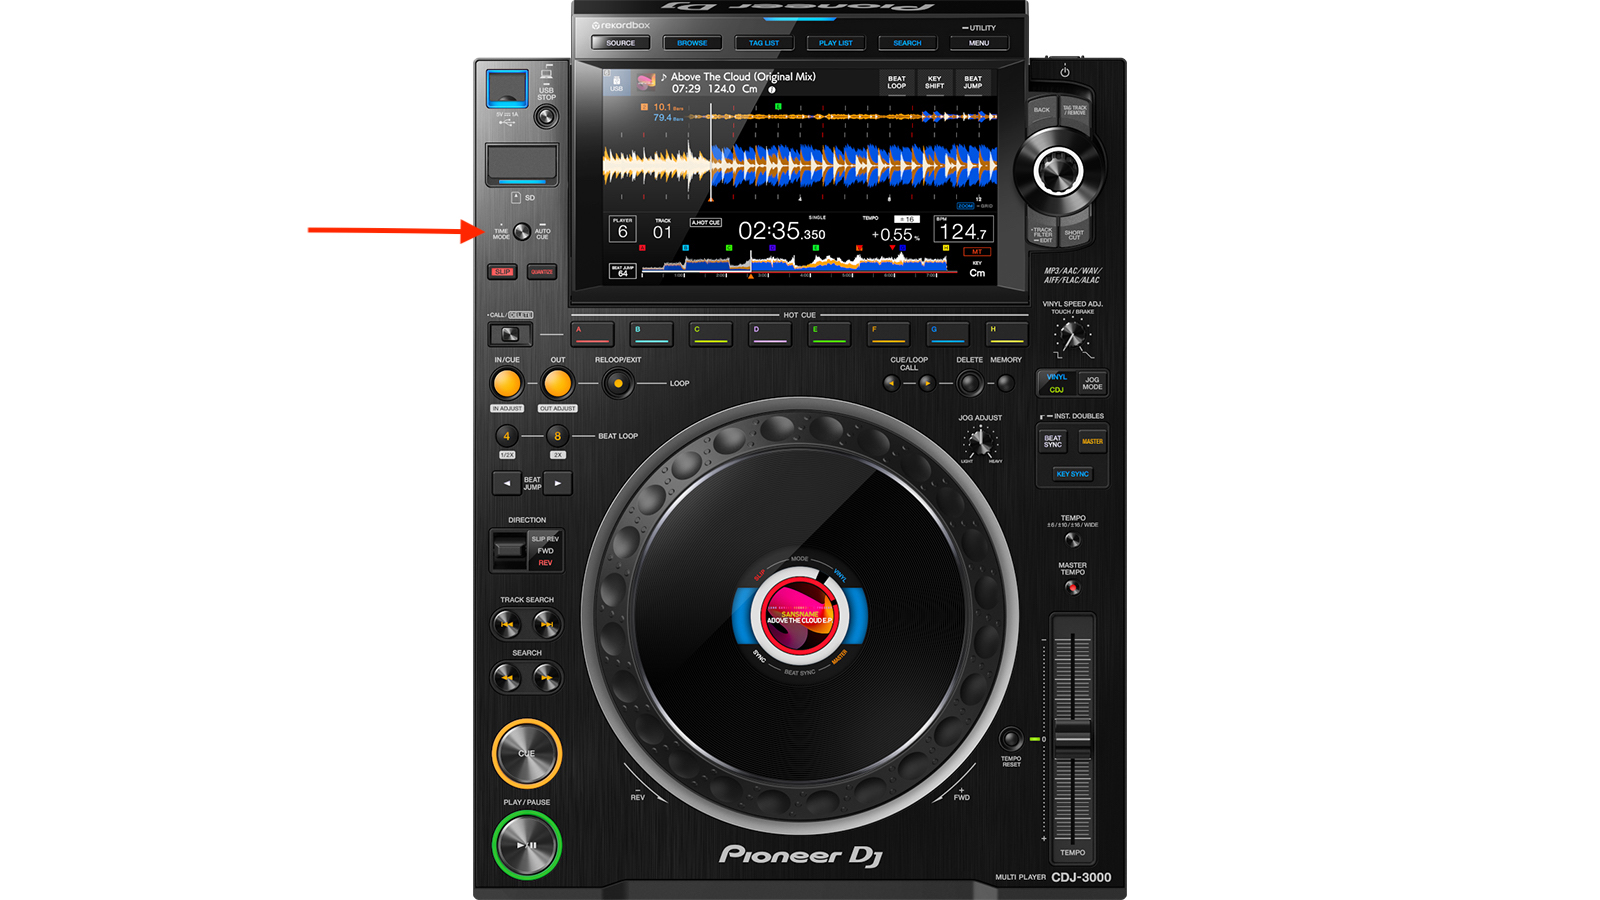
Still in the same left-of-the-screen area of the CDJ is the Time/Mode/Autocue button which has a dual function. Press it once to switch between displaying the time played and time left to play on your tracks. Hold it down for a second to enable Autocue which automatically jumps to the first sound when a track loads, skipping any silent sections at the track’s beginning.
7. Track search & search
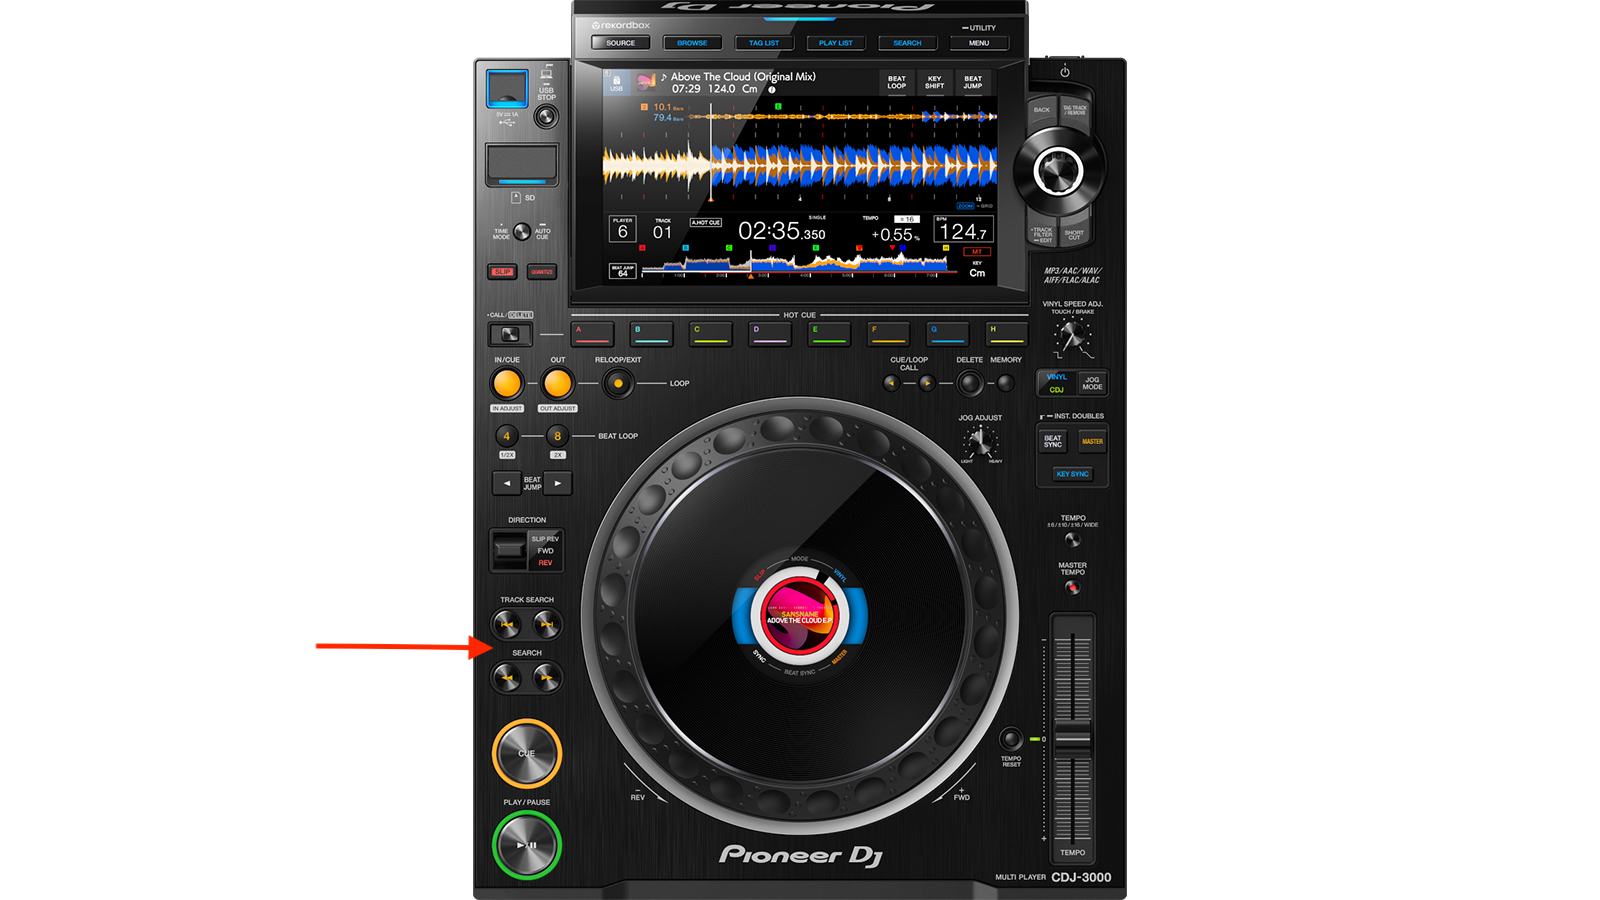
There are two sets of circular buttons above the Cue and Play/Pause buttons; the Track Search allows you to move instantly to the next track or back to the start of the current track, while the Search button allows you to scroll back and forth through the song.
8. Master tempo
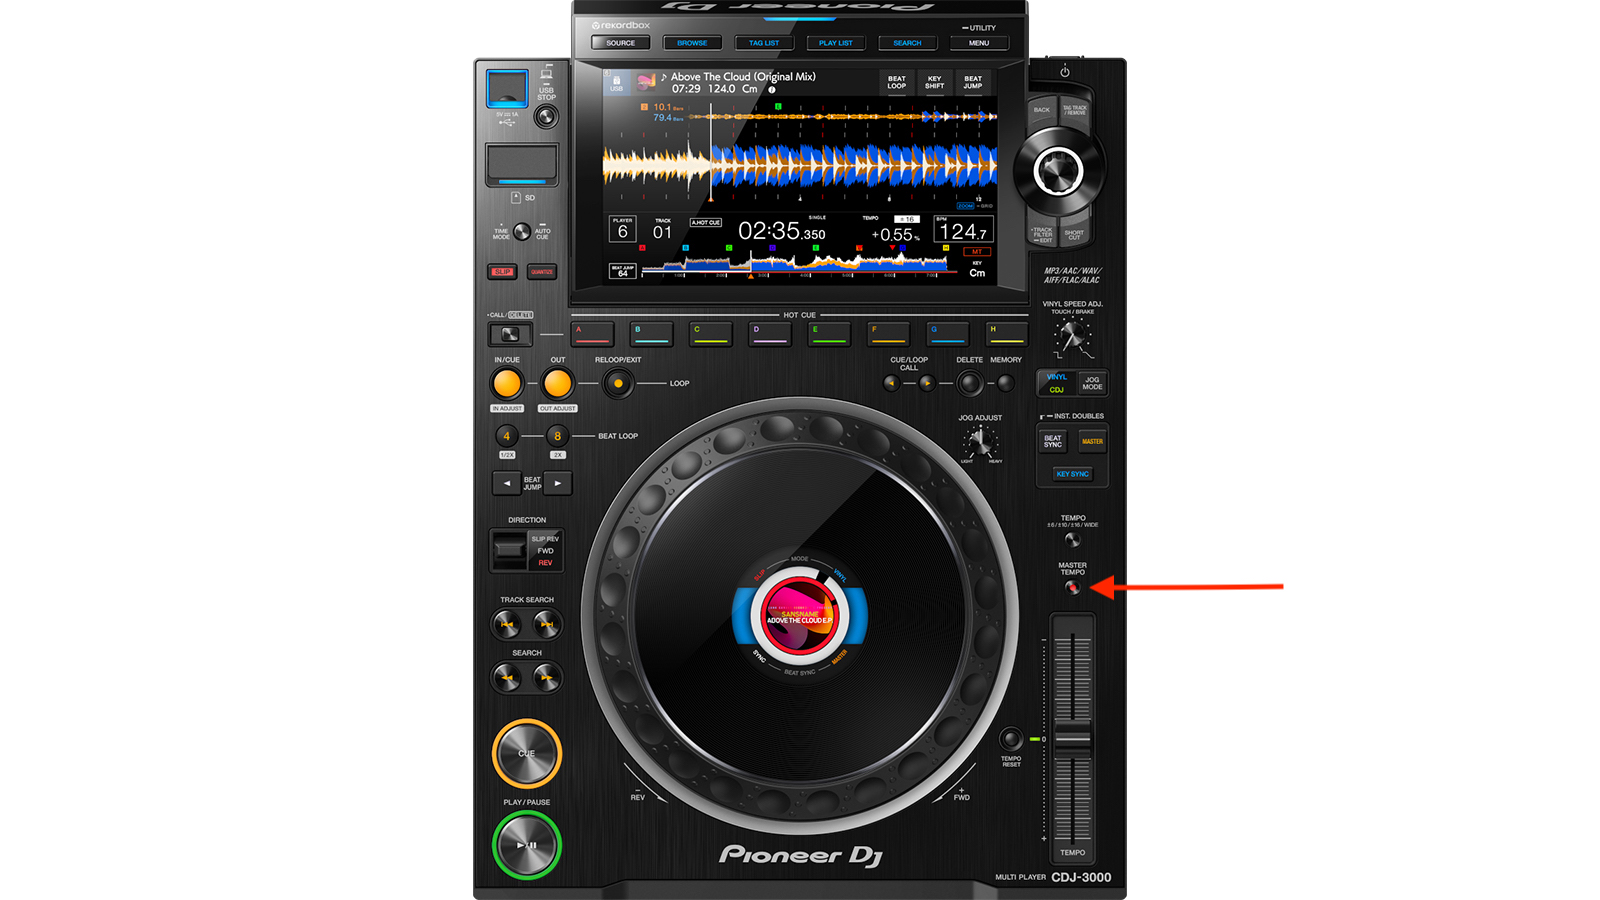
Directly above the pitch control slider is the Master Tempo button which when activated ‘locks’ the pitch regardless of tempo, preventing sped-up vocals that sound like chipmunks.
9. Tempo
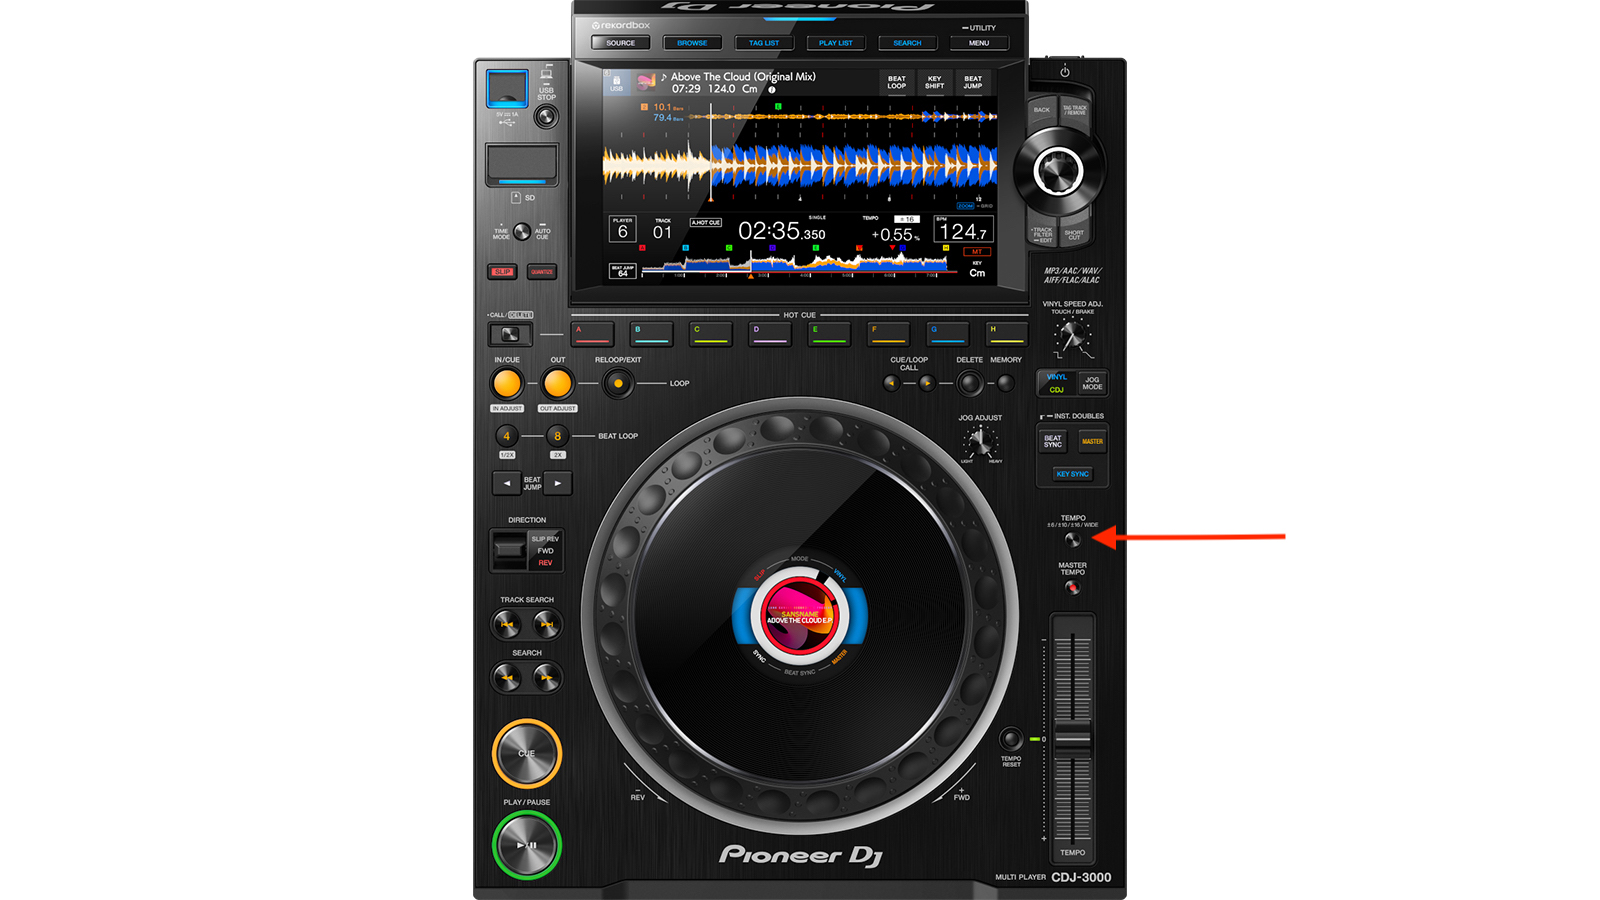
The second button above the pitch slider is the Tempo button which toggles between different widths of percentage of pitch control – 6% to 10%, 16% and ‘wide’, with 10% the default – enabling you to make extremely precise or very large pitch adjustments at either extremes. The default setting is ±10 and is displayed on the bottom right of the main screen. So if you take over and can’t seem to pitch your tunes up like you could at home, you might need to reset the Tempo – which in this case means how much or how little effect the pitch slider will have on the tempo of the track – to one you’re more familiar with.
10. Jog mode
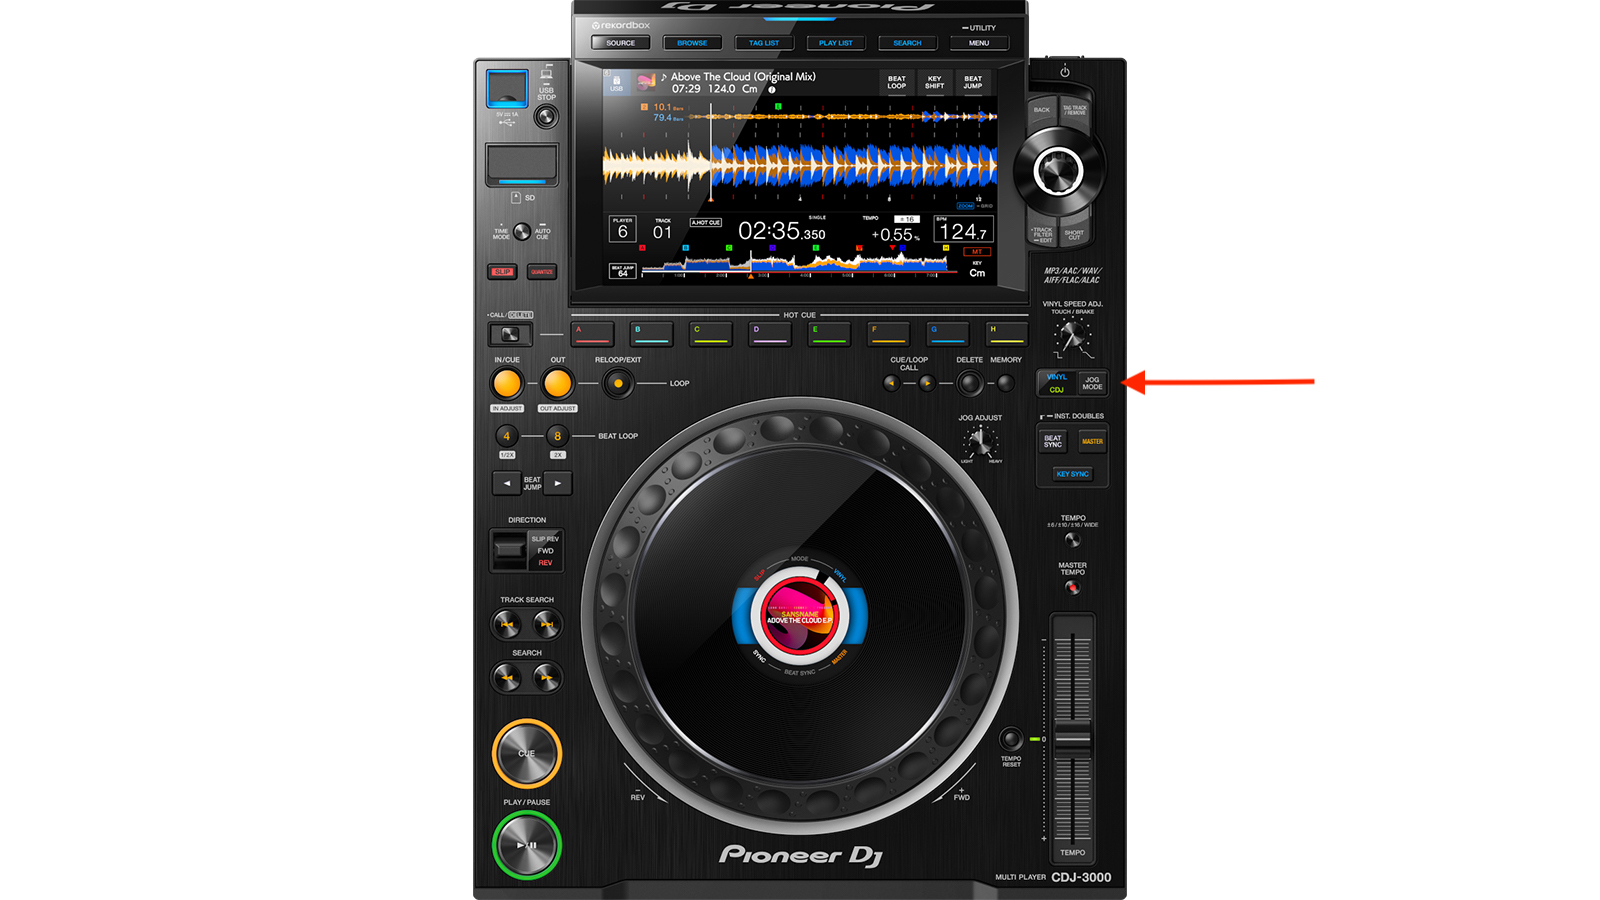
On the right hand side, about a third of the way down the front panel you’ll find the Jog Mode button which toggles between Vinyl or CDJ modes. The differences are that you can scratch and do reloads in Vinyl mode - you can’t in CDJ mode - and if you press the platter when the CDJ is in Vinyl mode it will stop, if it’s in CDJ mode it won’t – although it will still respond to pushing and pulling. How much the platter needs to be pushed or pulled to move or stop is determined by turning the Jog Adjust dial which is to the left of the Jog Mode button. So if you get on the decks and it all feels a little weird and unfamiliar, you might just need to switch modes and alter the Jog Adjust dial to get things to feel more familiar.
Harold Heath is a UK music writer and author. A DJ since the late 80s, Harold also produced a few hundred singles and remixes and two artist albums, and worked as a performer, ghostwriter and music-technology teacher. His first book Long Relationships: My Incredible Journey From Unknown DJ to Smalltime DJ was published in 2021.
