How to connect a MIDI keyboard to your audio interface
Learn how to hook up your MIDI keyboard to your audio interface - no matter how complex your setup
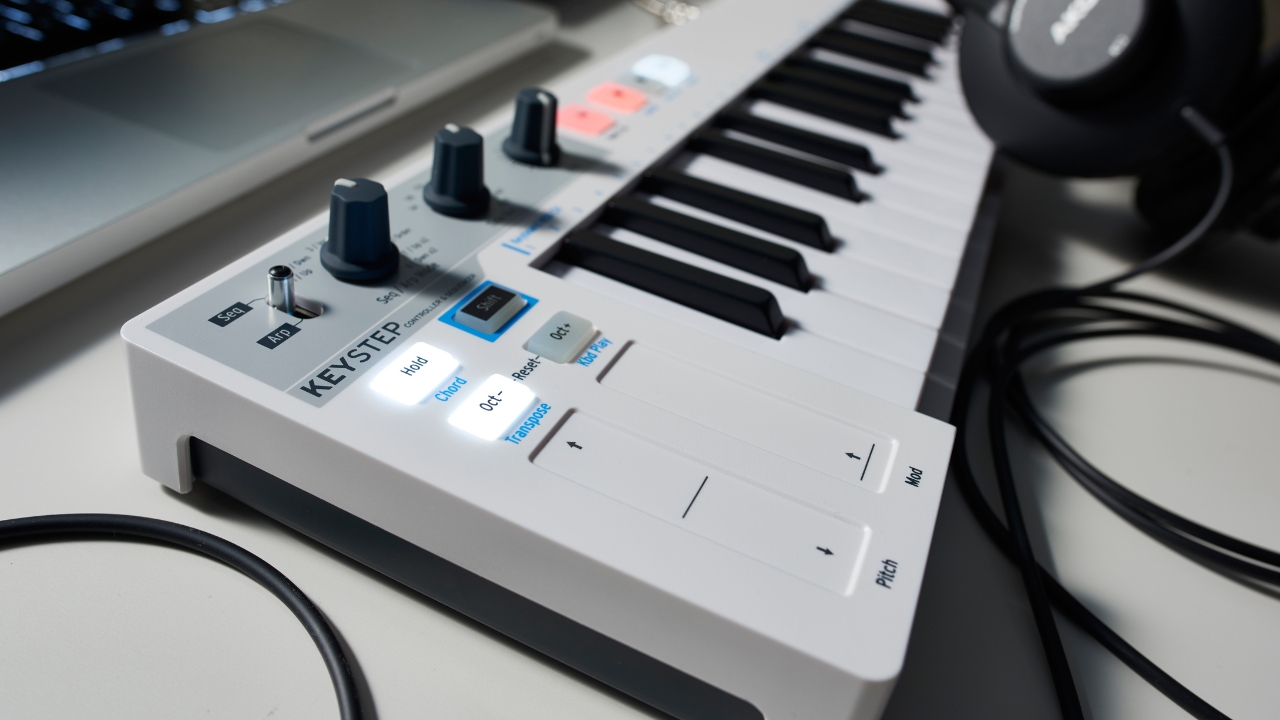
MIDI is, in a word, a godsend. This unassuming data-transfer standard is the magic sauce that enables drastically different music technologies, developed decades apart, to tell each other what to do – whether your computer is controlling a vintage synthesiser, or you are controlling your computer with your vintage synthesiser.
MIDI is cool, but it can also be a bit of a dense subject – so, for those newly blessed with a MIDI keyboard or controller, how does it factor into your wider audio studio setup? A commonly asked question in this field relates to audio interfaces, and how you connect one to the other. So, let’s answer this question comprehensively: how do you connect a MIDI keyboard to your audio interface?
1. Plug it into your computer
In short – you don’t. For some of you, at least. This is because, when most people think about MIDI keyboards today, they aren’t actually thinking about conventional 5-pin DIN connectivity; they’re thinking about USB MIDI technology.
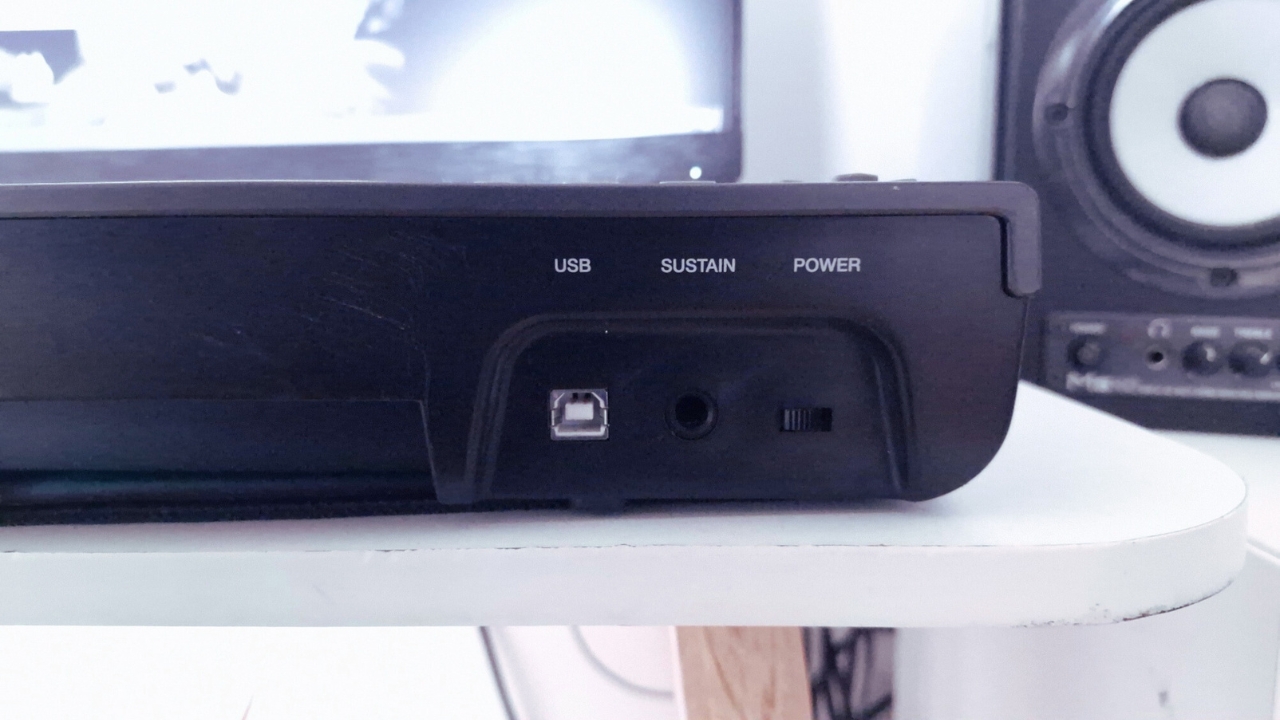
Many of you will be in possession of a USB MIDI keyboard, which uses a USB cable to transmit data. These kinds of keyboards are not connected to audio interfaces, but rather straight into your computer – because, internally, they are their own USB interface. You don’t need an audio-interface middleman for this USB MIDI information, only a spare USB port for the device, which also tends to provide the device’s power.
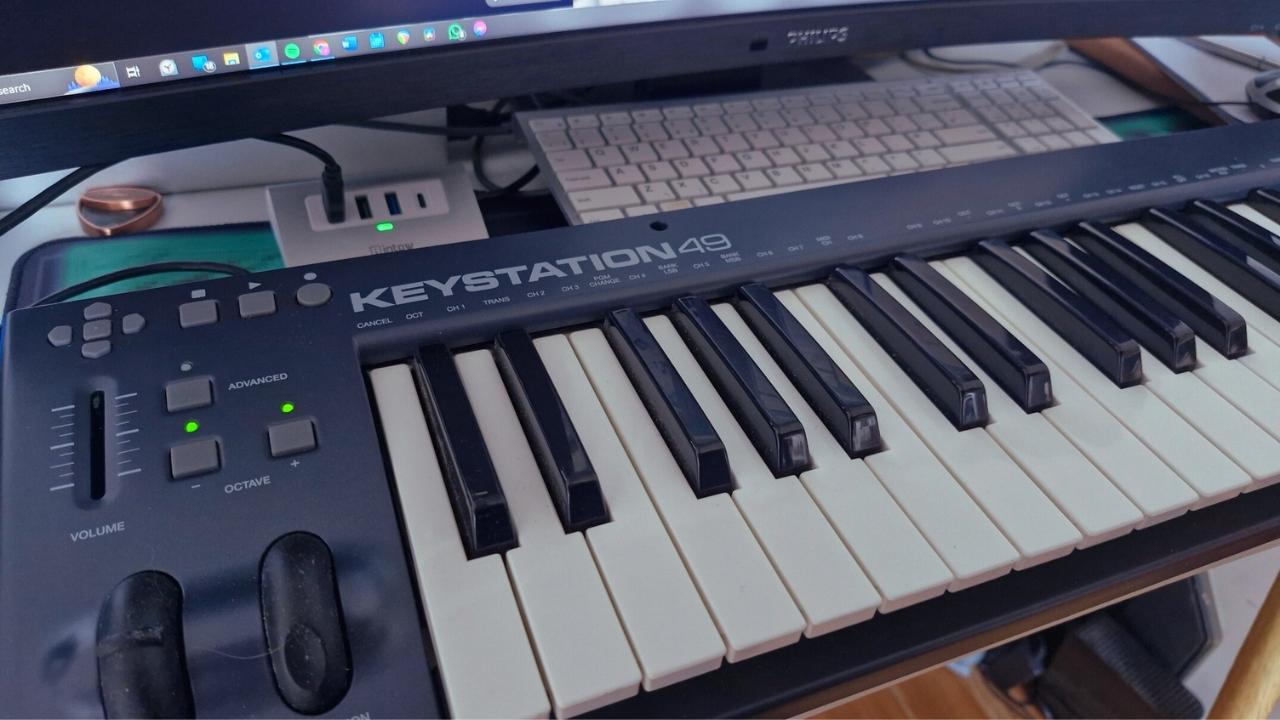
However, it isn’t always this simple. Many of you will have different equipment, different processes, and different aims when it comes to harnessing MIDI in your own studio setup or live rig – and it’s here where your audio interface may have an important part to play after all.
2. Define your needs
In order to make the most of your MIDI keyboard, and indeed your whole studio ecosystem, it would be beneficial for you to have a little sit-down and properly define your purposes. If you’ve got an old-school 5-pin MIDI keyboard you’d like to mate with your digital synth VSTs, then your needs are understandably simple; if you have a whole bunch of hard- and software you’d like to both send and receive MIDI, then there might be a few more steps to take – and potentially another piece of gear or two to buy.
Let’s review the basics. 5-pin DIN is the conventional standard form of MIDI connectivity for audio equipment. MIDI information, when carried via 5-pin DIN, is unidirectional – which is why you’ll see separate DIN ports labelled ‘in’ and ‘out’ on many MIDI-compliant devices.
Get the MusicRadar Newsletter
Want all the hottest music and gear news, reviews, deals, features and more, direct to your inbox? Sign up here.

If you want your MIDI keyboard to control software in your computer’s DAW, you want to send MIDI out from the keyboard to the ‘in’ port of your interface. If, however, you have a more complex MIDI controller like the Arturia Keystep Pro, and want your keyboard to control hardware as well as software – even if just by relaying tempo information from your computer – you’ll also need to connect your interface’s MIDI Out port to your keyboard’s MIDI In.
3. Locate your audio interface’s MIDI I/O
Look at your interface’s front and rear panels, and try to locate the MIDI connection ports. If you’ve got something like a Motu M4, you’ll find them on the rear.
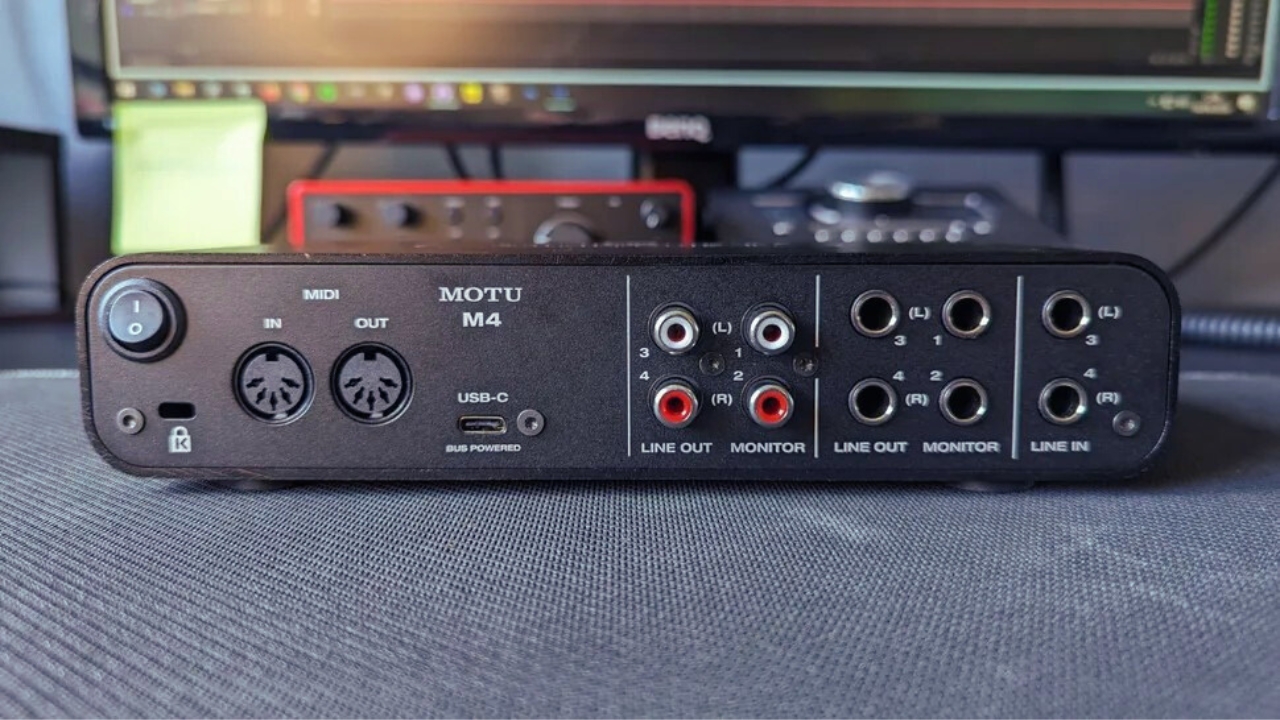
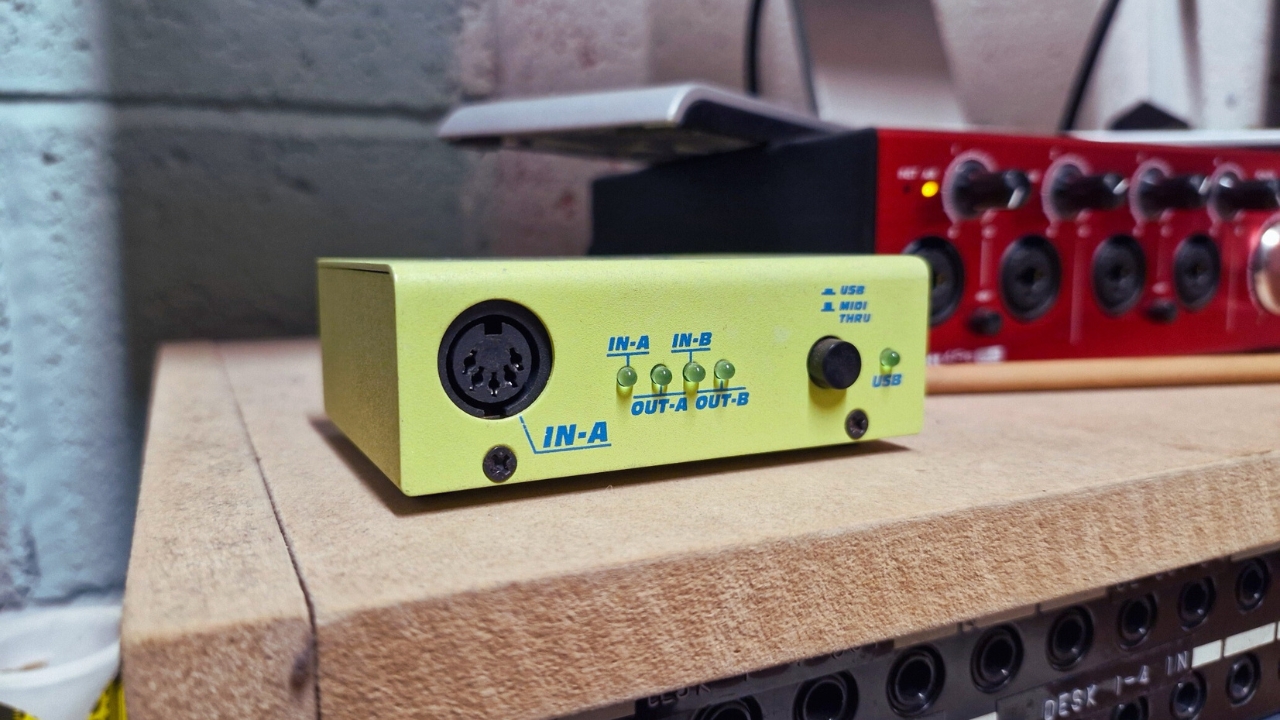
If your interface doesn’t have 5-pin connectivity, you can still use a USB MIDI hub to achieve the same ends. These can provide more 5-pin ins and outs for you to play with too, which may be useful for more complex setups. Though my Focusrite Clarett 4Pre has DIN ports on its rear, I still choose to use this 2-in 2-out MIDI hub.
4. Plug your keyboard in
If your needs are simple, this is where your journey ends. Take a 5-pin DIN cable and connect your MIDI keyboard’s MIDI Out to the MIDI In on your interface. Note that, unlike USB MIDI devices, 5-pin DIN cables are not power cables as well as data cables; your MIDI keyboard will need powering externally to work.
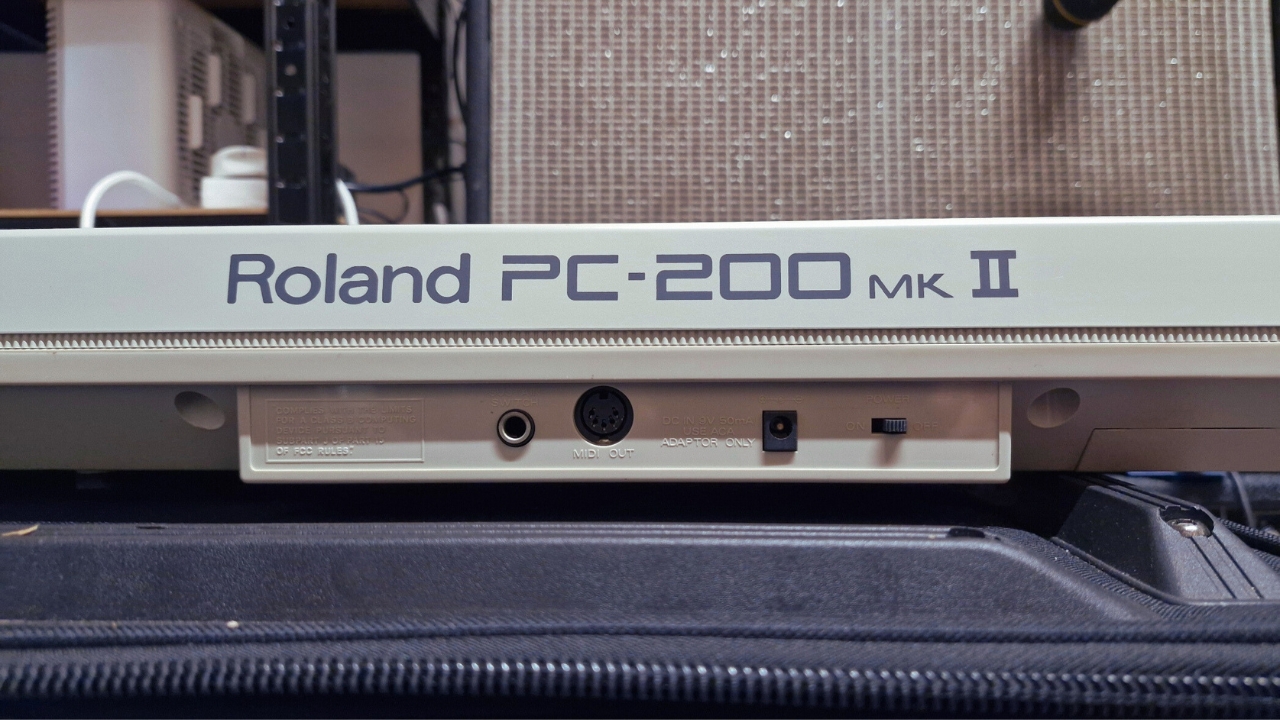
This is an old-school Roland PC200 Mk 2 MIDI keyboard, which runs off a 9V battery and connects to hardware via 5-pin DIN. Here, it is plugged into my USB MIDI Hub, and will be able to control software in my DAW via the hub.
5. Draw out a diagram
If your needs aren’t met by this simple connection, then you’ll need to devote a little more mental firepower to figuring out your connectivity. Create a block diagram by drawing oblongs for each of your devices, and labelling them. From here, draw lines for MIDI connections – with arrows to indicate the direction the data’s flowing.
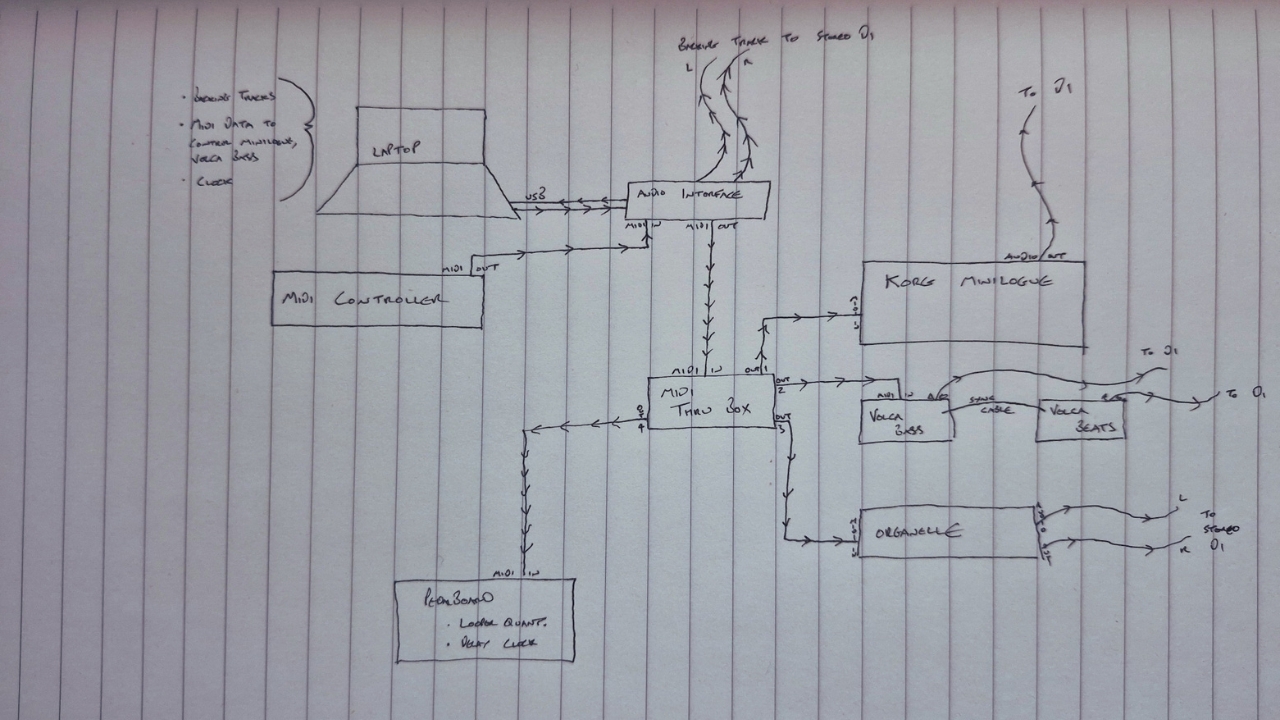
This diagram is for a live performance setup, where a laptop is responsible for playing backing tracks, sending MIDI information to hardware synths, and receiving its own MIDI information from a controller. There’s a lot to think about here, with respect to both audio and MIDI – which makes this diagram hugely instructive. Starting the diagram helped me visualise how many devices needed to receive MIDI – and hence demonstrated that I needed a MIDI thru box to multiply the signal leaving the interface.
6. Find your MIDI device in your DAW
Whatever the complexity of your setup – even if your MIDI keyboard is a straight-up plug-and-play USB device –, the last step is a digital one. In order to use your now-connected MIDI keyboard, you need to ensure it is discoverable in your DAW – and that your DAW is happy sending and receiving information to and from it.
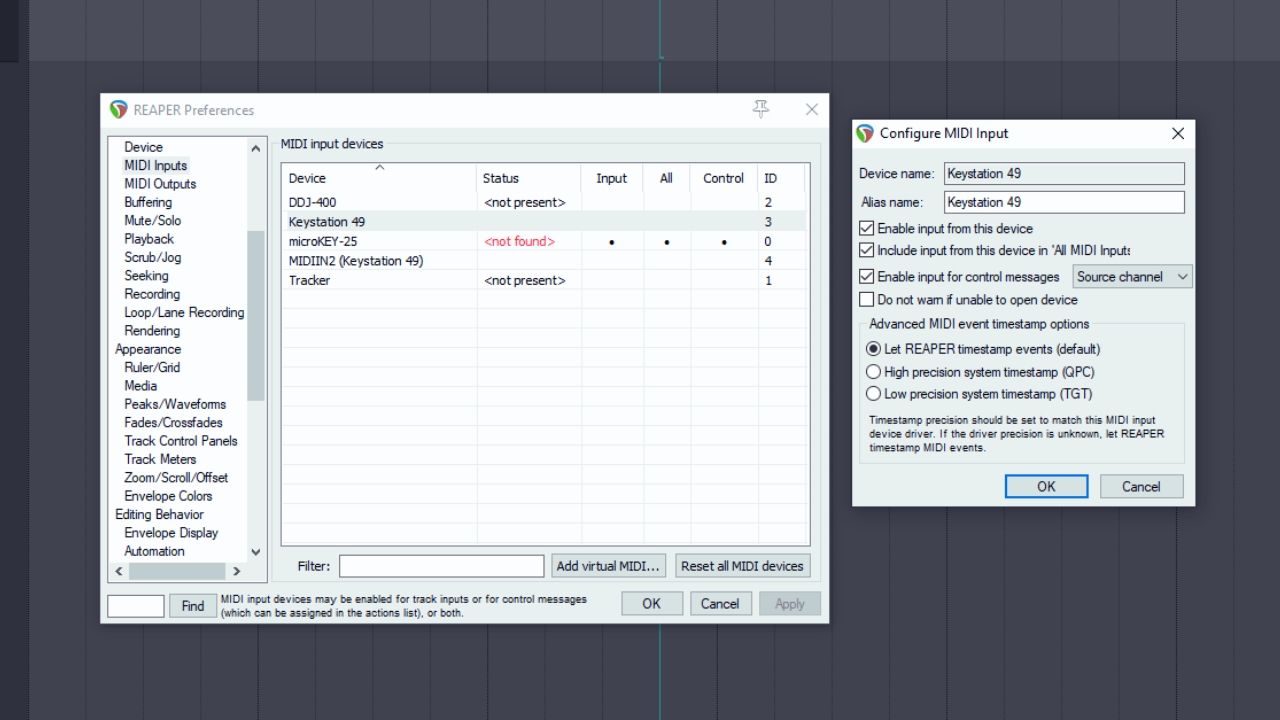
I’ve used Reaper for my example, but pretty much every DAW will have MIDI settings somewhere. You’ll find the MIDI device settings for Reaper under the Devices sub-menu of the Preferences window. In here, look for the name of your device. If you’re using the MIDI input on your audio interface, you’re looking for a device name that matches your interface. Once you’ve found it, enable input and input for control settings; I’m demonstrating with my USB MIDI keyboard, but the steps are exactly the same.
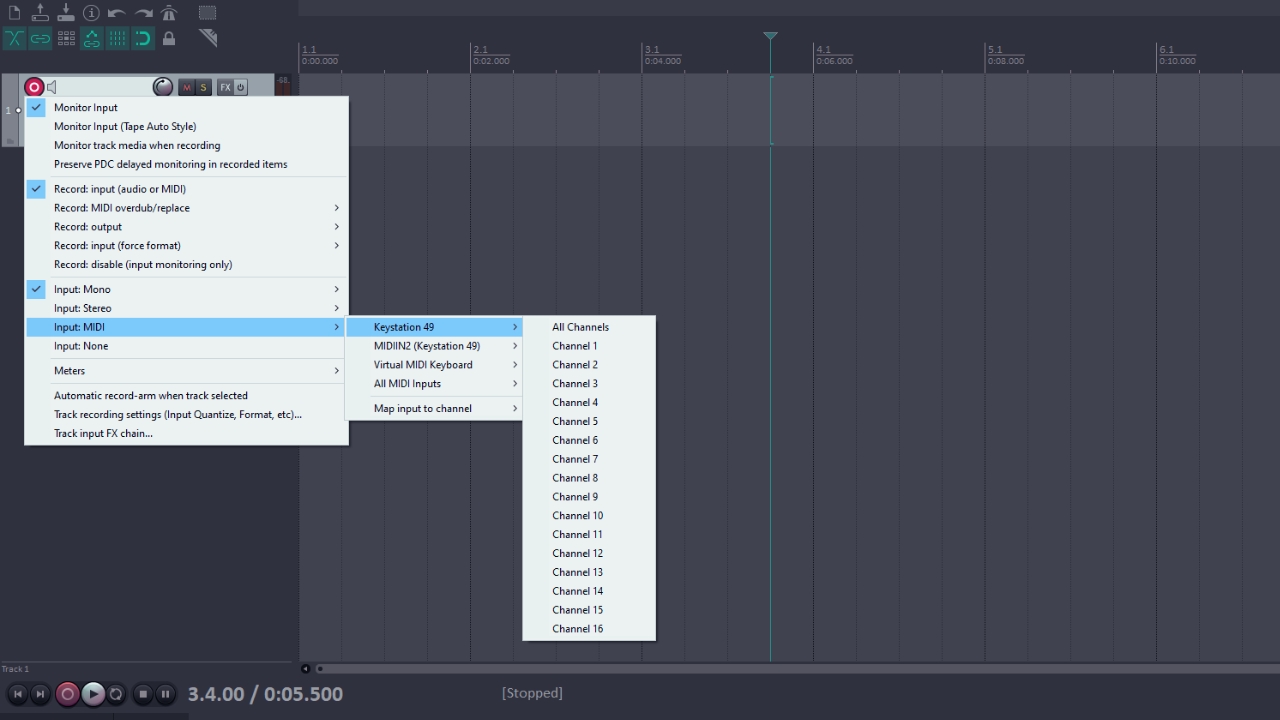
Now, create a track and navigate to the input selection menu. Here, you’ll find a MIDI Input sub-menu, and you’ll find your device or interface as an option within it. MIDI is a 16-track medium, meaning you can send 16 different streams of data simultaneously; if you’ve got a more complicated multi-MIDI setup, then you can set different channels so that different devices control different VSTs. If you’re programming instruments one at a time, or just want to control one VST, then just select Channel 1.
Conclusion
Your MIDI keyboard should now be successfully interfaced with your computer, potentially via your audio interface. This hurdle cleared, you are now unfortunately through the looking glass – and may be doomed to spend the rest of your days concocting clever and complex MIDI routing schemes for an ever-growing collection of esoteric equipment.

James Grimshaw is a freelance writer and music obsessive with over a decade of experience in music and audio writing. They’ve lent their audio-tech opinions (amongst others) to the likes of Guitar World, MusicRadar and the London Evening Standard – before which, they covered everything music and Leeds through their section-editorship of national e-magazine The State Of The Arts. When they aren’t blasting esoteric noise-rock around the house, they’re playing out with esoteric noise-rock bands in DIY venues across the country; James will evangelise to you about Tera Melos until the sun comes up.


