How to connect your audio interface to your computer – for both PC and Mac users
My guide to hooking up your audio interface to a laptop or computer, step-by-step
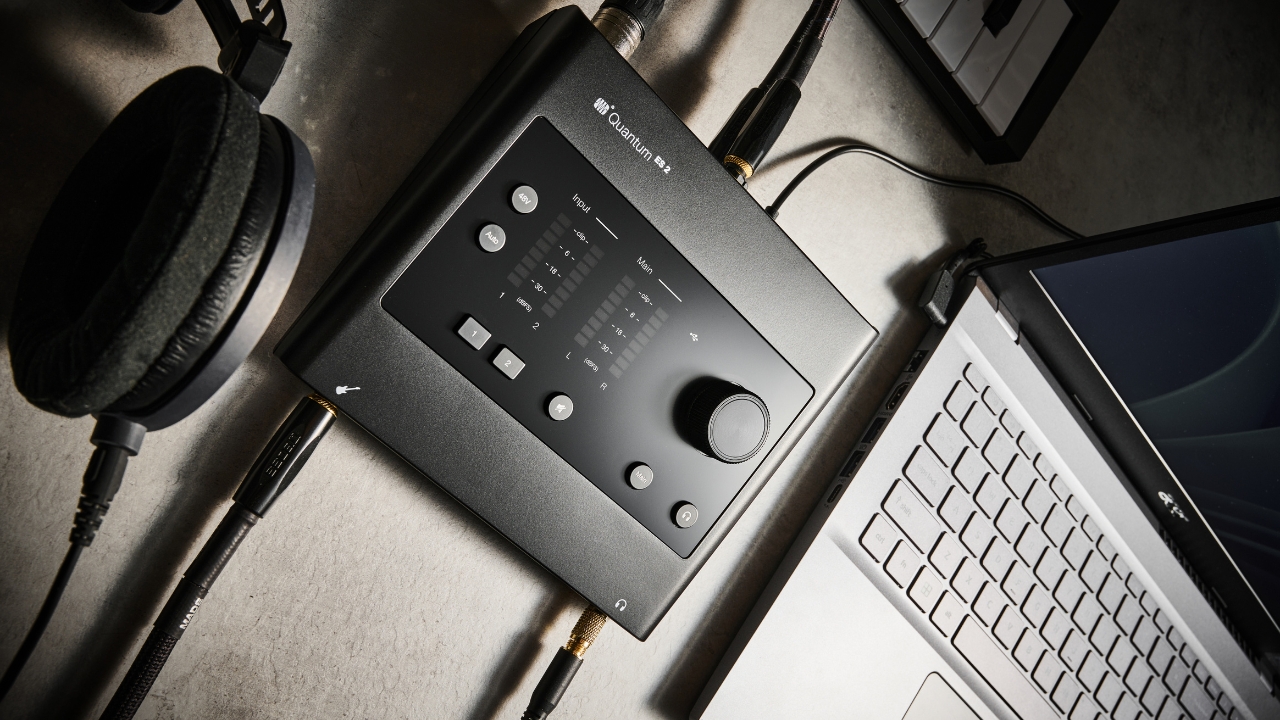
When it comes to making music, there are a lot of elements to consider – each of which have their own separate claim to being the ‘most important part’ of the whole deal. Microphones? Acoustic treatment? Sixty-year-old microphone preamps? Sure, but today’s democratised recording rigs are nothing without the humble audio interface.
From the pokiest of bedrooms to the most expensive of cutting-edge recording studios, audio interfaces are pulling serious weight – and now you’ve gotten one to carry the load of your own music-making. So, how do you connect your audio interface to your computer? Here, we’ll take you through the process from start to finish – for both Windows PCs and Mac laptops.
1. Familiarise yourself with your interface
Before you start plugging anything into anything, let’s get familiar with the ins and outs of your interface. Not only will this make getting started with it more intuitive, but it’ll also tell you some important things about how to get started at all. Familiarity is particularly important from a connectivity standpoint, as audio interfaces have enjoyed a number of different connection standards over the years.
On older interfaces that still have some form of support from their manufacturers, you can expect to find a USB-B port – meaning it’ll connect via USB-A or USB-C to your computer with the right cable. Today, most interfaces have adopted USB-C as the standard. This is because USB-C is significantly better equipped than its predecessors to transmit both data and power.
2. Plug the interface into your computer
Whichever connection your interface uses, it’s time to make it. Use the cable that came with your interface, and plug one end into the interface and the other into a corresponding port on your computer.
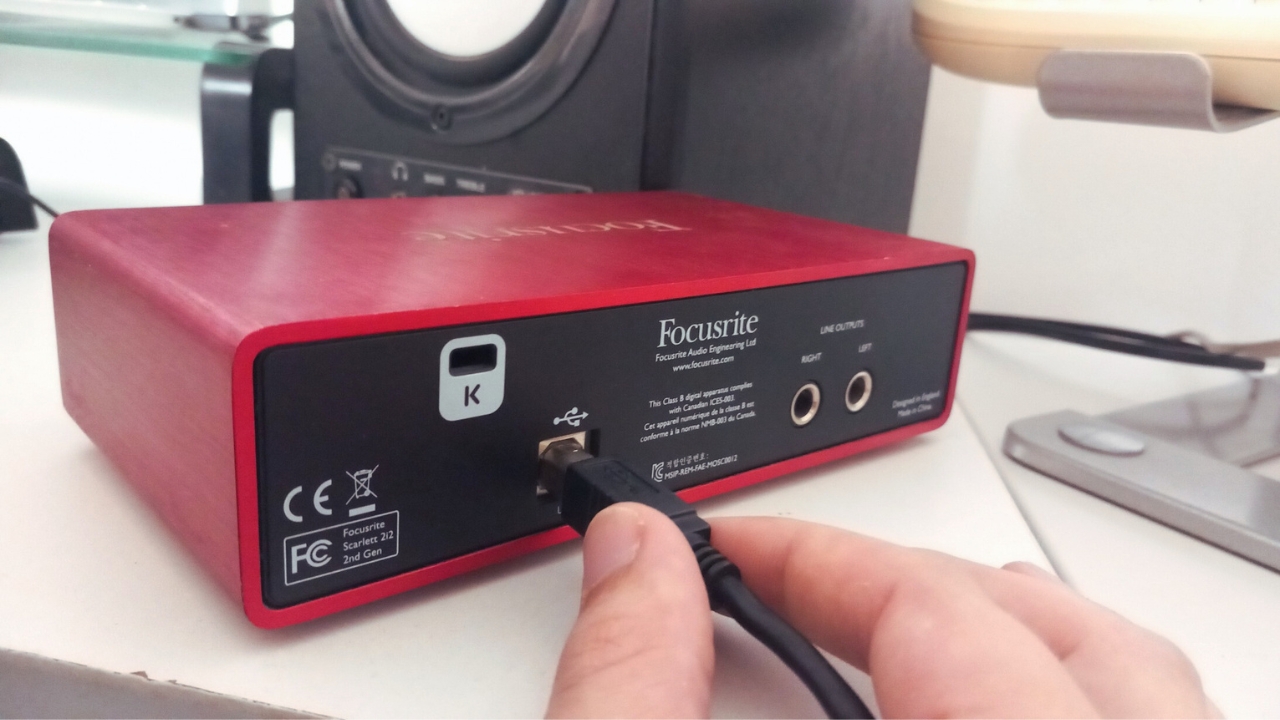
In the above example, my Focusrite Scarlett 2i2 connects to my computer via its USB-B port; a USB-B to USB-A cable is used to mate the interface with my laptop’s USB hub.
3. Complete your audio connections
Your next step is to start making audio connections between your equipment and your audio. Some of you will have a simple songwriting setup in mind, involving little more than a Universal Audio Volt 1, a microphone, an electric guitar, and some studio headphones. Some of you will have a studio room groaning under the weight of all the synths and hardware waiting to be hooked up to your new rack-mounted multi-Apollo megalith. In most cases, you’ll have three things to think about: your inputs, your headphones, and your studio monitors.
Get the MusicRadar Newsletter
Want all the hottest music and gear news, reviews, deals, features and more, direct to your inbox? Sign up here.
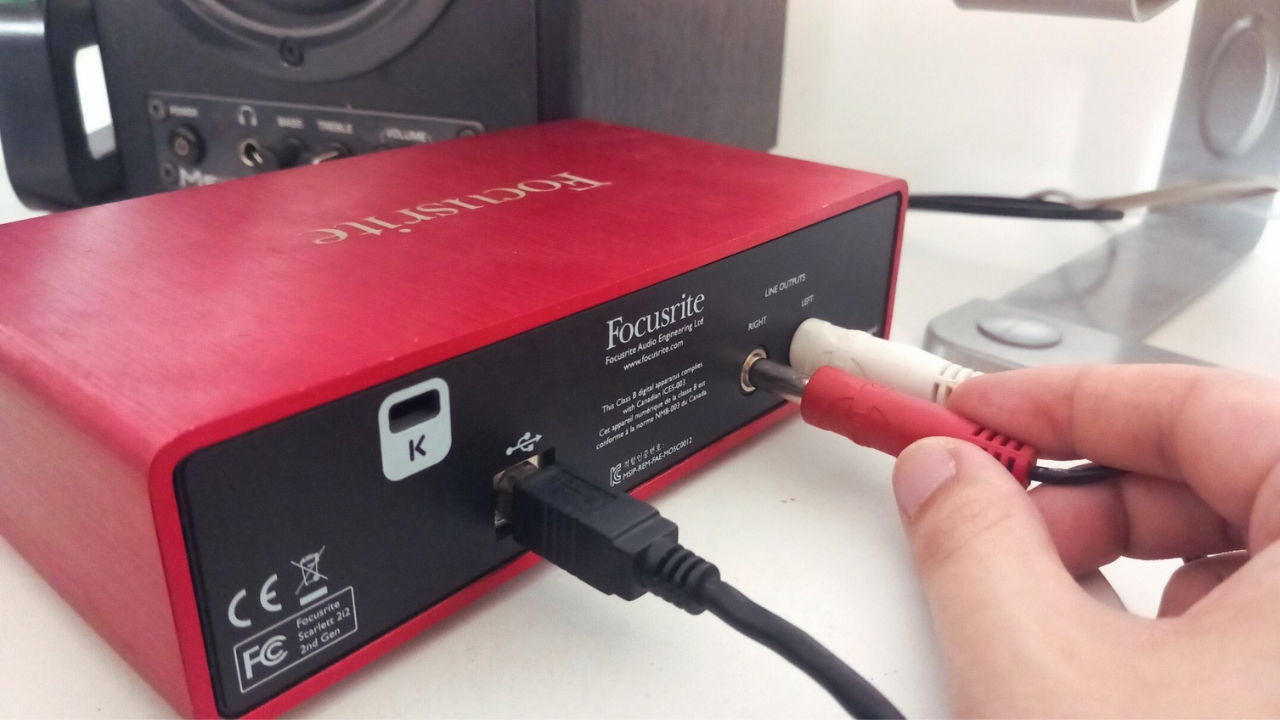
Start with the speakers, by plugging your speaker cables into the dedicated monitor outputs at the rear of your interface. Next, plug your headphones into the headphone monitor port at the front.
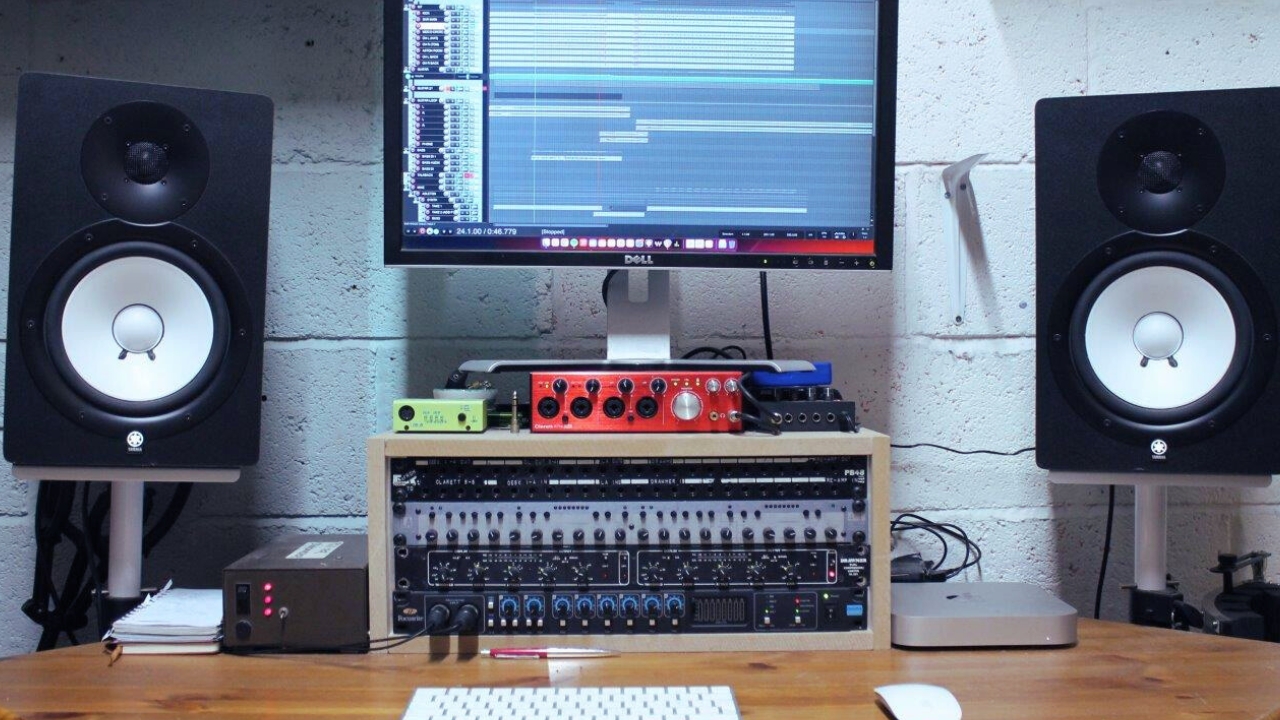
The inputs are yours to manage as you wish! At my studio, a home studio mixer is permanently plugged into a number of my inputs by way of a patch bay.
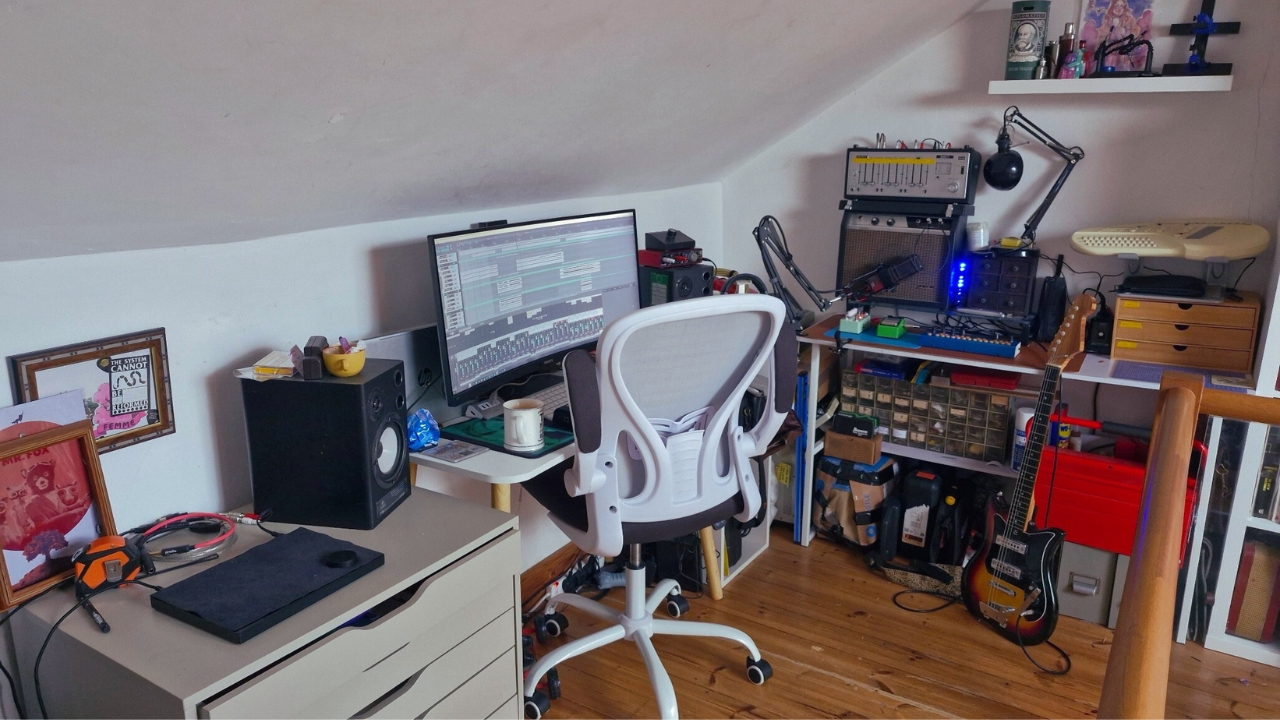
At home, I have a small summing mixer that all my instruments are plugged into – and I can easily unplug the mixer if I want to record with a microphone. Cables situated, you can now place your interface in its forever home on your studio desk.
4. Turn on your computer
Now, it’s time to turn your computer on. If your interface has a power switch, leave it off until your computer is booted up. Indeed, it’s good to form something of a habit here about this; your computer should come on first, then your interface, then your speakers.
This saves both your ears and your equipment from the loud bumps and buzzes that can come from starting things up. It’s a similar principle for keeping the gain down on any channels until after you’ve plugged in a mic, turned on phantom power, or switched on a synth or pedalboard. It can also be helpful for ensuring your computer recognises your audio interface.
5. Download the relevant software
Some interfaces come with additional software, which enables access to functions you otherwise can’t access on the interface itself. In my case, my trusty Focusrite Clarett 4Pre has an analogue ‘Air’ circuit that aims to ape Focusrite’s ISA 110 mic pre – and which can only be toggled on and off for each of the four front-panel channels via Focusrite Control.
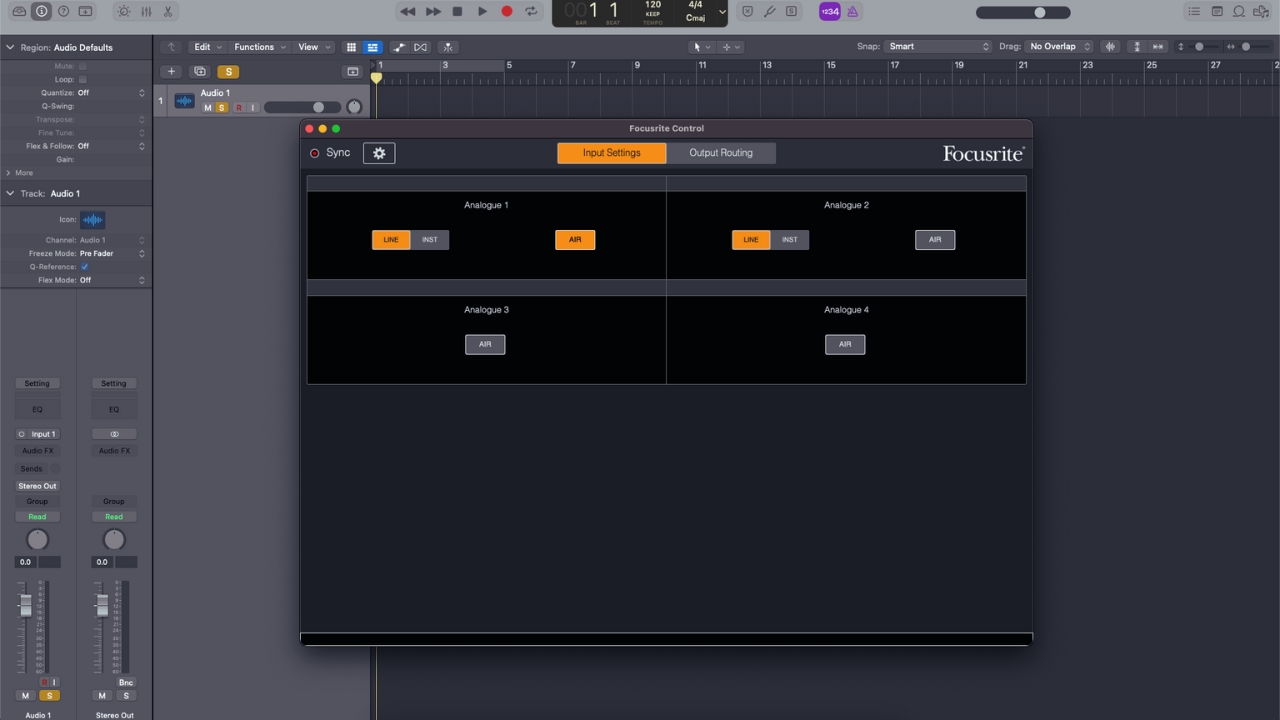
Other brands make extensive use of software for switching and routing too, including Universal Audio with its UA Connect software. Your own interface’s manual will undoubtedly hold the keys to any specific information about the software you might need, but either way, you’ll need to go to the manufacturer’s website to get it downloaded.
6. Make your interface the default audio device
At this point, you’re ready to finish up your audio interface’s setup. Make sure your interface is plugged in and powered on (some interfaces, even if powered via USB, still have a power switch on the rear), and then go to your OS’ sound settings or preferences.
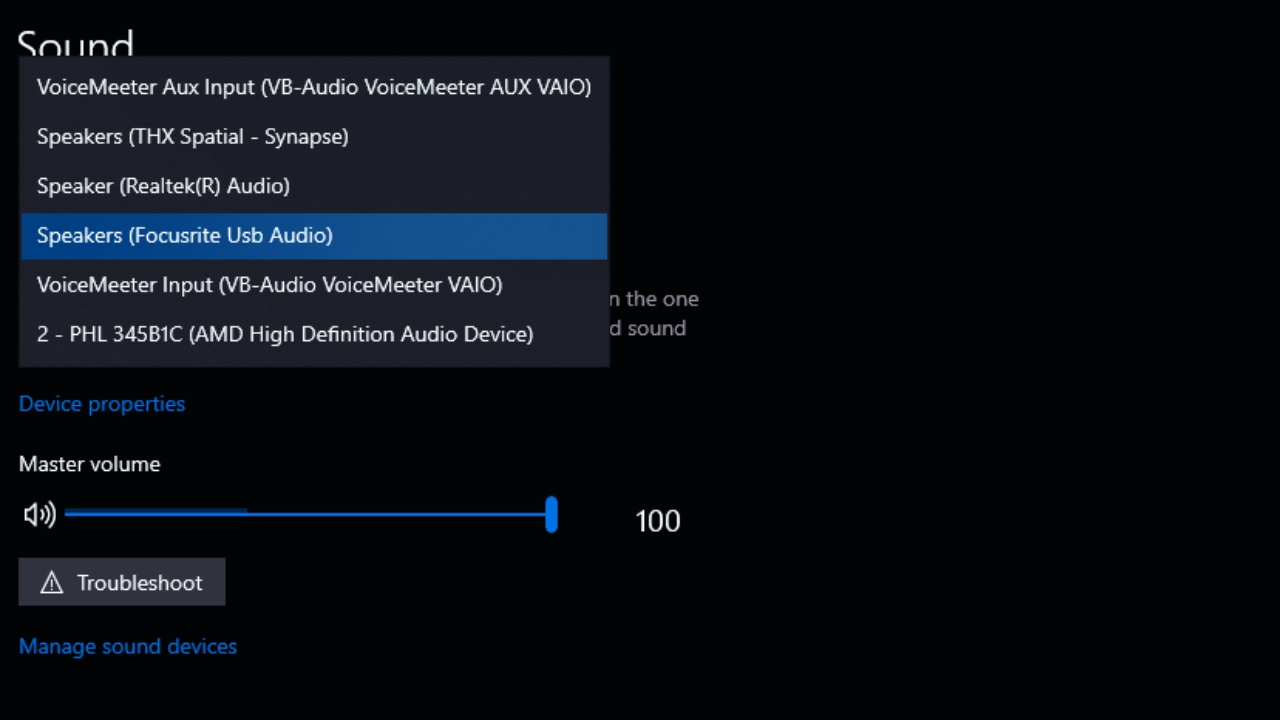
In Windows, this is found in the Sound section of the Settings menu. Click on the Windows logo, then click the cog that appears in the menu. Next, you'll need to click on system, then sound, or you can just type in 'sound' if you like. Under the 'Choose your output device select your interface.
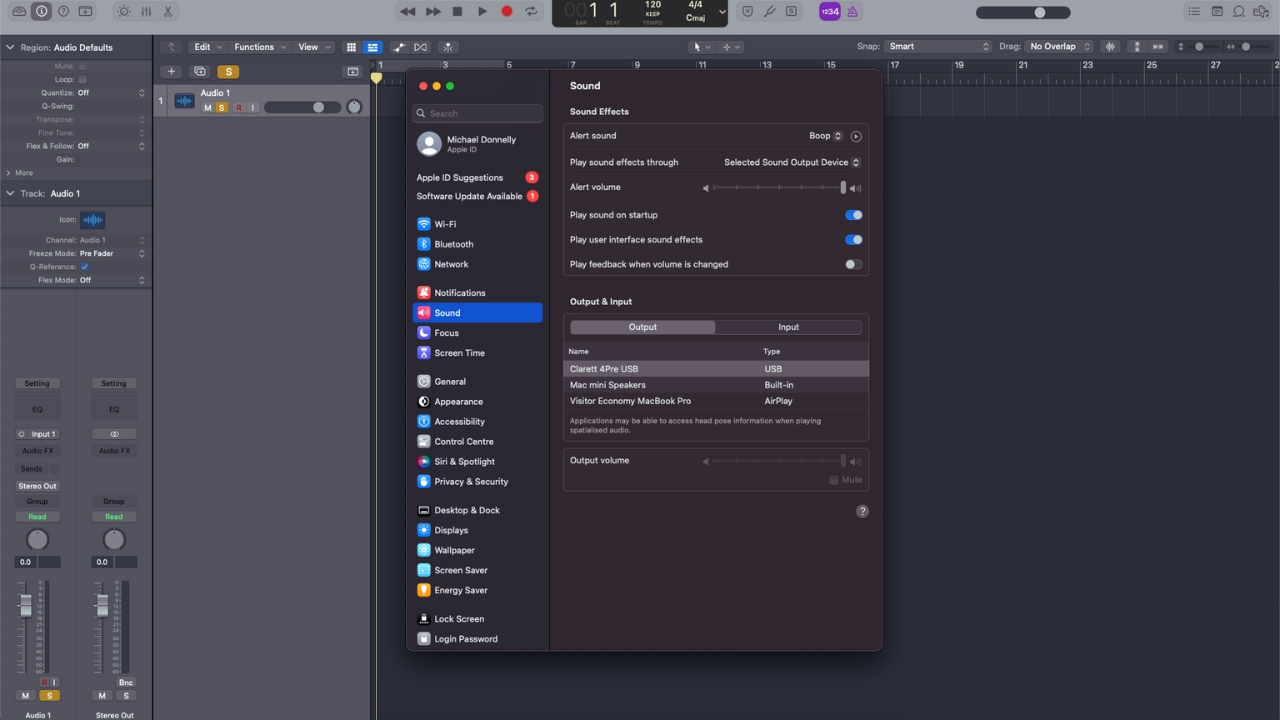
For Mac users, you'll need to start by clicking on the Apple logo. Click on 'System settings', then click 'Sound' and at the bottom you'll see a section titled 'Output & Input'. Provided all the connections have been made correctly, you should see your audio interface here.
7. Set up the interface in your DAW
Now for the the final step. Open up your favoured DAW and select your audio interface as the primary device for audio input and output. This will menu will be named different things in different DAWs. If you don't see your DAW below then a quick Google search will point you in the right direction.
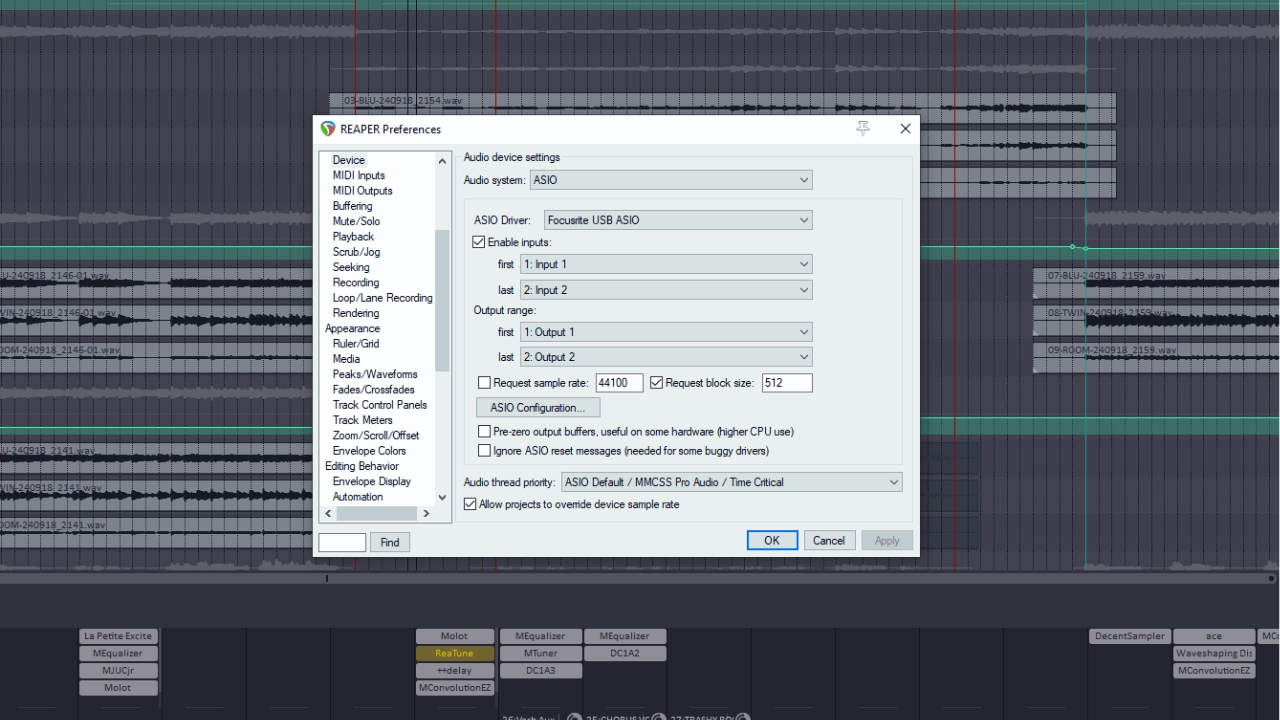
In Reaper, for instance, you’ll find this option under the Device subsection of Preferences, accessed either at the bottom of the Options tab or by clicking the audio device information at the top-right of the screen. For my Focusrite, I need to select ‘ASIO’ and then ‘Focusrite USB ASIO’ from the sub-menu.
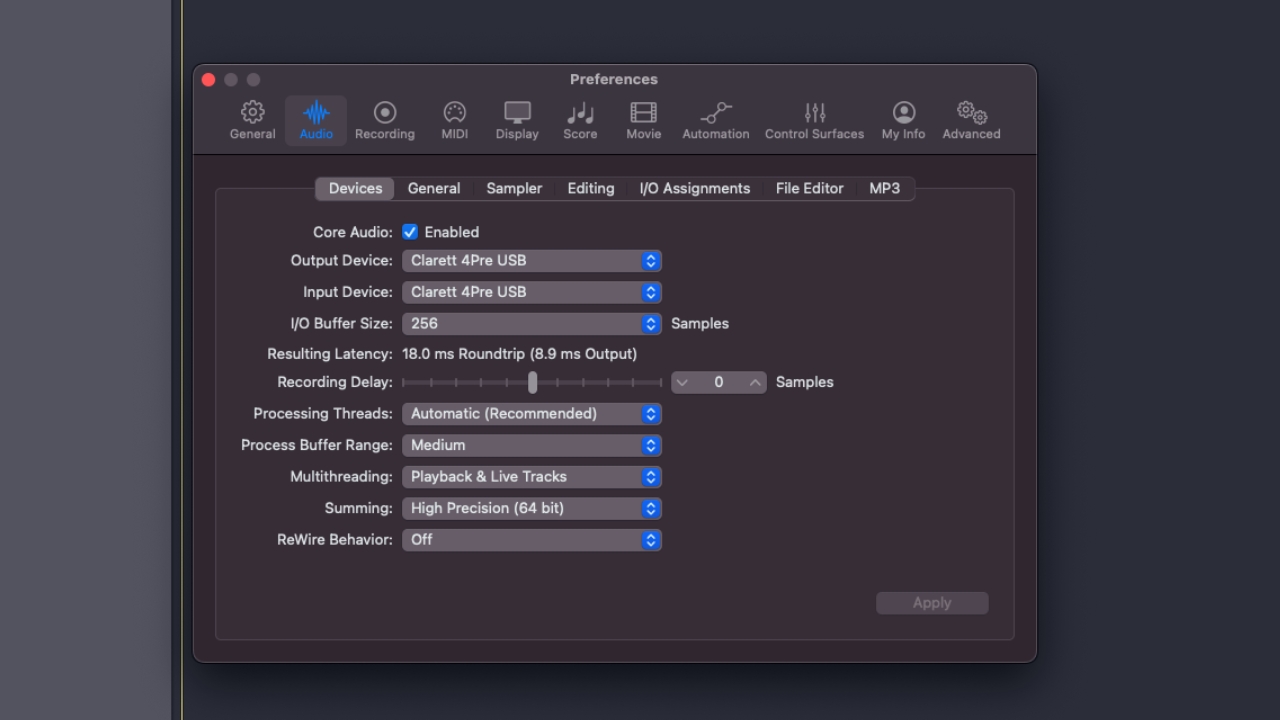
In Logic, you’ll also find this option under Devices in the Preferences window; just use the drop-down menus to select your interface, then click Apply.
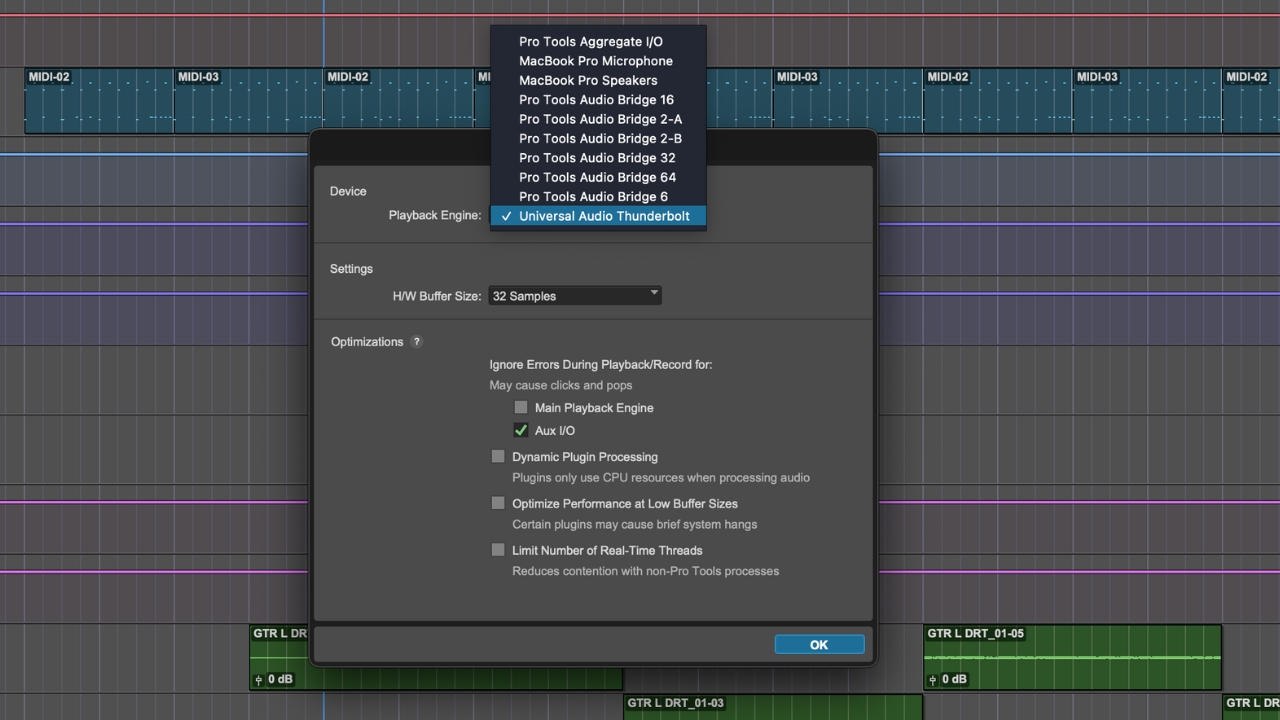
In Pro Tools, this menu will be found in Setup > Playback engine. If you're changing your audio device in Pro Tools and a project is open, you will need to save and relaunch so bear that in mind if you don't want to save any recent progress or need to go back on something.
Conclusion
And there you have it. Hopefully, you should be up and running with your brand new interface and ready to record. All that remains is to load up a session, plug in your instrument and microphone, and test you can hear everything. If you can’t, or if something else has gone awry, then don't worry, we have a troubleshooting guide that solves loads of common issues.

James Grimshaw is a freelance writer and music obsessive with over a decade of experience in music and audio writing. They’ve lent their audio-tech opinions (amongst others) to the likes of Guitar World, MusicRadar and the London Evening Standard – before which, they covered everything music and Leeds through their section-editorship of national e-magazine The State Of The Arts. When they aren’t blasting esoteric noise-rock around the house, they’re playing out with esoteric noise-rock bands in DIY venues across the country; James will evangelise to you about Tera Melos until the sun comes up.


