How to vinyl scratch in software
Master vinyl scratching in software with this step-by-step tutorial

In the hardware domain where you’re using turntables, CDJs or some other controller built for the job, creating scratch effects is easy to understand.
In the DAW domain, however, options are a bit more limited. However, this is something that’s very achievable using CableGuys' TimeShaper 3 plugin, which you can get free with the latest issue of Computer Music magazine. This is how you do it.
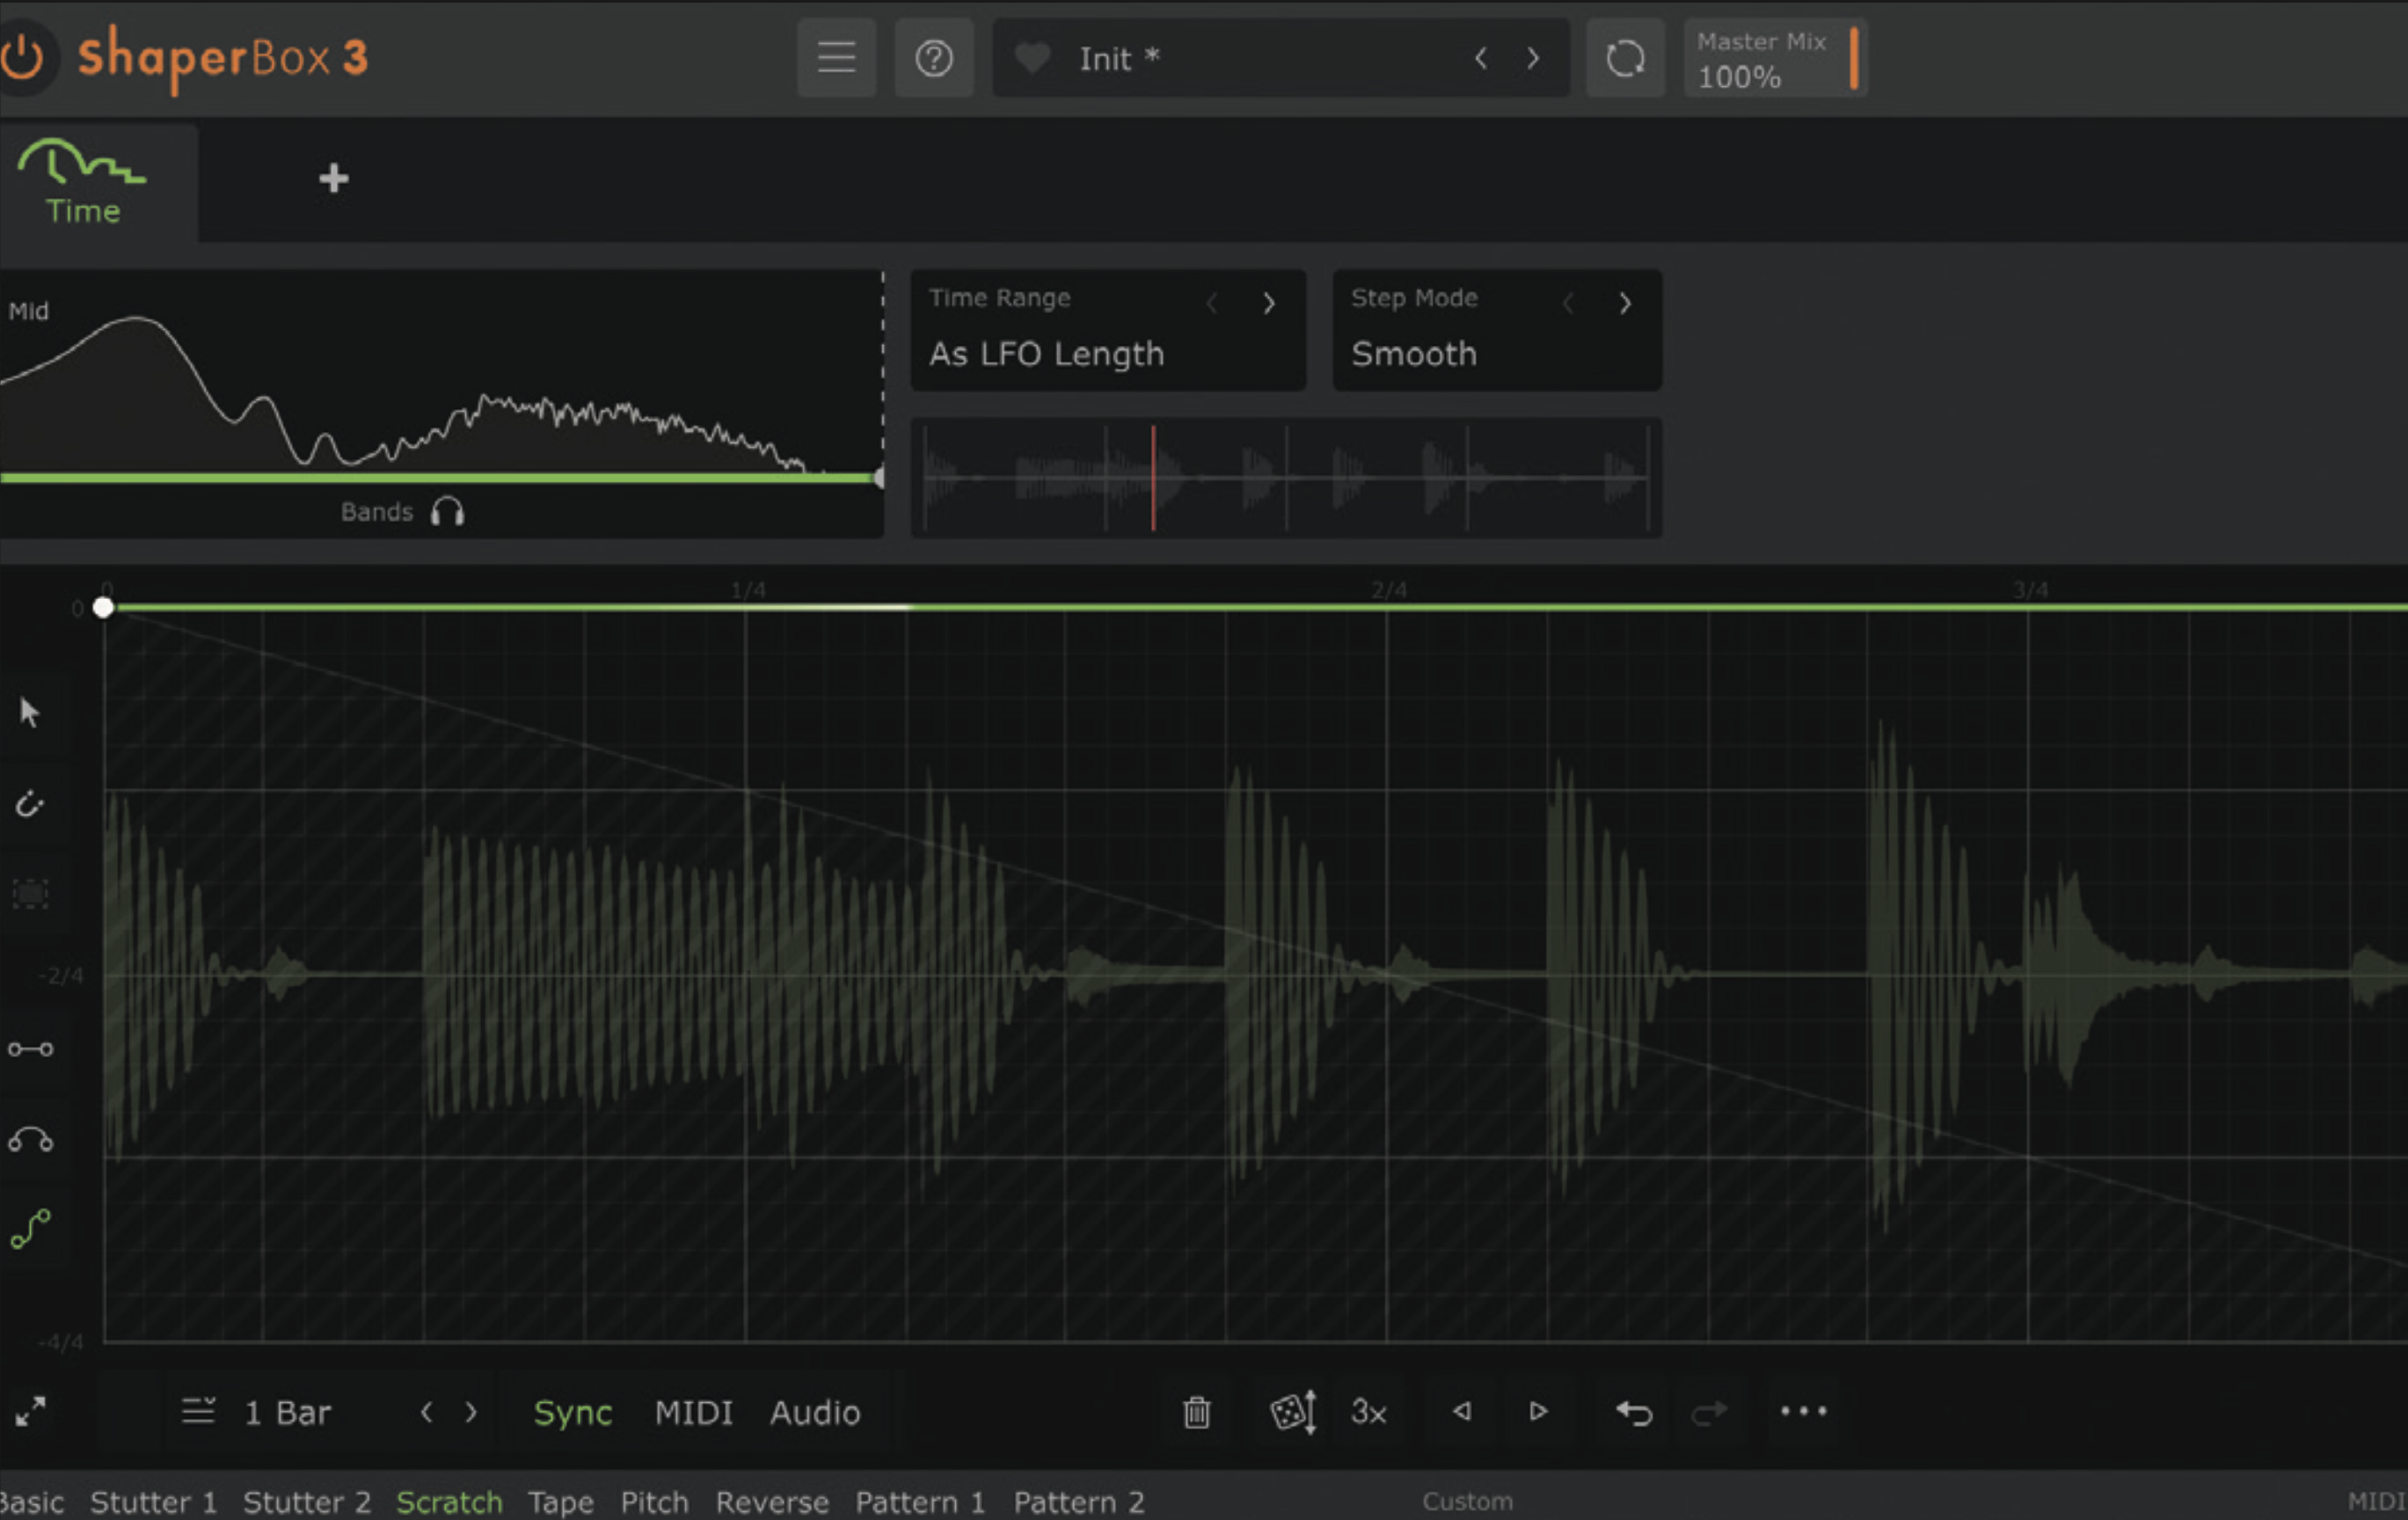
We’ve loaded up a hip-hop loop and our session is at 90bpm. TimeShaper 3 can achieve forward and backward effects based on the slope of the curve relative to the background grey line. To achieve scratching effects, we also need the LFO curve to have a particular shape.
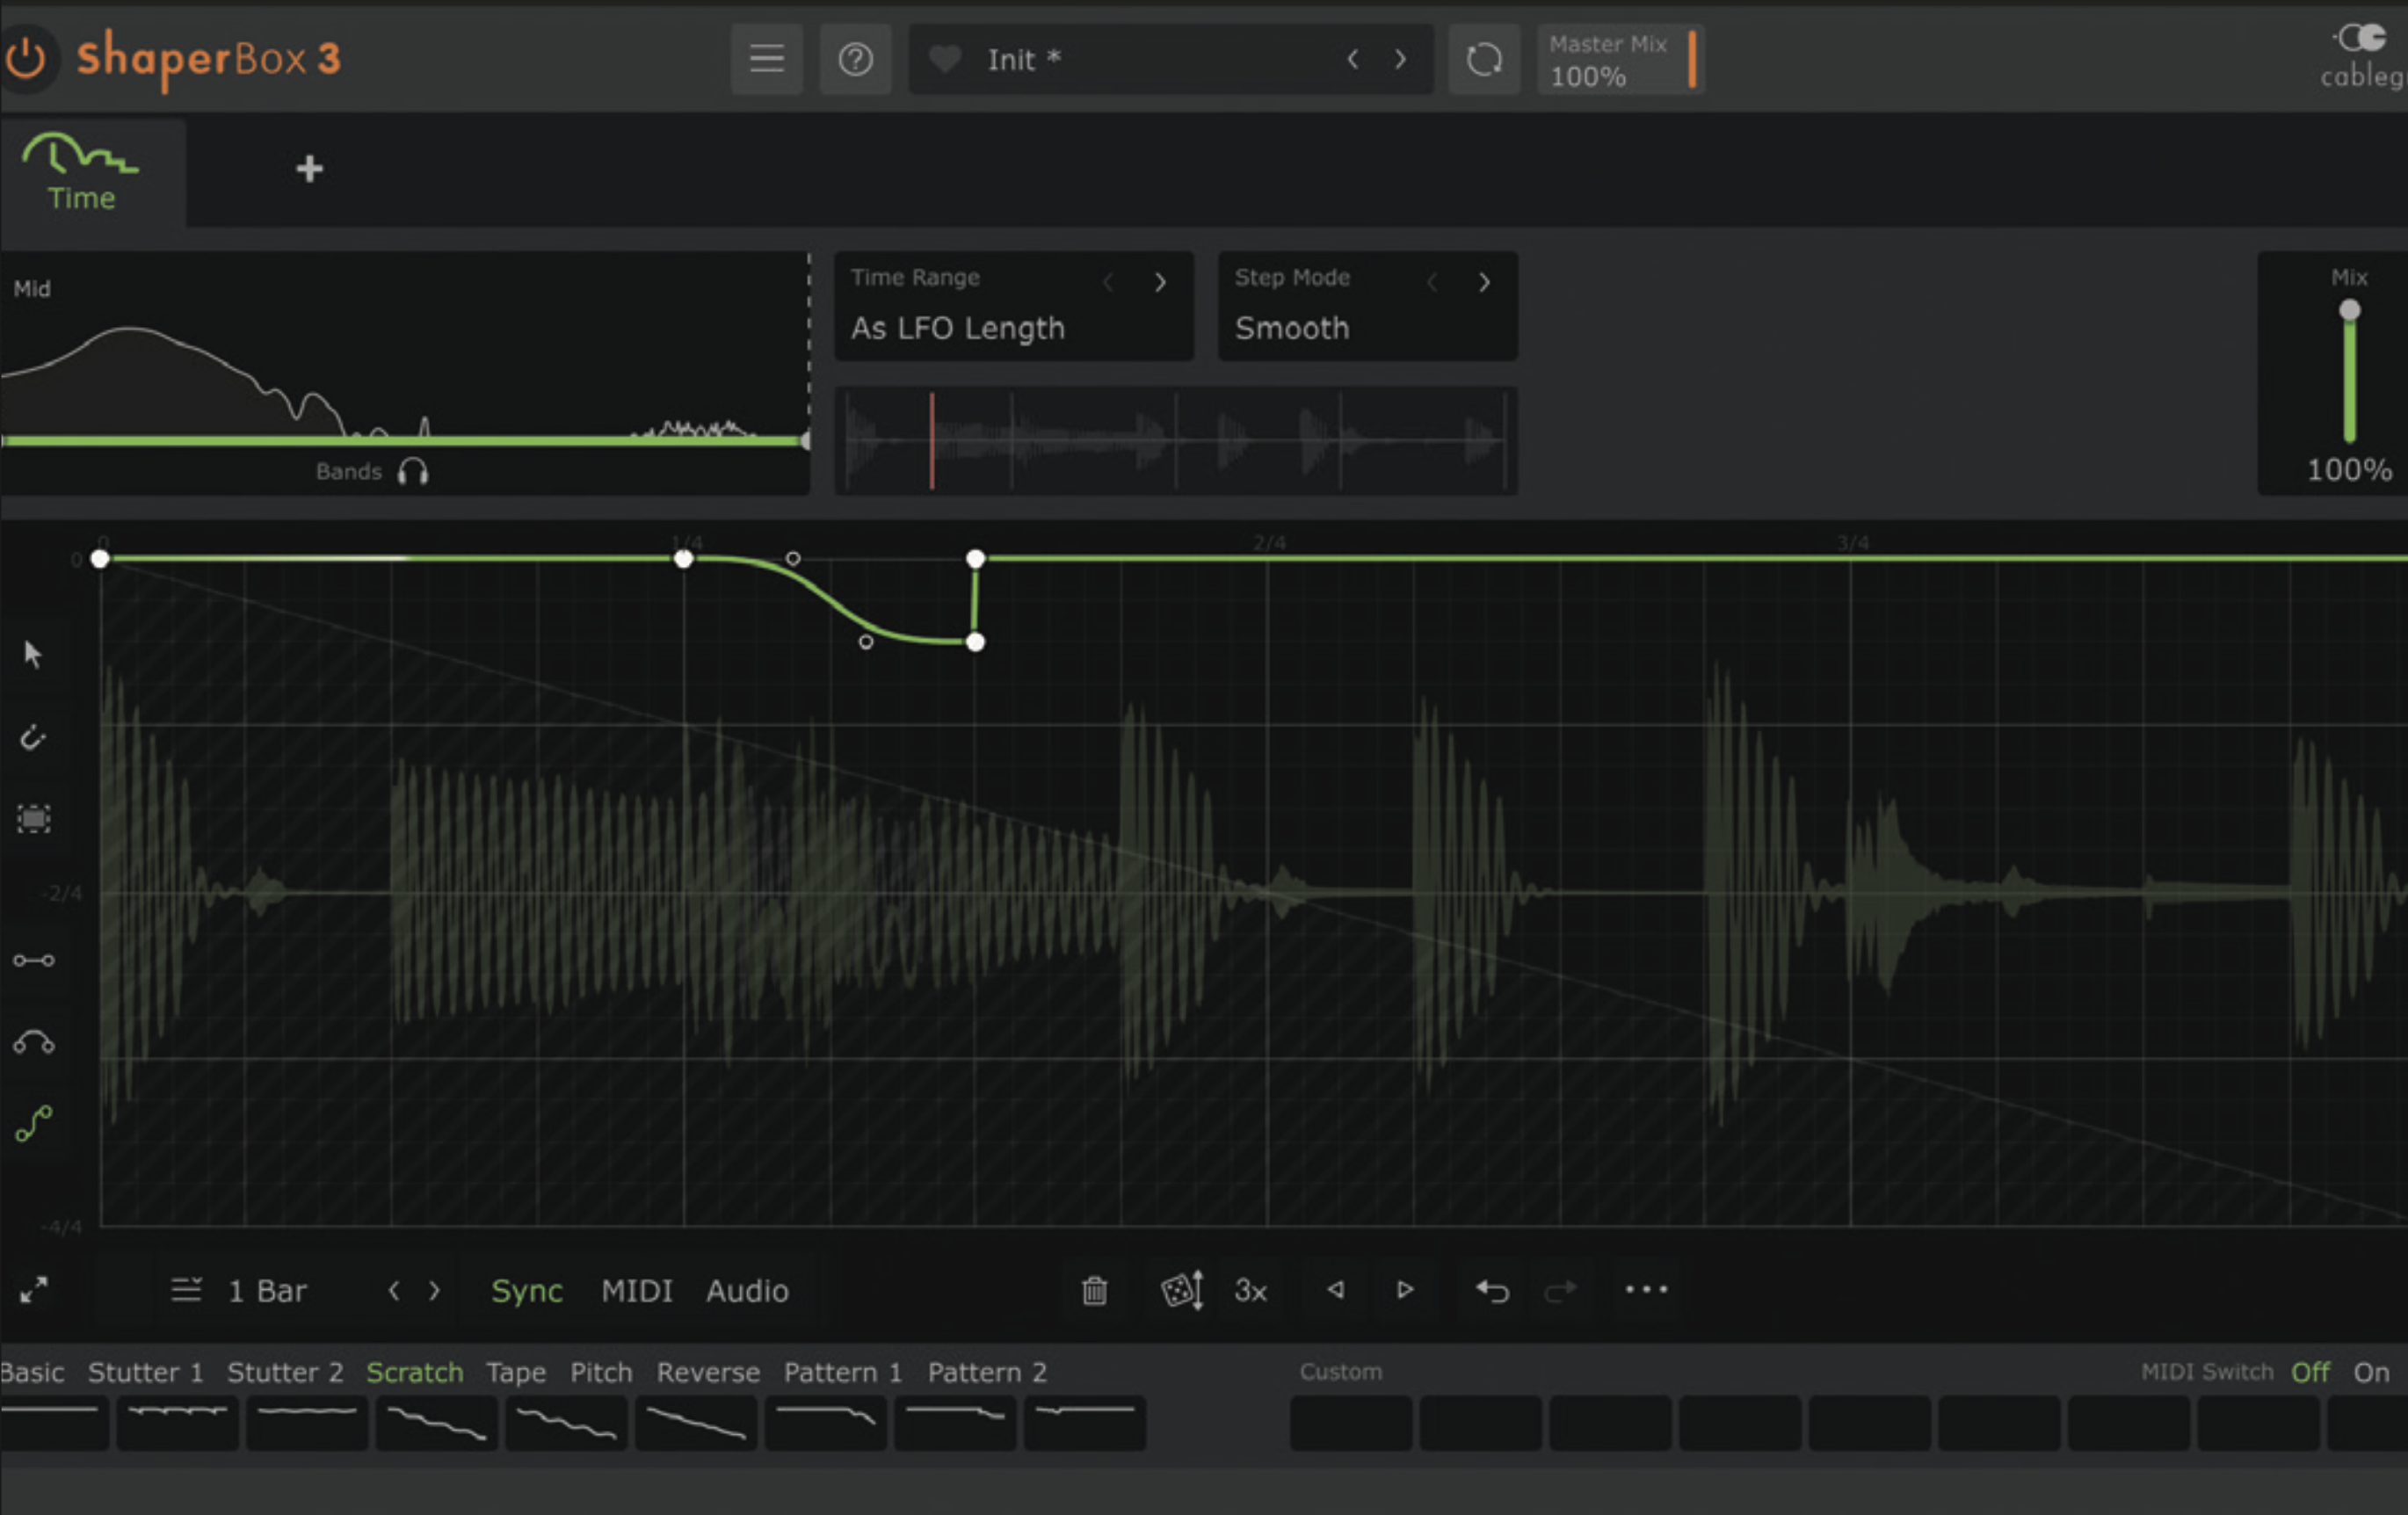
Start with a one-bar curve and grab the S-curve tool from the toolbar. Drag the S-shape to create an eighth note section, using the size of the curve to create the depth of the effect. Here with one-bar-length LFO and one-bar Time Range, a small amount is all it takes.
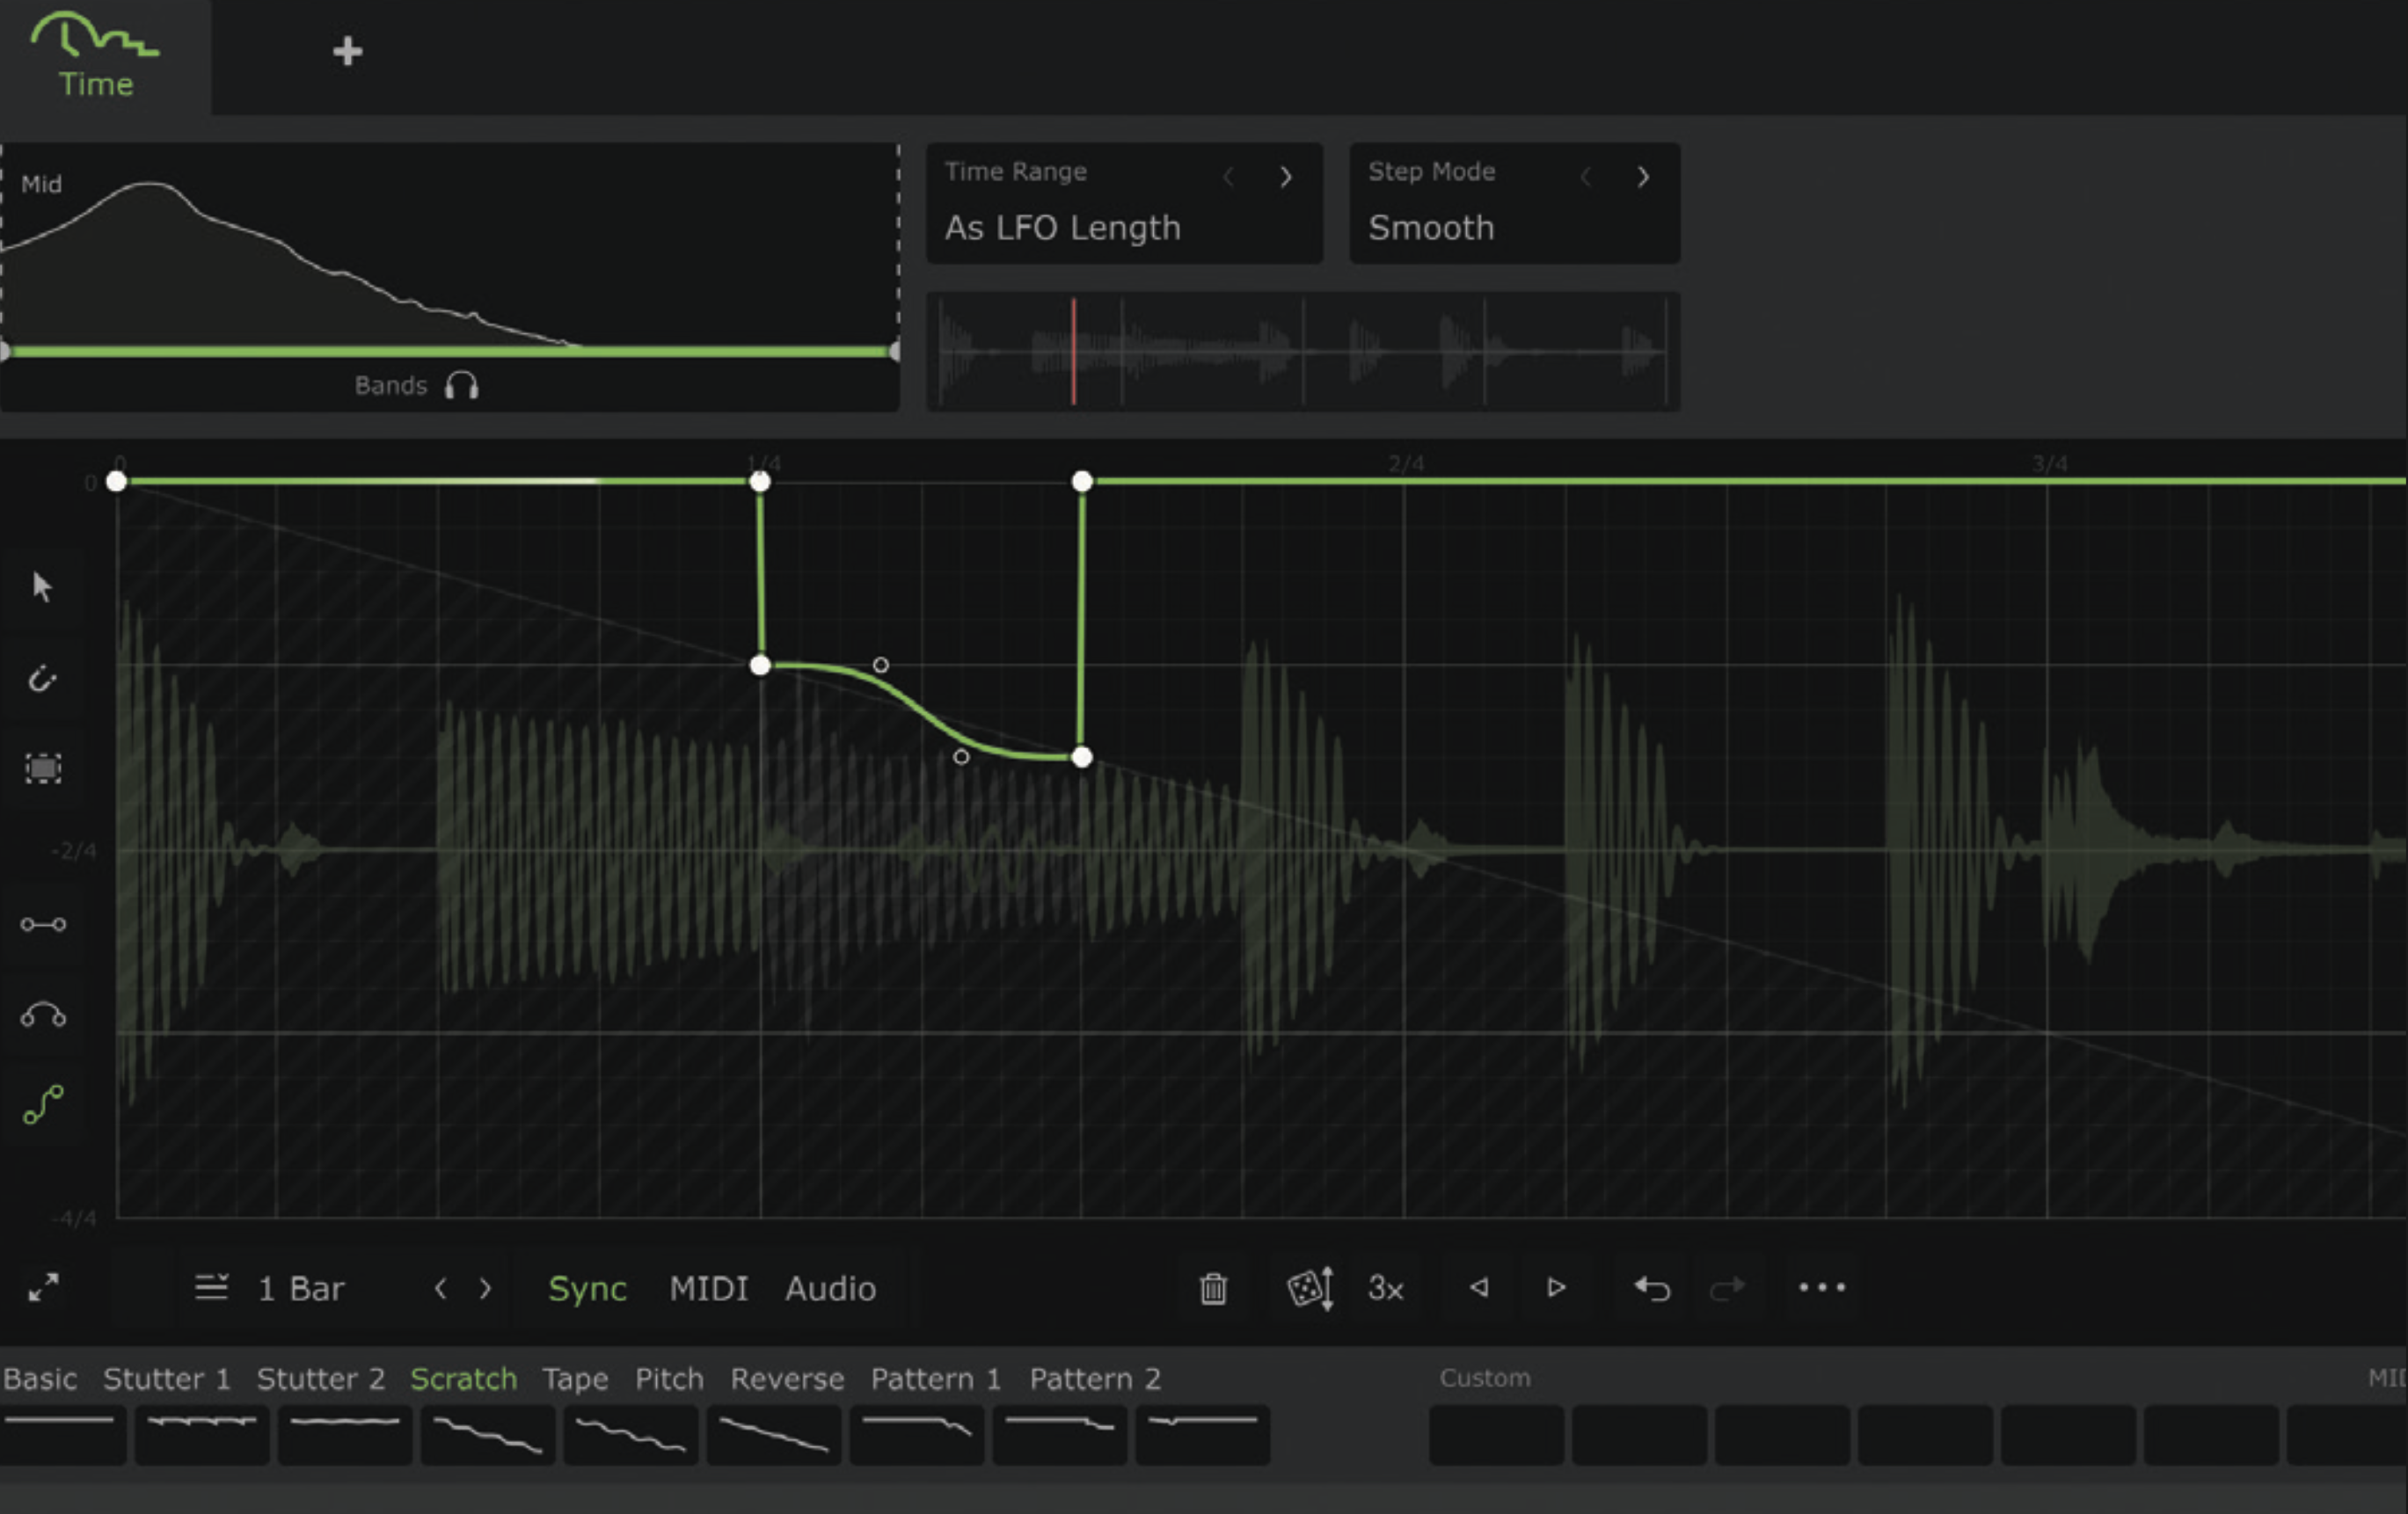
Use the curve handles to learn how the curve shape influences the timing and pitch of the effect. Then use the S-curve tool to place the move in more strategic places. So, if we want to introduce a scratch using the downbeat of the loop, but place that at quarter 2, we need the curve to intersect the grey line at quarter note 2.
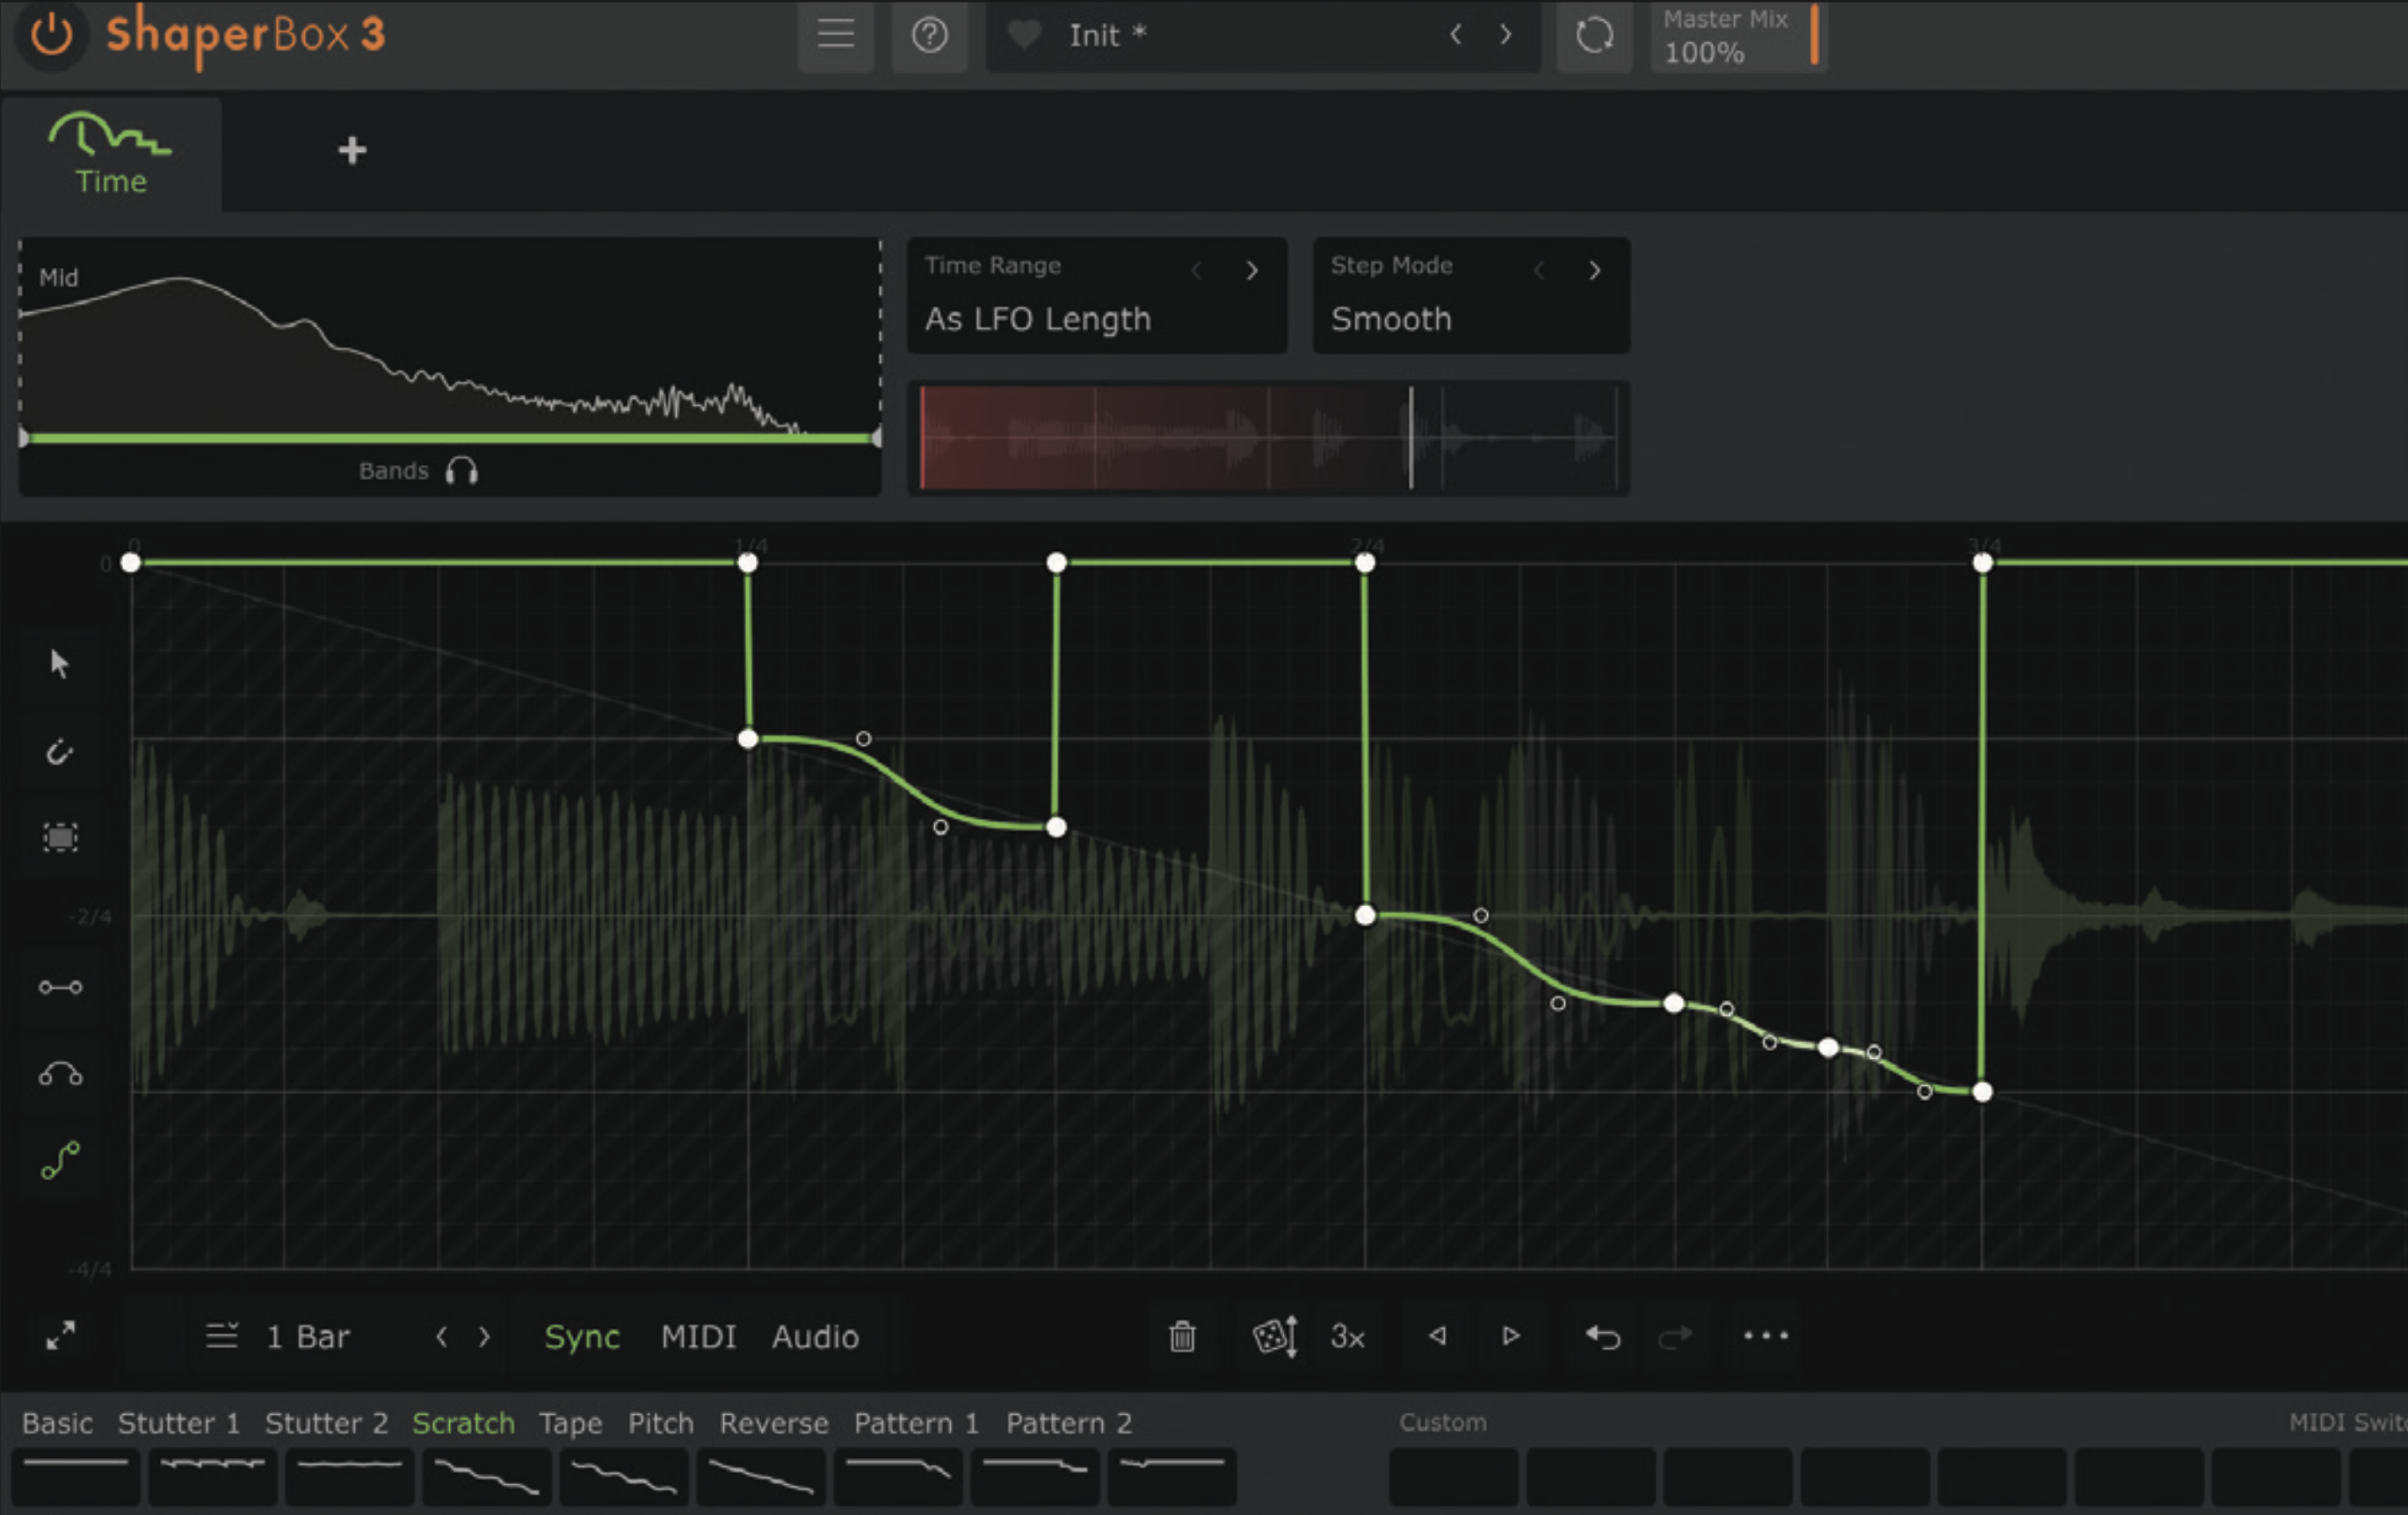
Scratching is often repeated rhythmically and to achieve this, all we have to do is repeat the same move, which is what we’ve done here. Once again, making sure each section of S-curve hits the grey line we can keep returning to quarter note 1. Here we’ve also introduced a double-speed scratch later in the bar.
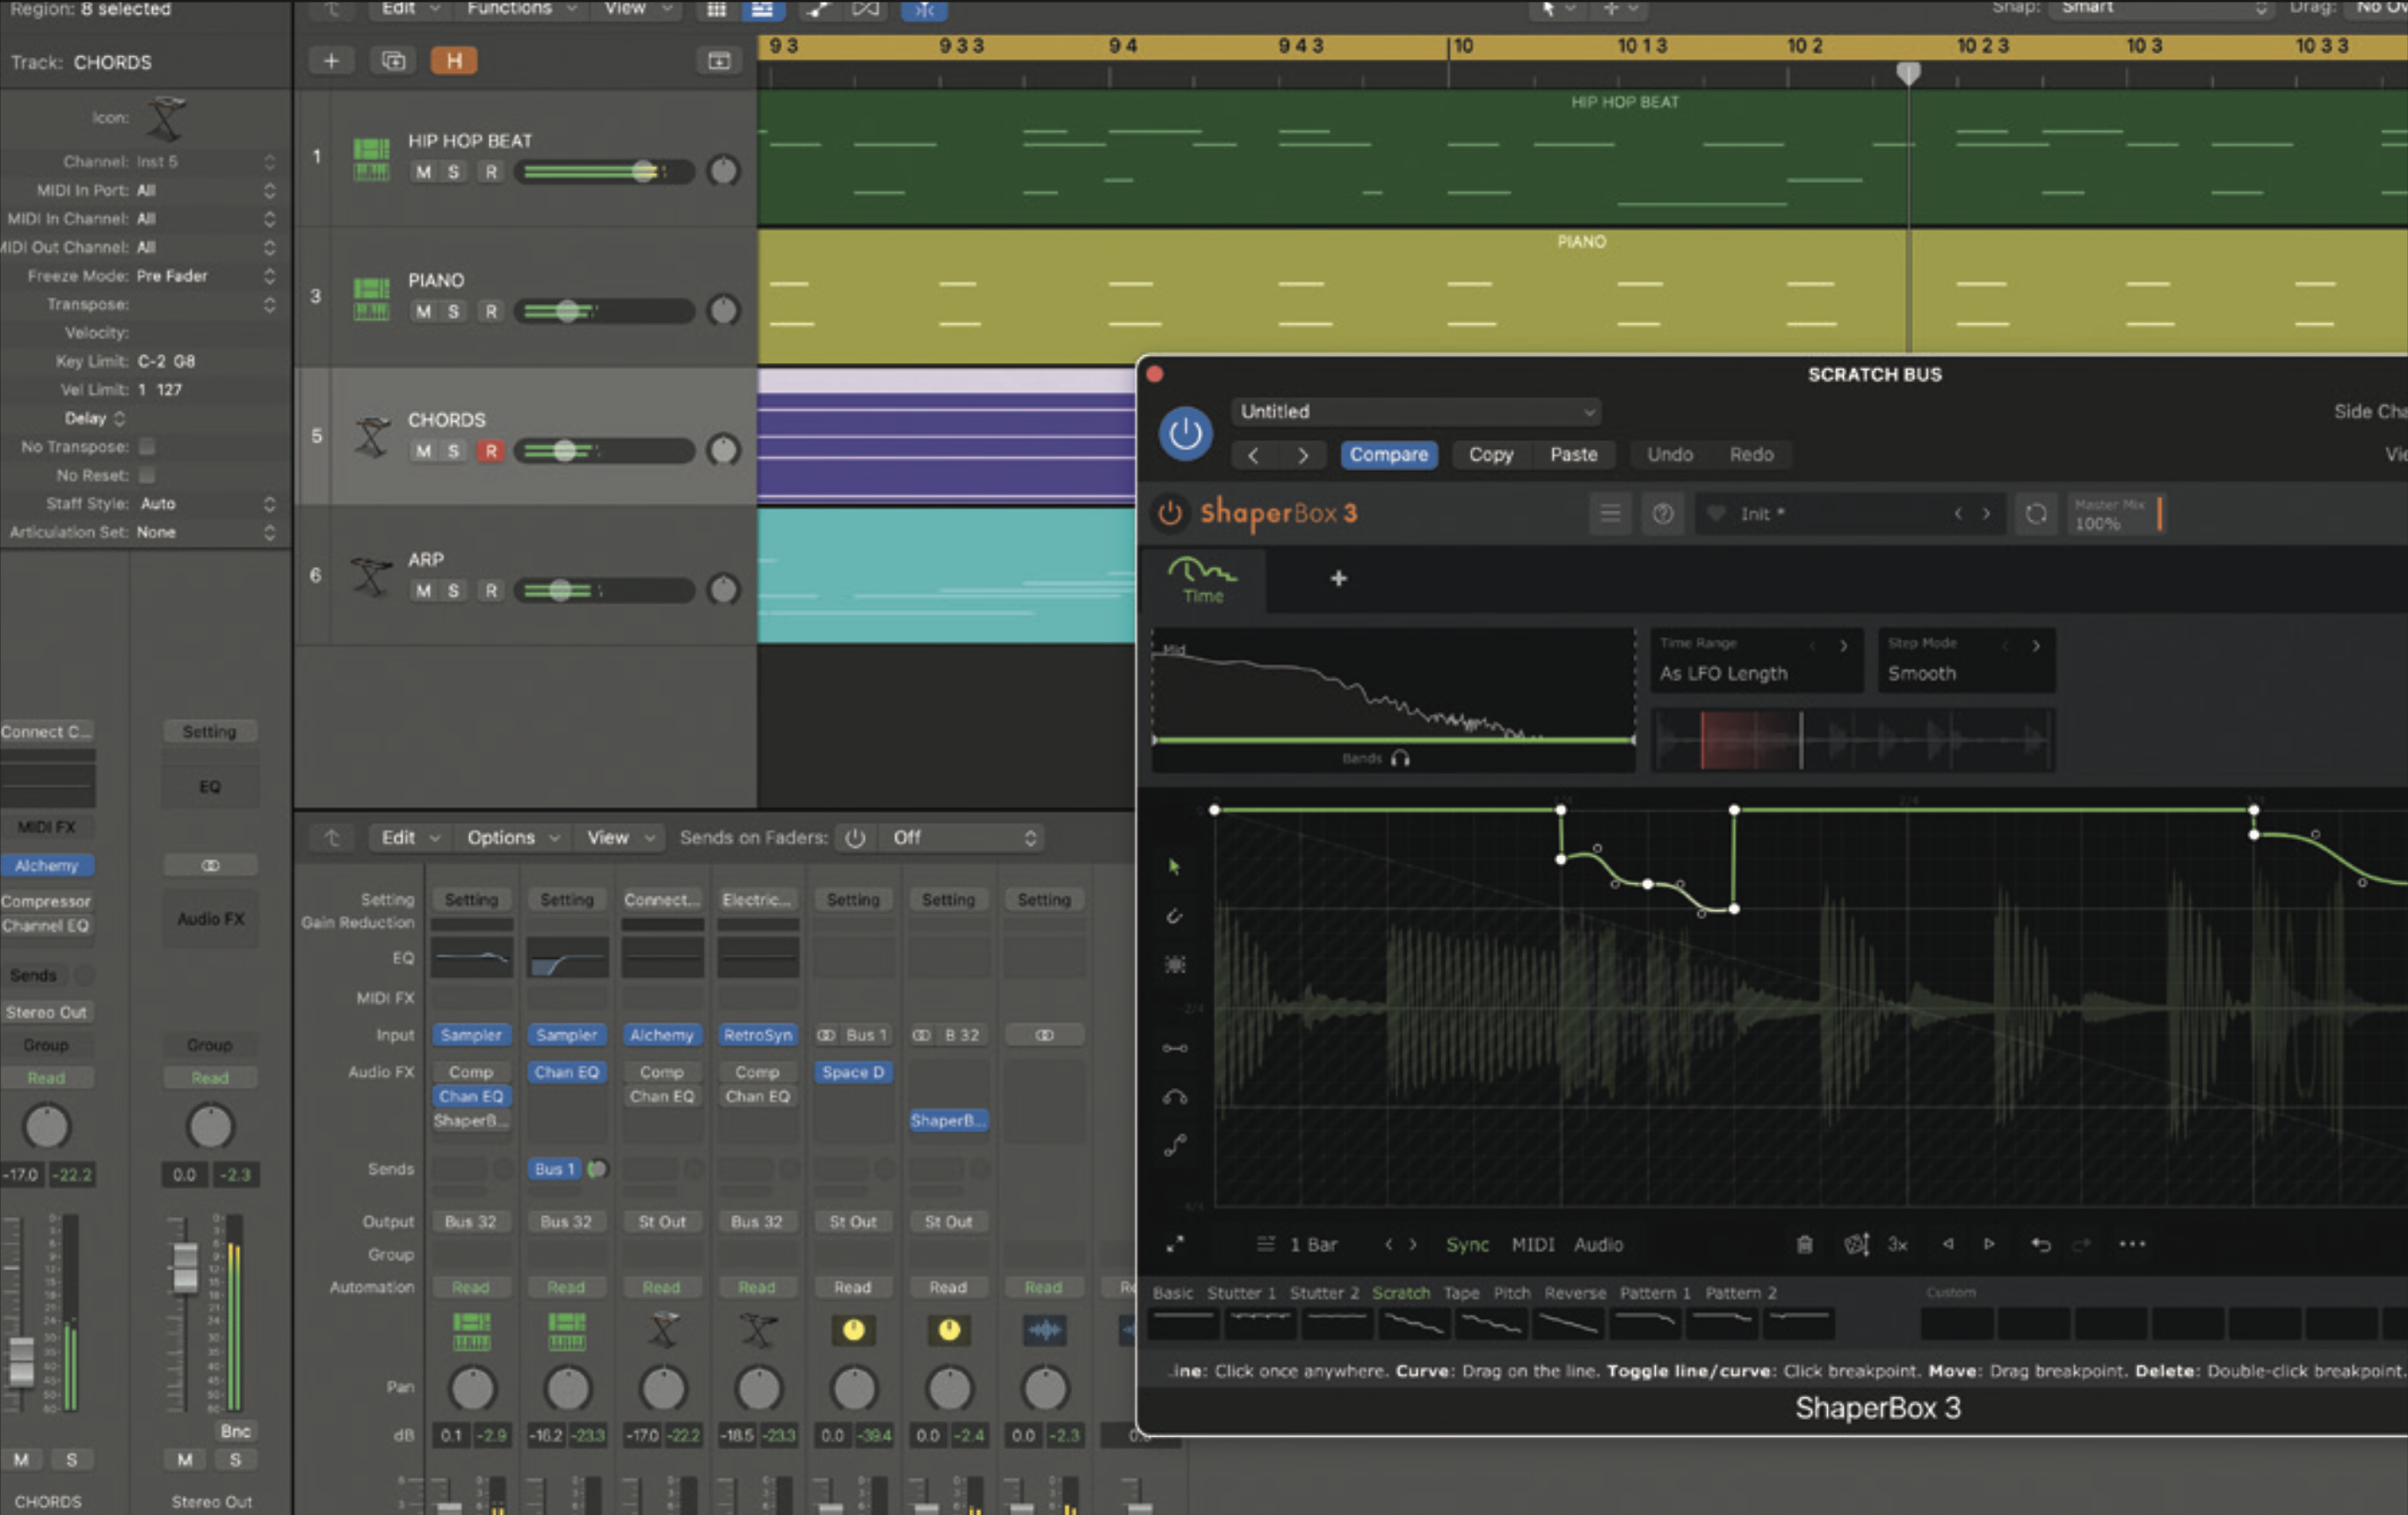
As we’re using a plugin to create this effect, we have the flexibility to process the main output or a submix bus, and here we’ve routed some of our tracks to the effect and some directly to the output. This offers loads of creative potential and of course is a technique you can use with many of the TimeShaper 3 effects.
Want all the hottest music and gear news, reviews, deals, features and more, direct to your inbox? Sign up here.
Jon is a London based platinum award winning mixer, producer, composer and club remixer with a diverse CV that spans dance, pop, rock and music for media. He’s also a long term contributor to MusicRadar's music technology tutorials and reviews. Whether working alone or collaborating he usually handles final mixdowns, so you’ll also find MusicRadar peppered with his handy mixing tips.
