Creativity hacks: using one sample to inspire a new track
How one sound can provide the spark for a complete song
When you begin the creative process of writing anything, not just a song, there’s nothing more intimidating than a blank screen.
Getting something onto the page to kick off the process can often be the hardest part, so how do you start the ball rolling in the first place when it feels like your thought pond has been totally drained?
In this lesson, we’ll be looking at a great trick to get your creative juices flowing when you find yourself with a rare window of time to write, but of course all that ends up happening is you stare helplessly at your DAW’s empty tracks area as the minutes tick by.
The traditional route that many of us take when starting a new song is to loop up an eight-bar region first and build it up into a full, multitrack section, then add other song parts derived from this later.
An alternative approach is to create a section made up of just a simple rhythm track and a basic chord part, then frame up the rest of the song with this lineup, then go on to add embellishments on a per-section basis.
Regardless of the route you take, the one thing that both these approaches share is that you often need that initial catalyst to kickstart your ideas - and this is where this guide comes in, as we demonstrate how it’s possible to use almost any sample as a basis for inspiring new tracks.
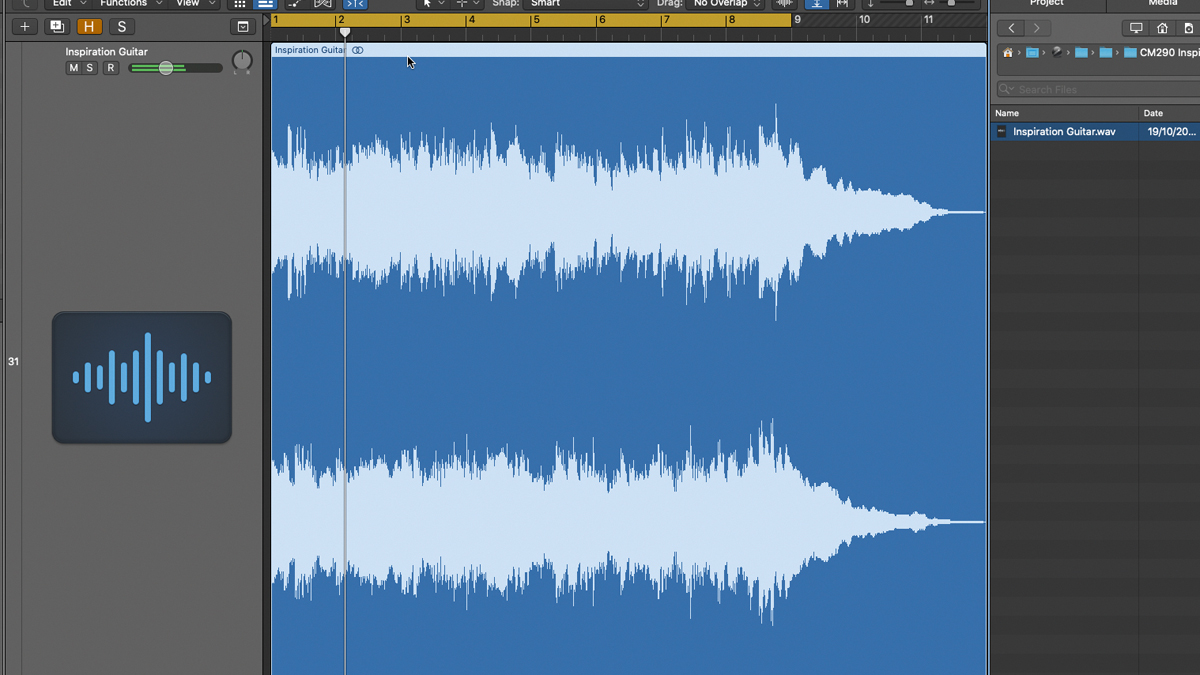
Step 1: The first thing to do is to find a source sample to base your initial idea on. This could be anything random you’ve found on your hard drive or recorded yourself, but ideally something that features some melodic content, like a chord change or two. For instance, we’ve found this melodic guitar sample from an old Ray Russel Guitar sample pack.
Get the MusicRadar Newsletter
Want all the hottest music and gear news, reviews, deals, features and more, direct to your inbox? Sign up here.
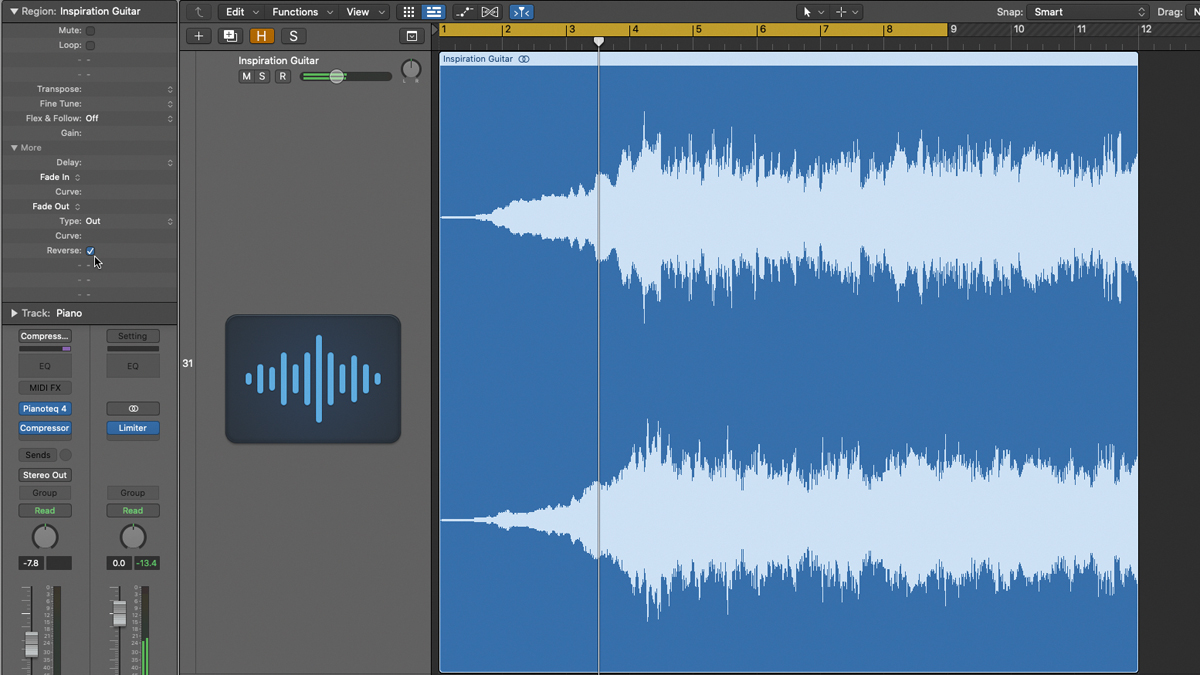
Step 2: The idea is to mangle the sample beyond recognition and then try and base a track around the resulting audio. So the first thing we’re going to do with this audio file is reverse it. Most DAWs have an easily accessible ‘reverse audio’ function - in Logic’s case, which is what we’re using, this is found in the Region Inspector pane.
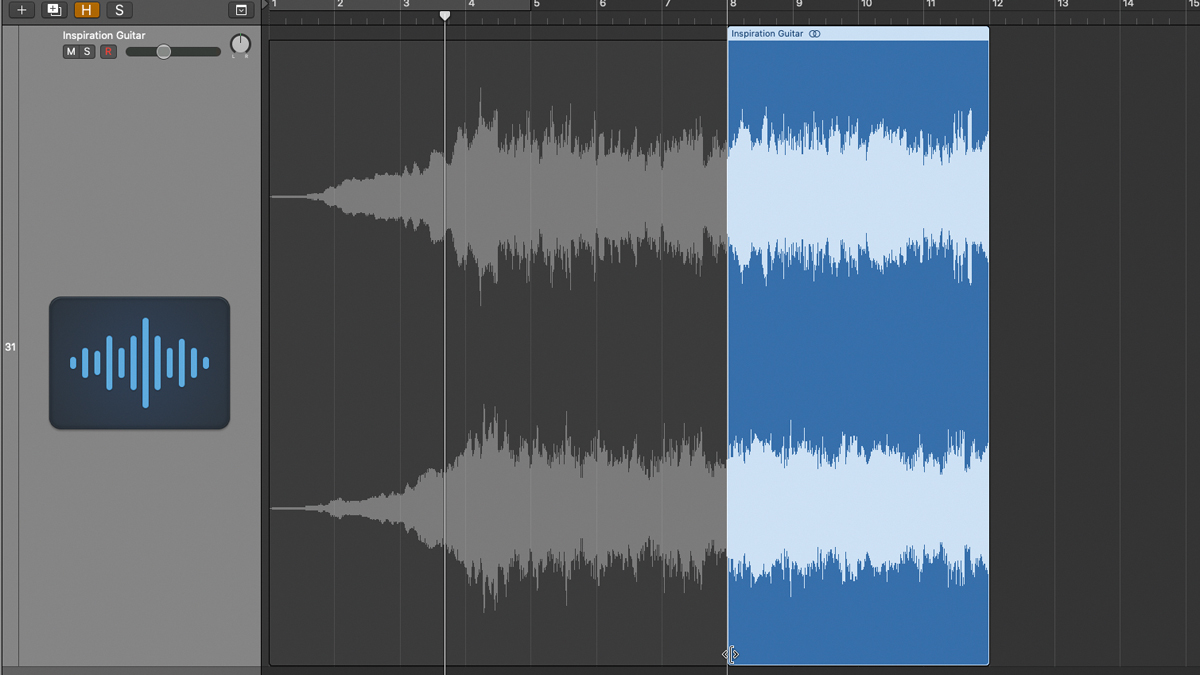
Step 3: Here we’ve trimmed the reversed region to four bars in length by making sure that the audio’s original start point - which is now the end of the region - finishes on a bar line, then drawing back the beginning of the region to give us the correct length. With this done, we can move the whole thing back to start at bar 1.
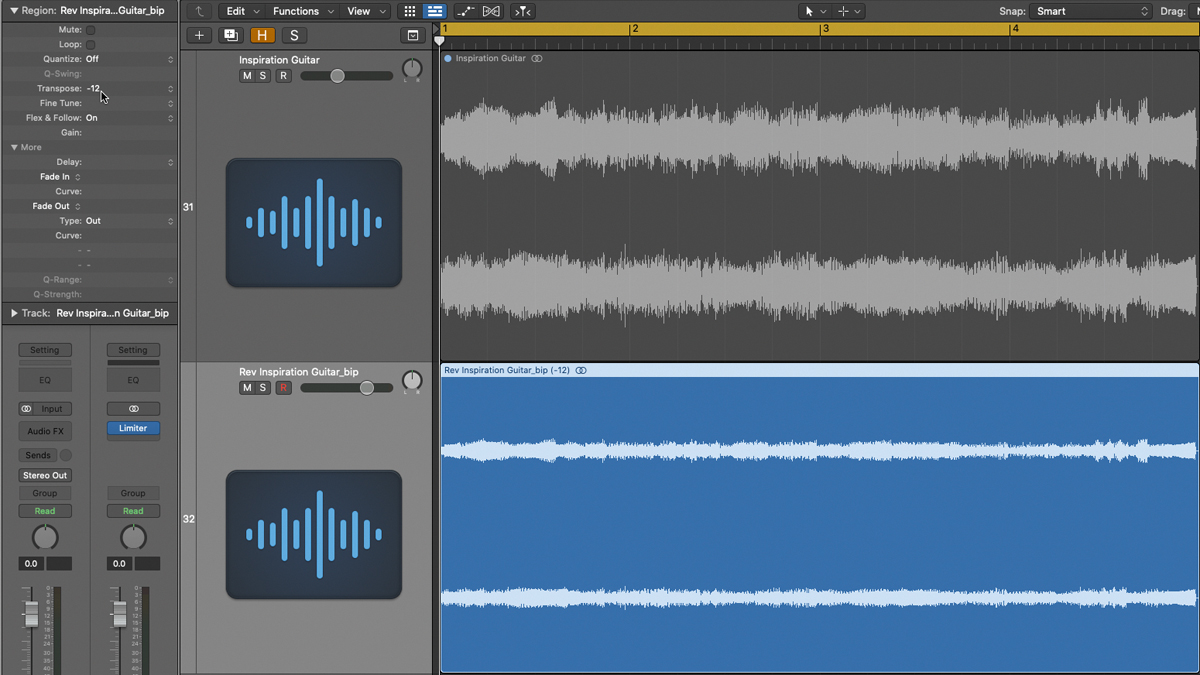
Step 4: Slowing a sample down to half time or lowering the pitch can provide alternative inspiration if you’re going for a more moody feel. To prepare for this, we’ve bounced the reversed audio down to a new audio file to make the change permanent, so that it can be transposed down an octave using the Transpose function in the Region Inspector.
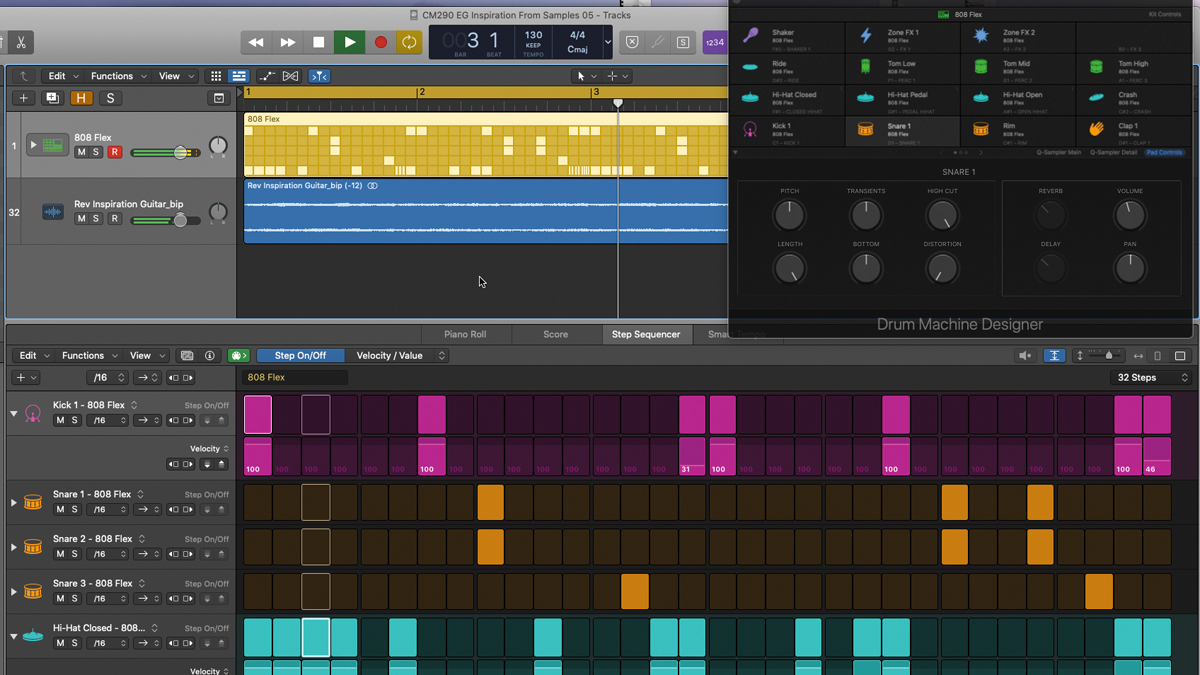
Step 5: At this point, we can start to build up ideas around the sample to begin creating our new track. The mood of the sample now suggests a sort of 808-based, trap-influenced beat. So here we’ve used Logic’s Step Sequencer to create the four-bar pattern shown, using the ‘808 Flex’ stock Drum Machine Designer preset.
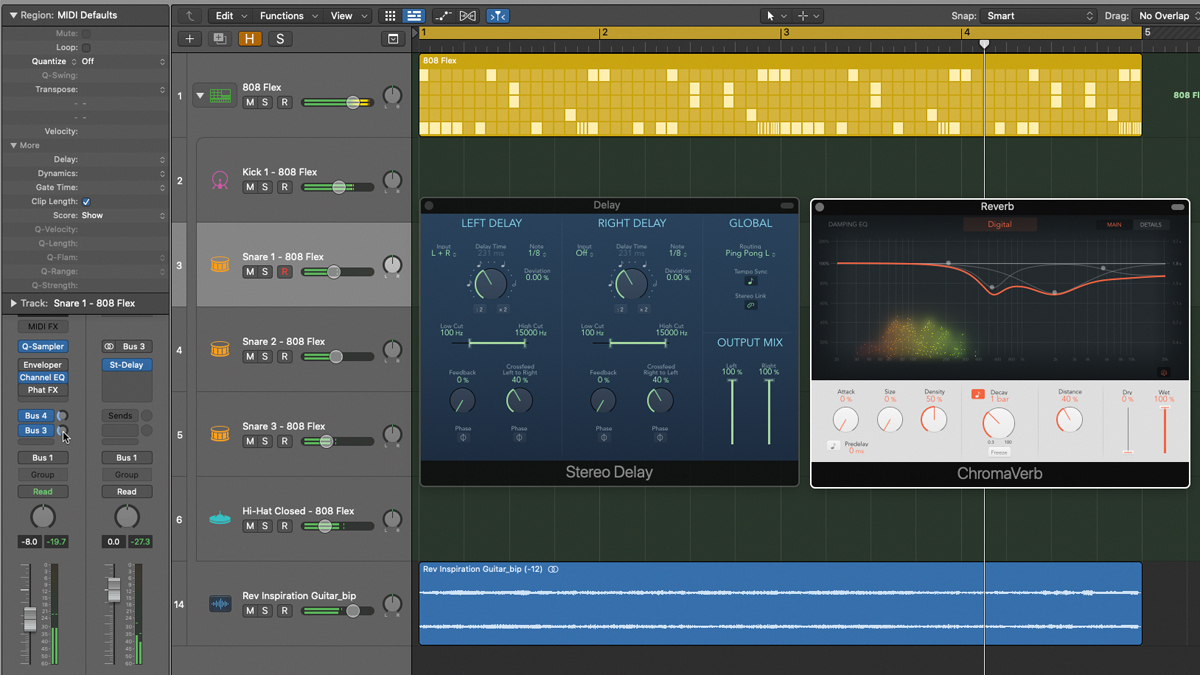
Step 6: We can enhance the moody vibe of the track a little bit and simultaneously add rhythmic interest with judicious use of reverb and delay effects. Using Logic’s stock plugins, we’ve added an eighth-note delay and some reverb to the snare drum, plus a splash of additional reverb on the sample itself.
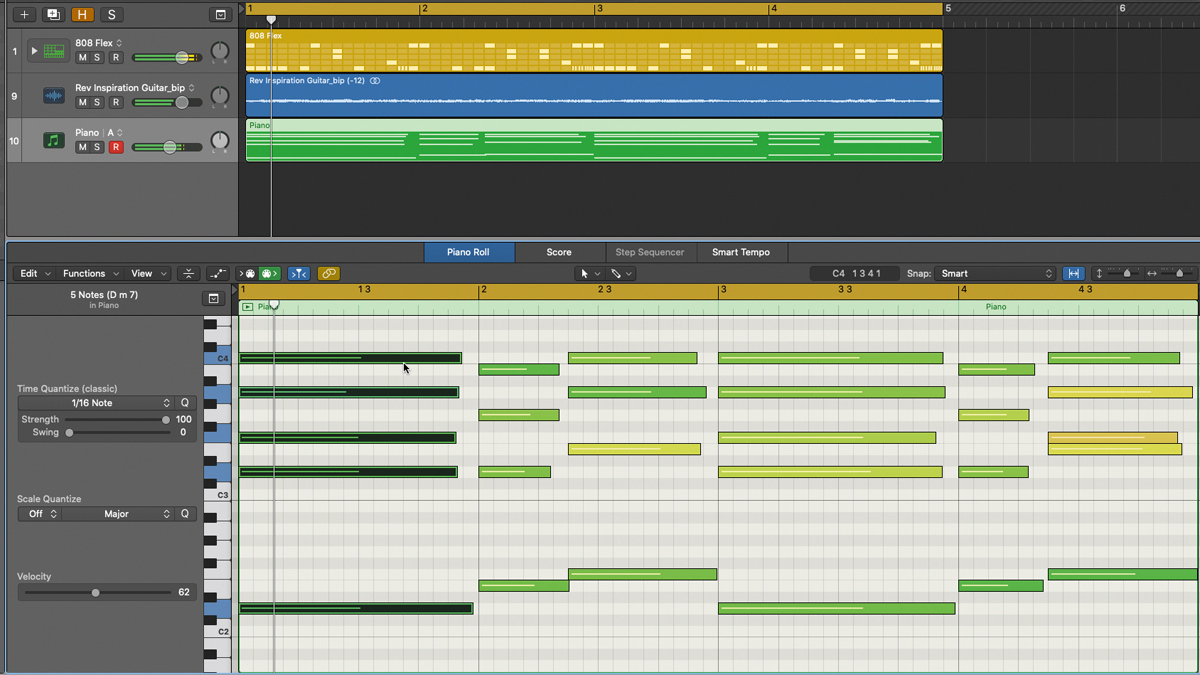
Step 7: Now we have the backbone of a basic track, it’s time to try and come up with some melodic parts to fit, suggested by what the sample is doing. A good place to start is to record or program in some piano or synth chords. Listening to the sample, a Dm7 > Em7 > Fmaj7 progression over the top seems like a good fit.
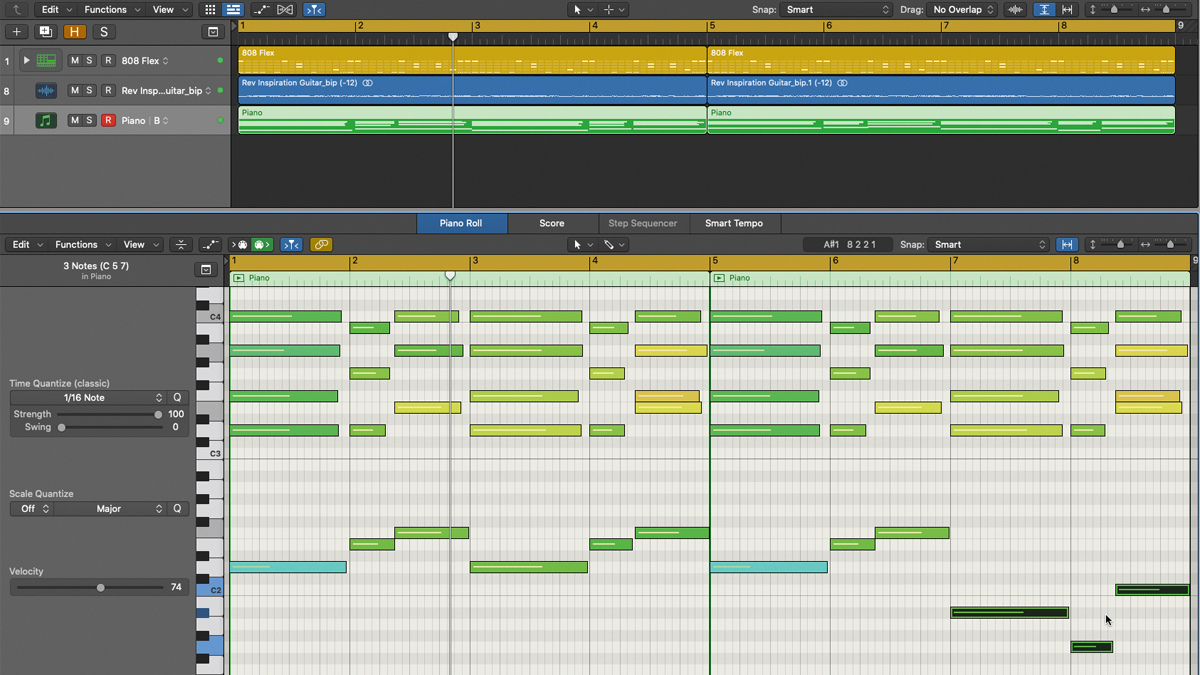
Step 8: If you don’t know the chords, note that they don’t have to fit exactly, just play what you imagine might sound good. Here, we’ve repeated everything so that we now have an eight-bar section, but at the end of the second repeat, we’ve altered the notes in the left hand of the piano part, which acts to change the chords to Bbmaj7/9 > G > C6/11.
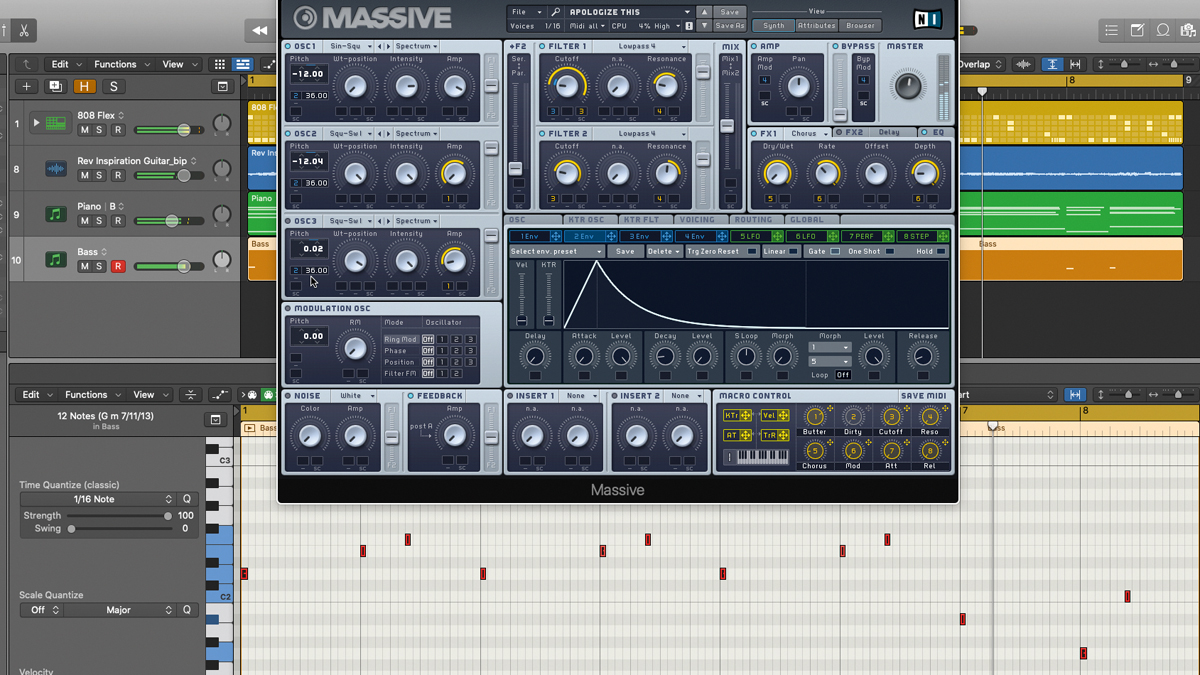
Step 9: Now let’s add a bassline using a tweaked Massive preset - a sine wave bass with a long release and a pitch envelope modified to add a pitched, 808-like attack to the sound. The part simply reinforces the root note of the chords each time they change, backing up the left-hand shift in the piano at the end of bar 8.
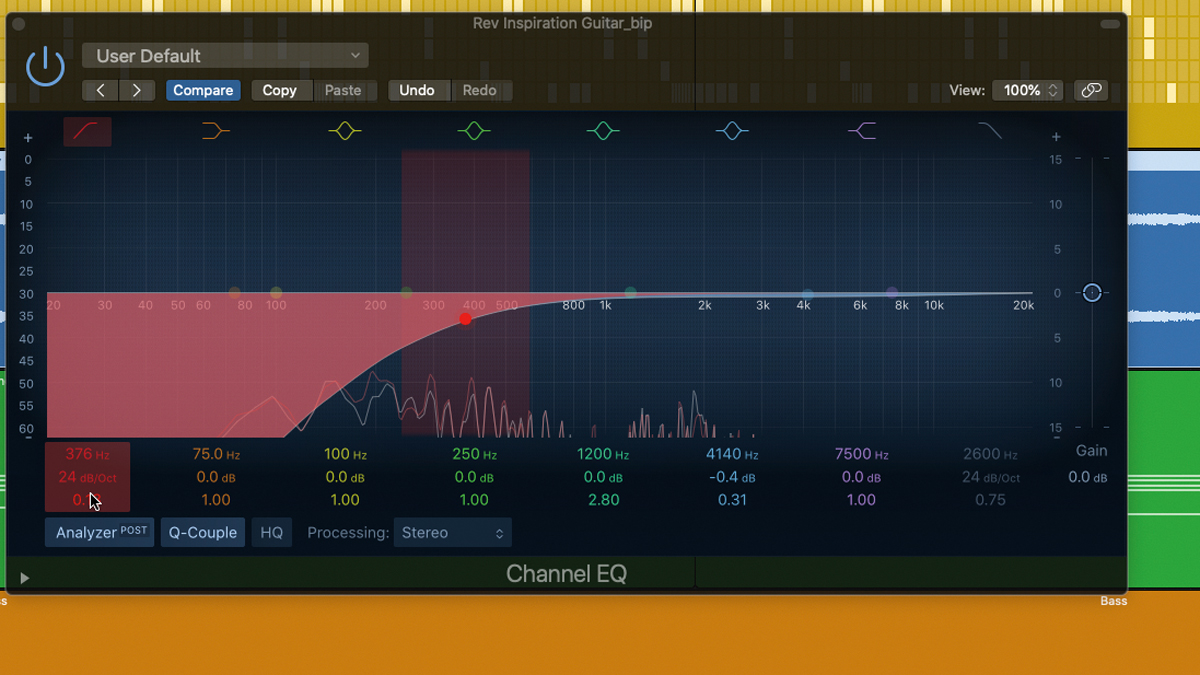
Step 10: As you add more parts, you might find it helps to EQ the sample to help it fit into the mix a bit better. We’re using a standard Logic Channel EQ plugin to clean up what’s now a bit of a clash in the low end due to that altered bass note. Alternatively, you might find that you can even remove the sample altogether now that you’re up and running.
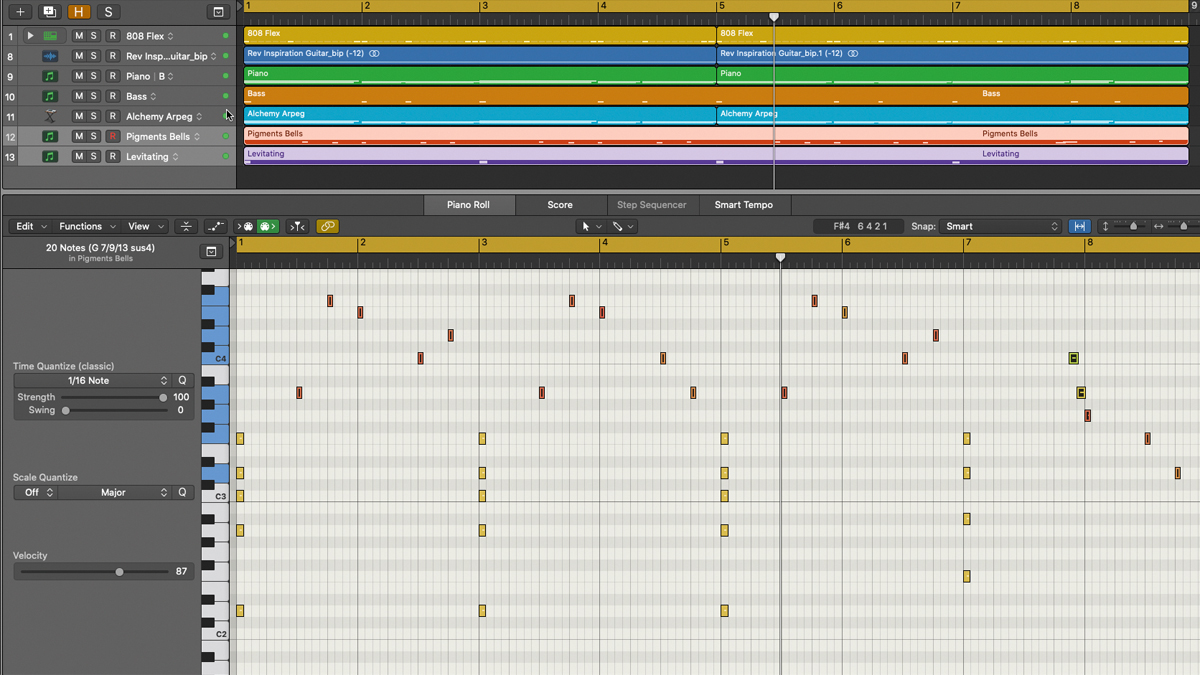
Step 11: Now that we’re well on the way to a completed eight-bar song section we’ll add a couple more synth parts to build up the track. Here, we’ve used an arpeggiated pad part from Alchemy to back up the piano chords, plus a call-and-answer-style bell melody and breathy vocoder-like stab courtesy of Arturia’s Pigments.
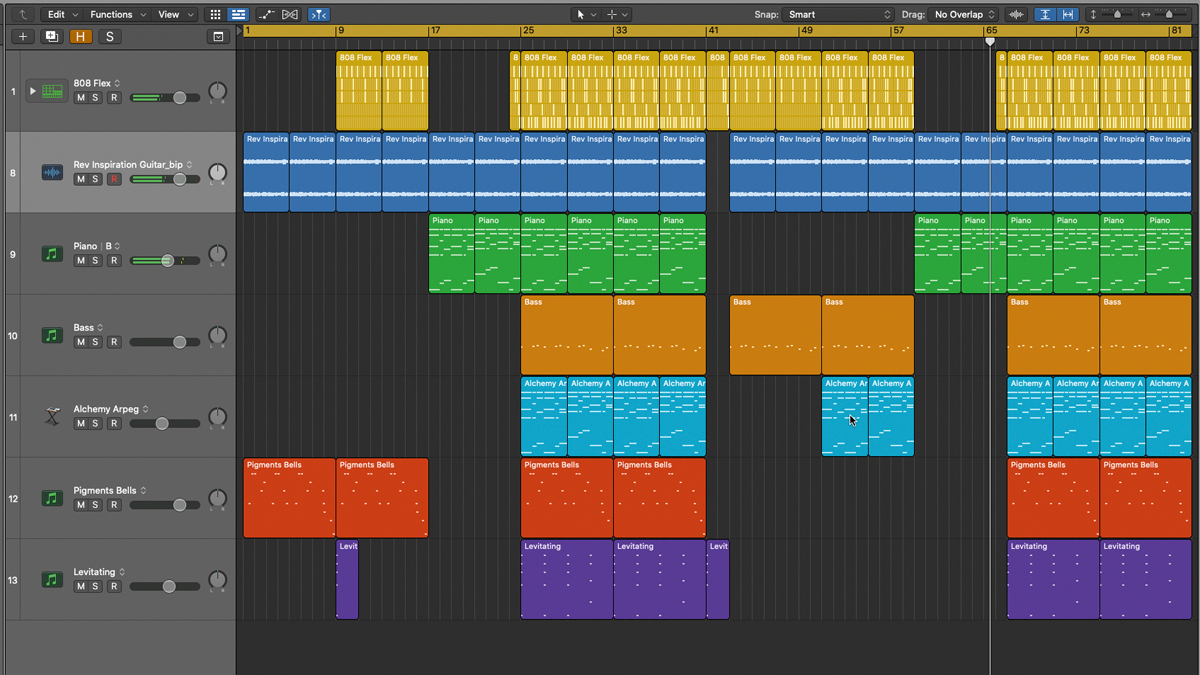
Step 12: With several parts now in place, we can use our DAW’s arrangement features to spin our eight-bar loop into a full arrangement. This includes things like copying the drum pattern and removing elements from the copies to provide the drum parts for different sections of the song, and trying out different combinations of the parts we’ve added.
Pro tips
Found surround sound
Taking inspiration from sounds that you find around you from day to day can be a great way to start new ideas. One recent track of mine started out as a piece of audio captured in the waiting room of my daughter’s dance class. A short segment of random background chatter and general ambience, captured by my laptop’s microphone and looped up, provided an intriguing rhythm, and even suggested a vocal hook!
Tempo tantrums
When setting the tempo of your project, why not begin by basing it on the tempo of the original sample if you know it? A lot of sample pack audio files already have their BPM value in the filename, so this makes for an easy way to kick things off, as you already know what the tempo needs to be; you can adjust it later. Or if you know what tempo you want, try using your DAW’s flex or autowarp features to conform your chosen audio to fit.
Computer Music magazine is the world’s best selling publication dedicated solely to making great music with your Mac or PC computer. Each issue it brings its lucky readers the best in cutting-edge tutorials, need-to-know, expert software reviews and even all the tools you actually need to make great music today, courtesy of our legendary CM Plugin Suite.


