How to use Alchemy as a sampler in Logic Pro
Learn how to use Logic's powerful native soft synth for a new purpose: sampling
PLUGIN WEEK 2023: Originally available as a third-party plugin and developed by Camel Audio, Alchemy is a really cool synth for sound design and manipulation, but did you know that it can also be used as a sampler?
It’s actually pretty amazing given that it’s now a free tool native to Logic Pro since version 10.2. Music makers really should be taking advantage as it offers a lot. In this tutorial I’m going to show you how to use Alchemy with your MIDI keyboard to trigger samples, and also the depth at which those samples can be manipulated. There are endless possibilities if you just want to experiment.

If you’ve read or watched my previous tutorials, you’ll know that I’m a producer who largely dabbles in hip-hop sub-genres. Sampling is a historical mainstay of a track whether it be drums or the basis of a new song entirely. I’ve used several tools to aid my creativity when it comes to sampling: Akai APCs, Novation Launchpads among them.
But I’ve had an equal amount of success just using my MIDI keyboard with the Alchemy synth. One of the best things about it has been the option to play a range of individual samples triggered by individual keys, in addition to having the full range of keys play a single sample at a different pitch. That kind of flexibility shouldn’t be overlooked.
So without further ado, let’s look at how you can use Alchemy and make an immediate impact on your sampling workflow.

Step 1: You may already have a bank of samples ready to use but, if not, you can use Logic’s timeline to manually slice portions of audio into manageable chunks for the sampler to handle. Once the audio is cut into separate parts, I save each sample to a folder as a new audio file.
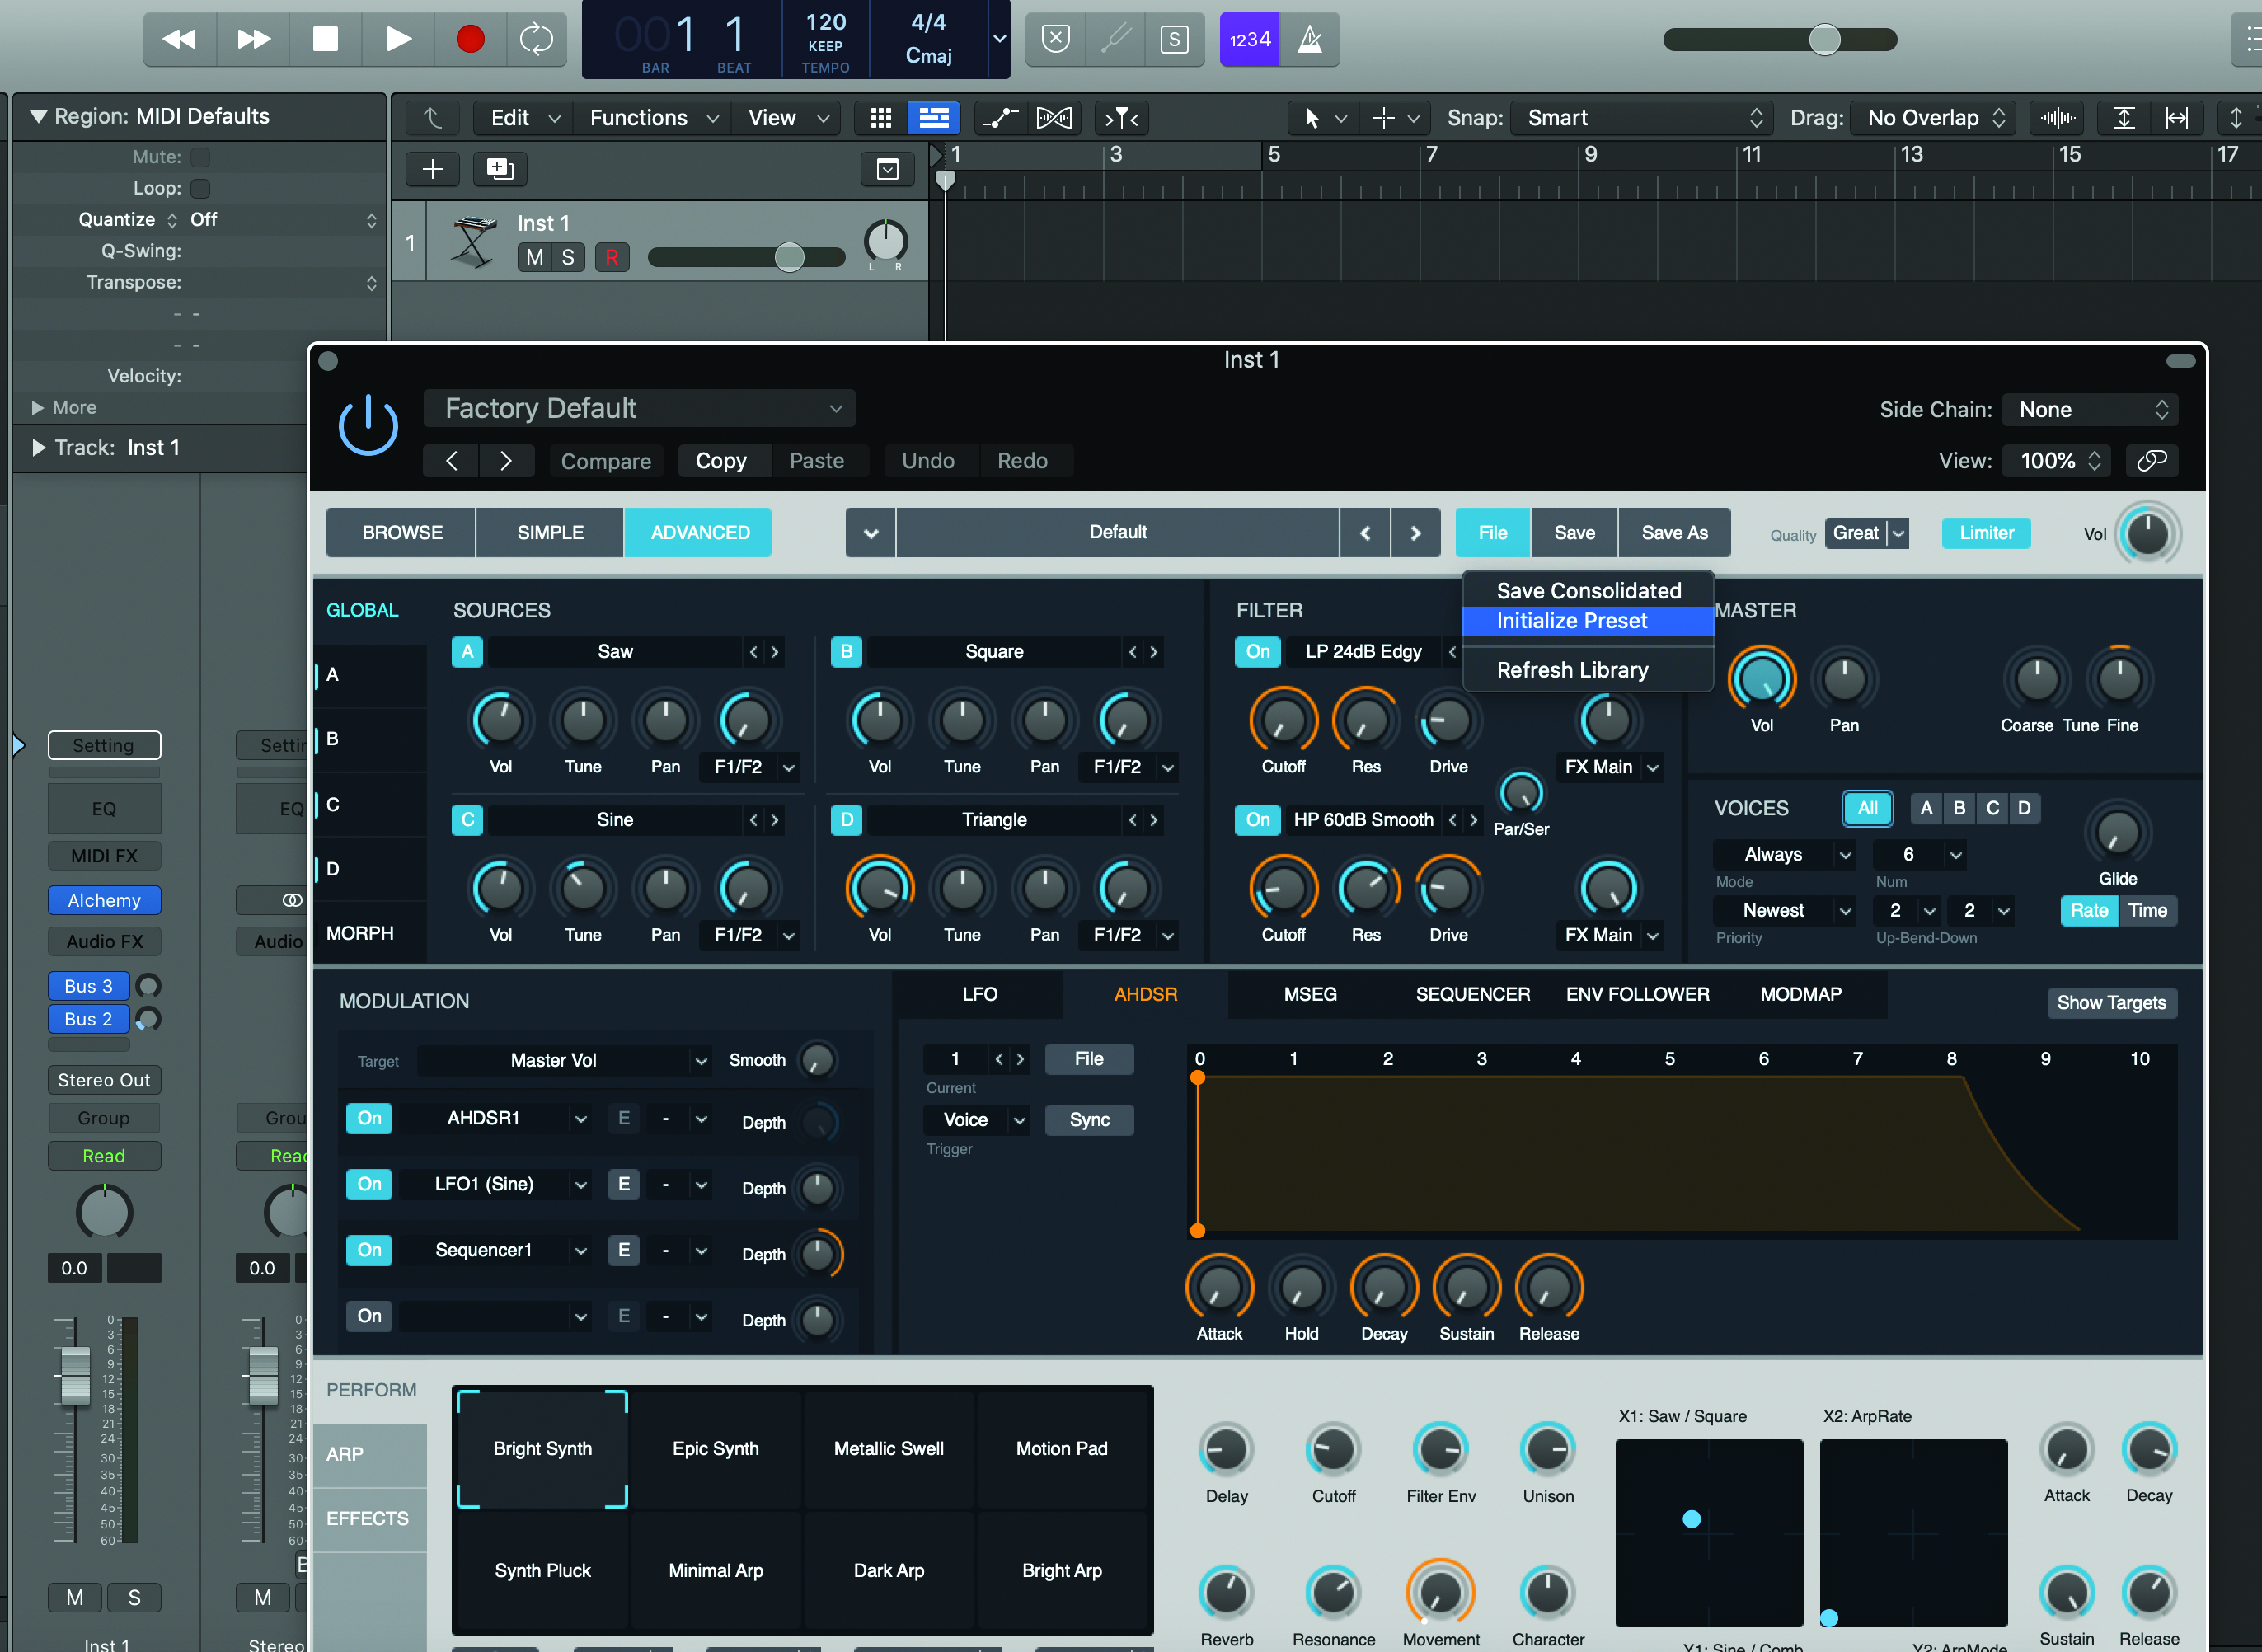
Step 2: Launch Alchemy on a new instrument track and go to the Advanced tab. Then go to File and select Initialise preset from the dropdown. This will reset the synth’s parameters and strip it back to a basic sawtooth wave.
Get the MusicRadar Newsletter
Want all the hottest music and gear news, reviews, deals, features and more, direct to your inbox? Sign up here.
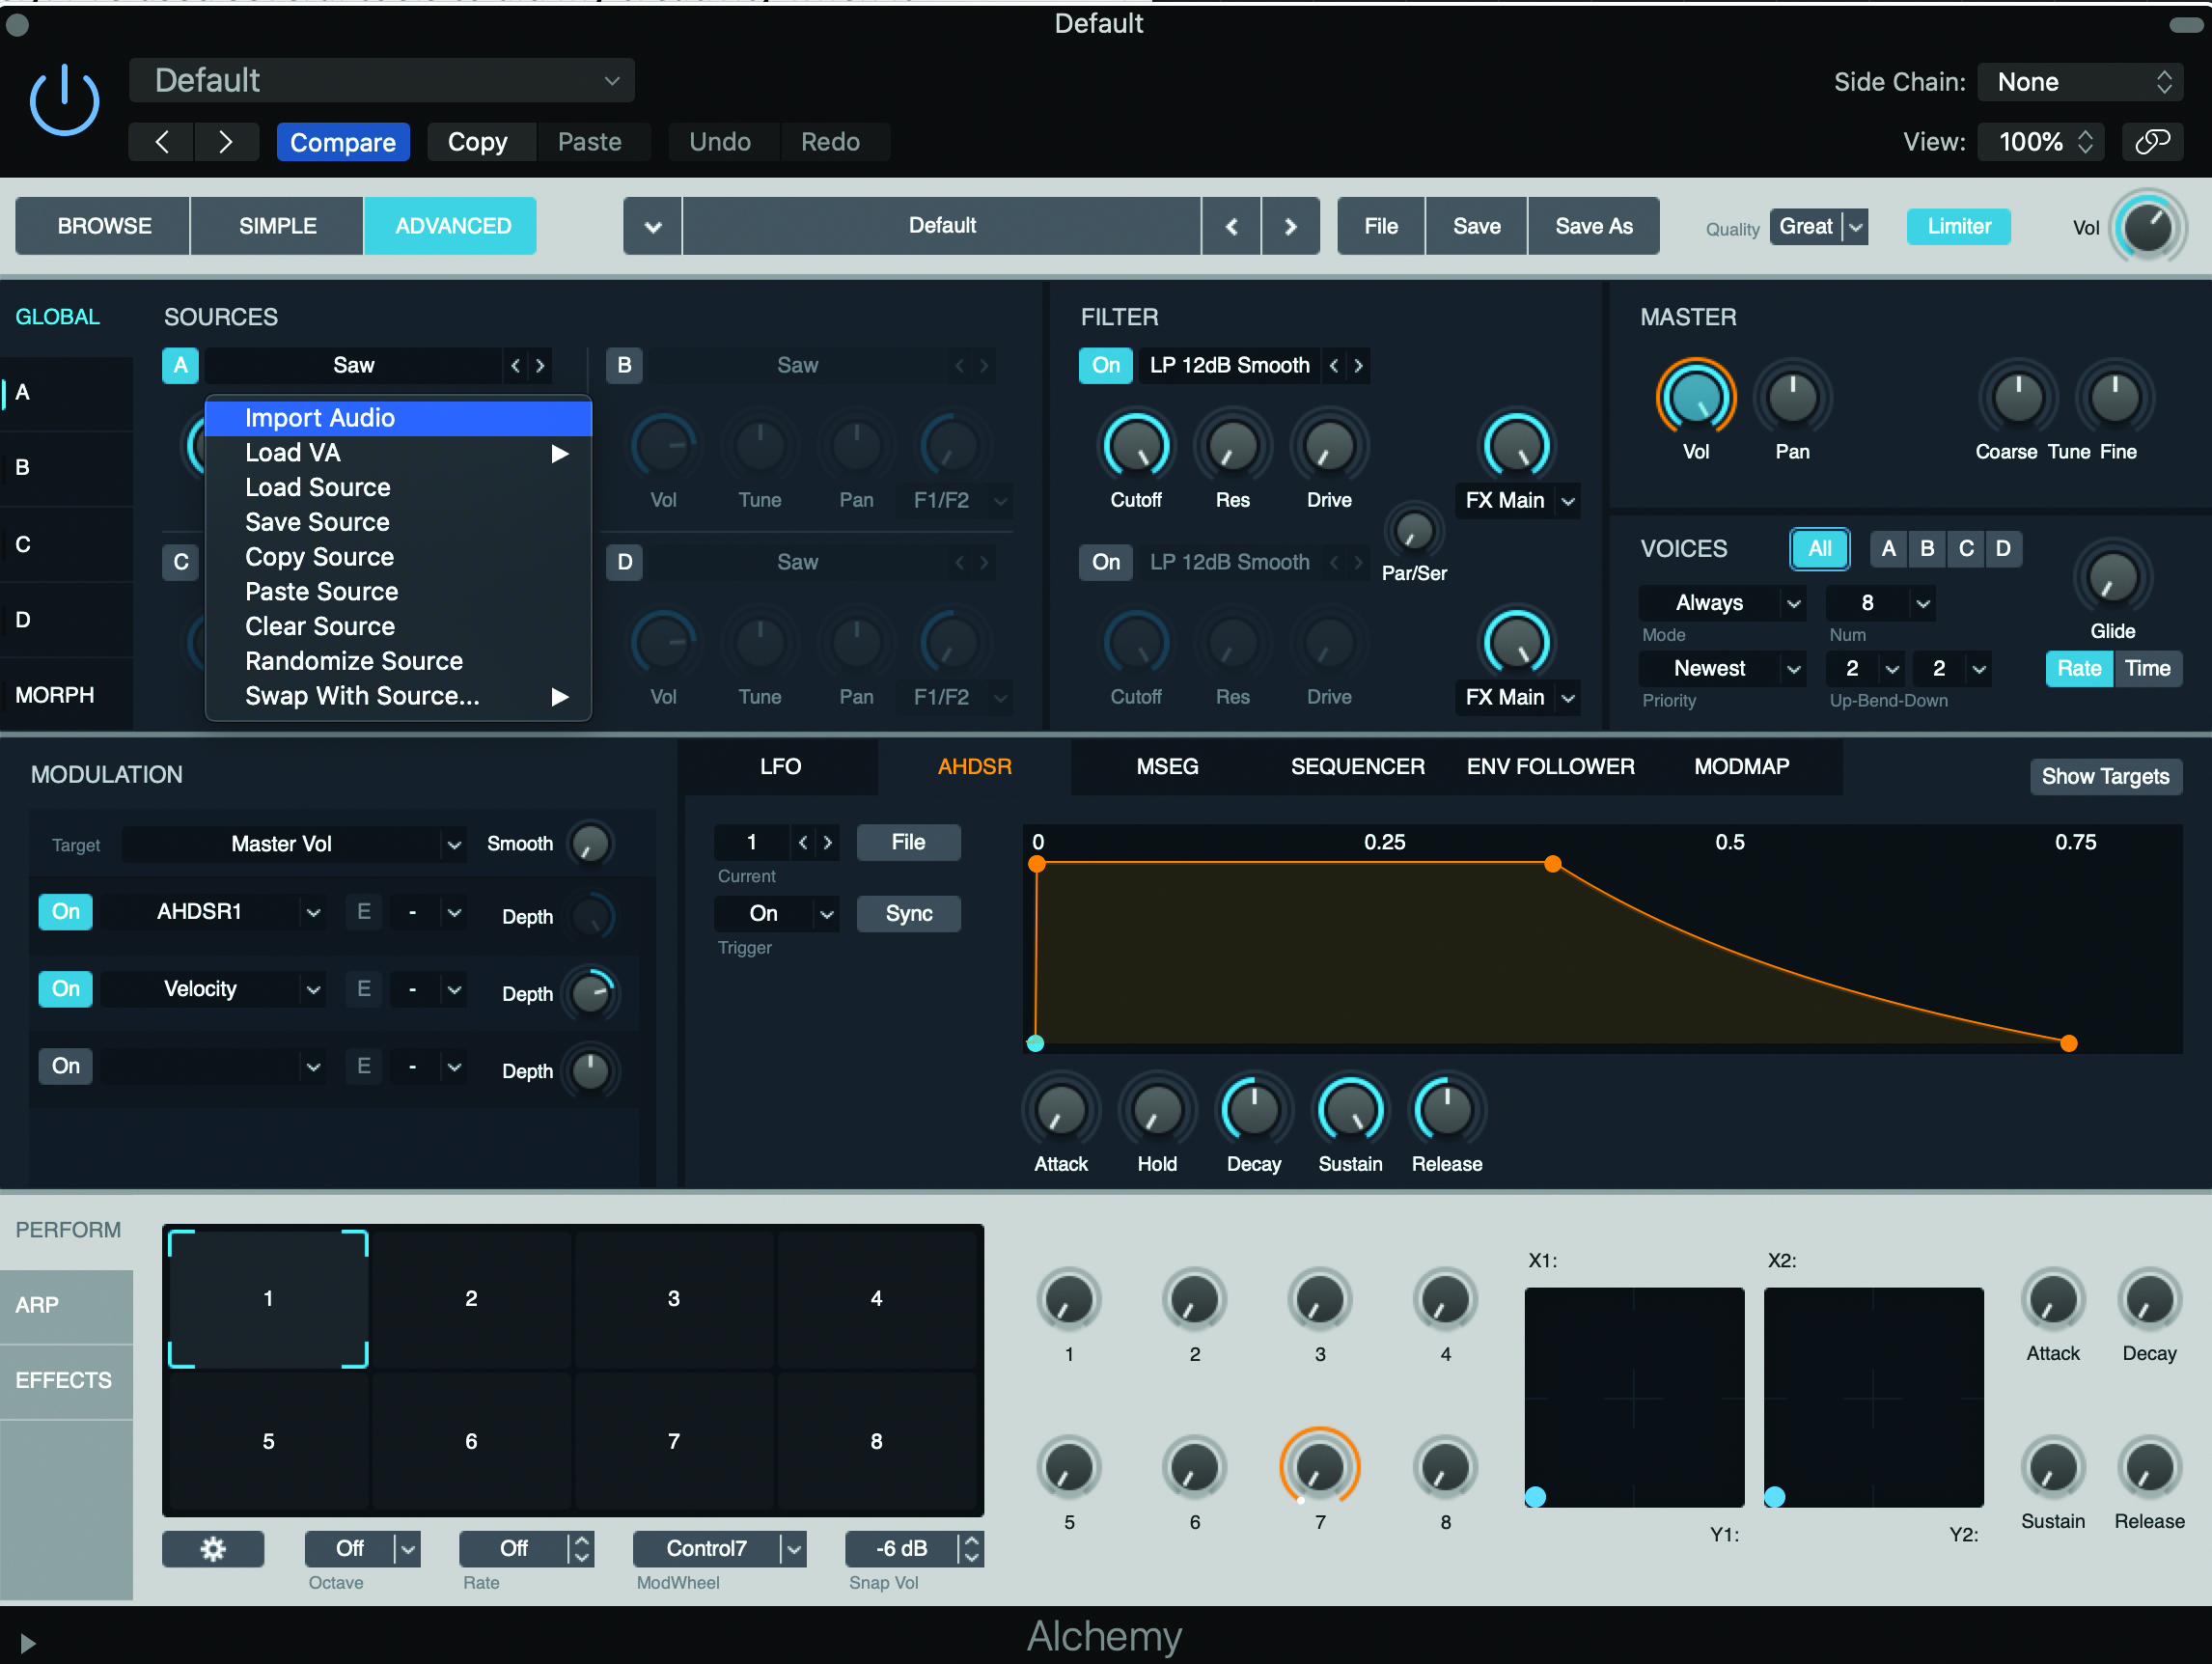
Step 3: You have four wave sound sources labelled A, B, C and D that comprise your synth sound. You only need source A highlighted for this. Click on source A where it says ‘Saw’ and select Import Audio. You’ll then be able to view your computer folder libraries to select the samples that you cut up earlier and wish to use.
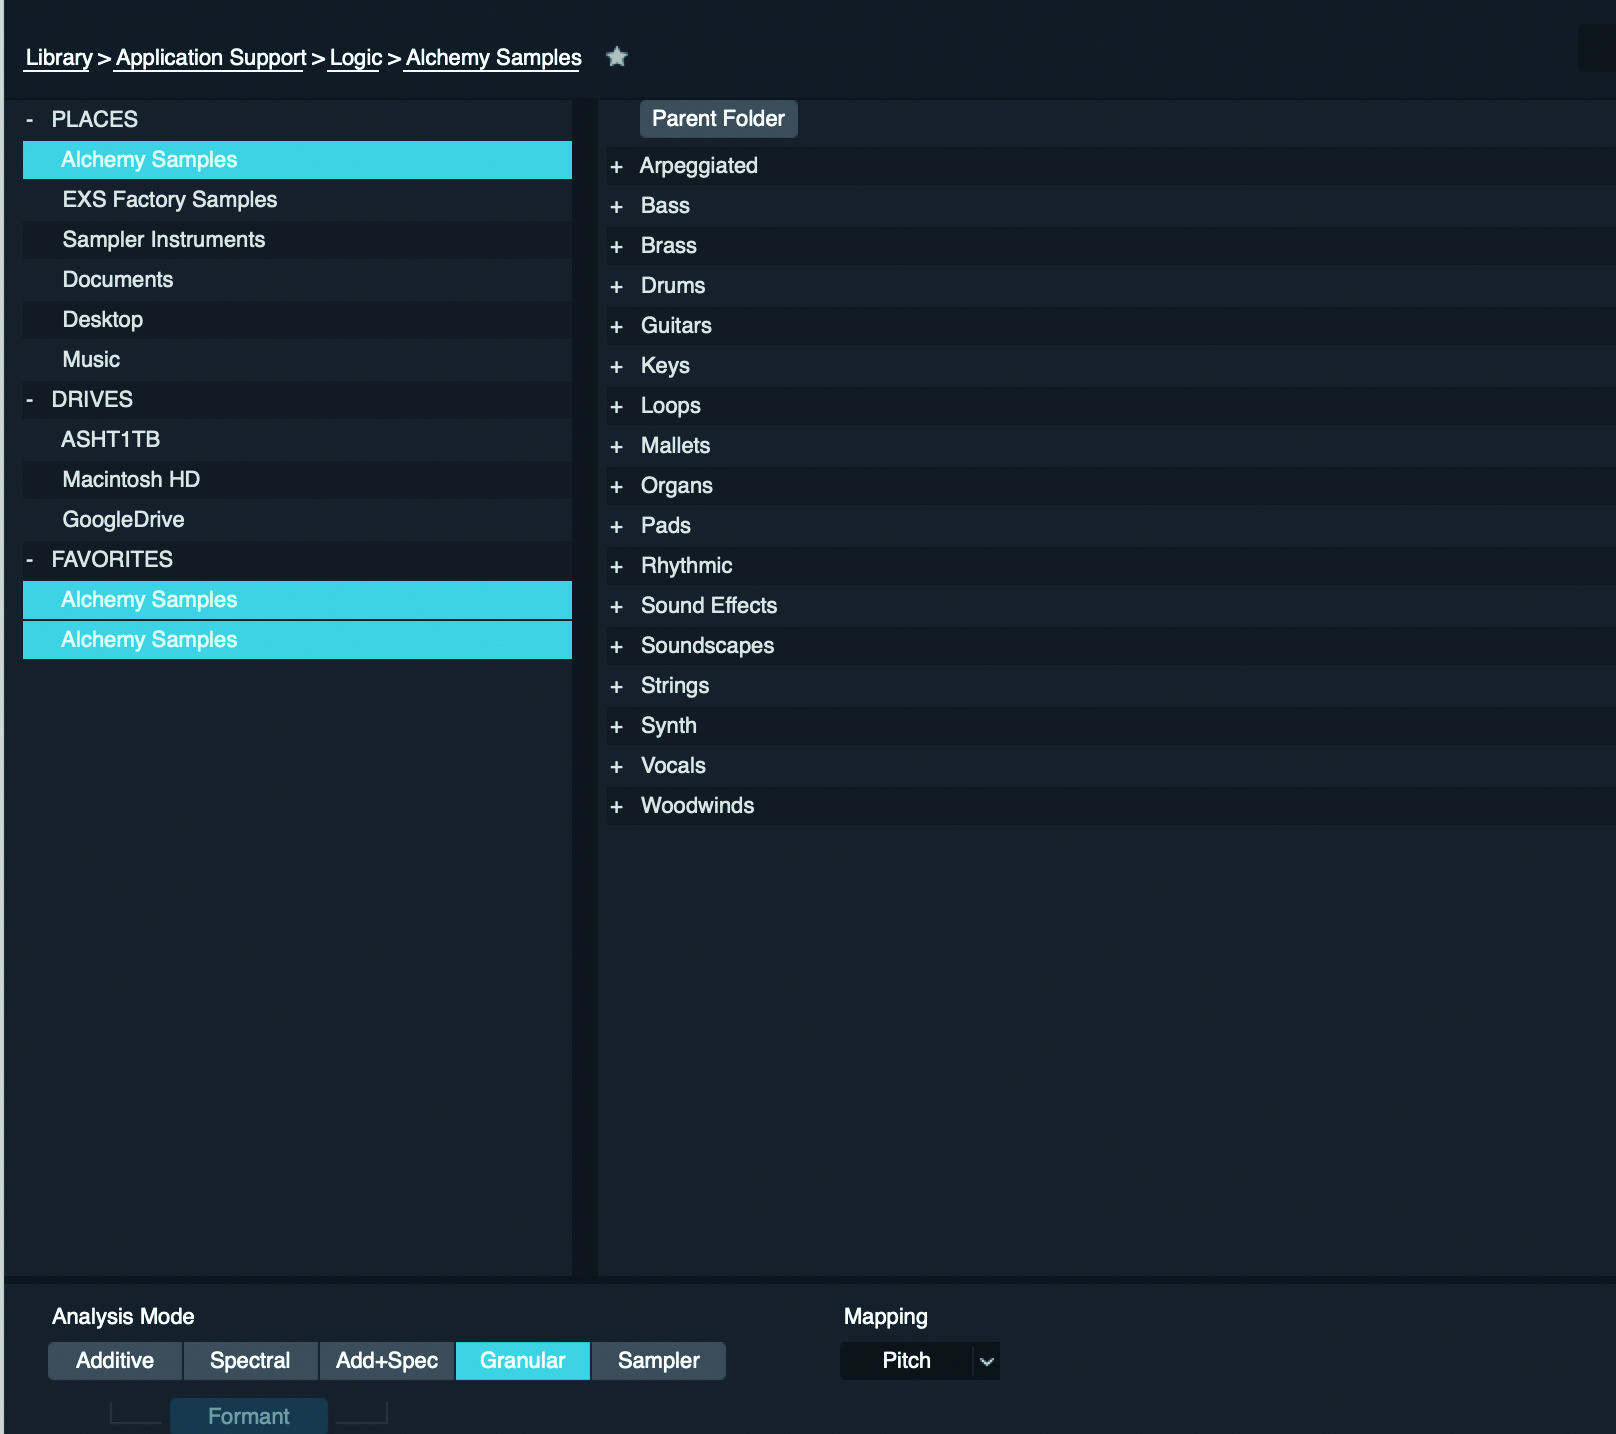
Step 4: Before selecting or double-clicking on samples you want to import, take note of the bottom-left section Analysis Mode. This is important to take into account in terms of the different modes available to you: Additive, Spectral, Add+Spec, Granular, Sampler and Formant.

Step 5: The Sampler option is the one to take if you’d like to use Alchemy as closely to a regular sampler as possible. But for this tutorial, I’m going to select Granular, which is much the same but will allow us to go further in breaking down the imported sounds as far as we like and creating new sounds.

Step 6: Under Mapping you can choose whether you want your MIDI keyboard to go up the octaves with your sample and play at different pitches (Pitch) or whether you want separate parts of the imported sample to play on a different MIDI keyboard key (Drum). I’m selecting Drum.

Step 7: Once imported, test it out on your MIDI keyboard. If you click from Global to source A on the main Alchemy interface, you’ll be taken to a page with detailed parameters and a visual for your keyboard and sample waveforms. Use the markers S and E to tweak where your samples start and end.
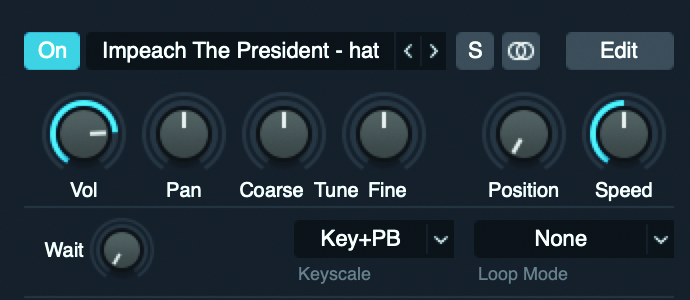
Step 8: In this same page you can also change the volume of each individual sample, the pitch and how they’re panned in stereo. Clicking off this page and back to the main interface page will give you even more modulation options.
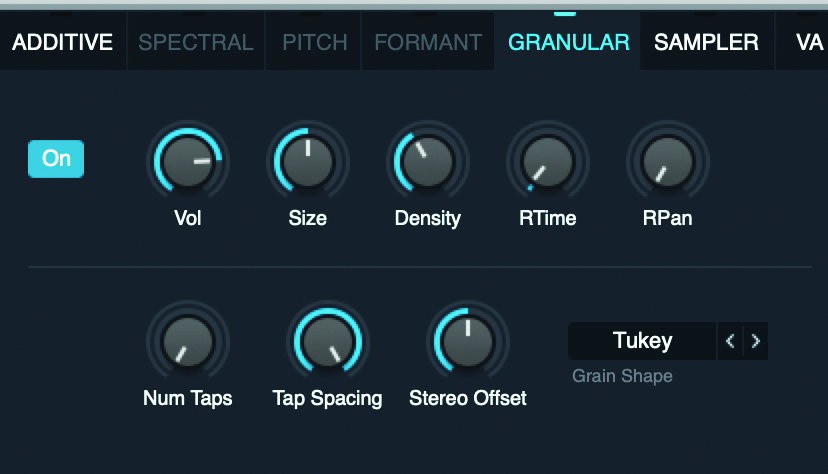
Step 9: These options include how coarse or fine you want the sample to sound. It also includes filters, which can be automated during a MIDI recording. You can also change the size and density of the samples. It unleashes a world of opportunities to create your own style.
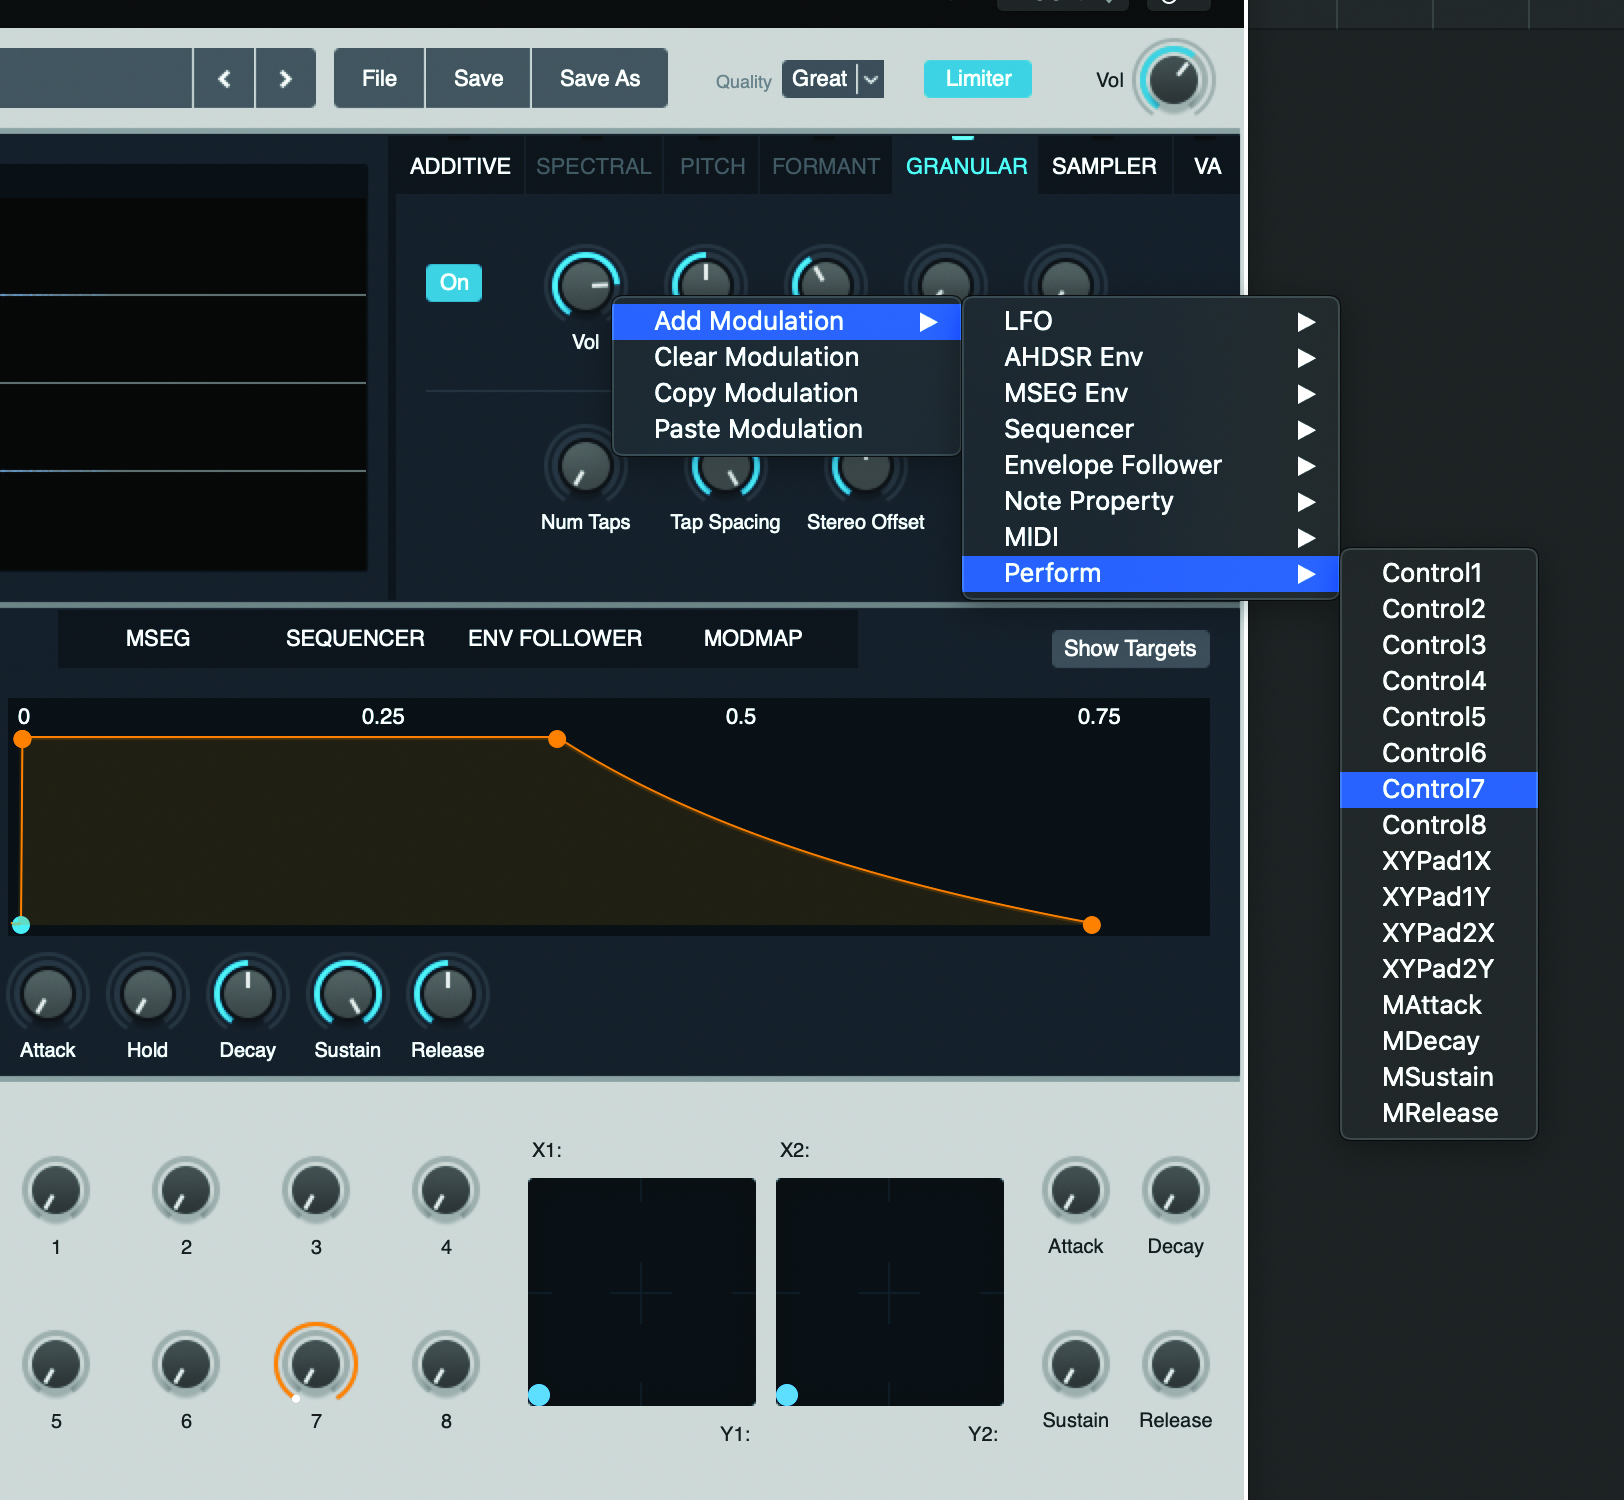
Step 10: By right-clicking on the Modulation knobs, you can assign each parameter to a numbered knob for even more control. By moving from the Perform tab to the Effects tab you’ll have access to classic effects presets such as reverb, distortion, band-pass filter and delay.

Step 11: Just like with the earlier modulation, you can assign these effects to a numbered knob for real-time manipulation/full control over the degree of effect added. Experiment with these to find the sound that’s right for you. Remember that, of course, you can add even more plugins to the track to finesse the sound.

Step 12: You’re now ready to record. So perform your MIDI recording into Logic making full use of all of the parameters and effects you want to. This is merely scratching the surface of what this great synth is capable of, but it should be an easy starting point for you.
Ashley Thorpe (aka Breezewax) is a producer and musician who has created electronic music for over a decade. He typically uses a mix of samples, field recordings, synthesis and live instrumentation in his work, which covers a variety of styles including hip-hop, chill-hop, neo-soul and RnB. He also works as a music facilitator and freelance audio engineer.


