The ultimate beginner's guide to Ableton Live 11 Lite: working in Arrangement view
This month's issue of Computer Music Magazine comes with a free copy of Ableton Live 11 Lite, and we're taking you through the basics
Ableton Live is a DAW that needs no introduction, and its combination of performance and production features mean it’s as popular with performers and DJs as it is with creators.
Live 11 Lite is a cut-down version of Ableton Live, with all of the essential workflows, instruments and effects, but with limited track count, and for many years this has been bundled with apps and hardware products. This month, you can grab a free copy of Ableton Live 11 Lite with the latest issue of Computer Music Magazine.
To mark this momentous occasion and also to get you started using this fabulous software, we’ve put together a series of tutorials that run through everything you need to get acquainted with Ableton Live 11 Lite, so you can learn how to build a track from scratch.
Our tutorials are primarily for new users, but that said, we’ll also flag some of the new features you’ll find in Live 11 Lite, so even if you’ve used Live Lite before, there may be some things for you to learn here.
Finally, although Live 11 Lite is awesome software, there are more fully featured versions of Ableton Live available on Ableton's website. So, let’s get creating in Live 11 Lite!
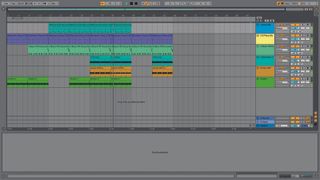
Step 1: Whichever methods you choose, you should now have your parts in the Arrangement View. Make sure to click the Back To Arrangement button so Live 11 Lite is playing from the Arrangement, not Session View.
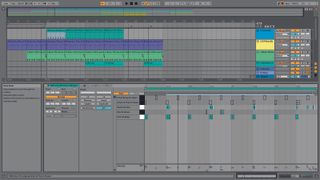
Step 2: We can now add some finessing to our track. First up, at bar 17, the beats all come in together and this is too sudden. Double-click the clip to open the MIDI note editor. Select Fold to hide unused notes. Try muting different sounds. Click on the piano roll note and click keyboard 0 to mute the selected notes.
Get the MusicRadar Newsletter
Want all the hottest music and gear news, reviews, deals, features and more, direct to your inbox? Sign up here.
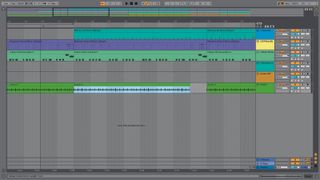
Step 3: Our beats now start at bar 17 with just the kick drum. We’ve also copied the shaker so it plays from bar 17 as well. However, we’ve removed it again on bar 24 simply by dragging back the clip end point.
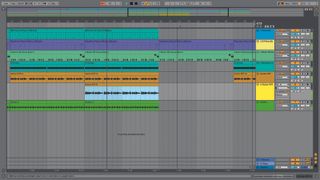
Step 4: Playing ahead, we want to double up the guitar part at bar 41 so that both the low and high parts play together. We’ve selected the guitar track and inserted a new audio track from the Create menu. Then we dragged the high guitar part underneath the low part.
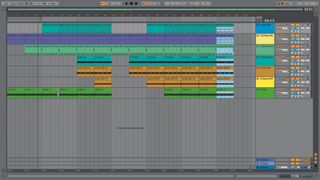
Step 5: Now we want to extend the drop section that starts at bar 49. We’ve duplicated the clips in bars 57 to 65. This is easily done by highlighting them and then using the right-click Duplicate option. We’ve also copied over the intro kick pattern and the high guitar part and copied bars 41 to 49 for the end section.
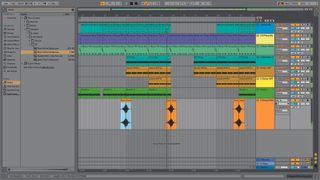
Step 6: With our structure complete we can finesse the transitions. Head to the Browser and find Packs>Core Library and search for Noise. We’ve grabbed Riser White Noise and Sweep White Noise Fall and dropped them into the arrangement to create a new track, then copied and positioned these at section changes.
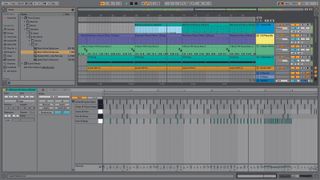
Step 7: Finally, let’s do a kick drum build from bar 69 to 73. Select the clip and choose Consolidate from the right-click menu then open the clip in the MIDI Note Editor. Selecting just bar 69 and 70 we’ve made these 1/8th notes and then used 1/16ths for bar 71 with a final kick at bar 72 beat 1.
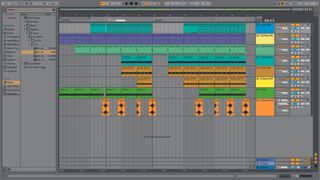
Step 8: Before we start mixing, it can be useful to set up navigation locators. These appear in the scrub area and to create one, click your cursor where required in the arrange area – you’ll see a vertical blue line – then choose Set at the right hand. Live Lite will automatically number them but you can use right-click to rename.
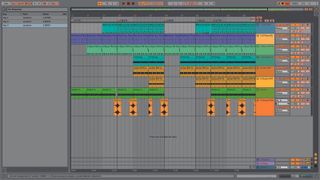
Step 9: To play from a locator, double-click it and use the arrows under the Set button to navigate to the next or previous locator. Alternatively, click on the Key button in the top right to create Key Mapping. Simply select a locator and hit a keyboard key to assign it. Now you can navigate with keystrokes.
Computer Music magazine is the world’s best selling publication dedicated solely to making great music with your Mac or PC computer. Each issue it brings its lucky readers the best in cutting-edge tutorials, need-to-know, expert software reviews and even all the tools you actually need to make great music today, courtesy of our legendary CM Plugin Suite.

"If I wasn't recording albums every month, multiple albums, and I wasn't playing on everyone's songs, I wouldn't need any of this”: Travis Barker reveals his production tricks and gear in a new studio tour

“My management and agent have always tried to cover my back on the road”: Neil Young just axed premium gig tickets following advice from The Cure’s Robert Smith


