The ultimate beginner's guide to Ableton Live 11 Lite: getting started on a new Live set
Get going on a new Live set with the free copy of Ableton Lite in latest issue of Computer Music Magazine
Ableton Live is a DAW that needs no introduction, and its combination of performance and production features mean it’s as popular with performers and DJs as it is with creators.
Live 11 Lite is a cut-down version of Ableton Live, with all of the essential workflows, instruments and effects, but with limited track count, and for many years this has been bundled with apps and hardware products. This month, you can grab a free copy of Ableton Live 11 Lite with the latest issue of Computer Music Magazine.
To mark this momentous occasion and also to get you started using this fabulous software, we’ve put together a series of tutorials that run through everything you need to get acquainted with Ableton Live 11 Lite, so you can learn how to build a track from scratch.
Our tutorials are primarily for new users, but that said, we’ll also flag some of the new features you’ll find in Live 11 Lite, so even if you’ve used Live Lite before, there may be some things for you to learn here.
Finally, although Live 11 Lite is awesome software, there are more fully featured versions of Ableton Live available on Ableton's website. So, let’s get creating in Live 11 Lite!
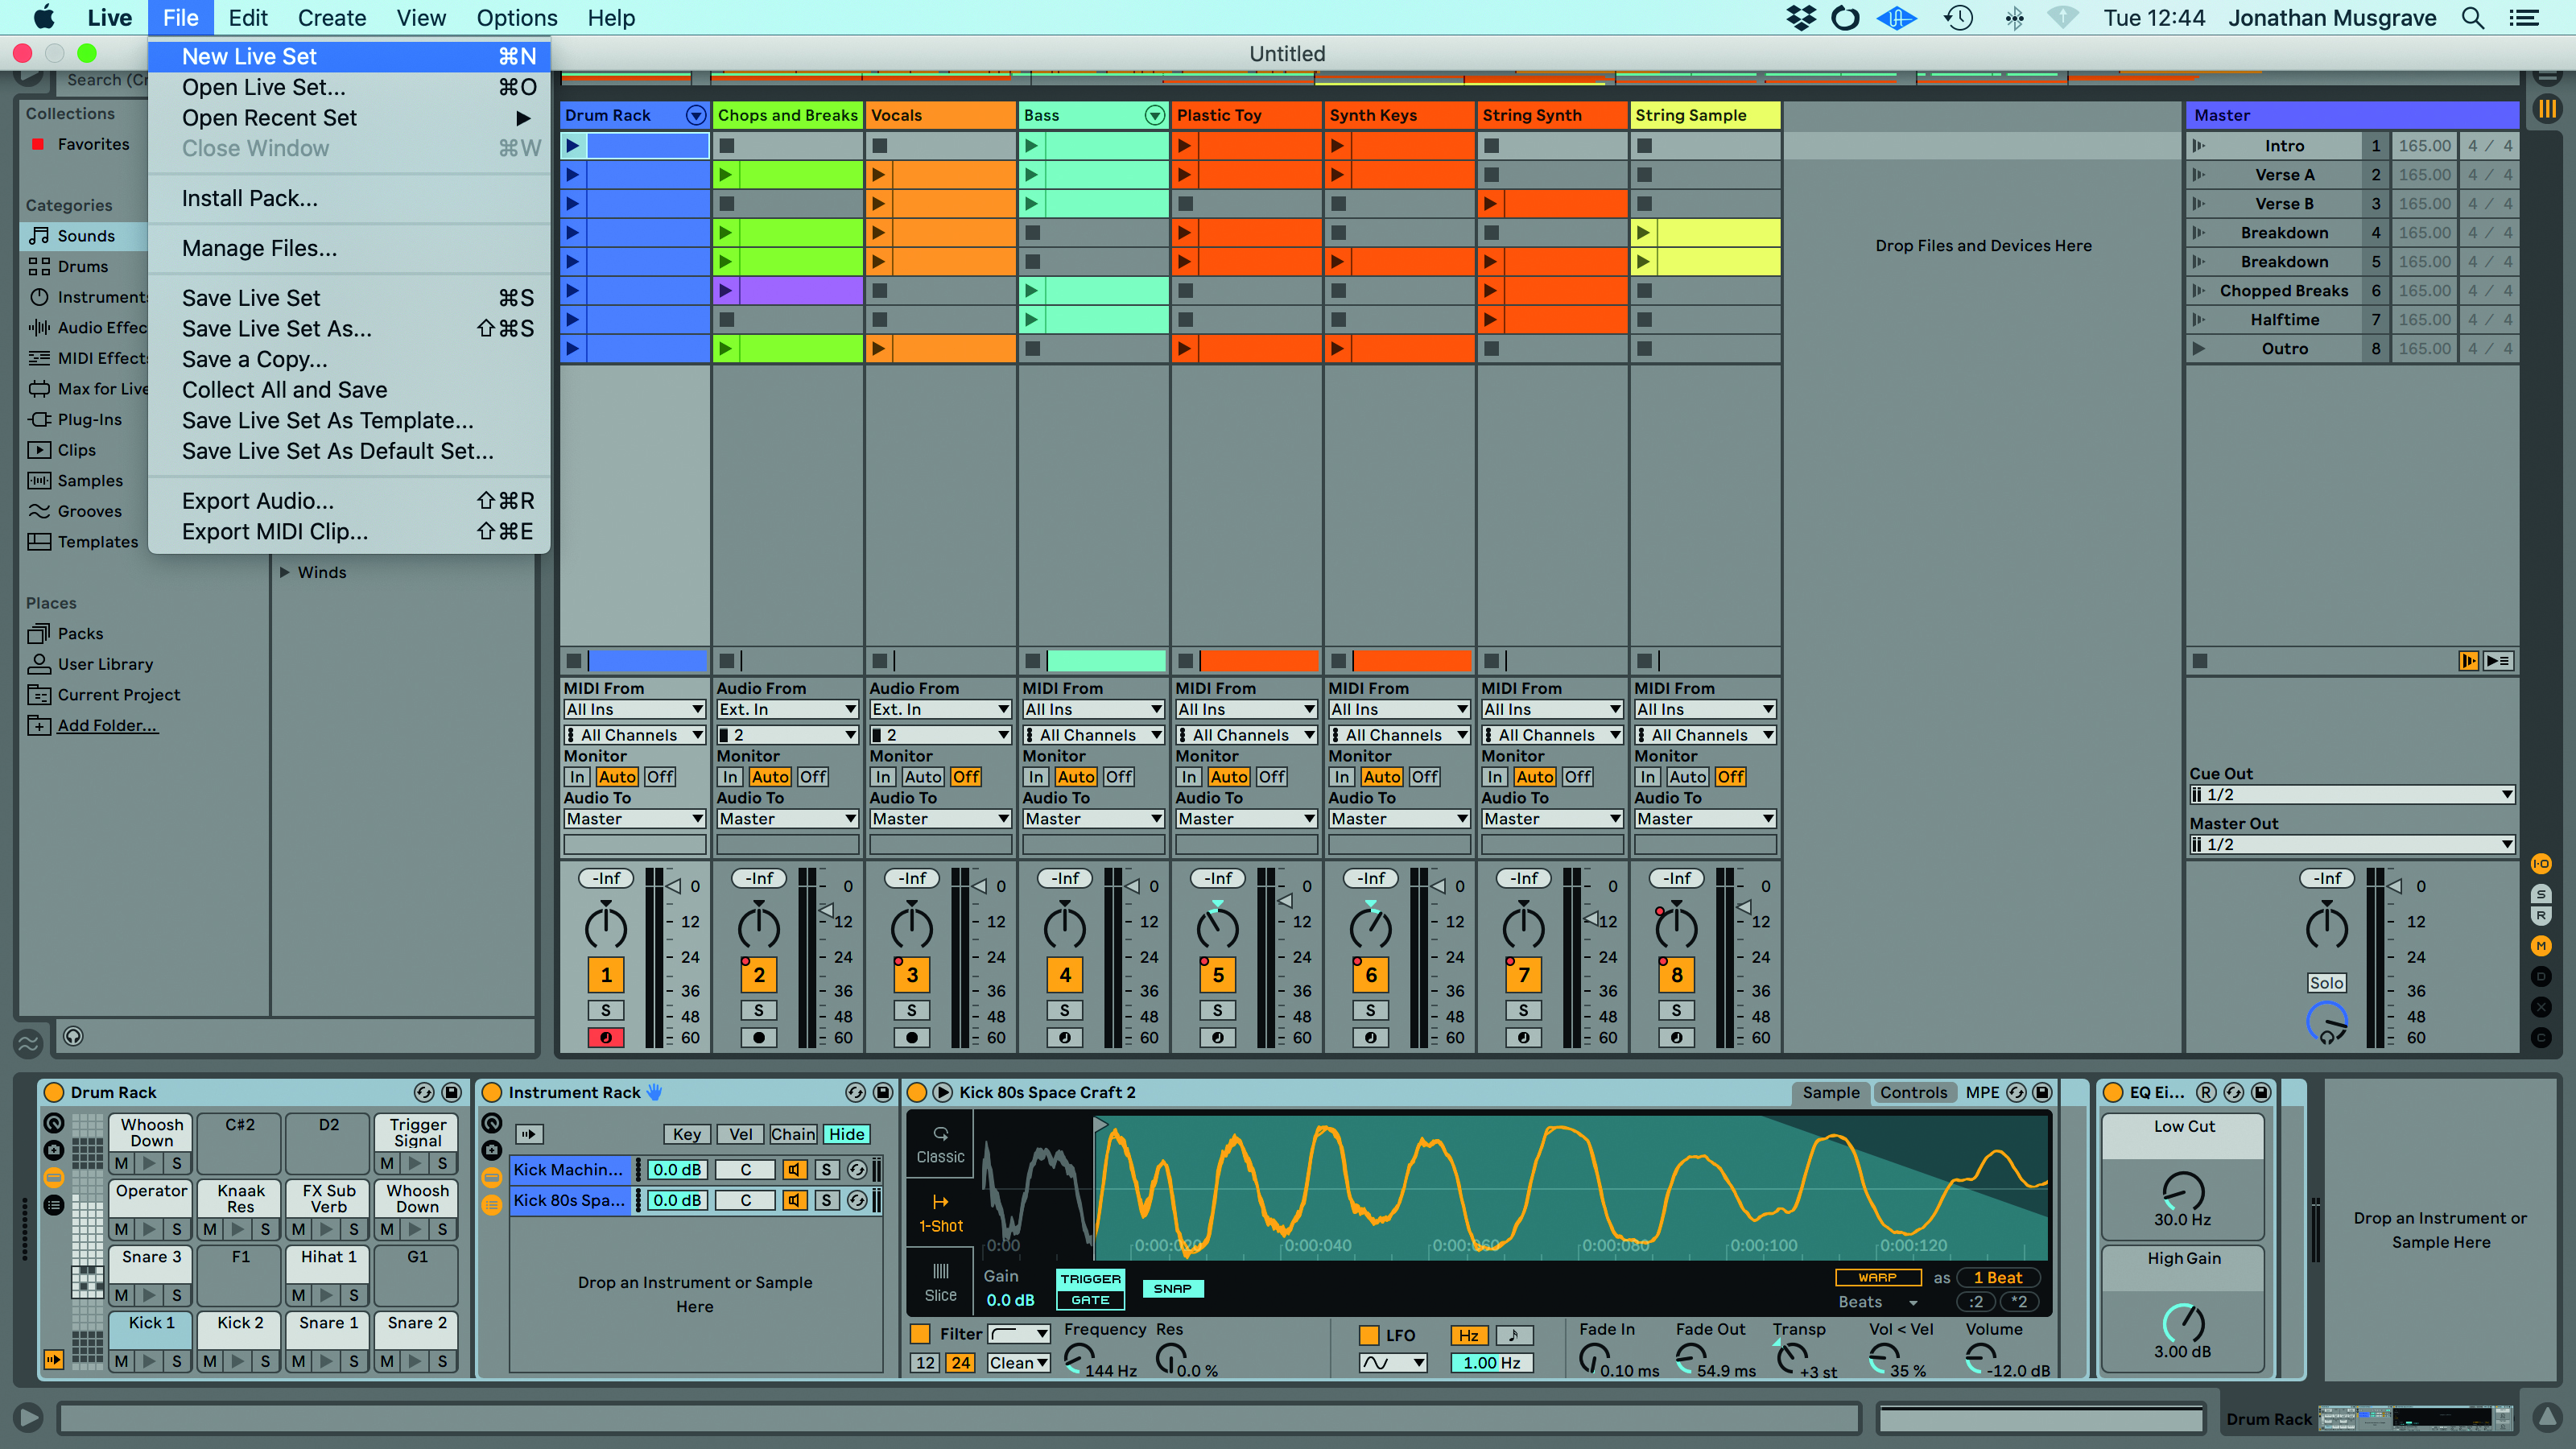
Step 1: Now let’s create a song from scratch. Select New Live Set from the File menu. This will automatically create a Live Project to organise any samples and audio for your Set. We’re going to start in Session View and once we’ve sketched out some ideas, we can transfer things over to the Arrangement View to mix and master.
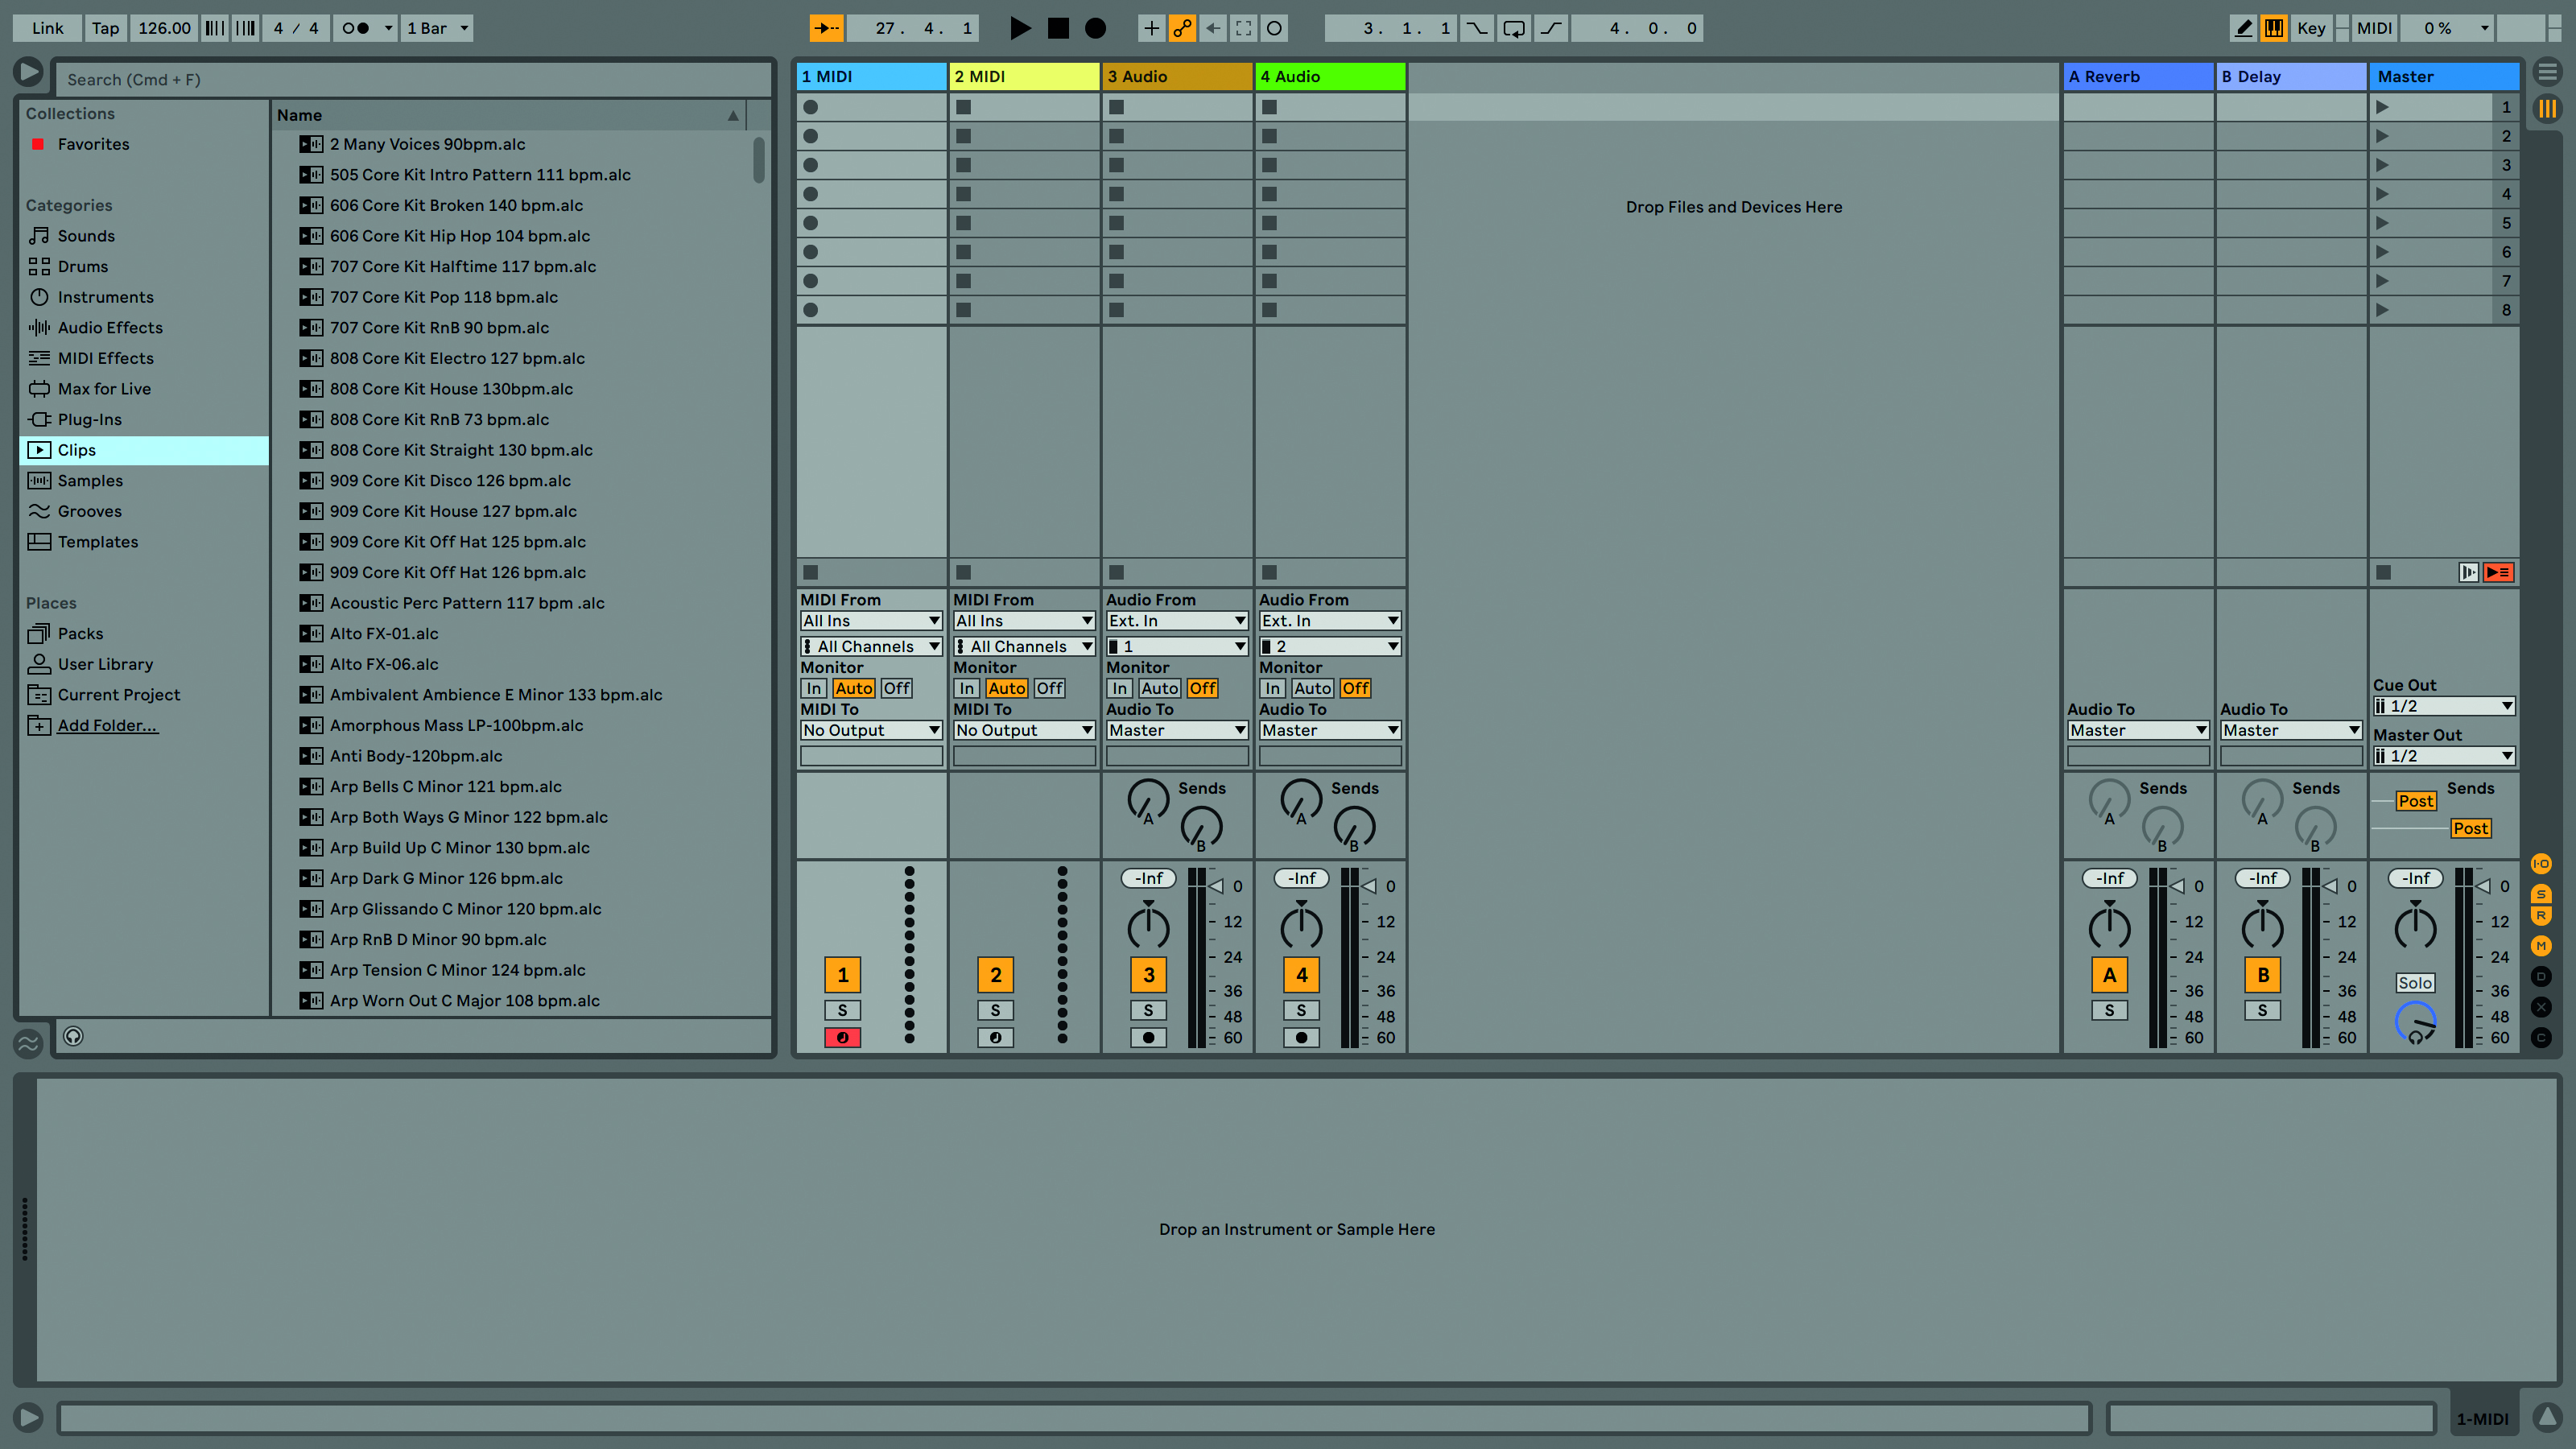
Step 2: Live Lite includes the Ableton Core Library and there are plenty of sounds and processing in there to build a track. Open the Browser on the left-hand side and you’ll find various categorised folders. Open the Clips folder.
Get the MusicRadar Newsletter
Want all the hottest music and gear news, reviews, deals, features and more, direct to your inbox? Sign up here.
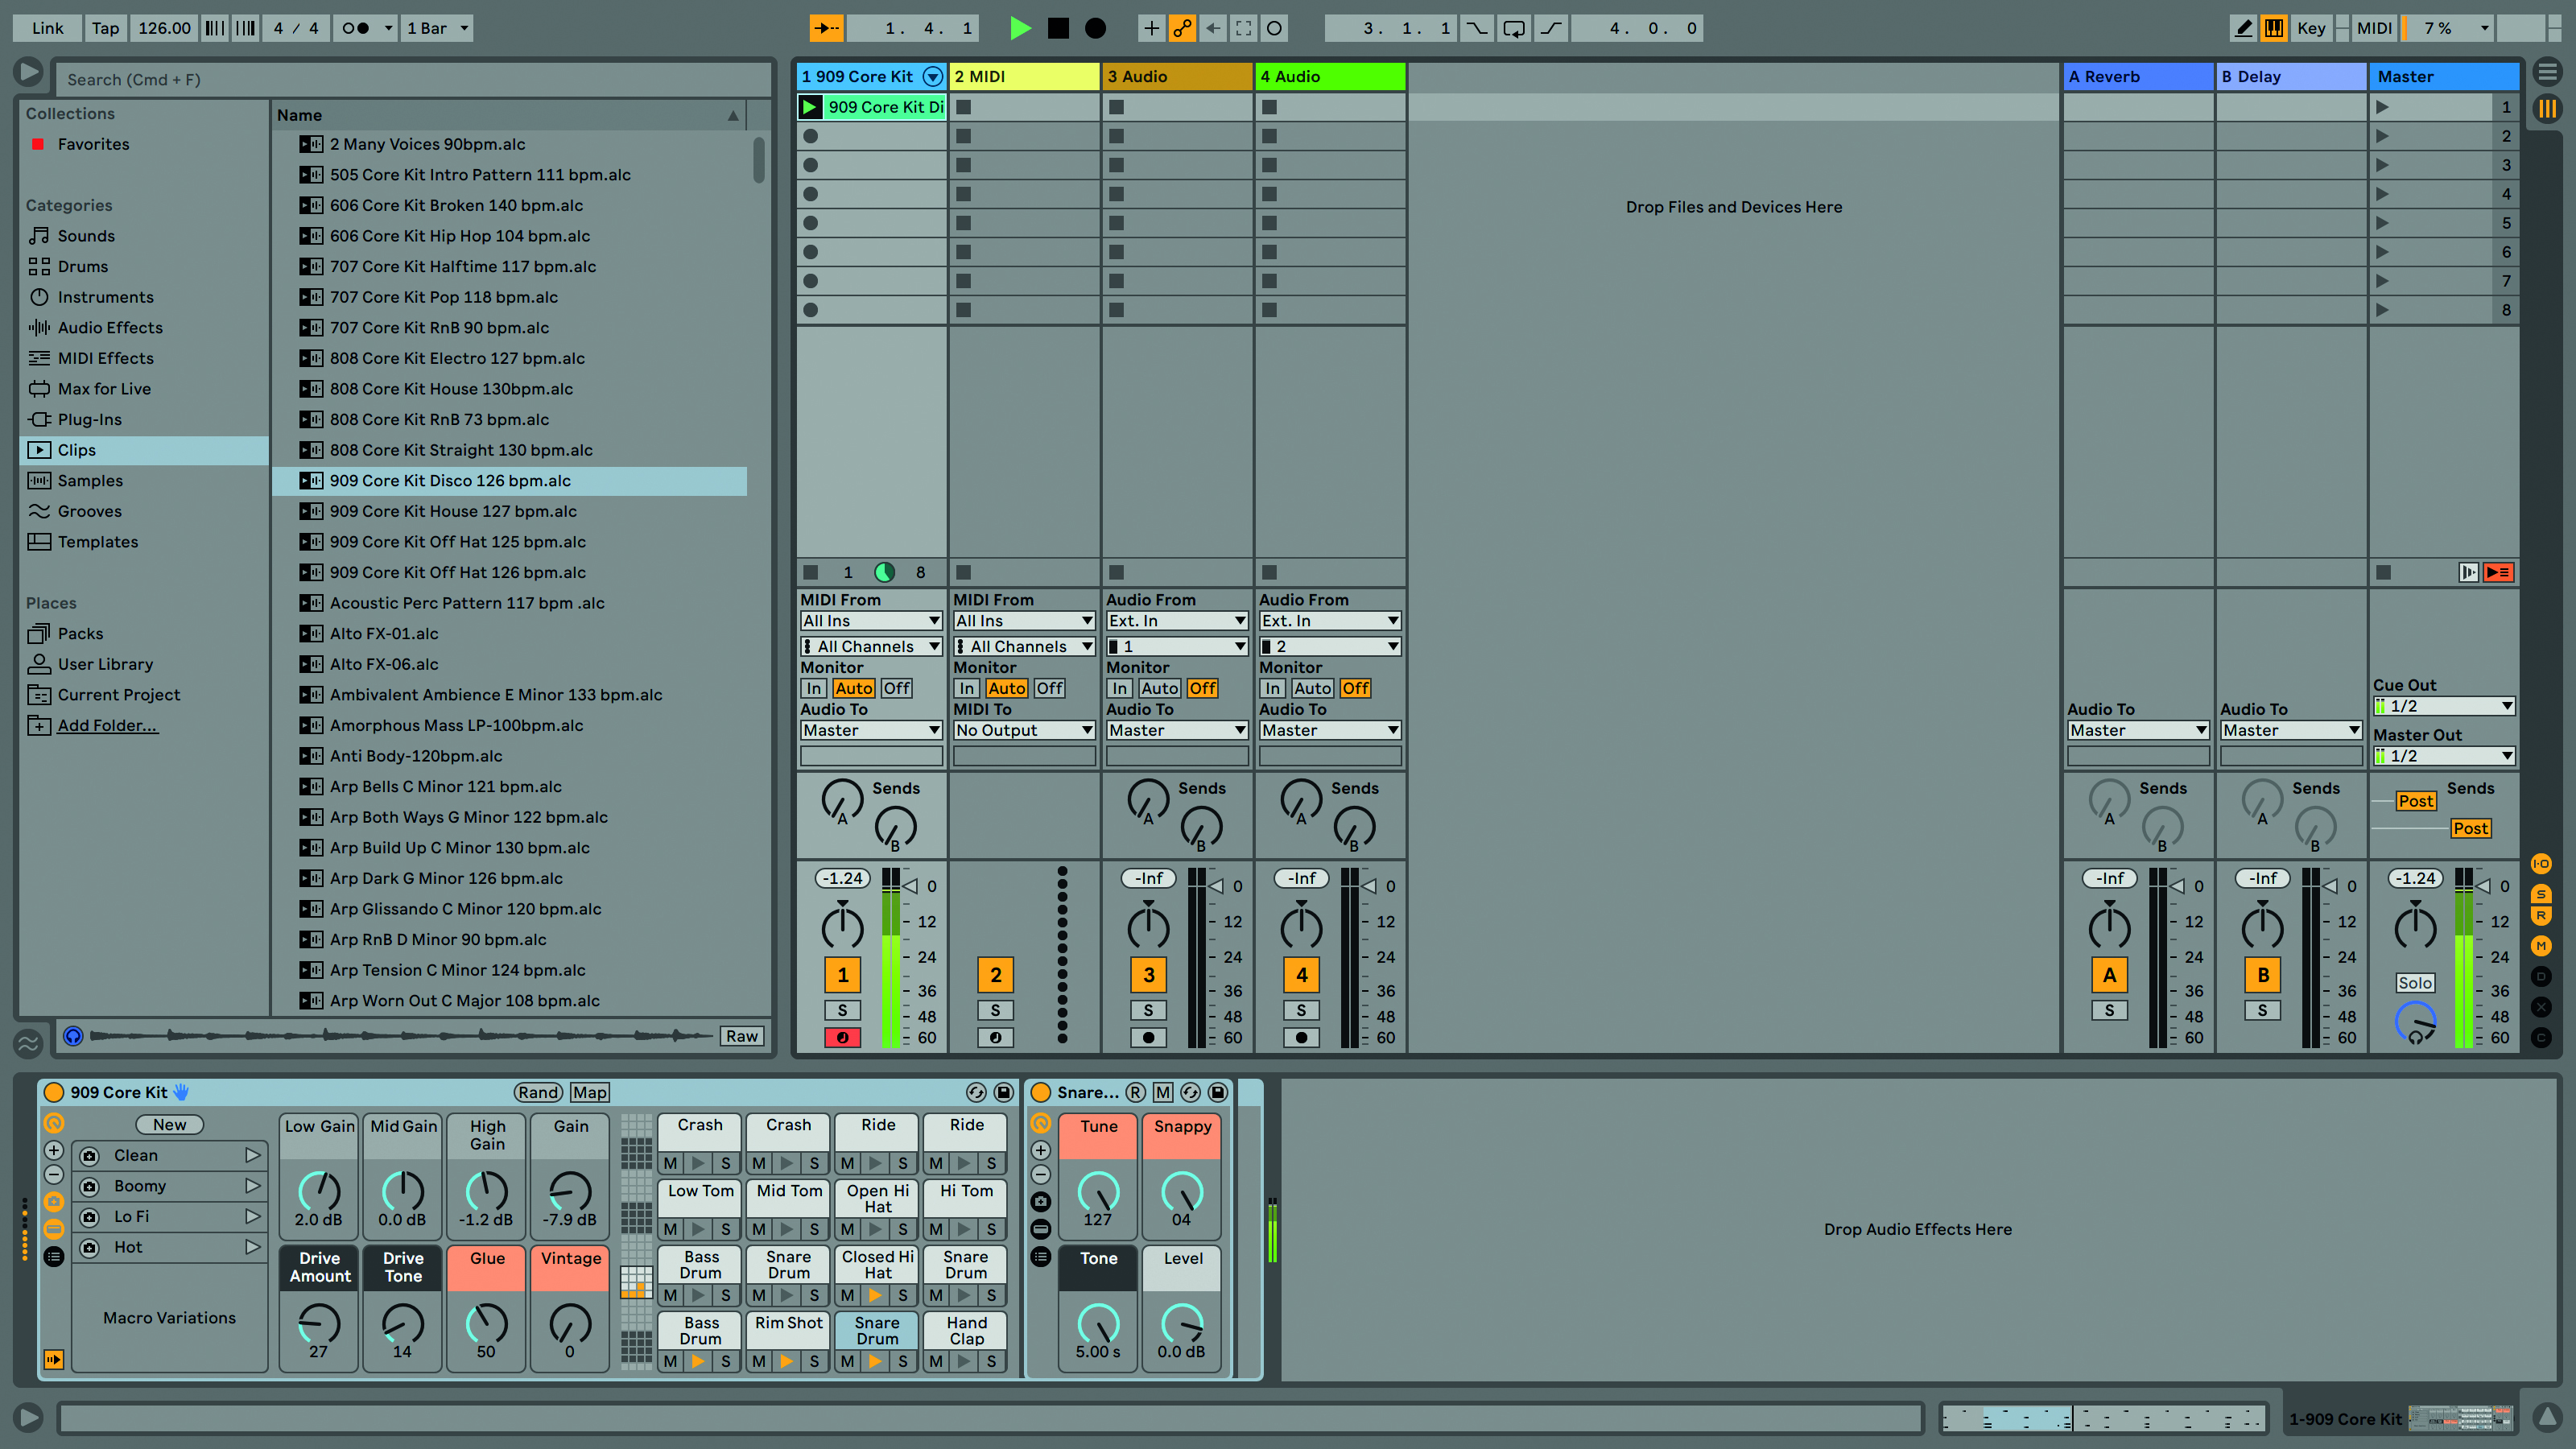
Step 3: Select clips and try auditioning them by clicking on the headphone icon at the bottom of the panel. We want to start with a beat and we’ve run through the various clips and chosen 909 Core Kit Disco 126 bpm.alc. You’ll see this is a .alc file. Drag this into the first slot on the first MIDI track.
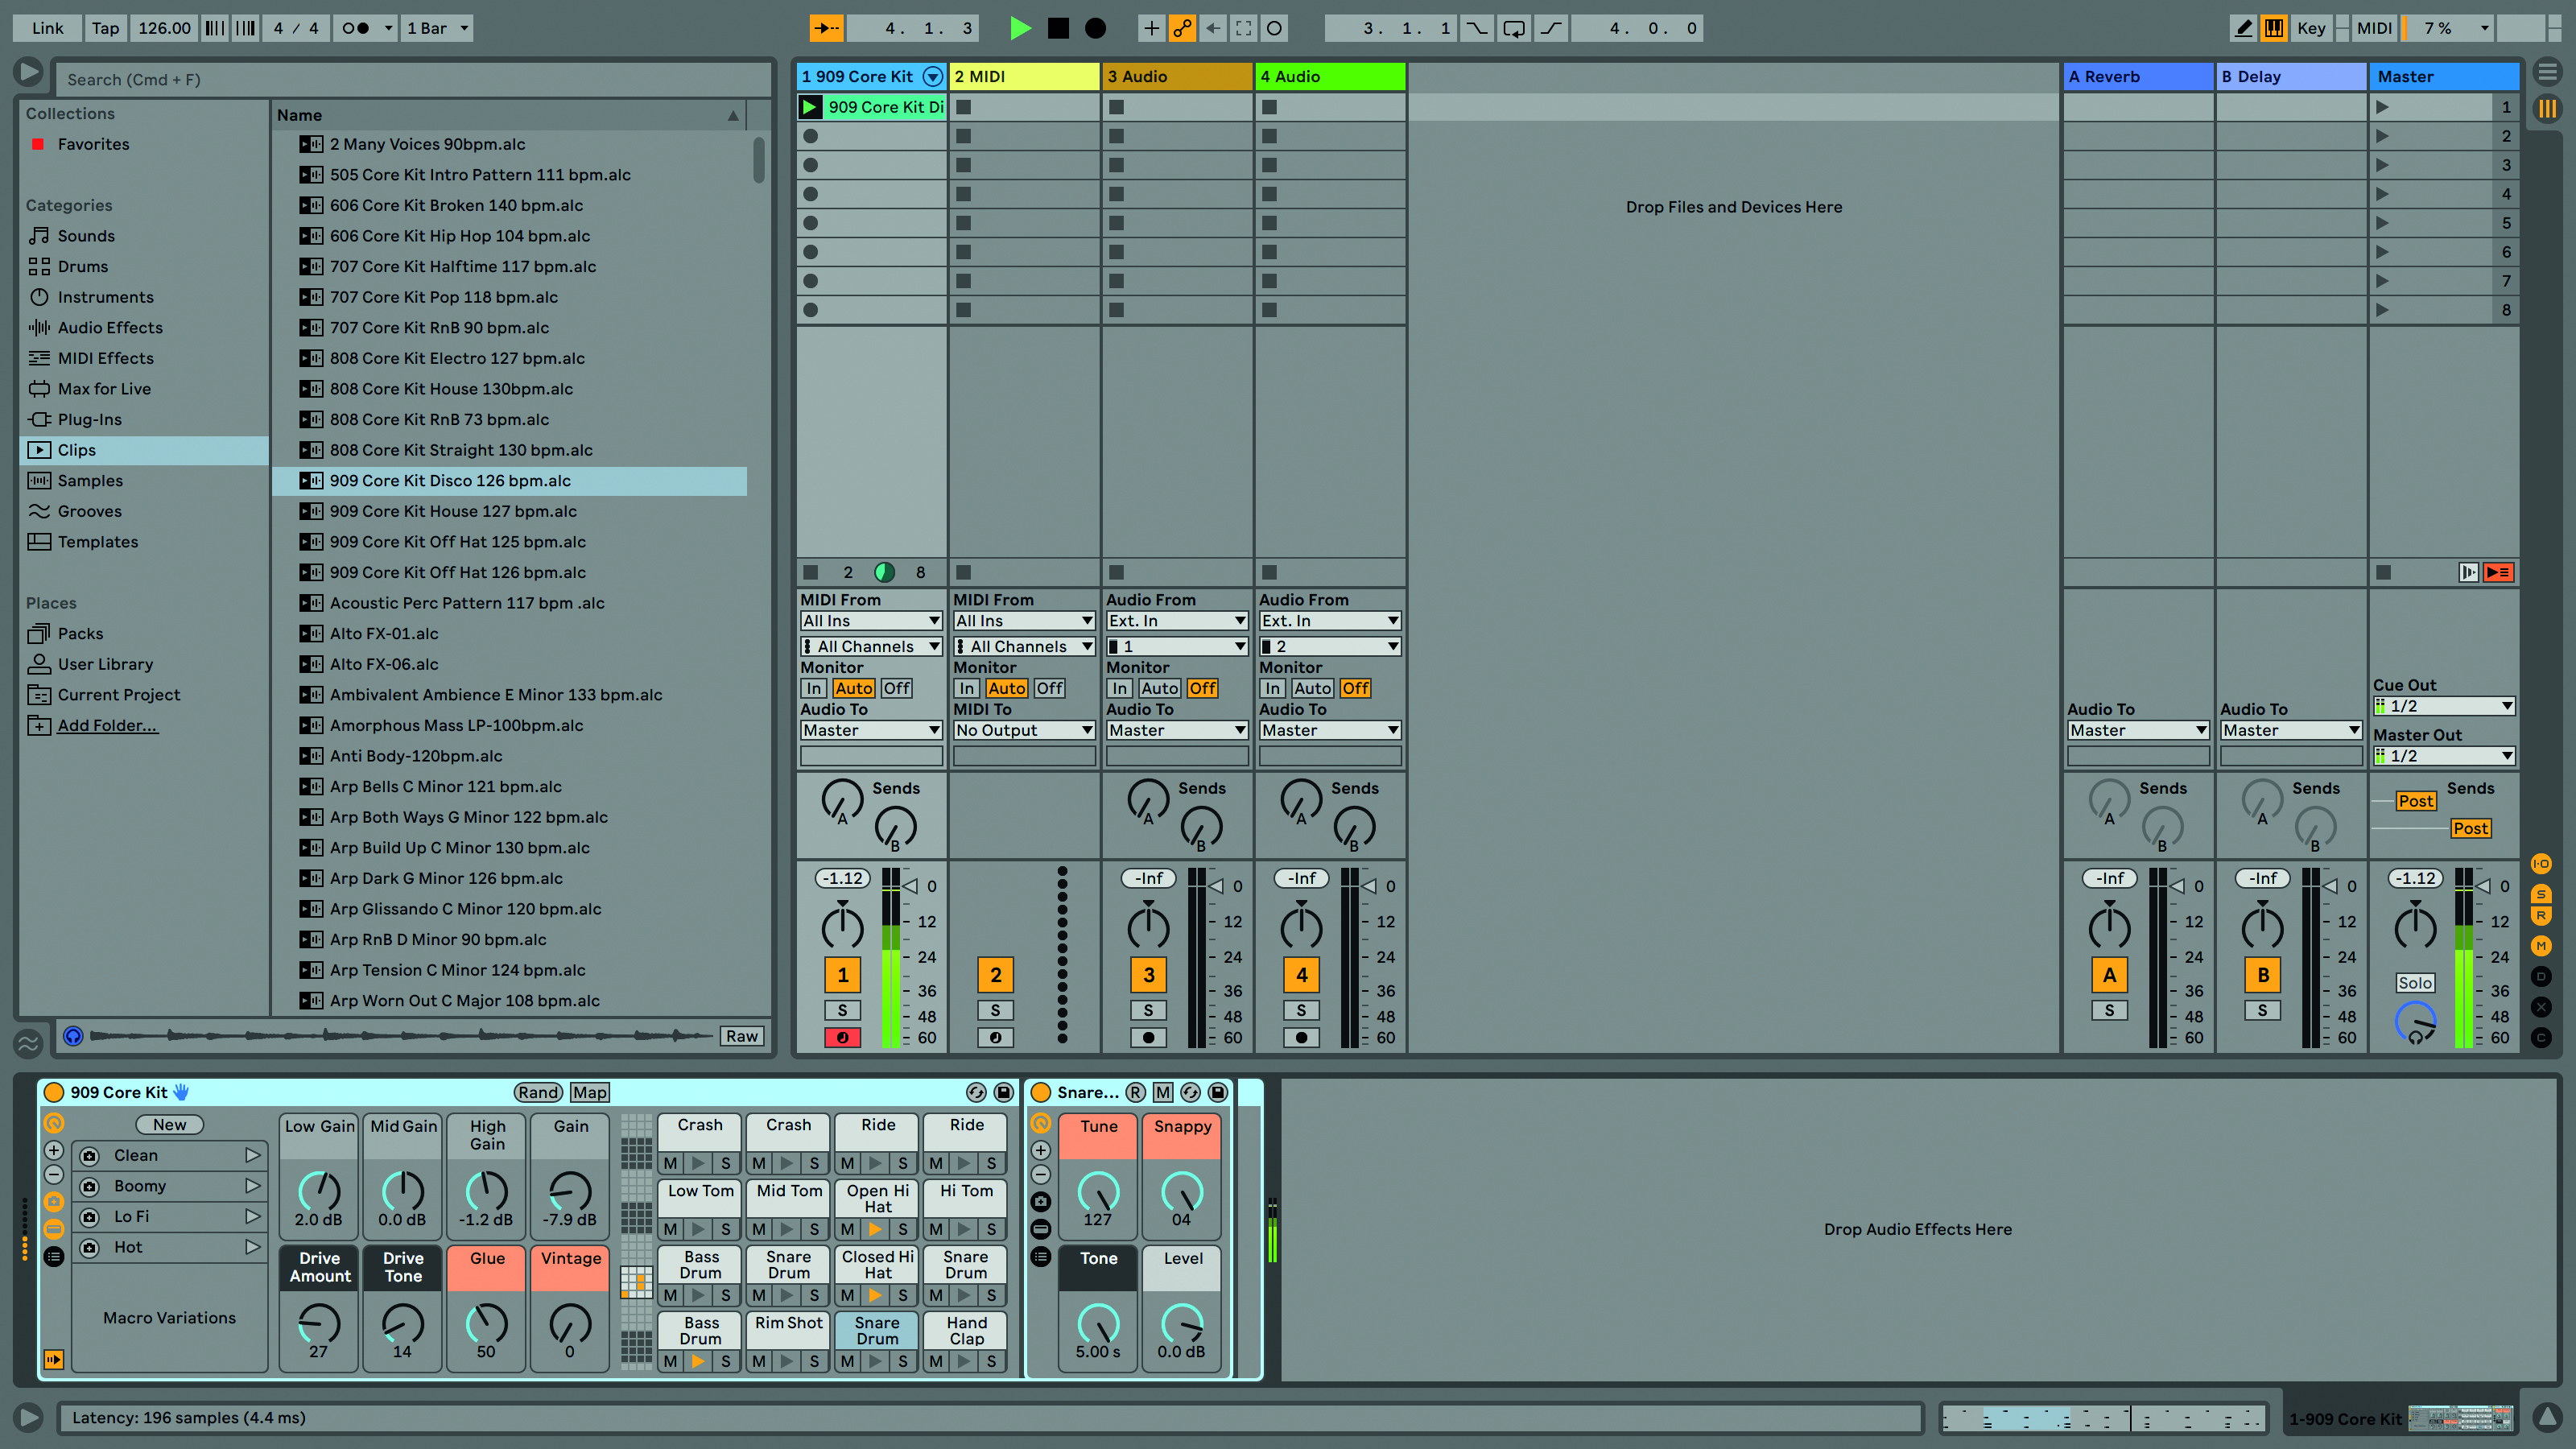
Step 4: We like the part but want a different sound. Because it’s a MIDI Clip, we can go through the kits and find a sound we like. You’ll see in the Device View at the bottom, the clip has loaded with the 909 Core Kit. To change this we can look via the Browser or use the Hot Swap option.
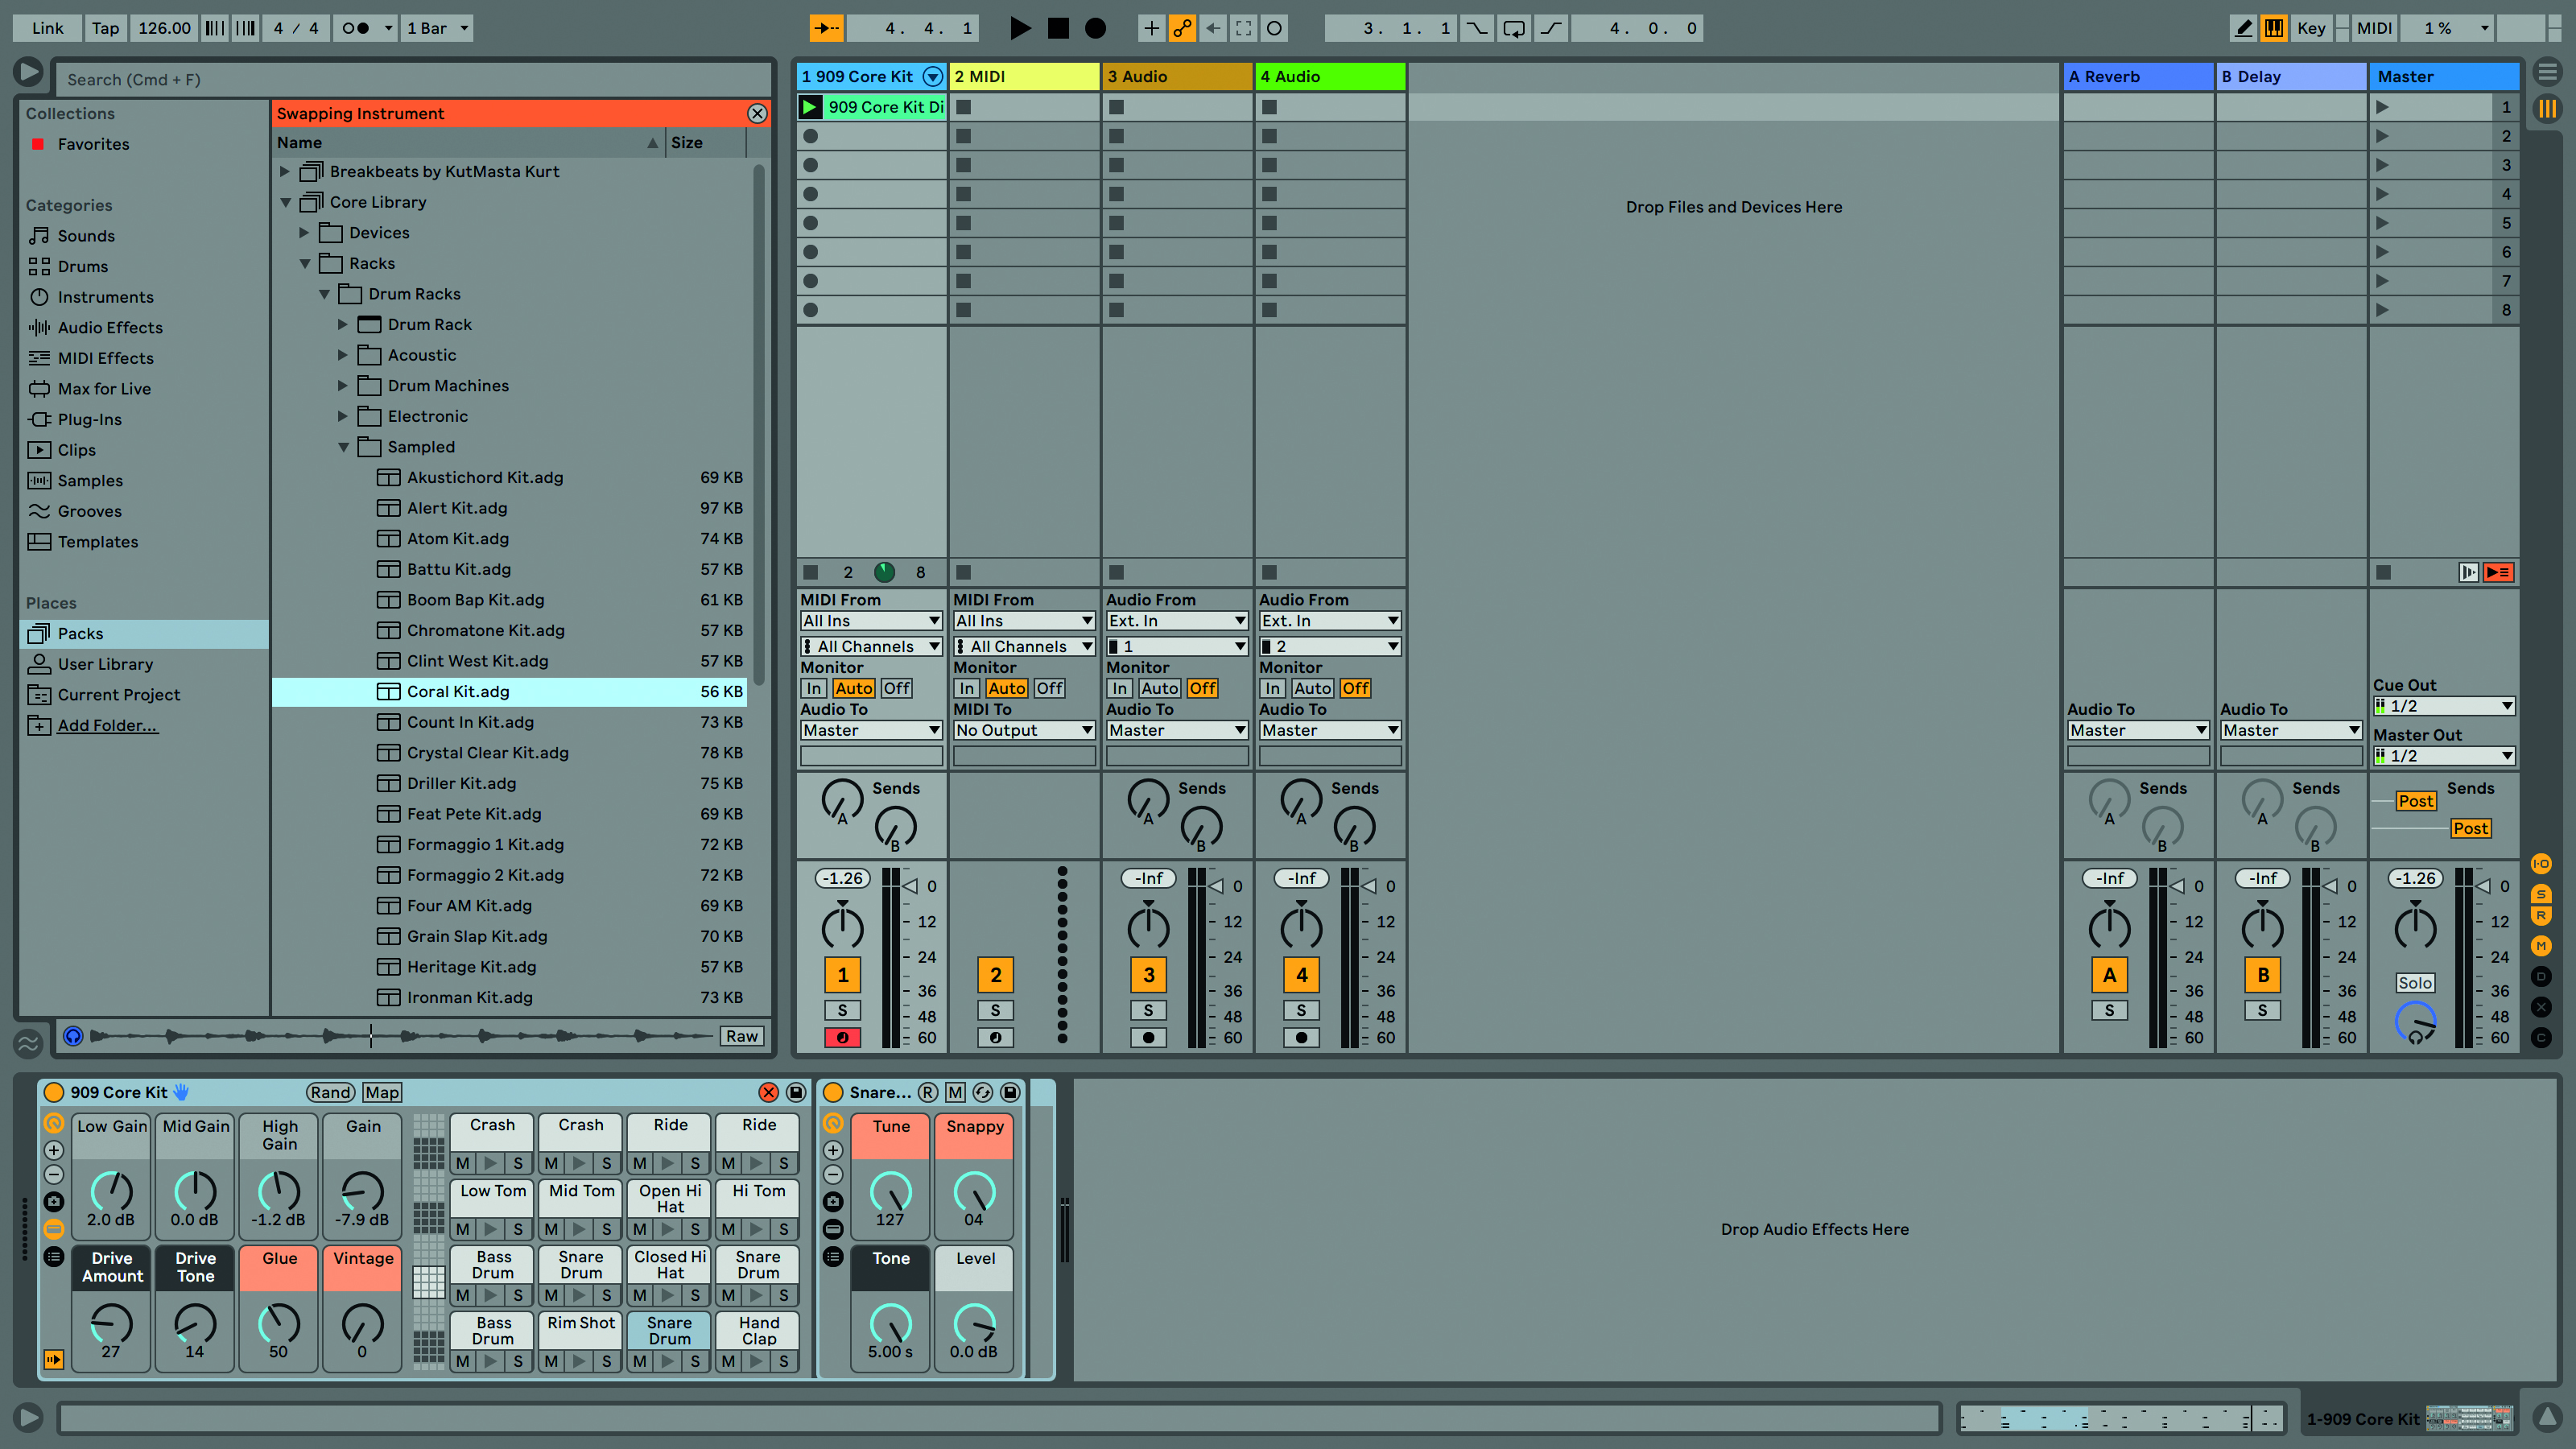
Step 5: To use Hot Swap, find and click the two-arrow icon in the top right of the 909 Core Kit title bar. This launches us directly into the Drum Racks. With the clip playing, double click new racks to load them. We’ve chosen Coral Kit from the Drum Racks>Sampled folder.
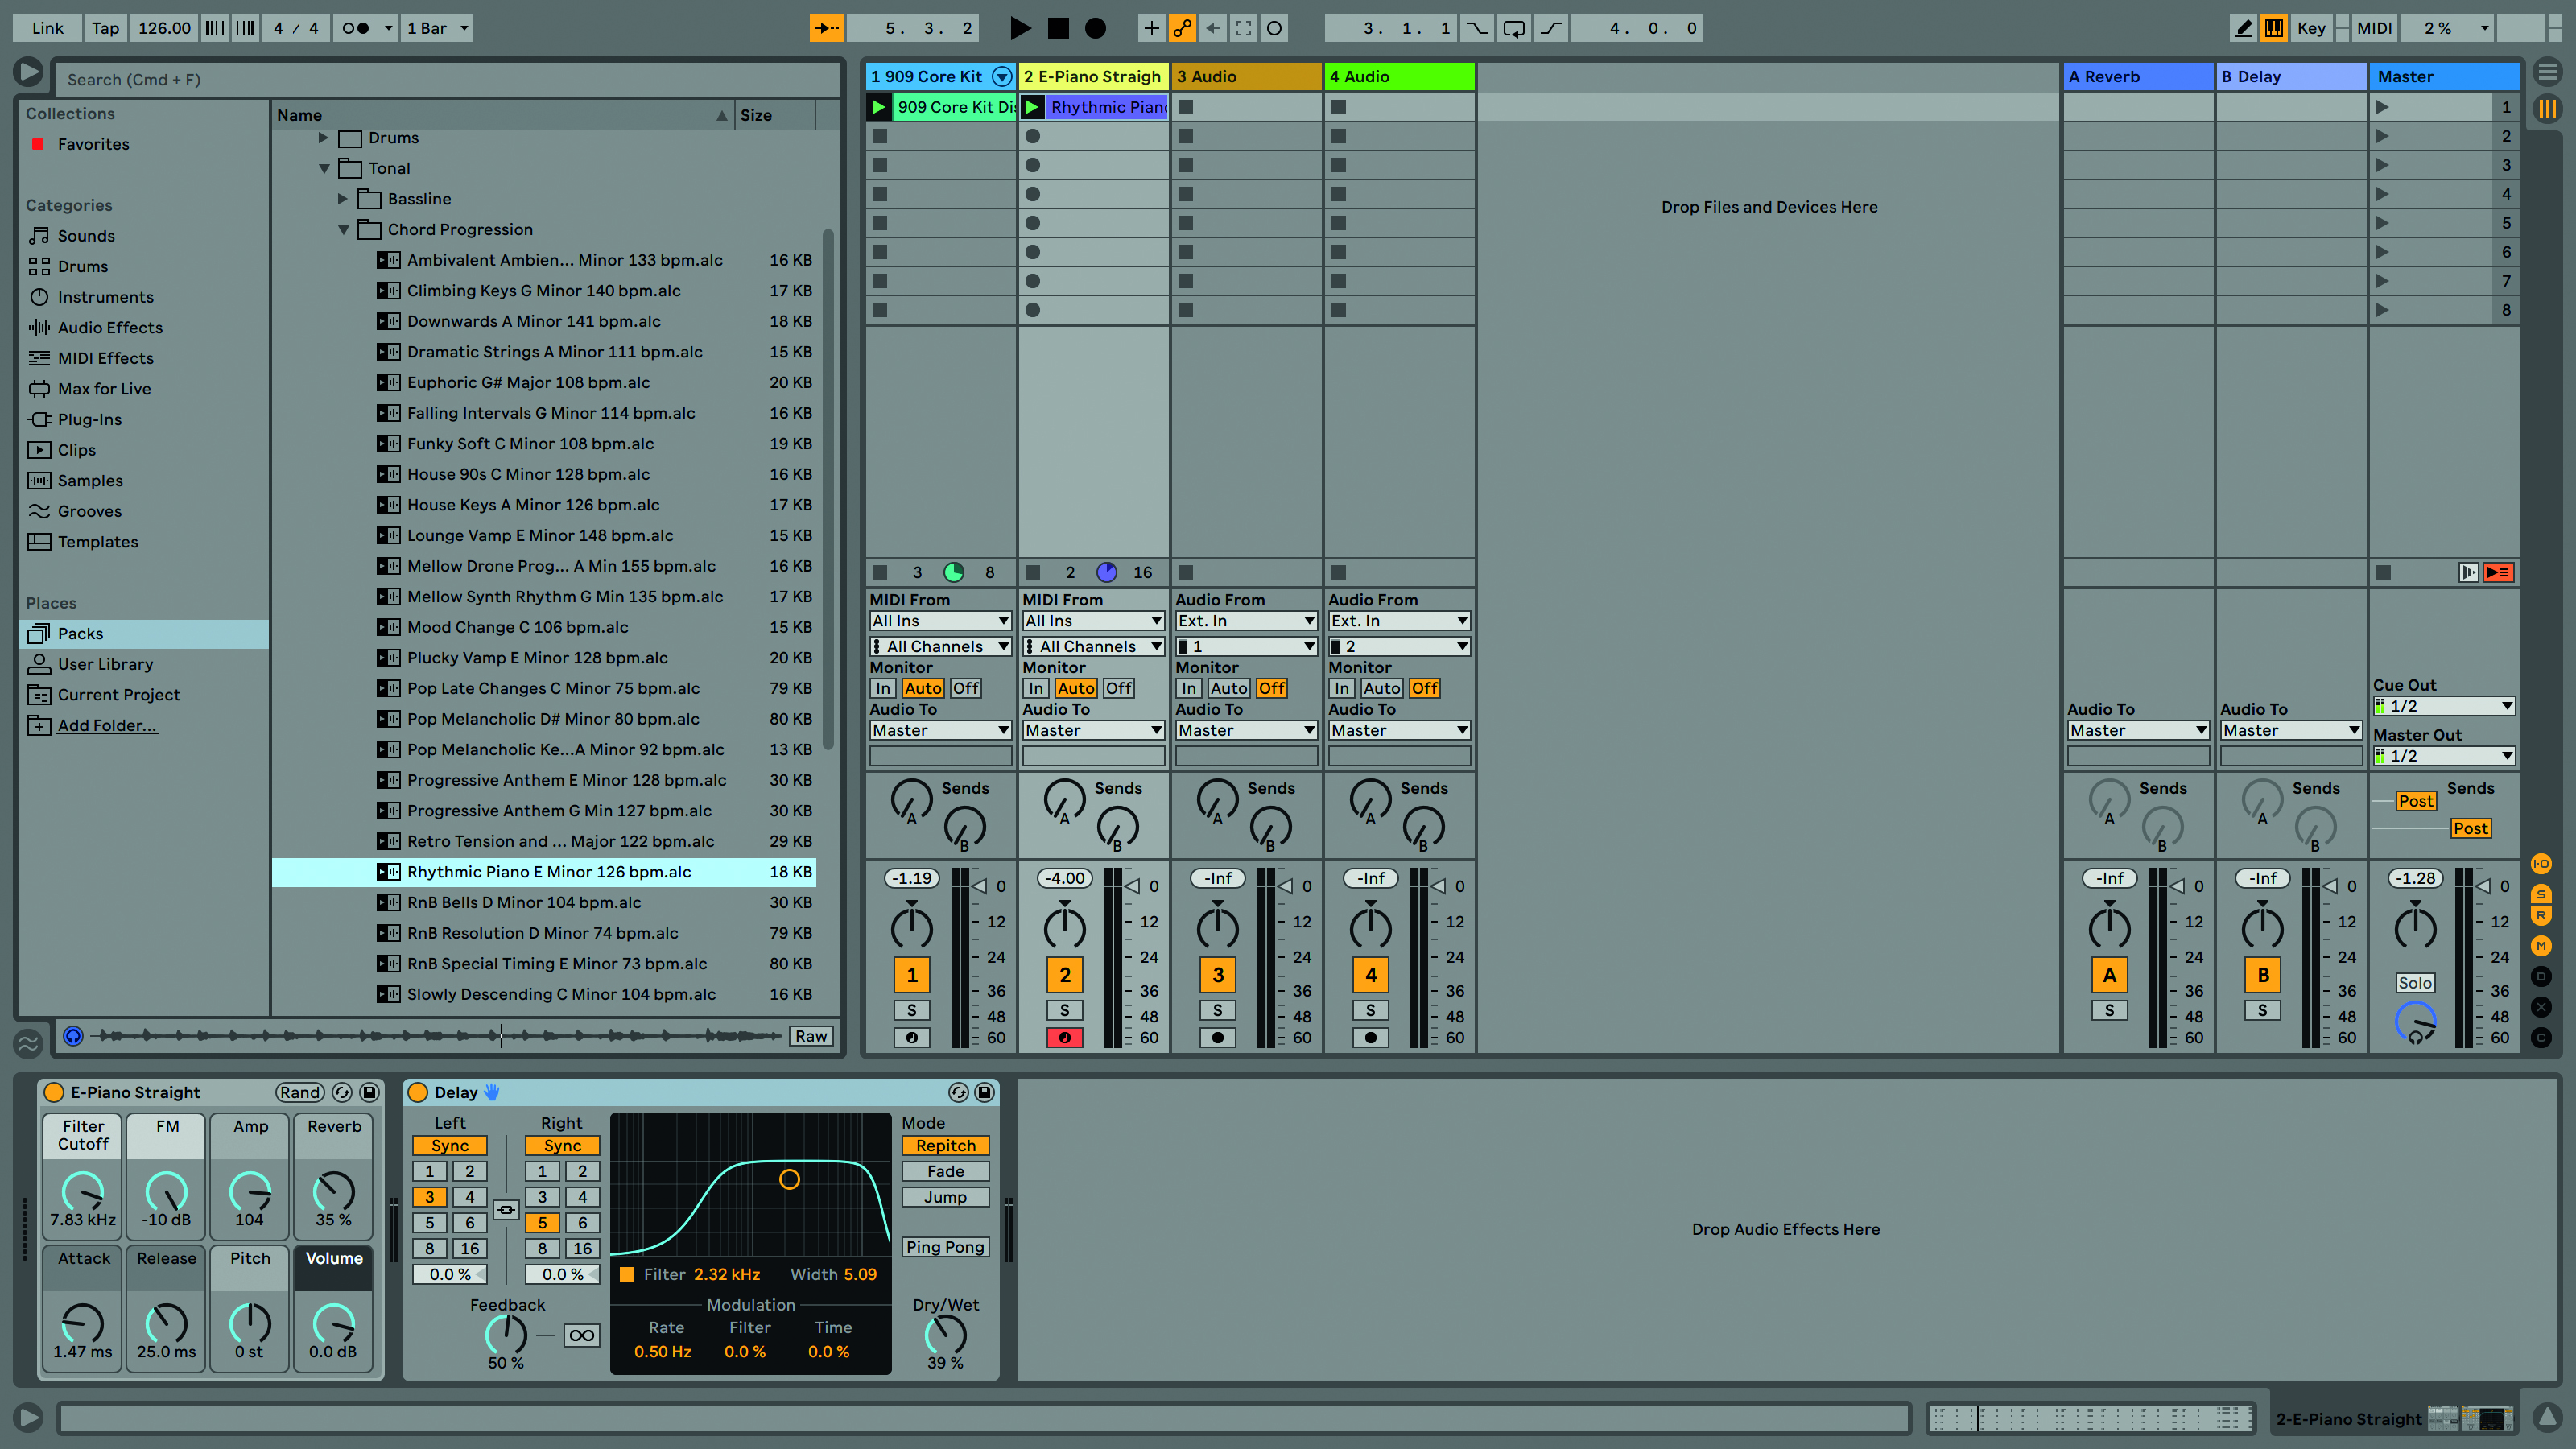
Step 6: Now let’s add a chord progression. Following the same process we used for the beat, in the Browser open Packs>Core Library>MIDI Clips>Tonal> Chord Progression and choose the Rhythmic Piano E Minor 126bpm clip and drag it onto our next MIDI track. Click both clips’ Play buttons or use the Scene button to hear both clips together.
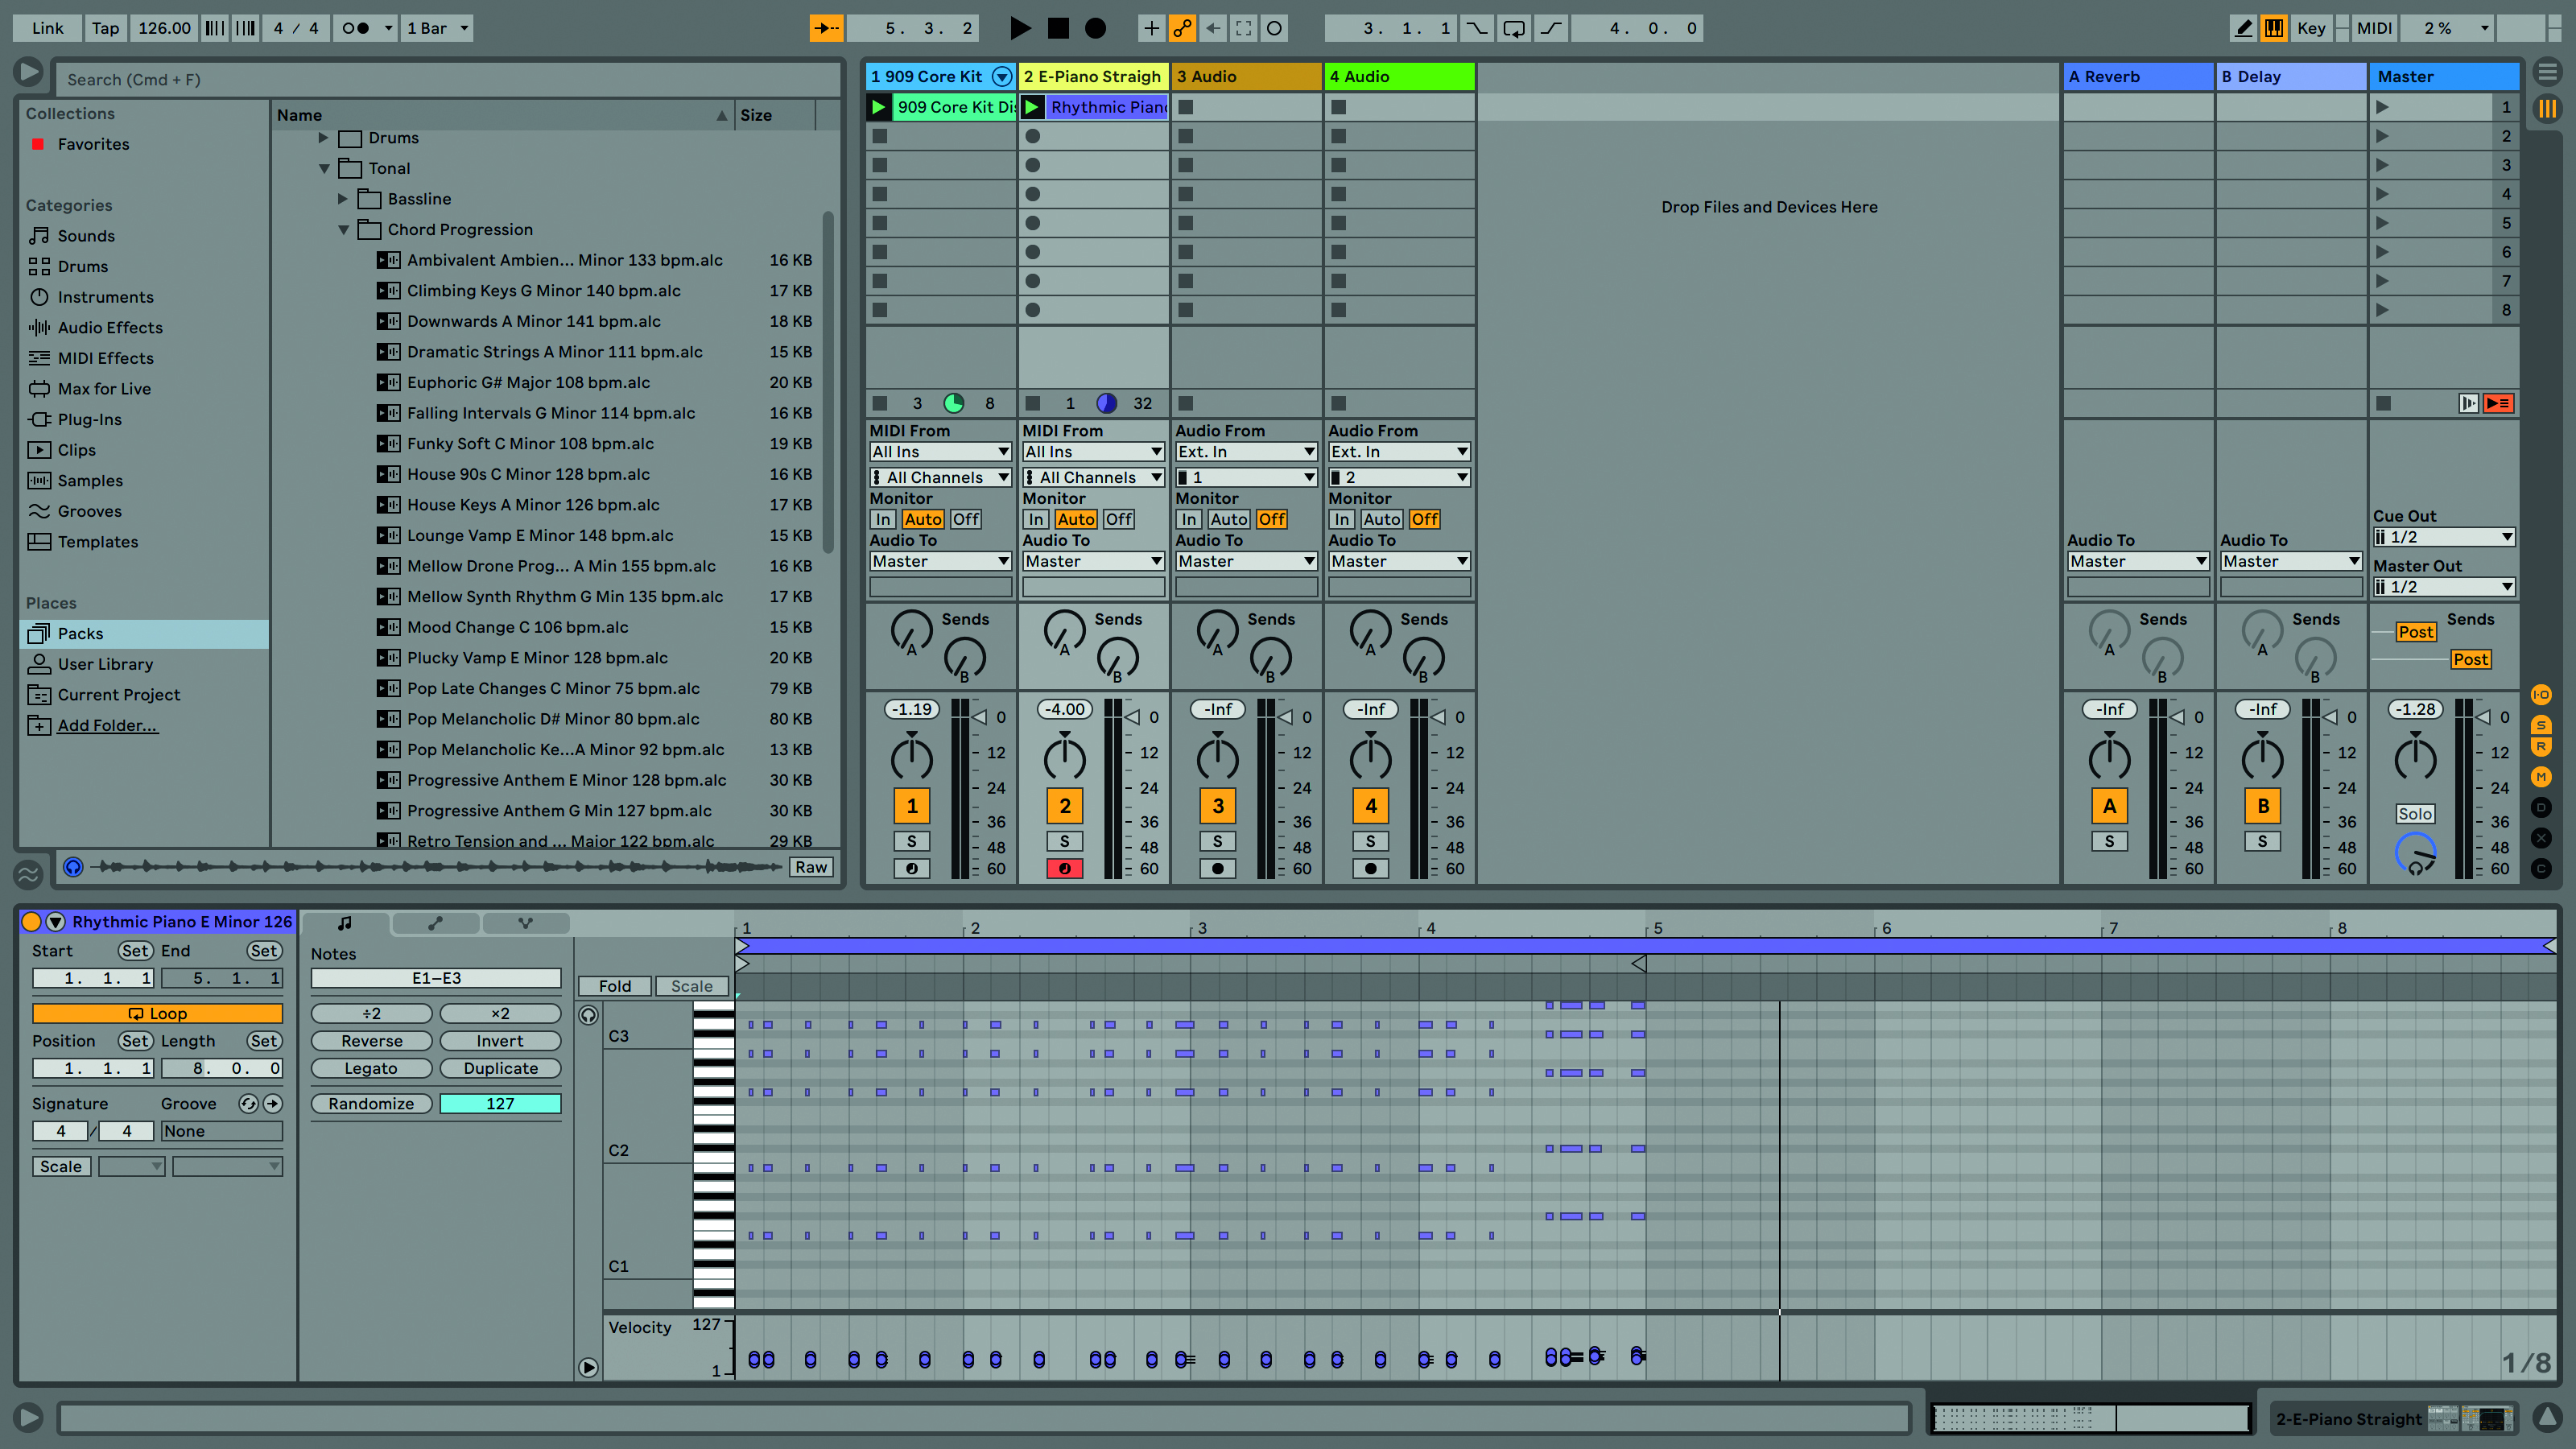
Step 7: We like the part but want to make some changes. Double-click the clip slot to open the Clip View MIDI at the bottom. The clip is four bars long but we want the part to loop over eight bars. The first job is to adjust the clip length to 8.0.0 which we do in the section to the left.
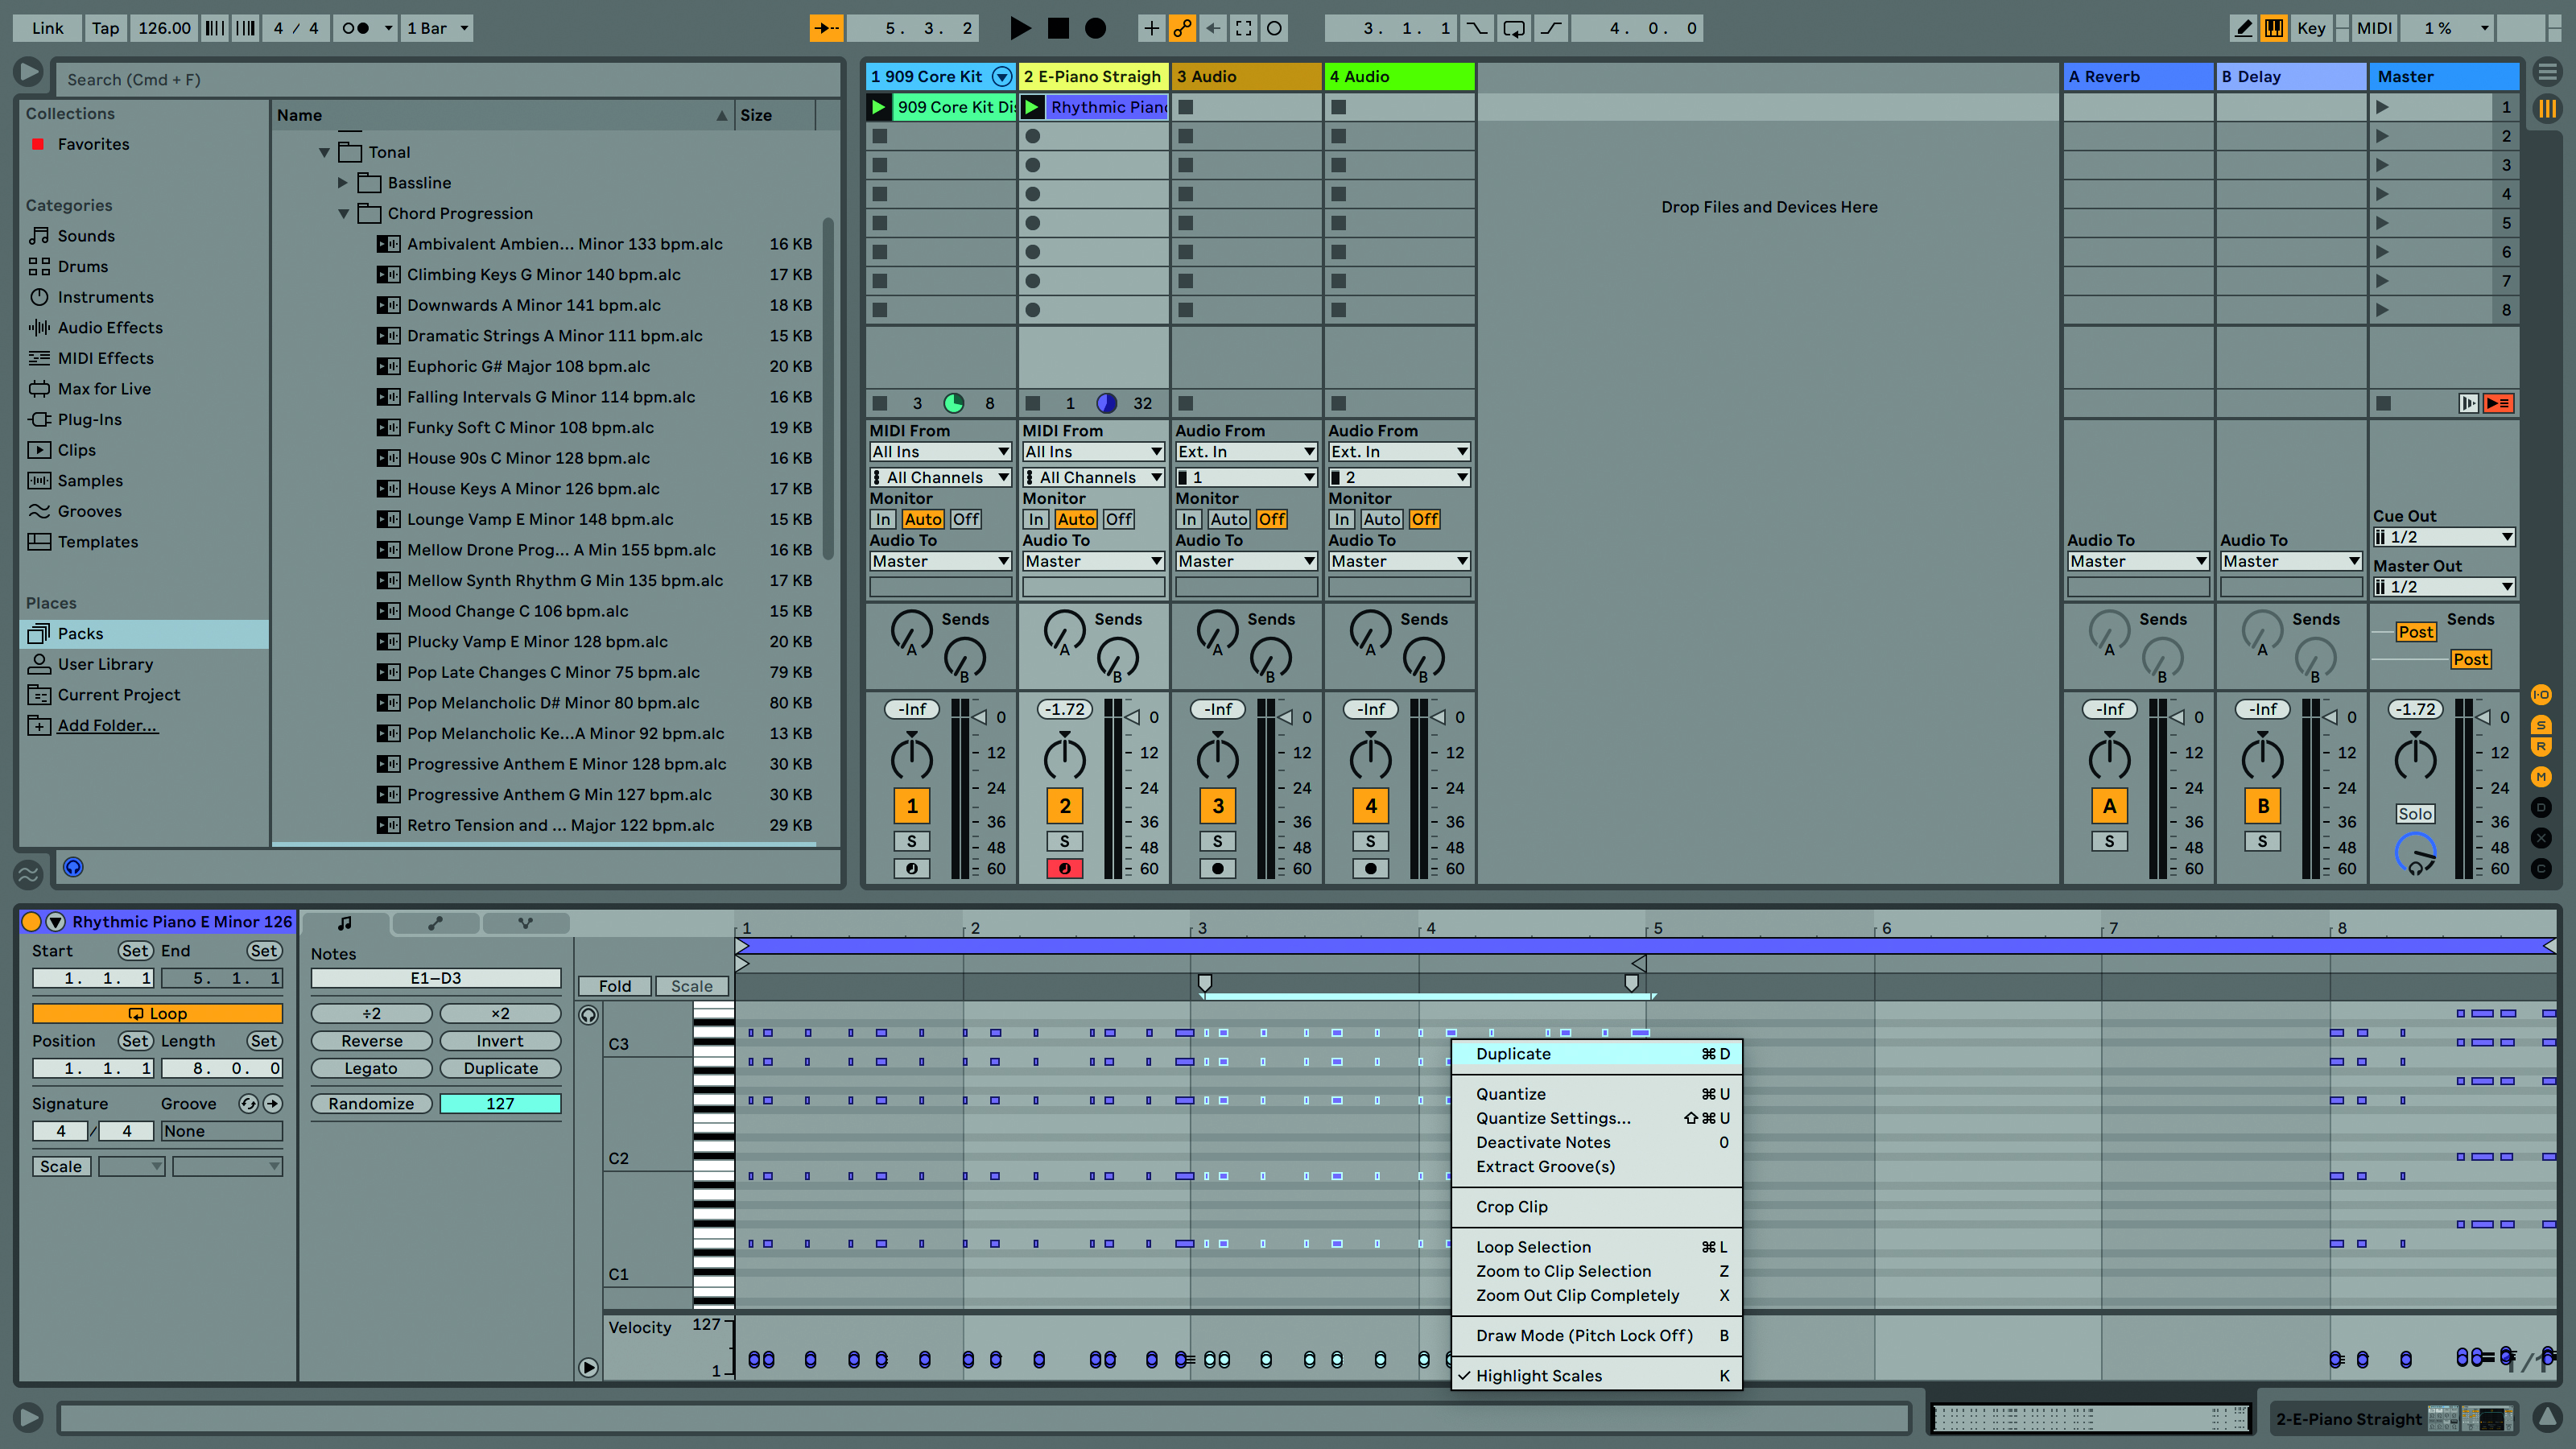
Step 8: Next, move bar 4 of the original clip to bar 8. Use your cursor to lasso and drag these MIDI notes. Now delete bar 3 and copy round bars 1 and 2 to fill the gap. Use right-click to set the Fixed Grid to one bar, then select each bar of notes and use the Duplicate option.
Thinking of using an external MIDI controller?
The grid layout and clip-style playback of Session View really lends itself to performance and once you have a few clips loaded up, launching them from a hardware controller is fun and creative.
There are many suitable devices available including Ableton’s own Push unit. Other options include Akai’s APC and Novation’s various Launchpads, giving you loads of options to match your budget.
Once you have your device, getting up and running is very easy, and you simply need to select it and connect it in the Preferences page under the Link Tempo MIDI tab.
Computer Music magazine is the world’s best selling publication dedicated solely to making great music with your Mac or PC computer. Each issue it brings its lucky readers the best in cutting-edge tutorials, need-to-know, expert software reviews and even all the tools you actually need to make great music today, courtesy of our legendary CM Plugin Suite.


