The ultimate beginner's guide to Ableton Live 11 Lite: creating MIDI clips
Our guide to getting to know Ableton Live 11 Lite continues - grab your free copy in January's issue of Computer Music Magazine
Ableton Live is a DAW that needs no introduction, and its combination of performance and production features mean it’s as popular with performers and DJs as it is with creators.
Live 11 Lite is a cut-down version of Ableton Live, with all of the essential workflows, instruments and effects, but with limited track count, and for many years this has been bundled with apps and hardware products. This month, you can grab a free copy of Ableton Live 11 Lite with the latest issue of Computer Music Magazine.
To mark this momentous occasion and also to get you started using this fabulous software, we’ve put together a series of tutorials that run through everything you need to get acquainted with Ableton Live 11 Lite, so you can learn how to build a track from scratch.
Our tutorials are primarily for new users, but that said, we’ll also flag some of the new features you’ll find in Live 11 Lite, so even if you’ve used Live Lite before, there may be some things for you to learn here.
Finally, although Live 11 Lite is awesome software, there are more fully featured versions of Ableton Live available on Ableton's website. So, let’s get creating in Live 11 Lite!
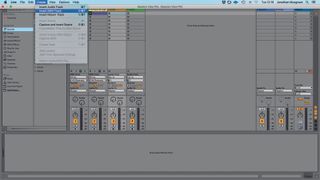
Step 1: So far we’ve used ready-made clips to create our parts in Session View, but we can, of course, record parts from scratch. So, let’s now add a bass part from scratch. First up, from the Create menu, choose Insert MIDI Track.
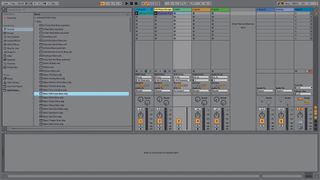
Step 2: Now from the Sounds folder in the Browser, open the Bass folder. Once again, you can audition sounds or simply load them up and play along to the existing clips. We’ve chosen Basic FM House Bass and also activated the Computer MIDI Keyboard using the keyboard icon in the top right so we can play from our computer.
Get the MusicRadar Newsletter
Want all the hottest music and gear news, reviews, deals, features and more, direct to your inbox? Sign up here.
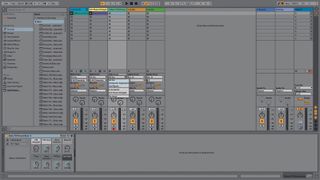
Step 3: With the instrument loaded, make sure the red record Arm button is selected at the bottom of the Track and that the MIDI In above is on All Ins or Computer Keyboard. If you now play the keyboard – it’s the middle row of letters – you should hear the bass sound.
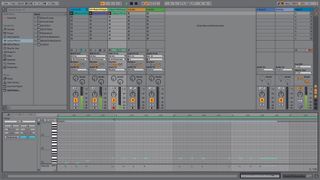
Step 4: Our bass track should have empty clip slots and, with the track armed, the slots should have circular icons ready to record. Now to start recording your bass part, simply click on the circular clip slot icon and start playing. Once you’ve finished, hit stop on the transport bar.
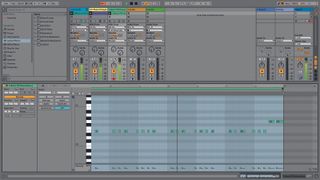
Step 5: Our part is eight bars long, although we’ve overrun a little bit. The first thing to do is trim the clip length back to exactly eight bars in the clip details to the left, and also make sure the Loop button just above this is activated.
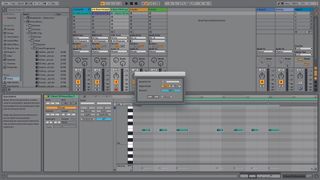
Step 6: Next, it’s quite likely the part will need to be quantised. Lasso all the notes and use right click to open the floating menu. Choose Quantize Settings. This provides a few options including the quantise division. We’ve chosen pretty standard settings of 1/16ths at 100% and we are quantising the note start point. Click OK to apply the quantise.
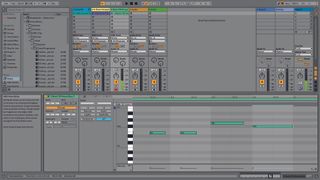
Step 7: We also need to adjust a couple of notes at the end, moving one note down in pitch. To be able to hear the notes as you select them, make sure the headphone icon next to the piano roll is selected. Here we’ve moved one note down a semitone and manually adjusted one note’s length.
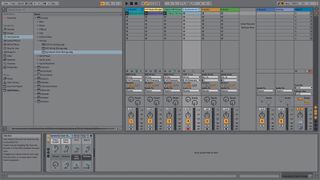
Step 8: We’ll add one more MIDI part at this stage and it’s going to be a string. Head to the Browser again, this time to the Instruments>Strings folder and grab Synthetic Choir Strings. Make sure none of the tracks are selected in Session View and double-click the preset. This will automatically create a new MIDI track.
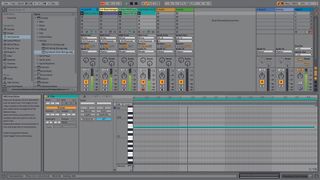
Step 9: Rather than play our part, we can just program it into a clip. Create a new
clip by double-clicking in an empty slot, then head to the piano roll editor at the bottom. Here, use keystroke B to select the pencil tool and draw in the notes. We’ve added a held E5 for four bars, adjusting the clip length accordingly.
Computer Music magazine is the world’s best selling publication dedicated solely to making great music with your Mac or PC computer. Each issue it brings its lucky readers the best in cutting-edge tutorials, need-to-know, expert software reviews and even all the tools you actually need to make great music today, courtesy of our legendary CM Plugin Suite.

"If I wasn't recording albums every month, multiple albums, and I wasn't playing on everyone's songs, I wouldn't need any of this”: Travis Barker reveals his production tricks and gear in a new studio tour

“My management and agent have always tried to cover my back on the road”: Neil Young just axed premium gig tickets following advice from The Cure’s Robert Smith


