"Isn’t recording drums a total nightmare? No, that’s a myth – recording drums is actually surprisingly easy": The simple guide to recording drums: kit tips, mic placement and setting up your DAW
Inject some feel into your tracks by recording a real human drummer (no jokes, please) playing actual drums!
DRUMS WEEK 2025: Record drums? Why would you bother when it’s so easy to simply launch Superior Drummer or BFD, bash out a quick beat on the keyboard, hit the quantise button and get stuck into recording everything else?
It’s certainly true that some of these virtual drums/drummers sound awesome, and offer a mind-boggling choice of sounds and patterns.
Not only that, but they don’t argue, and they don’t issue demands for payment, writing credits or bowls of Smarties with all the blue ones taken out – so it’s effectively a no-brainer, right?
Well, here are some other things that those pieces of drum software – and all the rest of them – don’t do. They don’t know how your song goes; they don’t have ideas; they don’t have a background of musical influences; they don’t know how to make your songs come to life; and they don’t sound unique.
If you’ve ever spent hours trying to program a fill that sounds right, or hi-hat parts that groove, or grace notes on a snare, or a convincing crash-ride, then you’ll know that for all their amazingness, these superb virtual instruments require a lot of work to produce totally lifelike results.
But isn’t recording drums a total nightmare? No, that’s a myth – recording drums is actually surprisingly easy. Admittedly, it’s often the sound of a badly recorded kit that makes an otherwise great track sound like a ‘demo’, but if you follow some simple rules, you can avoid the pitfalls.
Of course, a big, posh recording studio would make things easier, but we’re going to assume you haven’t got one of those and show you how to turn your DAW into a drum studio with nothing more than a basic set of microphones, an eight-channel audio interface, an extra set of headphones and a splitter box.
Want all the hottest music and gear news, reviews, deals, features and more, direct to your inbox? Sign up here.
Apart from the recording gear, the drum kit and the room, there is, of course, one more vital component: the drummer! If your drummer’s not up to scratch, all your efforts will have been wasted. There’s no point listening to a great recording of something crap – but there’s definitely a point in listening to a crap recording of something that’s great! So make sure your drummer is experienced, knows how to tune their kit, hits well and consistently, and can play with a click.
Preparing to record
When setting up a recording session, the first thing you need to sort out is the room in which the drums are going to be recorded. The question is: live or dead?
If you’re making a rock track, you’ll need a ‘live’-sounding room or an adjacent live-sounding room where you can put ambient mics. If there’s a rug on a wooden floor, get rid of it – drums always sound better on a hard surface.
For a dry, disco-sounding kit, you’ll need a ‘dead’ room, like the lounge or bedroom, where soft furnishings help to calm the sound.
The drum kit
A good drummer will know how important it is to get the kit sounding right. Freshly tuned, new heads will have a crisp attack and make the drums nice and loud. Loud drums make the room sound better and don’t get drowned out by cymbal wash.
A common mistake people make is over-damping the drums in pursuit of a dry, '70s type of sound. Bear in mind that lots of top-end resonance and room ambience gets absorbed in the mix by guitars – especially in rock music. Over-damping also makes the drums quiet, so easy does it!
Keep a selection of blankets, pillows and bricks around to help get the kick drum right. Try and keep some life in the sound; don’t muffle it so much that it sounds like a cardboard box. Use the dampening to just shorten the sound. The best thing for dampening the top head of the snare is Moon Gel by RTOM. It costs about £8 and makes fine-tuning snare sounds easy.
The session
Before you hit the record button, you need to prepare your session. Working with a sprawling production featuring 20 tracks of backing vocals and tons of plugins is going to mean complications down the line.
By printing or bouncing down the key elements of your track as new audio files, you can unload all plugins from the session. This will prevent latency problems, so that the drummer will hear everything right in his headphones and there won’t be any complicated latency compensation processes happening in the background.
You should aim to end up with a few bounced ‘stems’ – guide drums, bass, guitars, keys, vocals. Make sure they all start on bar 3 or later, so that you have at least a couple of bars of count-in. The click or guide drum loop can be MIDI-triggered or printed as audio.
These few tracks then need to be turned down to around -15dB – this will leave plenty of headroom for the click to be clearly heard by the drummer over the backing track and the drums.
Getting the spot mics right
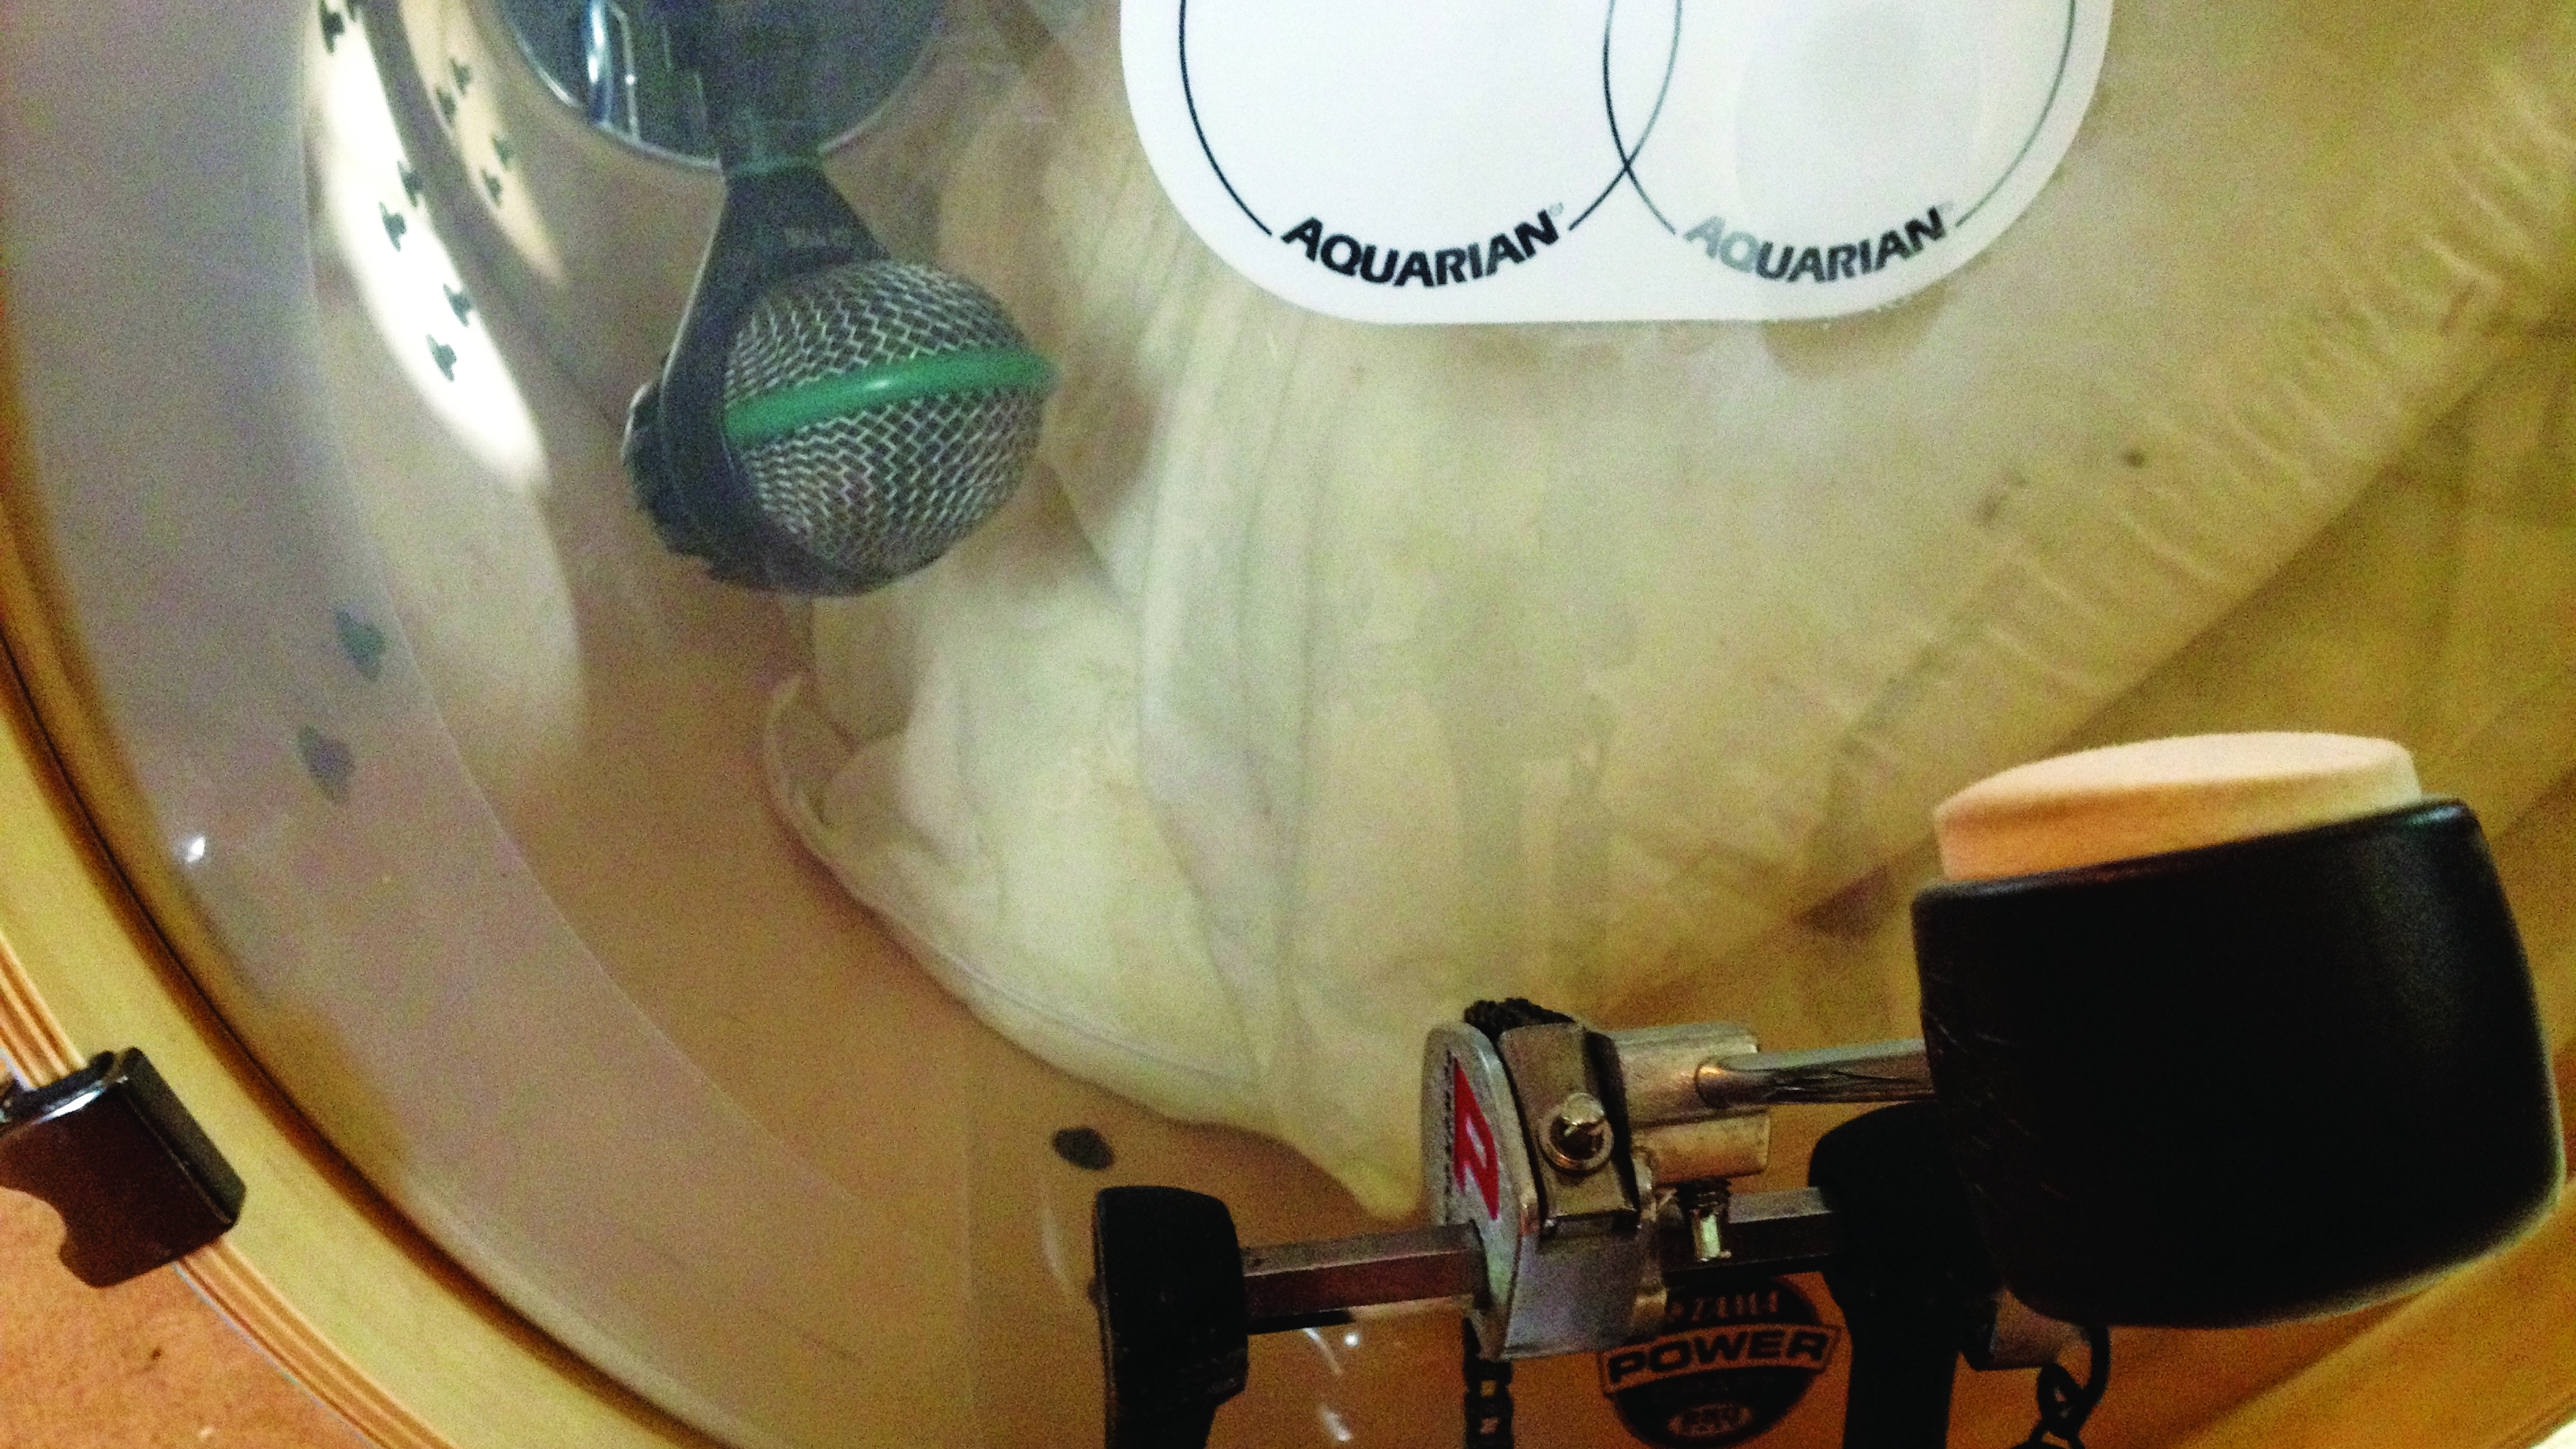
Step 1: Once you’ve got your kick sounding good, put a dynamic cardioid mic, like the AKG D112 shown here, inside it. The closer it is to the beater contact point, the punchier a sound you’ll get – 5-6" away is about right, at a 45º angle to the batter (top) head. A small boom stand is ideal for this.
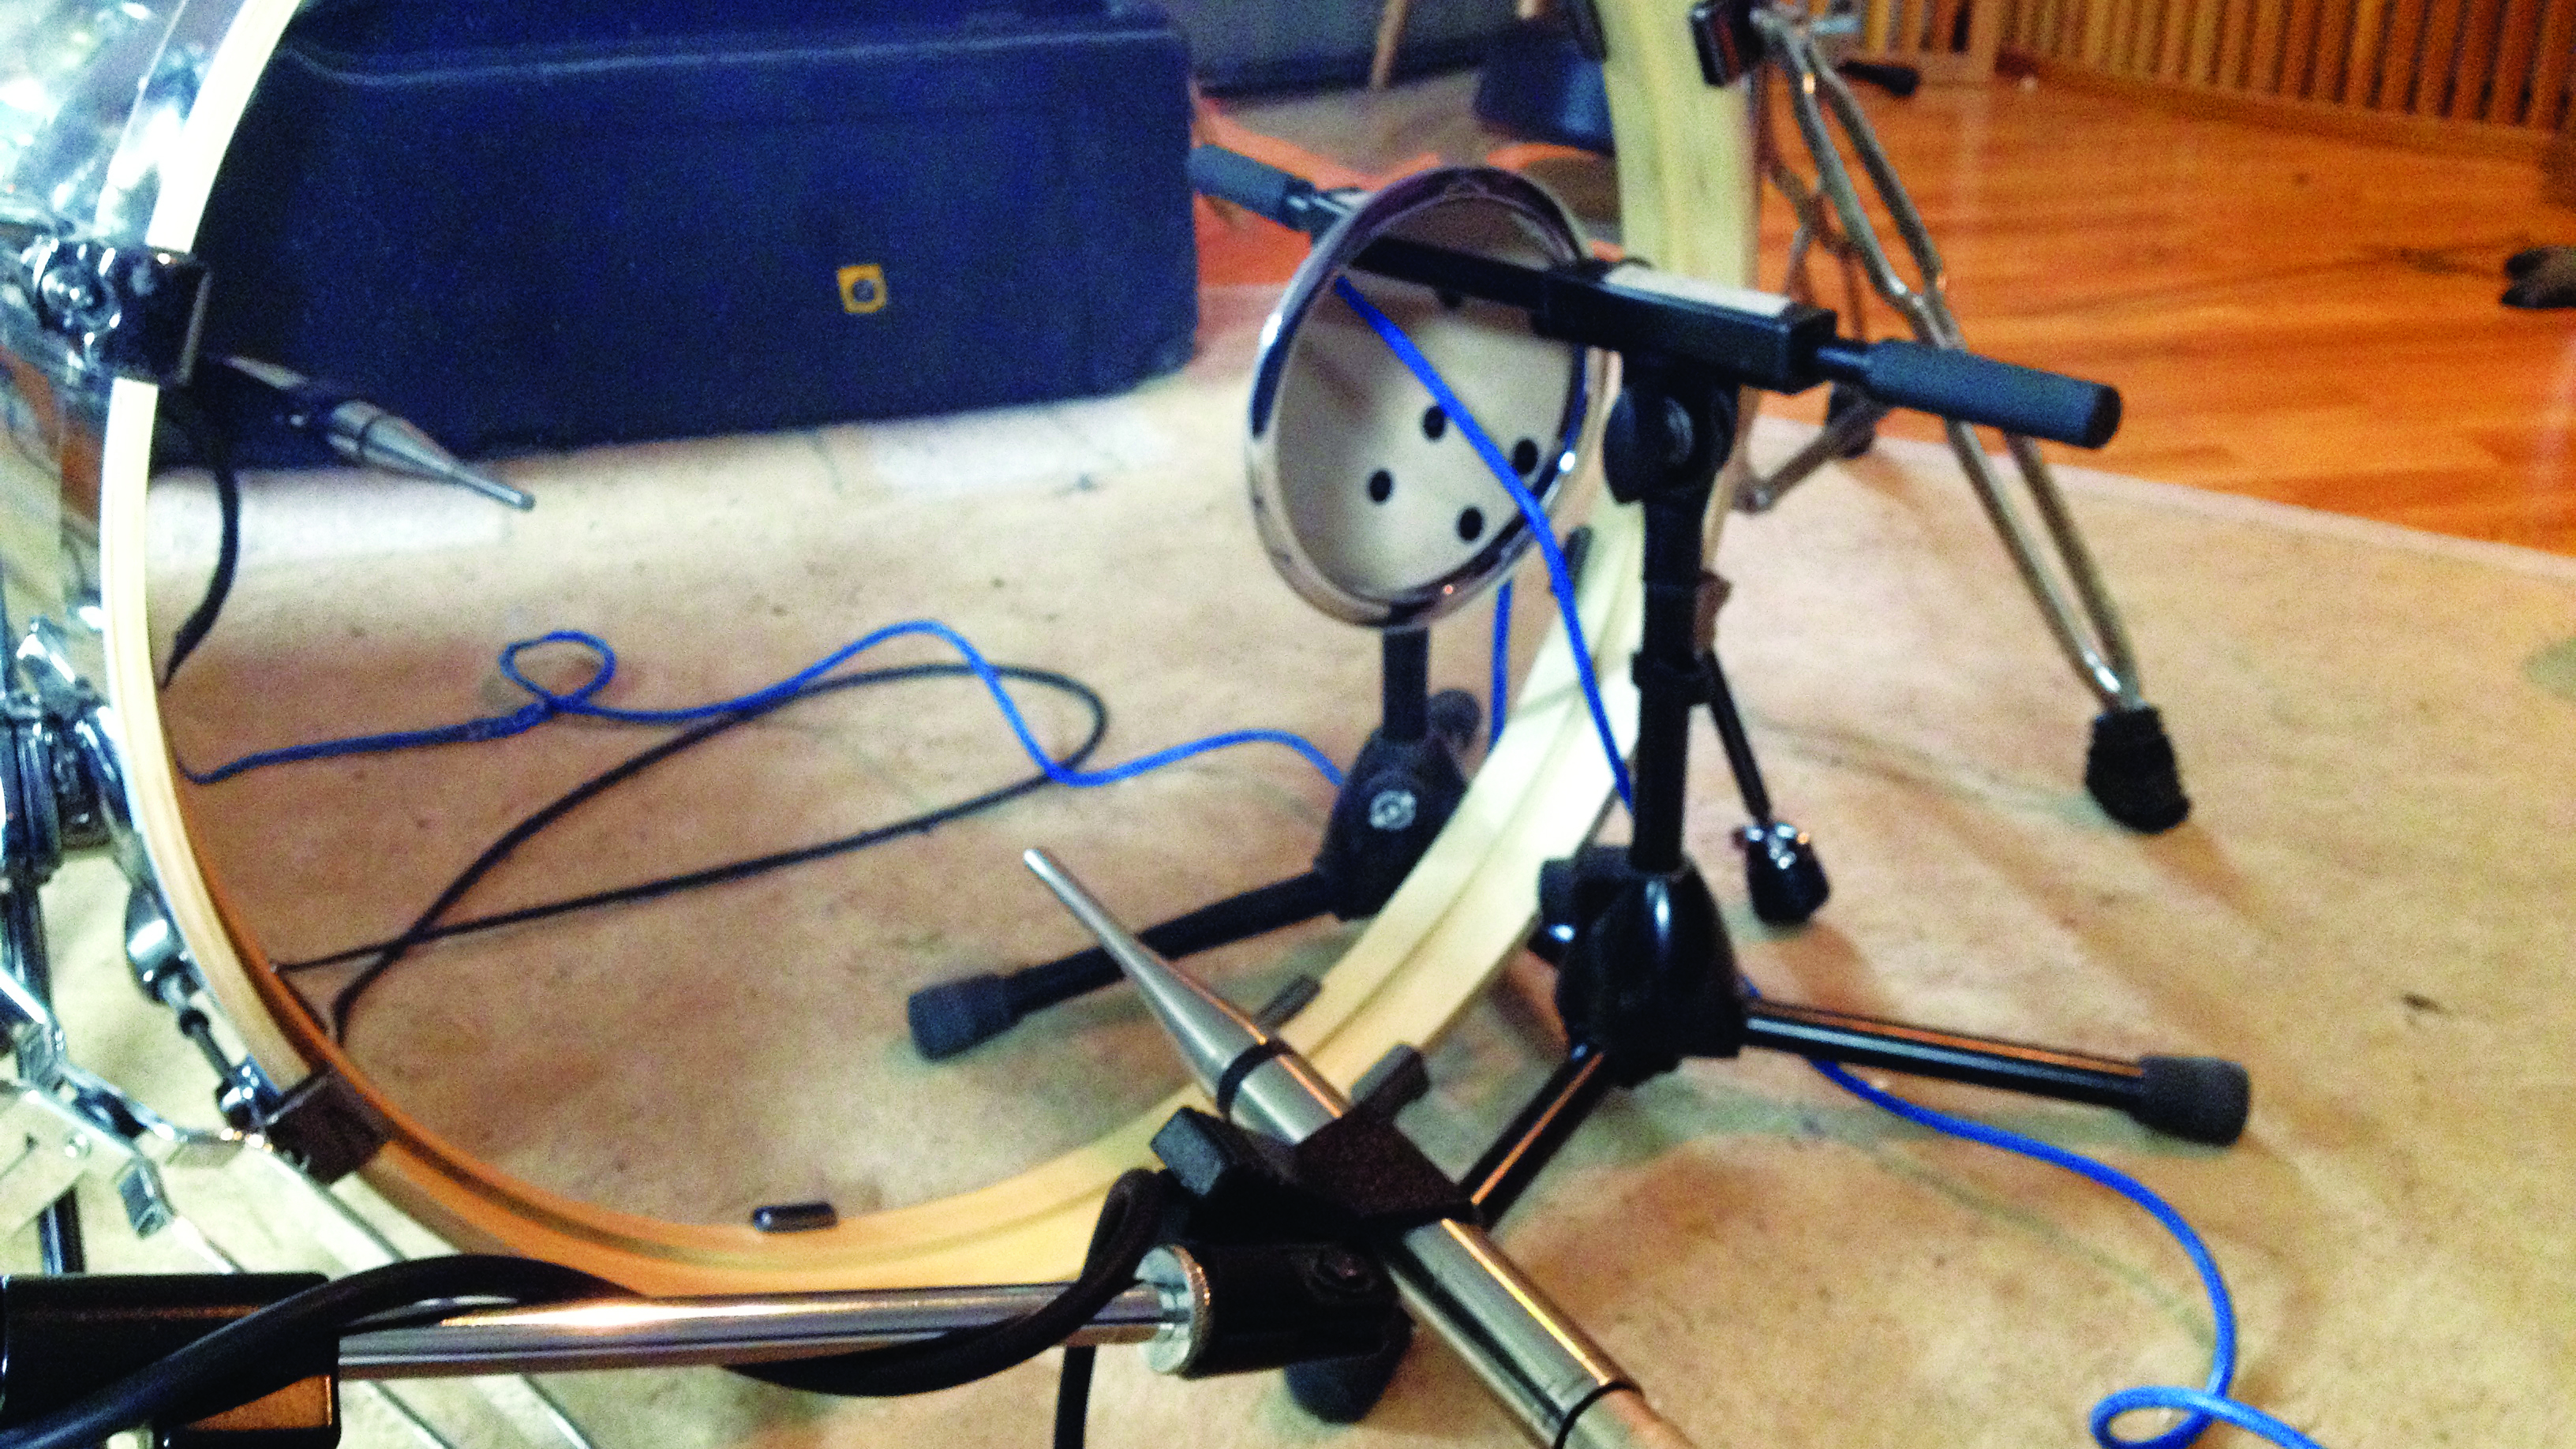
Step 2: This next step isn’t essential, but is well worth trying. Take another mic (dynamic or condenser) and place it outside the kick – this results in a more rounded and meaty sound. Don’t get any closer than 5-6" to the skin, though. Weight both kick drum mic stands with bricks so they don’t flop around.
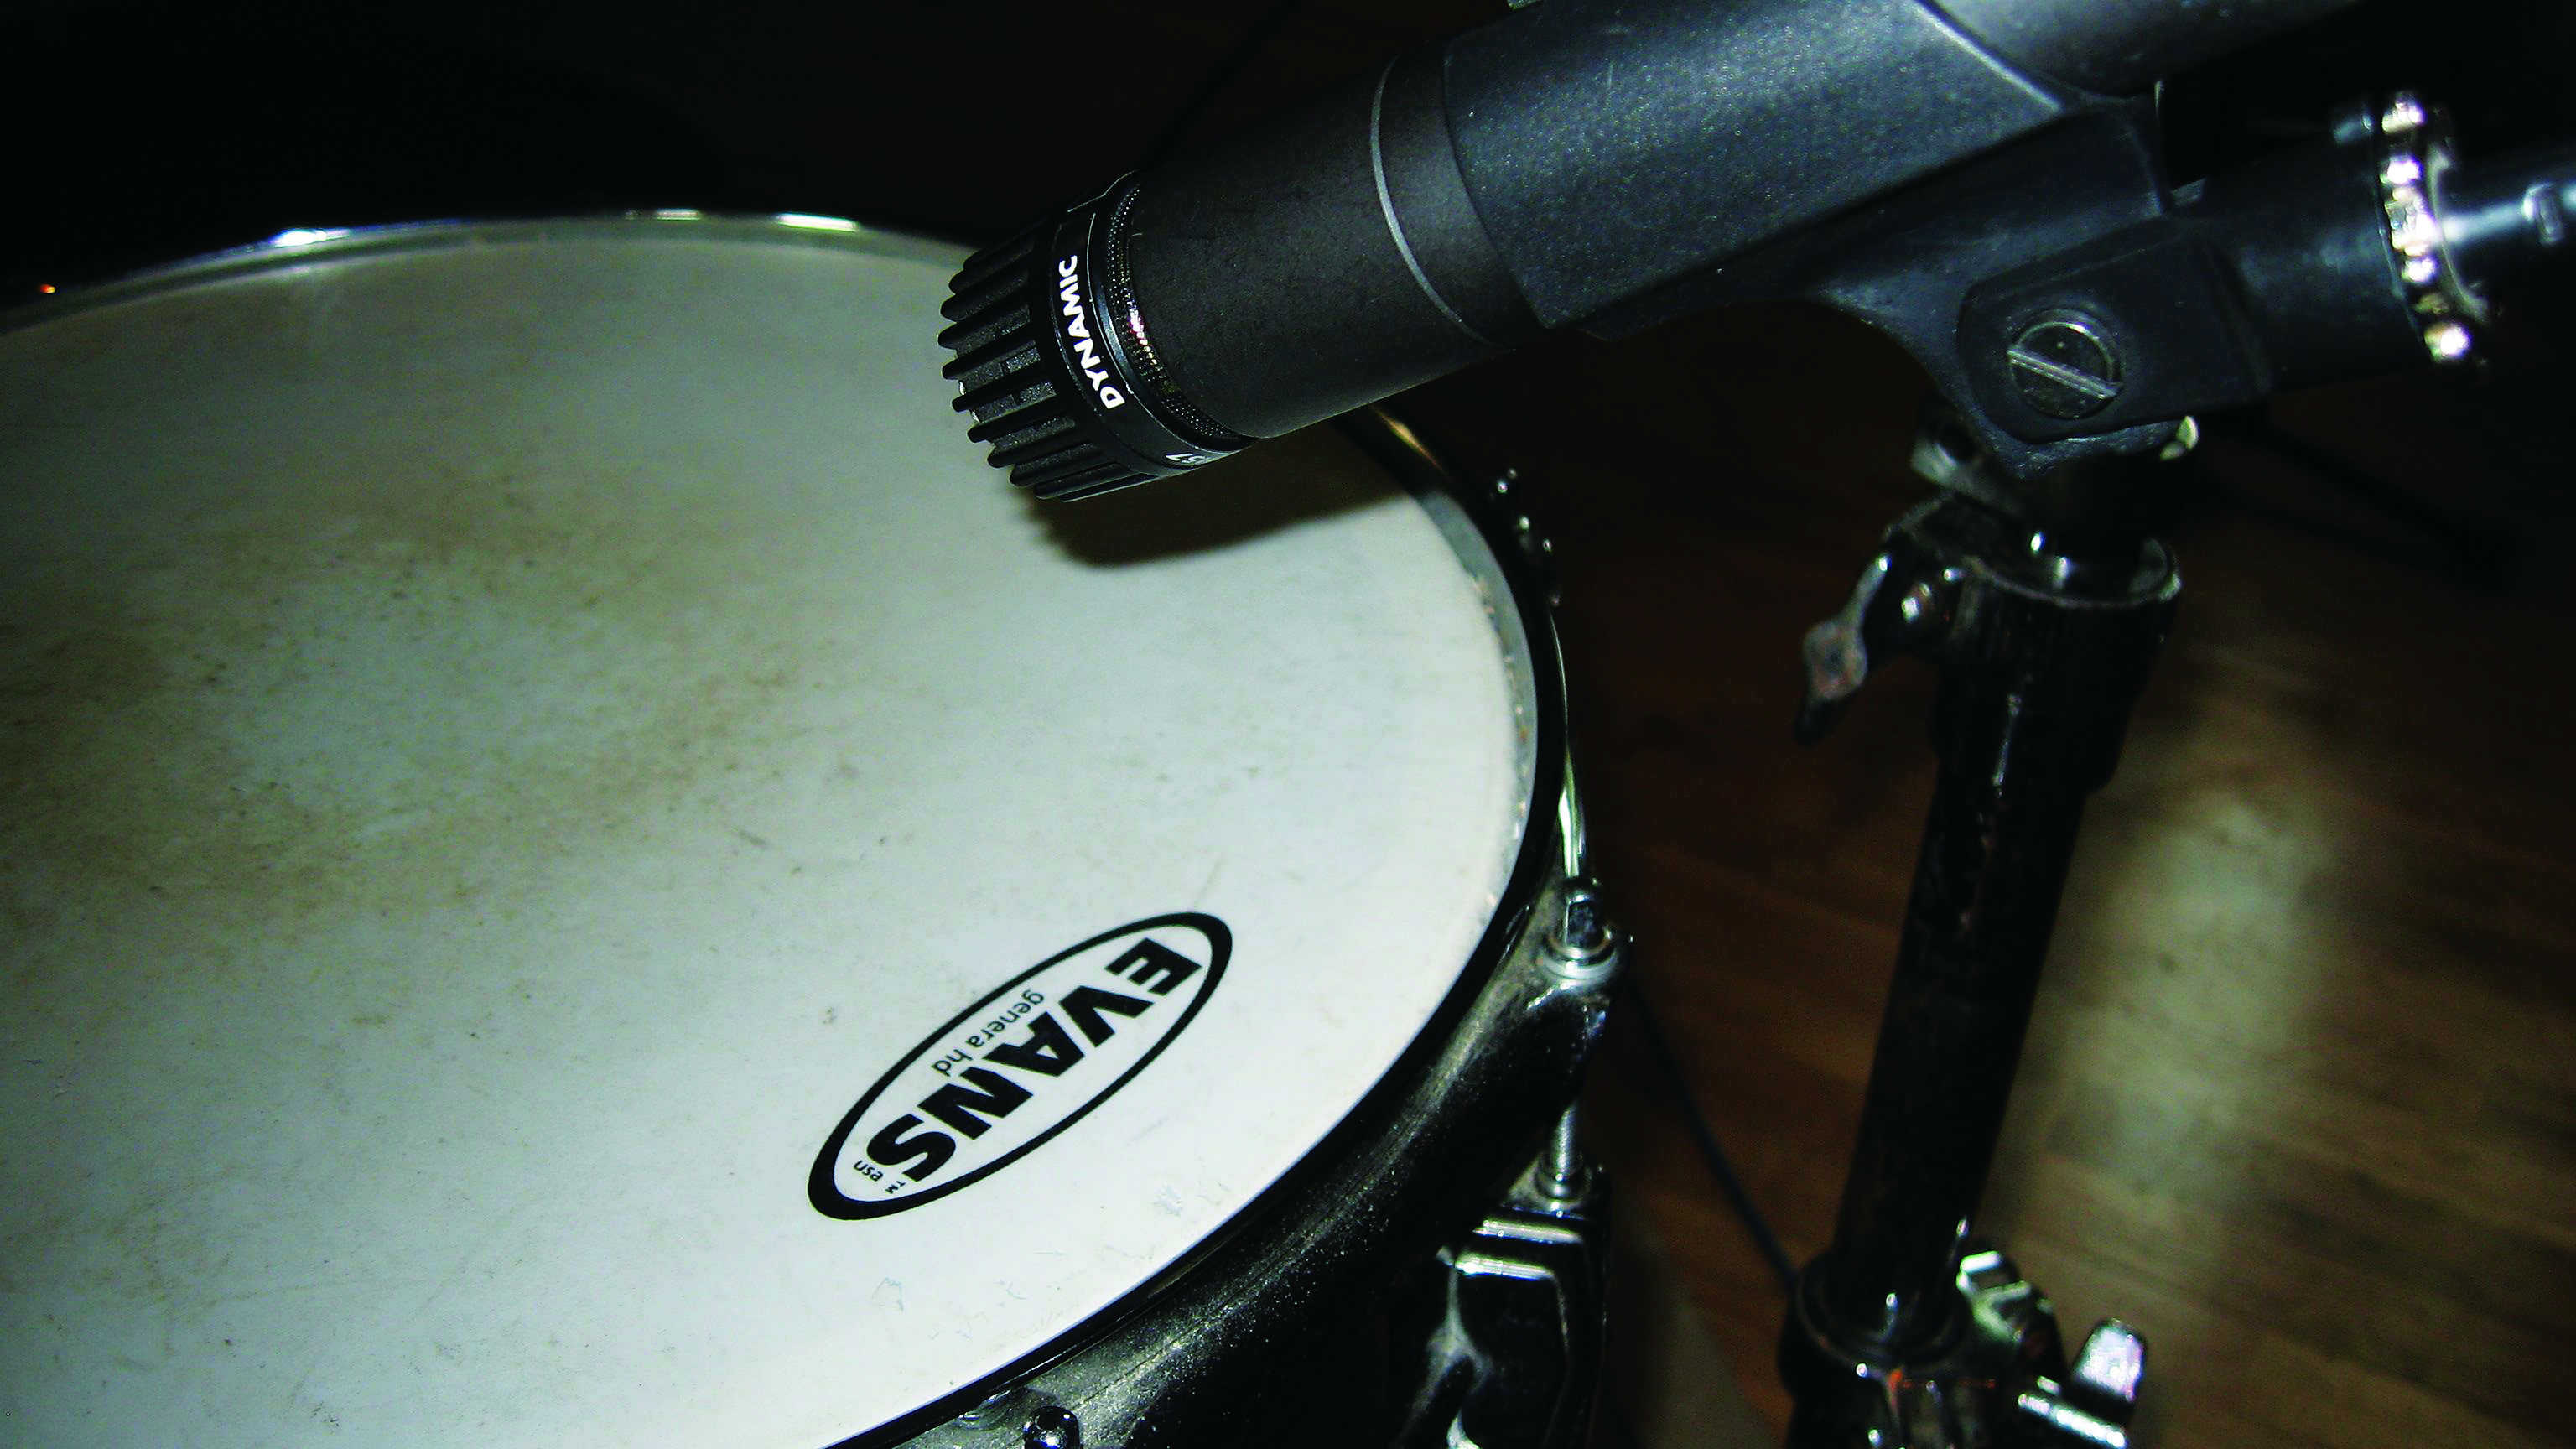
Step 3: Use a dynamic cardioid mic, like this Shure SM57, for the snare batter head. Try to have it looking in and down onto the centre of the head. You’ll need to keep it outside or near the edge of the drum so that it doesn’t get in the drummer’s way, but this will sound better anyway. As an alternative, try having the mic looking horizontally across the snare.
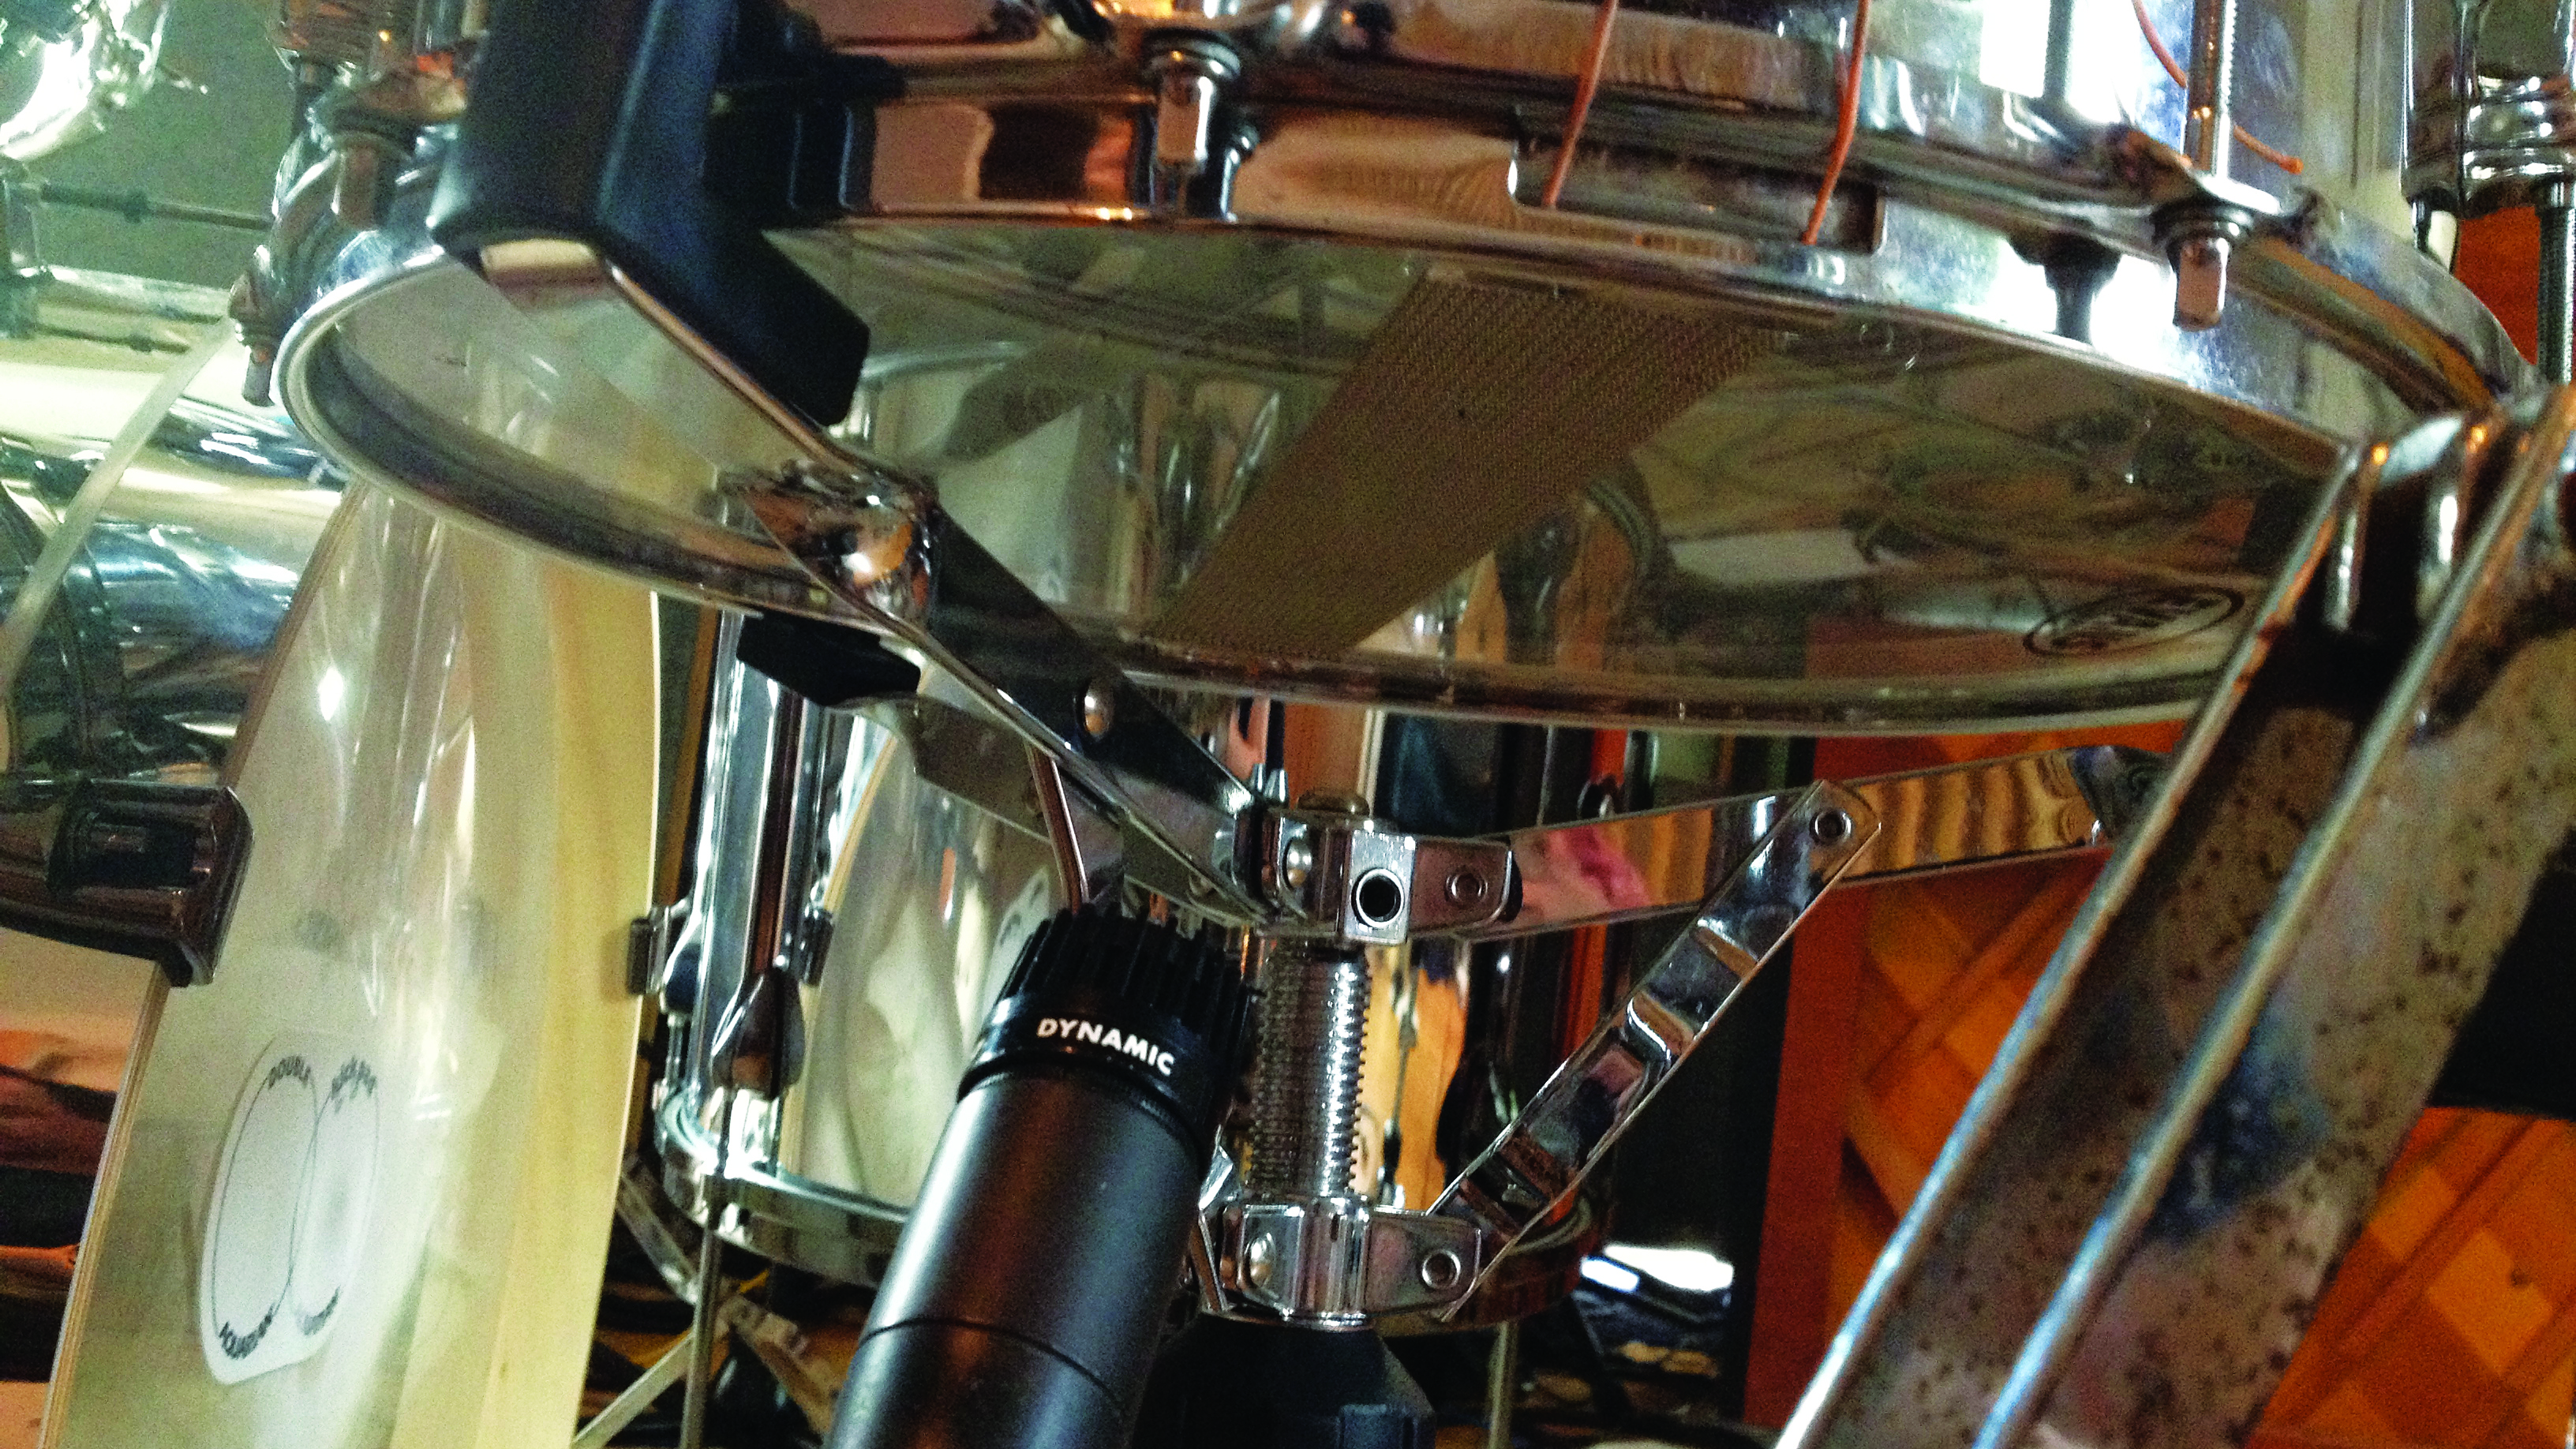
Step 4: Again not essential, but a mic under the snare can help to bring out the rattle of the snares, as well as improving the fatness of the overall sound. If your overheads are good (see next page), you may end up using more of this in the mix than the top snare channel. If your audio interface has a phase reverse button, activate it for this mic’s channel.
Overheads
The most important microphones in our whole setup are the two overheads, which basically record the whole kit sound. Ideally, you’ll have a pair of large diaphragm condenser mics on tall stands two or three feet above the kit and about four feet apart. These are a ‘spaced pair’ of omni-directionals or cardioids. Omnis will give you more of the room sound, while cardioids achieve more focus.
Although this setup is common practice and can sound great, it’s not actually the easiest to get right, and it can also sound terrible.
The main problem is phase – you need to ensure that the sounds from your drums get to all of the overheads at roughly the same time. The more mics you use, the more complicated the phase relationships get and the less focused the sound can become, leading to a loss of punch and low frequencies in the recording.
Google the XY, ORTF and MS overhead miking techniques, all of which give very different sounding results – and all with just two condenser mics. Experiment to find out which suits your kit and room.
The Glyn Johns method
Mega-producer/engineer Glyn Johns has recorded many of the greats. Here’s his quick and economical kit miking method, which has become something of a standard over the years:
• Overhead 1 (cardioid condenser, panned left) is about 4-6" above the floor tom, facing the hi-hats across the snare.
• Overhead 2 (cardioid condenser, panned right) is about 2-3' above the kit, pointing down between the toms and snare
• Snare spot mic
• Kick spot mic.
Room mics, bottom snare mic and second kick mic are all optional. This method does depend on having a great-sounding kit and room, though, so it could be a bit unflattering to a home setup.
Below we’re going to use the two-mic overhead technique that’s become known as the ‘Recorderman’. It involves quite a close mic placement, and minimises the room sound in the overheads. Here’s how it’s done…
Getting the ambient mics right
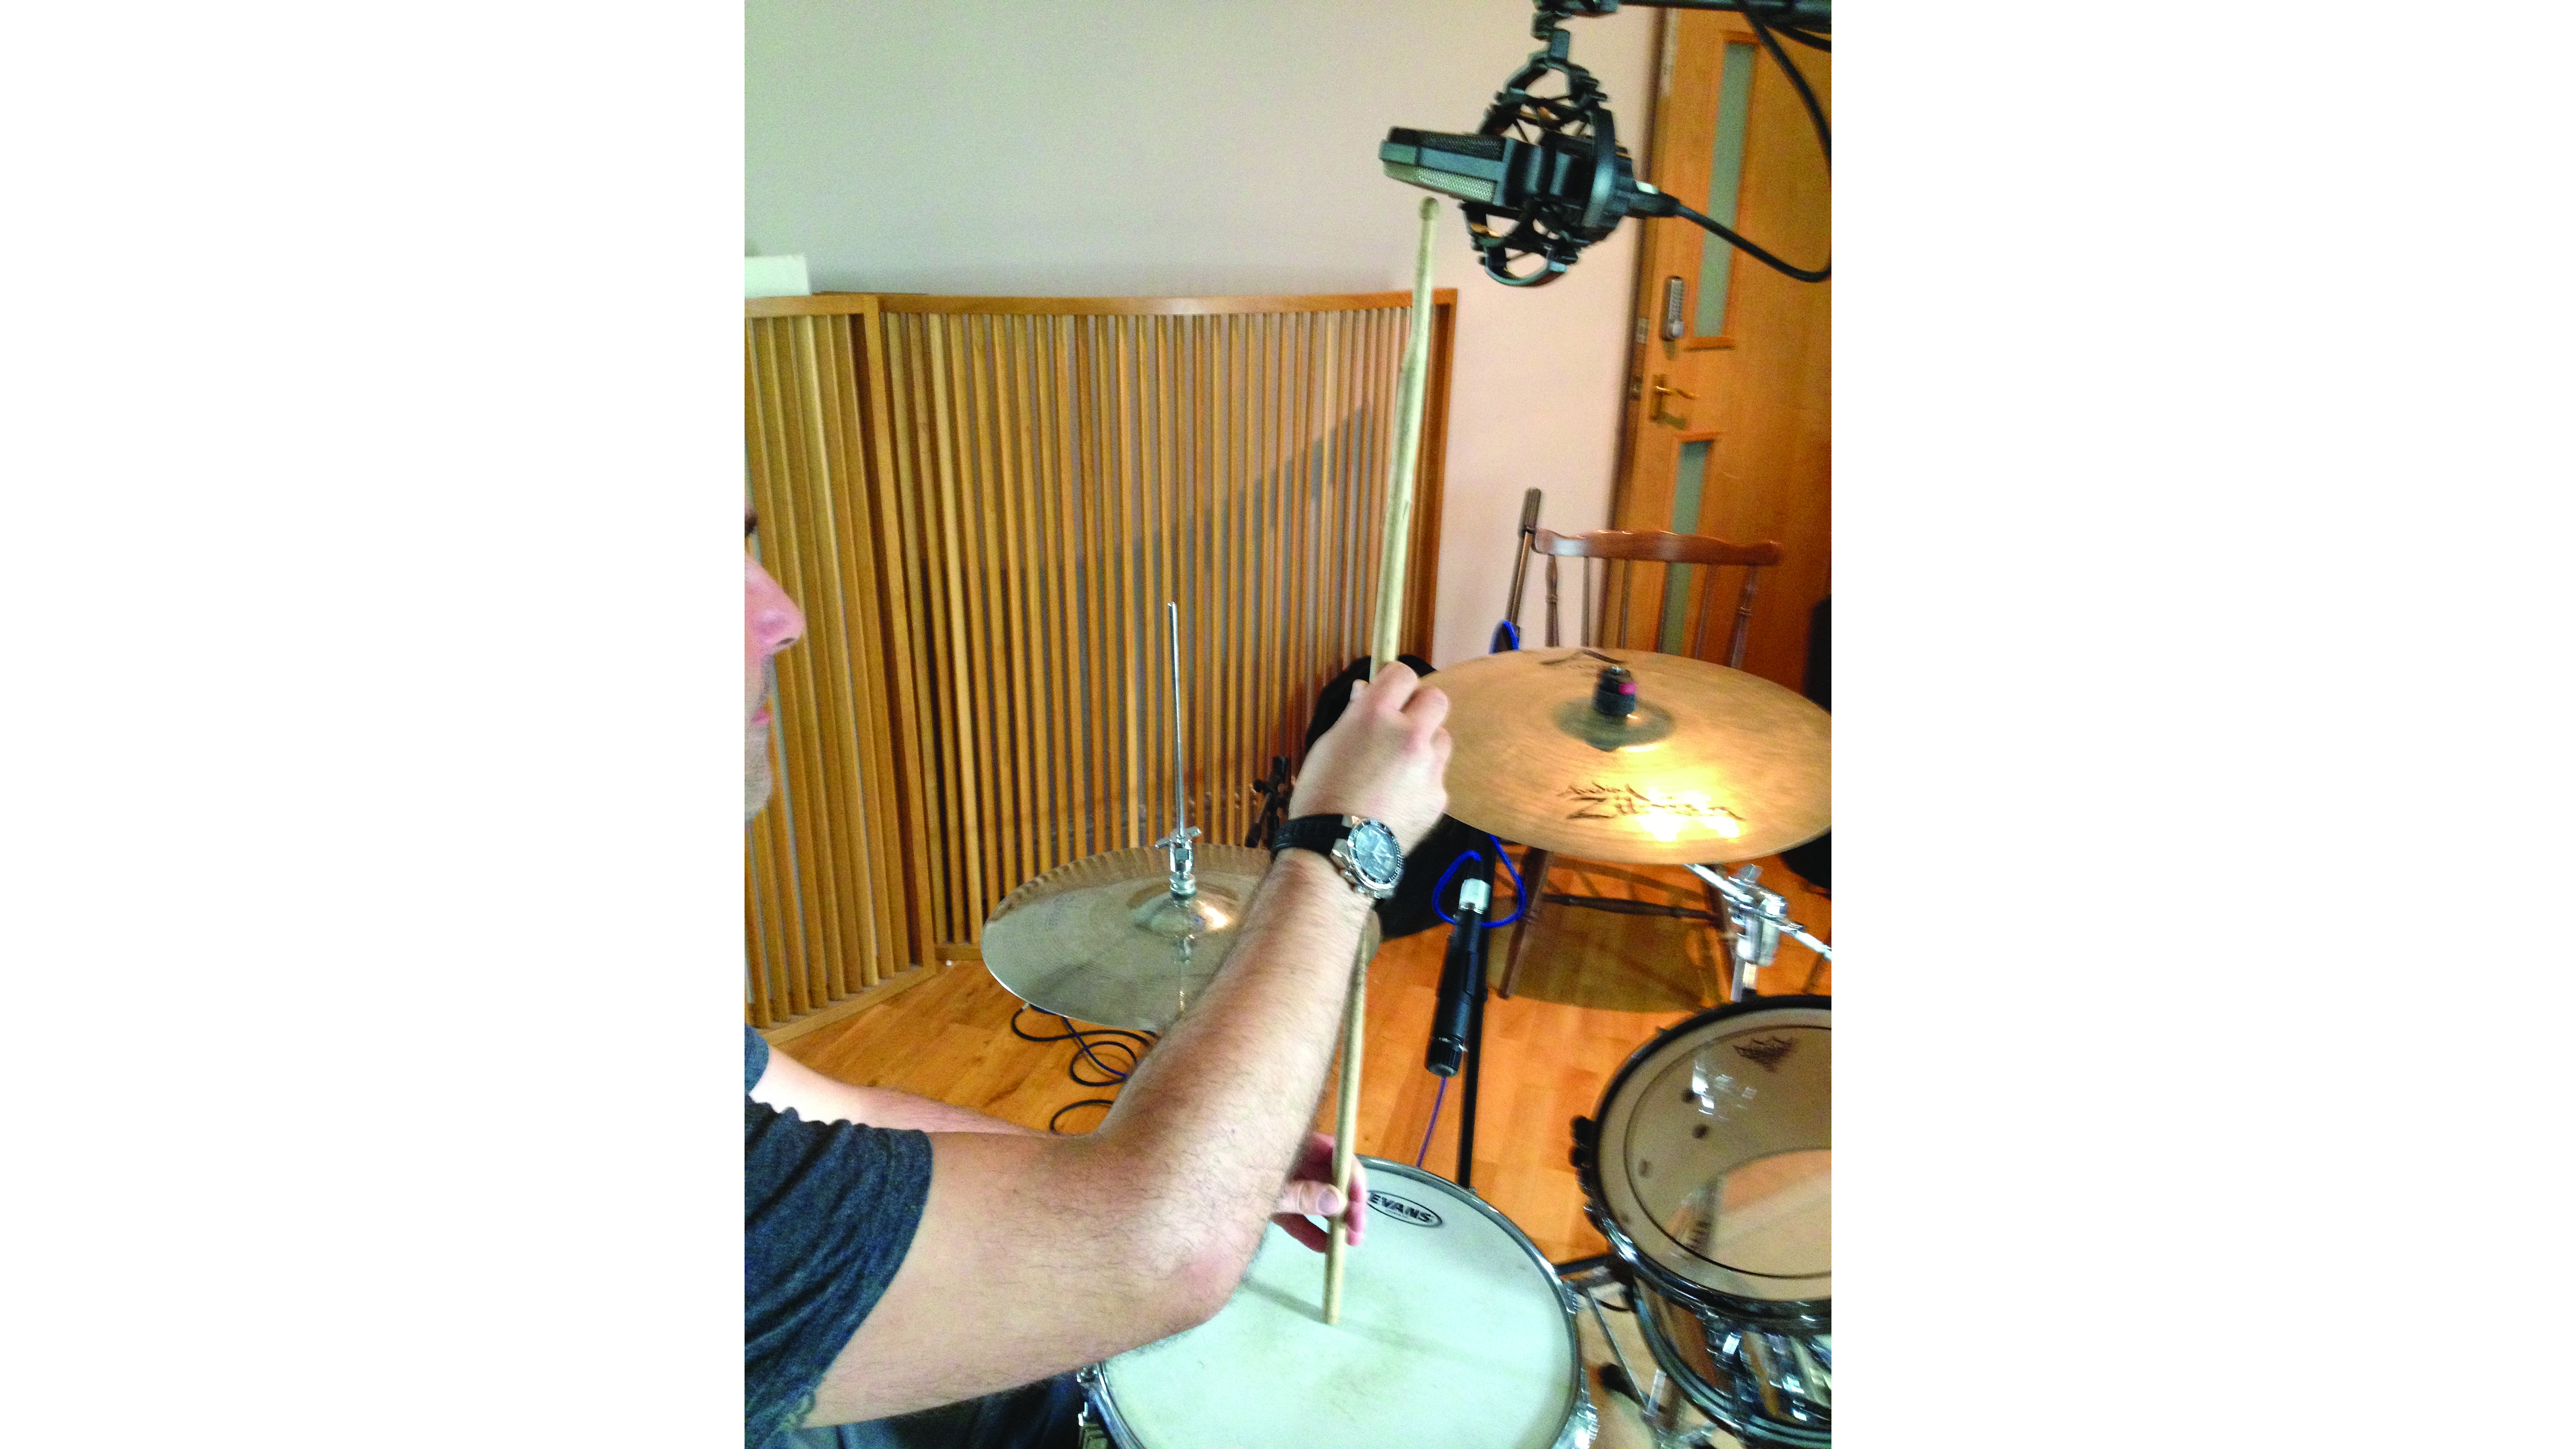
Step 1: For overhead 1, mount a large diaphragm cardioid condenser (if possible) looking down on the snare drum from a height of roughly two drumsticks. This is a starting point that can be adjusted to tweak cymbal and room spill. This technique will give a tight sound, focused on the snare – to tighten the sound further, you could set a hyper-cardioid pattern.
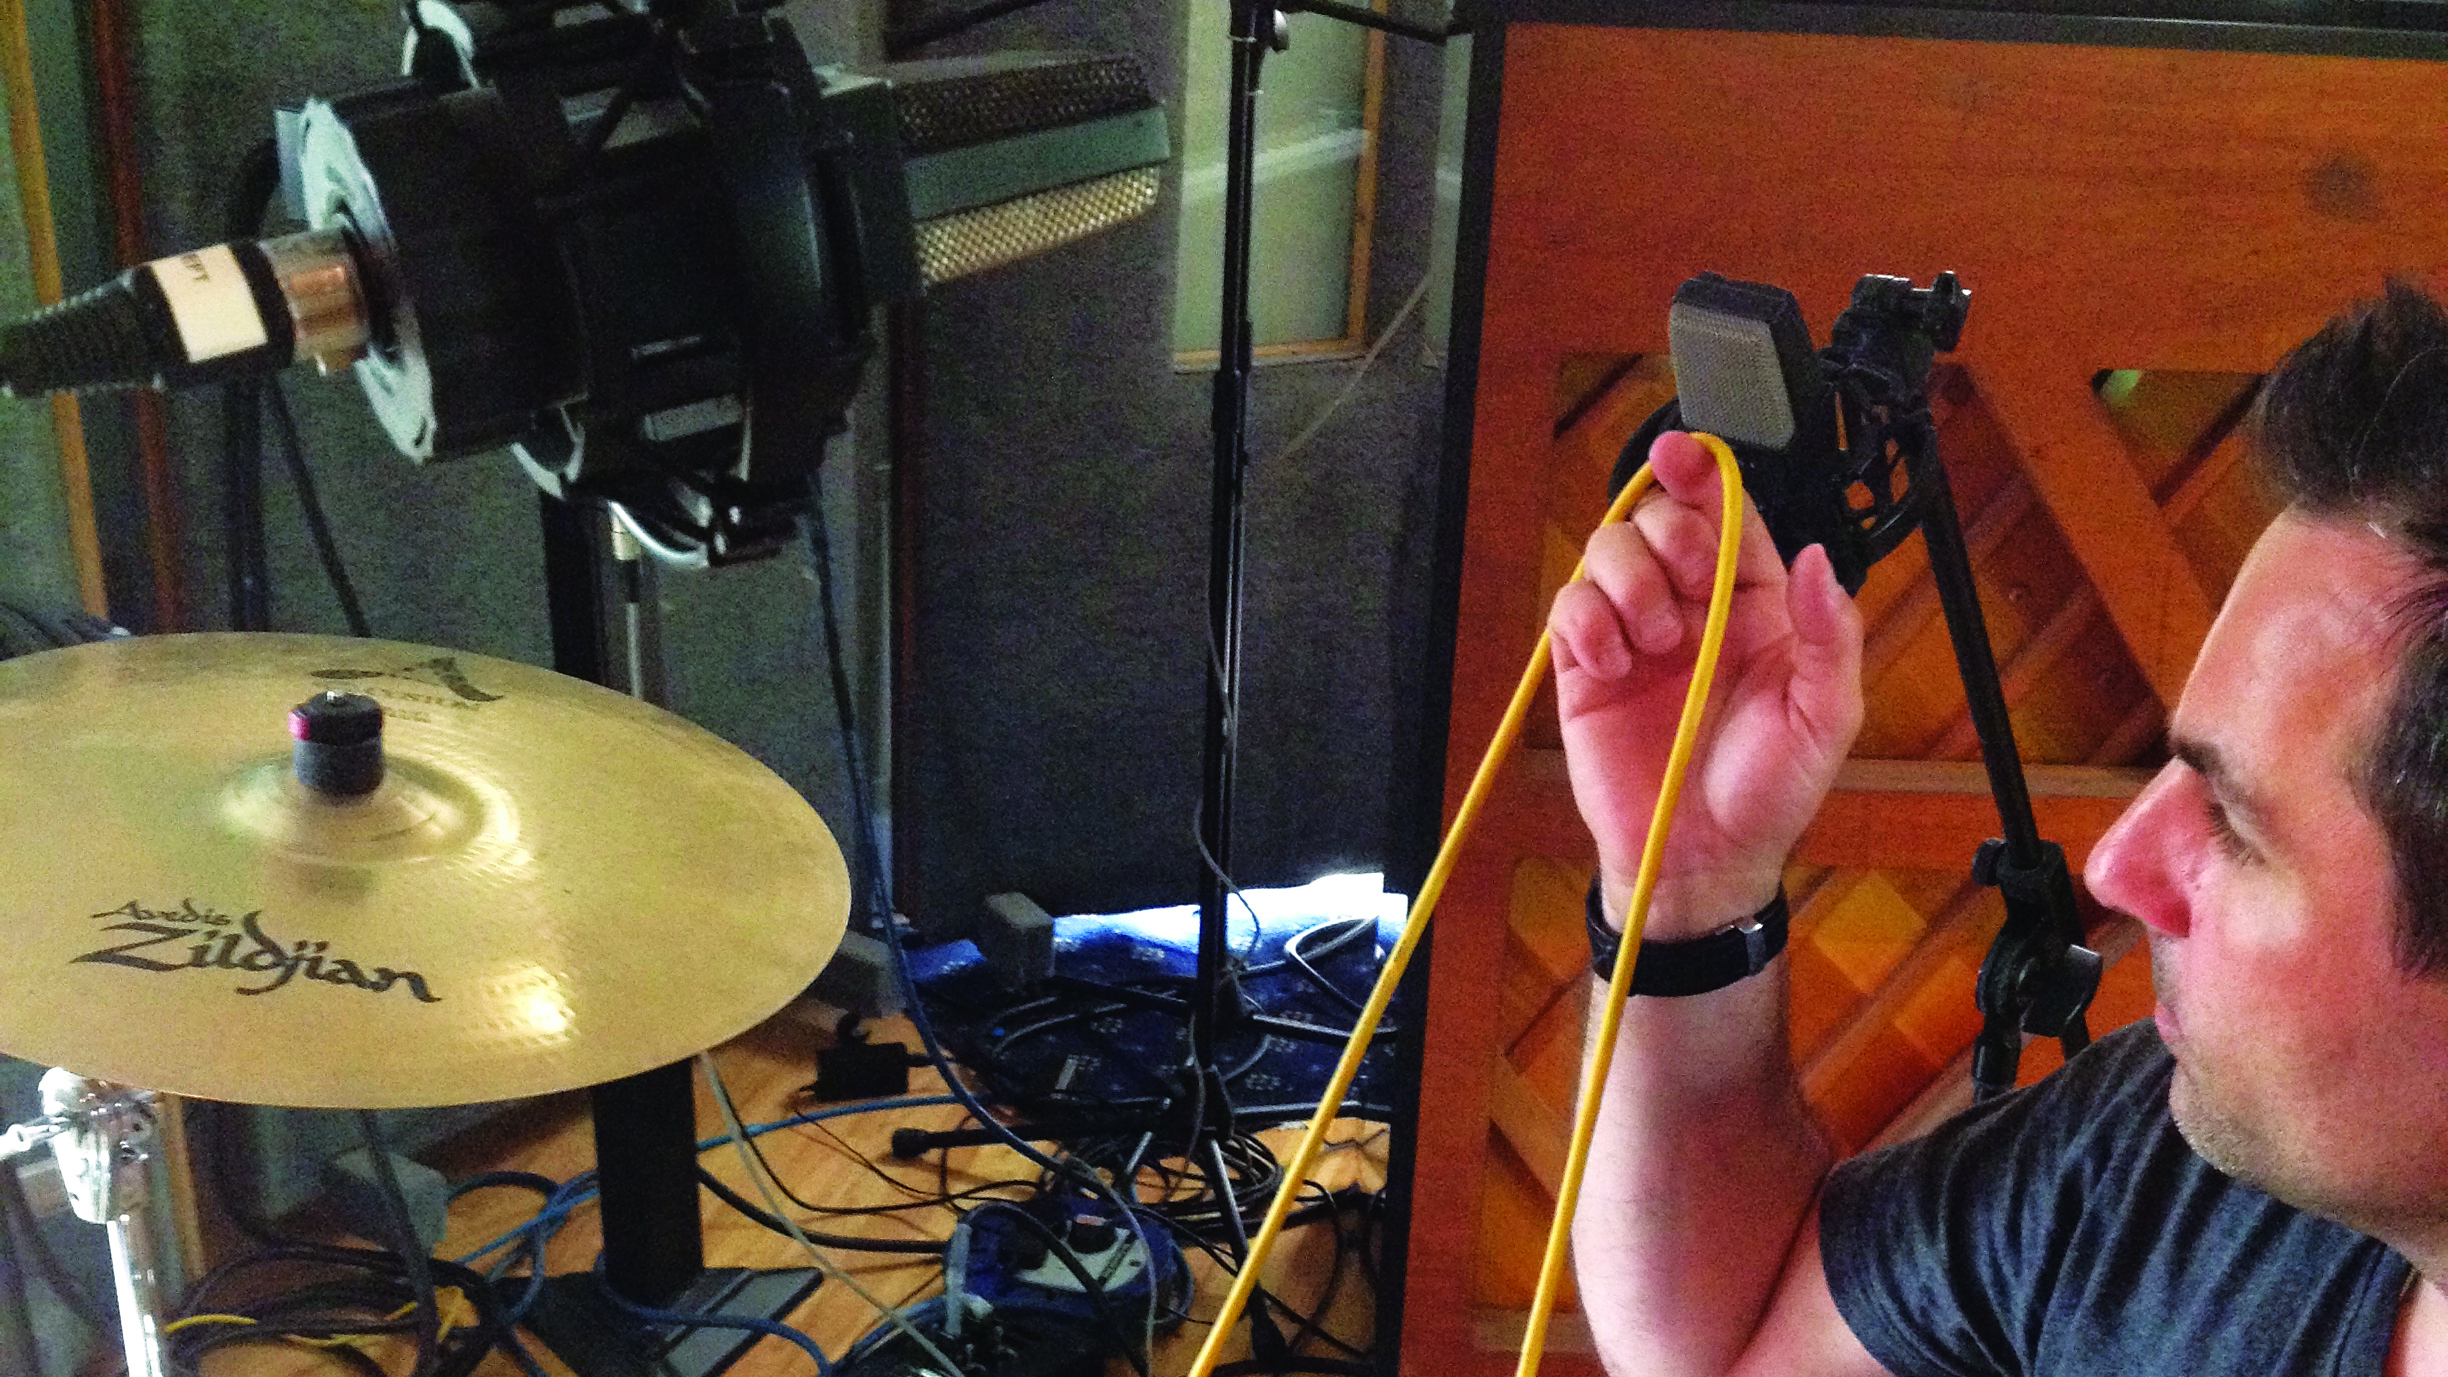
Step 2: The second condenser (OH2) looks directly at the snare over the drummer’s right shoulder. To set the distance, make a loop of string starting at the centre of the kick, going up to the top overhead mic, looping round your finger, and then down to the centre of the snare. Keep the snare end in position and bring your finger back towards the second mic.
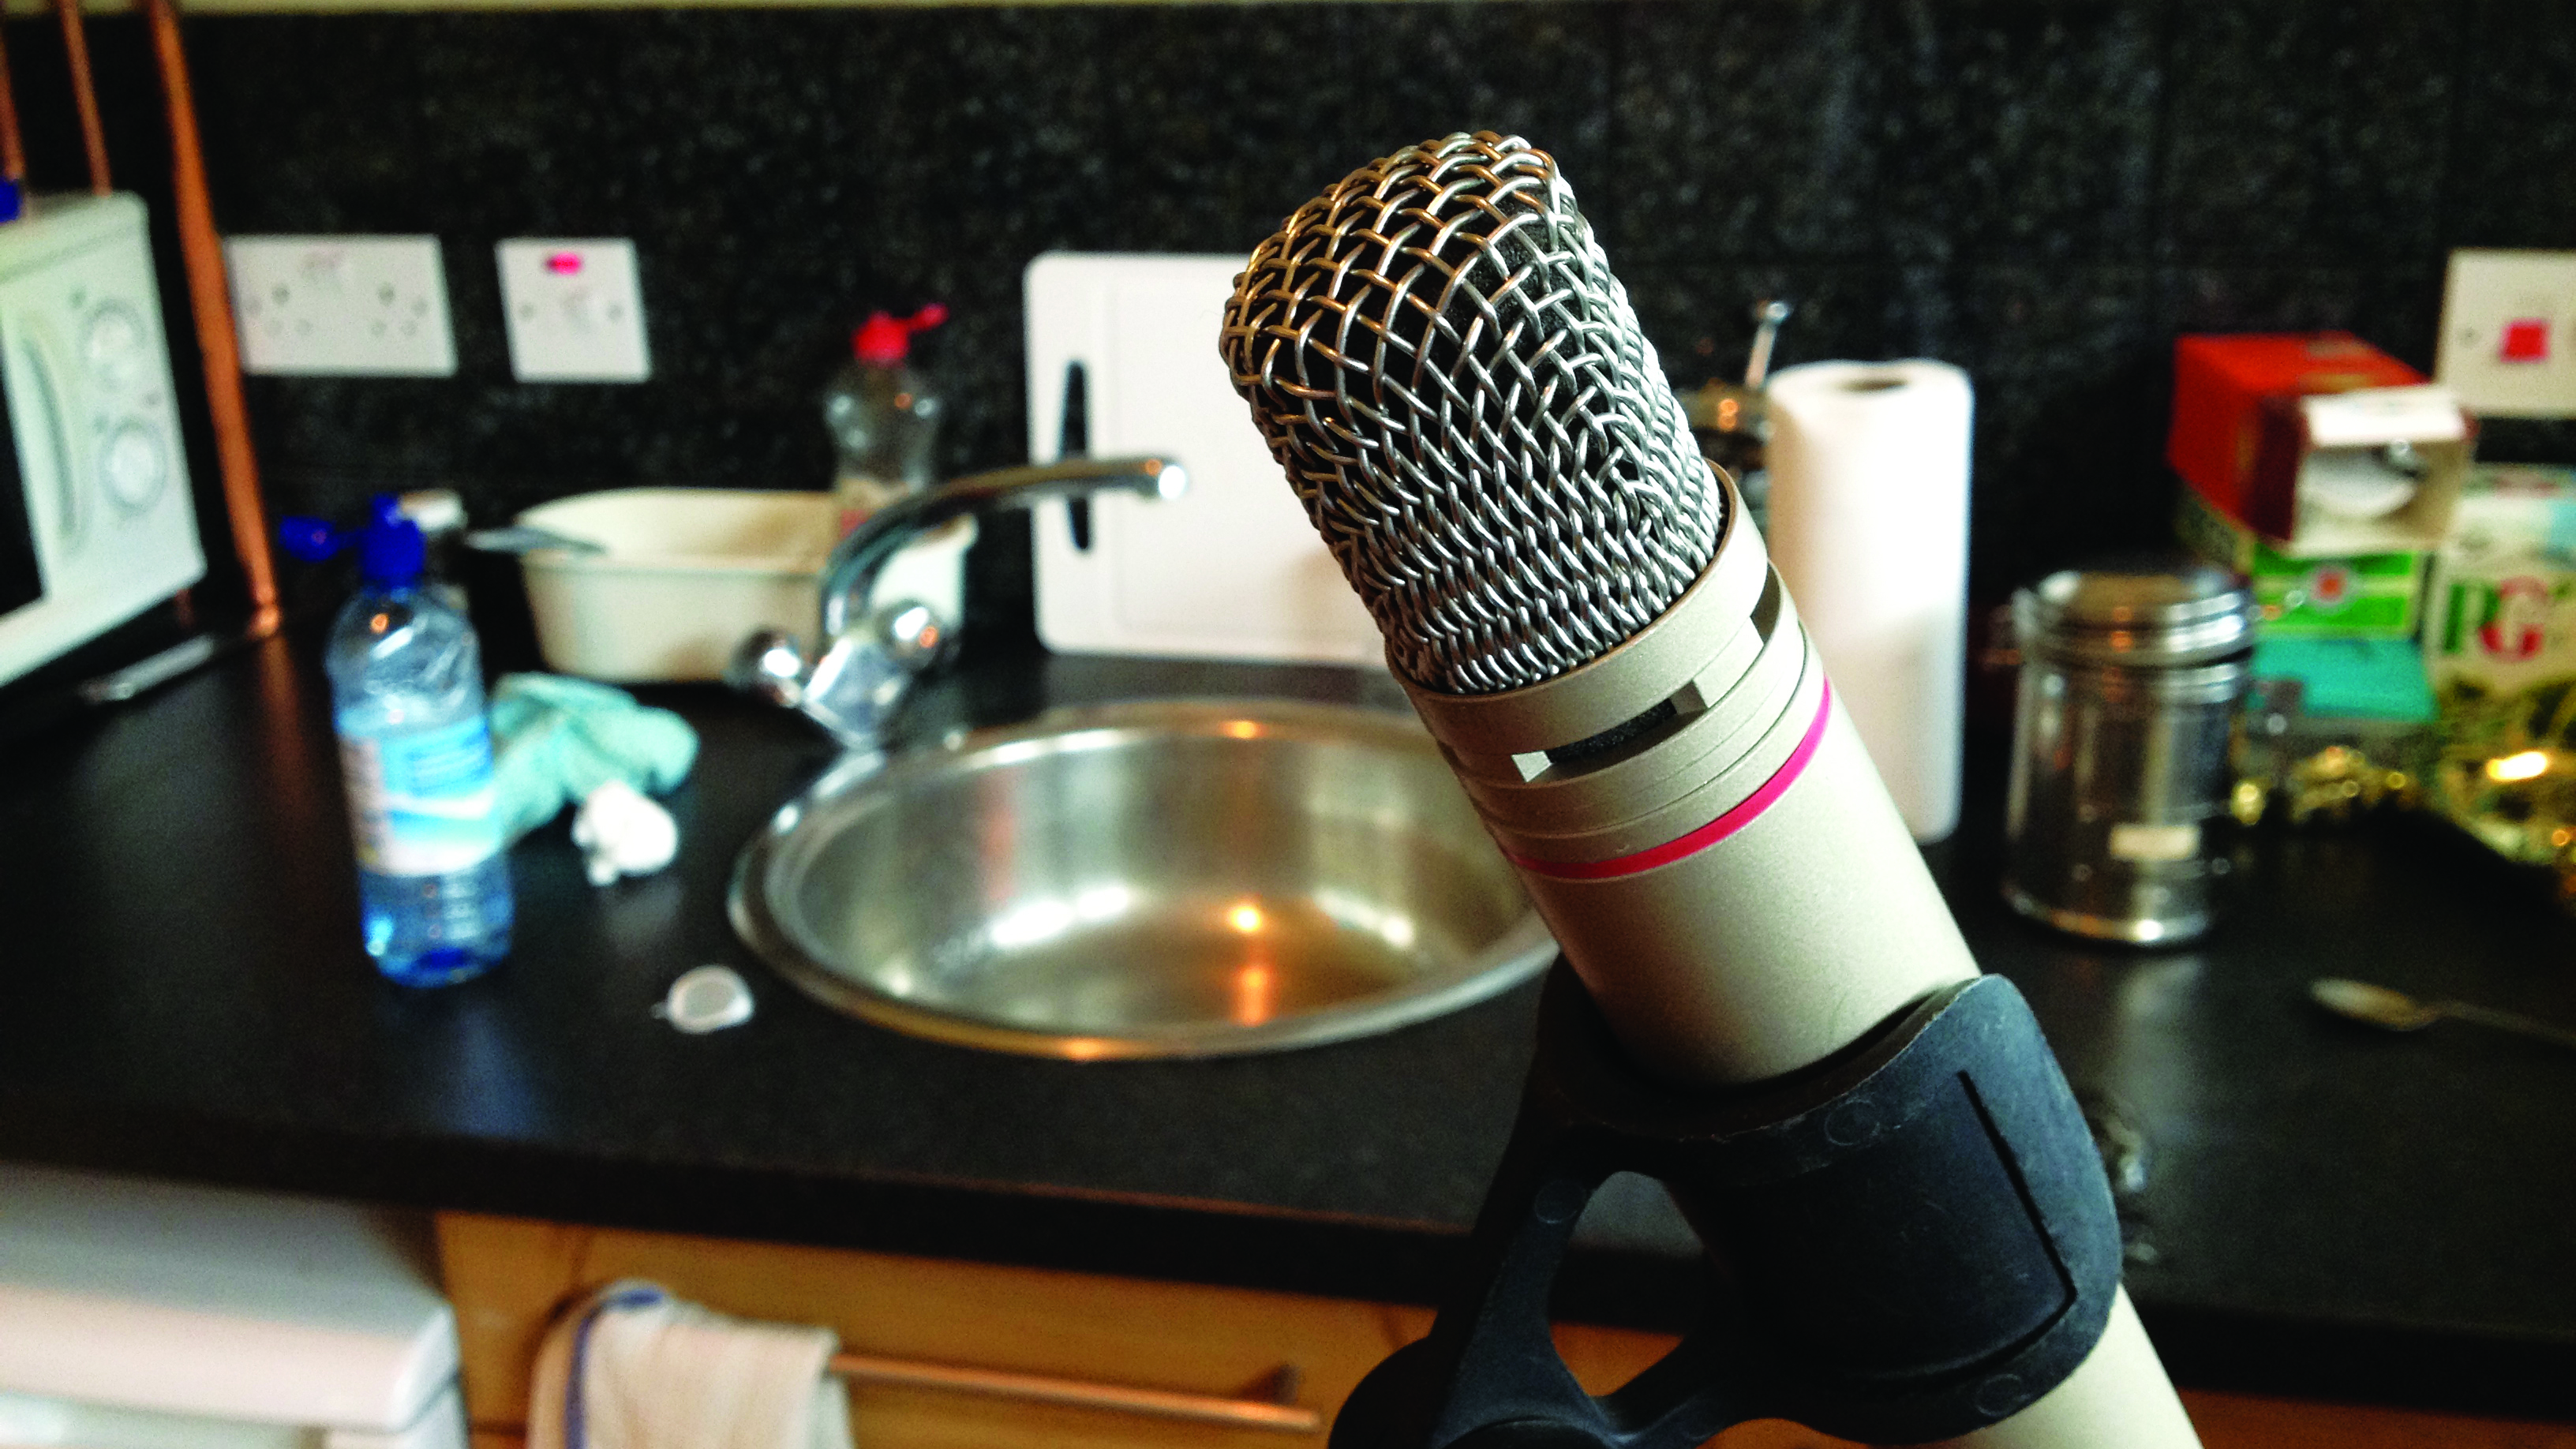
Step 3: In a dead or bad-sounding room, the ambience won’t be great, but it’s useful to set up an ambience mic some distance from the kit anyway, as we’ll see later. Even better is putting a mic up in an adjacent space that’s bright-sounding, like a bathroom, kitchen or corridor. This signal can be delayed to create the illusion of size.
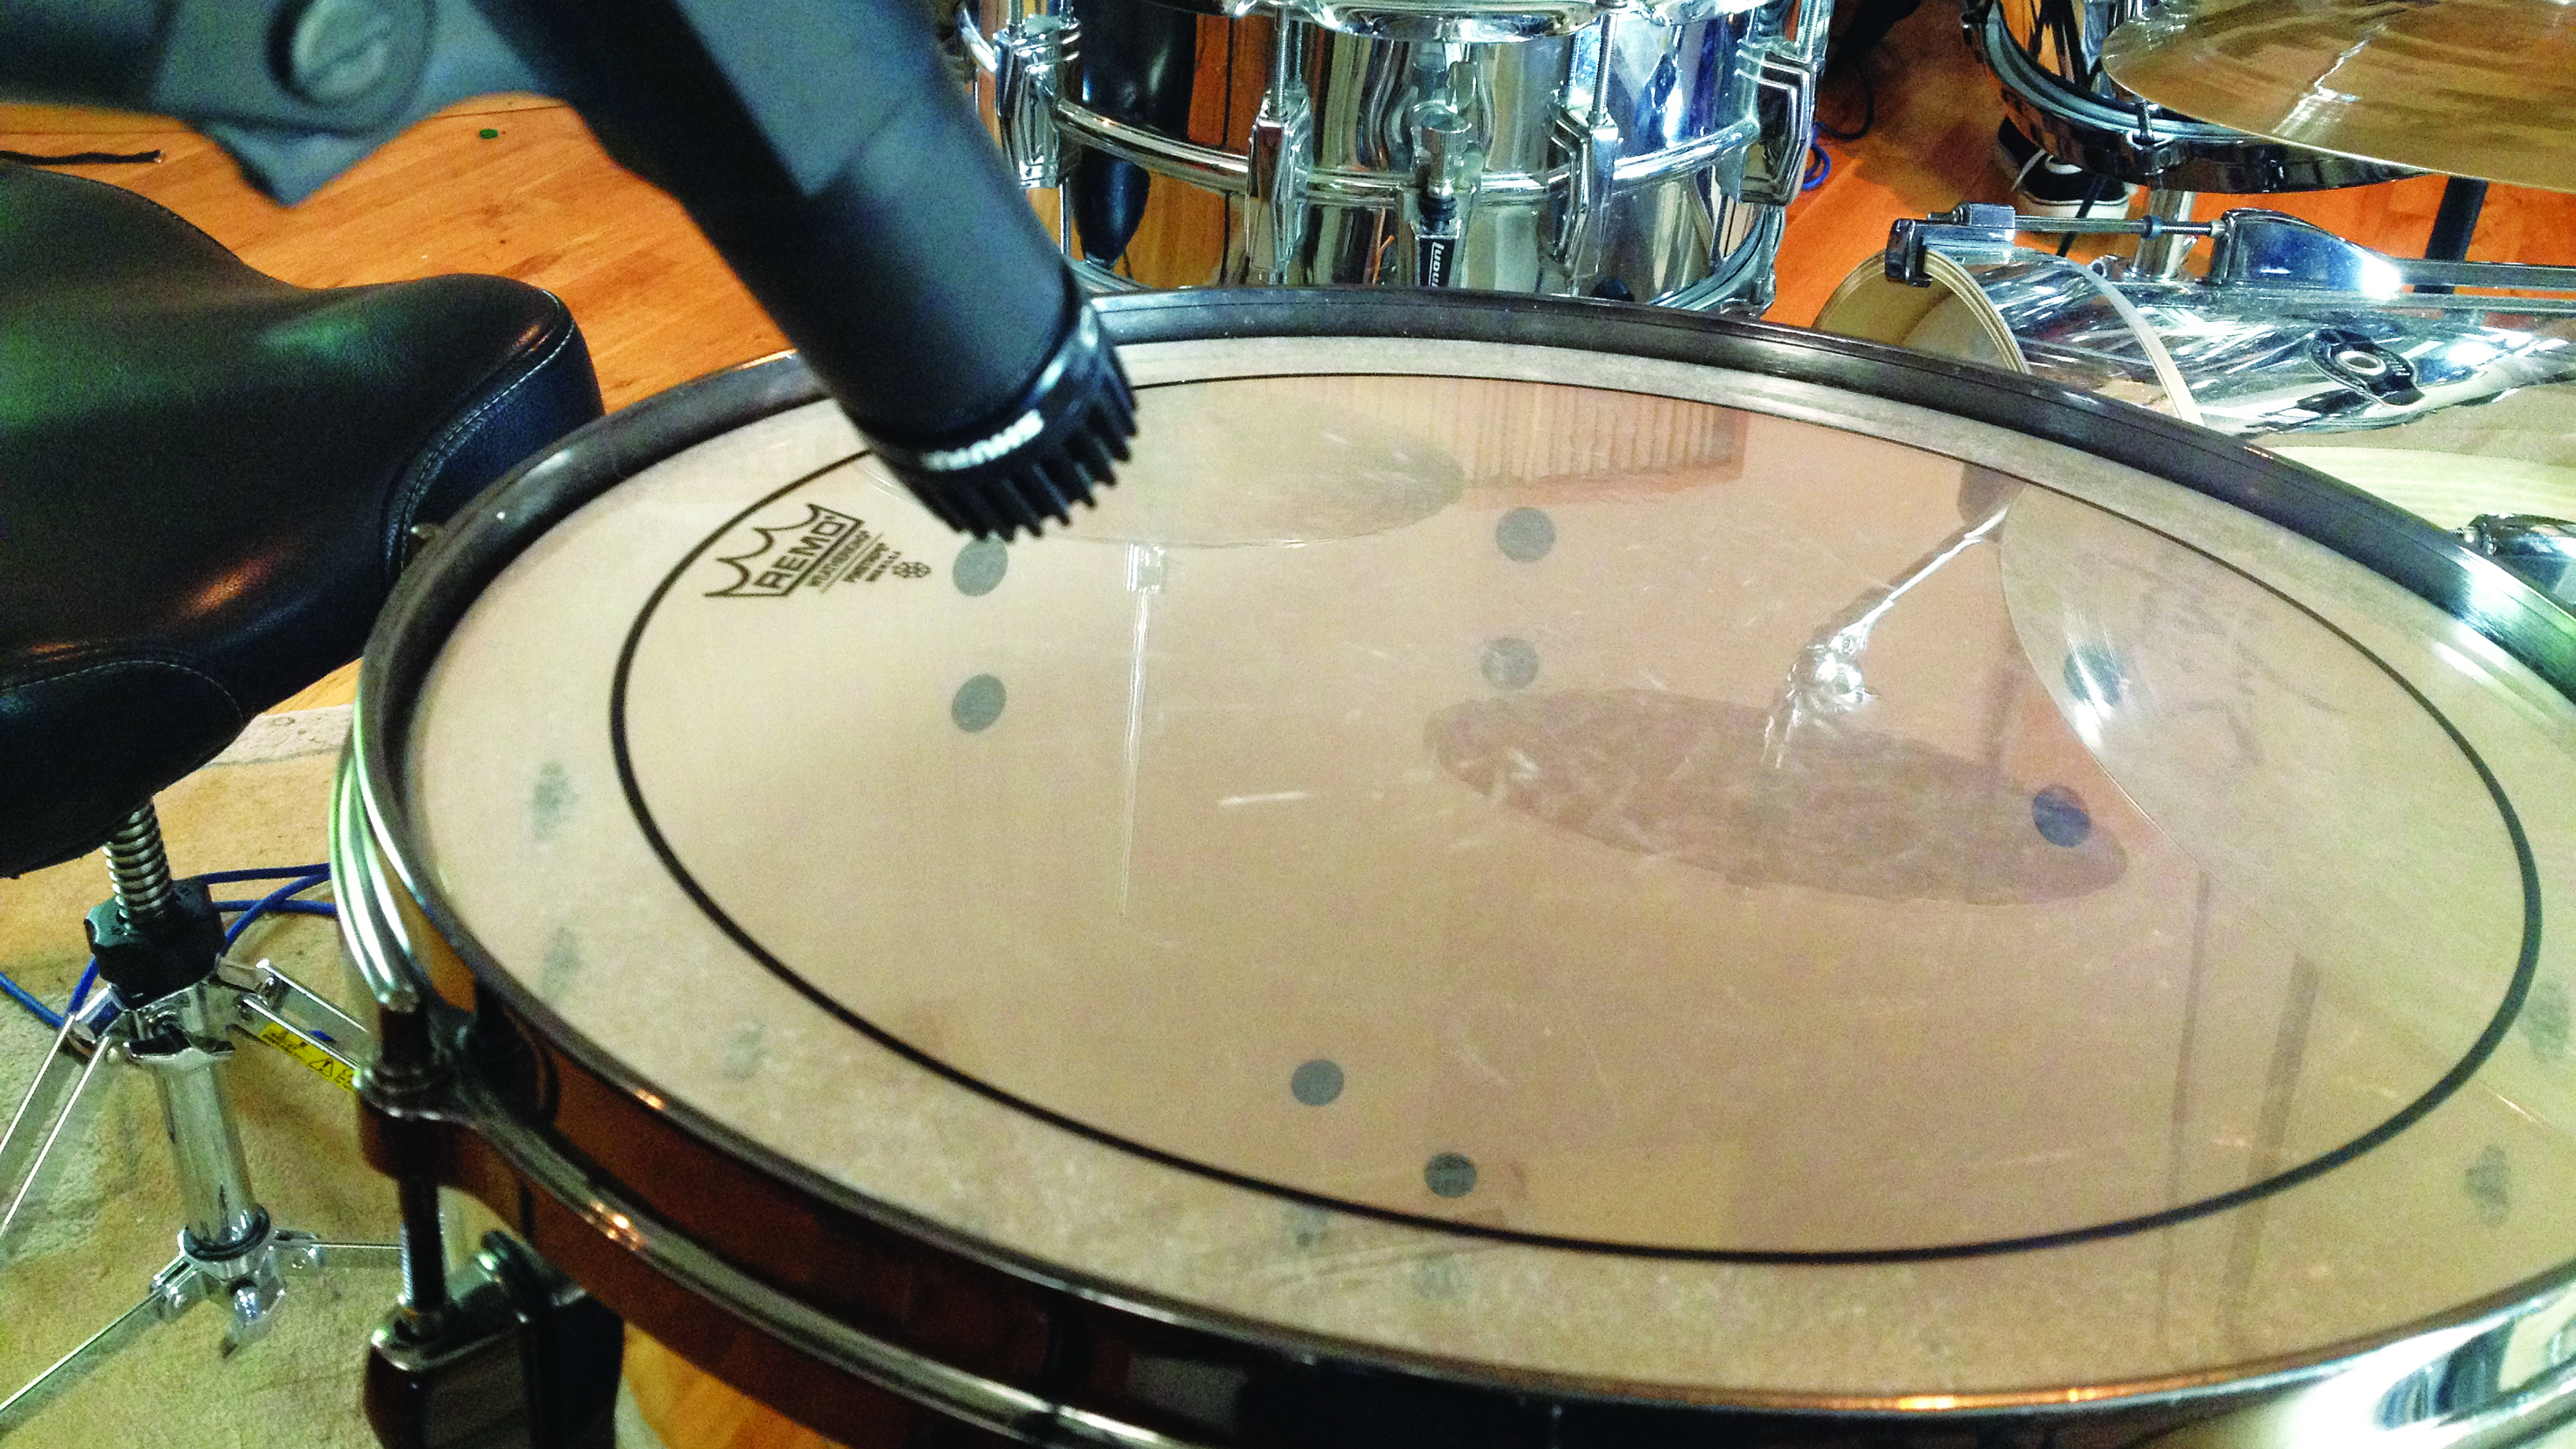
Step 4: Even though we’ll be getting most of our sound from the overheads and kick mics, it’s a good idea to put dynamic mics on the toms in the same way we did the top of the snare. If nothing else, these can be used to trigger tom samples if your tom sound isn’t that great.
Getting a great recording
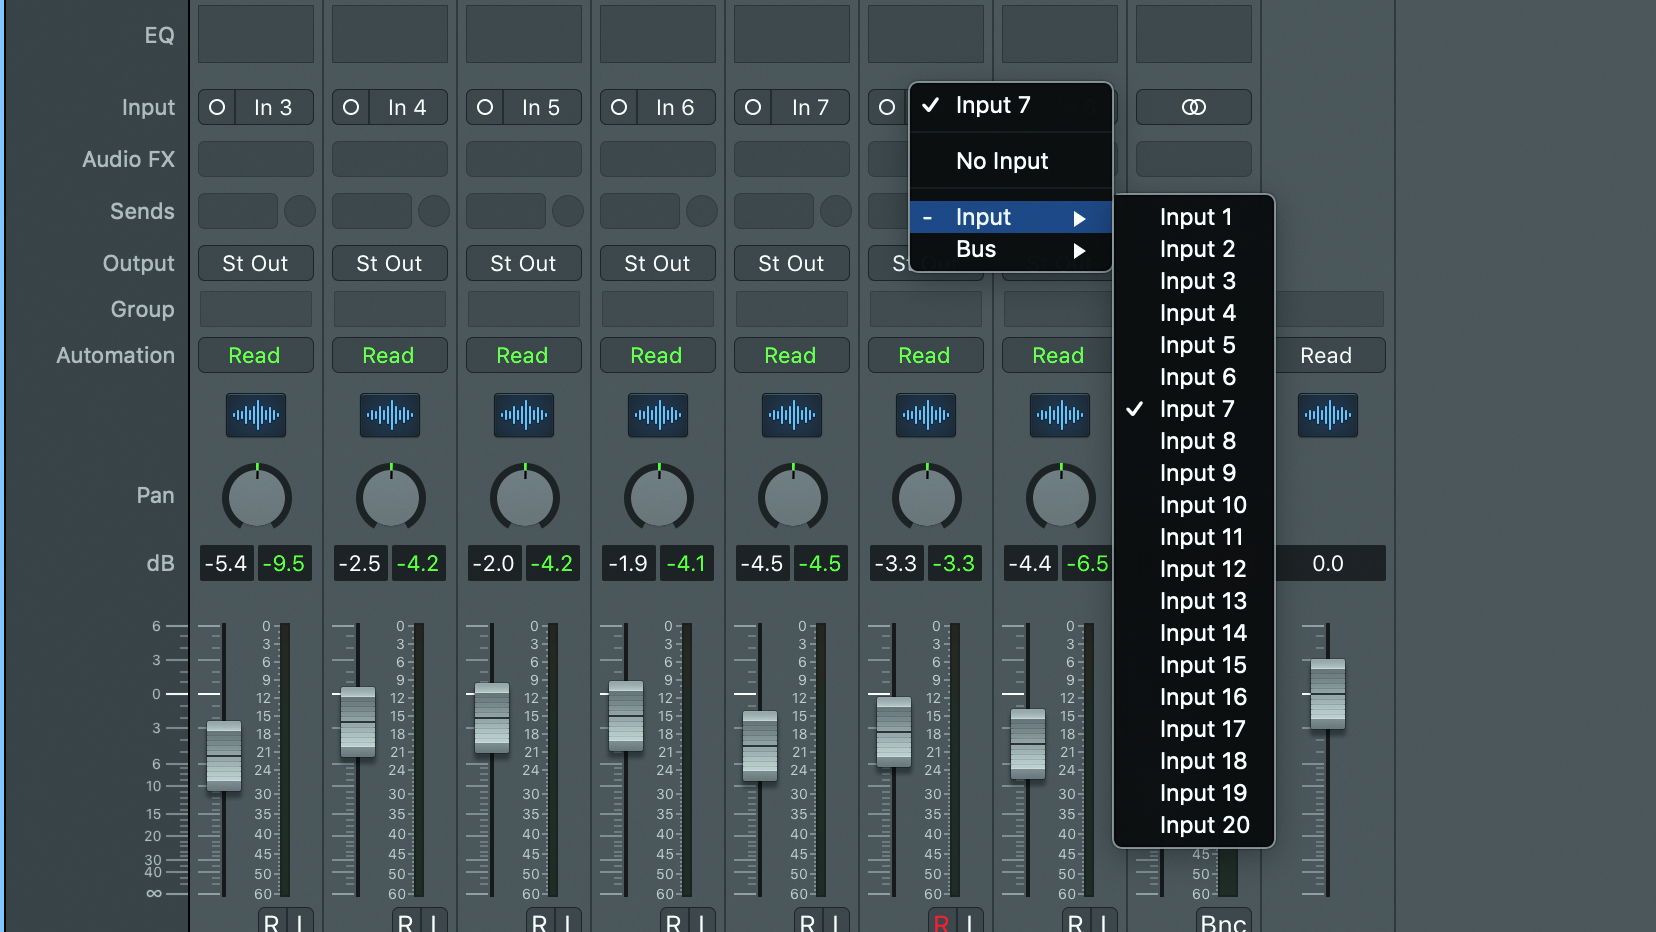
Step 1: Plug the mics into your audio interface. The overheads go to inputs 1 and 2 and will need 48v phantom power (unless you’re using ribbon mics – in which case, don’t touch that switch!). Kick in and out go to inputs 3 and 4, while snare top and bottom go to 5 and 6. The ambient mic (hopefully a condenser, so requiring phantom power) goes into 7, and the floor tom mic into 8.
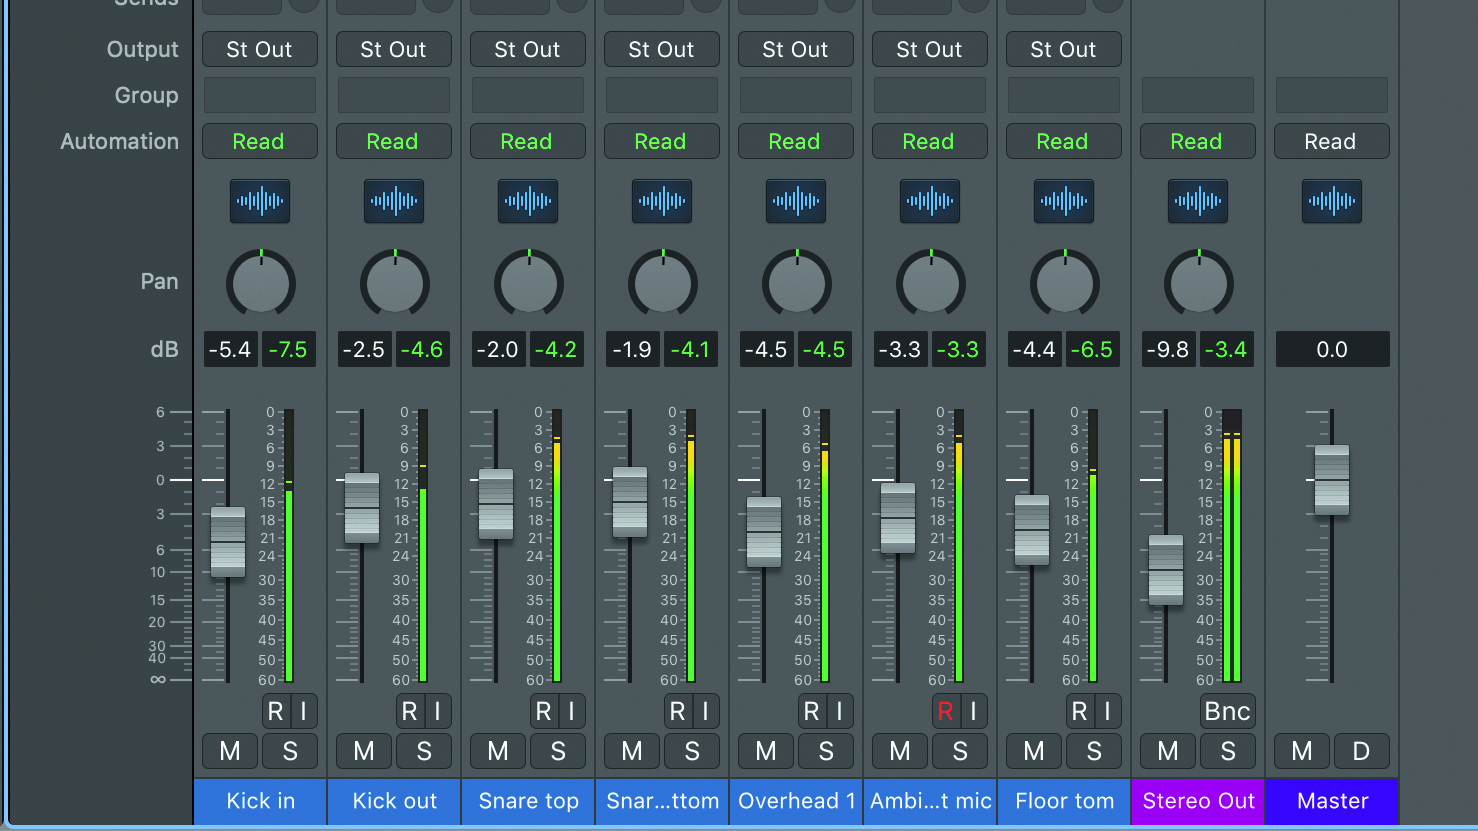
Step 2: Get the drummer to beat the hell out of the kit. They always play louder on the actual takes, so don’t worry about getting too hot a signal – having the highest peaks spike at around -5dB is a good target. There’s something to be gained from clipping, but not on the way into the interface – keep it clean.
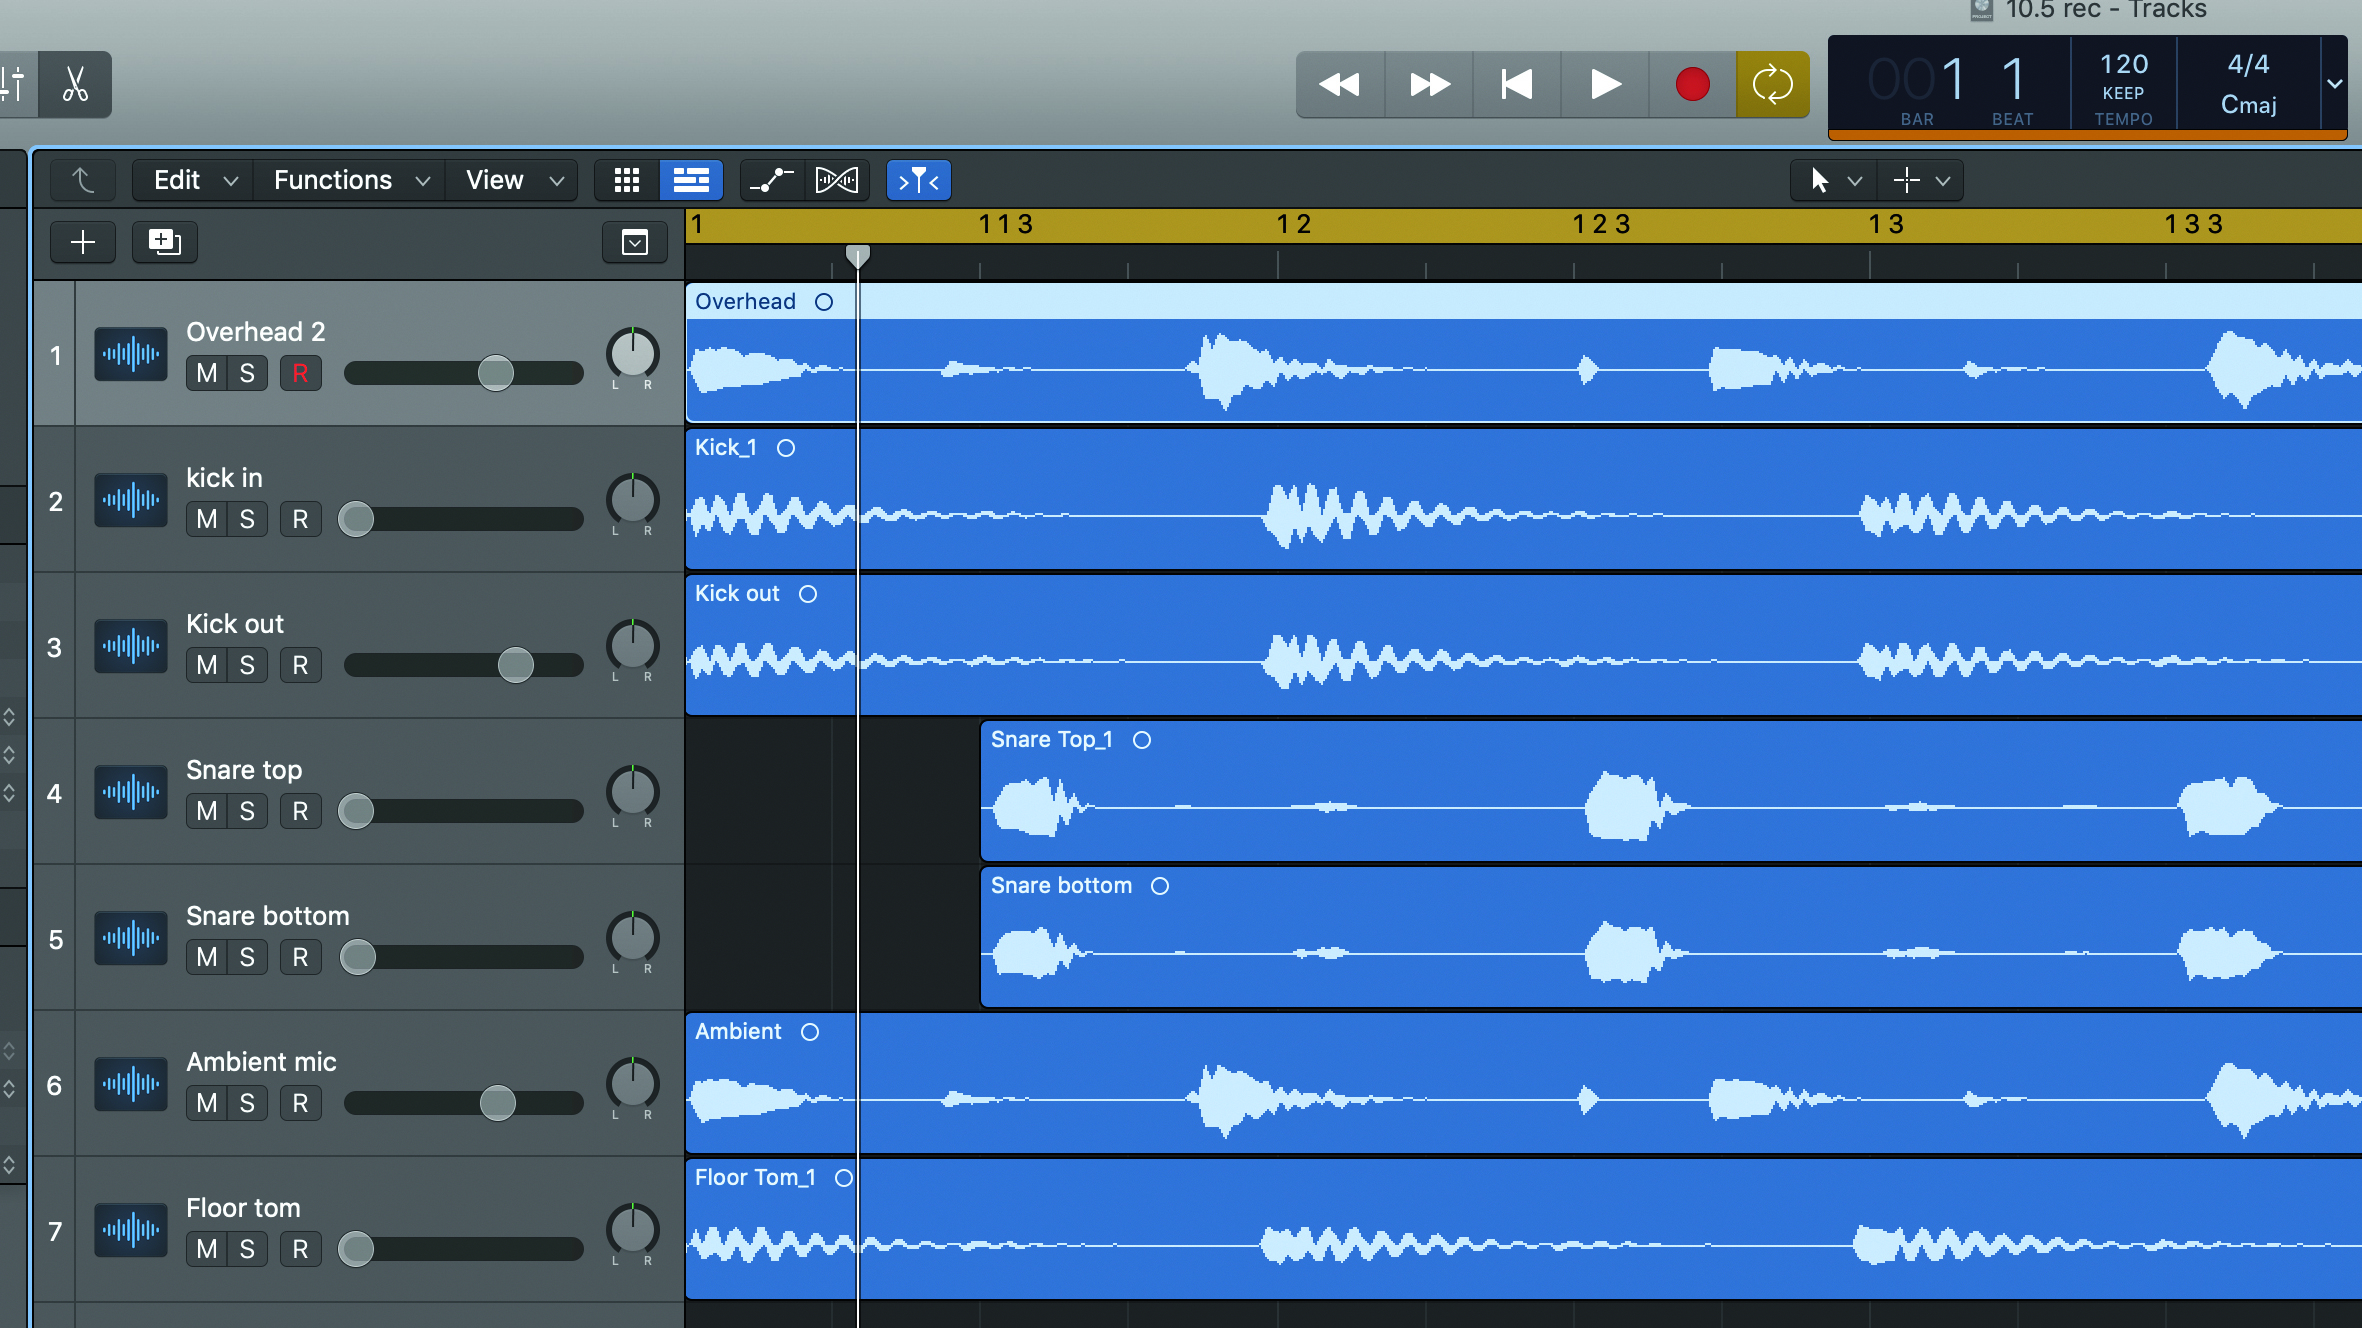
Step 3: Once your levels are sorted, it’s a good idea to run a test take to check for silly mistakes and any uninvited hum, hiss, clicks or crackles. You can also use the test recording to check the phase of the mics and ensure a fully fat sound on playback. Even though the theory of phase is complex, the practice is easy…
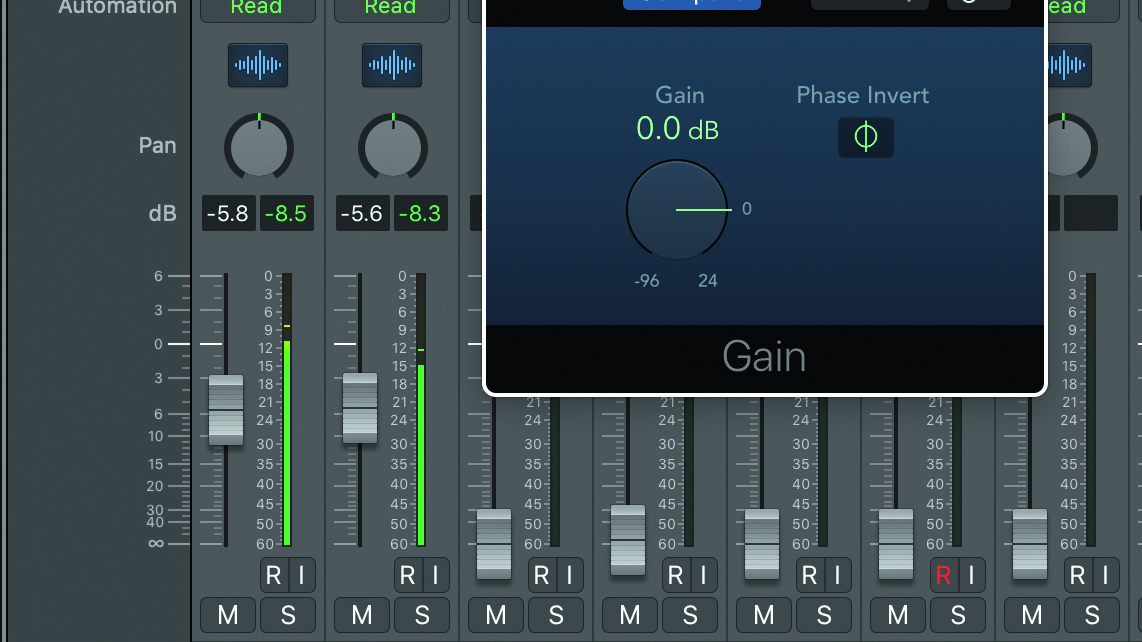
Step 4: Insert a trim or gain plugin into each of your eight drum channels. Bring up the first kick mic, followed by the second. When the two are balanced, try inverting the phase on the second kick channel (the left/right Phase Invert icons). Leave the button set where the sound is best.
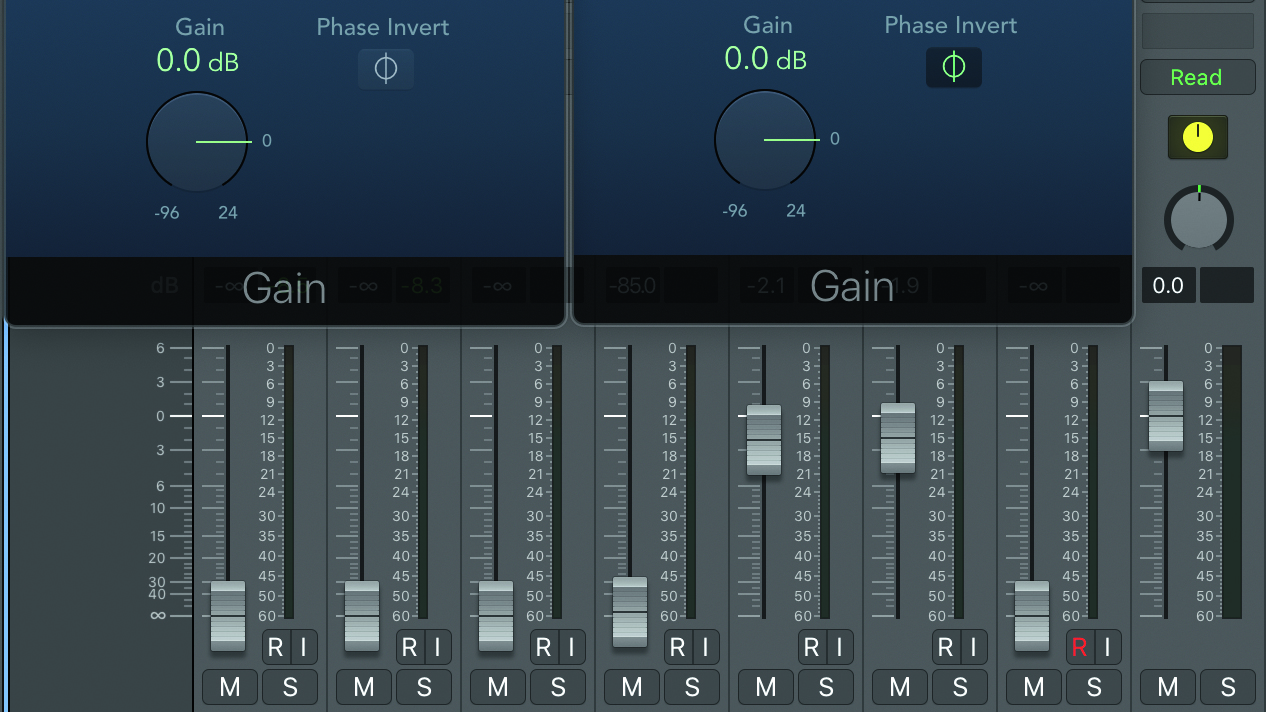
Step 5: Now turn down the kicks and bring up the overheads, panned centre. Try inverting the phase of one of them. If the overheads sound fatter with just one channel phase inverted, leave it like that. Bring the kicks back in and blend them with the overheads. Change the phase on both the overheads now, and leave them set at wherever the kick sounds fattest.
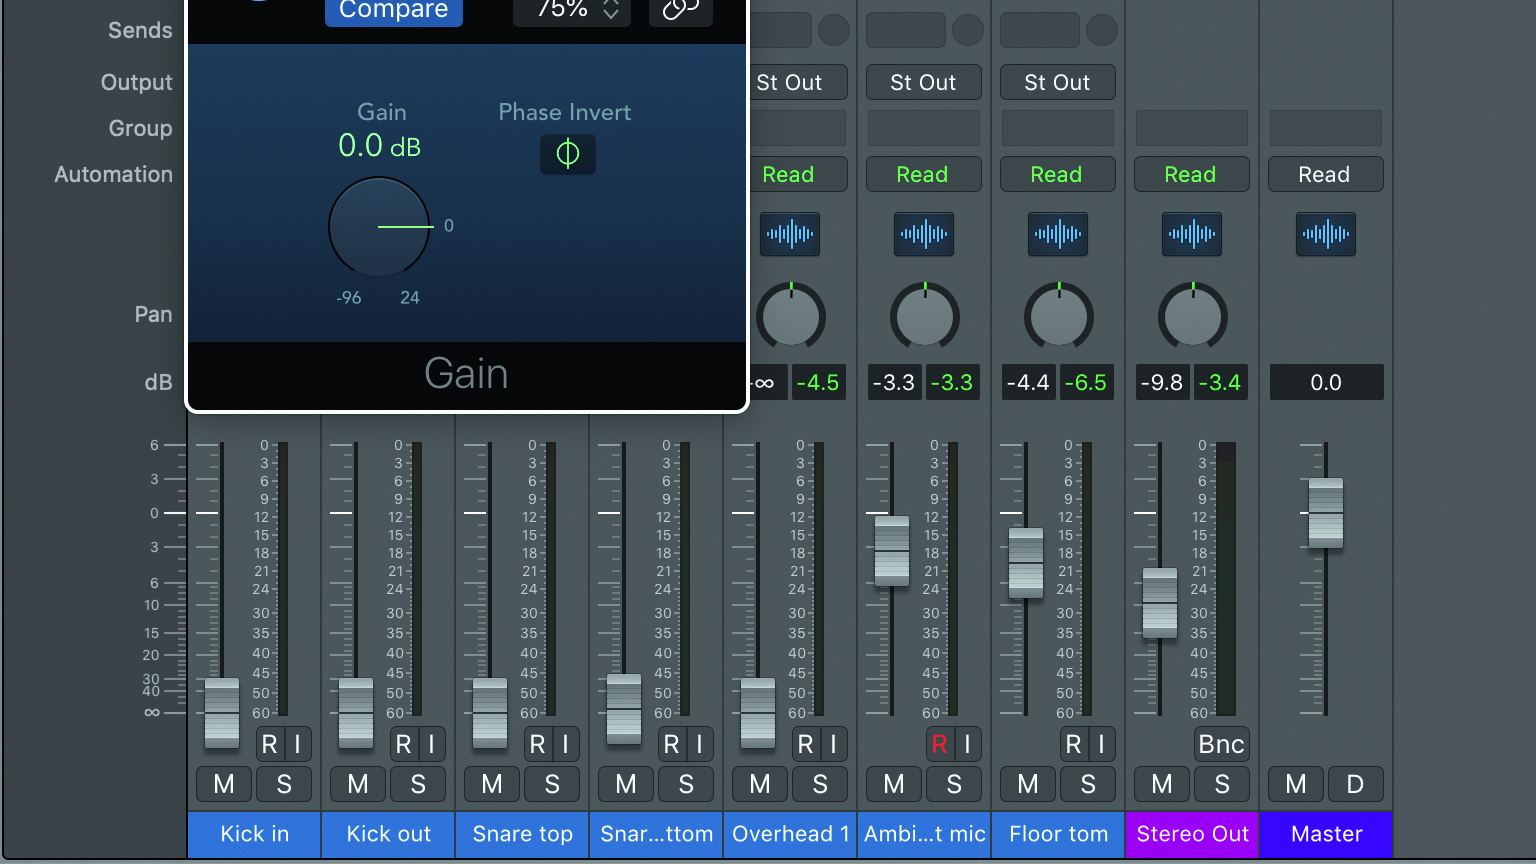
Step 6: Balance in the top snare mic and switch the phase to whichever setting sounds fattest with the kick and overheads. Bring up the bottom snare mic and set the phase to the opposite of whatever the top is set to. Repeat this process with the floor tom and ambient mics. This is quick ’n’ dirty, but now you’re ready to record.
Quiet studio, please
You should now be ready to press the record button, safe in the knowledge that you have the sound of the drums completely nailed. Of course, there’s a whole bunch of stuff to do post recording to turn the raw drum takes into a mixed kit, but we’ll cover that in future features. First, though, we have to make sure we record everything we need.
There’s nothing worse than putting up your drum recordings, long after the drummer has packed up and left, only to find that the bottom snare mic hasn’t recorded or that your middle section has click track from the headphones spilling all over it. That’s why a test take is important; here are a few tips on how to get the most out of the session.
Setting up a rough live mix
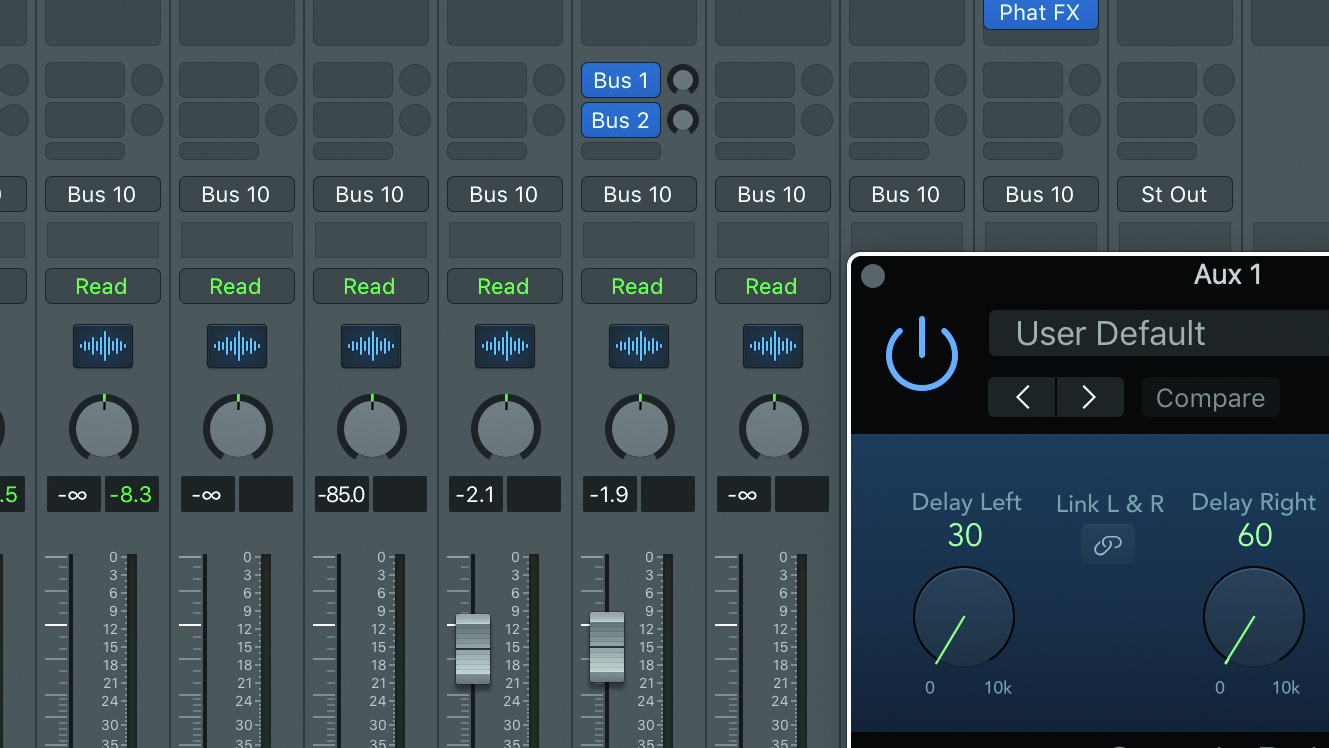
Step 1: Although you won’t create your final drum sound until the mixdown, you’ll need to get your mix half-decent for recording. Here’s some CPU-friendly advice to help you get it right. Create two auxiliary sends and returns from the ambience track. Insert a delay plugin over the first return and set the L and R Delay times to 30ms and 60ms.
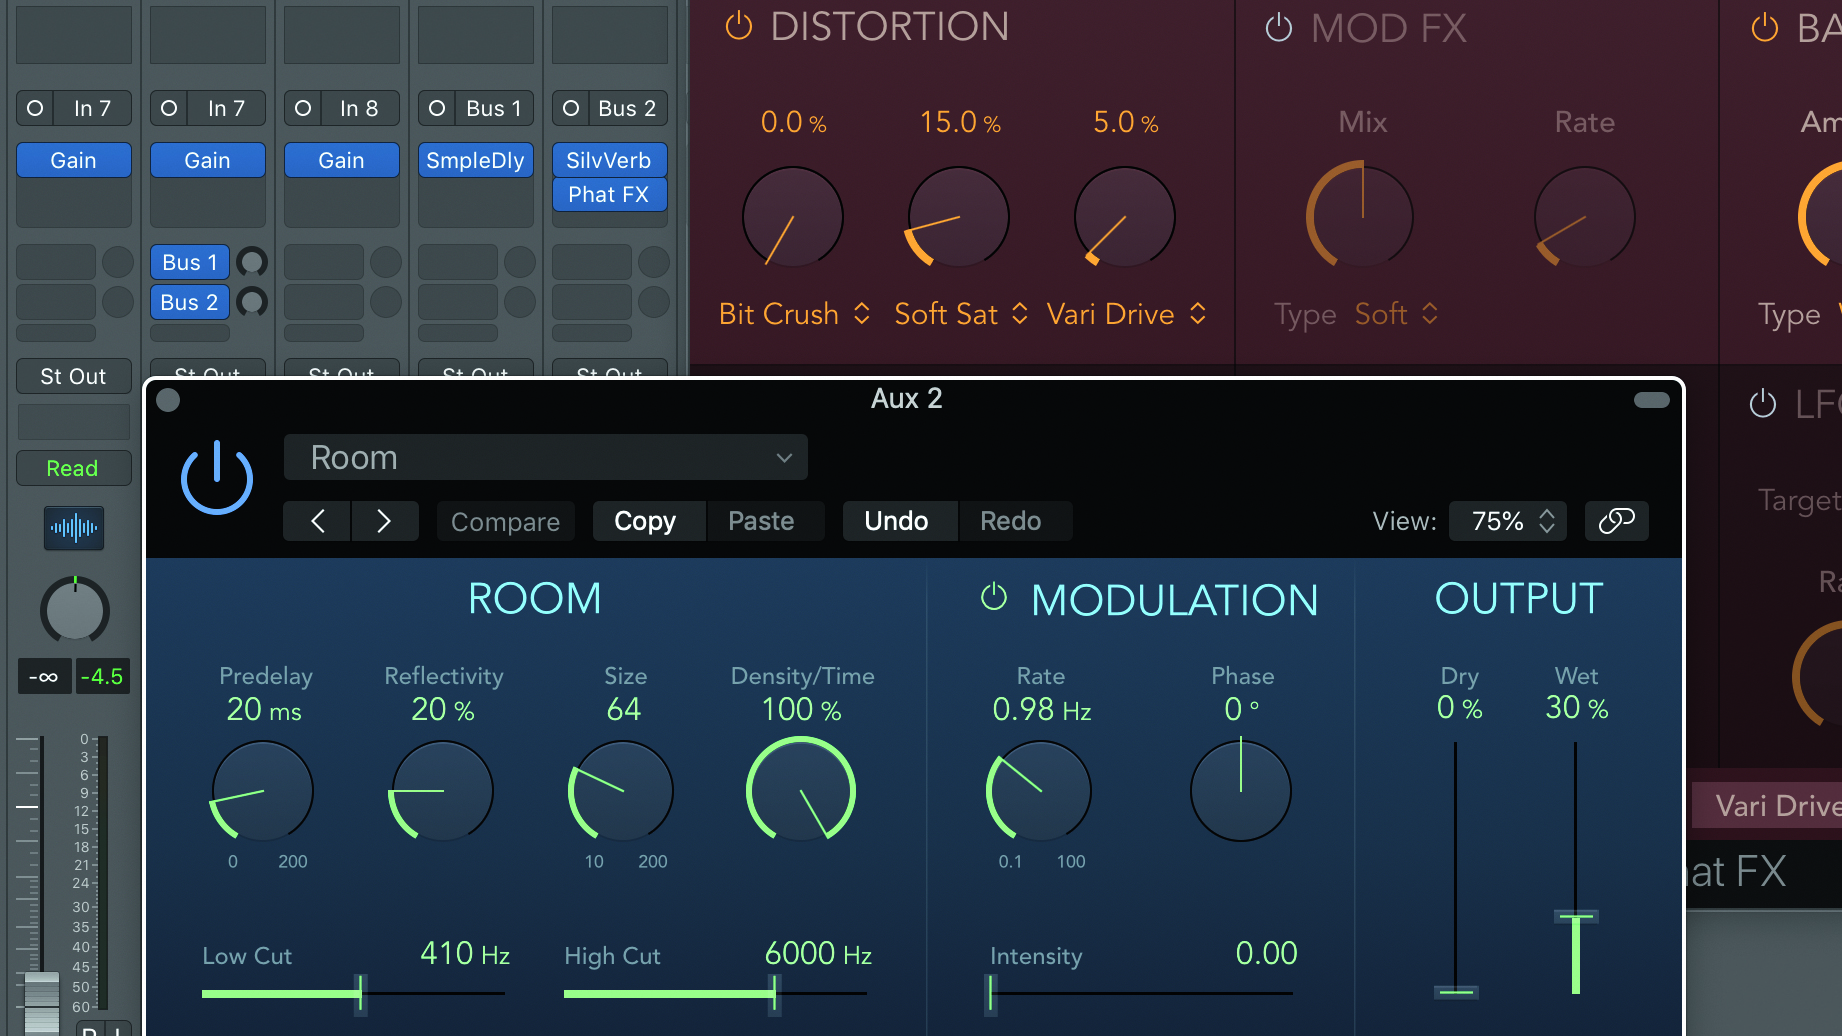
Step 2: Next, insert a room reverb over the second aux return set to around 0.6s Decay time. Compress this and add a harmonic distortion (we’ve used the Phatr FX again). This artificial space will help the kit sound more ‘finished’ while you’re tracking – and a more exciting sound will make your drummer play better.
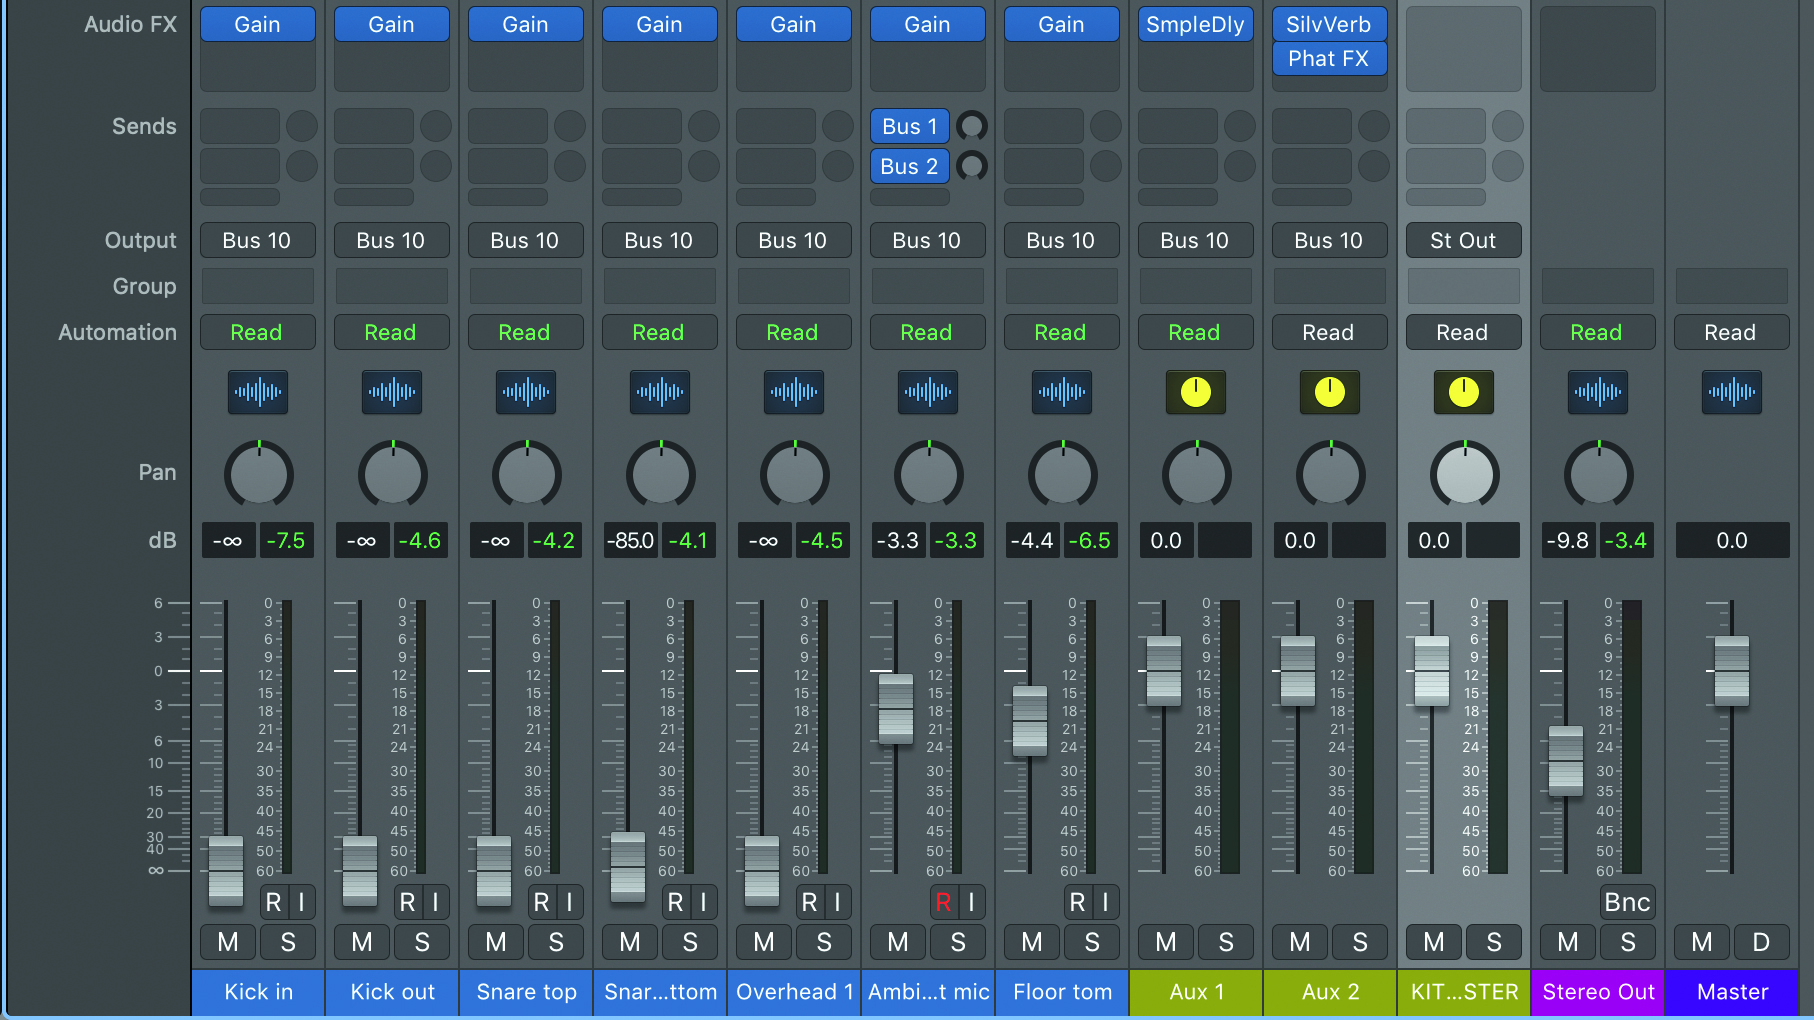
Step 3: Take your individual drum channels and the two new aux returns and set their outputs to a new bus. Create a new aux return for this bus and call it ‘Kit master’. This is your main drum channel. Now create two or three more busses and returns for the rest of your recorded track stems (guitars, bass, vocals, etc).
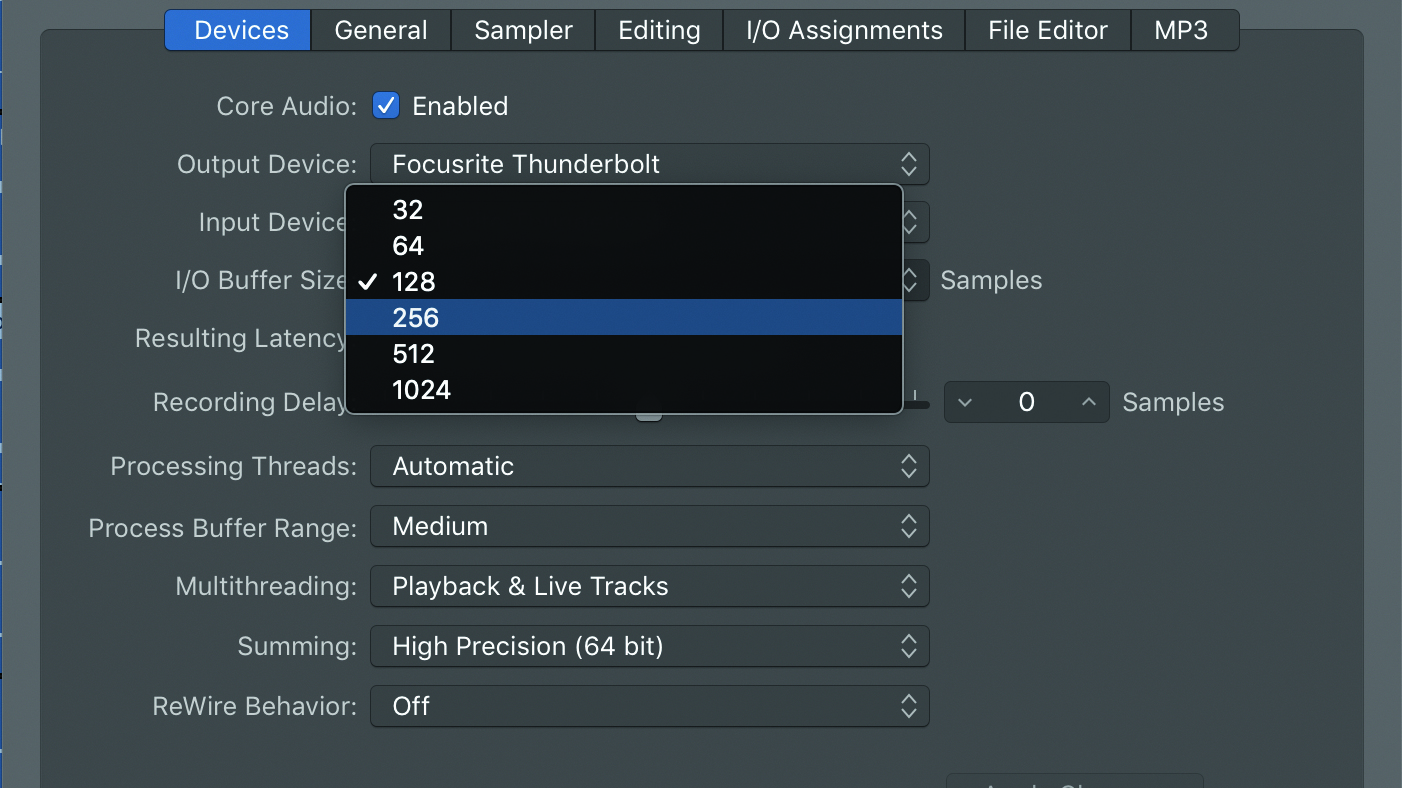
Step 4: You should now have five or six ‘master’ faders, making it easy to create a good working balance and hear the drums properly in context. You can also create a separate sub-mix for the drummer by adding aux sends to the master faders and routing them discretely to the headphones output. To minimise latency, keep your audio interface buffer size as small as possible.
You must confirm your public display name before commenting
Please logout and then login again, you will then be prompted to enter your display name.