How to make a banging tech house groove
Get to know the fundamentals of dance music with our new monthly column as we begin with a drill down into the genre of tech house
Tech house is a subgenre of house music that combines techno with house. It originated in the ’90s, and is still one of the most popular genres today.
Tech house has been influenced by Detroit techno, house music from Chicago, minimal techno, and electro house. Tech house began as an approach to DJing, when DJs like Bushwacka!, Mr. C, and the Wiggle DJs began to mix together house and techno cuts.
The genre has grown and diversified over time, and today artists like Dom Dolla, MK, James Hype, John Summit, Solardo, Chris Lake, ESSEL, Peggy Gou and Westend dominate the tech house charts.
But you’re here to make your own tech house track, right. Firstly, there are a few USPs of the genre that should be noted. Tech house has a slower BPM than techno, it tends to orbit a catchy hook and have a bassline that grooves. The key components of any tech house track are kick, bass, hats, claps, percussion, synths, FX, and vocals.
The kick used in this genre tends to be short and punchy, to leave room for the bass. It’s best to start by listening to references to learn more about the types of kicks, and drum samples that are used in modern tech house and then finding samples that will suit the style of your production.
Kick and bass
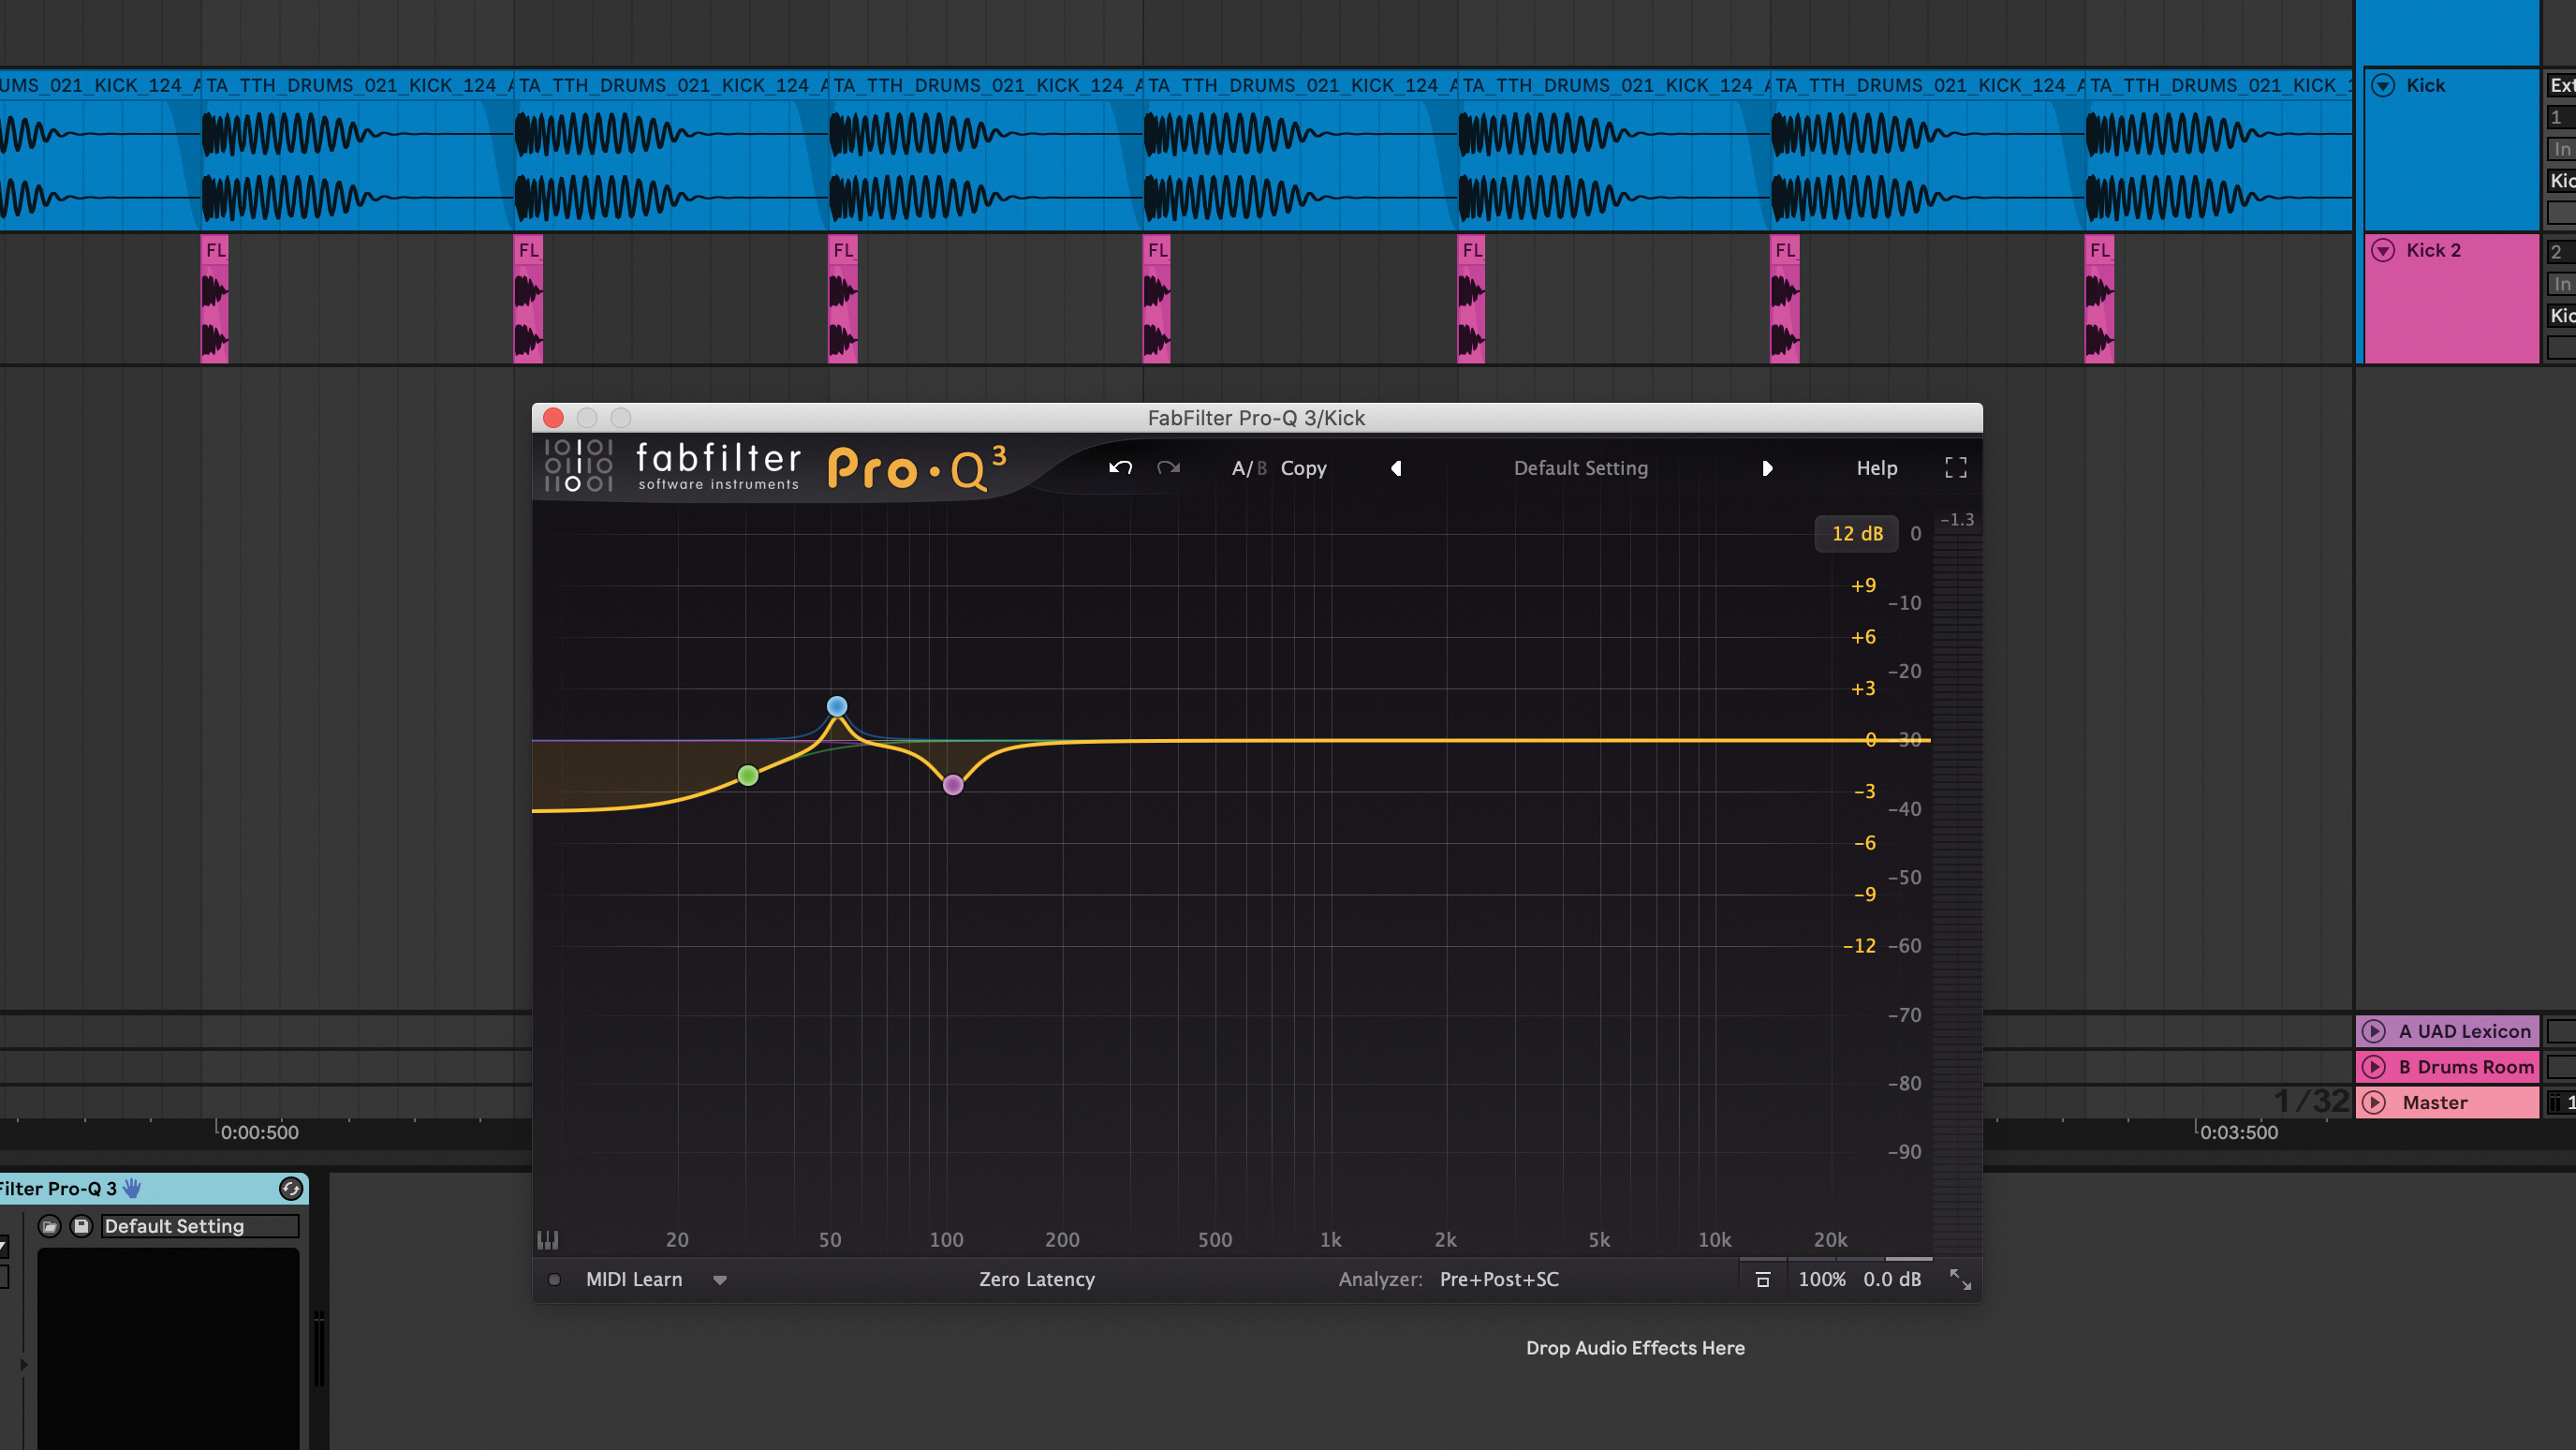
The kick and bass are key to a tech house rhythm. Start with a punchy kick drum with a short tail to leave space for bass. Put in a kick on every quarter note. If you know the key of your kick, boost the first fundamental frequency of the kick and cut the second to leave room for bass. Work with the key and samples to work out what’s best.
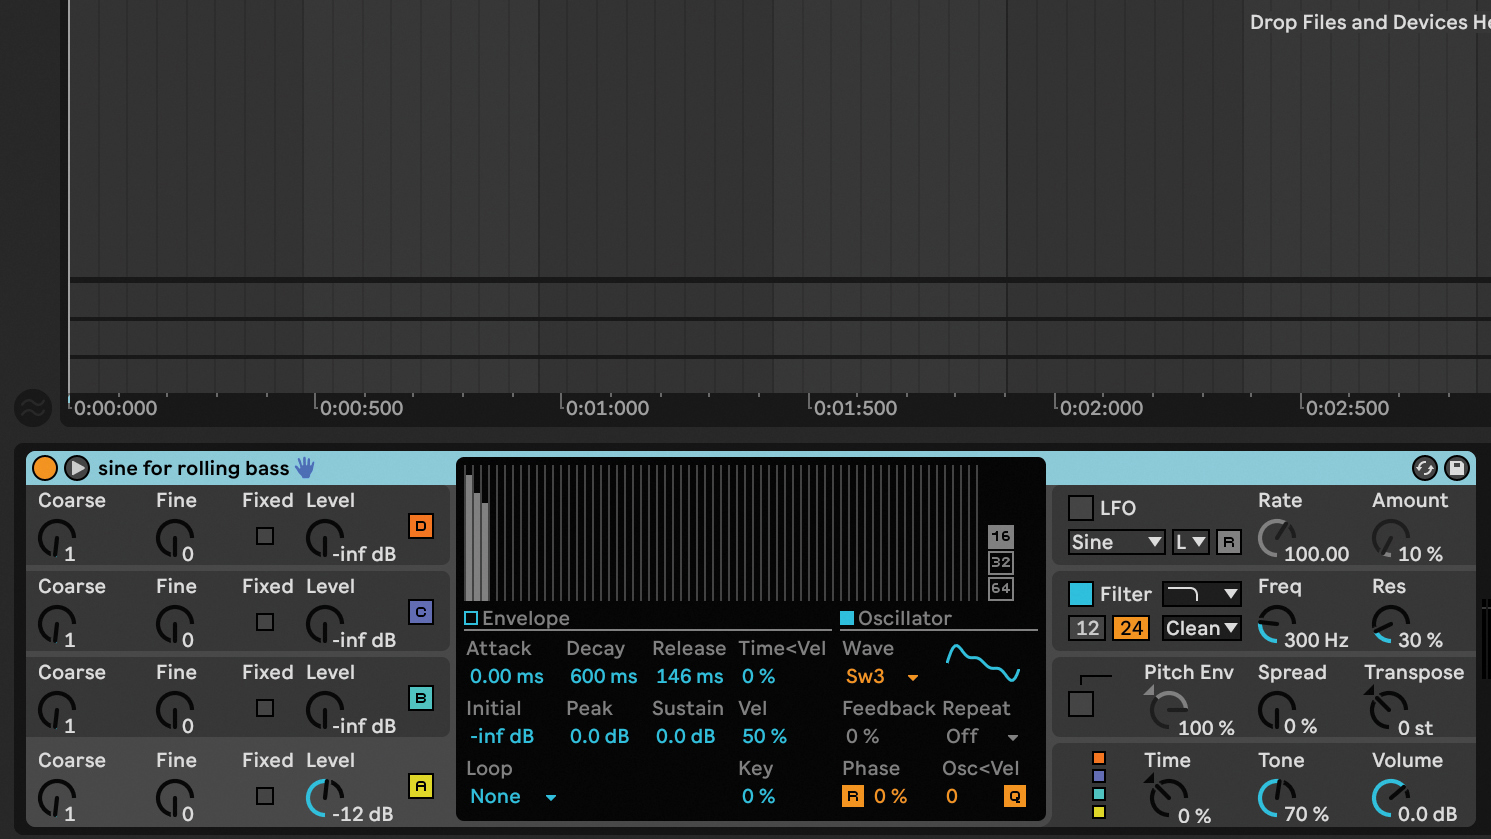
For the bass, you can use Ableton Live’s Operator or a software synth. To make your own bass sound in Operator, use a saw wave with the release set to around 150 ms. Use the low-pass filter and cut away frequencies above 300 Hz. Create a MIDI clip with a 1/16 note grid between one and four bars long.
Get the MusicRadar Newsletter
Want all the hottest music and gear news, reviews, deals, features and more, direct to your inbox? Sign up here.
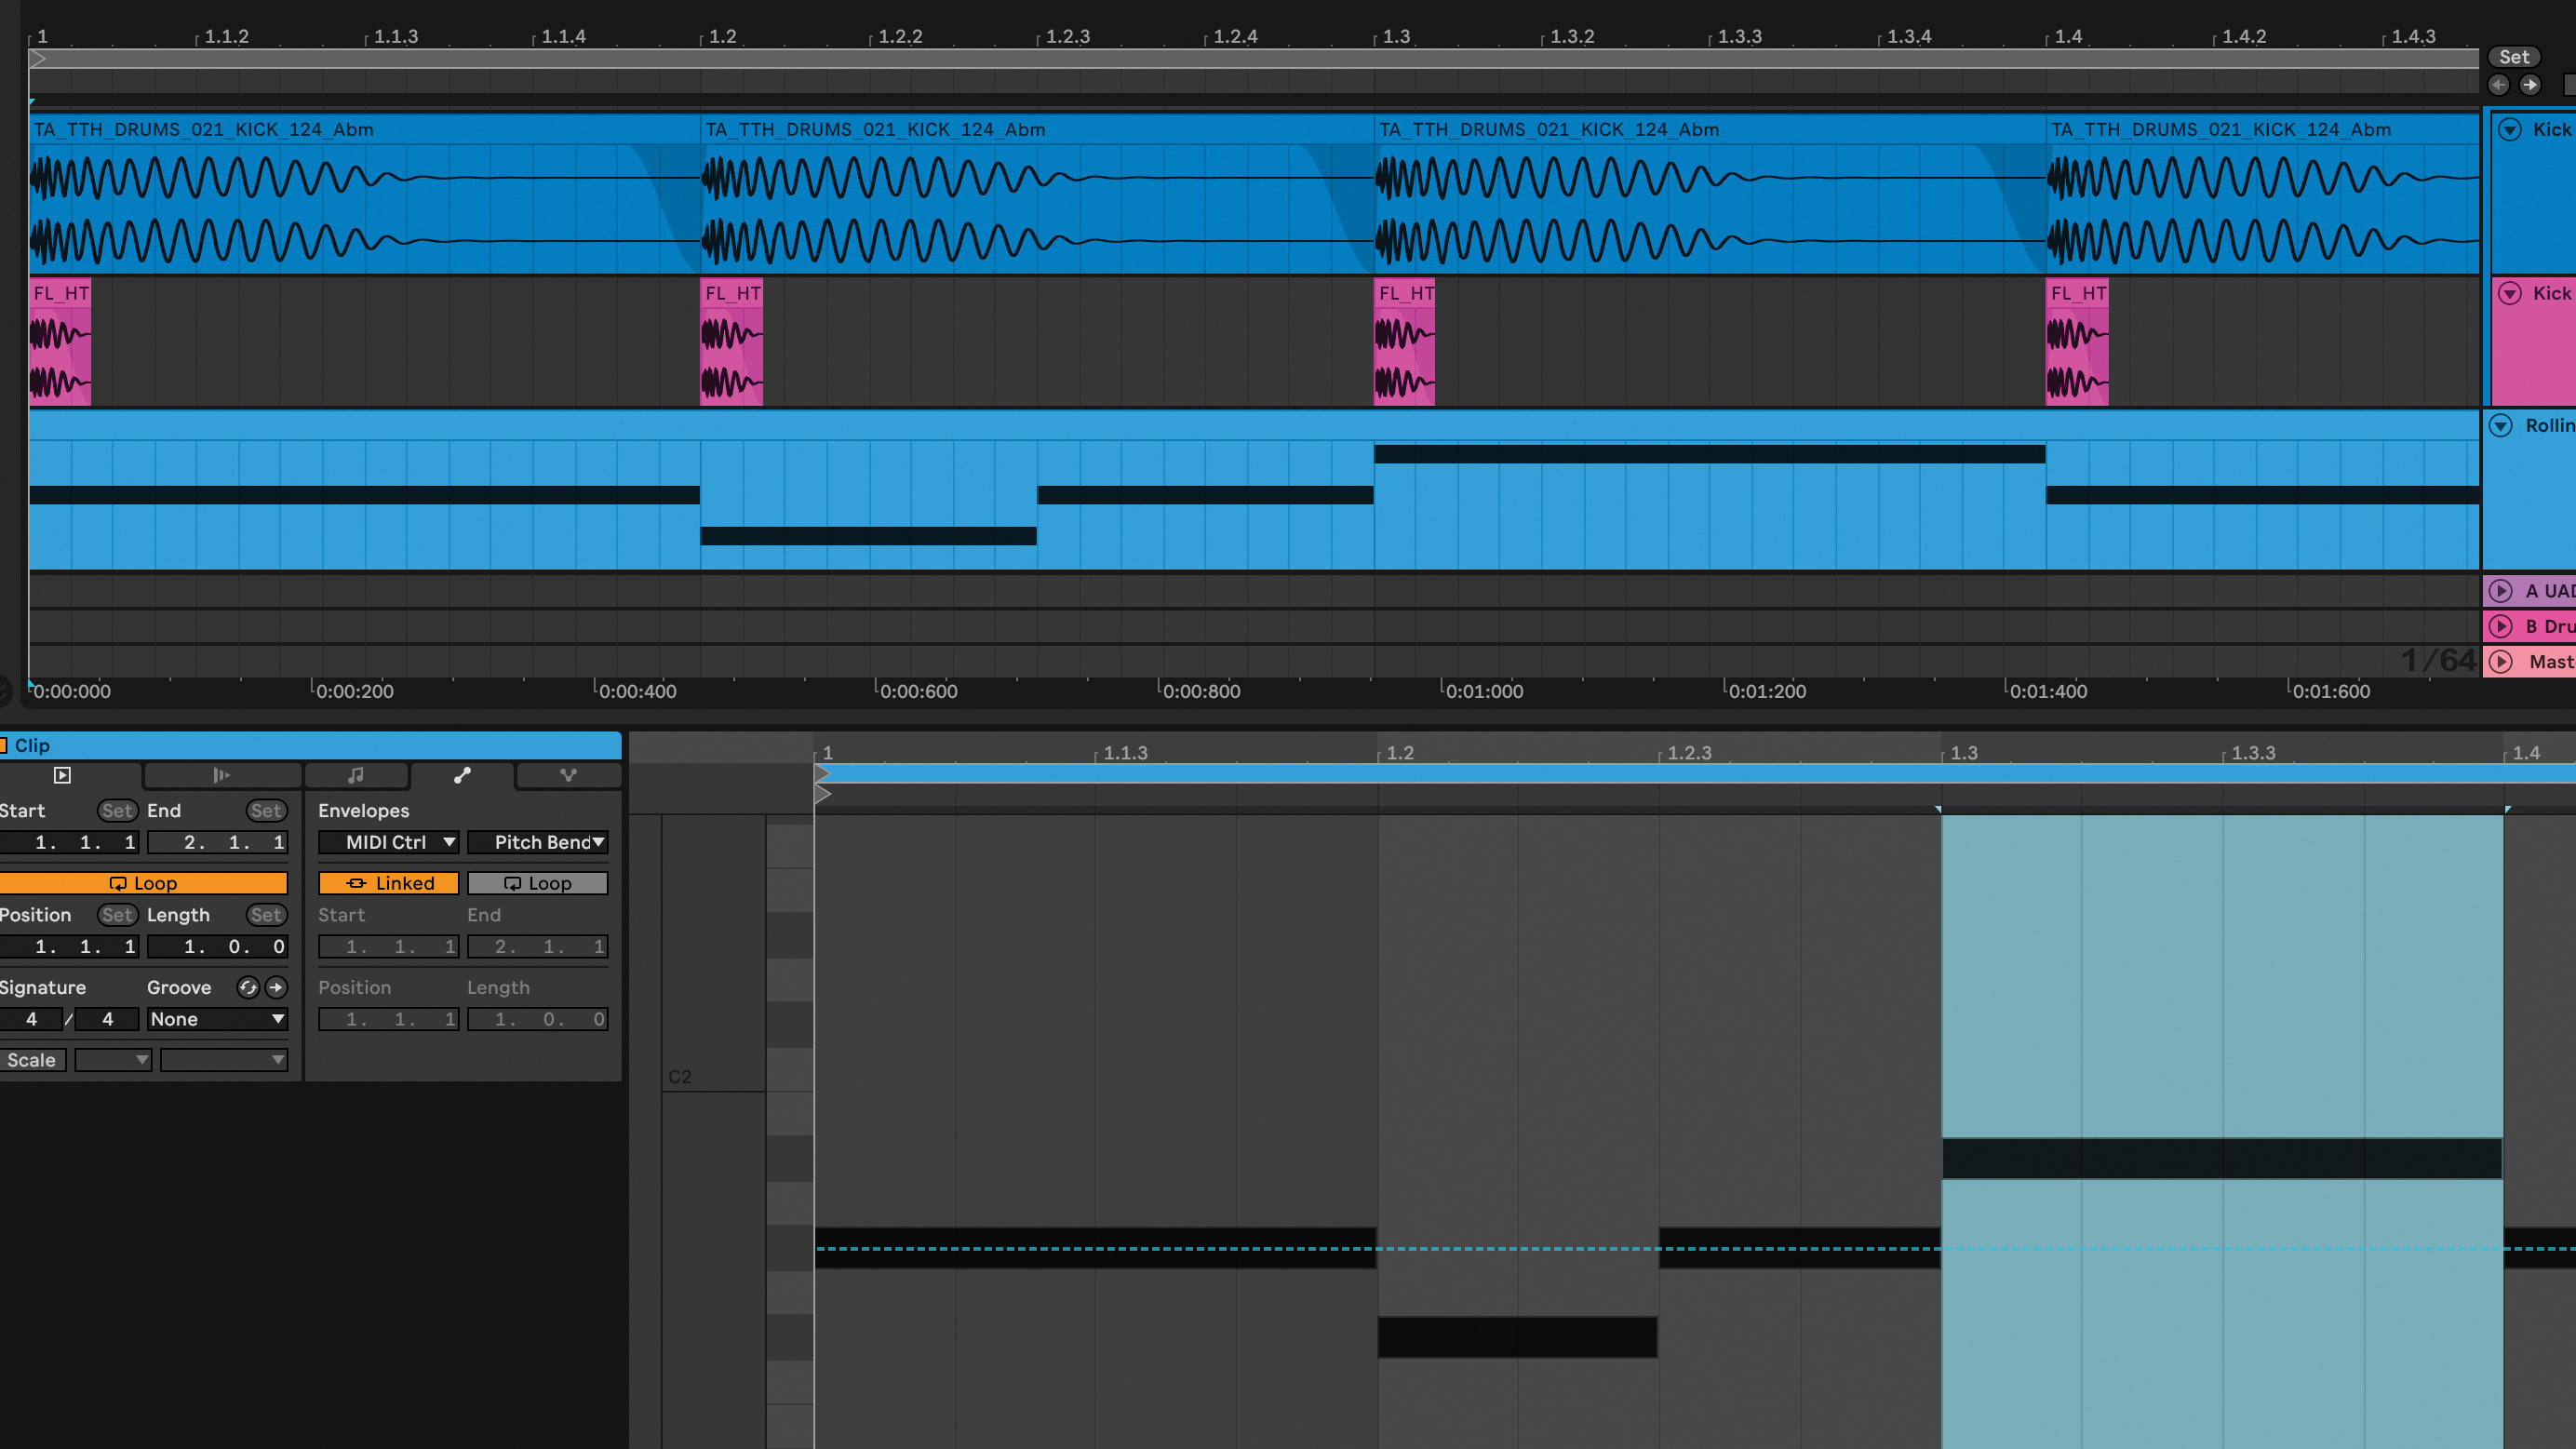
Program in a bassline that’s in the key of your track; generally tech house is written in minor keys. You may want to focus on using just a few notes, as a simple bassline with one or two notes can work well. Next we will add some pitch bend to the notes. Double click on the MIDI region and open the Clip’s Envelope.
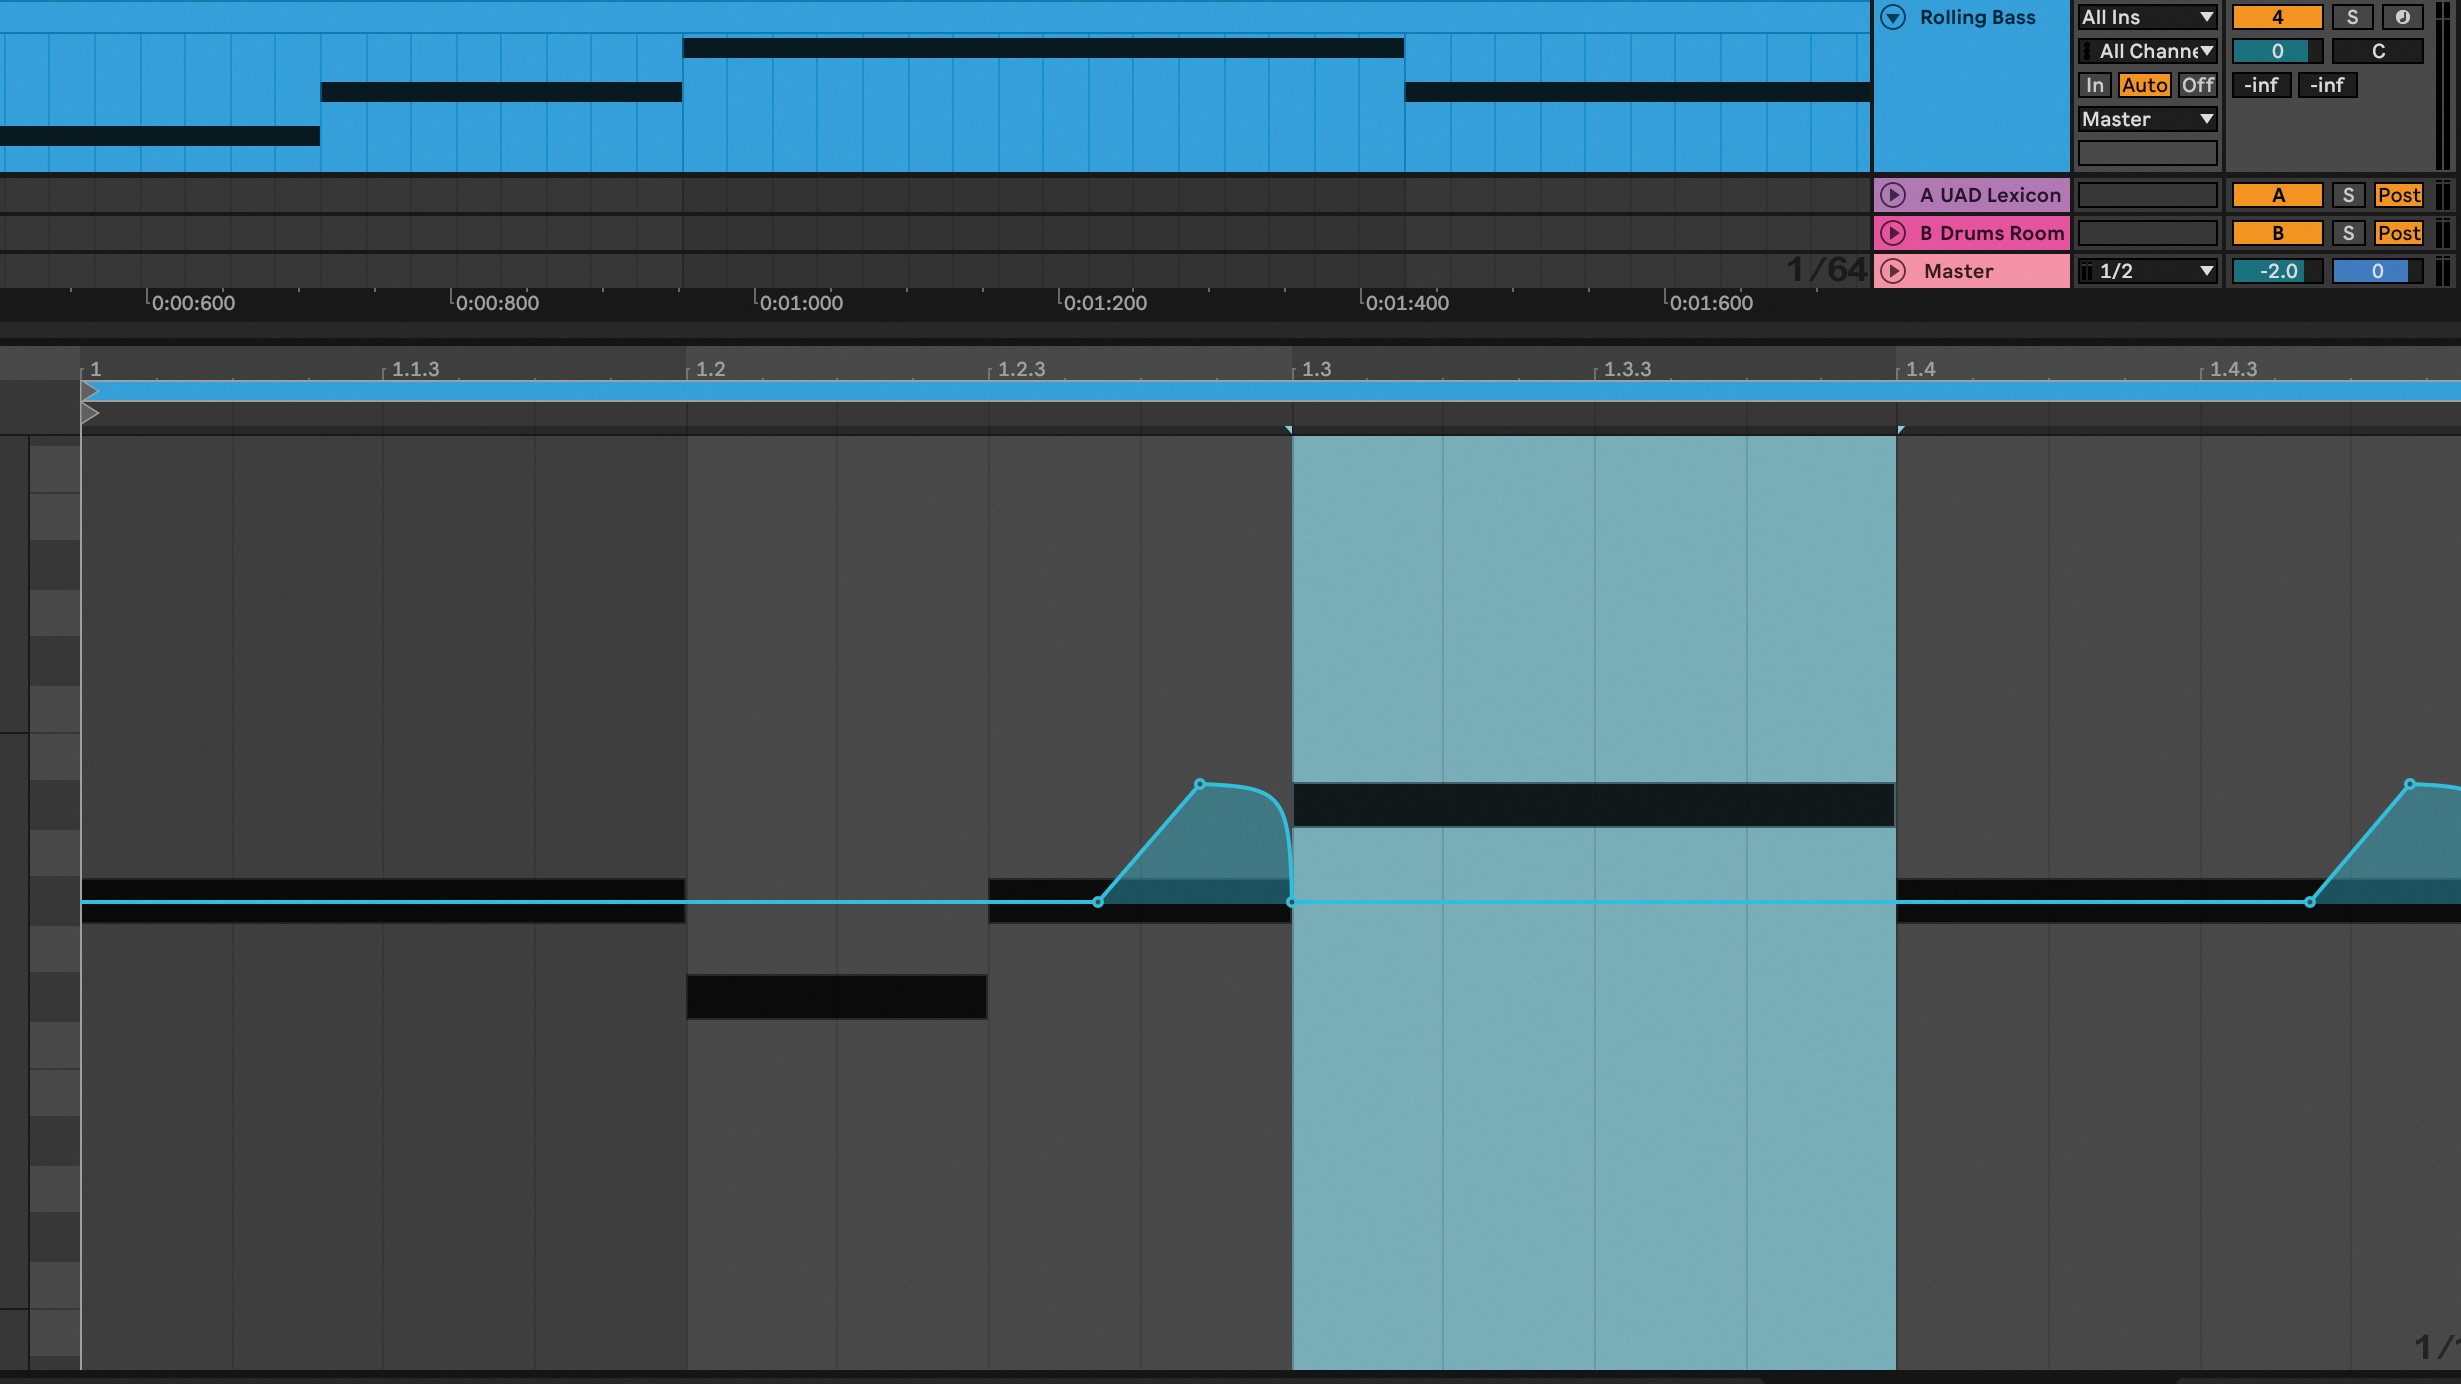
Select MIDI control, then Pitch Bend and write in pitch bend automation on a few notes. This gives your bassline more movement. For the bass processing, add saturation using a plugin like FabFilter Saturn 2 or Ableton’s Drum Buss. Try to apply it subtly at first (If you’re using Saturn 2, try Gentle Saturation).
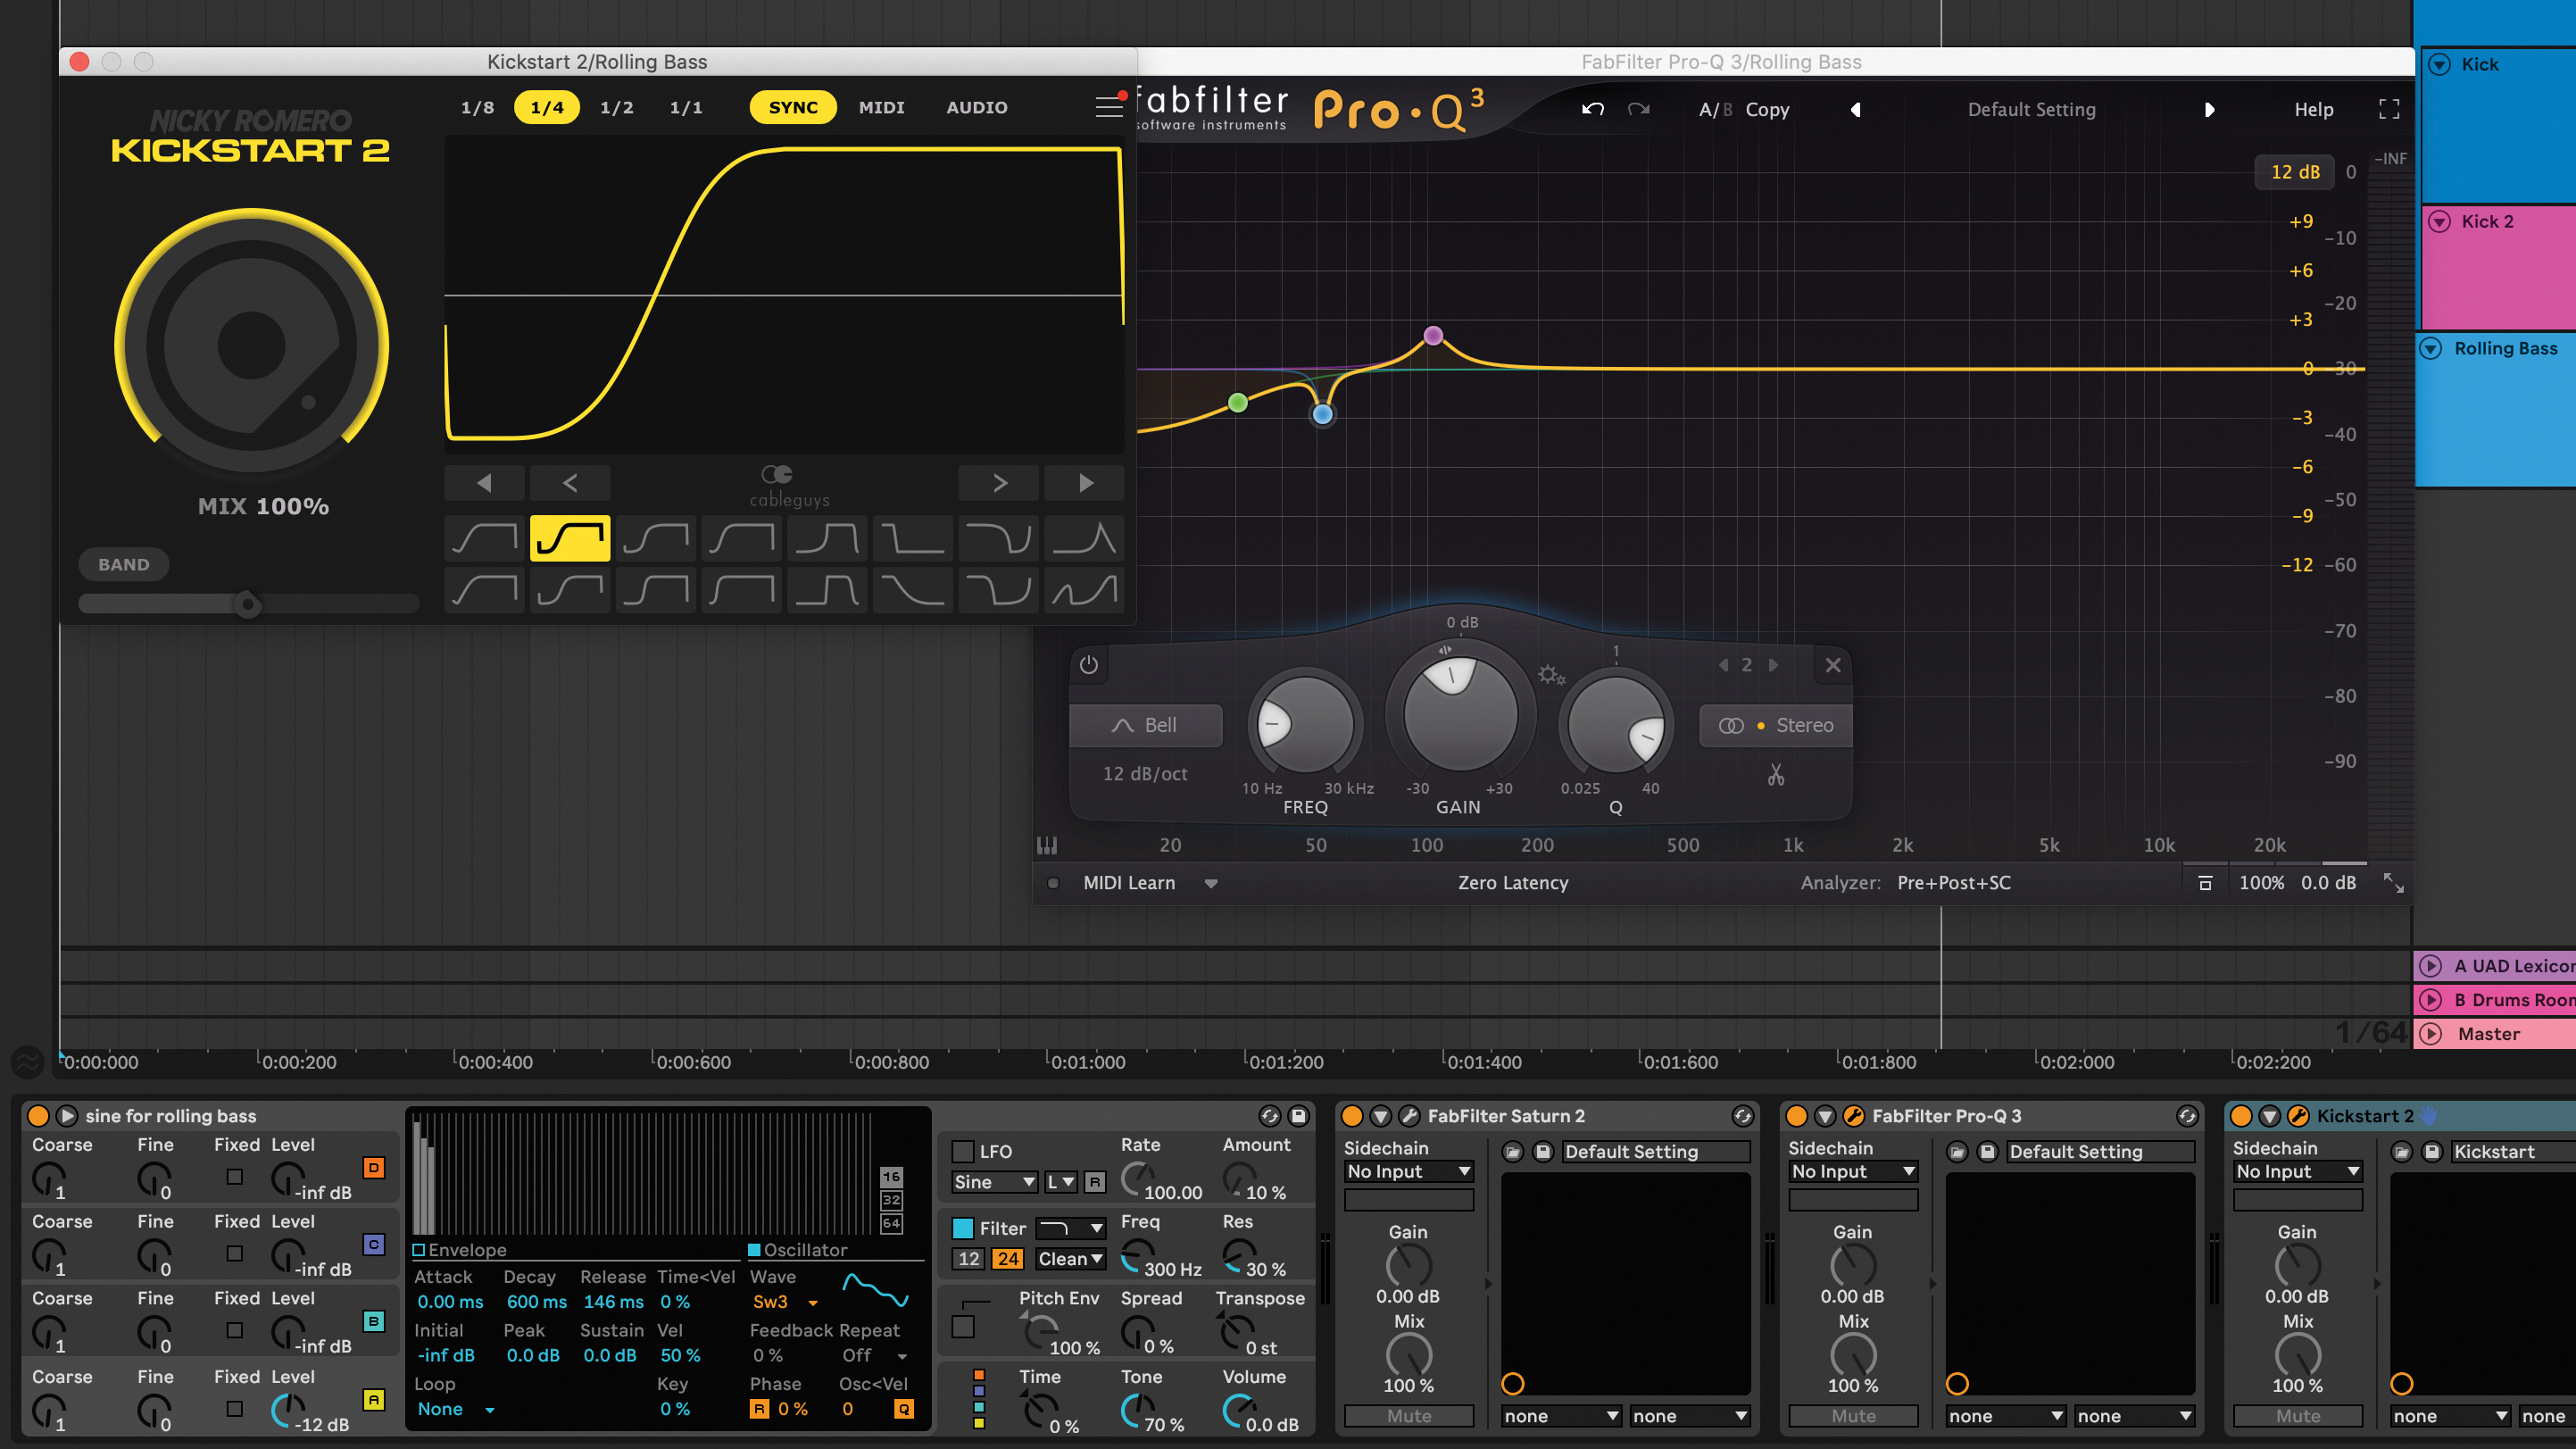
Use an EQ with a low shelf to roll off frequencies below 30 Hz. If you want to go a step further, make a small cut where you boost the second fundamental frequency of the kick and boost the bass in the first fundamental. Sidechain the bass to the kick drum using a compressor (we’ve used Kickstart 2) to allow room for the kick drum.
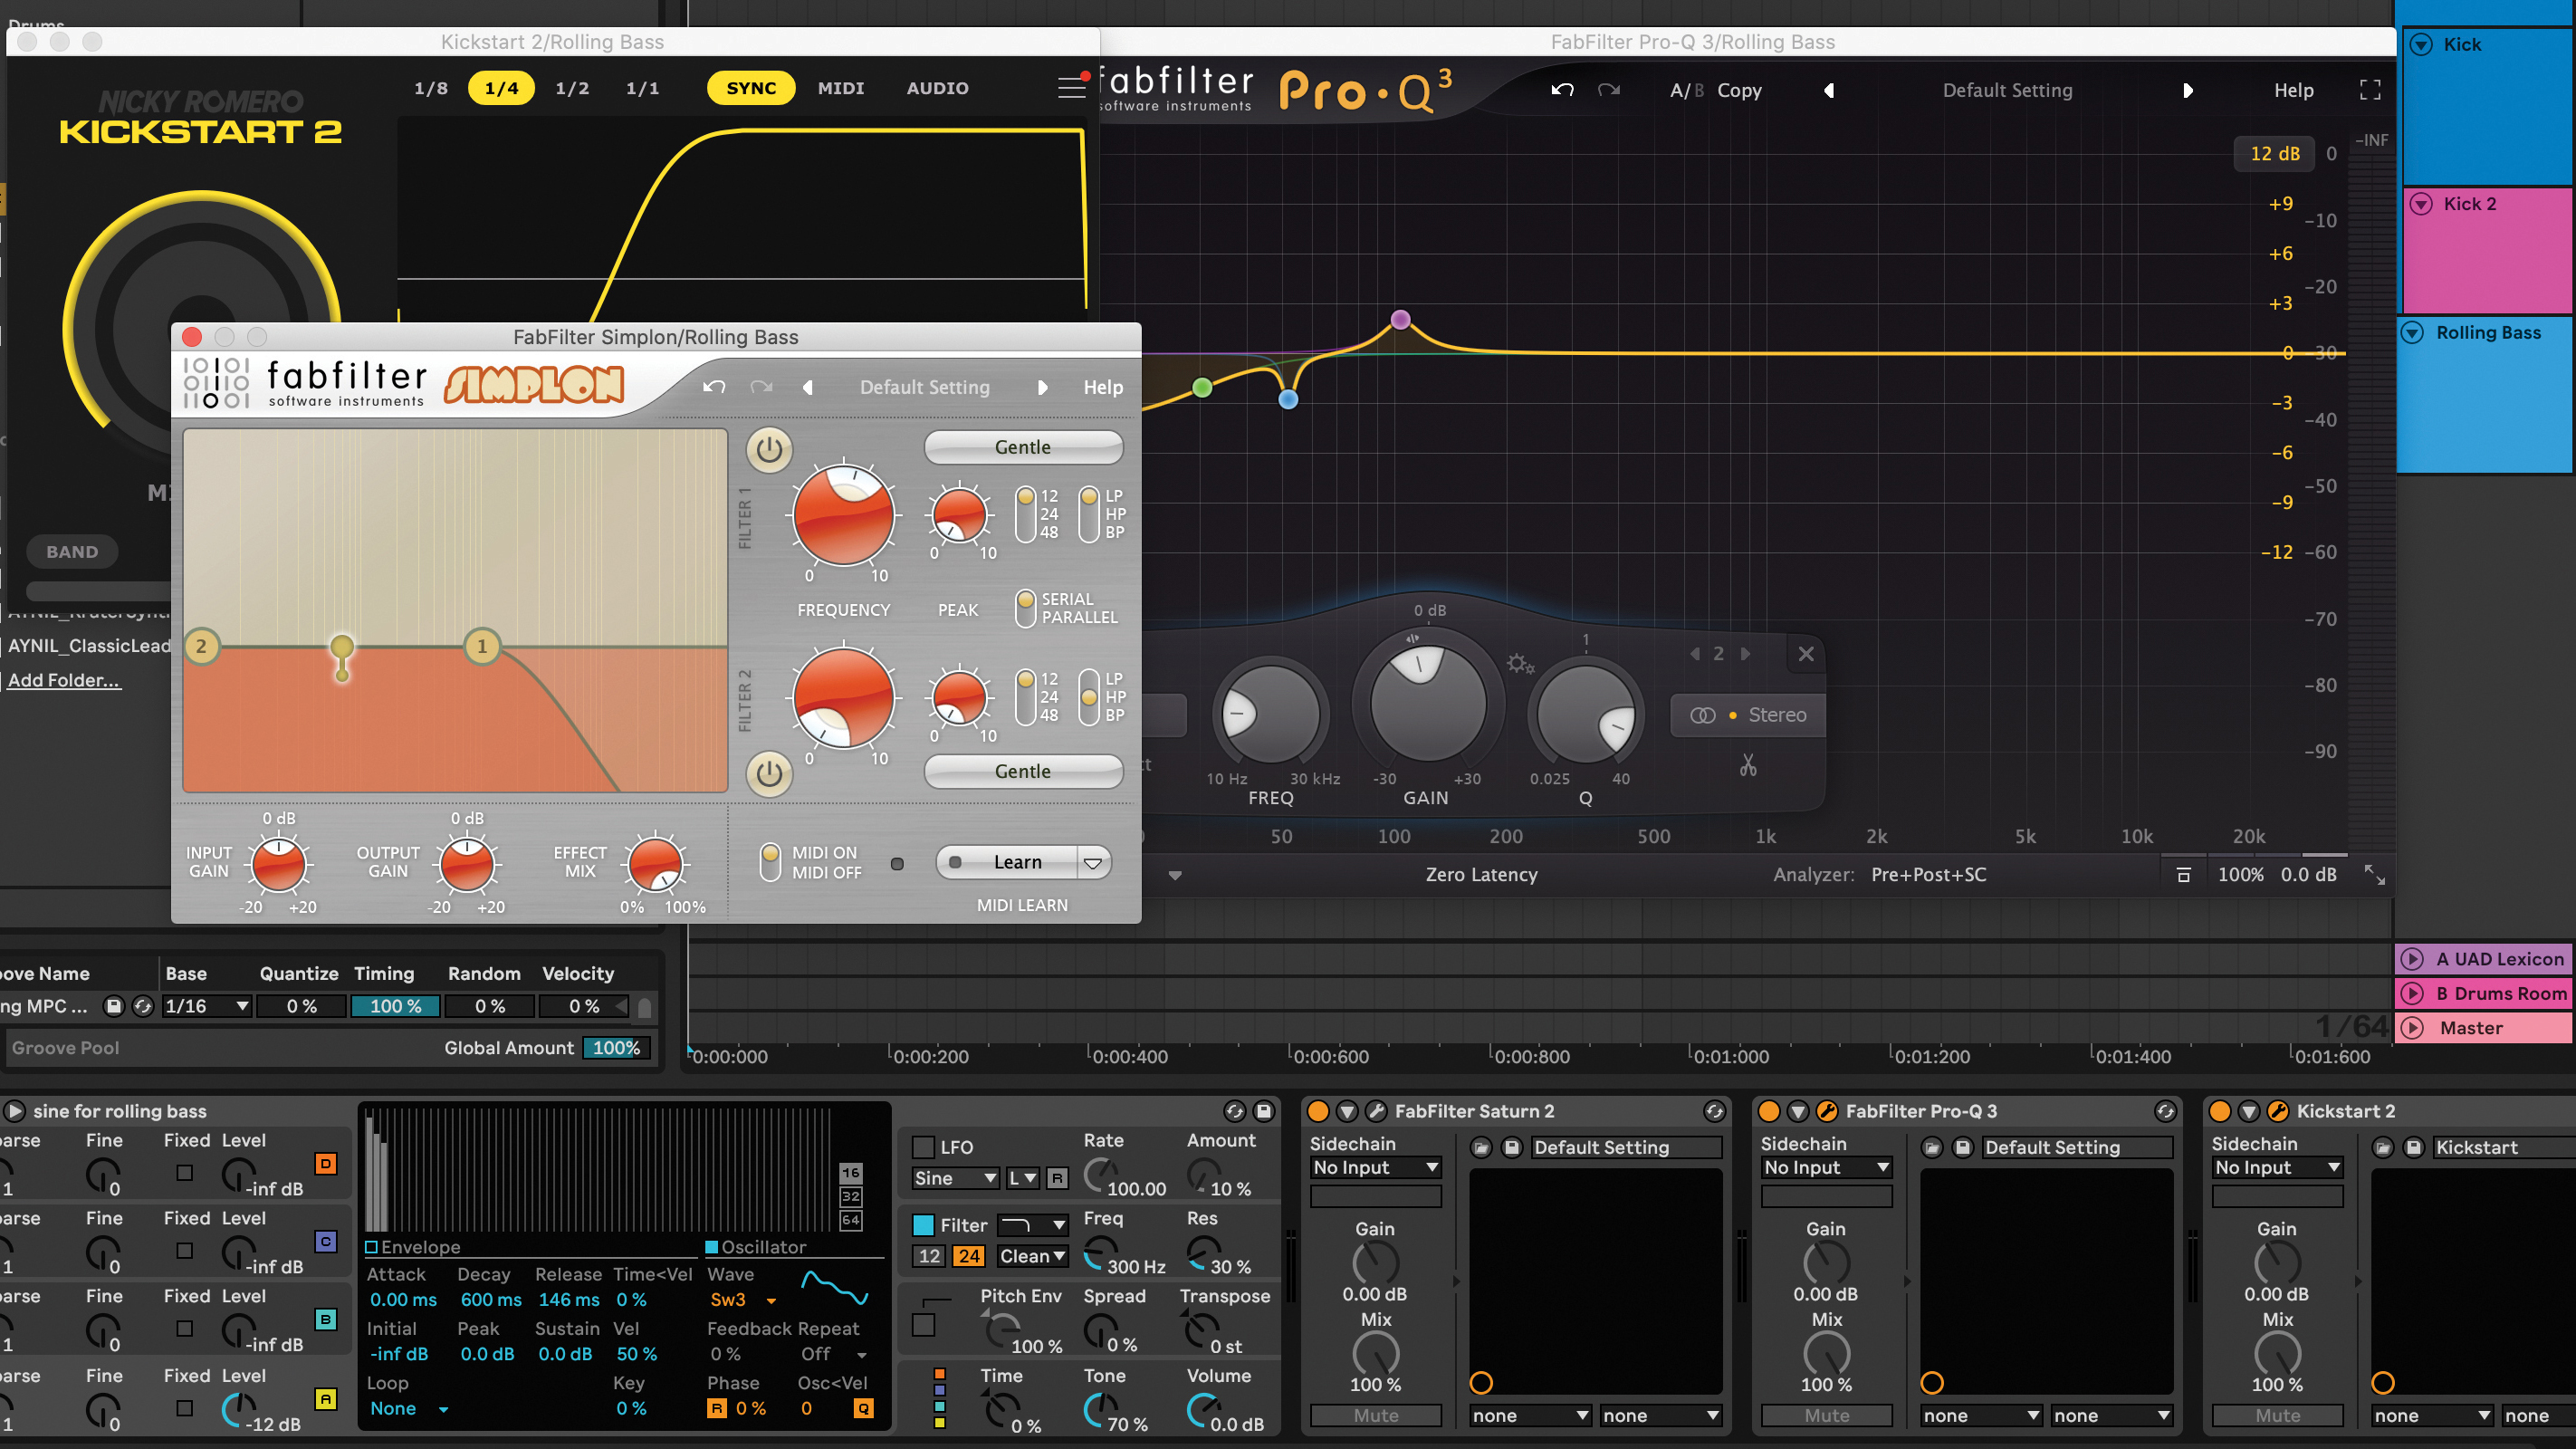
Use a filter (we’ve used FabFilter Simplon) to cut off any frequencies above 1000 Hz. Adjust the filter to taste as you may want to roll off frequencies above 300 Hz. Play your kick and bass together and listen to the groove. Both should have their own space in the mix. If you can hear both kick and bass clearly, you’re on track.
Creating drums
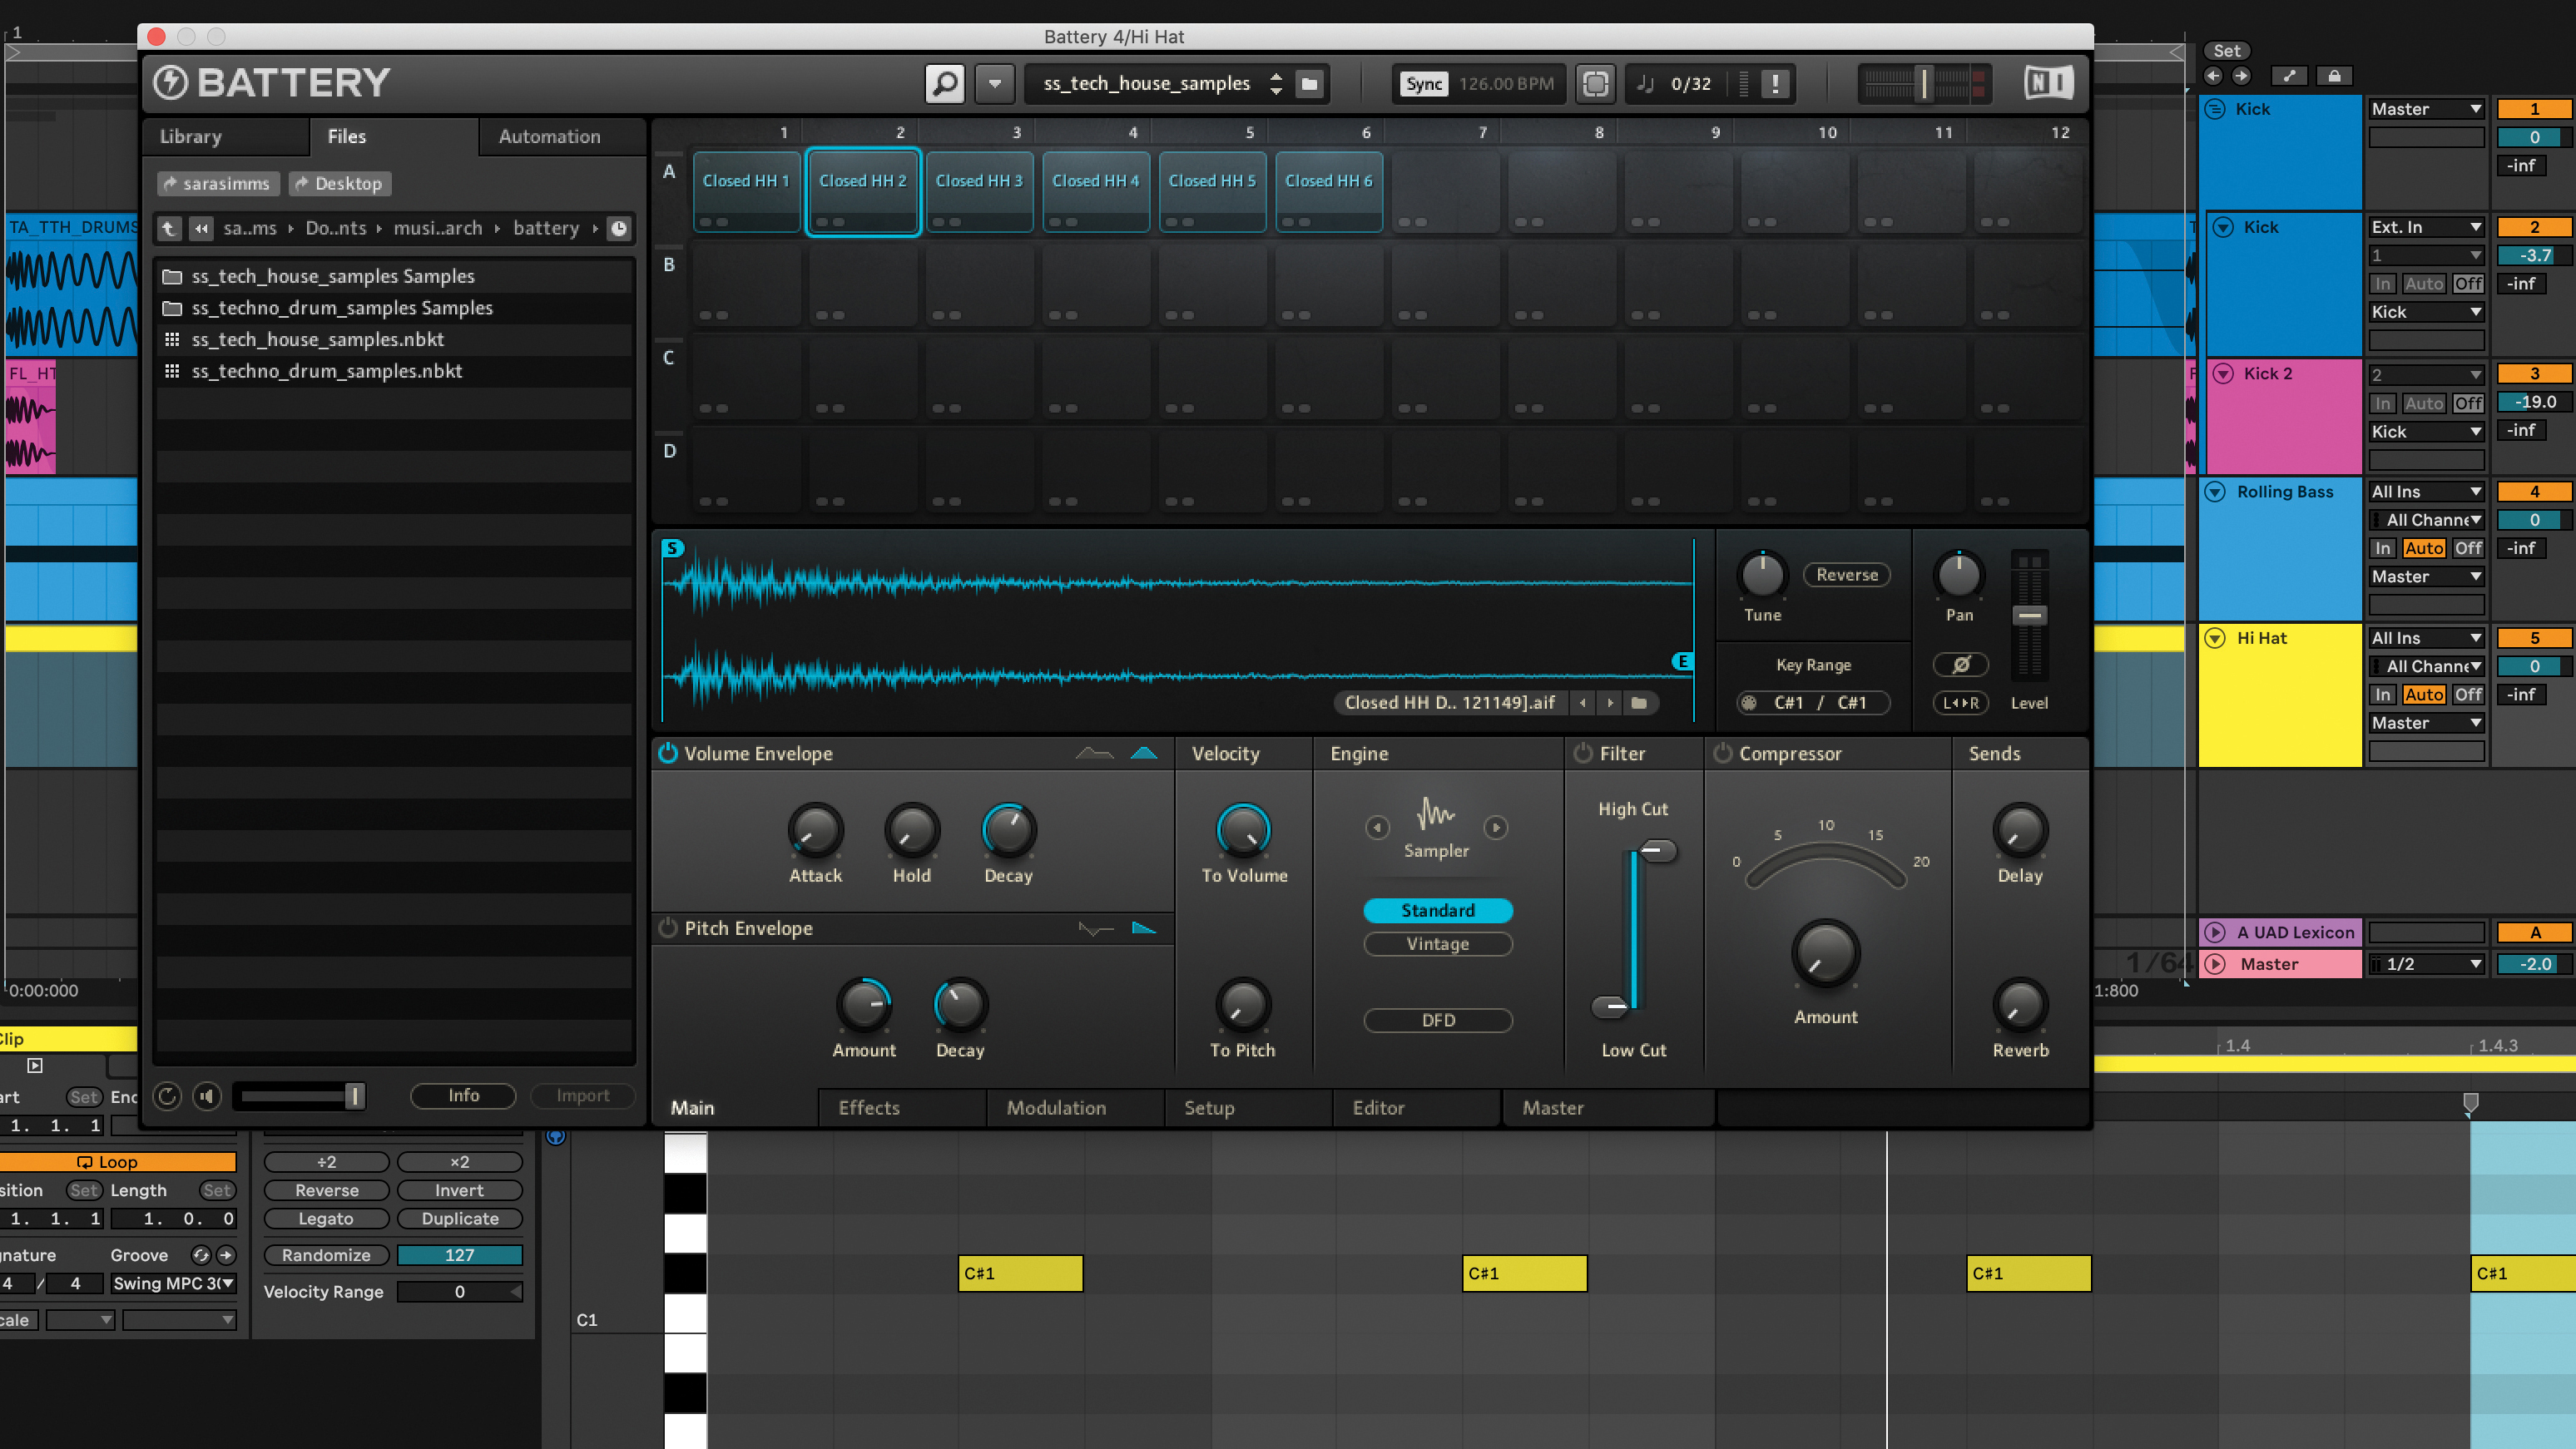
For interesting hi-hat sounds, try layering different hats. A classic 909 closed hi-hat could work as the main hat. Use a sample or a sampler like Battery that has a 909 kit. Create a MIDI clip and program the hats on the off-beats using a 1/16 note grid, eg 1.1.3, 1.2.3, 1.3.3, 1.4.3.
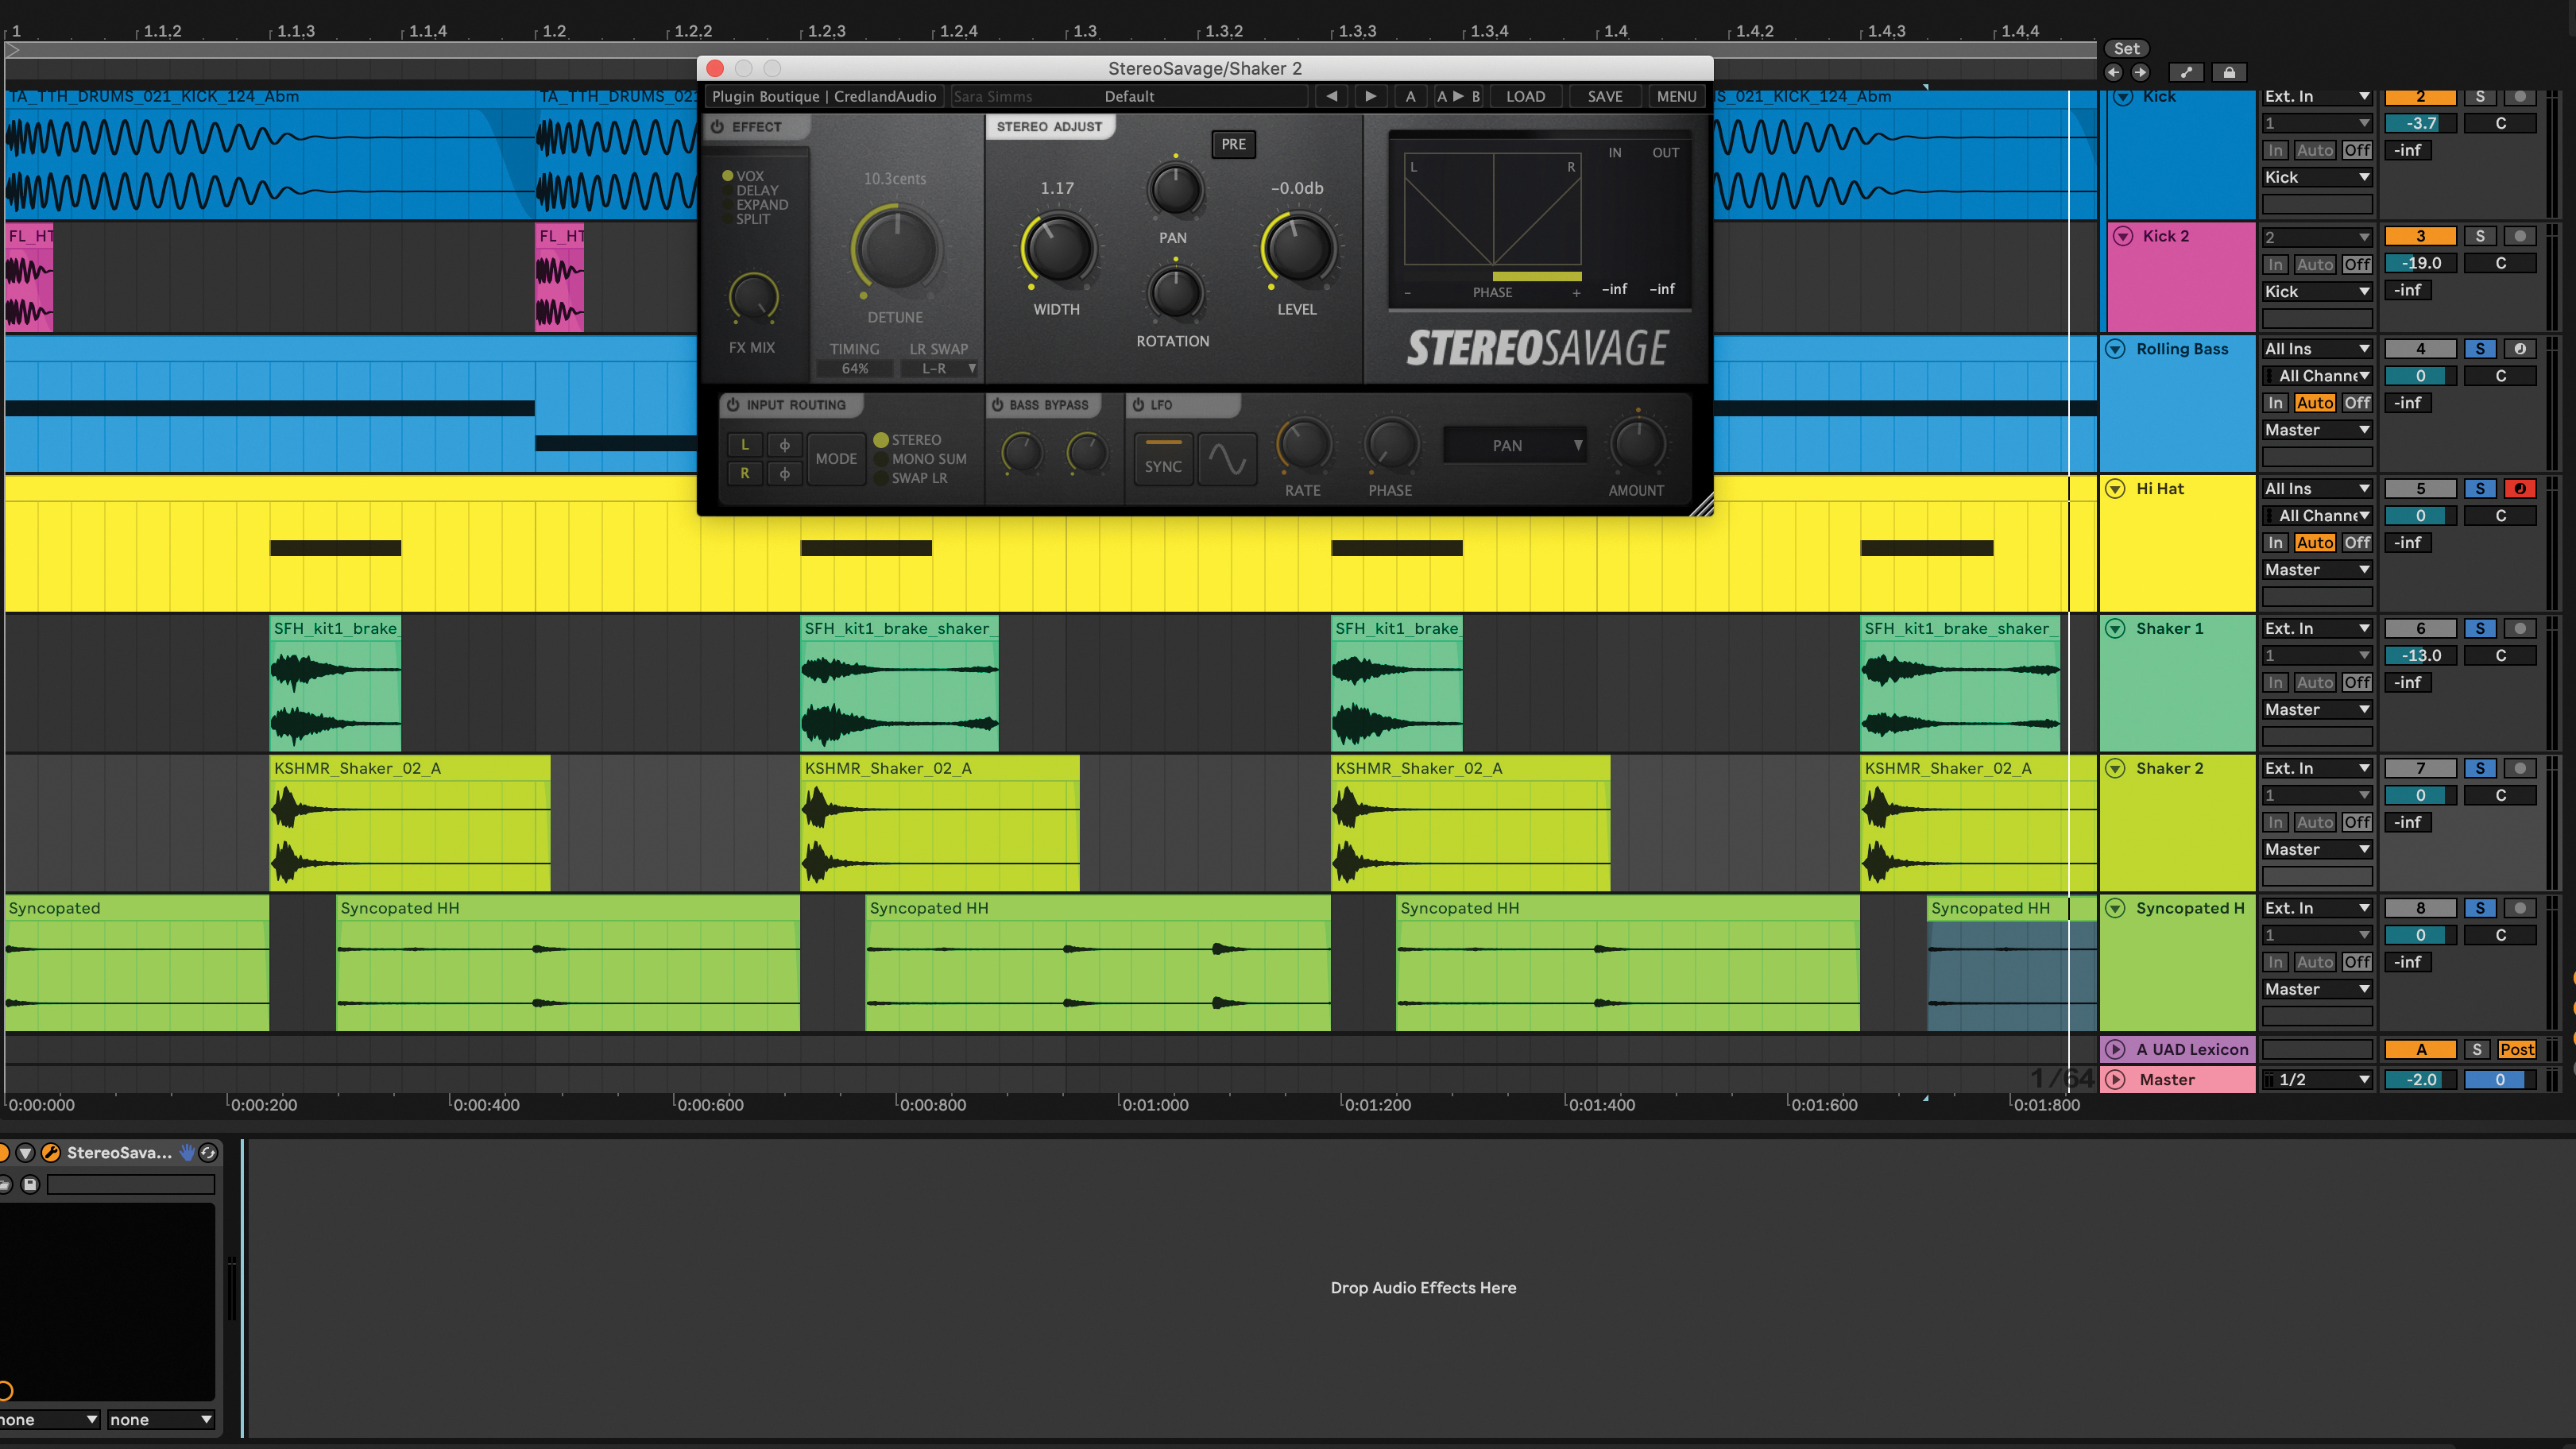
Find a shaker sample and program in the same rhythm as the main hat. Use the audio samples in your DAW, or load them into a sampler like Simpler. Make the shaker wider by using a widening plugin such as StereoSavage or Polyverse Wider. Try adding in a syncopated hat after the 3rd or 4th hat.
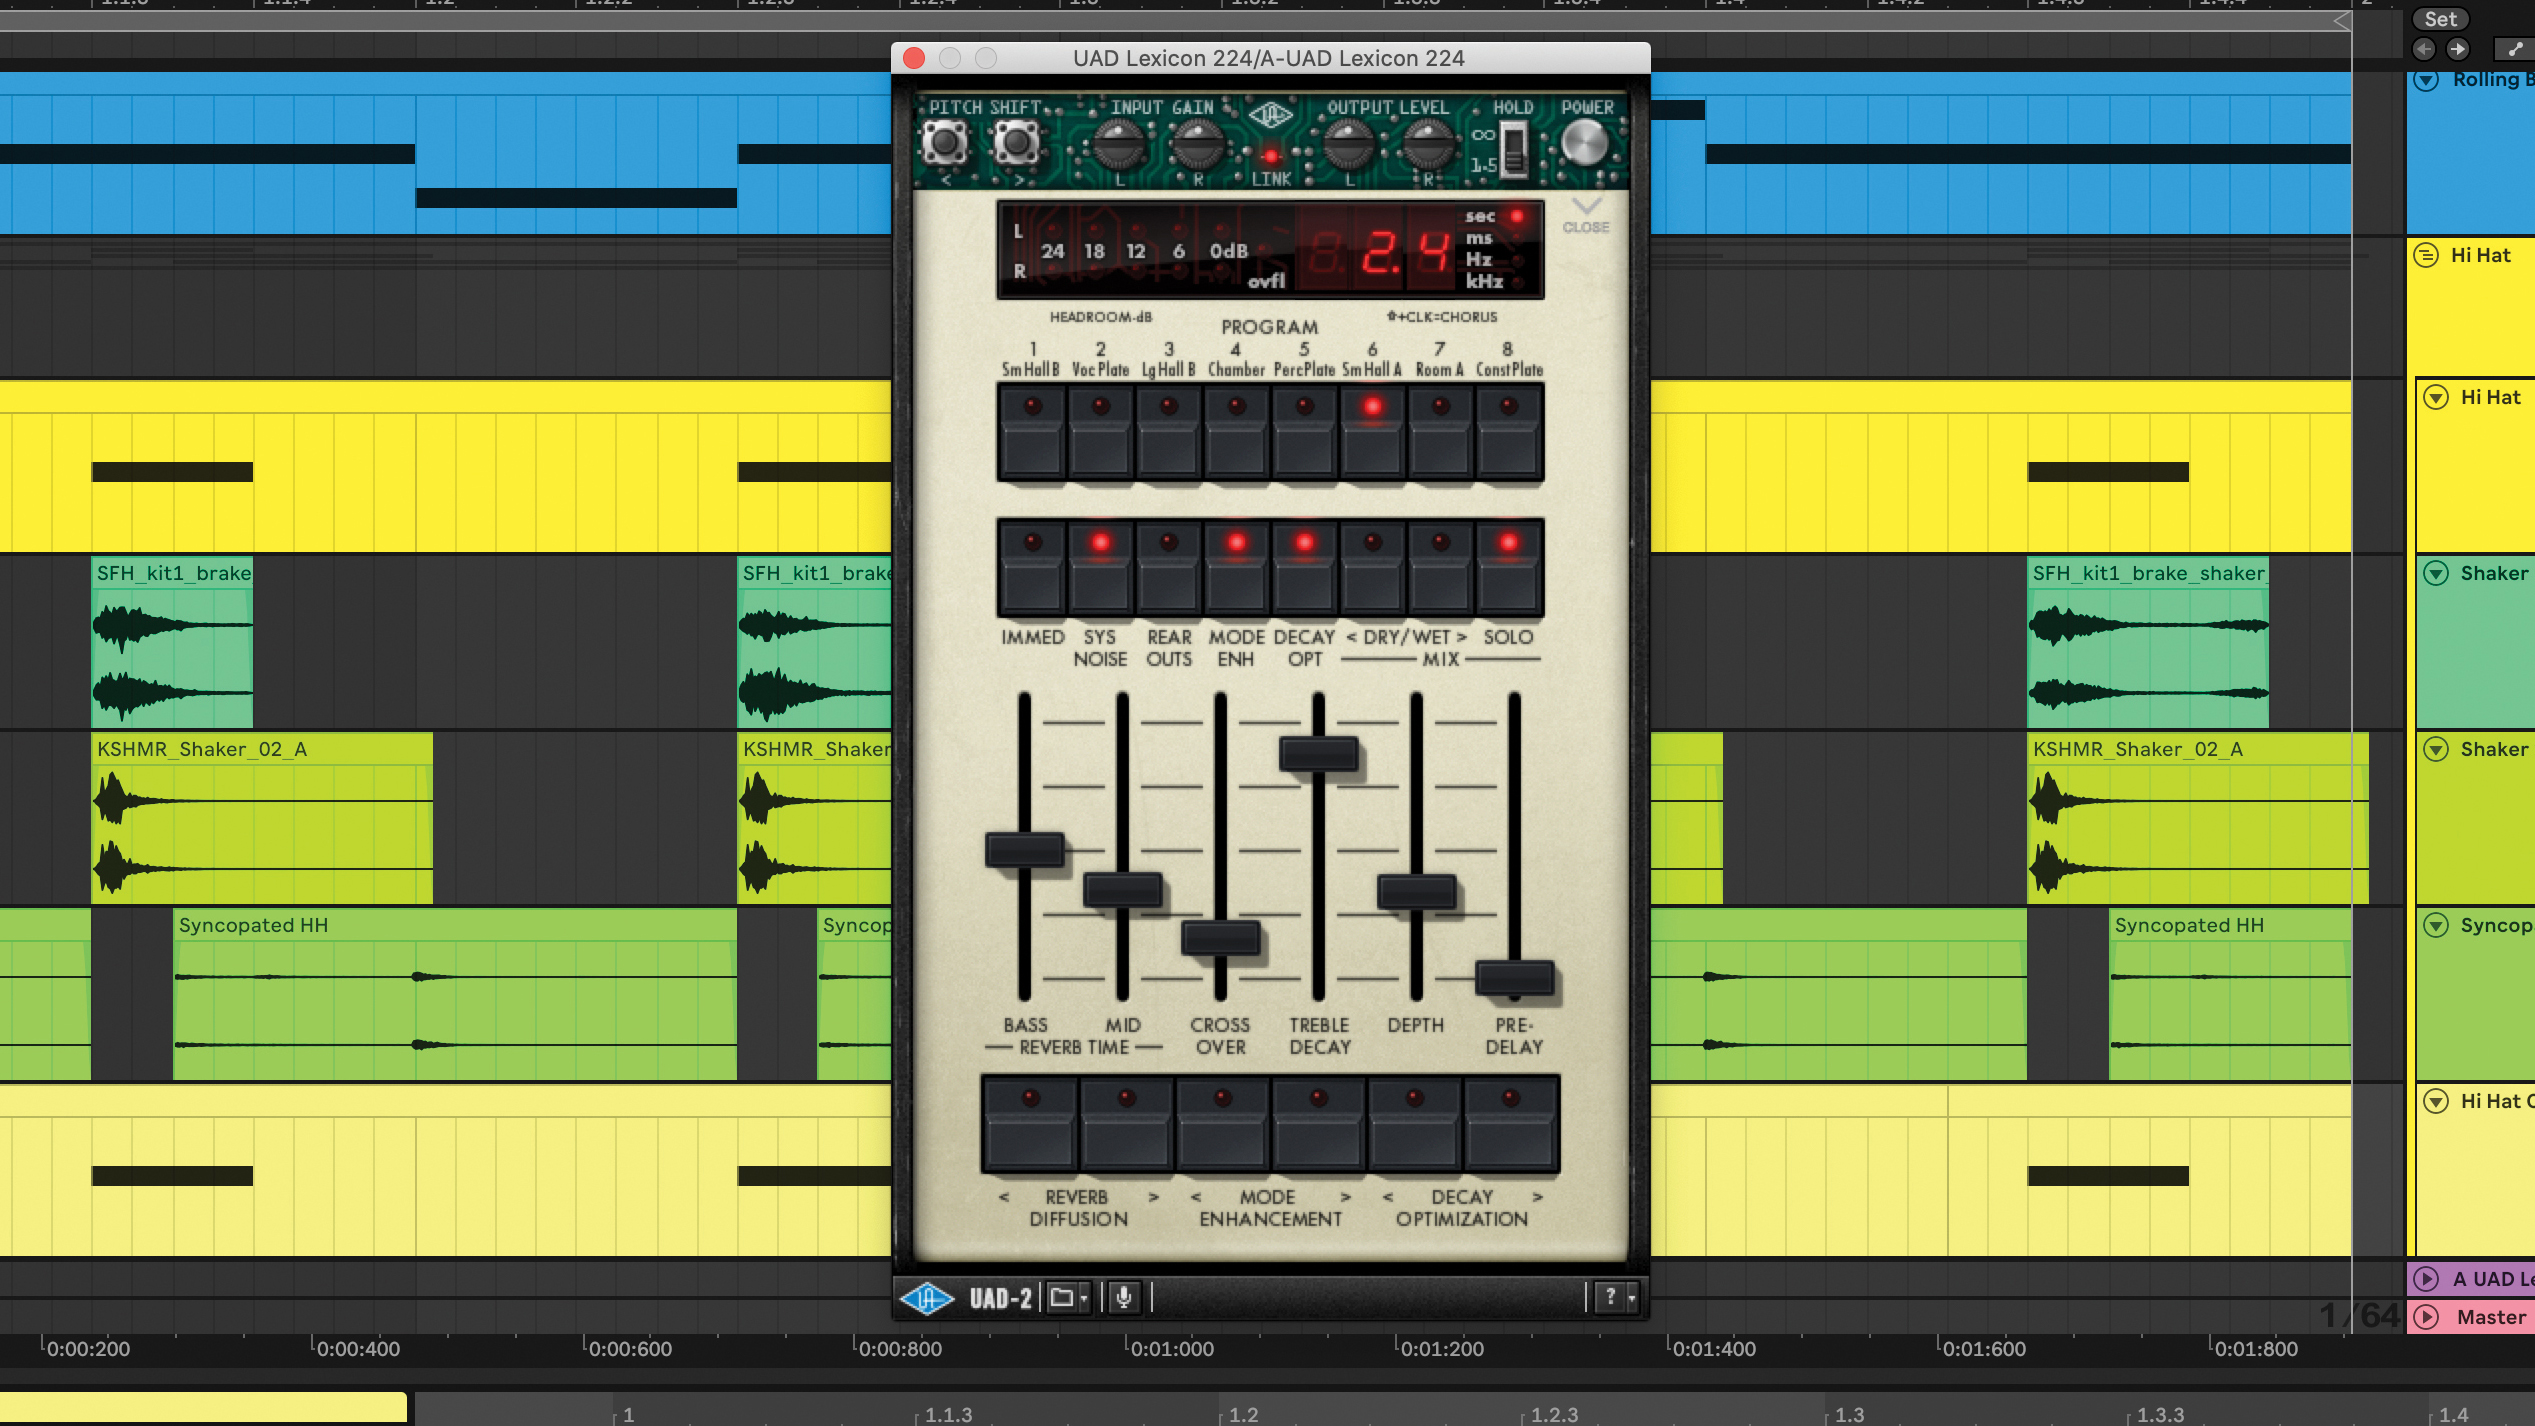
Create more interest by adding an additional hi-hat sound, like an Open hi-hat underneath the main hi-hat. Create a hi-hat group and send this group to a Return track with Reverb. Dial in the reverb settings according to the style of tech house you want to achieve, for example a medium-sized room works for clubby tracks.
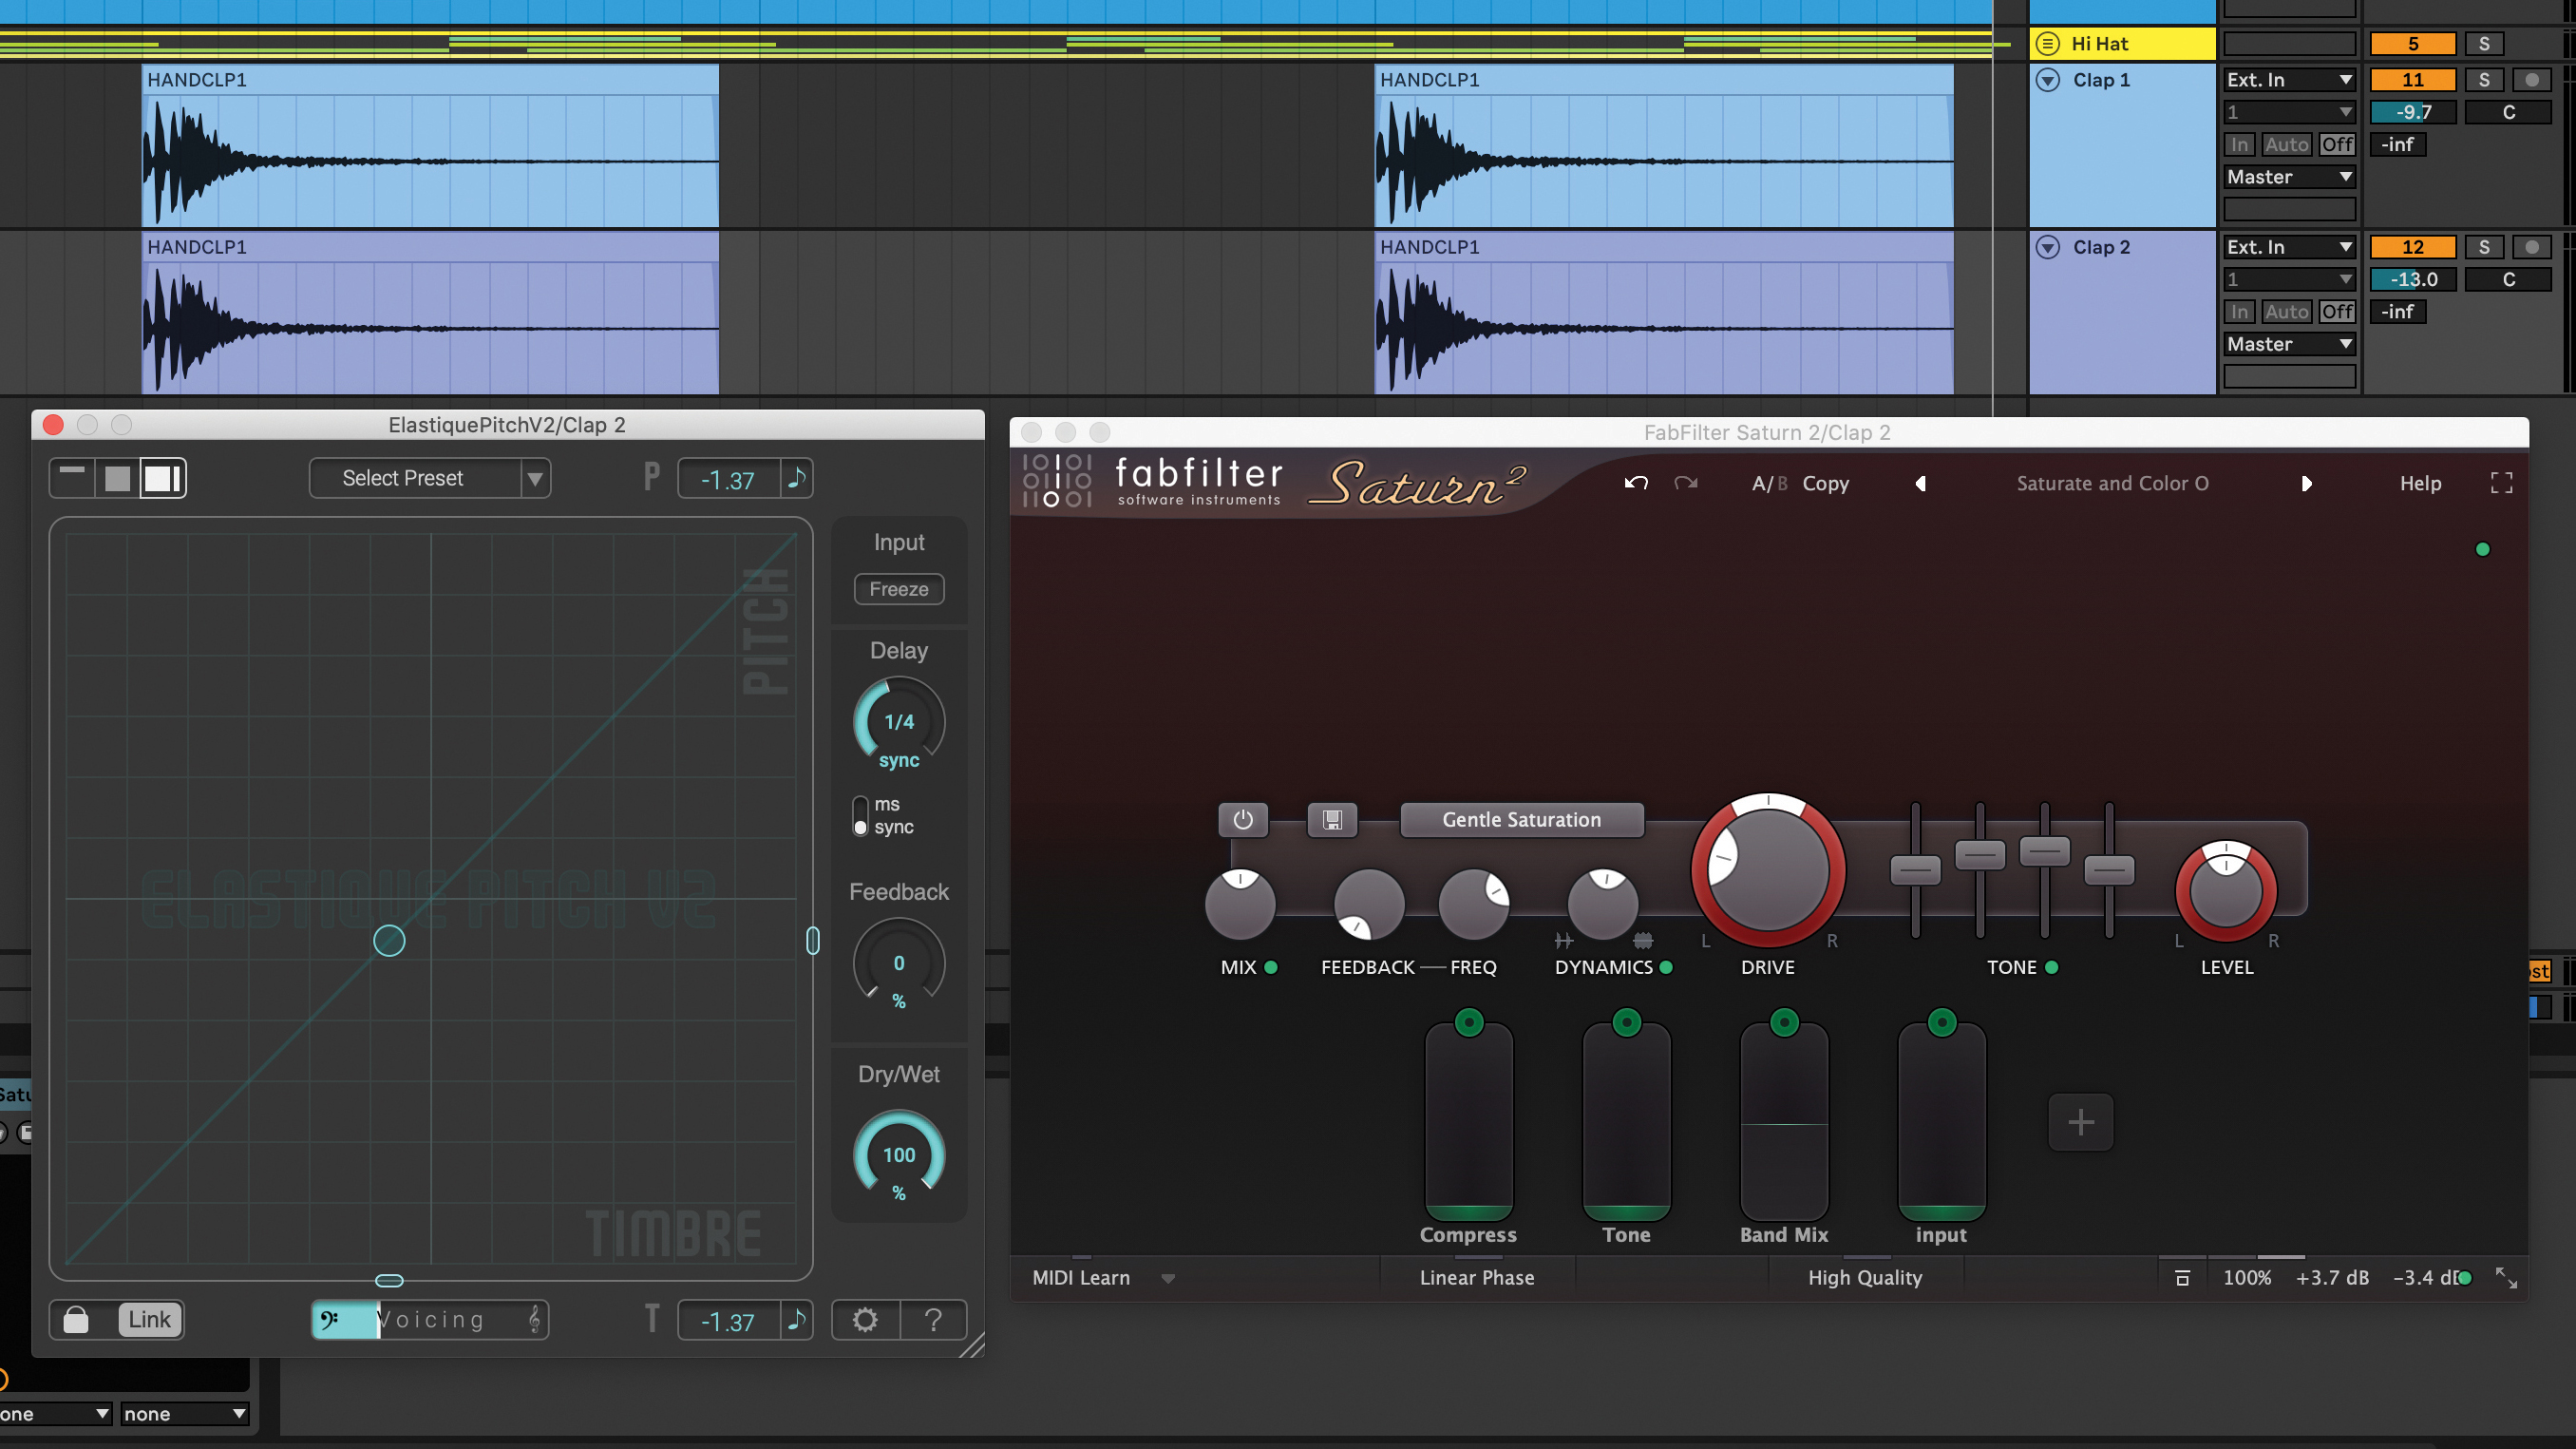
Add in claps on beats two and four using a clap sample as an audio file or in or sampler. Create a more interesting tone by adding a clap layer, using a sound that’s complementary. You could also use the same sample for the second clap, and process it differently by detuning it with a tuning plugin (such as zplane Elastique Pitch) and adding saturation.
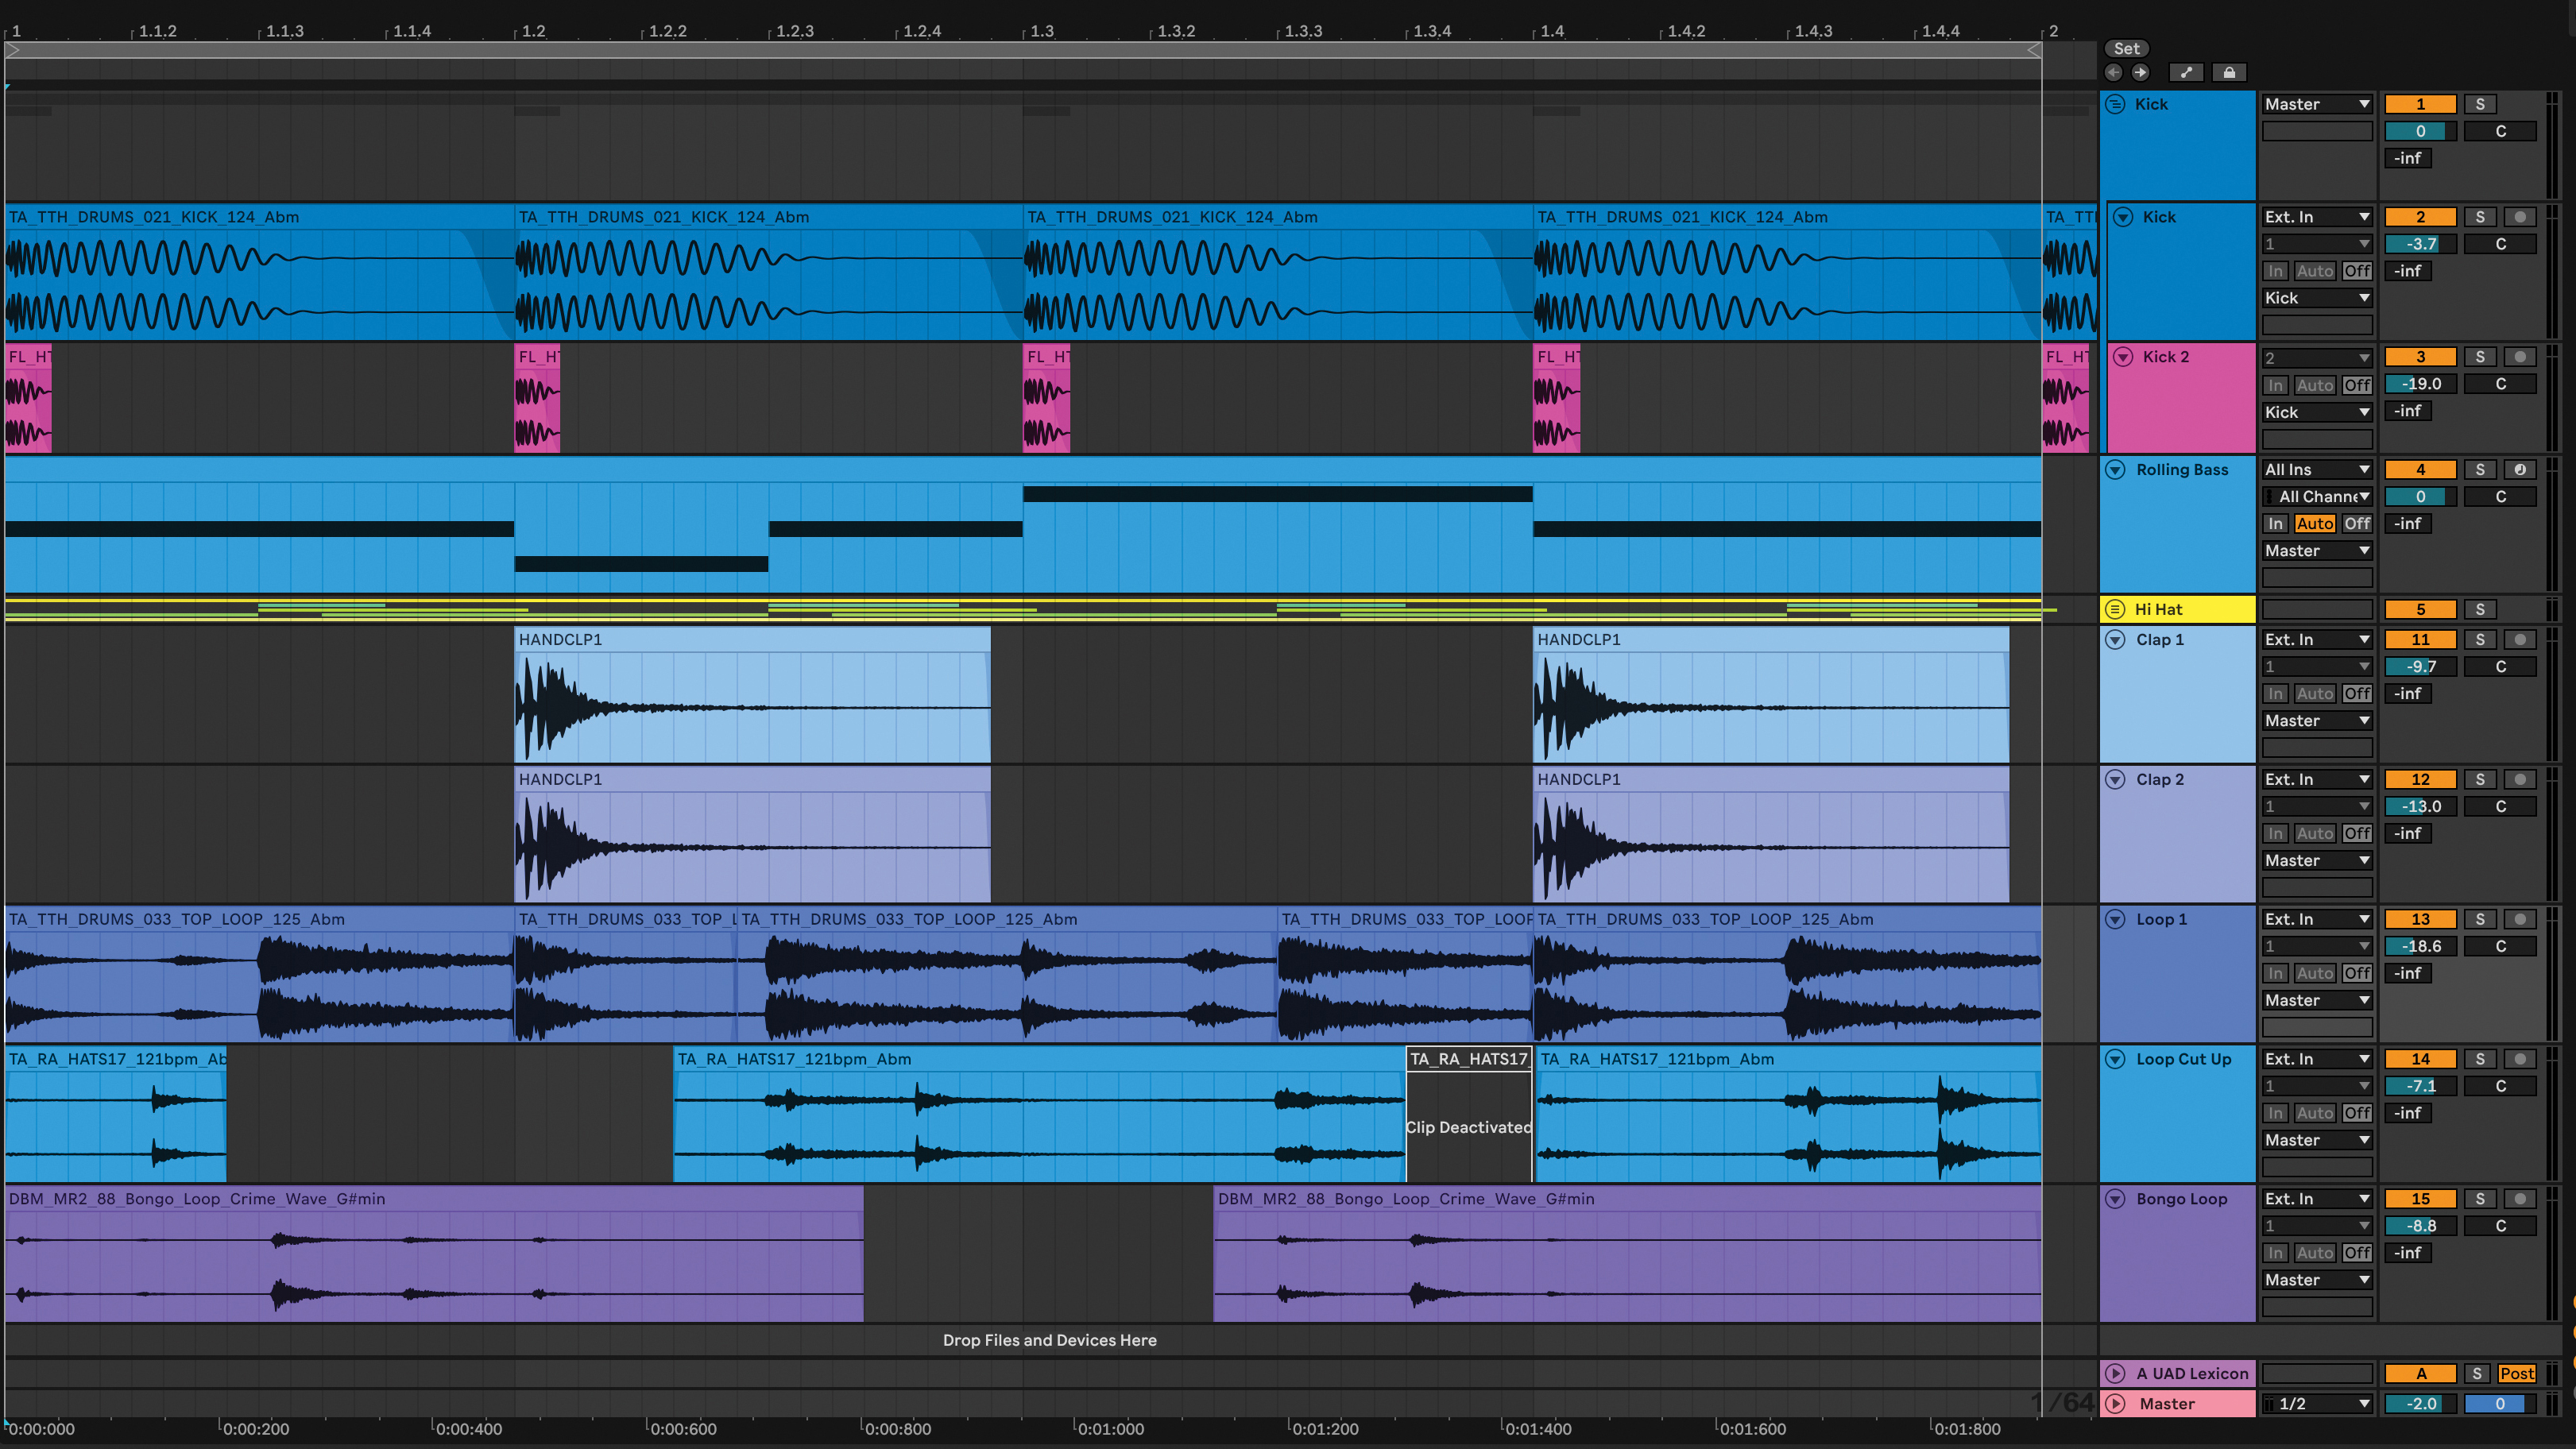
Choose a few percussive loops from a sample pack from SampleRadar. Rather than have the entire loop play, try editing the loops and using pieces of them. Layer one or two percussive loops together so that they complement each other. The loops should work with your bassline, so both grooves are similar.
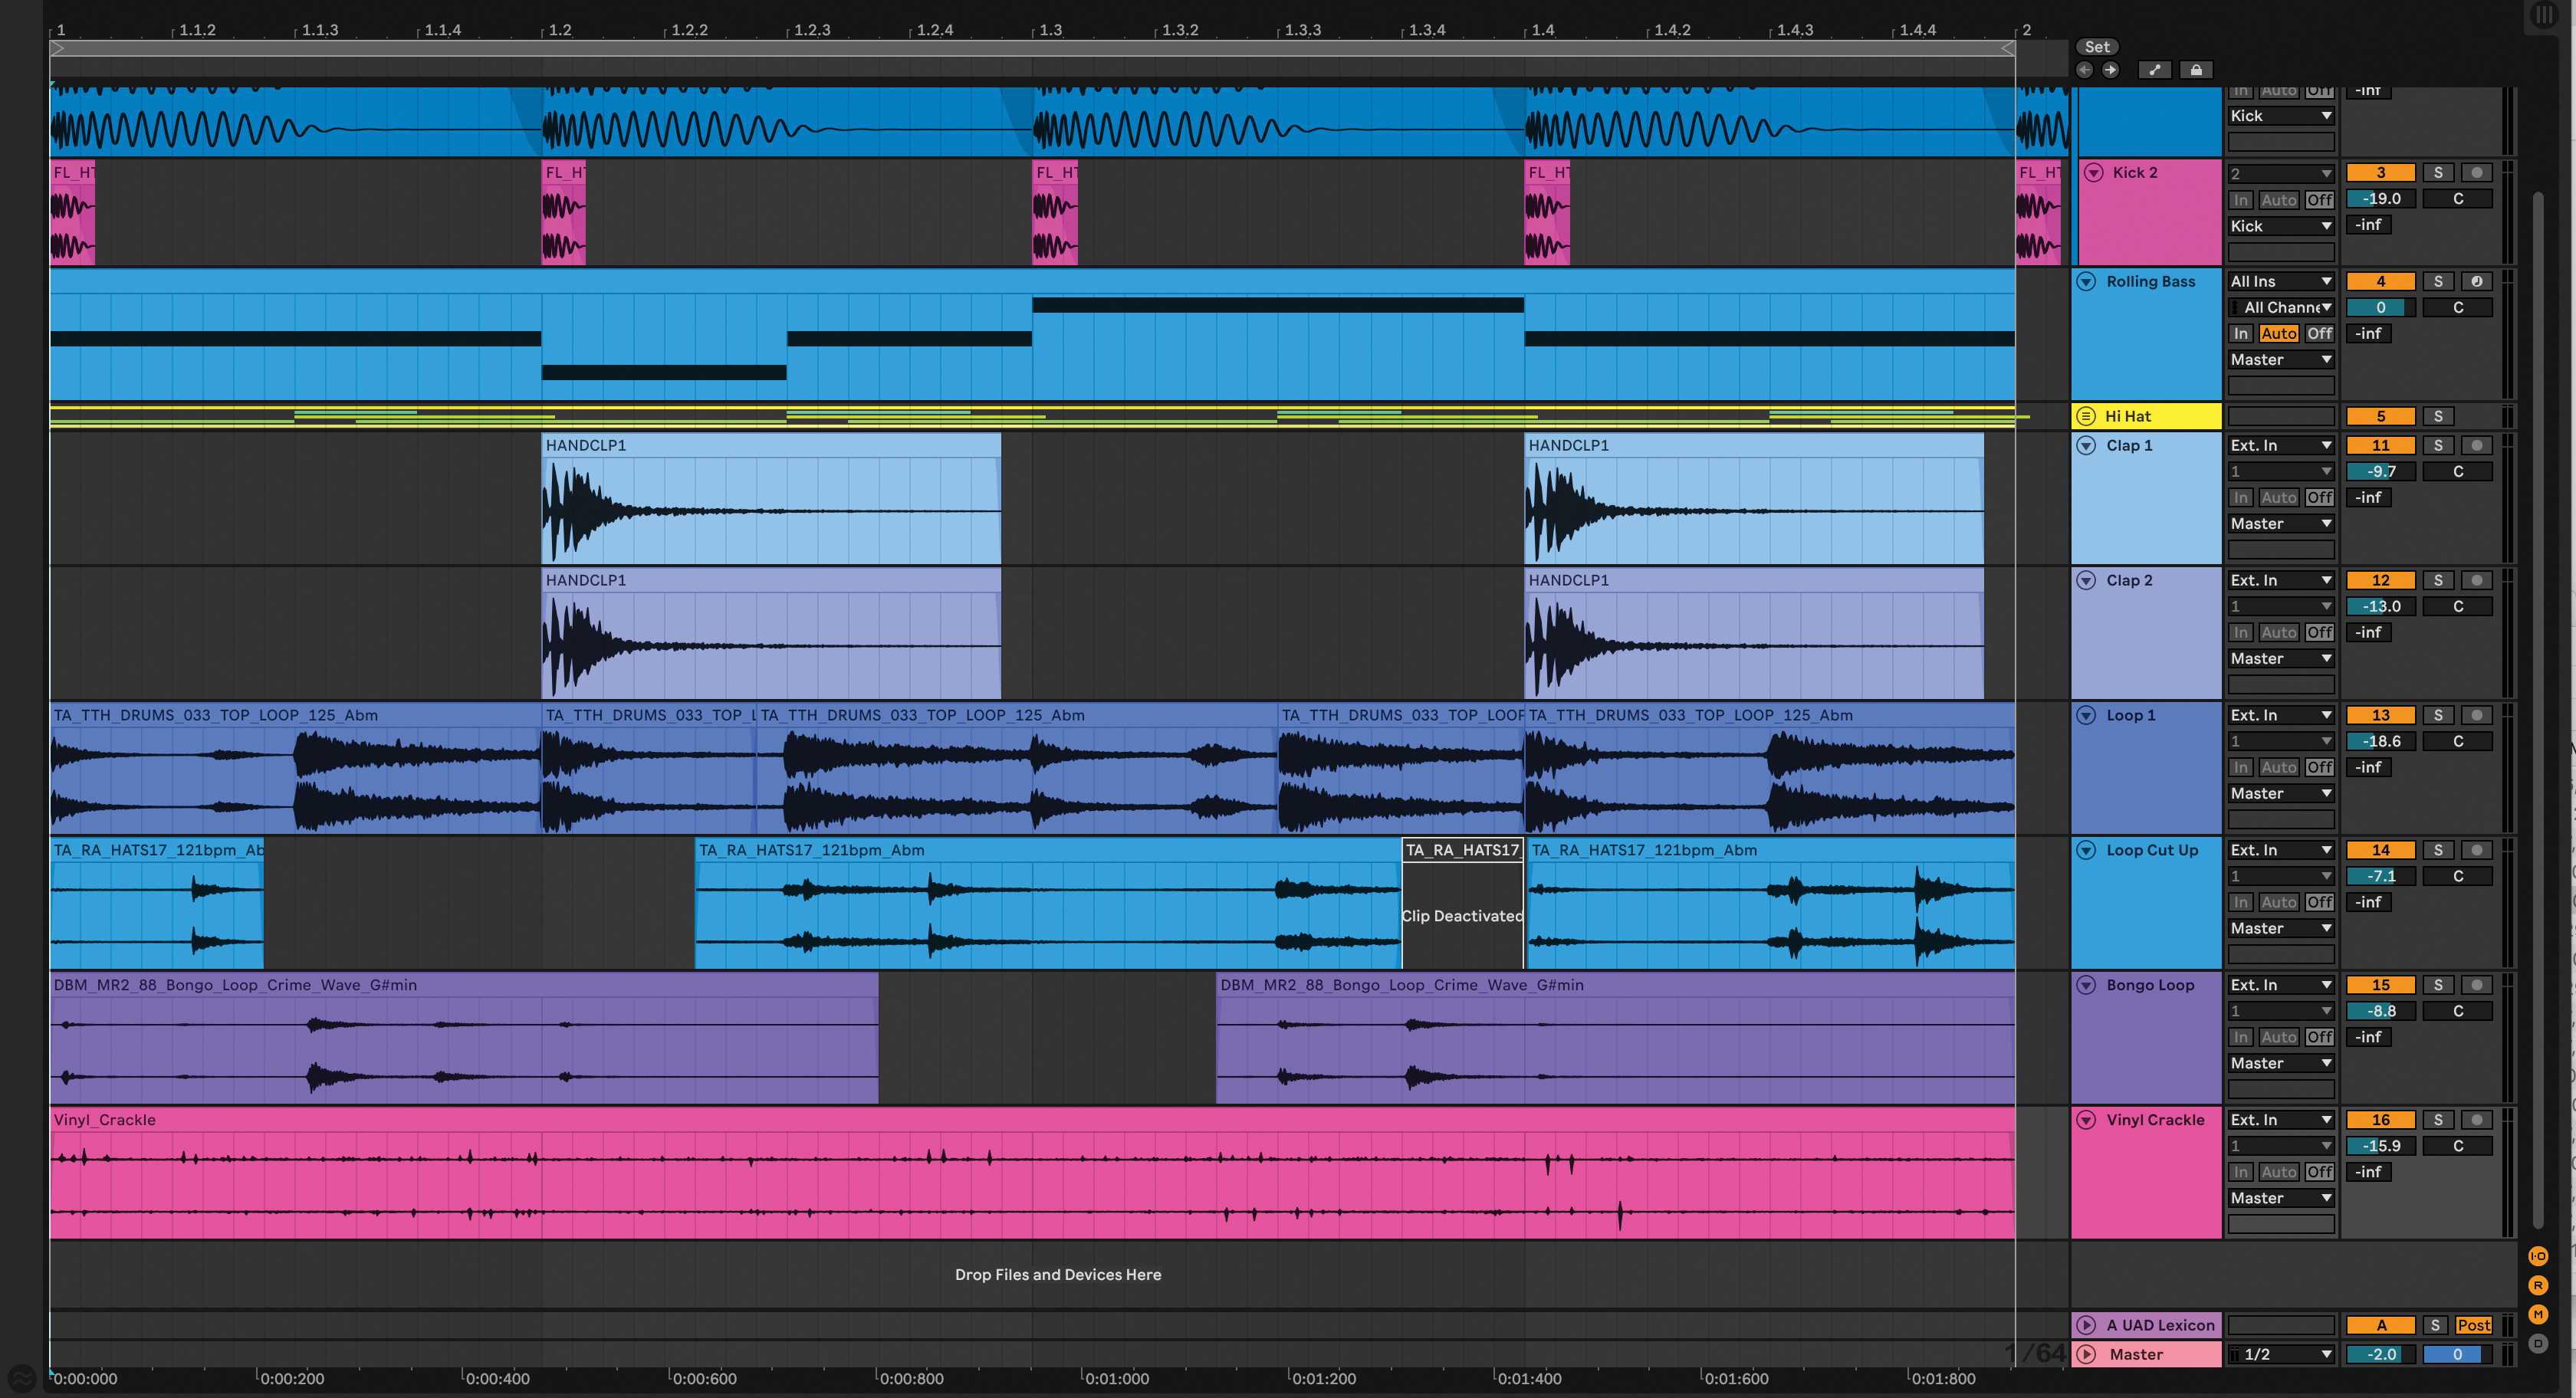
Find a sample of vinyl crackle and add it in as a texture layer that plays at a low volume in the mix. You could also find a texture sample and edit it, and have it play at the same time in every bar. Lastly, you may want to add a few drum fill loops every eight or 16 bars to keep the groove interesting.
Pro tip
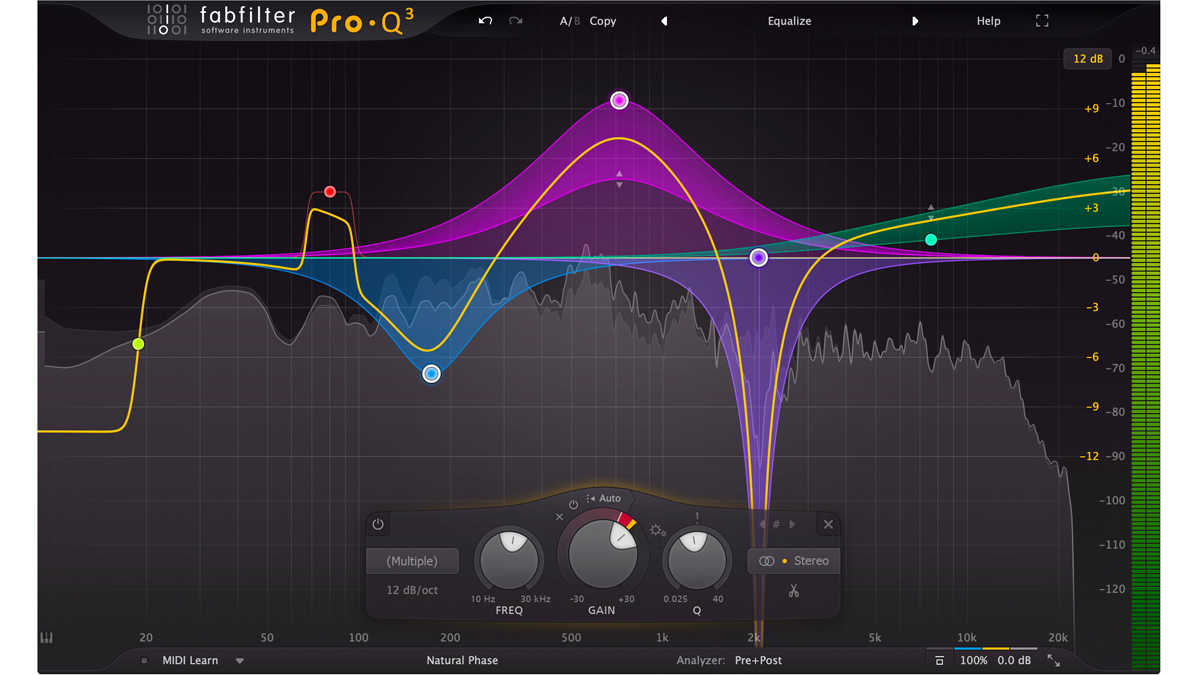
Your drums need to cut through with a little dynamic shaping. Adjust the attack and sustain using your DAW’s in-built compressor, or via a plugin like iZotope Neutron 4, or Native Instruments’ Transient Master. You can shape the transients of sounds like hi-hats by increasing attack to make them stand out.
EQ each drum sound with an EQ (FabFilter Pro Q-3, pictured above, is our choice) that has a dynamic EQ feature, so that when you make a boost or cut, the track has more movement overall. Compression can be used on drums but consider if it’s actually needed, as many drum samples are already processed. You can layer drum sounds instead.
Compression can add more punch by allowing your transient to remain the same volume while reducing the sustain. Slower attacks let through initial transients to create punchier sound. Fast releases give a more aggressive sound, while slow releases produce a smoother sound. Lastly, group your drums together, send the group to a drum bus, then glue the drums with soft compression and saturation.
Recommended listening
1. ESSEL - Sweat (Extended Mix)
A tech house banger with solid drums and memorable main riff by one of dance music’s hottest new talents.
2. Gorillaz - New Gold (Dom Dolla Remix)
A unforgettable dancefloor party-starter helmed by one of tech house’s finest producers, Dom Dolla.


