How to design a tape-inspired string synth patch like Moby's Porcelain
When you want a hint of vintage, but you’re keeping things contemporary, try programming this tape-inspired string synth sound
Want all the hottest music and gear news, reviews, deals, features and more, direct to your inbox? Sign up here.
You are now subscribed
Your newsletter sign-up was successful
Nothing conjures up the vintage sound more than analogue tape. While the days of huge reel-to-reel multitracks have become the preserve of a few choice studios, ‘real’ tape delays are enjoying a renaissance, both hardware and software forms.
The popularity of sounds from vintage machines, like the tape-based Mellotron, continue to be exploited in a number of production circles. This beast of a machine was an early form of sampler, before sampling went digital. Playing a note on the Mellotron’s keyboard would activate a tape-rolling mechanism, where the recording of a chosen instrument would be replayed, in real-time, by tape!

But even in contemporary live settings, there have been attempts by artists such as Nine Inch Nails to use cheap and cheery cassette-based 4-tracks, to replay pre-recorded chords, using the faders and pitch control to alter harmony. Thankfully, we can adopt a more pragmatic approach, but what do you do if you want that hint of vintage, but want to keep your sounds far more contemporary?
Article continues belowIn this tutorial, we’re going to use a randomised LFO to emulate the sound of a well-worn tape, thus creating the wow and flutter effect which is so heavily associated with the concept. We’re also going to concentrate on keeping our initial sound sonically rich and contemporary, with some bright saw waves, with a little bit of added white noise, to aid the overall texture.
We're going to use ZebraCM for this tutorial, a free synth plugin bundled with every issue of Computer Music Magazine, but you should be able to follow along with any well-equipped software synthesizer.
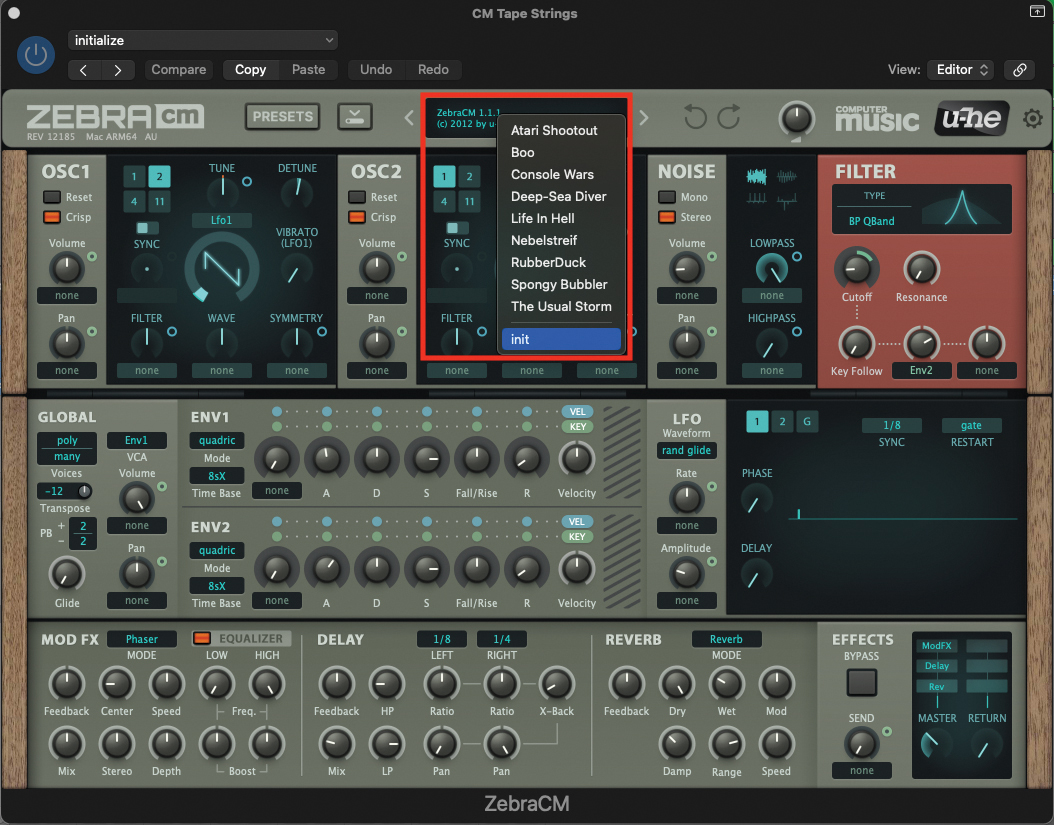
We’ll begin by initialising a patch on the ZebraCM. Open up your DAW and load up the plugin. Once the plugin window is open, move to the central display at the top of the window, click to reveal the drop-down menu, and select ‘init’ from the bottom. This will initialise the patch.
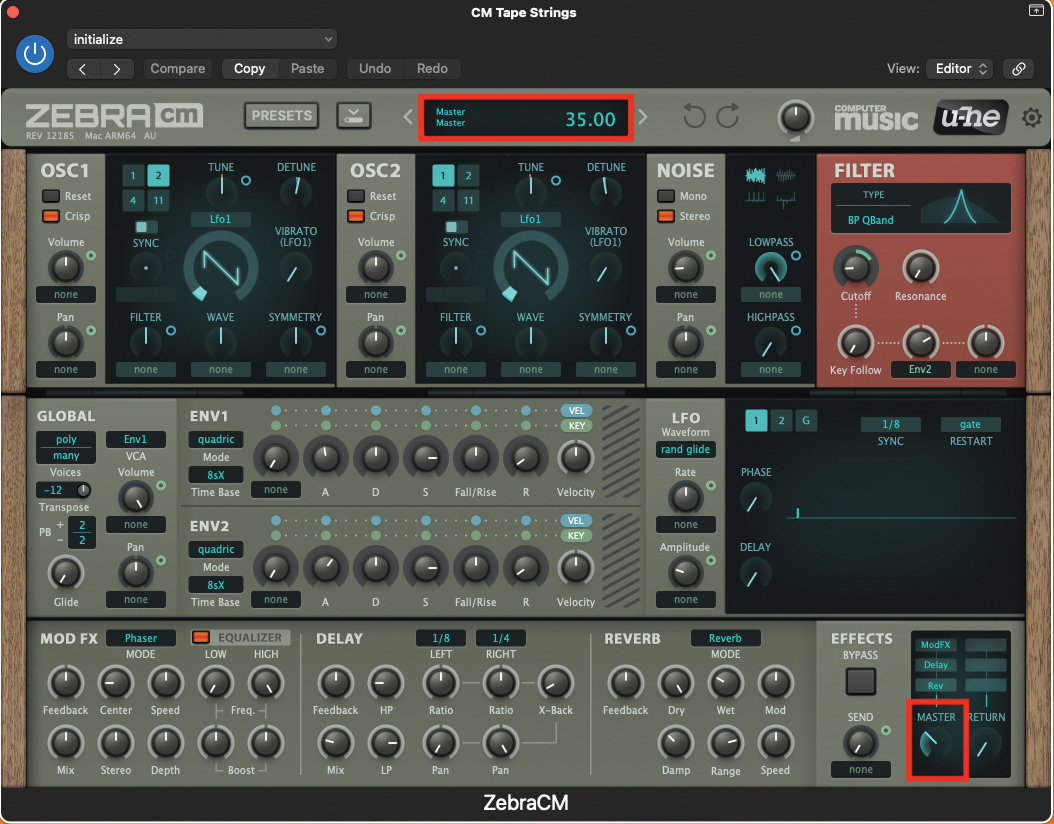
To avoid any possibility of damaging your monitoring, and your ears, reduce the ZebraCM master volume to a level of 35. Just as a reminder; every time you tweak a pot or setting on the plugin, you will see an accurate value/numeric in the upper display.
Want all the hottest music and gear news, reviews, deals, features and more, direct to your inbox? Sign up here.
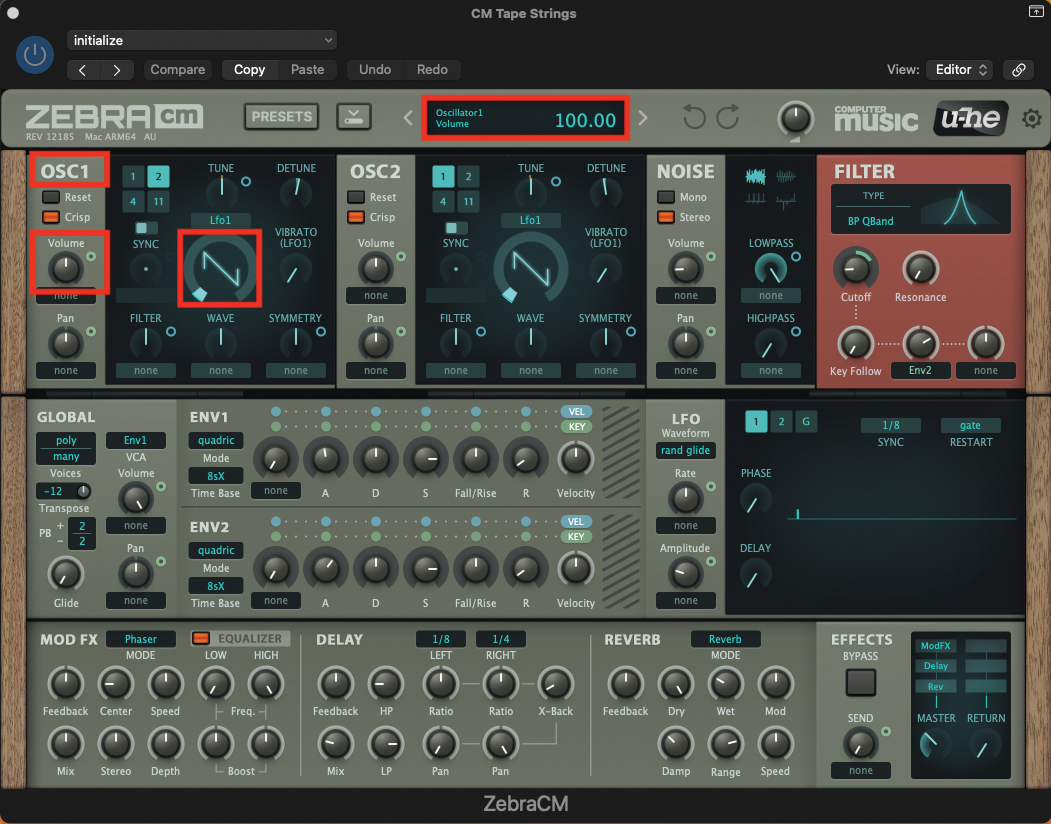
We begin creating a sound by turning our attention to Osc1. We want to use the default sawtooth waveform, which should be visually apparent post-initialise. Check that the volume of Osc1 is set to the 12 o’clock position, which should read 100 in the upper display.
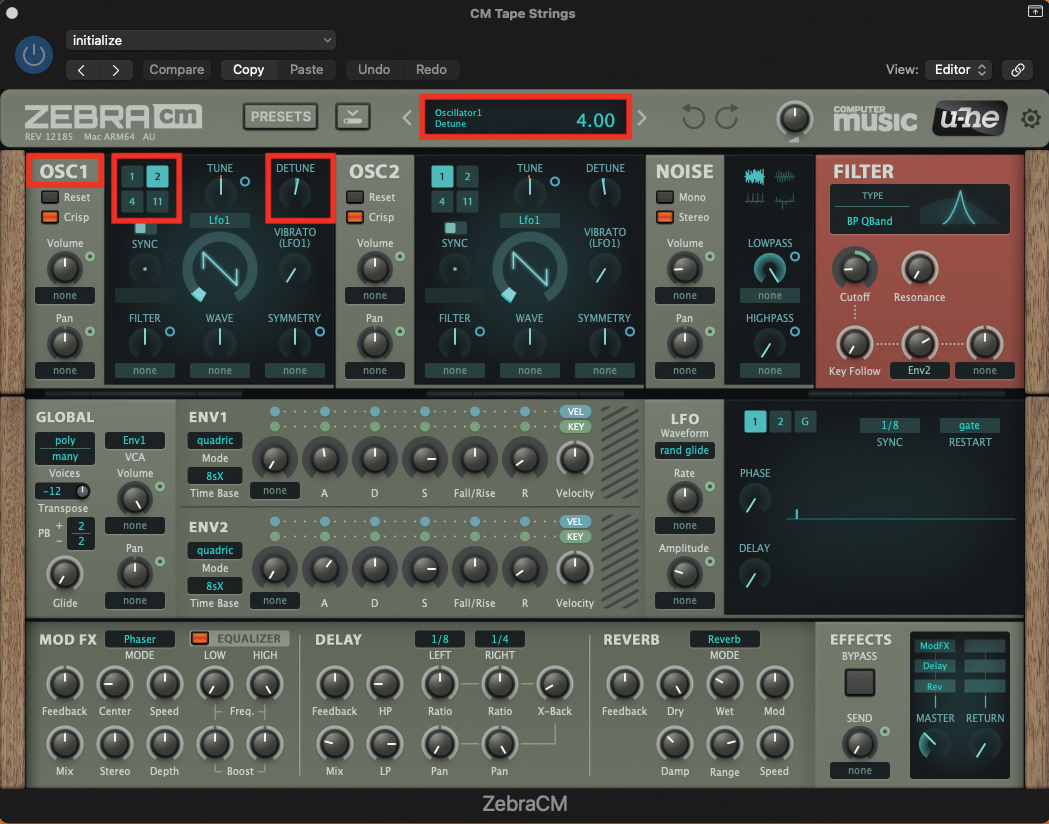
Staying within the Osc1 section, we want to introduce some wave aliasing, which we can do by highlighting the 2 in turquoise, in the upper left-hand corner. This will immediately sound phased, but we can alleviate this problem by increasing the Detune pot to a value of 4.
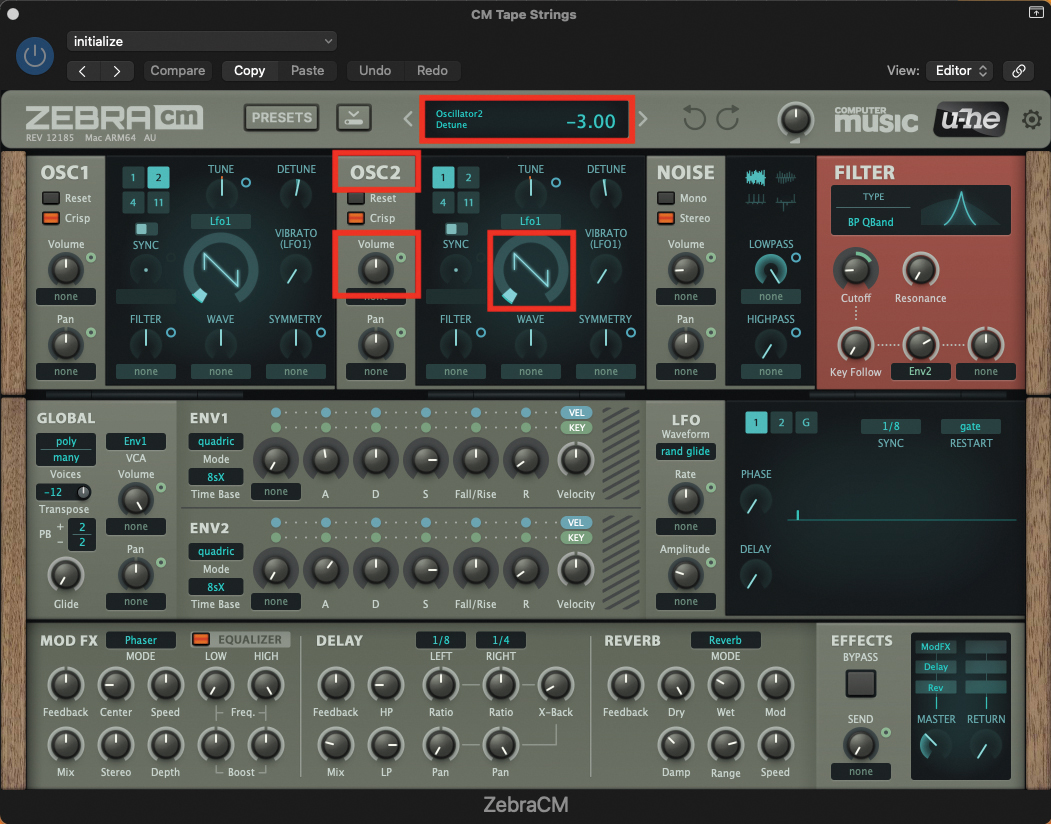
Next, we can shuttle across to Osc2; we will also leave this set to a sawtooth waveform, but unlike Osc1, we will need to increase the volume from its default of zero. Increase the volume pot to a value of 100, and adjust the Detune pot to a value of -3.
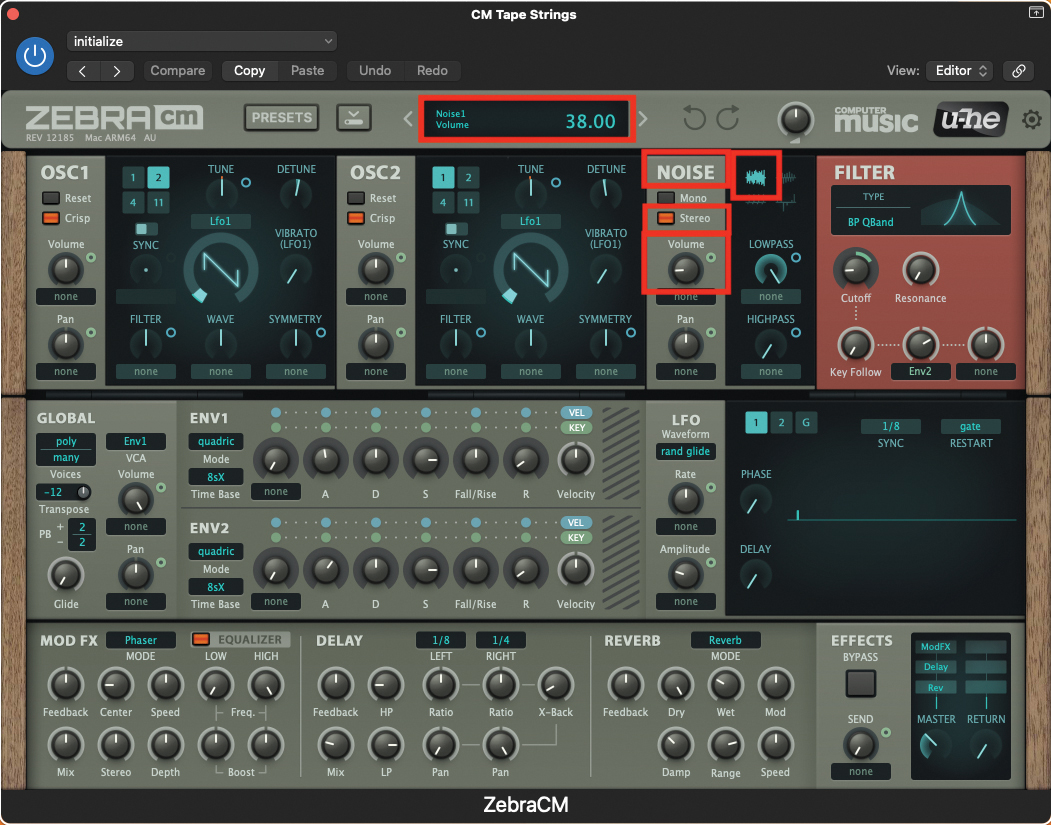
To add further colour to the saw-based oscillators, we’ll introduce some white noise into our sound. Within the Noise section, select the Stereo option and increase the volume pot to a value of 38. You can also check that you have white noise selected by default, indicated by the icon in the upper left-hand corner of the noise section.
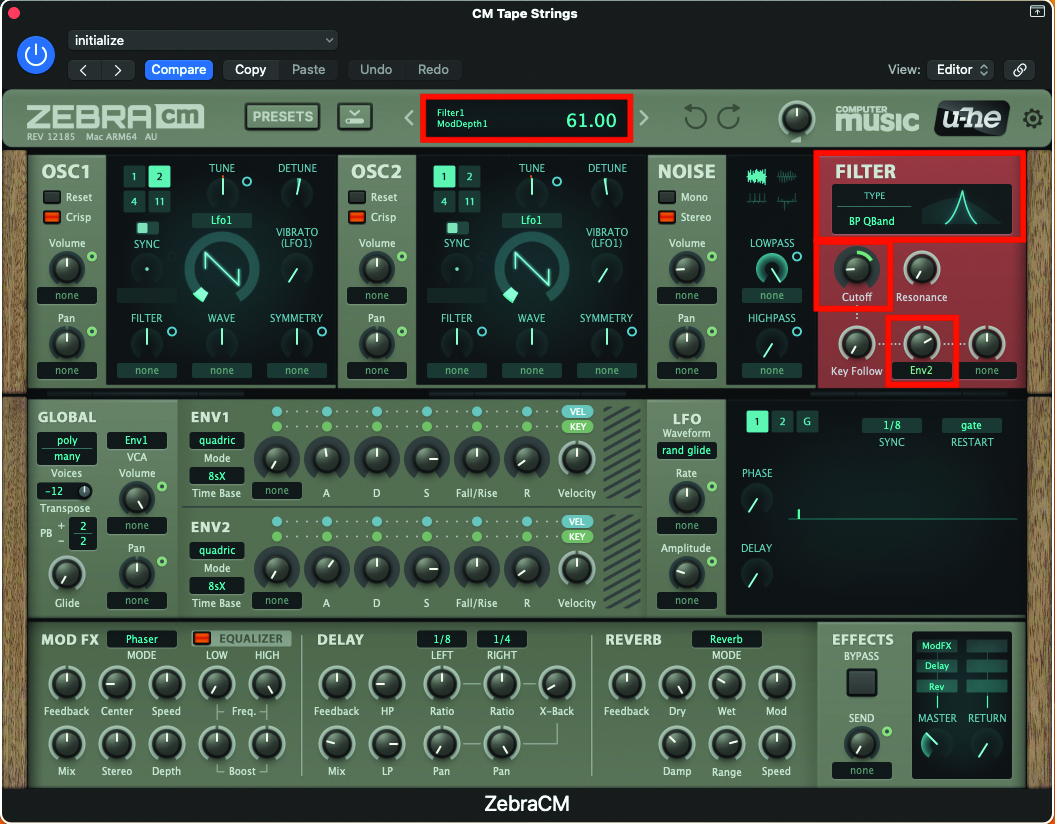
We can sculpt our patch by using the filter section; first, select the BandPass filter described as BP QBand, from the filter-type dropdown. Then adjust the cutoff pot to a value of 28, before also adjusting the user-defined ENV2 pot to a value of 61. This means ENV2 will be modulating the filter’s cutoff, as we play notes on the keyboard.
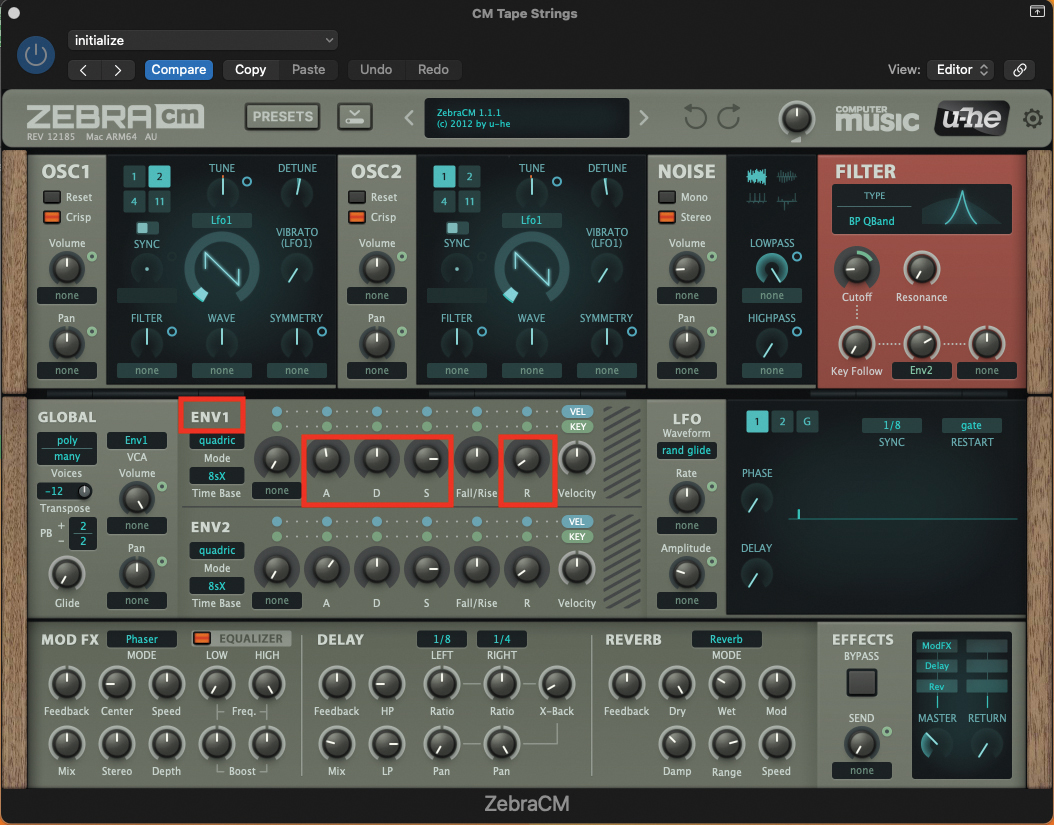
Move to the Envelope section, where we’ll adjust the values of ENV1, controlling our patch’s amplitude/volume. Set the Attack pot to a value of 47, Decay to a value of 50, the Sustain to 80, and finally the Release to 8. This will provide a slow fade in, at the beginning of each note, but a quick release on the back-end of each note.
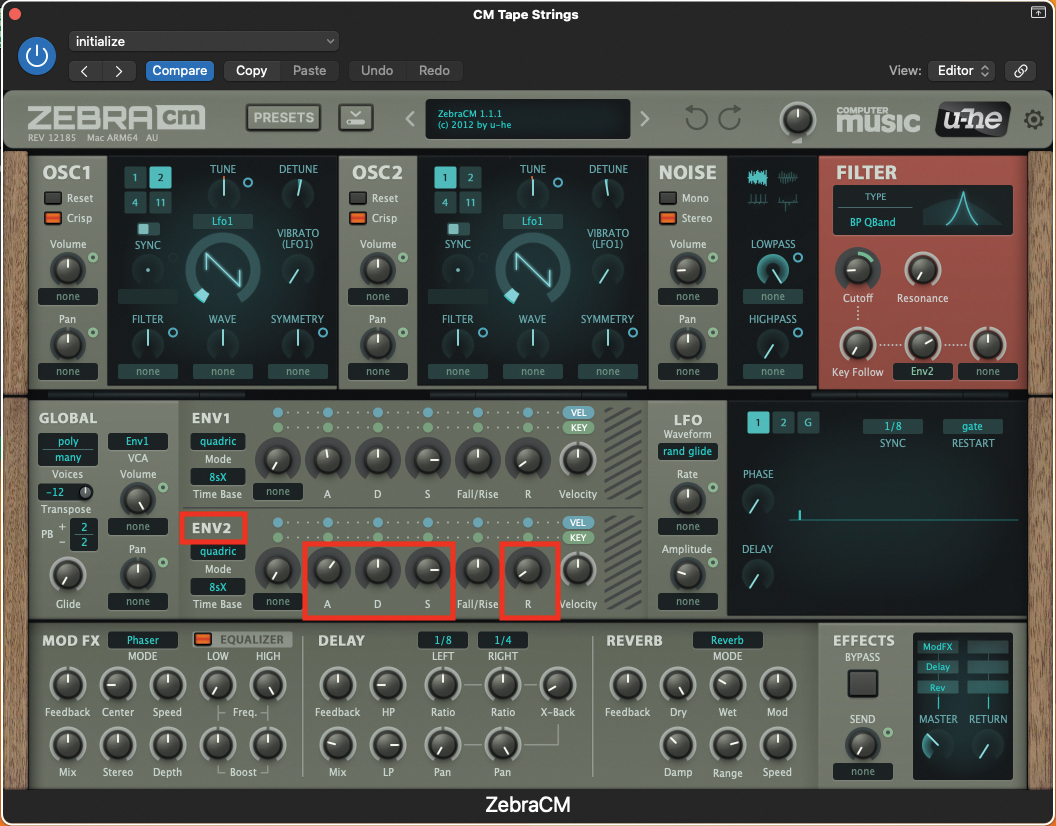
As previously mentioned, ENV2 will be controlling the cutoff amount within the filter section. Set the Attack pot to a value of 62, Decay to a value of 50, the Sustain to 80, and finally the Release to 8. This should provide a swell in the brightness of the sound, at the beginning of each note played.
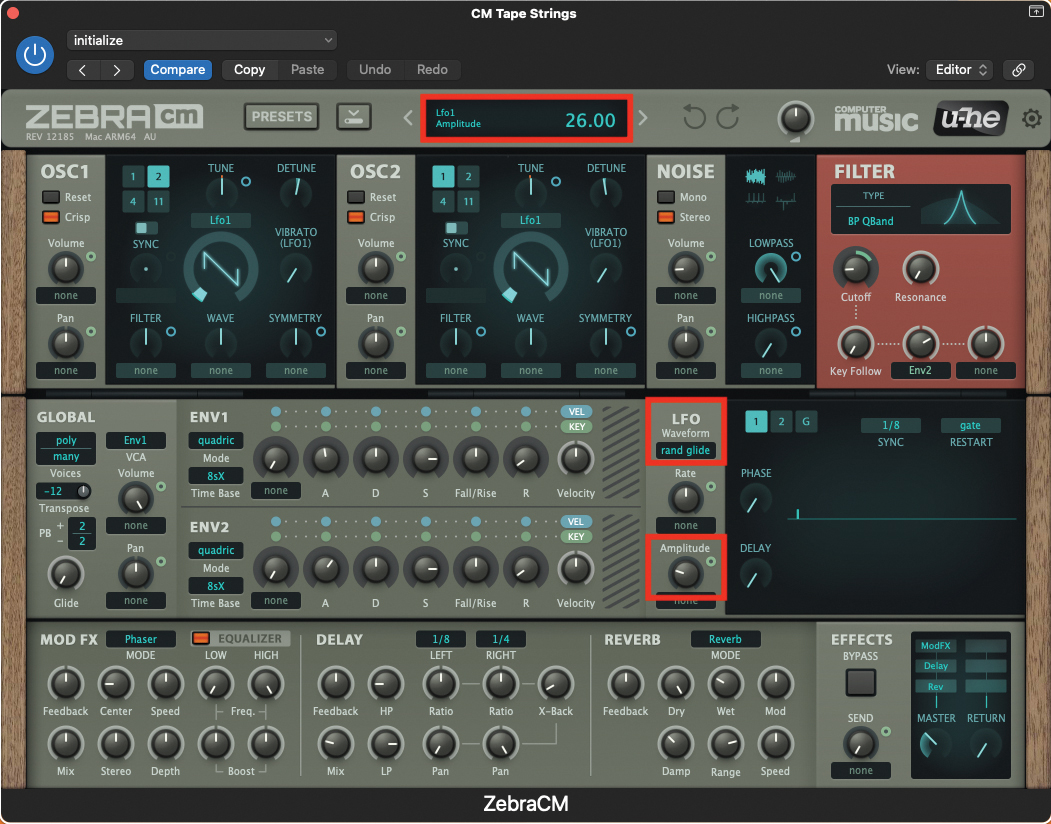
Now it’s time to apply our tape effect; move to the LFO section and select Rand Glide (Random Glide) from the drop-down waveform menu. Adjust the amplitude pot, to a value of 26. This control reduces the height of each wave oscillation, and hence the amount of LFO output. By decreasing, you get greater control over the modulation.
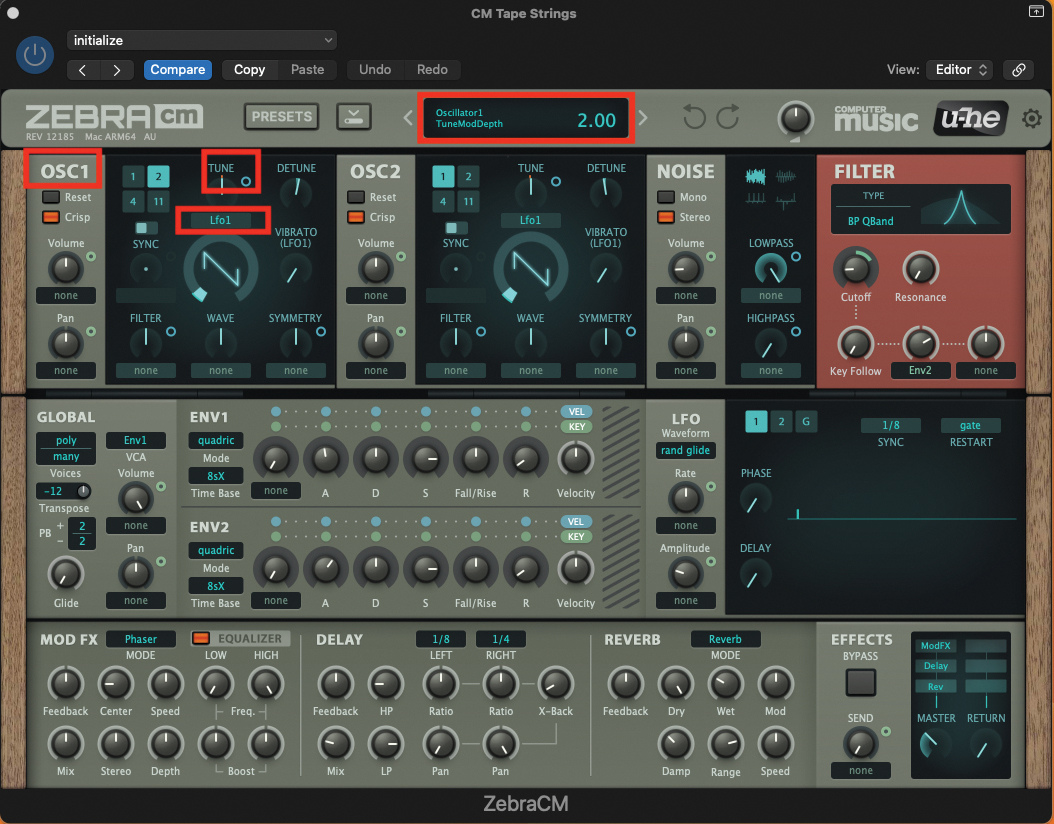
We need to indicate the amount of detune being applied to each oscillator, so moving back to OSC1, select LFO1 from the dropdown menu immediately below the Tune pot. Then click and drag the small turquoise circle, to the right of the main pot upwards, to a value of 2. This value assigns the amount of LFO-induced detune modulation.

Finally, we need to do the same within the OSC2 section; select LFO1 from the dropdown menu, immediately below the Tune pot. Then click and drag the small turquoise circle, to the right of the main pot, but this time downwards to a value of -2. You should now have some tape-style ‘wobble’ on your patch!
Pro tip
We’ve made every effort to keep this patch usable within the contemporary domain, but even while keeping things up-to-date, you may well want to dial up the vintage quotient to the extreme. There are many occasions where this might be required, even while exploiting the most up-to-date production techniques.
Unsurprisingly, the filter that we use will have a huge effect on the overall sound of the patch. By using a band-pass filter, we eliminate upper and lower frequency content, but within the ZebraCM we don’t have an enormous amount of manual control over this parameter.
One way to create the classic music-down-the-telephone effect, is to employ an EQ that places a heavy cut on both the lower and higher frequency bands
One way to create the classic music-down-the-telephone effect, is to employ an EQ in your DAW that places a heavy cut on both the lower and higher frequency bands. This emulates a telephone as the bandwidth of traditional landline telephones is very narrow, compared to the sharp digital output we get over a mobile network.
Still, this has its place, and you can add to the sound by boosting middle frequency content. There’s also nothing to stop you adding specific vintage emulation plugins. From tape delays, to valve channel strips – they all add to the vintage effect.
Recommended listening
1. Moby - Porcelain
The opening chords typify the effect that we have attempted to make today, with vintage colour and string-based amplitude swells.
2. Radiohead - The Tourist
This track includes the perfect placement of a Mellotron choir, with the return of each chorus. Highly identifiable and brimming with vintage charm and colour.
Roland Schmidt is a professional programmer, sound designer and producer, who has worked in collaboration with a number of successful production teams over the last 25 years. He can also be found delivering regular and key-note lectures on the use of hardware/software synthesisers and production, at various higher educational institutions throughout the UK
