Songwriting basics: how to produce an authentic ‘80s-style synth track in your DAW
Composing and programming tricks revealed
Music technology in the 1980s went through a transformative period. The arrival of MIDI and digital synthesis on the scene superseded ‘old-fashioned’ analogue equipment such as the Minimoog, and sampling and sequencing were on the point of revolutionising the way that records would come to be made.
New Order and the Eurythmics were just two bands whose experimental forays into commercial electronic pop music, with tracks such as Blue Monday and Sweet Dreams (Are Made of This), spearheaded a radio-friendly revolution in how popular music was now meant to sound.
Fast-forward almost 40 years and you only have to listen to current releases by Dua Lipa, Lady Gaga or The Weeknd to realise the influence that ‘80s music is now exerting.
But how do you go about getting that distinctive ‘80s flavour into your own tracks? We’ll be looking at a couple of constructive ways in which you can do just that, with sequenced synth basses, blippy arpeggios and big polyphonic synth chords being the order of the day.
You’ll find all the synths used in this tutorial free with Computer Music magazine every month, so dig out your mullets, neon shades and shoulder pads, and let’s Jump to it.
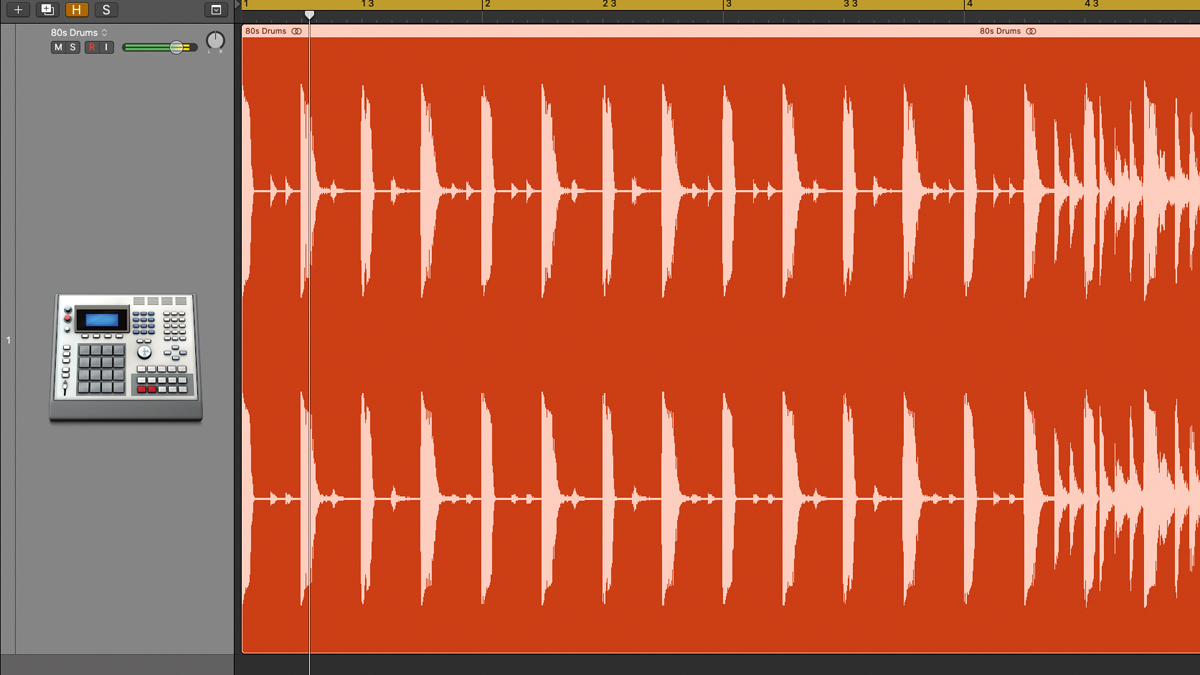
Step 1: To illustrate a few typical ‘80s-style sounds and the parts that make them tick, we’ll add some tracks to a project that already contains a suitable drum loop. This was made using sampled sounds from a classic -80s sampling drum machine - the E-MU SP1200. The tempo of our track is 90bpm.
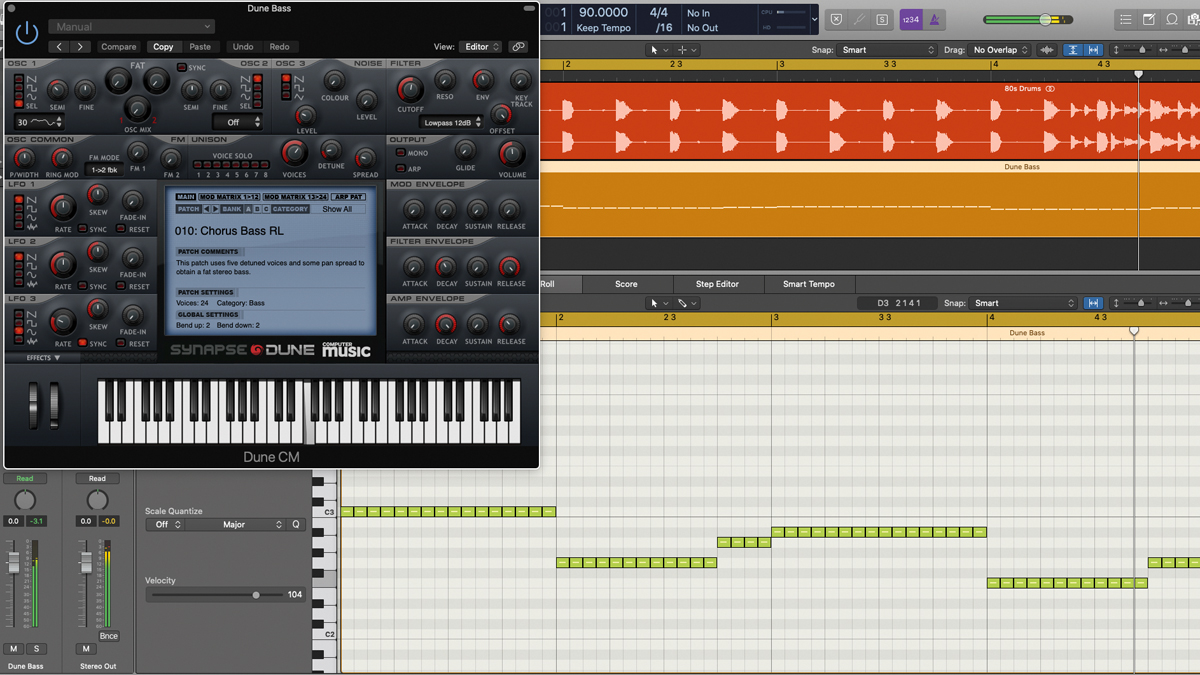
Step 2: To emulate an ‘80s-style, step-sequenced analogue bass synth part, let’s turn to Synapse Audio’s excellent Dune CM. Load an instance onto a Software Instrument track in your DAW and select 010 Chorus Bass RL, then program a sequence of sixteenth notes, all with the same length and velocity, on the notes C, G, Bb and F, as shown.
Get the MusicRadar Newsletter
Want all the hottest music and gear news, reviews, deals, features and more, direct to your inbox? Sign up here.
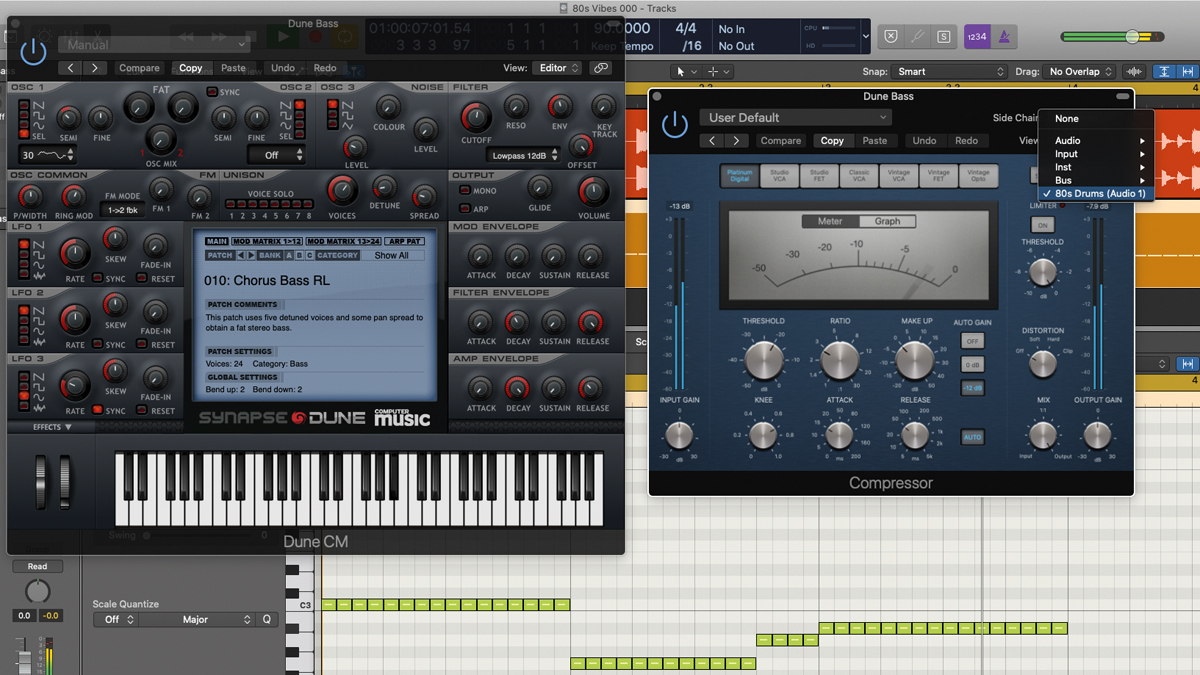
Step 3: In the ‘80s, compressor sidechaining livened up the dynamics of sequenced basslines like this by allowing non-accent notes to poke out in between drum beats. Place a compressor across the Dune CM track and select the drum loop track as the sidechain input. The settings shown dip the bass in volume when a kick or snare hits, giving the bass a pulsating feel.
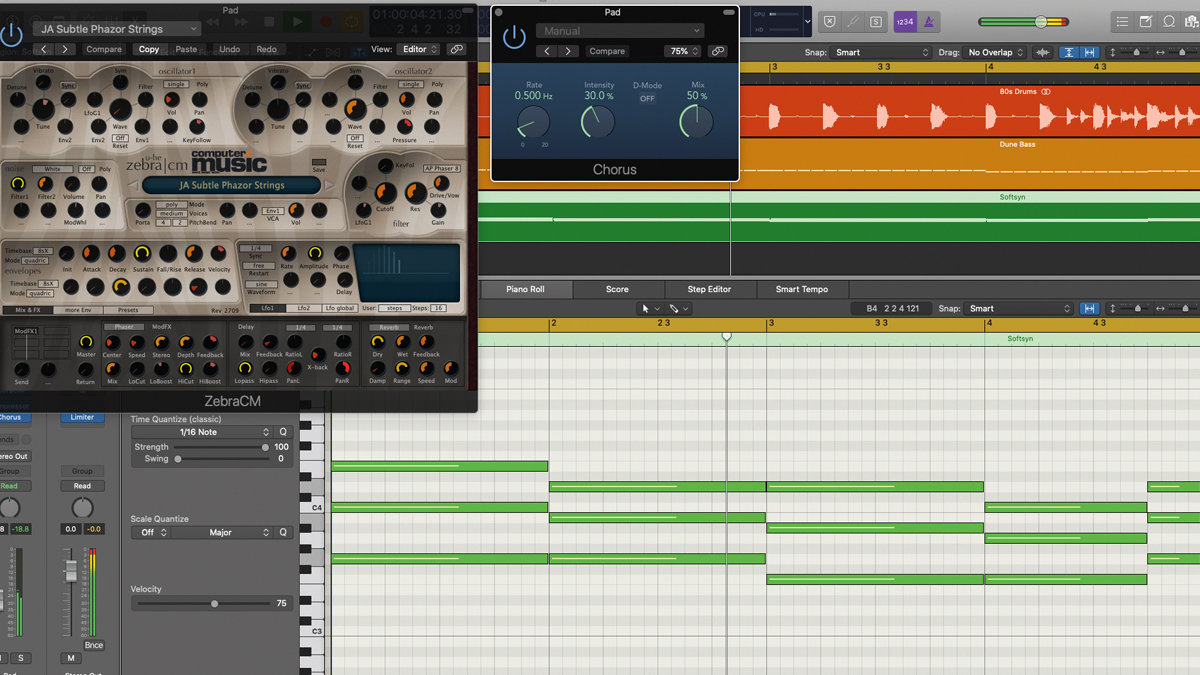
Step 4: Analogue synth pads are the glue that holds everything together musically. Let’s load up u-he Zebra CM and select the ‘JA Subtle Phazor Strings’ preset. To thicken up the sound we add a touch of compression and one of Logic’s own stock Chorus plugins, then program in some simple triad chords - C major, G major, Bb major and F major.
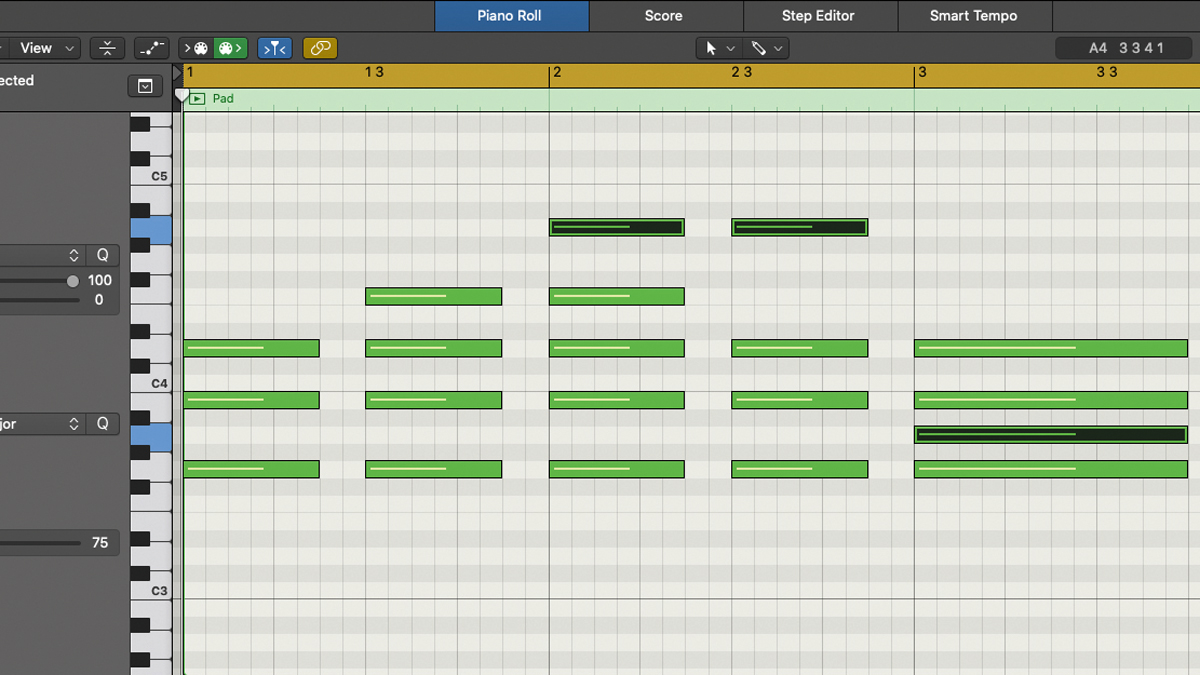
Step 5: To really ‘80s it up, use a slightly different voicing on a couple of these chords. Extend a regular triad by adding extra notes from the scale, such as the seventh and ninth. If you just add the ninth without the seventh, then transpose the ninth an octave down so that it sits between the root and the third, you get an add9 chord.
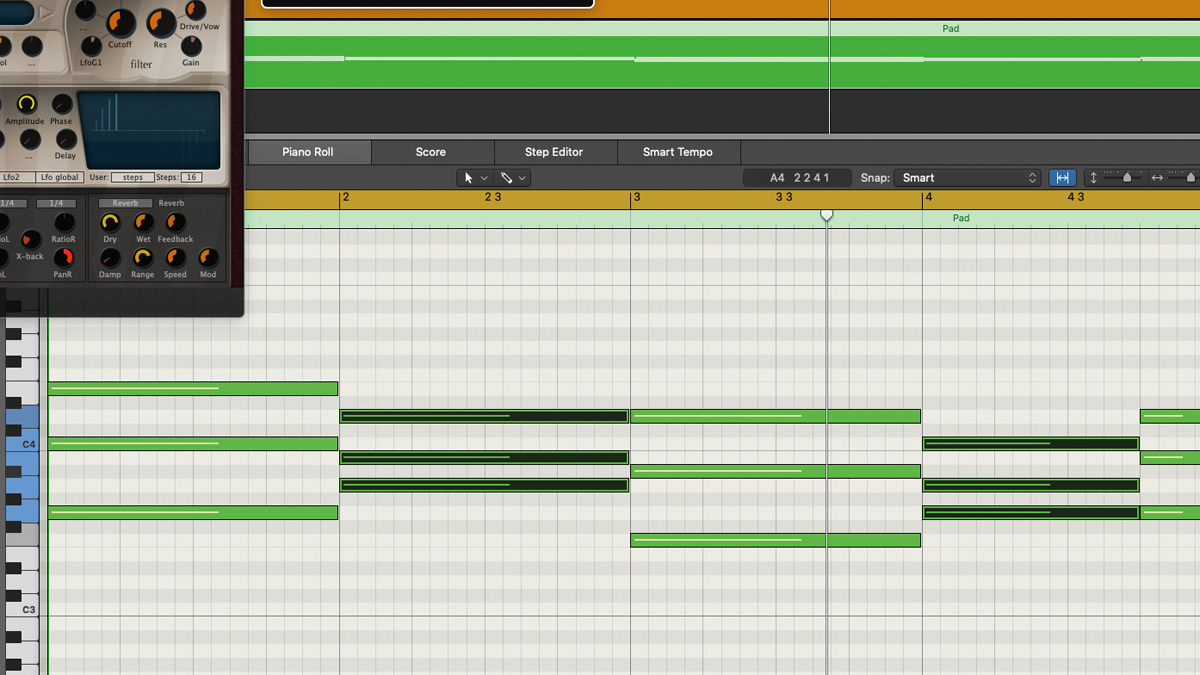
Step 6: Here’s what it looks like if we apply this to the G major and F major chords. In this case, instead of adding the ninth to the triad to make a four-note chord, we’ve simply shifted the root note up a whole tone to make a three-note add9 chord. So G major (G B D) has become Gadd9 (A, B, D), and F major (F, A, C) has become Fadd9 (G, A, C).
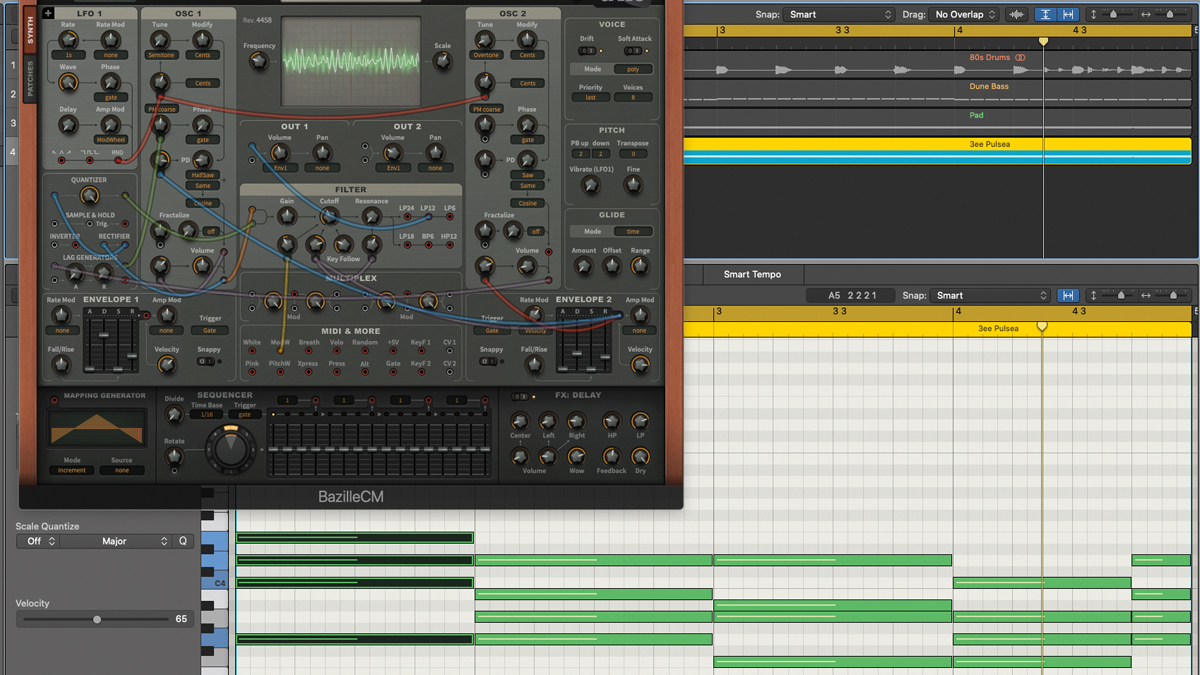
Step 7: To create an arpeggio part, we first load up an instance of Bazille CM and select the ‘3ee Pulsea’ preset. Because the arpeggio we want is a four-note ascending pattern, we program some four-note versions of the chords. Here, we’ve ended up with Cadd9, Gadd9, Bbmaj7 and Fadd9 - with a sneaky Gadd9 tacked on at the end to bring us back round to the C.

Step 8: We’re going to use an external arpeggiator for this, as would most likely have been the case in the ‘80s. So, we use Logic’s Arpeggiator MIDI FX plugin with the settings shown, to produce a simple, ascending four-note arpeggio based on notes within each chord. Finally, dial in some delay via Logic’s stock delay plugin, sent from an Auxiliary send.
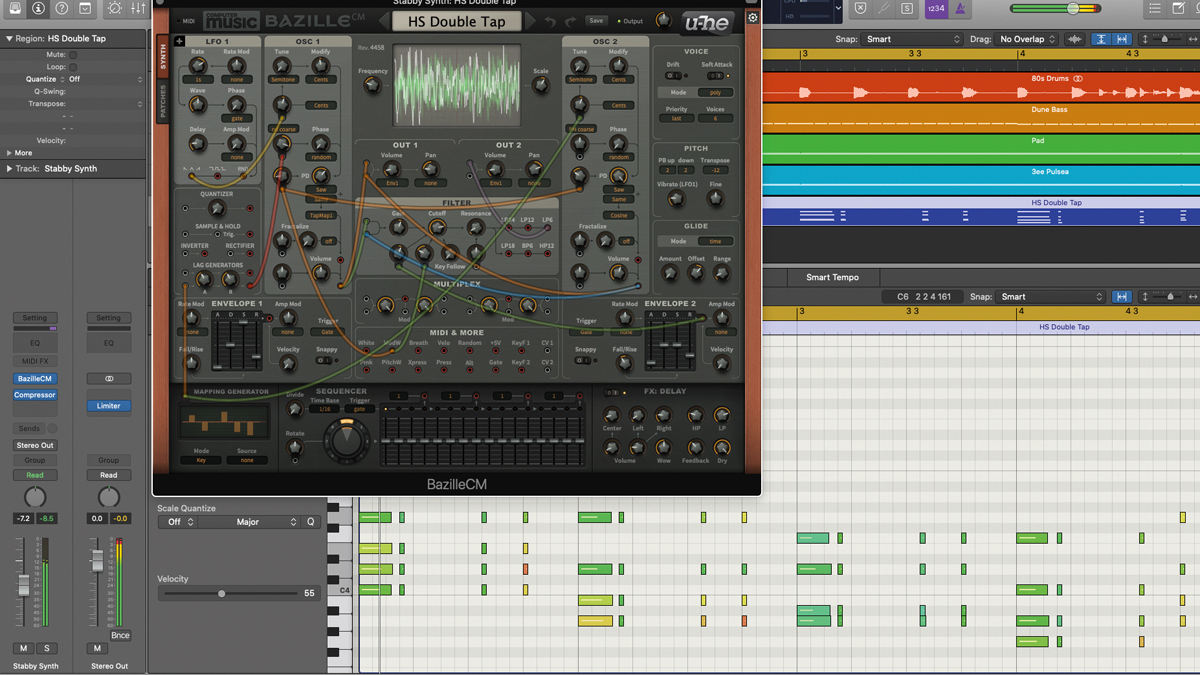
Step 9: Use another Bazille CM’s HS Double Tap for a stabby synth part. We’ve copied the chords from the arpeggio almost exactly for this part, but played one inversion higher, and placed one long and three short, clipped instances of each chord in each bar. The preset’s built-in delay effect creates a syncopated rhythm that interplays nicely with the short chops.
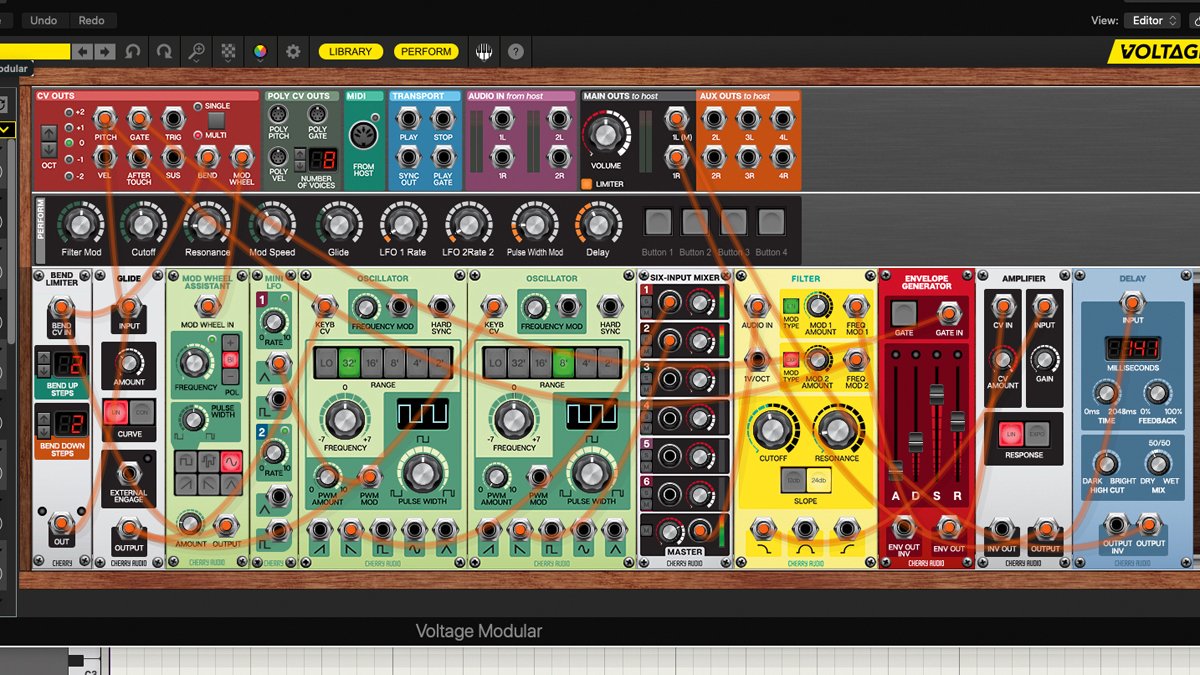
Step 10: Lastly, to get yourself an ‘80s-style synth hook that might work for a chorus or tag section, we load up an instance of Cherry Audio’s Voltage Modular and select the Wide Modular preset. This is a monophonic lead sound with portamento applied so that the note pitches glide together.
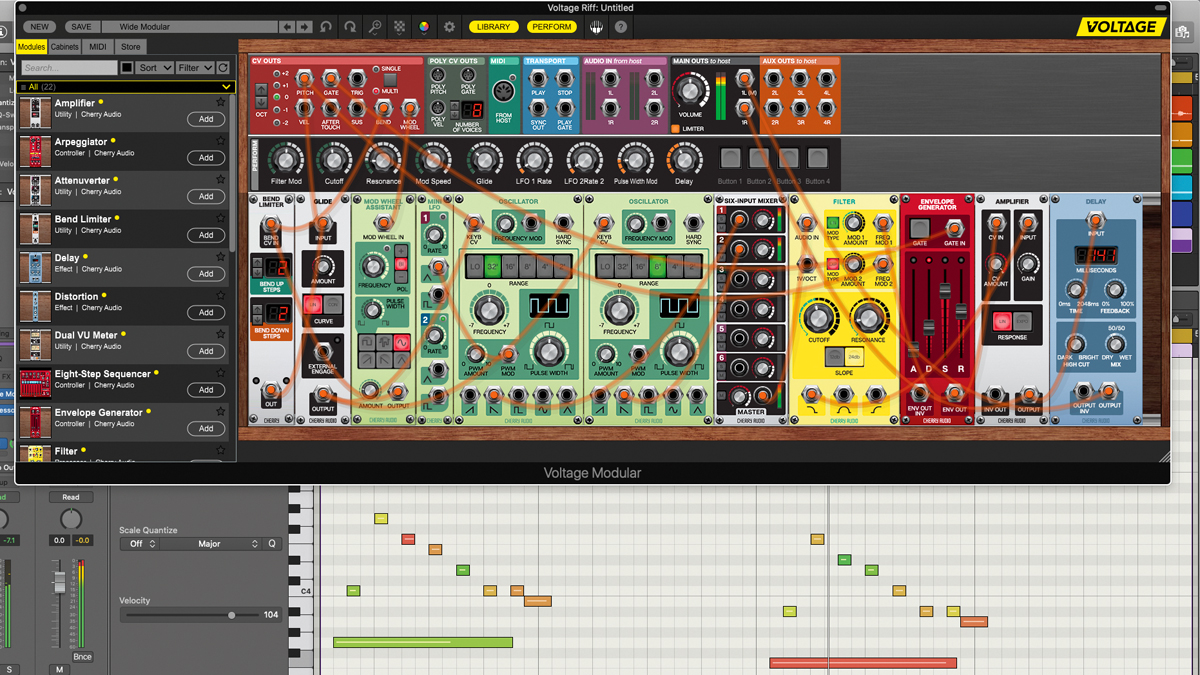
Step 11: For the part, we’ve come up with a hook that uses a particular technique for playing monophonic lead sounds - we hold down one long note and play shorter notes higher up in pitch so that, after each short note, the pitch reverts to that of the long held note. This makes good use of the glide setting built into the sound.
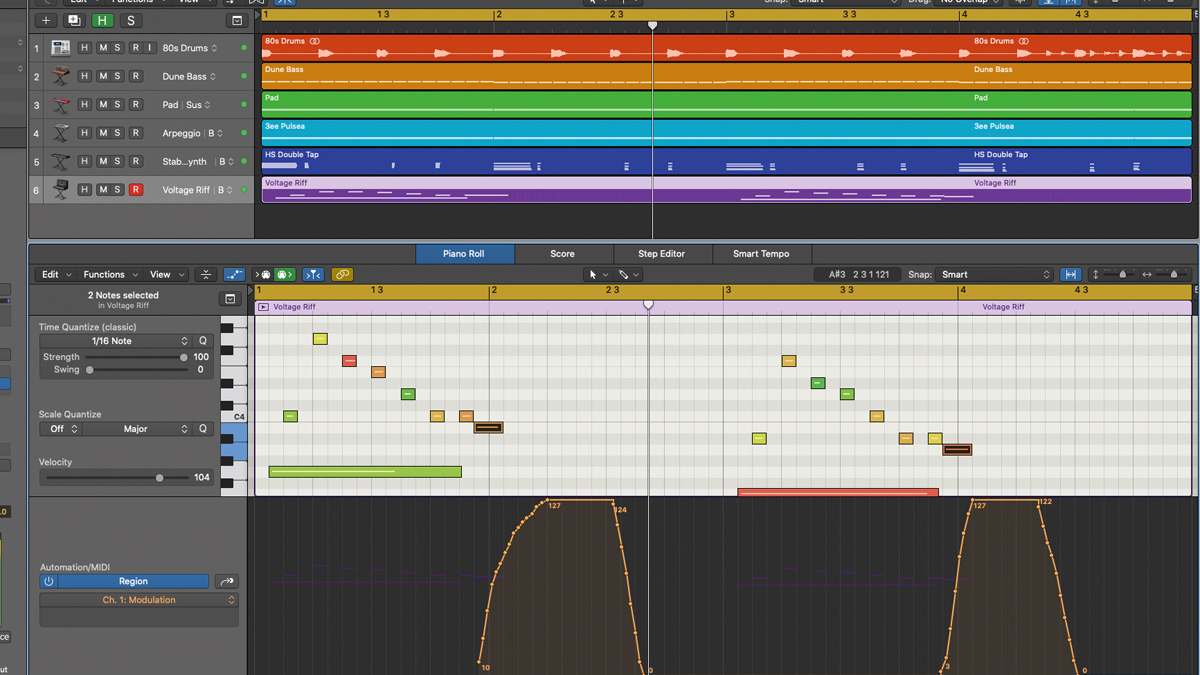
Step 12: As a finishing touch, we add a hint of modulation via our MIDi keyboard’s mod wheel controller on the last note of each phrase. Mod wheels in the ‘80s almost always controlled vibrato, and this sound has been selected largely due to the fact that MIDI CC 1, as transmitted by the mod wheel, controls vibrato for an authentic ‘80s feel.
Pro tips
Gateway to the '80s
Other well-used ‘80s tropes, eventually dismissed as clichés at the time, come in handy when trying to evoke the sound of the decade now. For example, gated reverb - allegedly discovered when Hugh Padgham patched a gate over the heavily-compressed listen mic used to communicate with Phil Collins in the drum booth - became a decade-defining effect, used a lot on drums.
Make your own gated reverb effect by heavily compressing a non-linear reverb tail, then placing a noise gate plugin across it to chop off the release.
Synths you been gone
The 1980s was also the decade in which innovative new synthesis techniques like FM (Frequency Modulation), PD (Phase Distortion) and Wavetable synthesis appeared on the scene. So a great way to recreate the sounds of the era is to dig out software emulations of iconic synths from the period like the Yamaha DX7, Casio CZ101, Fairlight CMI and Synclavier.
Great examples include Native Instruments’ FM8, Waldorf’s PPG Wave 2.V, and the DX7 V, CZ V, CMI V and Synclavier V synths from Arturia’s V Collection.
Computer Music magazine is the world’s best selling publication dedicated solely to making great music with your Mac or PC computer. Each issue it brings its lucky readers the best in cutting-edge tutorials, need-to-know, expert software reviews and even all the tools you actually need to make great music today, courtesy of our legendary CM Plugin Suite.
"If I wasn't recording albums every month, multiple albums, and I wasn't playing on everyone's songs, I wouldn't need any of this”: Travis Barker reveals his production tricks and gear in a new studio tour
“My management and agent have always tried to cover my back on the road”: Neil Young just axed premium gig tickets following advice from The Cure’s Robert Smith


