How to use snap compression to add punch to your mixes
Compression can be used in many wonderful ways. Today we’re looking at a technique that adds impact to sounds
Want all the hottest music and gear news, reviews, deals, features and more, direct to your inbox? Sign up here.
You are now subscribed
Your newsletter sign-up was successful
Understanding how a compressor works doesn’t really reveal the breadth of outcomes it can achieve. When you factor in the individual attack and release characteristics of different compressor designs, it’s easy to see why people develop favourites for certain tasks. Here I’m focusing on one specific effect that requires a fast and flexible compressor.
This technique, sometimes called snap compression, is a technique that fine-tunes the attack and release stages of your compressor to add punch or snap to a sound.
It works best for backbeat sounds such as snares and rims, although it isn’t necessarily limited to these. What’s more, it’s an unapologetically audible compression effect where the sound of the compressor is what we’re utilising.
Article continues belowWhen a sound starts with a sharp fast transient, a super fast compressor can actually catch that transient and clamp down its level. With snap compression we actually want to let that transient pass, but only just.
The effect does take a bit of tweaking to get right and you’ll find some compressors are simply better at it than others. My preference is for a VCA or FET-based design, but we will try some different options in the walkthrough. Right, let’s get to it - follow along with the steps below or watch the video embedded at the top of the page.
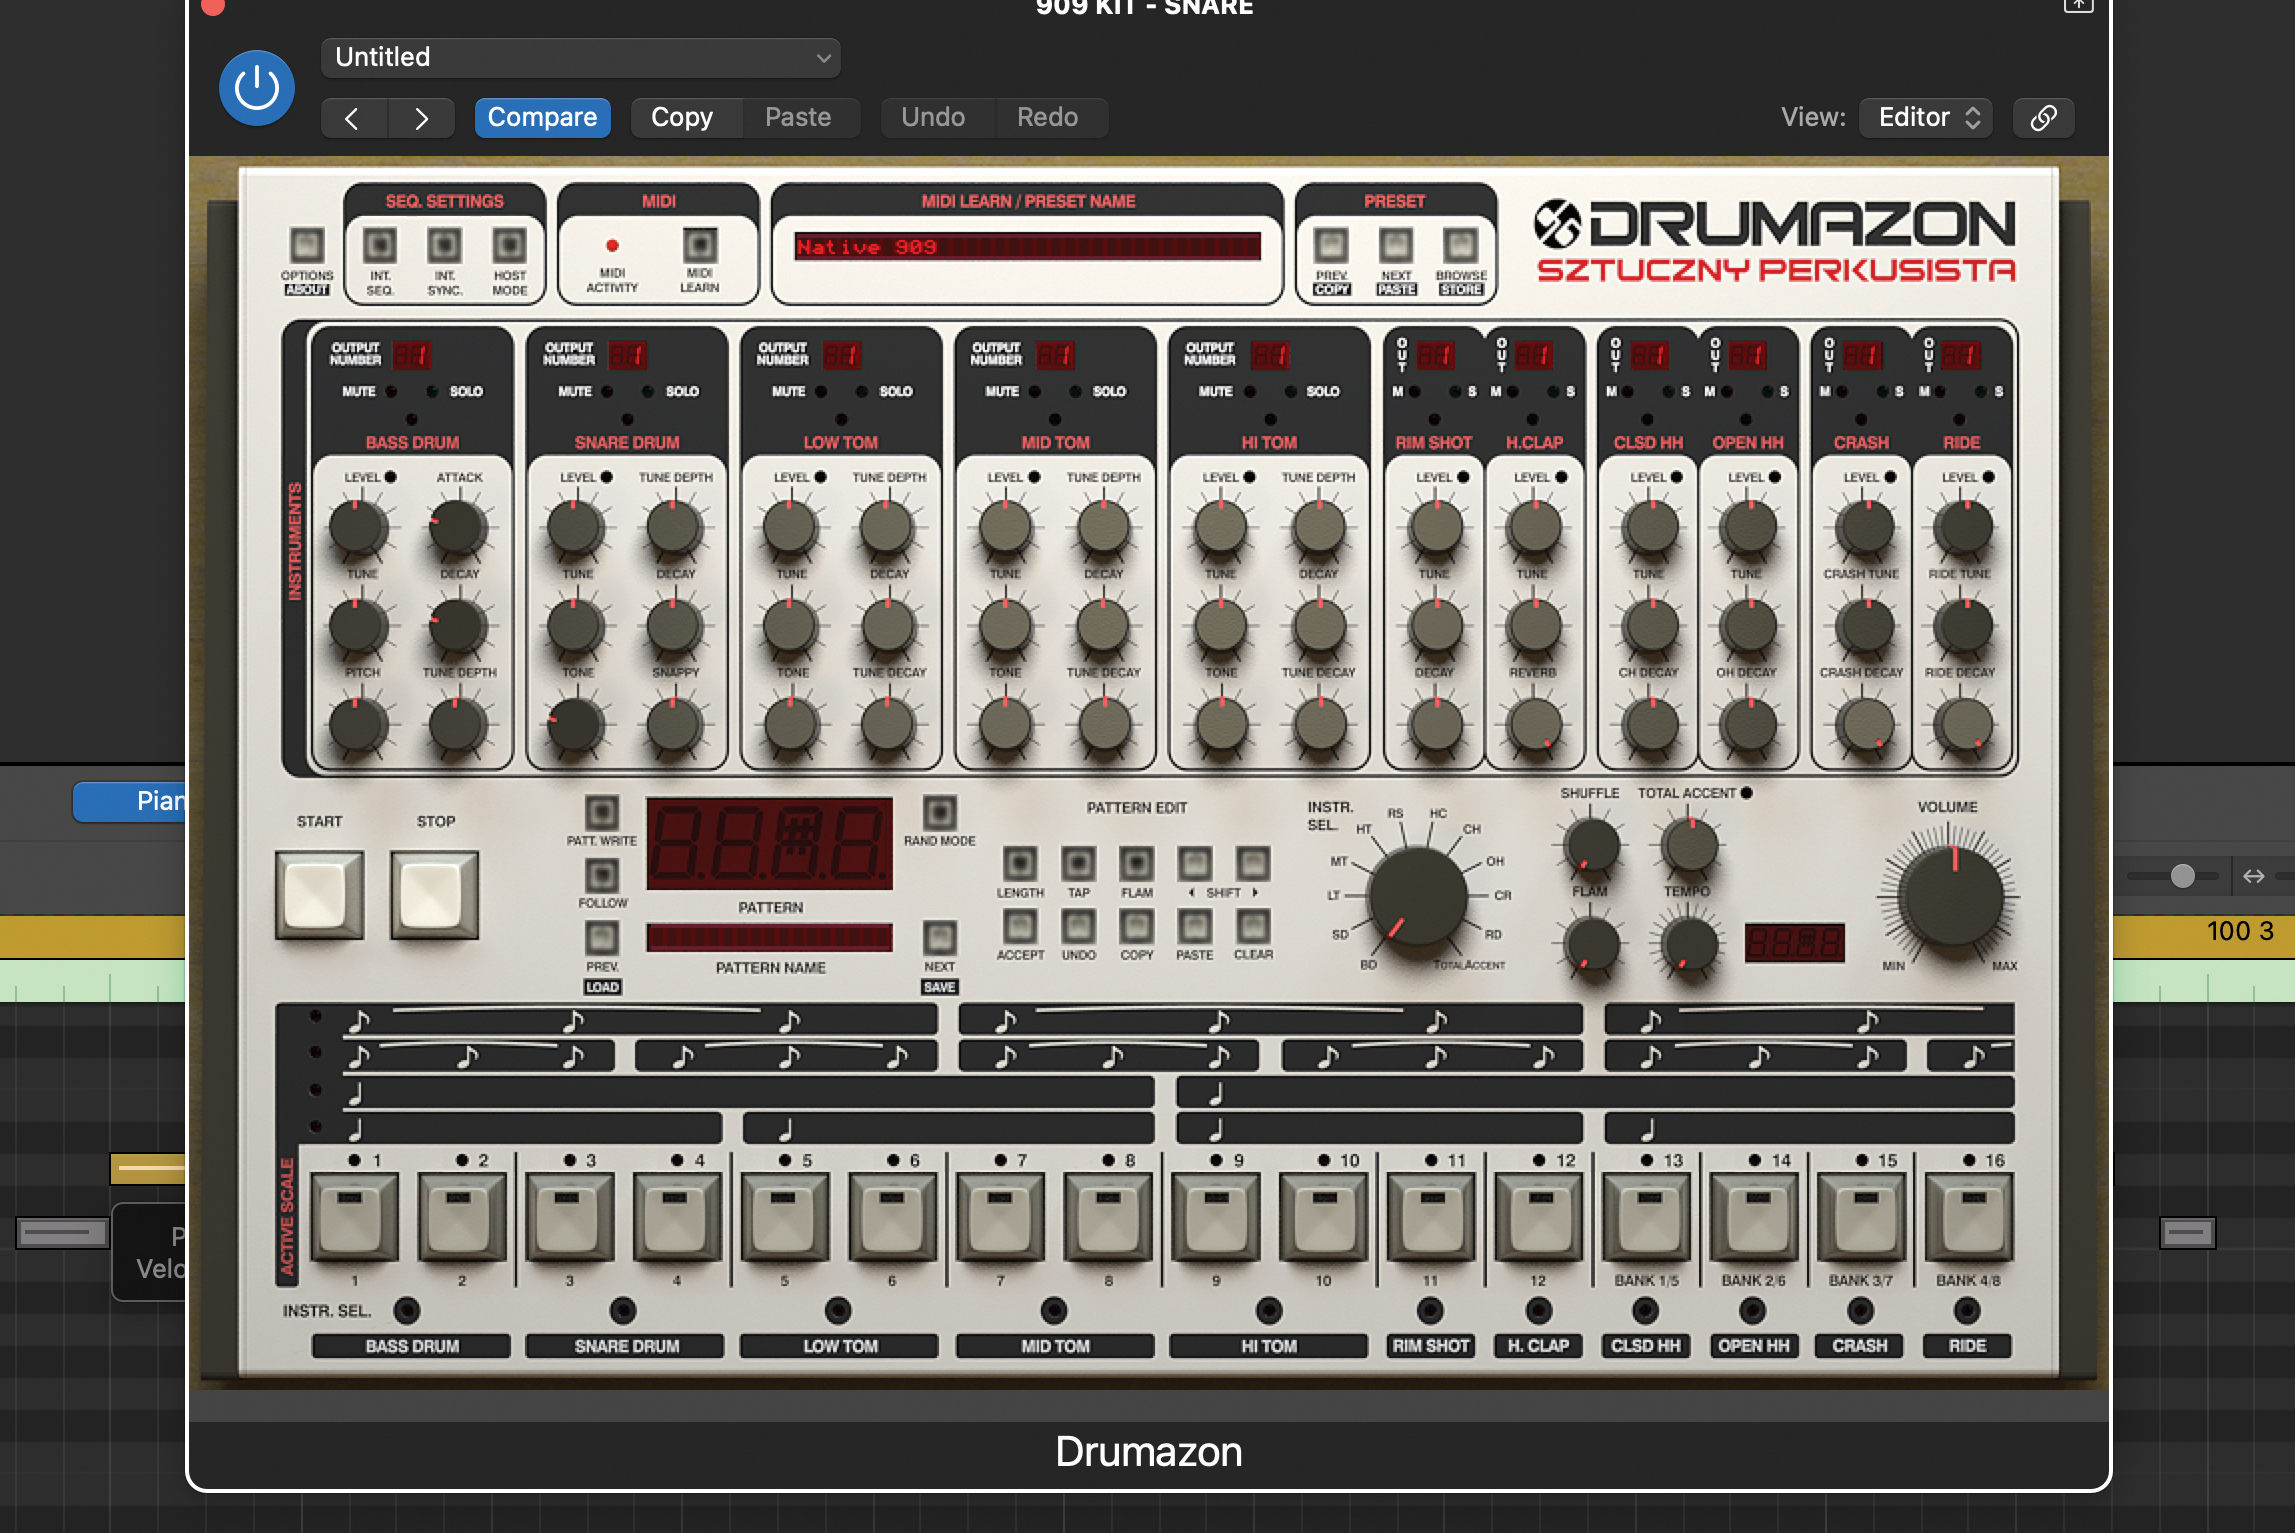
Snap compression is a technique best suited to transient heavy sounds, where you want to make the transient pop a bit more. To that end to get started you should grab some suitable sounds that aren’t already heavily processed and need something extra to enhance them. To start we have a raw 909 snare.
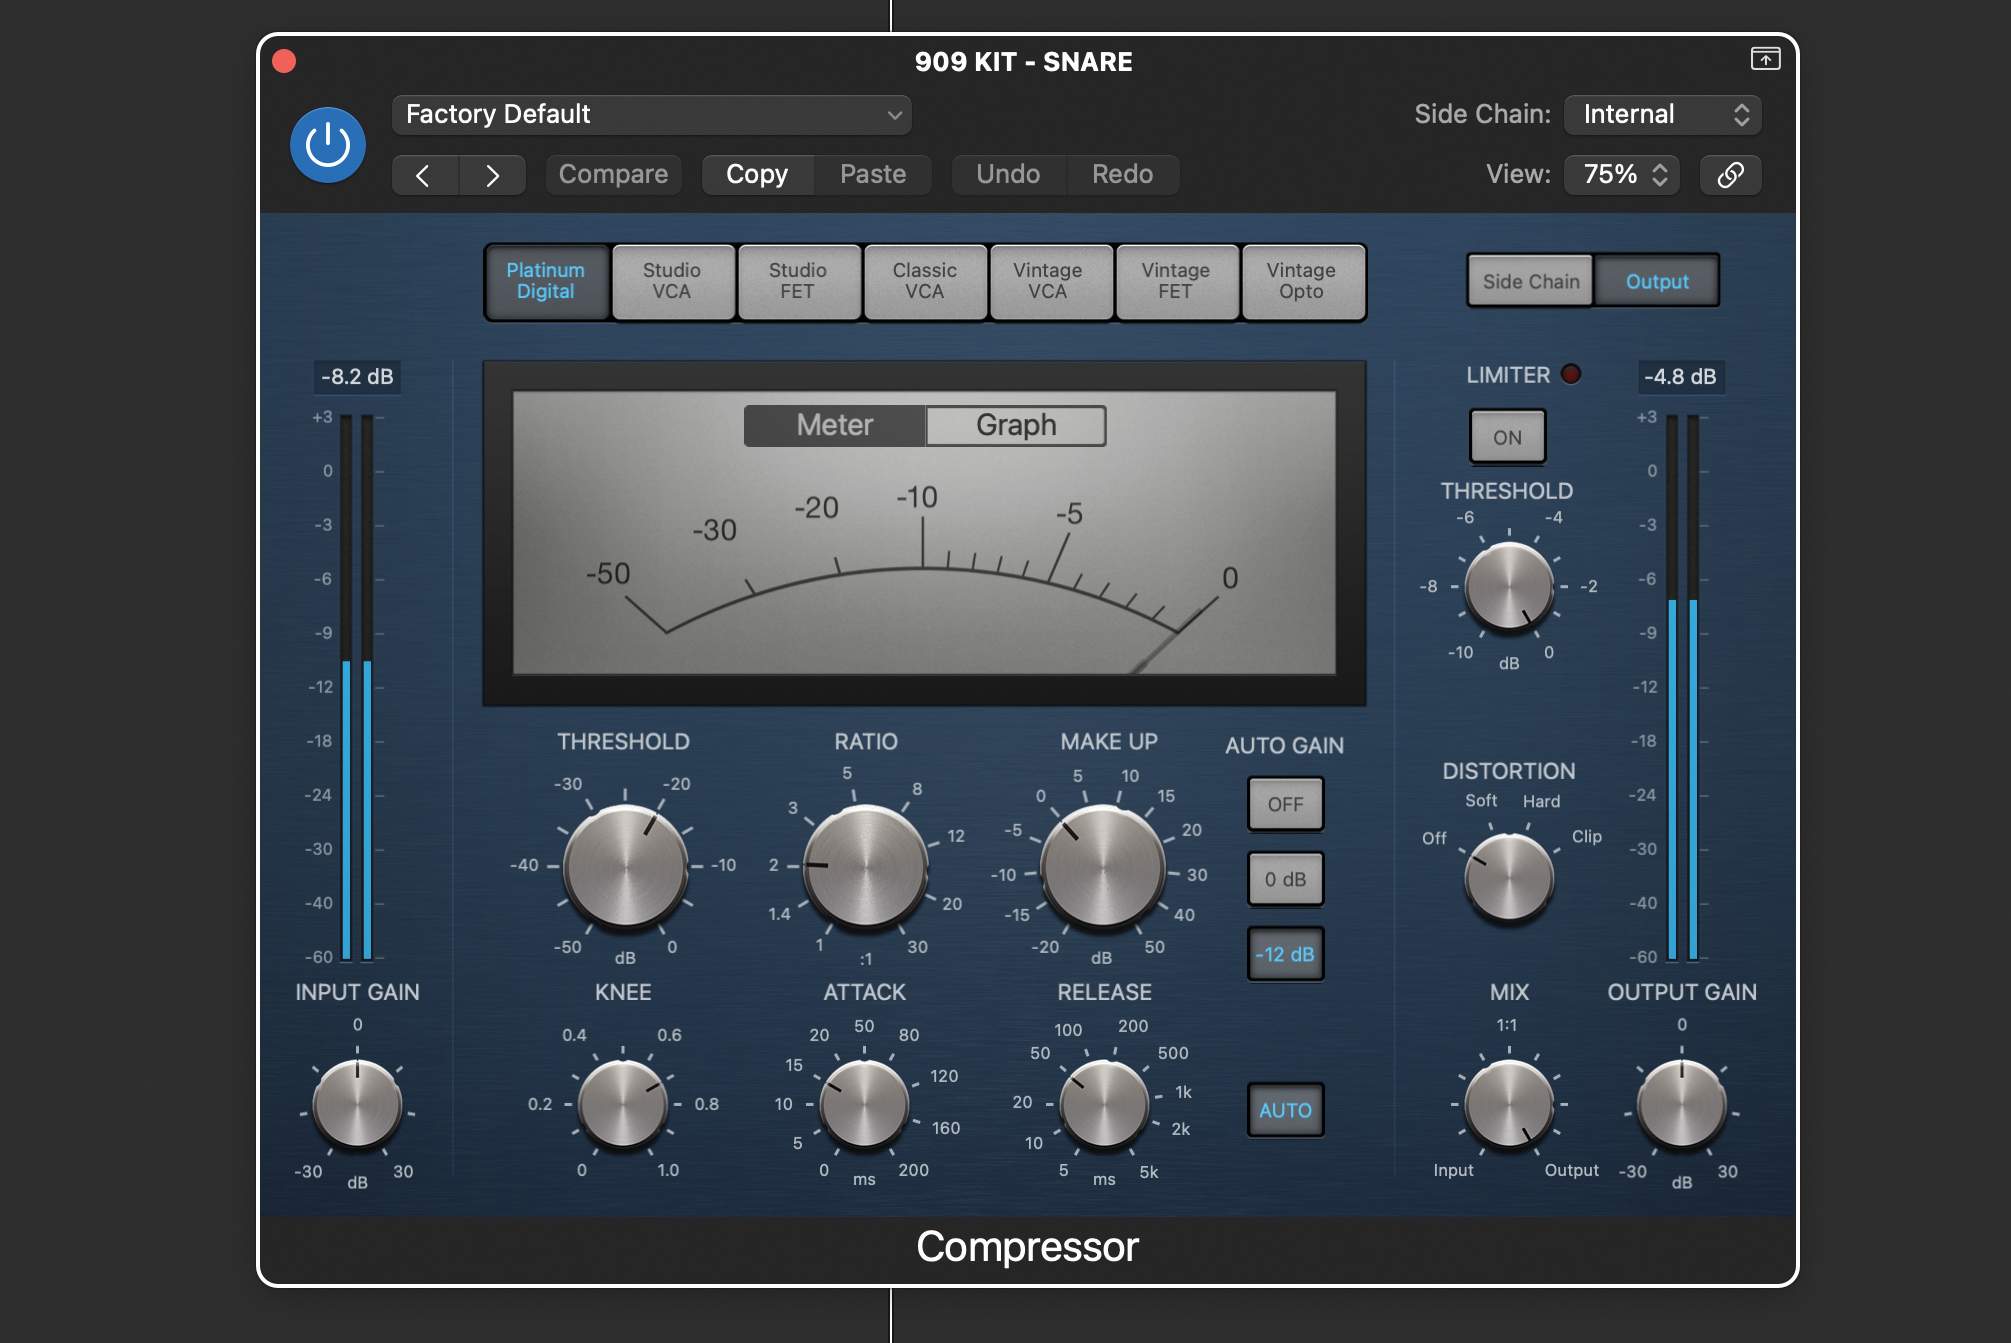
This is the sort of sound that can be perfect in its original state, but for some applications can sound a bit weedy. Snap compression can help resolve that. We’ve loaded up an instance of Logic’s compressor, not to showcase it particularly, but primarily because it gives us easy access to multiple compressor types.
Want all the hottest music and gear news, reviews, deals, features and more, direct to your inbox? Sign up here.
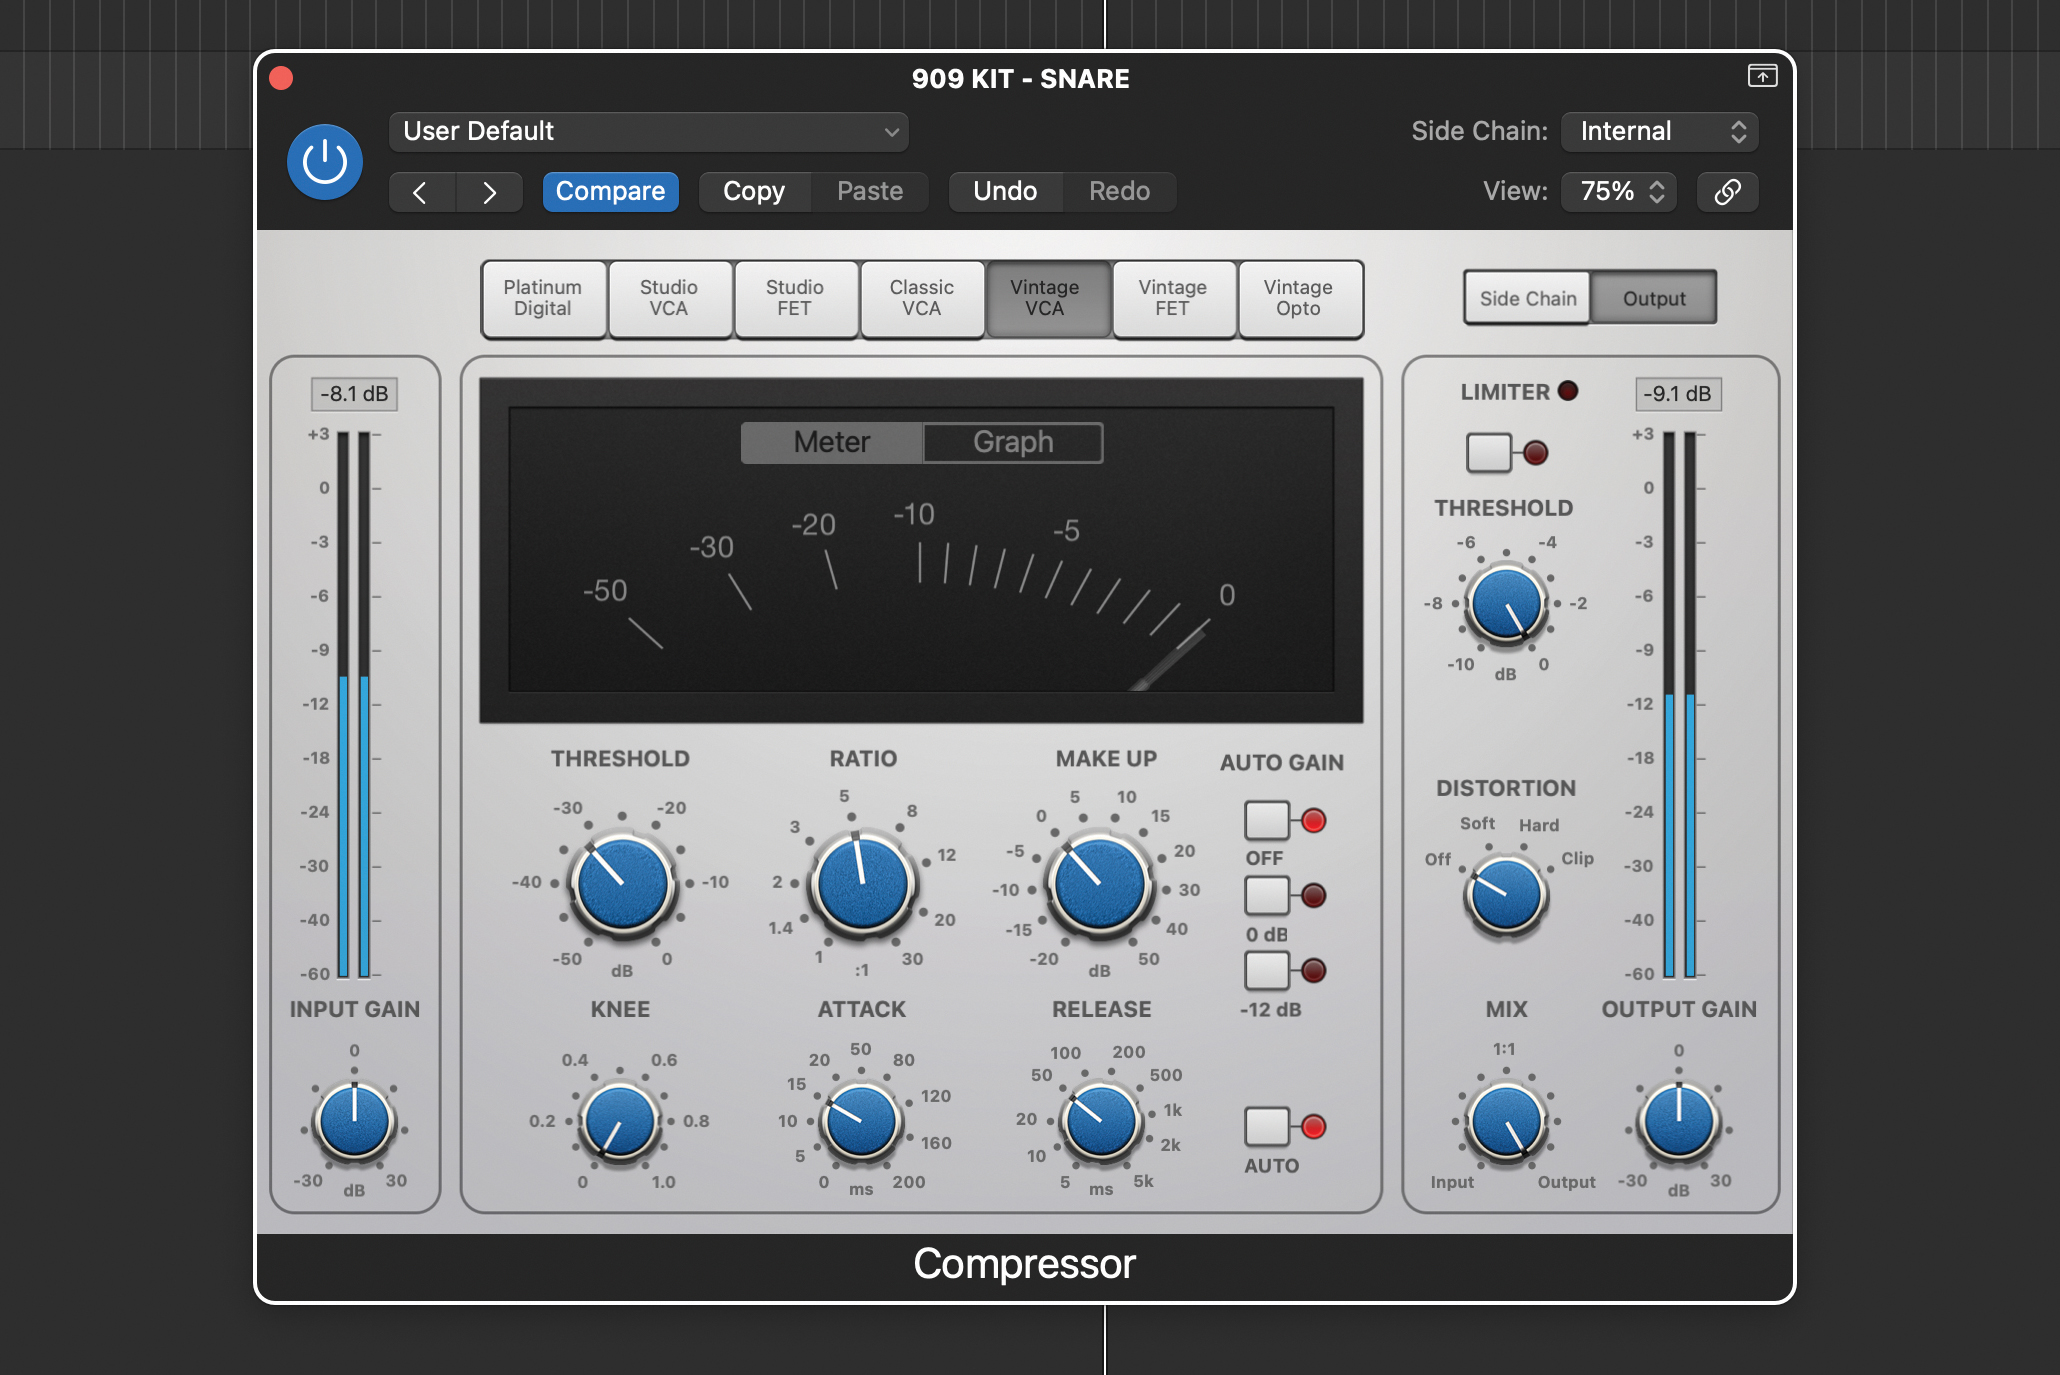
Next, choose any VCA design. This should provide not only flexible attack and release but also adjustable knee shape. If your compressor includes automatic gain make up then switch this out. Then set a medium ratio (we’ve gone for 5:1), and if you have the option, set the knee shape to hard.
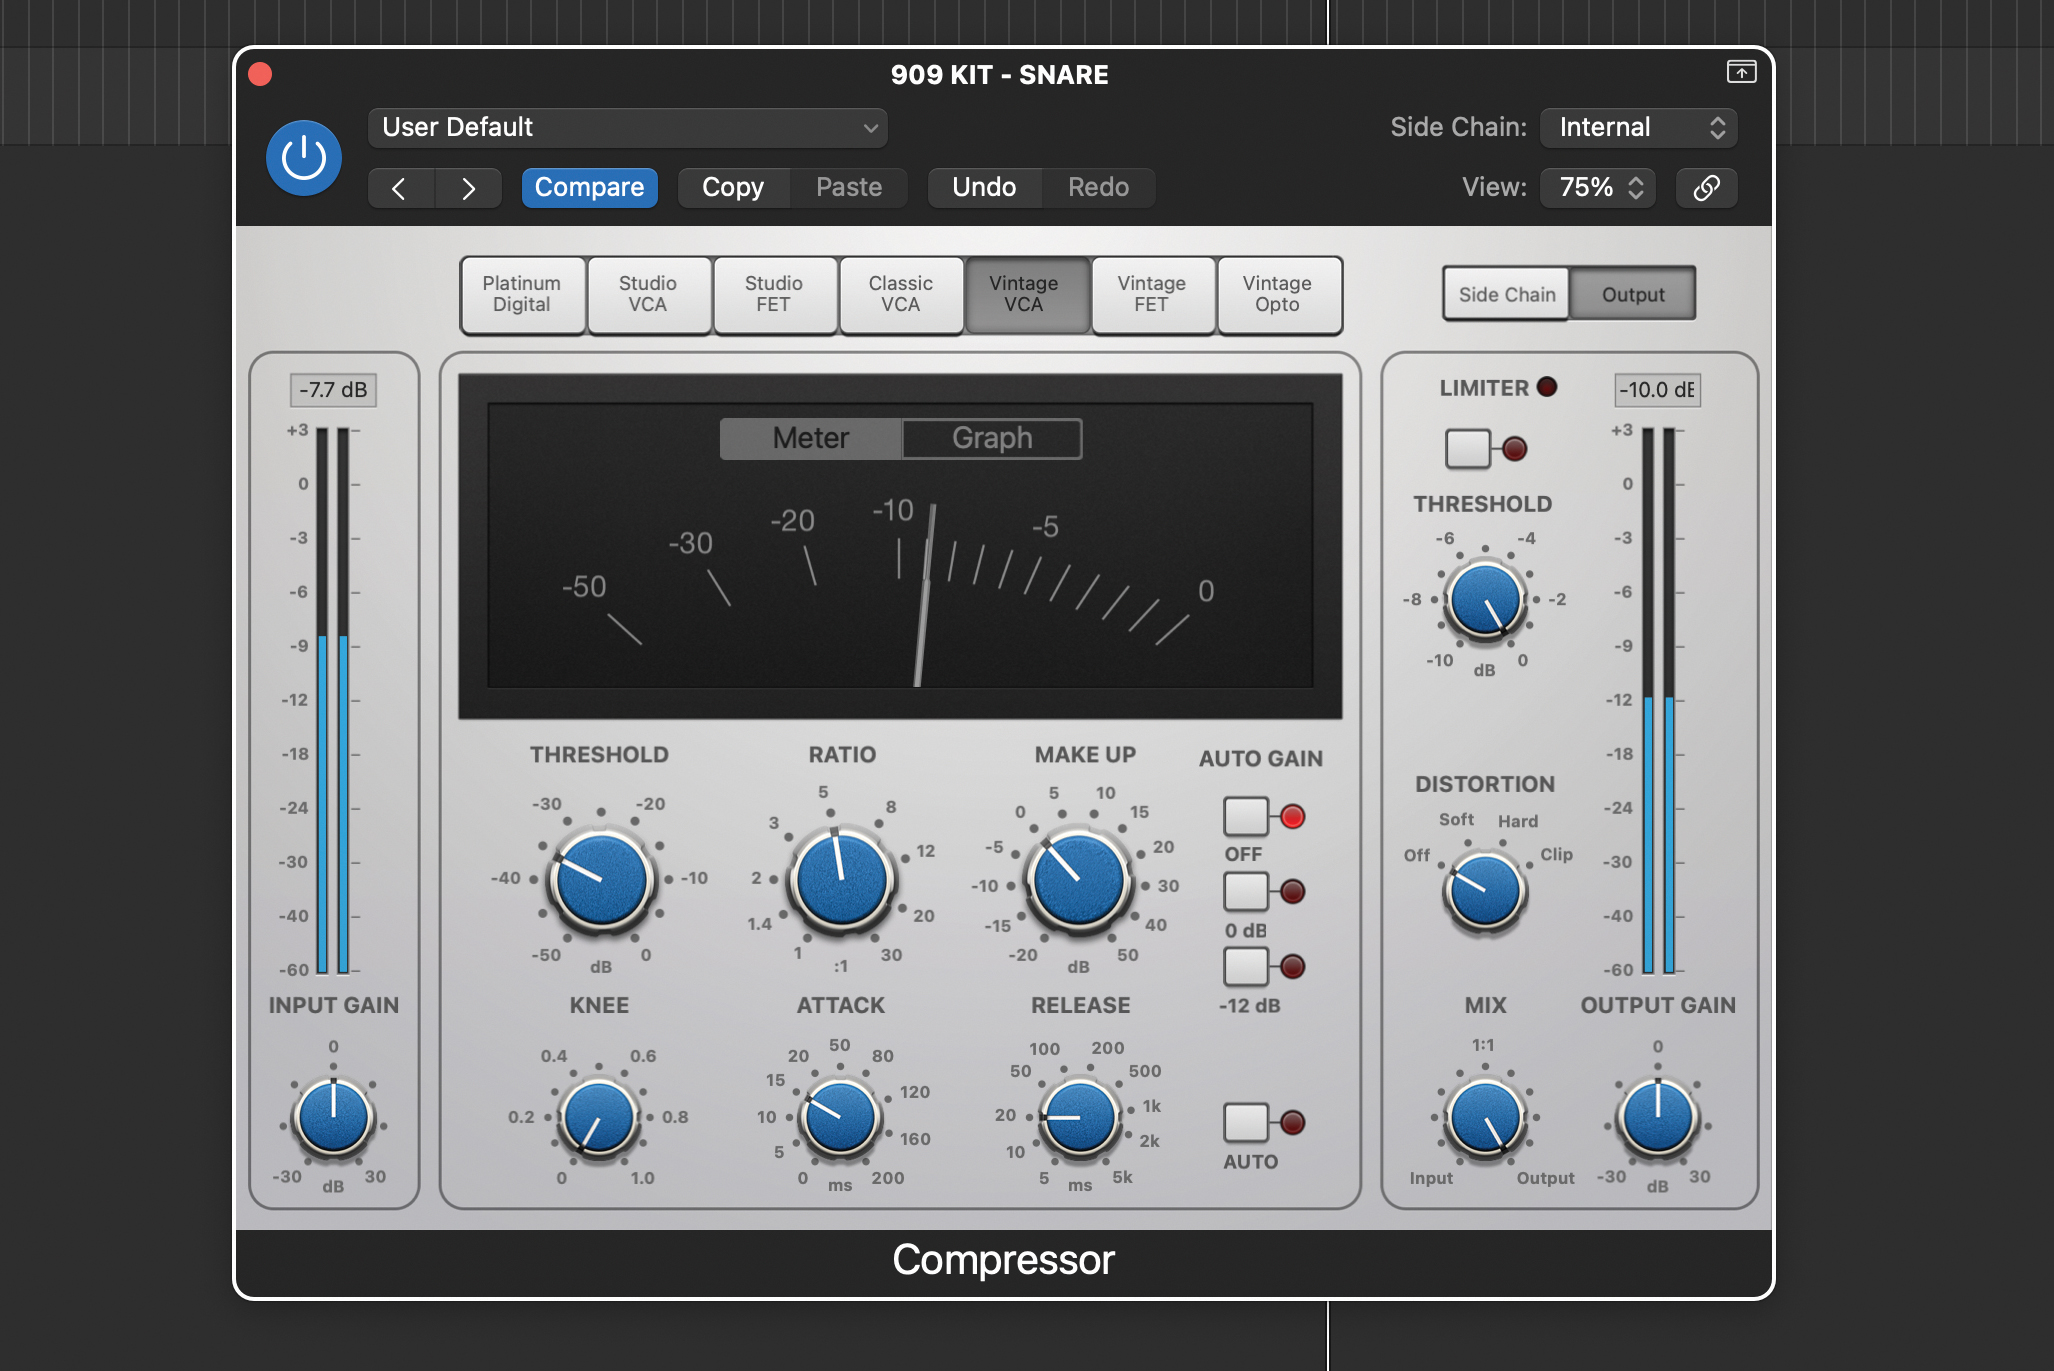
Our attack and release are set to about 15ms and 20ms respectively – switch off auto release if you have it. Now lower the threshold to get some gain reduction. Here we’ve got about 10dB of reduction and the compression is certainly adding fatness to the sound, but it’s not really punchy yet.
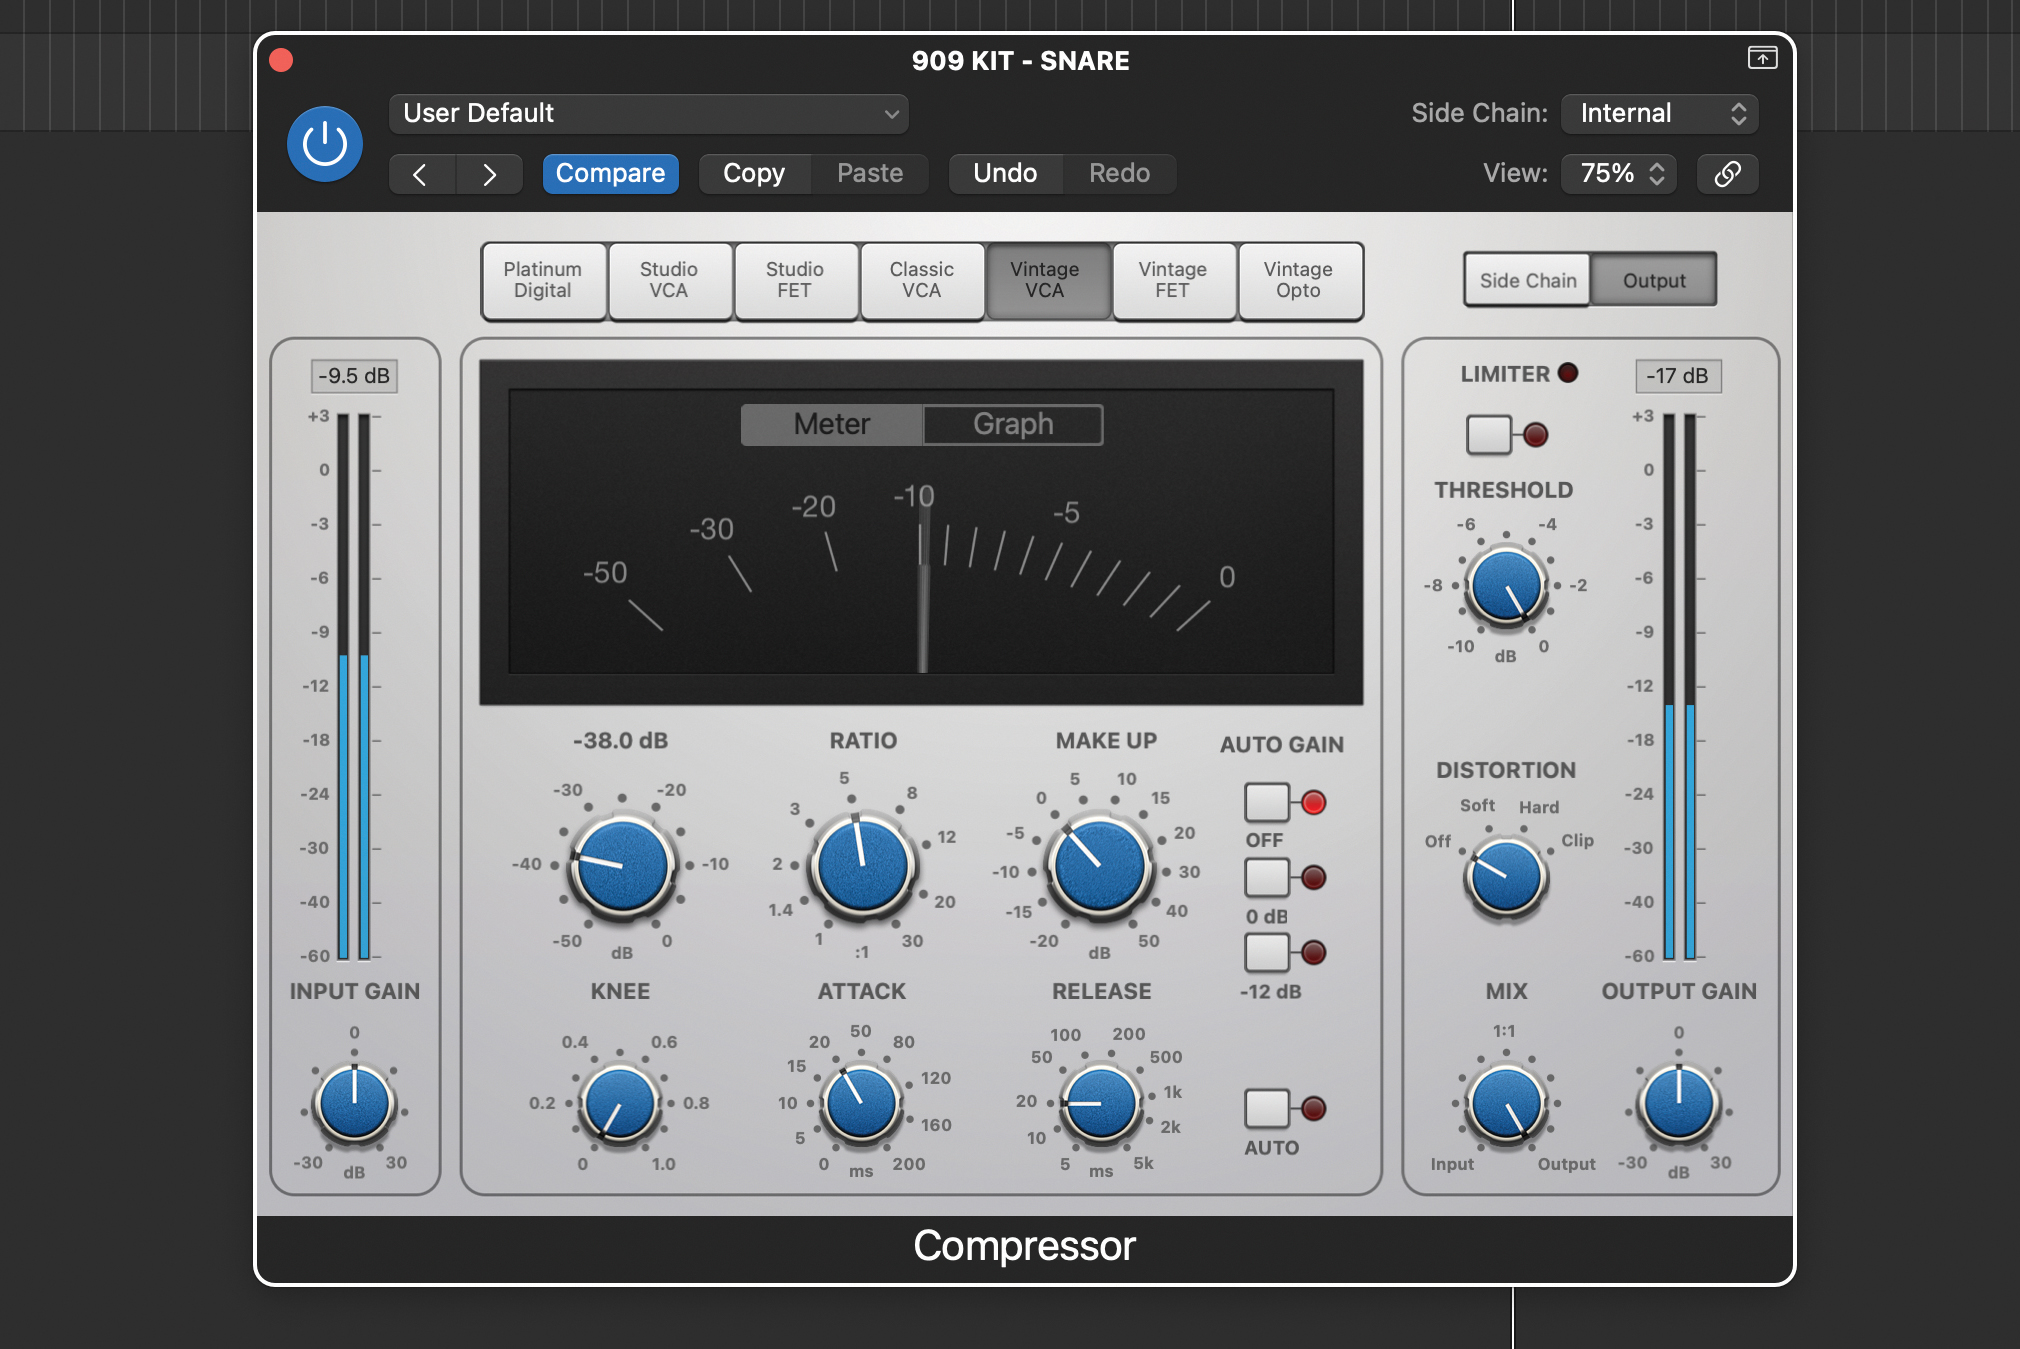
To get the snap effect, focus on the attack and release controls. Start by sweeping the attack. You’ll hear at its fastest settings the snare attack is hammered down, but as you ease it back the attack is more audible. We’ve set ours to about 20ms, but you’ll find the exact setting depends on the sound and compressor used.
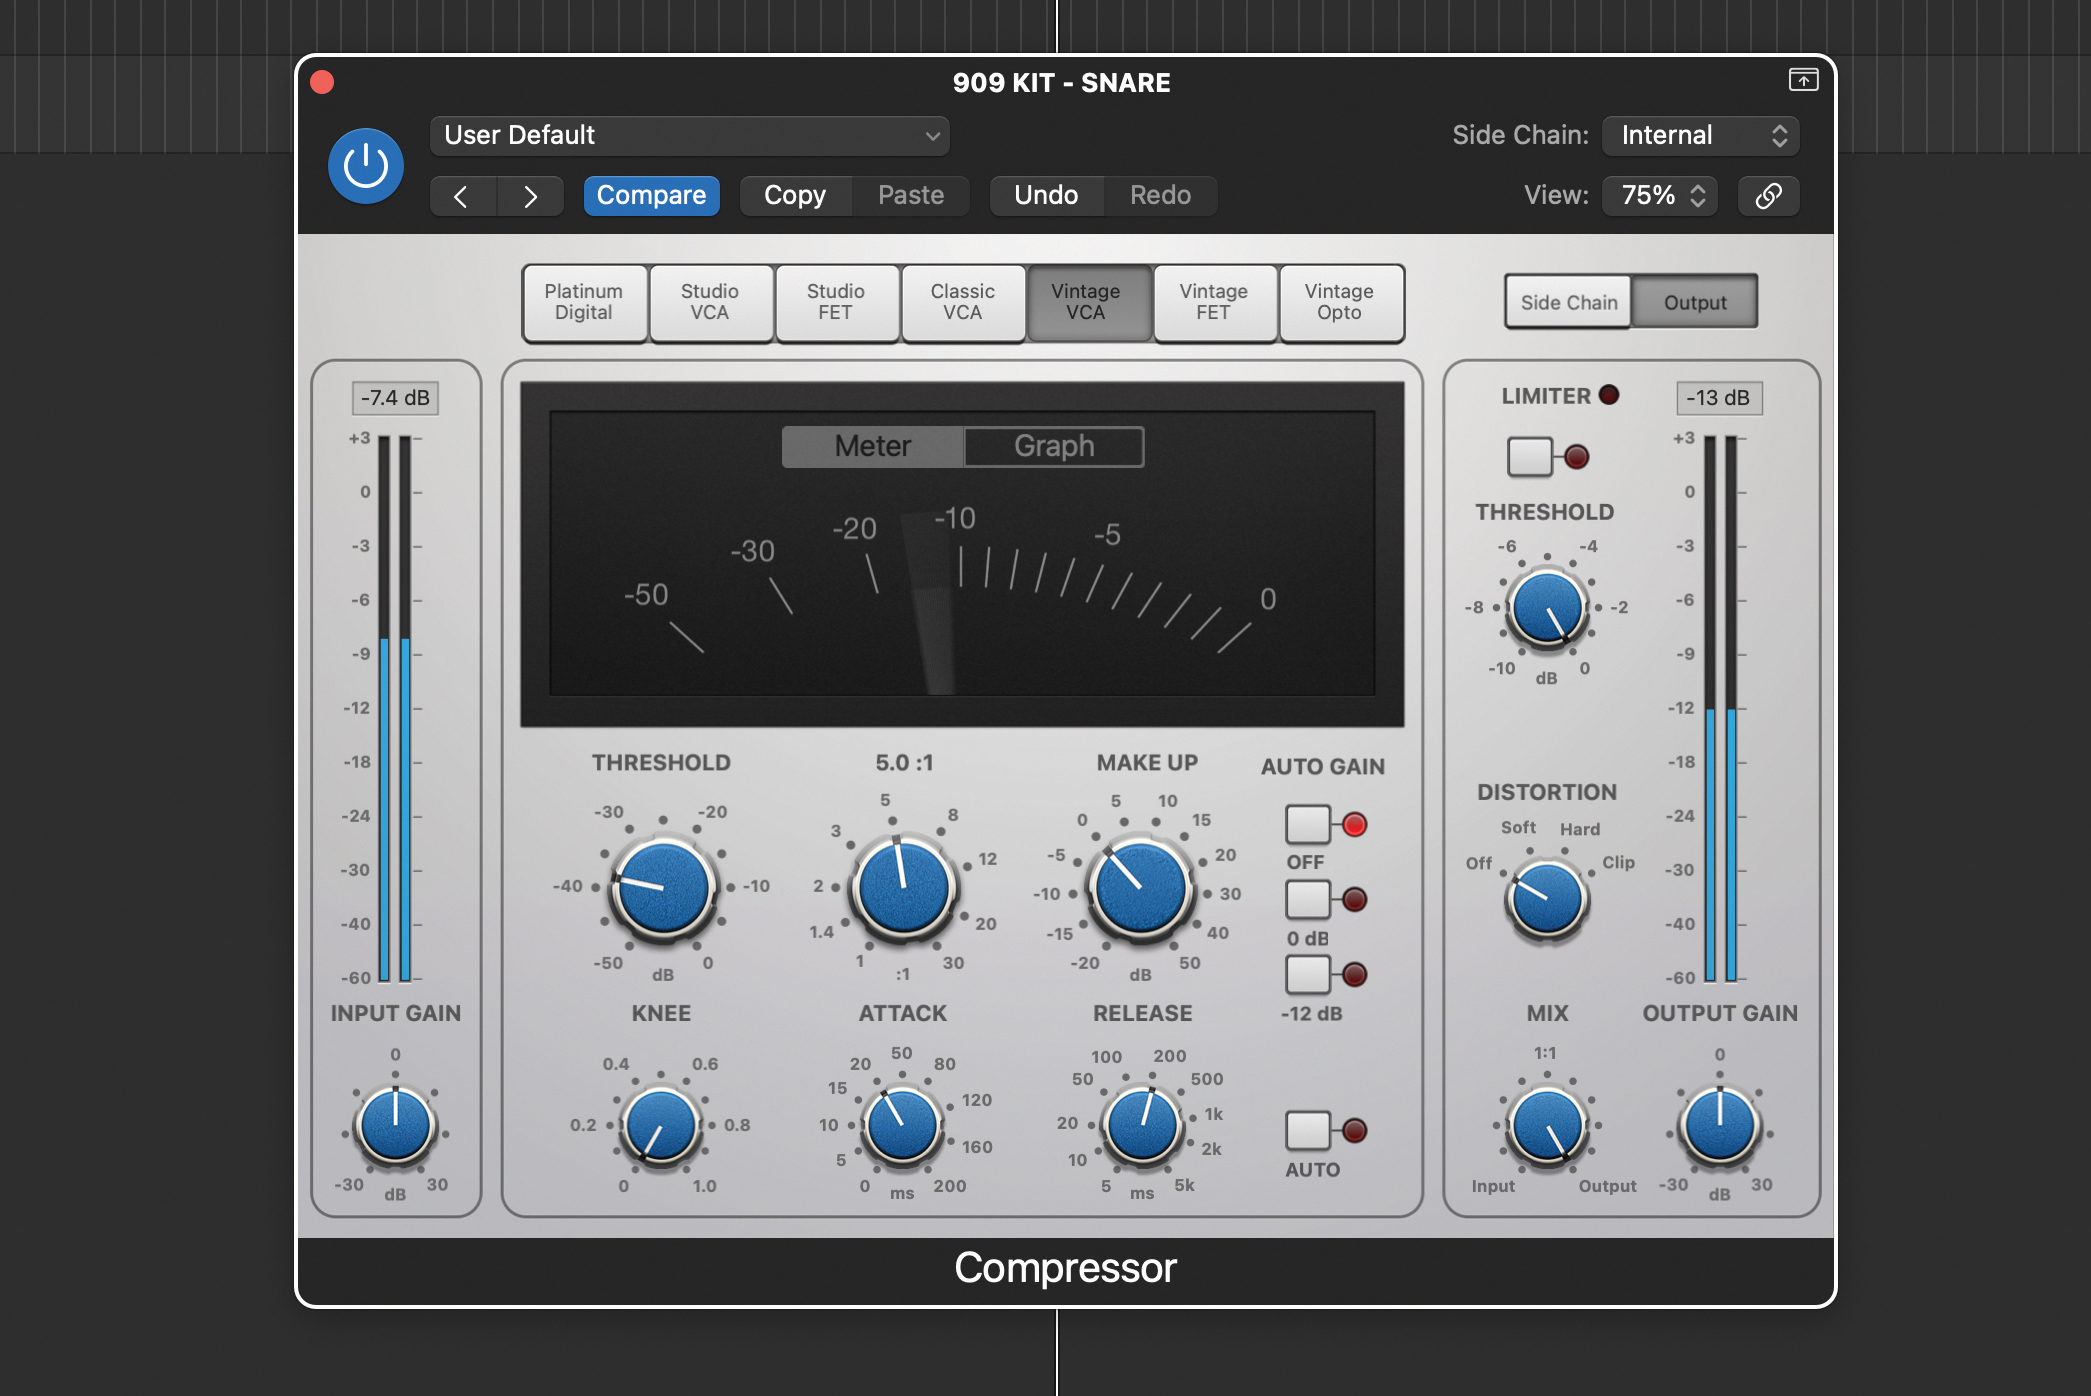
Now focus on the release. At the fastest release times, the decay of the snare dominates, but as we increase the decay time the initial snap of the attack becomes more obvious. For us this sounds pretty good at around 200ms, but once again settings are sound- and compressor-dependent, and faster release times are often ideal.
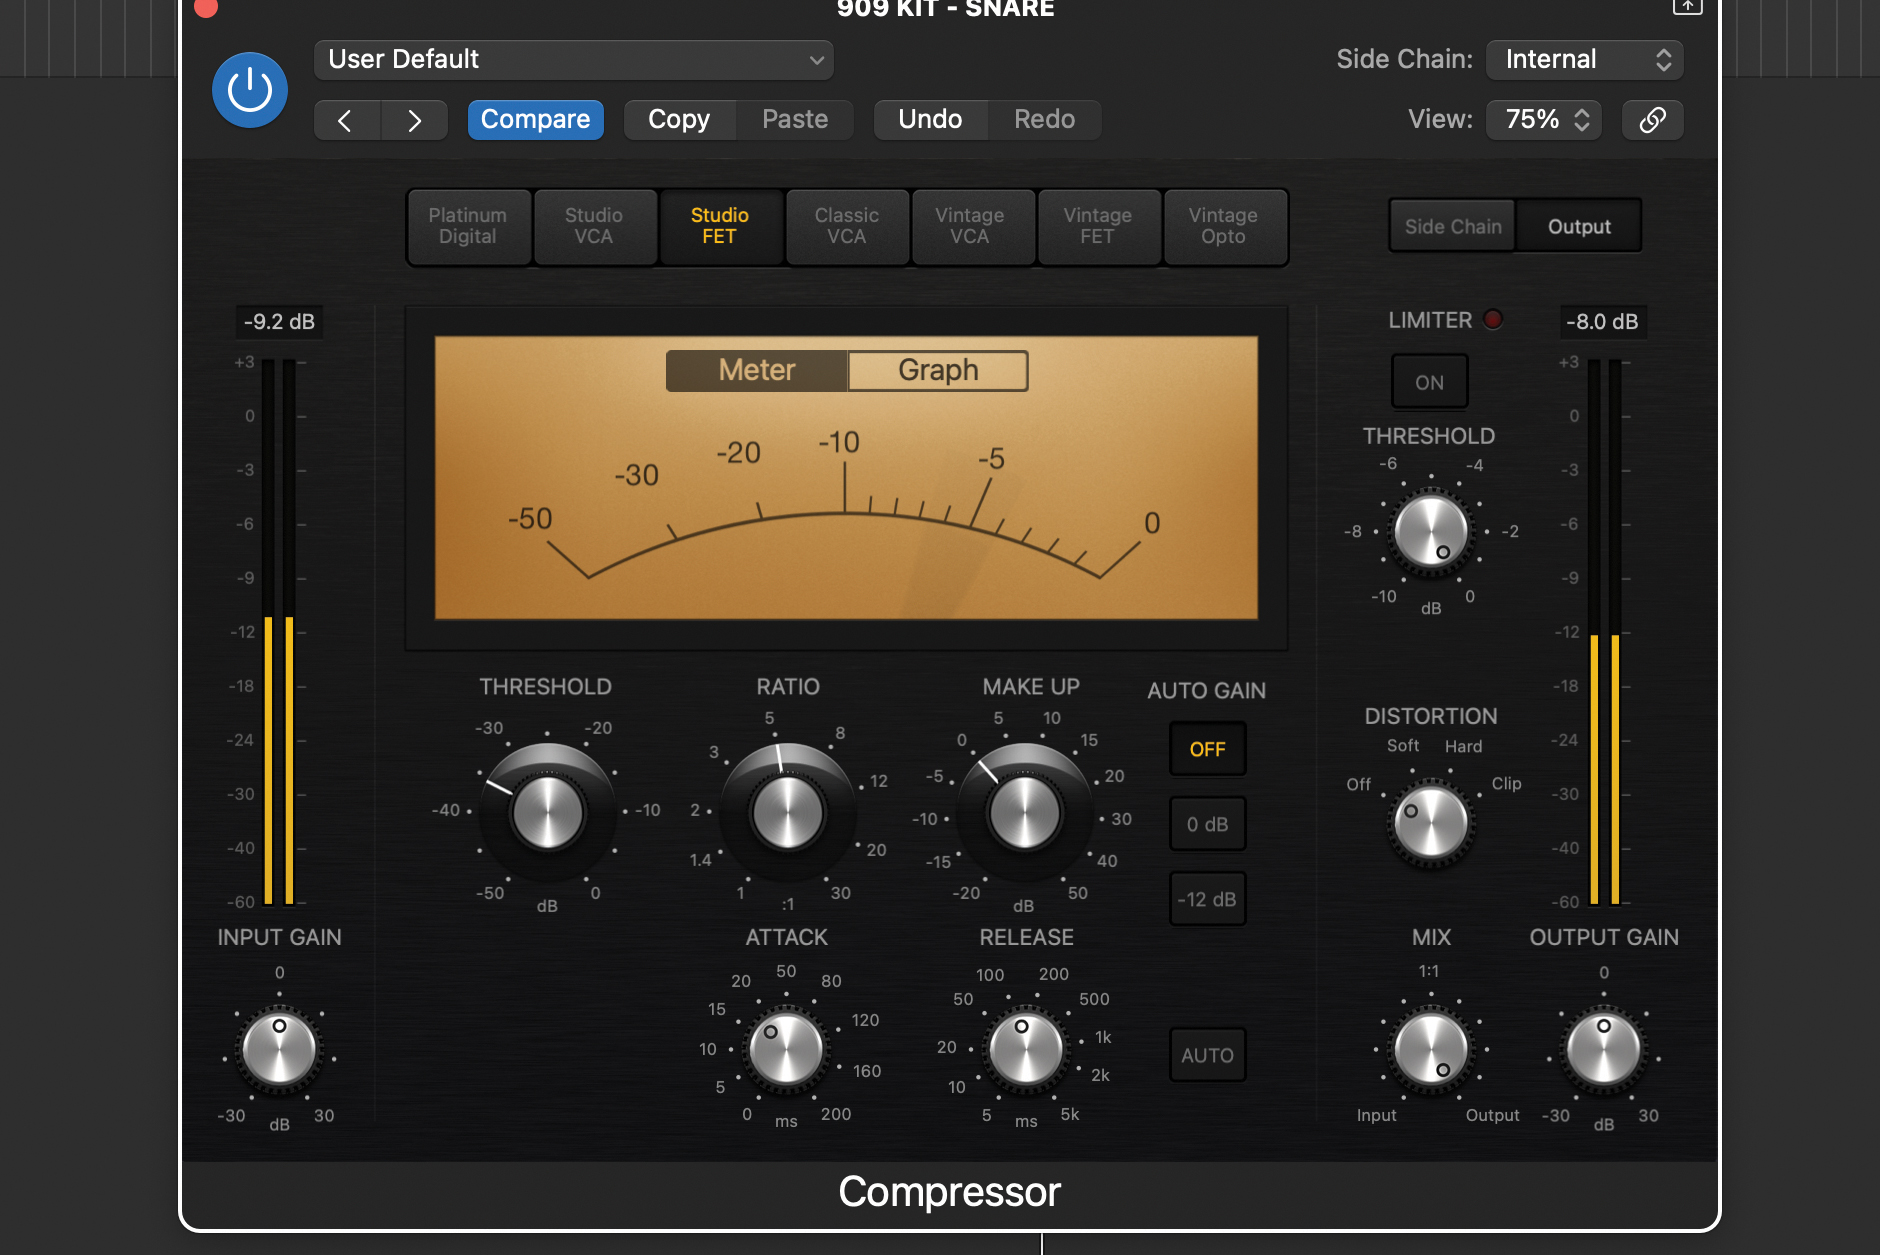
Let’s try some different compressor types. Firstly FET. In this instance the FET design is more responsive. Adjusting the threshold to achieve similar gain reduction, we can then also modify the attack and release accordingly. We’ve set the attack and release to 20ms and 100ms respectively for a really snappy sound.
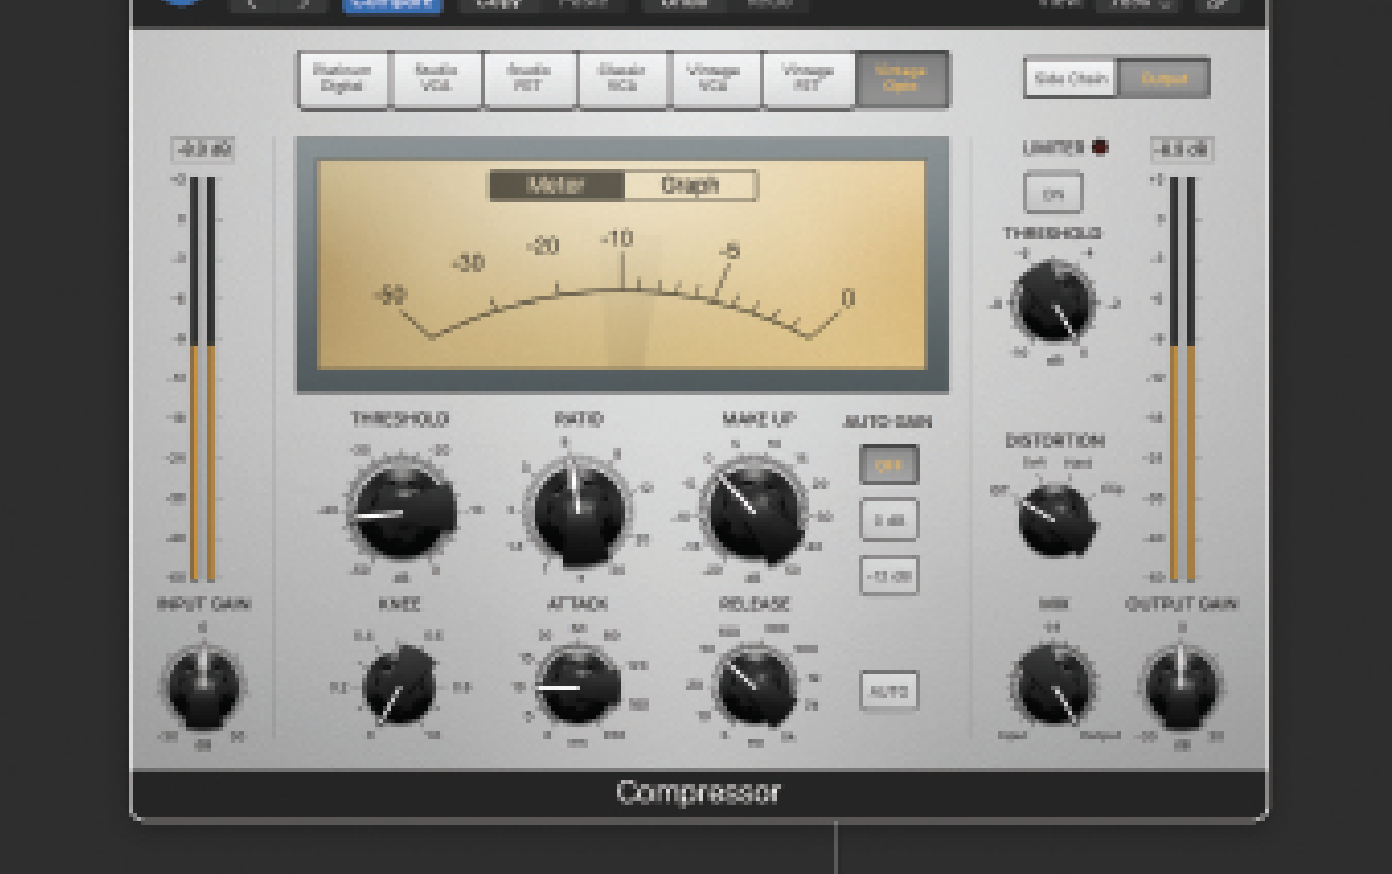
Next up, we’re trying an opto-style compressor. Here we’ve had to reduce the threshold considerably to get the right response (at least -40dB), and we’ve also set the attack and release fast – about 10ms and 50ms respectively. The effect is very fat but lacks the snap of the other two compressors.
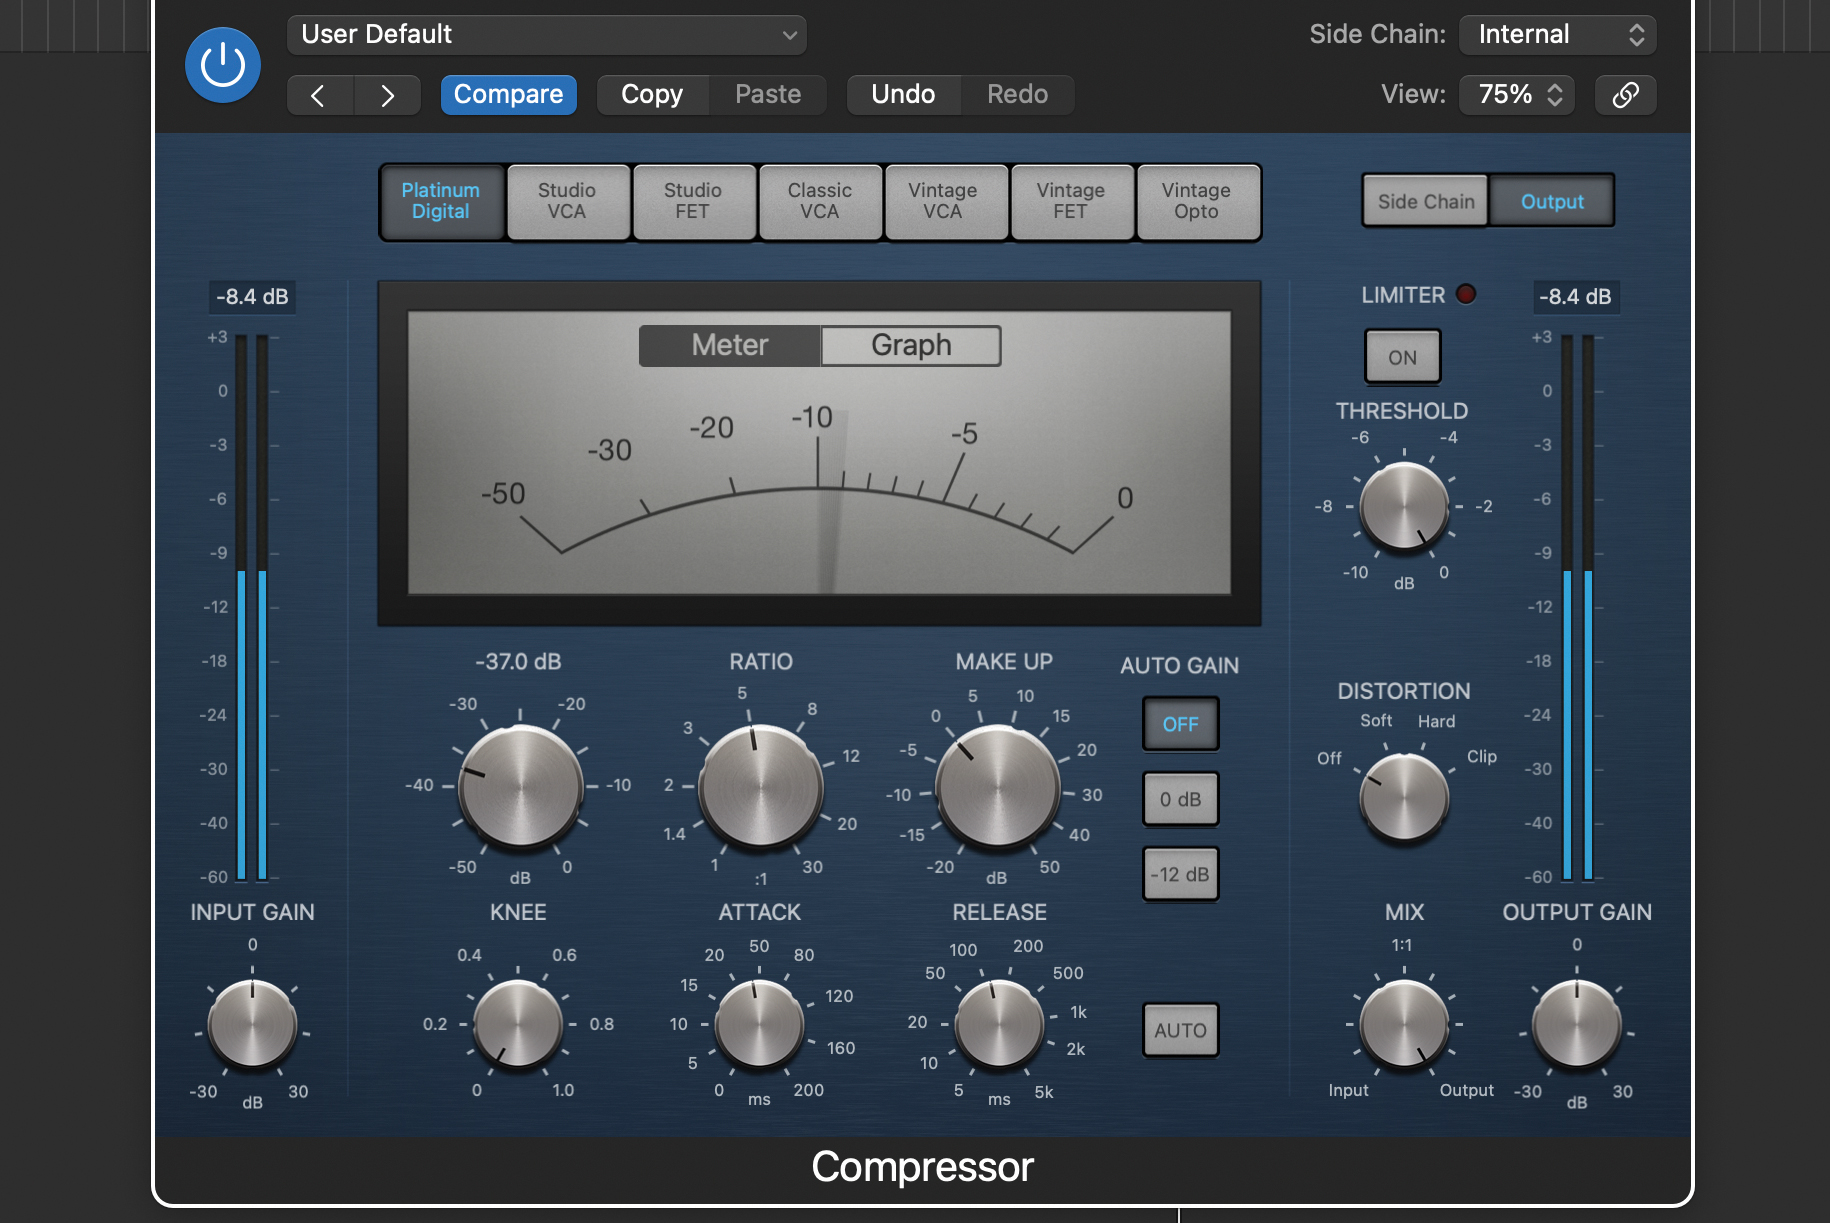
Finally, if you have a modern linear DAW-style compressor (we’re using Logic’s) then try that. Here, we’ve set the attack and release to 40ms and 120ms respectively. To recap, each compressor style delivers a different type of punchy sound, providing us with plenty of choice.
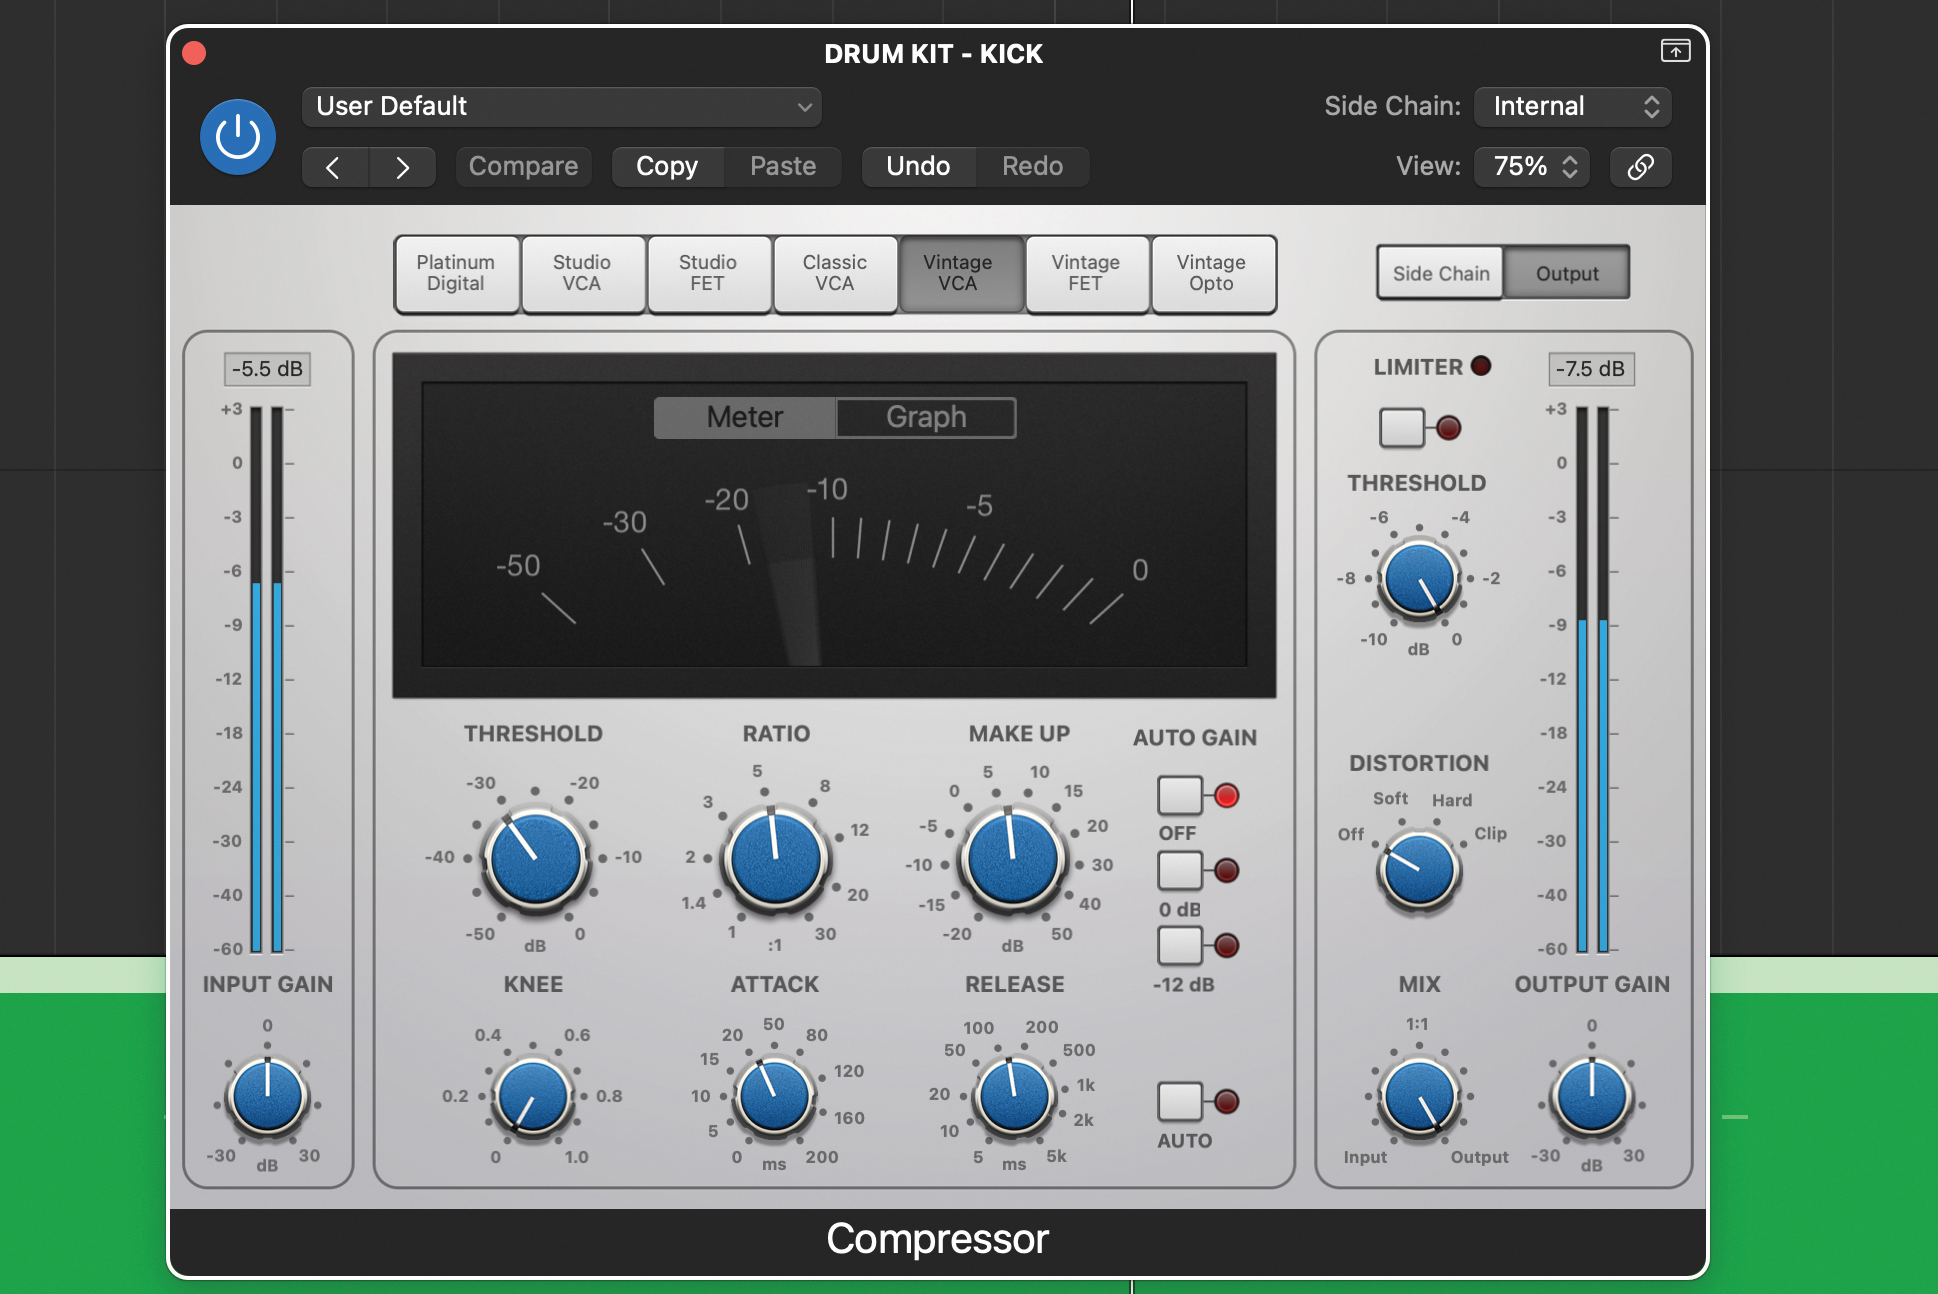
Returning to our original VCA compressor, try the same method on a kick drum – we’re using an acoustic kick. With a bit of tweaking we can add punch to the kick attack and also curtail the decay slightly – our settings are 20ms attack and 150ms release. For a flavour-filled kick this can be a great treatment.
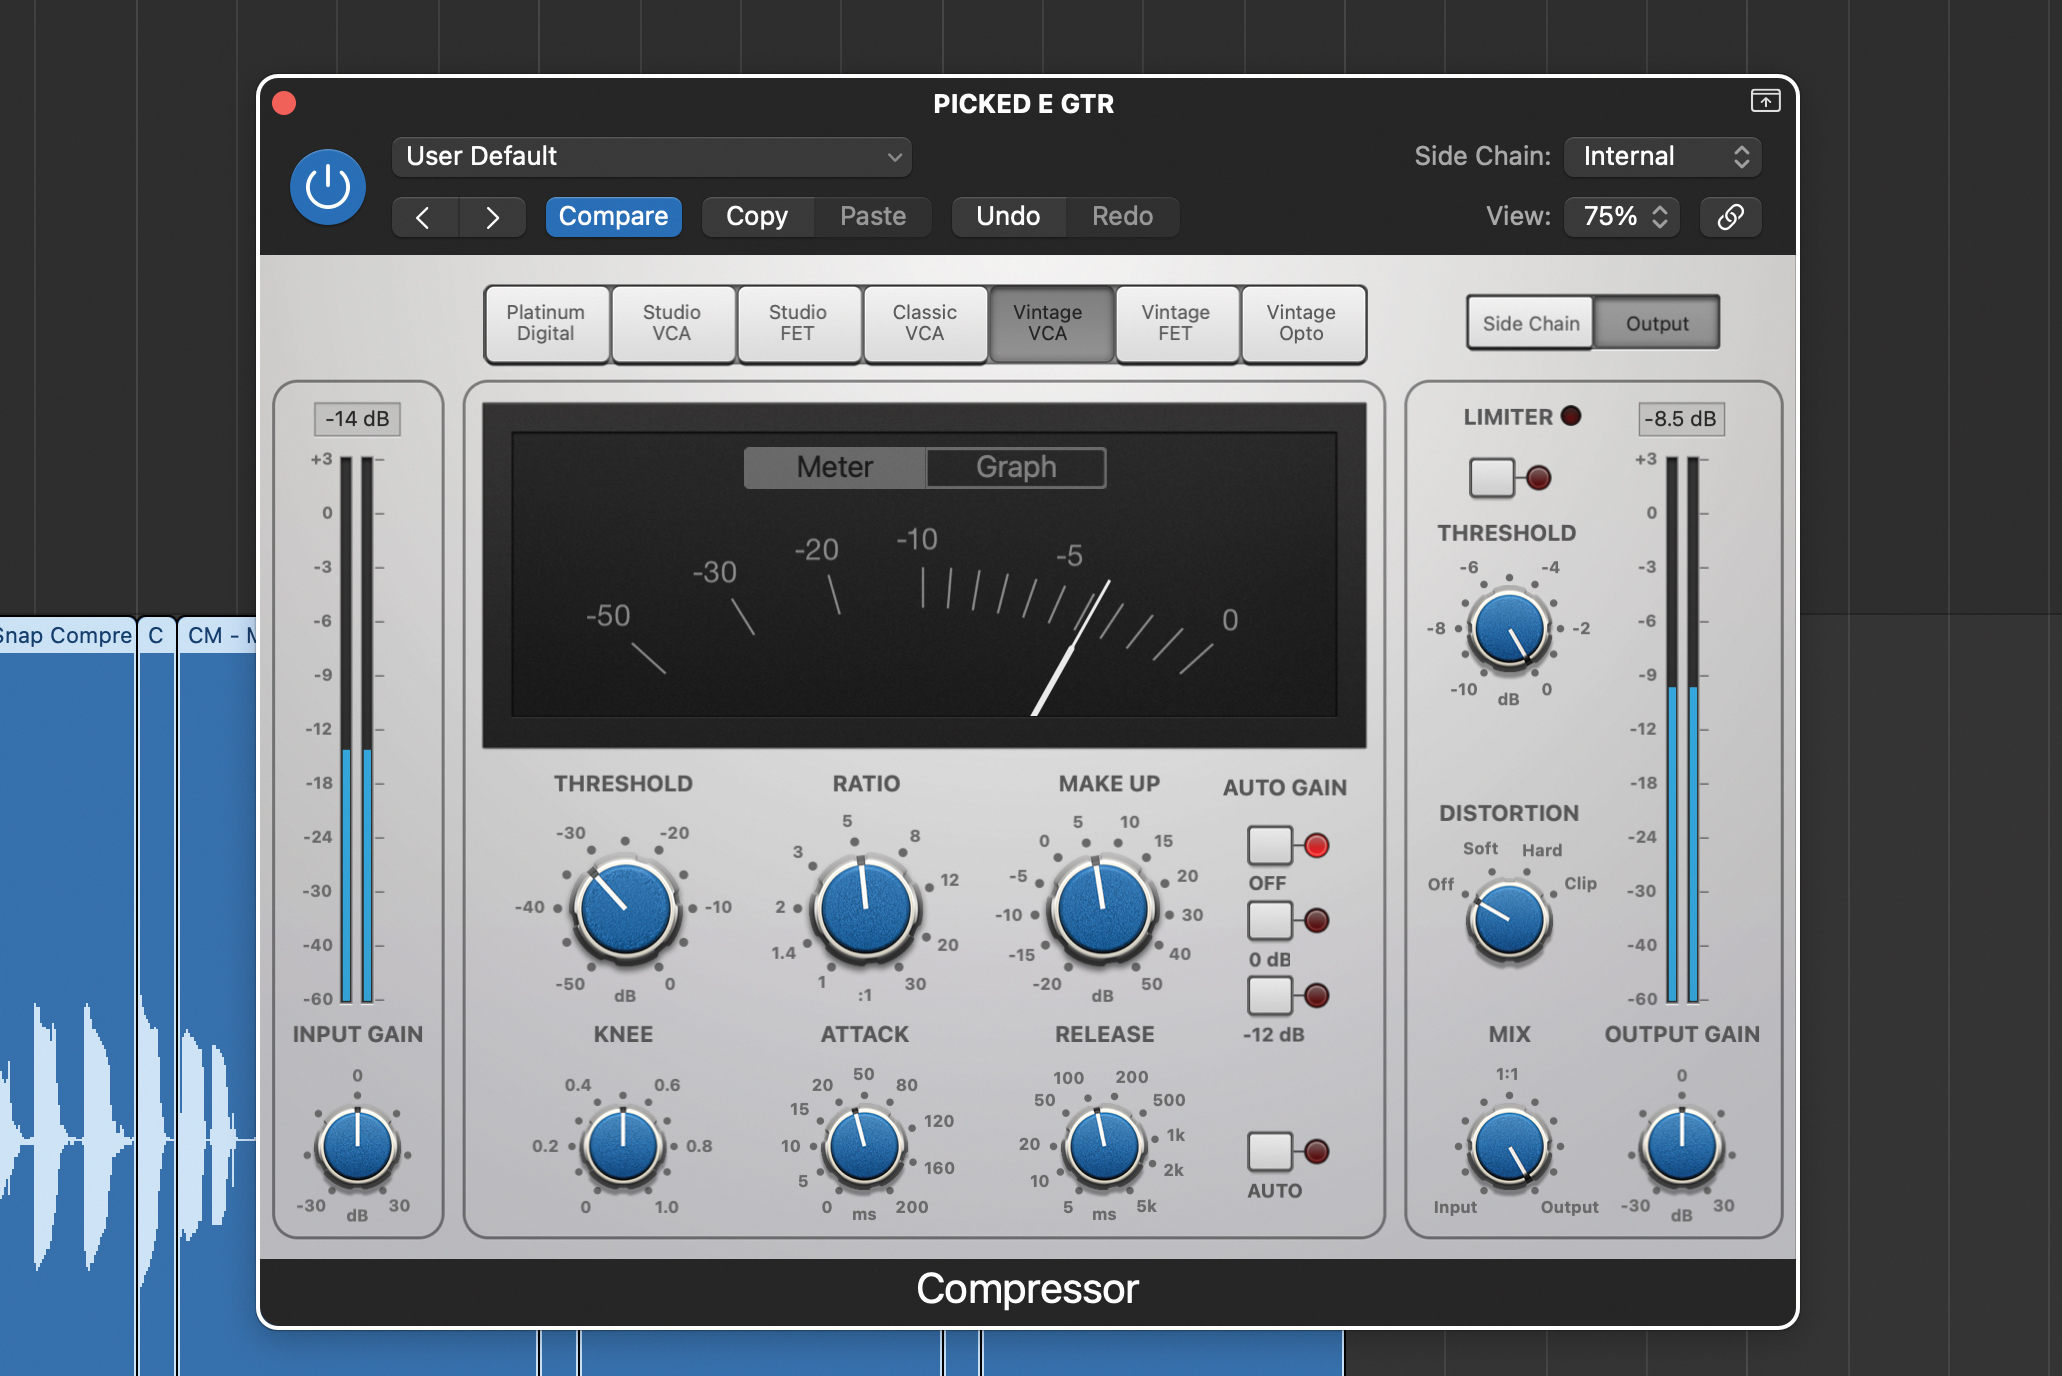
If we try the technique on a percussive, picked electric guitar sound, again with a bit of tweaking we can enhance the attack. The technique works best on clear, short, predictable sounds, where we can tailor the compressor very carefully and really fine tune the threshold.
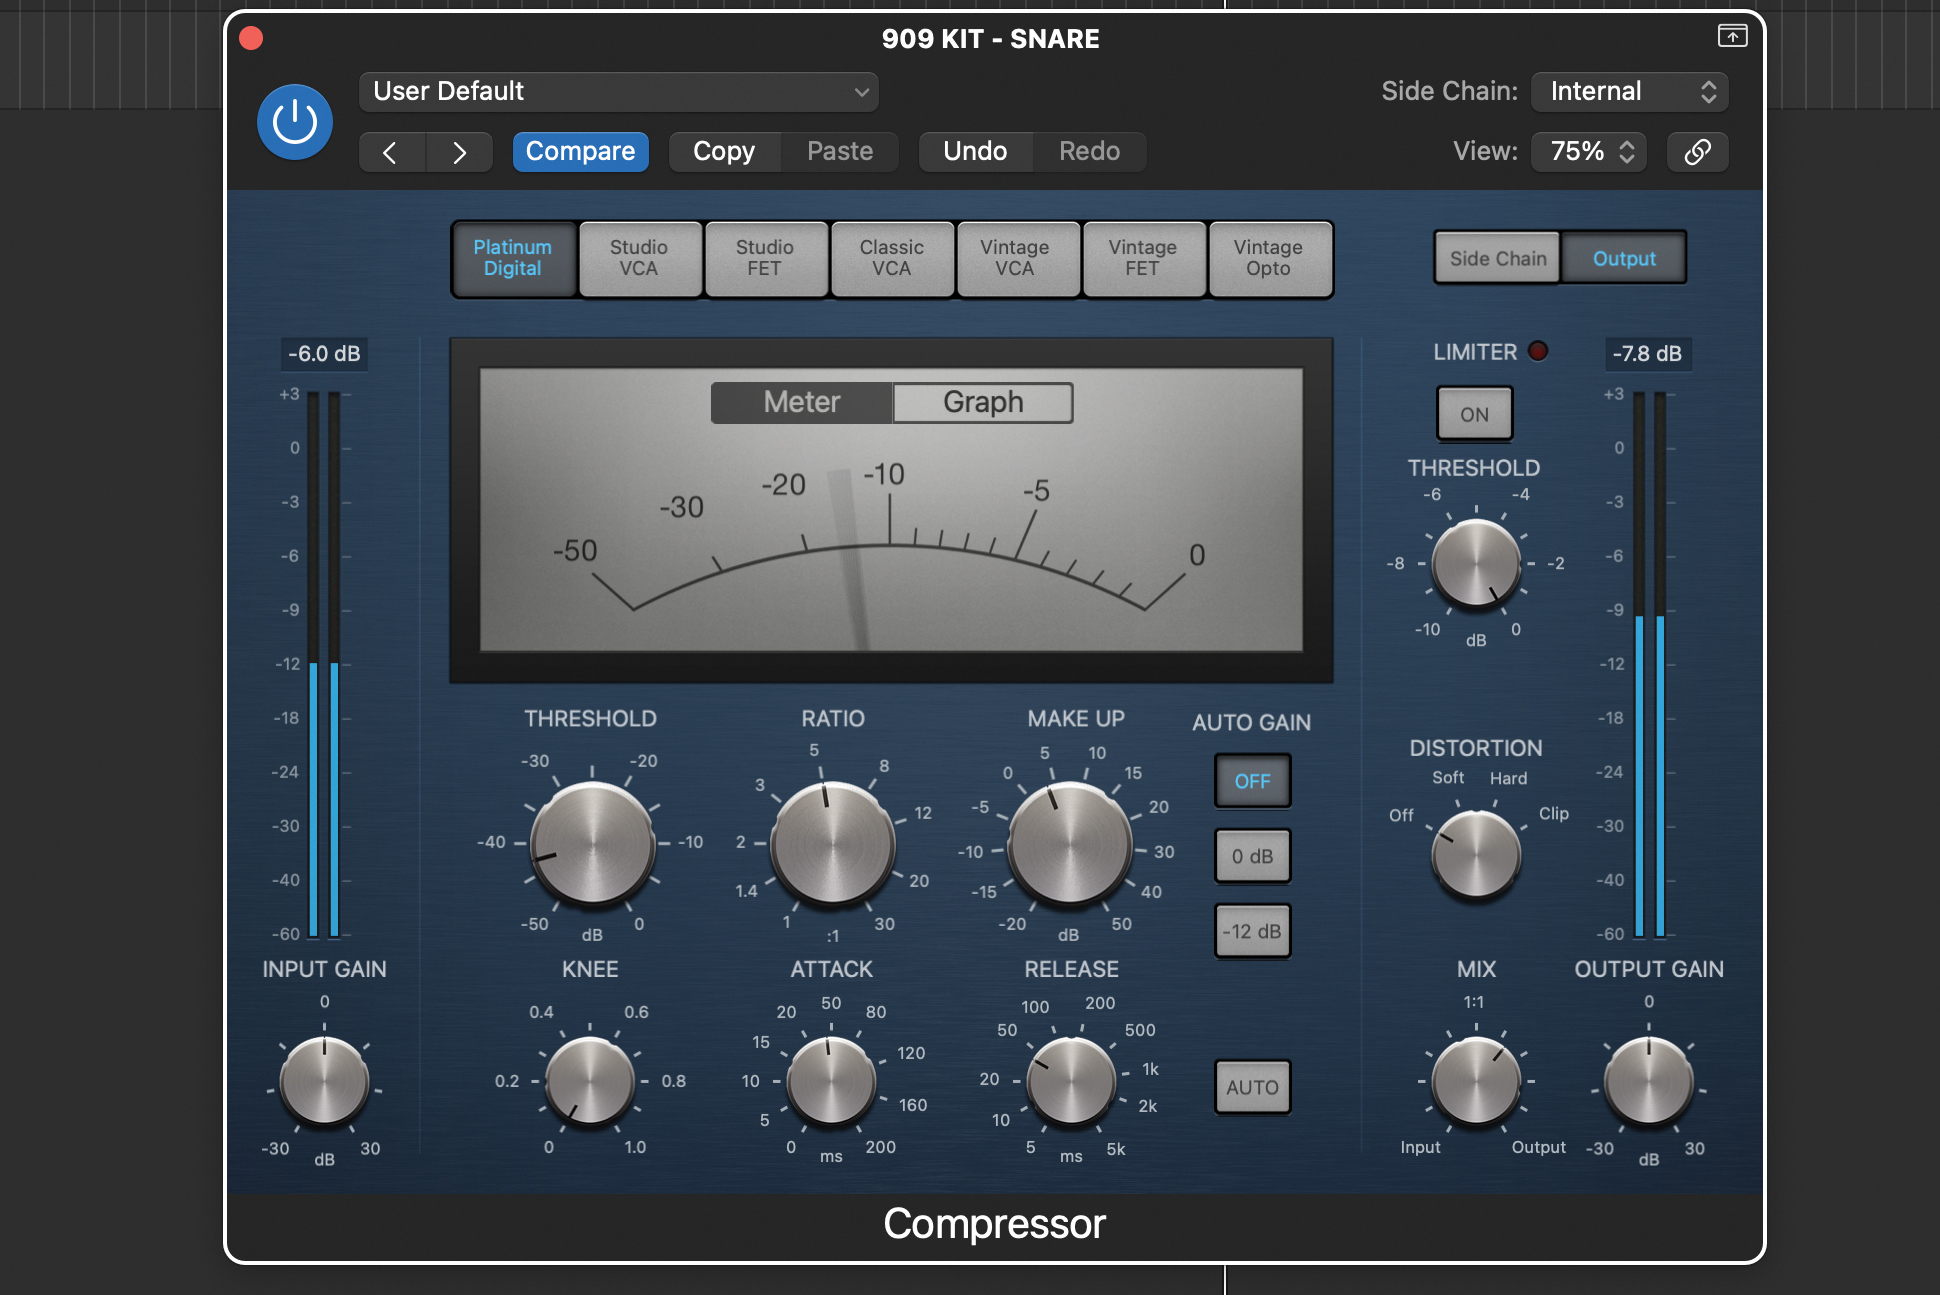
Finally, many compressor plugins include a mix control. This provides a convenient way to blend your carefully crafted, audibly compressed sound with the dry signal, using what is essentially parallel compression. Returning to our step 9 backbeat compression, we’ve used this method to get our desired sound.
- Read more: The ultimate beginner's guide to compression
Pro tips
1. Try a transient shaper
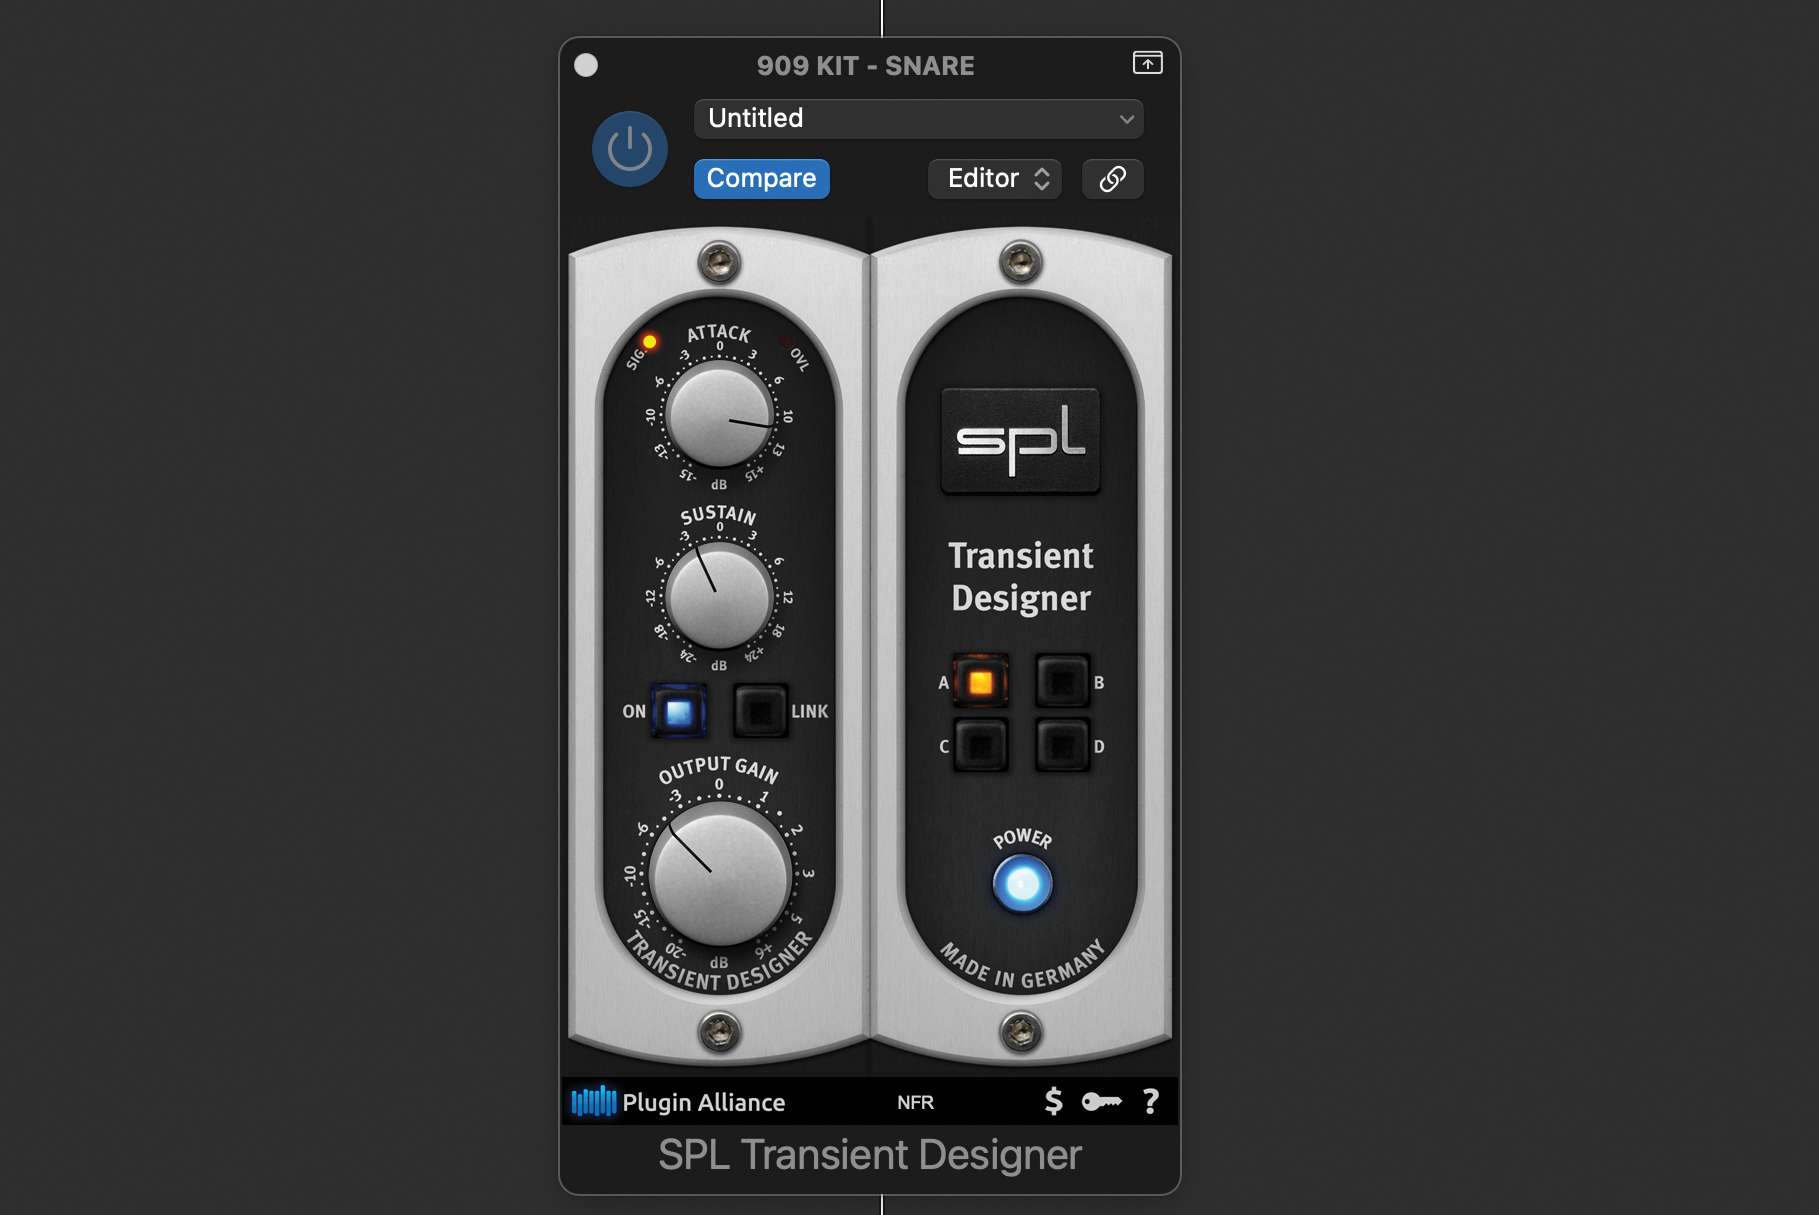
Once you get into reshaping sounds using the attack and release characteristics of a compressor, you should also consider, as an alternative, using an enveloper or transient shaper. Clearly, this does not have the same gain reduction profile as a compressor, so the outcome won’t be exactly the same.
Even so, for sharpening up beats, playing with their decay and generally making your sounds punchy they are an often overlooked tool and in terms of shaping can achieve far more extreme outcomes. With that last thought in mind, it’s also easy to overdo the transient shaping, so always make sure to A/B as you go.
2. Fix problems at the source
Without wishing to state the obvious, if you are mixing a track and have the option to edit or replace a source sound, then that can sometimes be quicker than trying to solve things using processing.
As an example, if you’re using compression to reshape a snare sound that’s from a sampler or ROMpler, and have the option to reshape the sound within those instruments, then that is probably a good starting point. Equally, if you’re working with audio and the source sound is really unsuitable, you could replace it or layer it with an additional sound.
Recommended listening
1. Sub Focus & Dimension - Ready to Fly
Compression can be great for enhancing the fat backbeat on tracks such as this.
2. Drake - Nice For What
Sometimes an audibly compressed punchy kick drum is just what the track needs.
Jon is a London based platinum award winning mixer, producer, composer and club remixer with a diverse CV that spans dance, pop, rock and music for media. He’s also a long term contributor to MusicRadar's music technology tutorials and reviews. Whether working alone or collaborating he usually handles final mixdowns, so you’ll also find MusicRadar peppered with his handy mixing tips.
