Create a rumbling techno kick in 10 easy steps
We get aggressive with Ableton Live's effects
The low-end of dark driving techno is often created by processing the kick drum.
Here, we’re using a selection of aggressive effects in Ableton Live to produce what’s generally known as the “rumble”.
Step 1
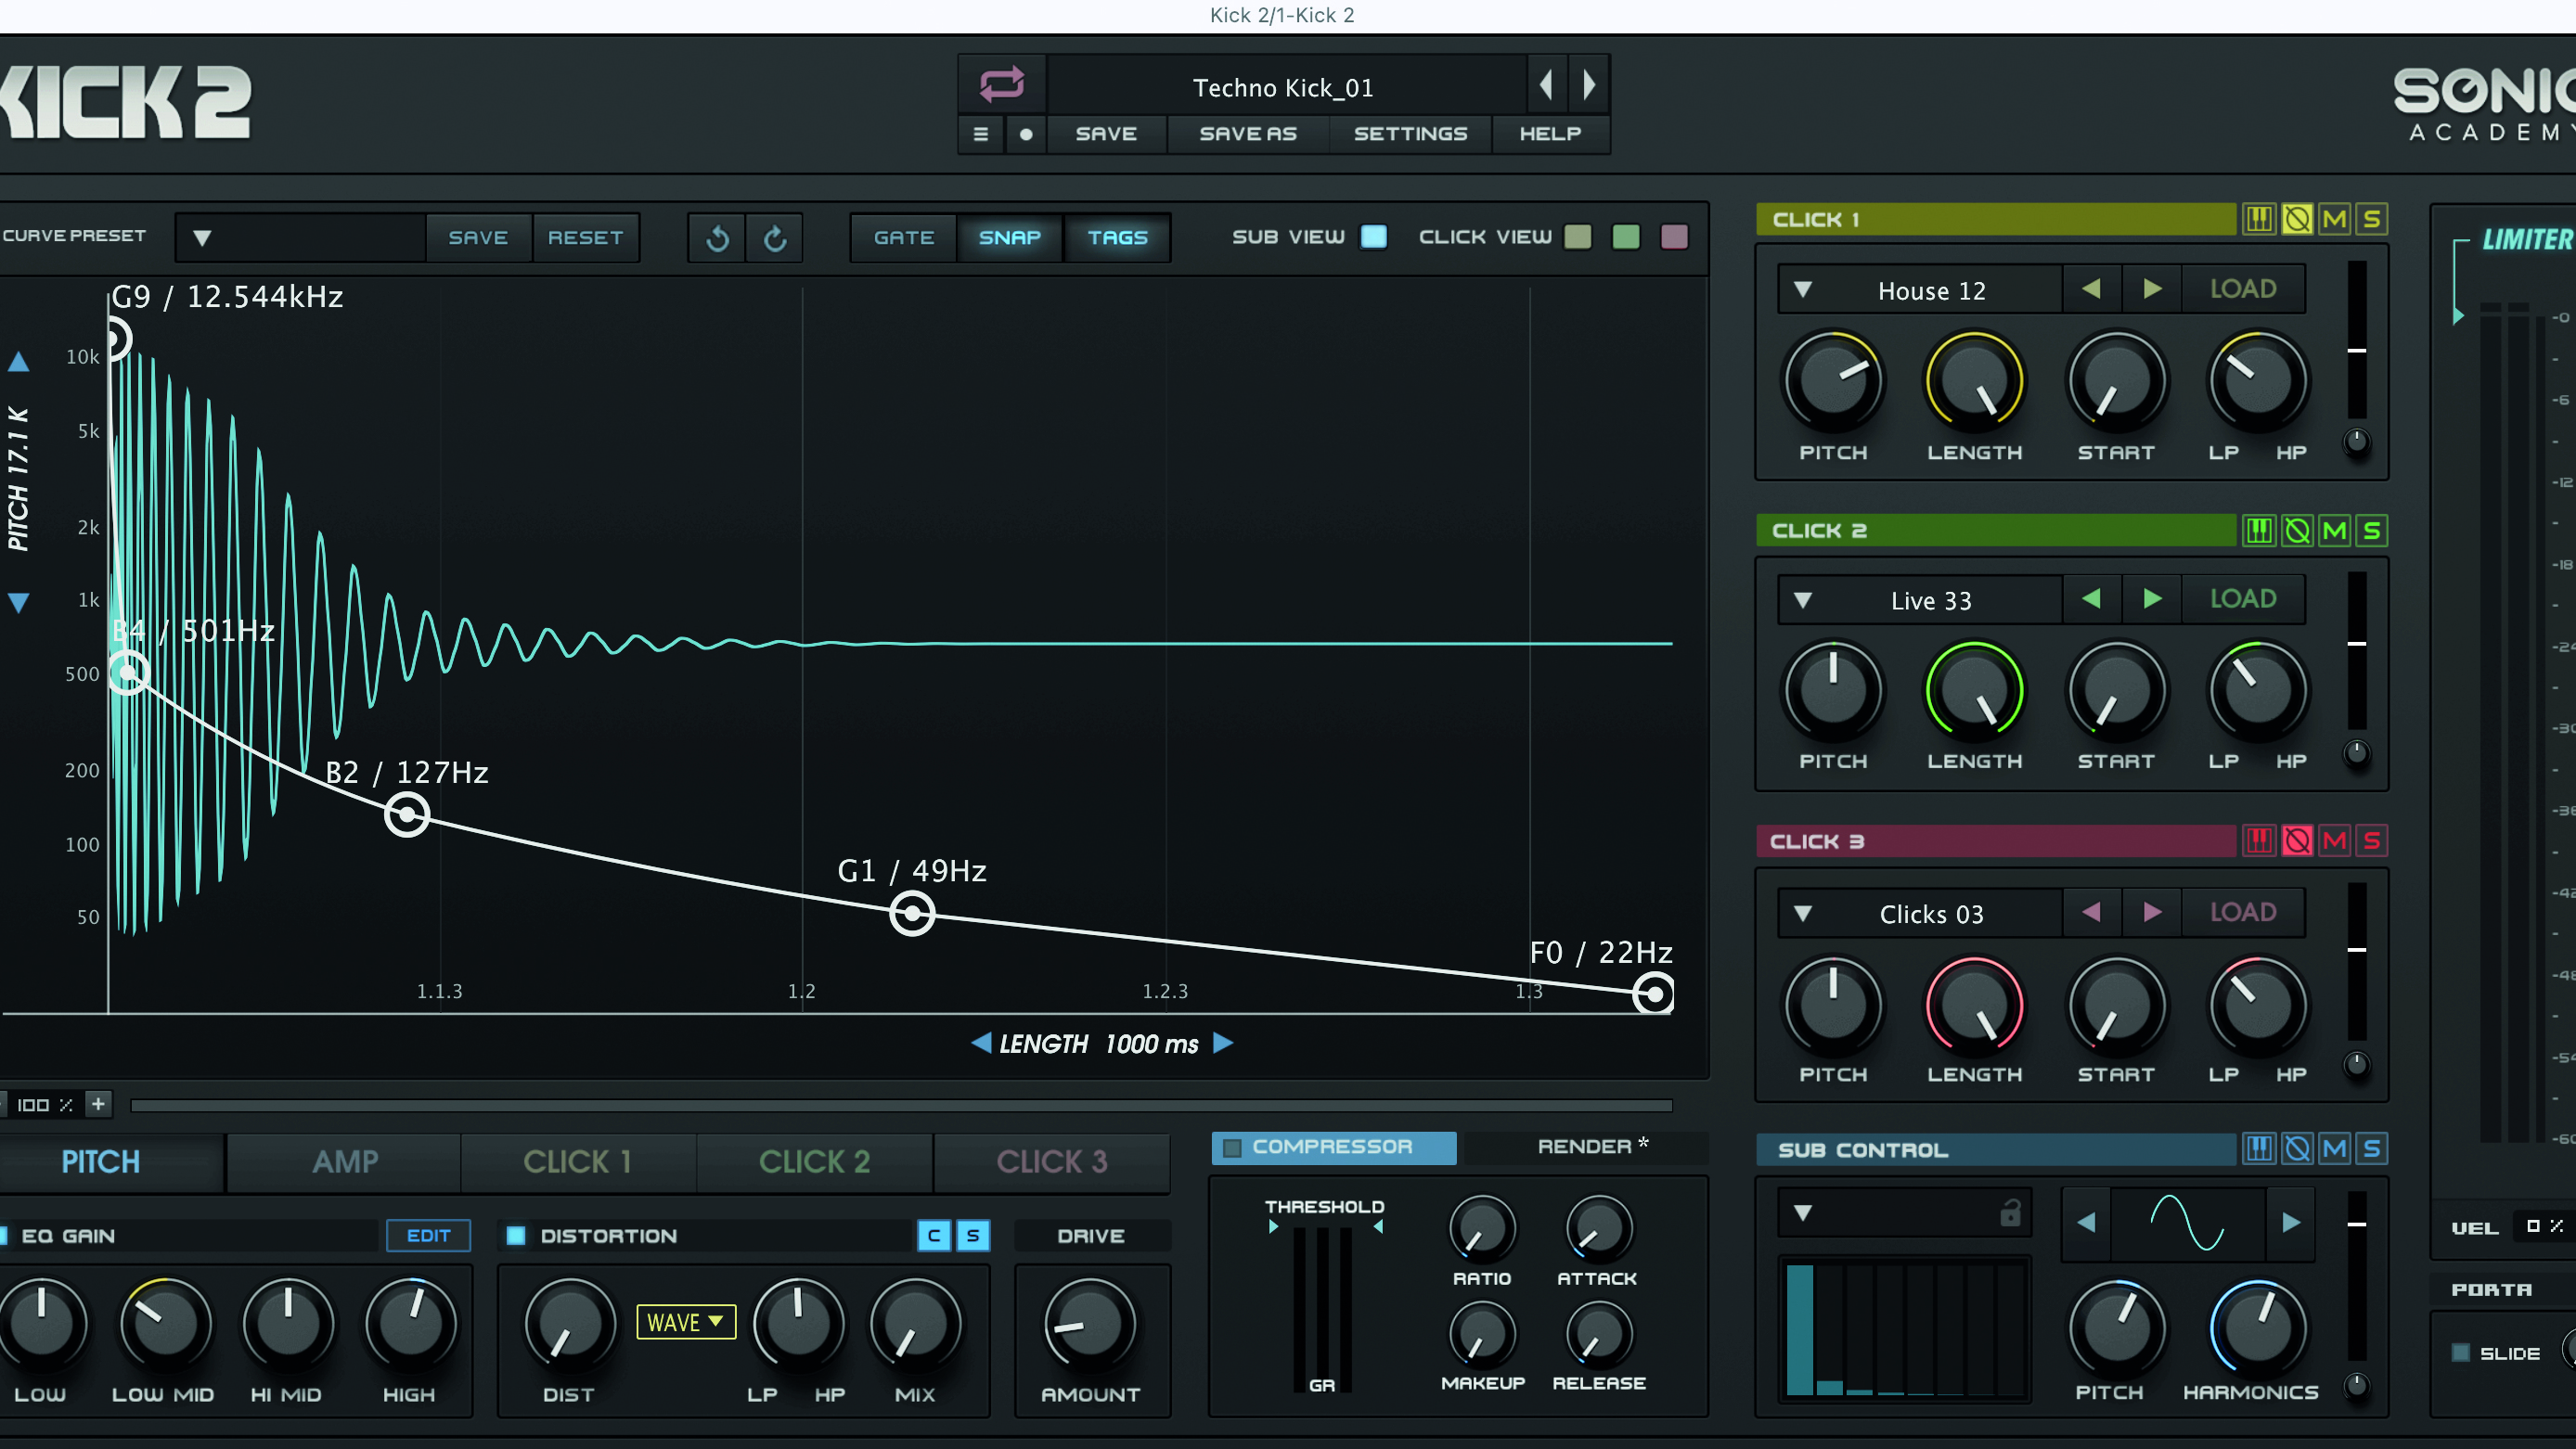
We’re using Sonic Academy’s Kick 2 plugin. Another option is to use a kick sample, typically from a Roland TR-909. However, Kick 2 allows greater flexibility in duration, pitch and top element clicks, essential to hone and personalise the style of your track.
Step 2
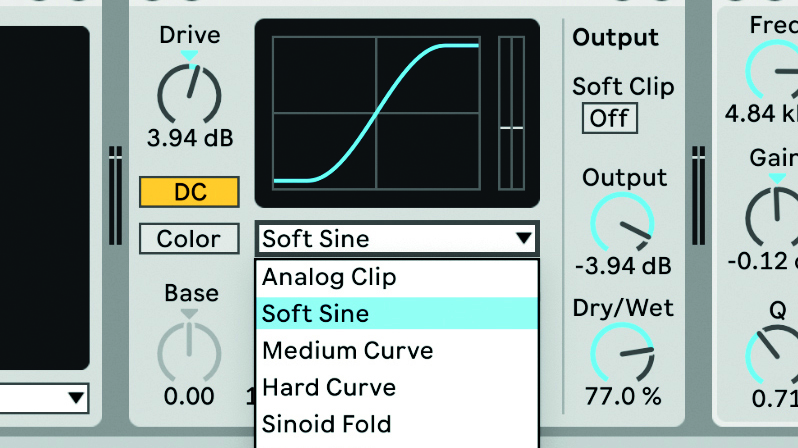
The next stage is to add harmonic bite to the kick using the Drive control on the Saturator plugin. It’s worth experimenting with the Curve Types as well as the DC and Color controls, and Dry/Wet balance, as these greatly affect the sound. We have then added EQ Eight to sculpt the sound.
Step 3
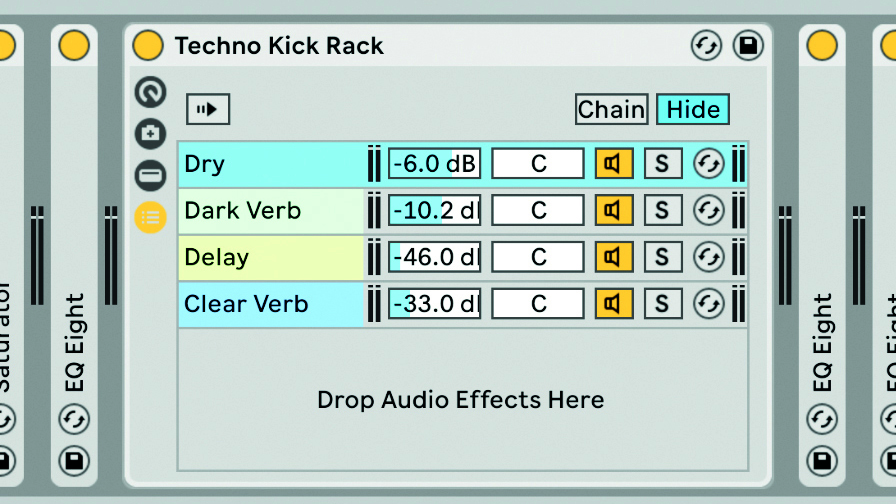
We then add an Effects Rack for several stages of parallel processing. The first chain is the dry kick signal. Additional chains are added for Dark Verb, Delay and Clear Verb. Each chain has a series of effects, and the volume of each of the chains is then blended for the final sound.
Step 4
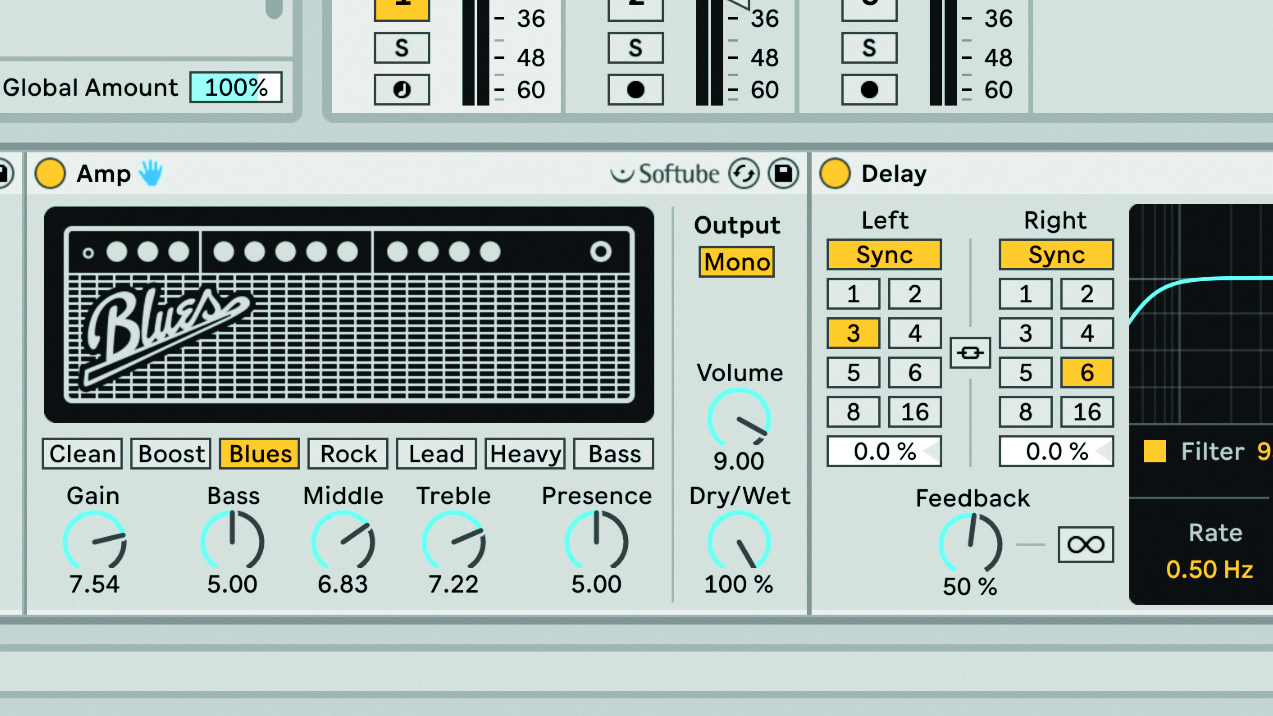
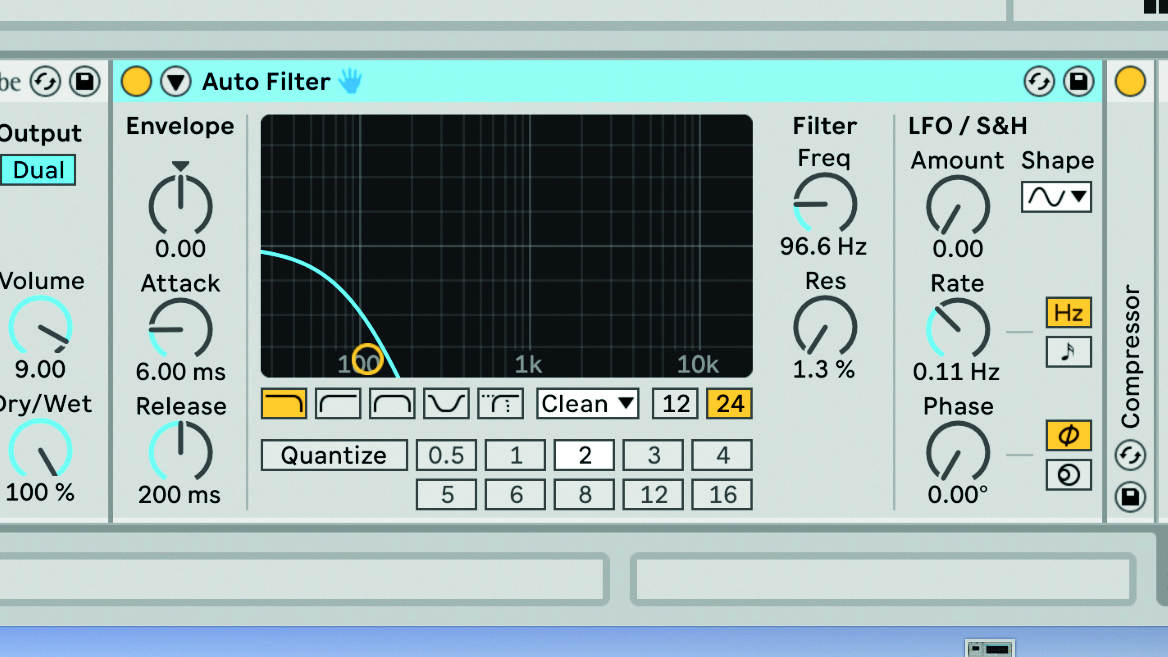
The Dark Verb chain includes a Convolution Reverb Pro, set 100% wet, followed by the Amp plugin. This distorted reverb needs to be radically shaped using an Auto Filter, with the Filter Frequency set at 96.6Hz. The Gain, Amp Type and EQ controls have a pronounced influence on the sound, so try all the settings.
Step 5
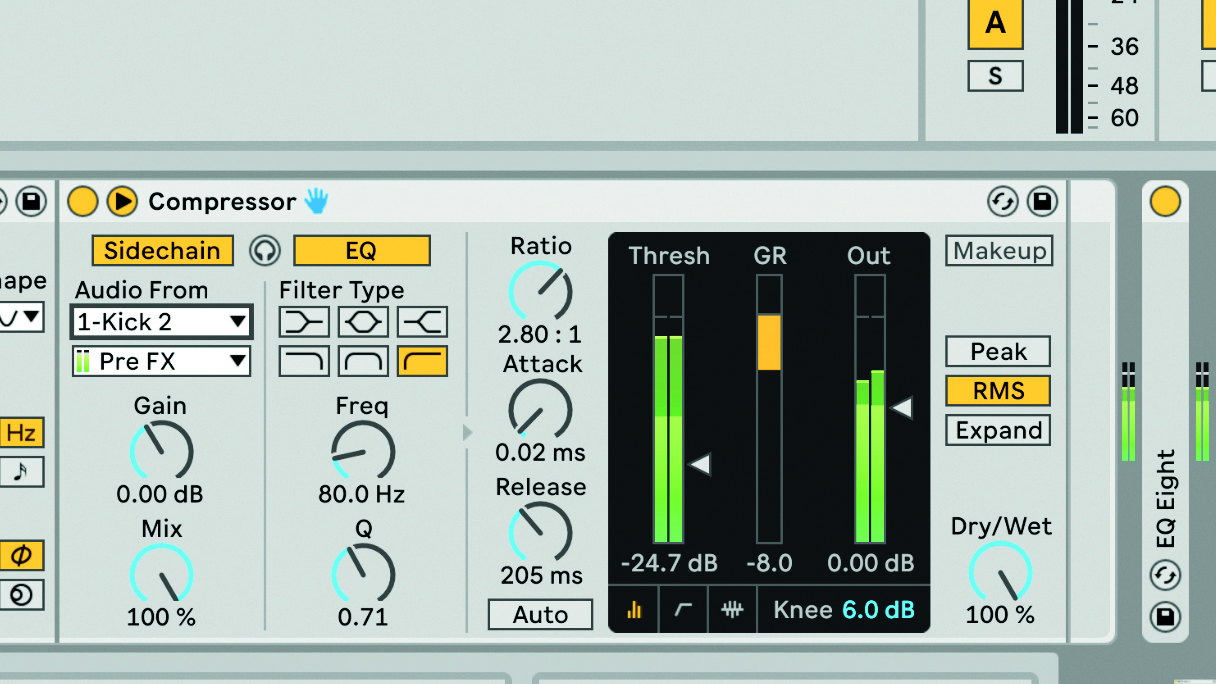
We need to create some breathing space for this dark reverb using a Compressor sidechained from Kick 2. The Ratio, Attack and Release can be adjusted to suit the feel of the track. The general idea is to have the filtered reverb pumping on the offbeat.
Get the MusicRadar Newsletter
Want all the hottest music and gear news, reviews, deals, features and more, direct to your inbox? Sign up here.

Step 6
A heavily filtered and distorted delay is another option to use instead of reverb. In this case however, we’re subtly adding repeats at higher frequencies to add rhythmic interest. We’ve added Amp, again 100% wet, and Delay. Because the repeats are stereo, we’ve added a Utility plugin to add control to the width of the delay.
Step 7
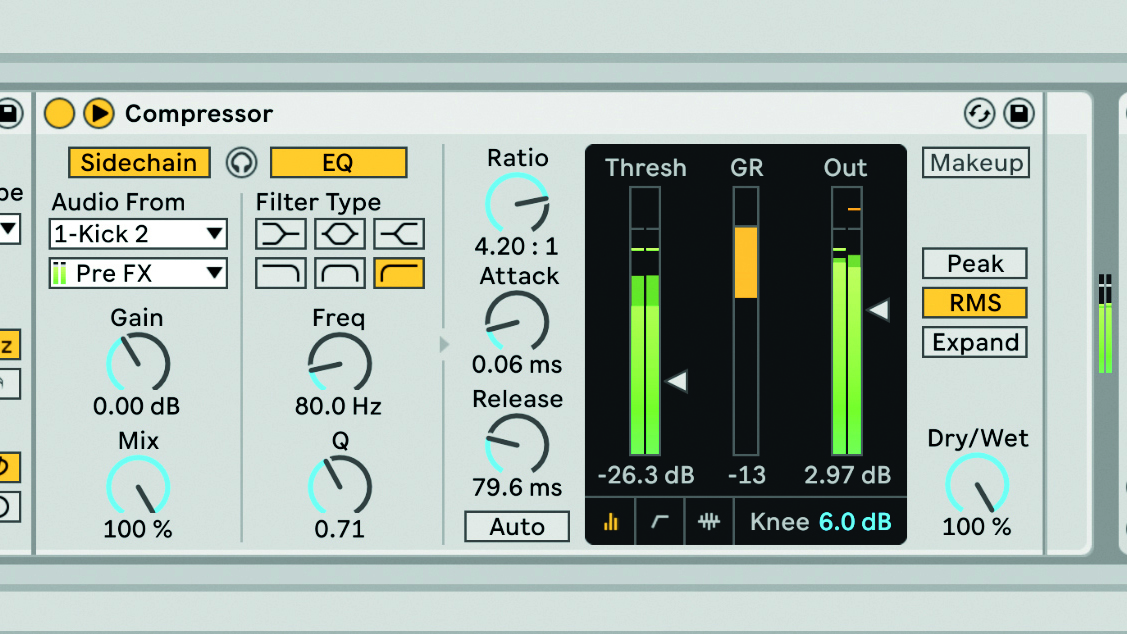
These repeats also need to be controlled using Auto Filter, but to a far lesser degree here than the Dark Verb processing. The Filter Type, Drive and Circuit Slope determine the character of the filtering. Similarly, the delays are sidechained using the Compressor plugin to add some pumping.
Step 8
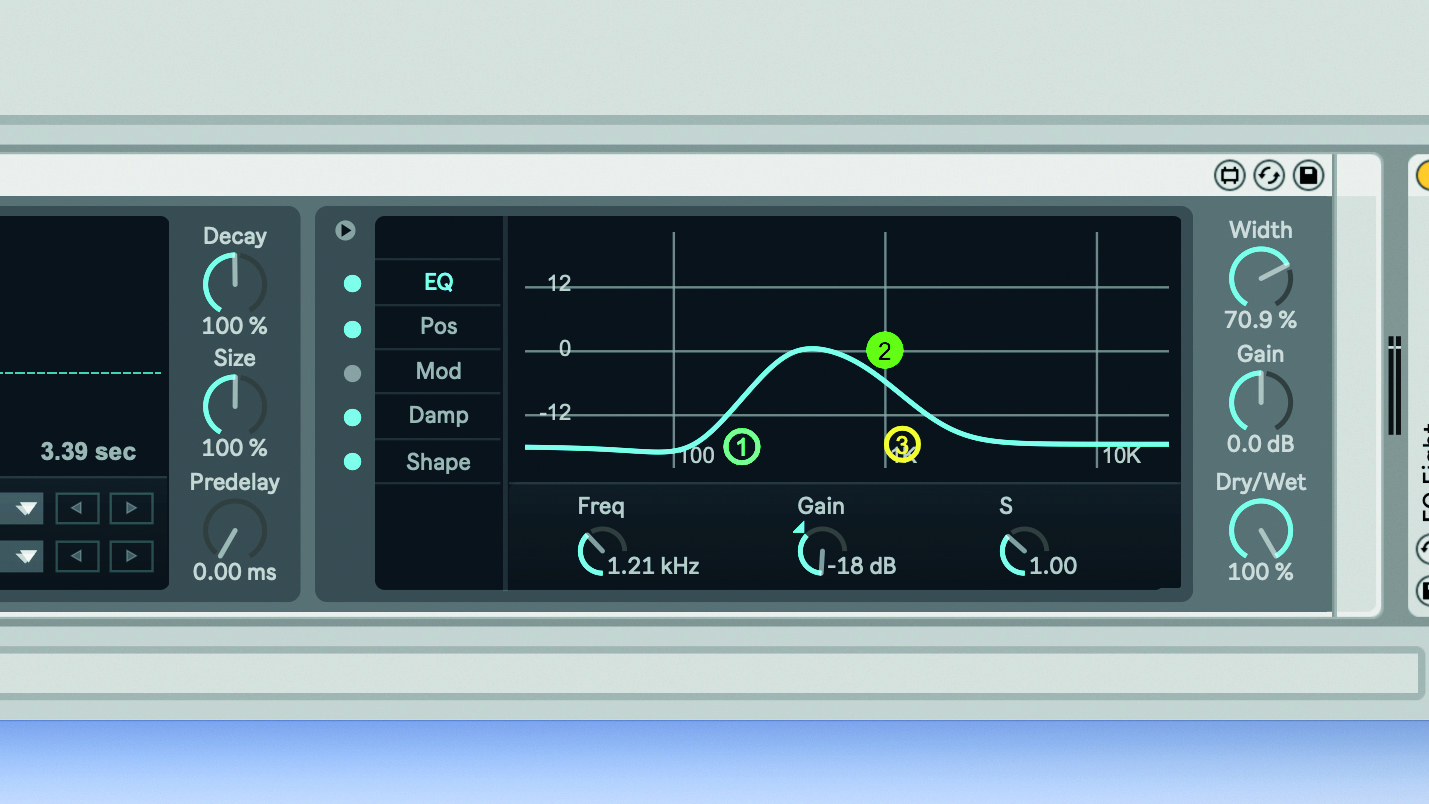
The Clear Verb chain also uses the Convolution Reverb Pro, but here the objective is to add general ambience. The on-board EQ is used to limit the reverb frequencies produced. The stereo width control can be used to widen the feel of this ambience, or to push it to the centre of the stereo field.
Step 9
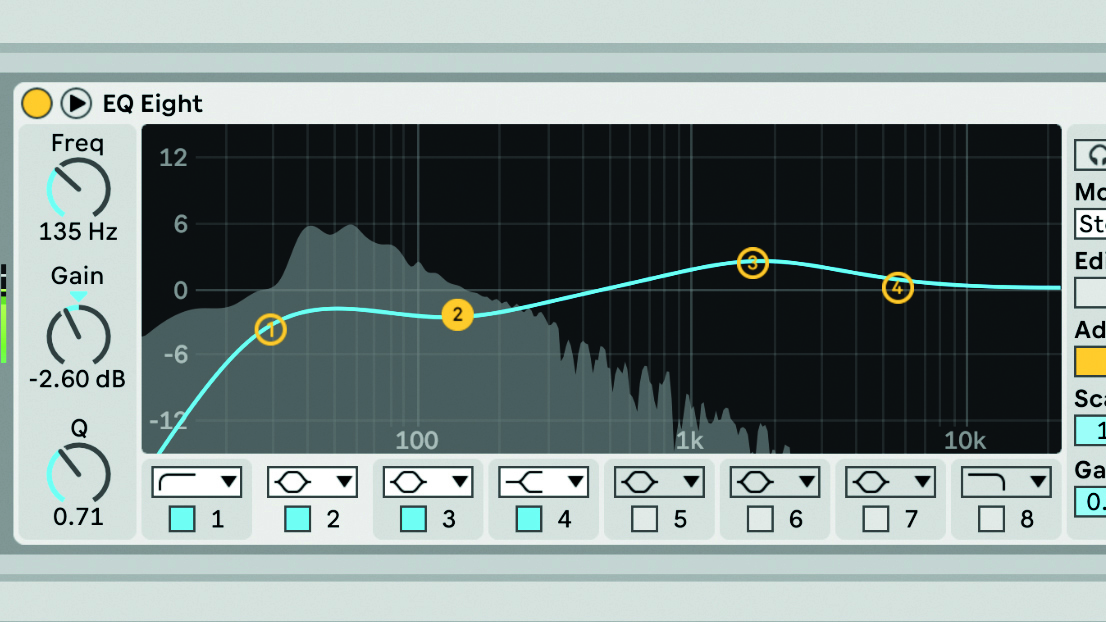
The blended outputs from the four chains in the Effects Rack are now routed through an EQ Eight set to Mid/Side mode in order to filter out low frequencies in the sides of the stereo field. This is followed by a standard EQ Eight to filter out the ultra-lows and to notch out some boxy frequencies at 135Hz.
Step 10
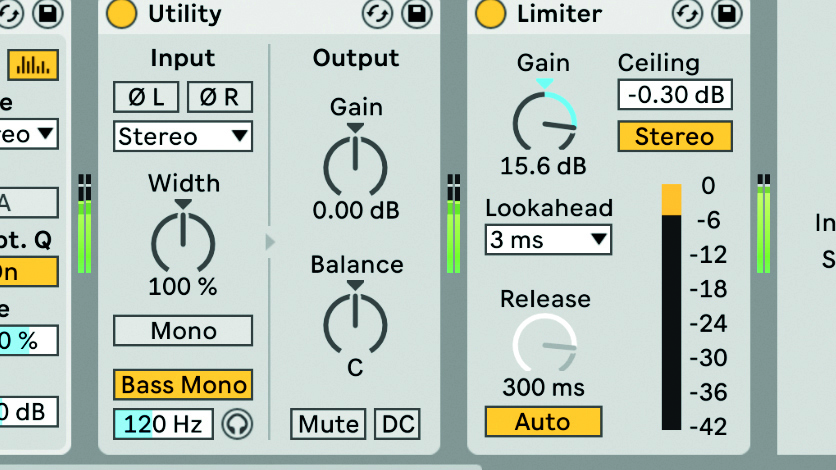
The last stage is to add a Utility plugin so all frequencies below 120Hz are summed with the Bass Mono switch. And finally, a Limiter plugin is added to compress the kick and rumble elements. Alternatively, the separate elements of the Effects Rack can be bounced to individual tracks for further processing.
Future Music is the number one magazine for today's producers. Packed with technique and technology we'll help you make great new music. All-access artist interviews, in-depth gear reviews, essential production tutorials and much more. Every marvellous monthly edition features reliable reviews of the latest and greatest hardware and software technology and techniques, unparalleled advice, in-depth interviews, sensational free samples and so much more to improve the experience and outcome of your music-making.


