How to simulate and warp a real room in software
Recreate room acoustics reverb with our step-by-step tutorial

Want all the hottest music and gear news, reviews, deals, features and more, direct to your inbox? Sign up here.
You are now subscribed
Your newsletter sign-up was successful
We've been doing a deep dive into reverb on MusicRadar over the past few weeks, looking into everything from off-the-wall, creative reverb manipulation to bread-and-butter reverb production tips.
Today, we're going to explore the various reverb parameters and how they relate to room acoustics.
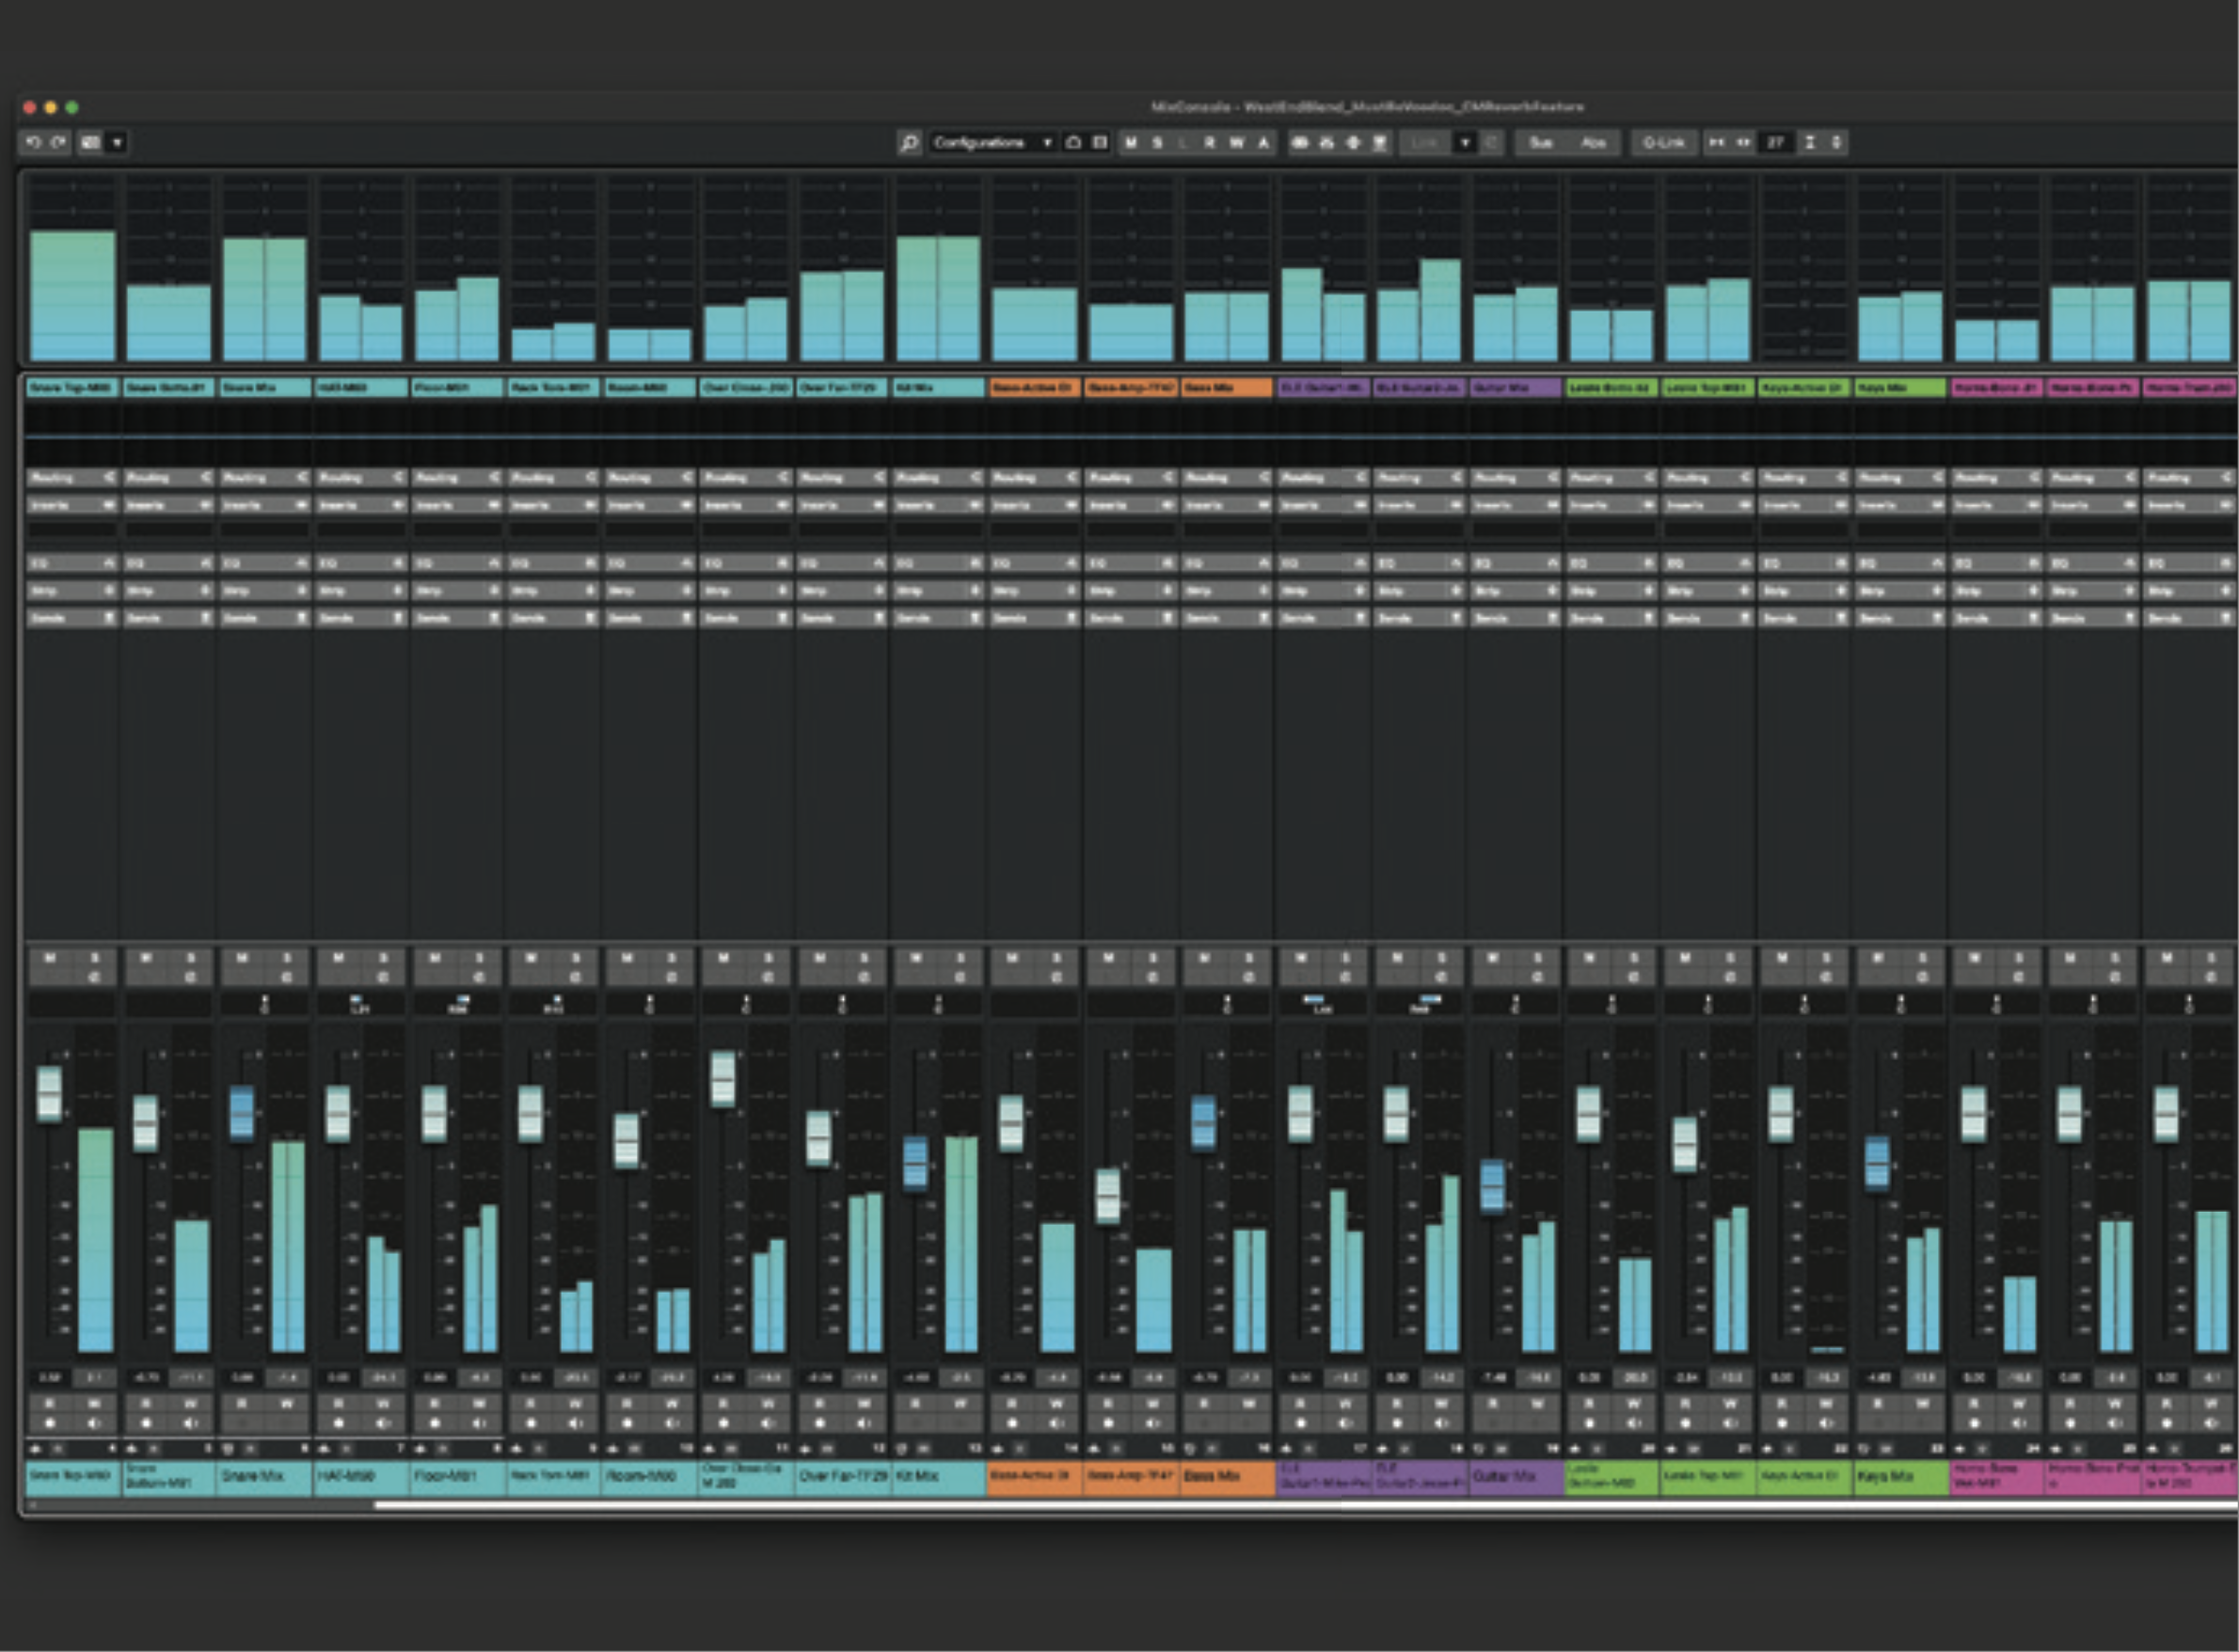
Start by loading an existing project into your DAW. If you don’t have anything suitable then you could grab one of your DAW’s demo projects, or download something from a multitrack library such as Cambridge MT. Disable any existing reverbs and reverb sends used by the project.
Article continues below 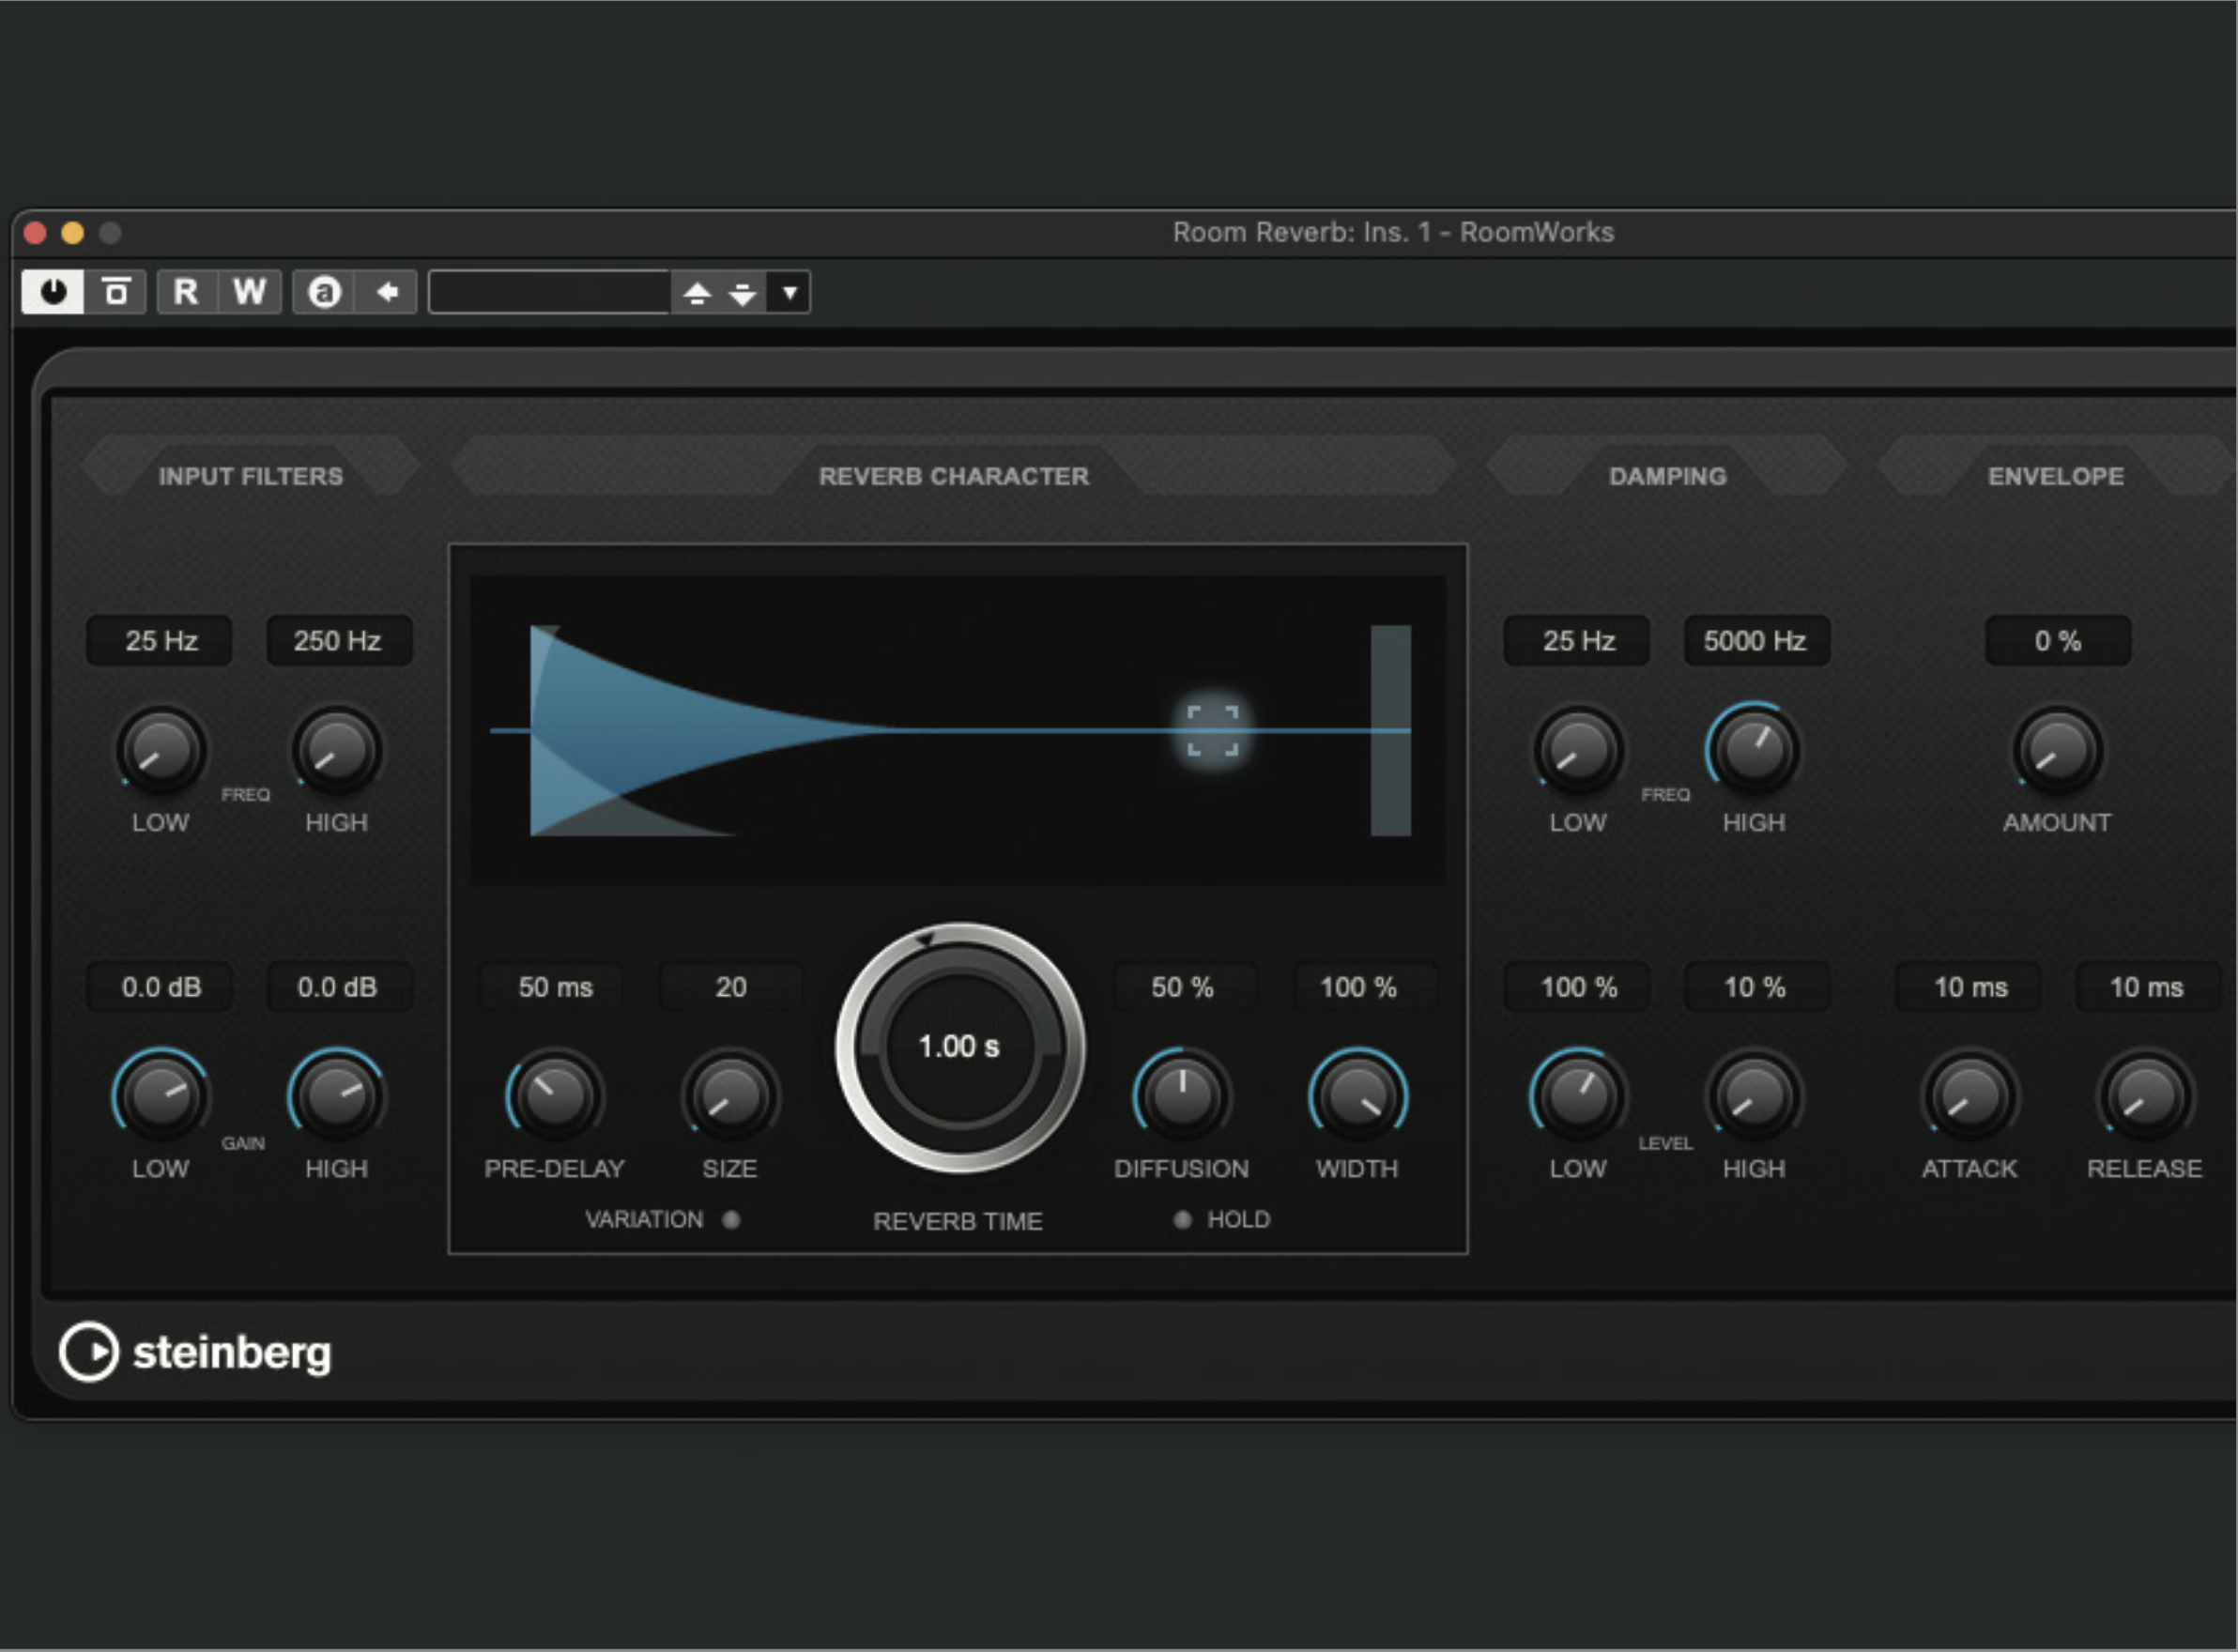
Create an FX/Auxiliary track, name it ‘Room Reverb’, and insert an algorithmic reverb on its channel. Set the wet/dry balance to 100% wet. We’re using Steinberg RoomWorks, included in Cubase and Nuendo, because it exposes lots of useful parameters and names these clearly. You can use your own choice of plugin, but aim for one with a similar selection of parameters.
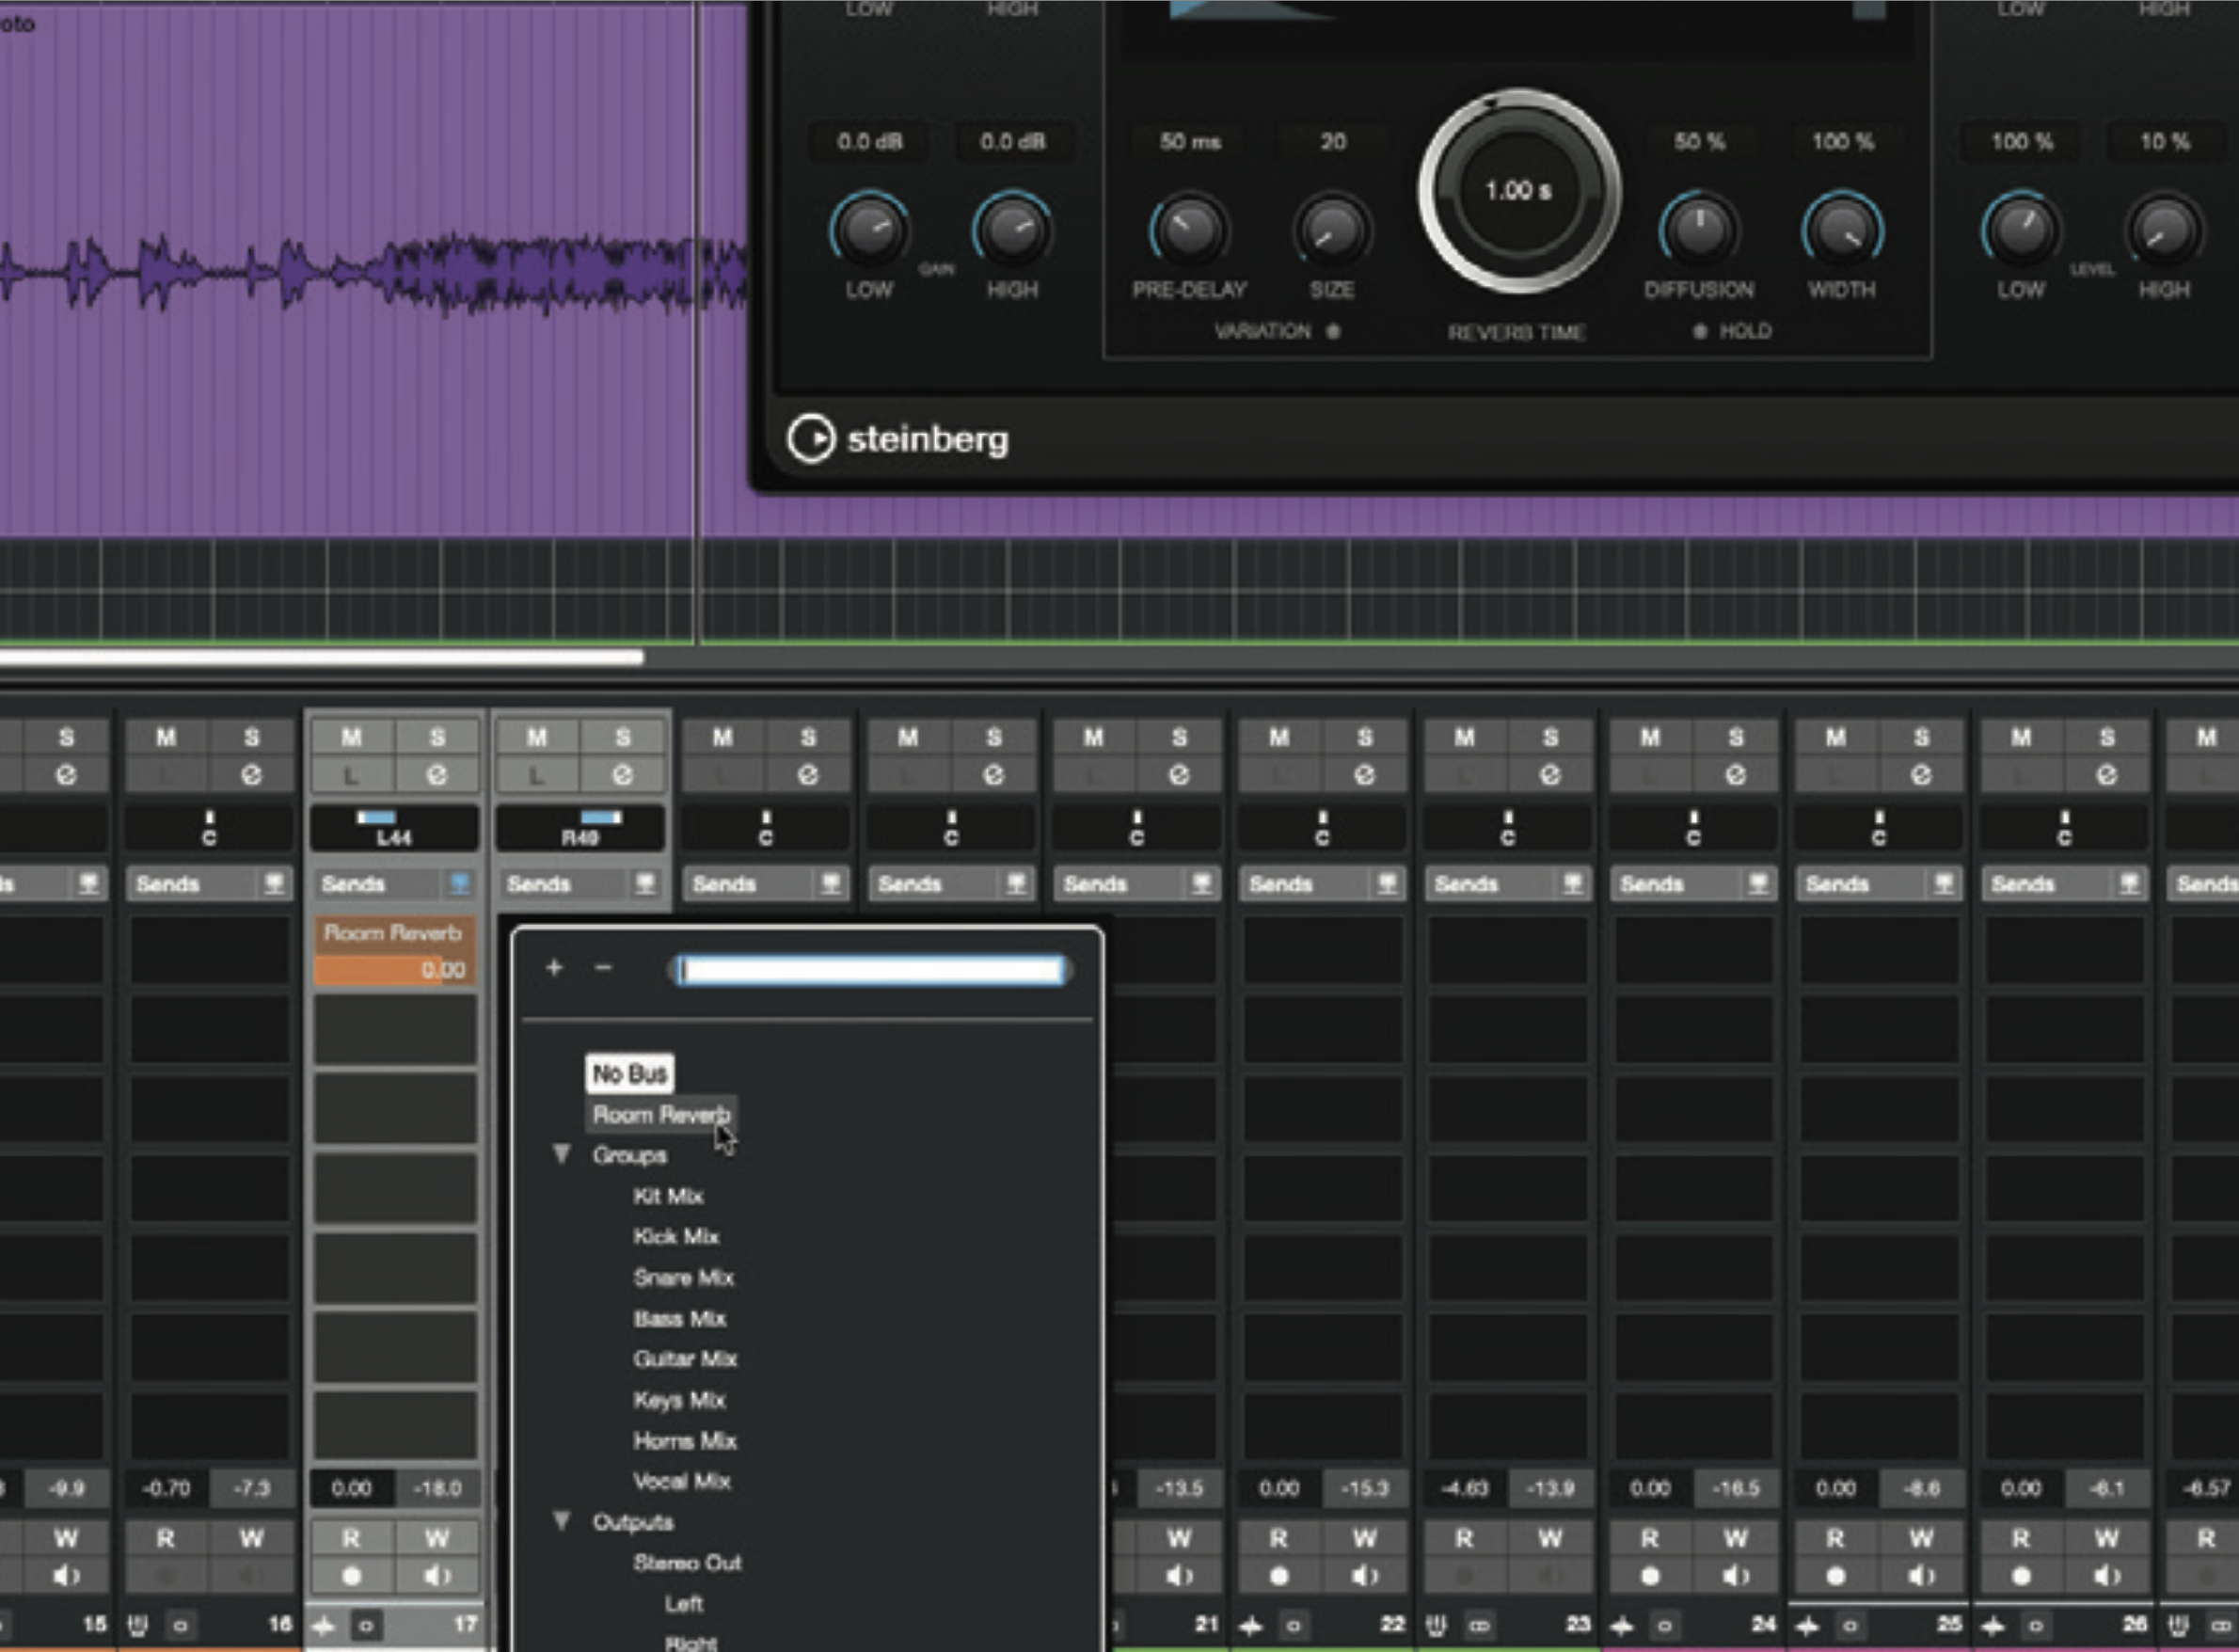
Work through the parts of your project, creating sends to the Room Reverb from any channel that you wish to place into the simulated space. Be sure to use post-fade sends so that the balance between channel level and send level always remains consistent. For now, keep your Room Reverb channel quite loud so that the effect is obvious.
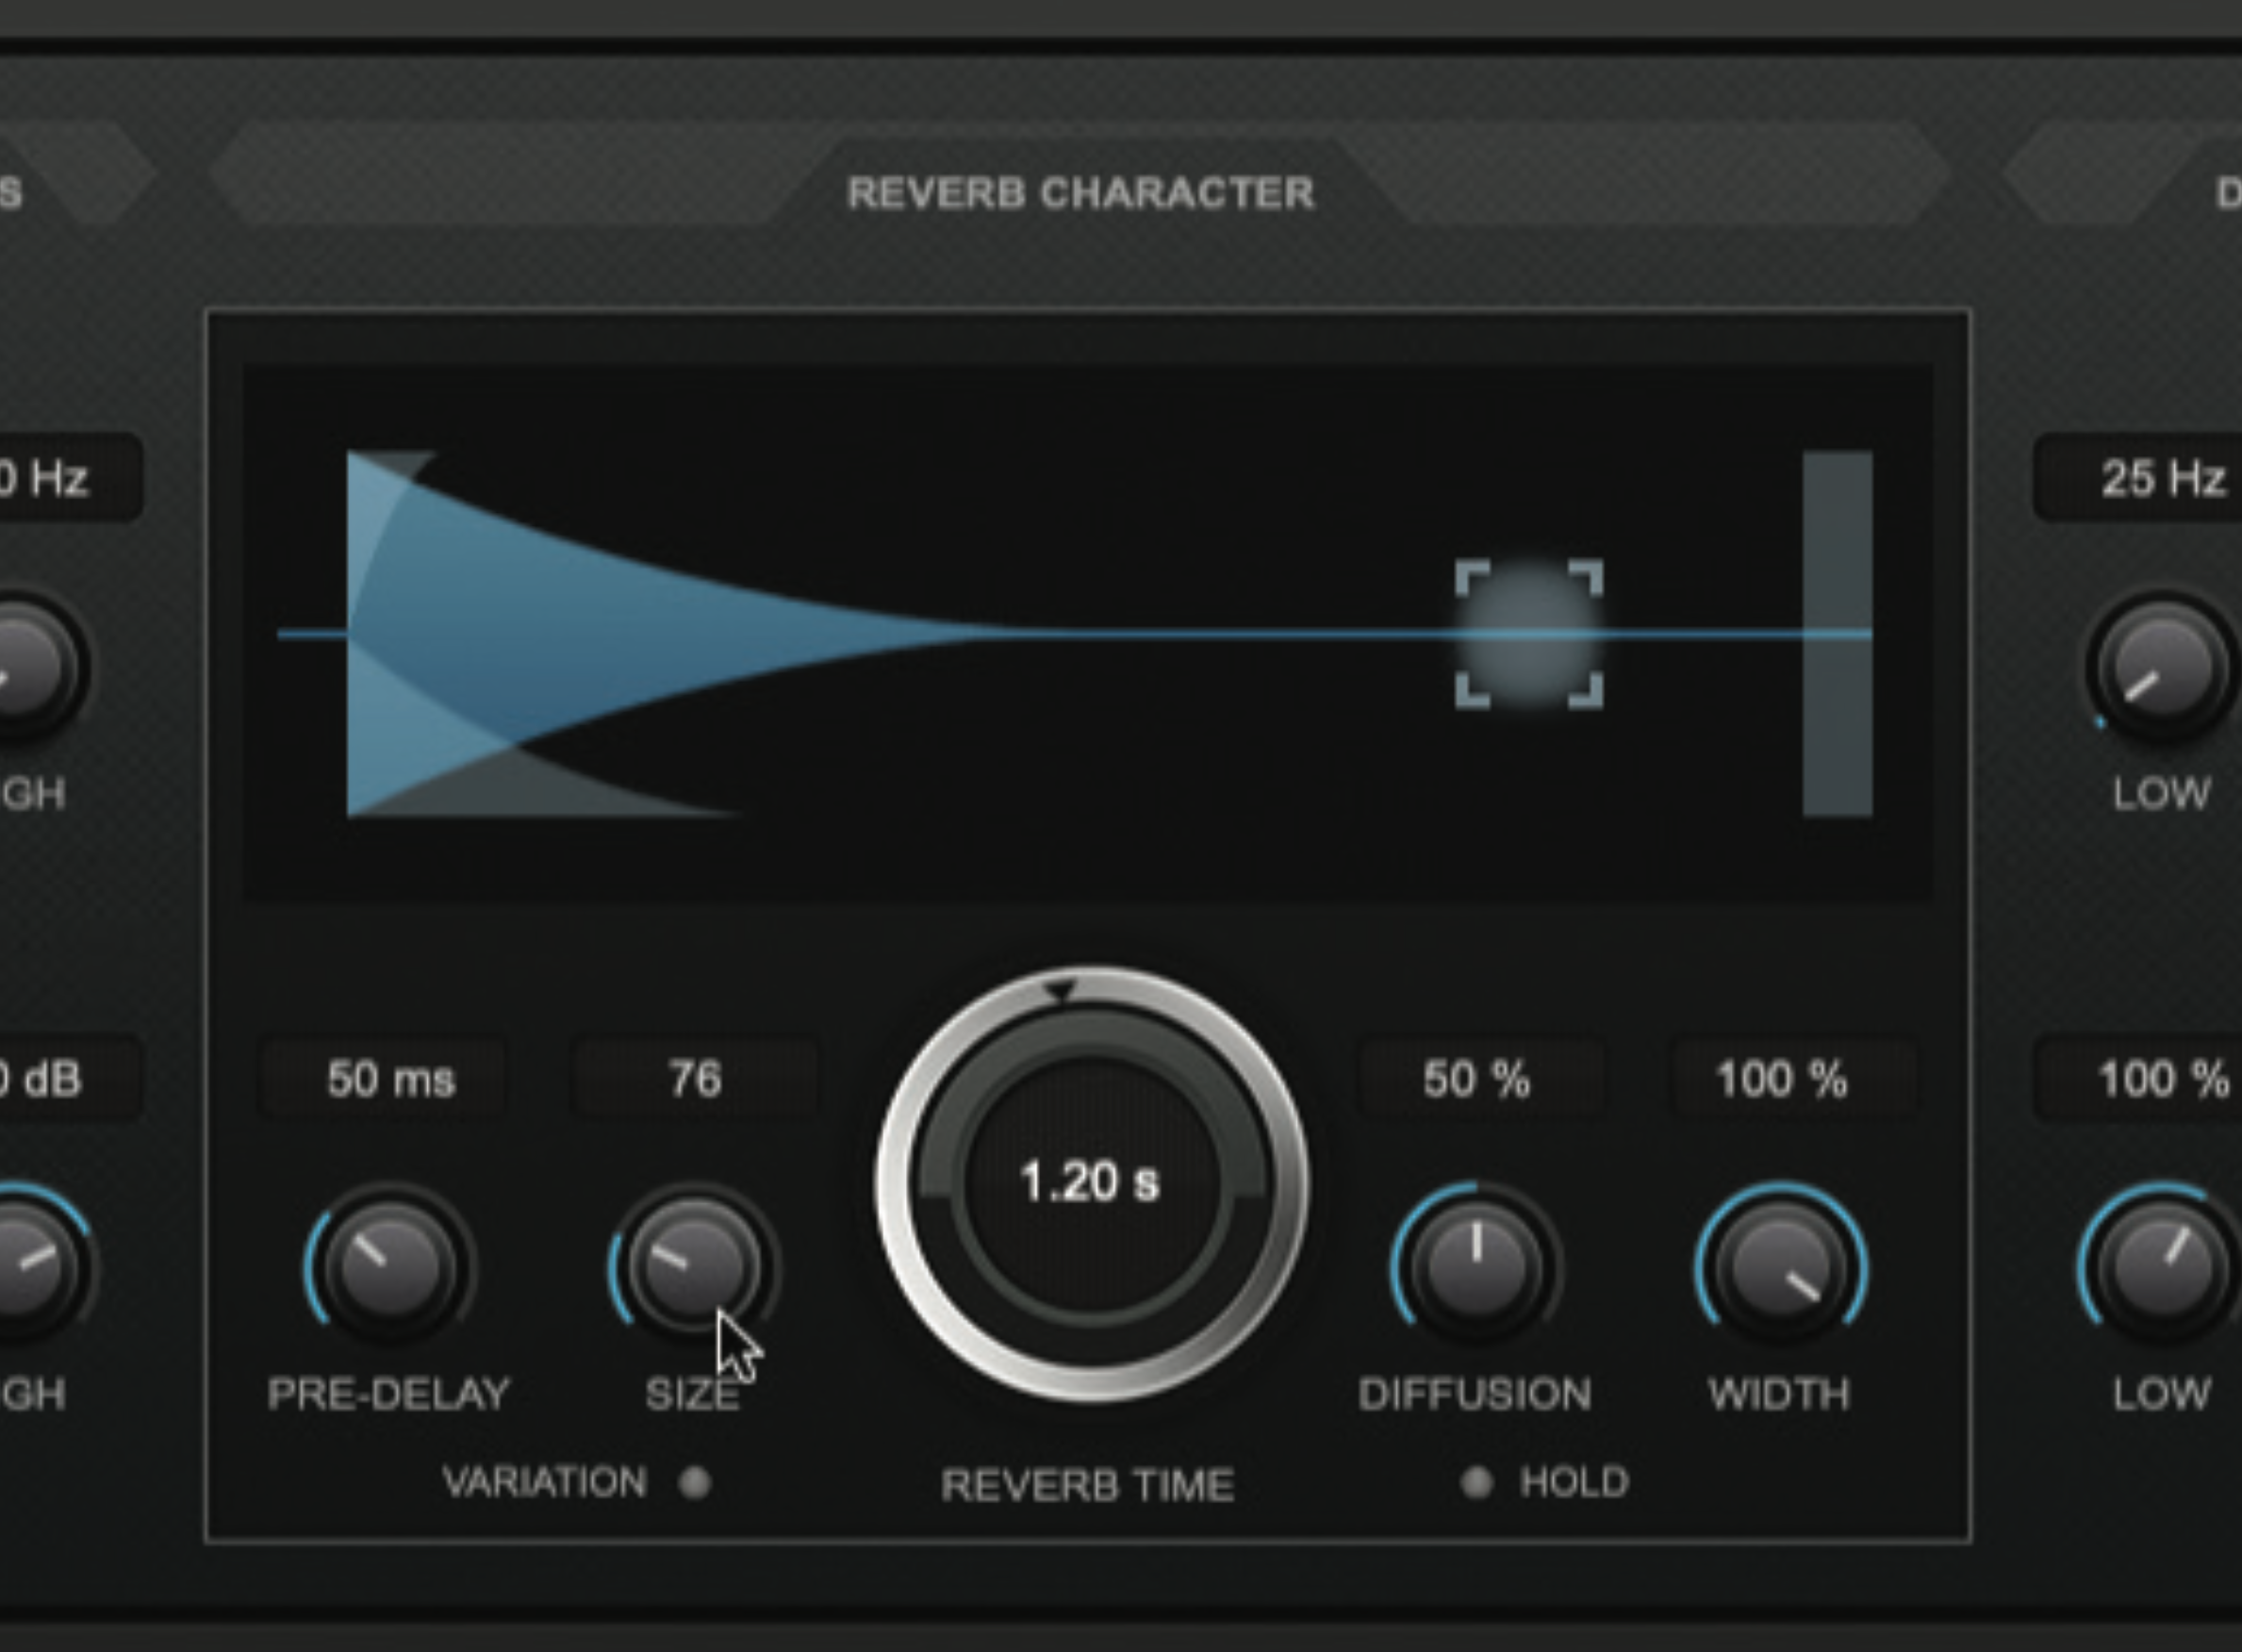
Our song will suit an intimate live venue sound, like a smallish club (follow our lead on this for now). Set a middling reverb/decay time of 1.2s then adjust the room size/reverb type, noting how this affects the reverb’s snappiness, brightness and density. Starting and stopping playback helps these details stand out. We’ve settled on a value of around 33% of the maximum room size.
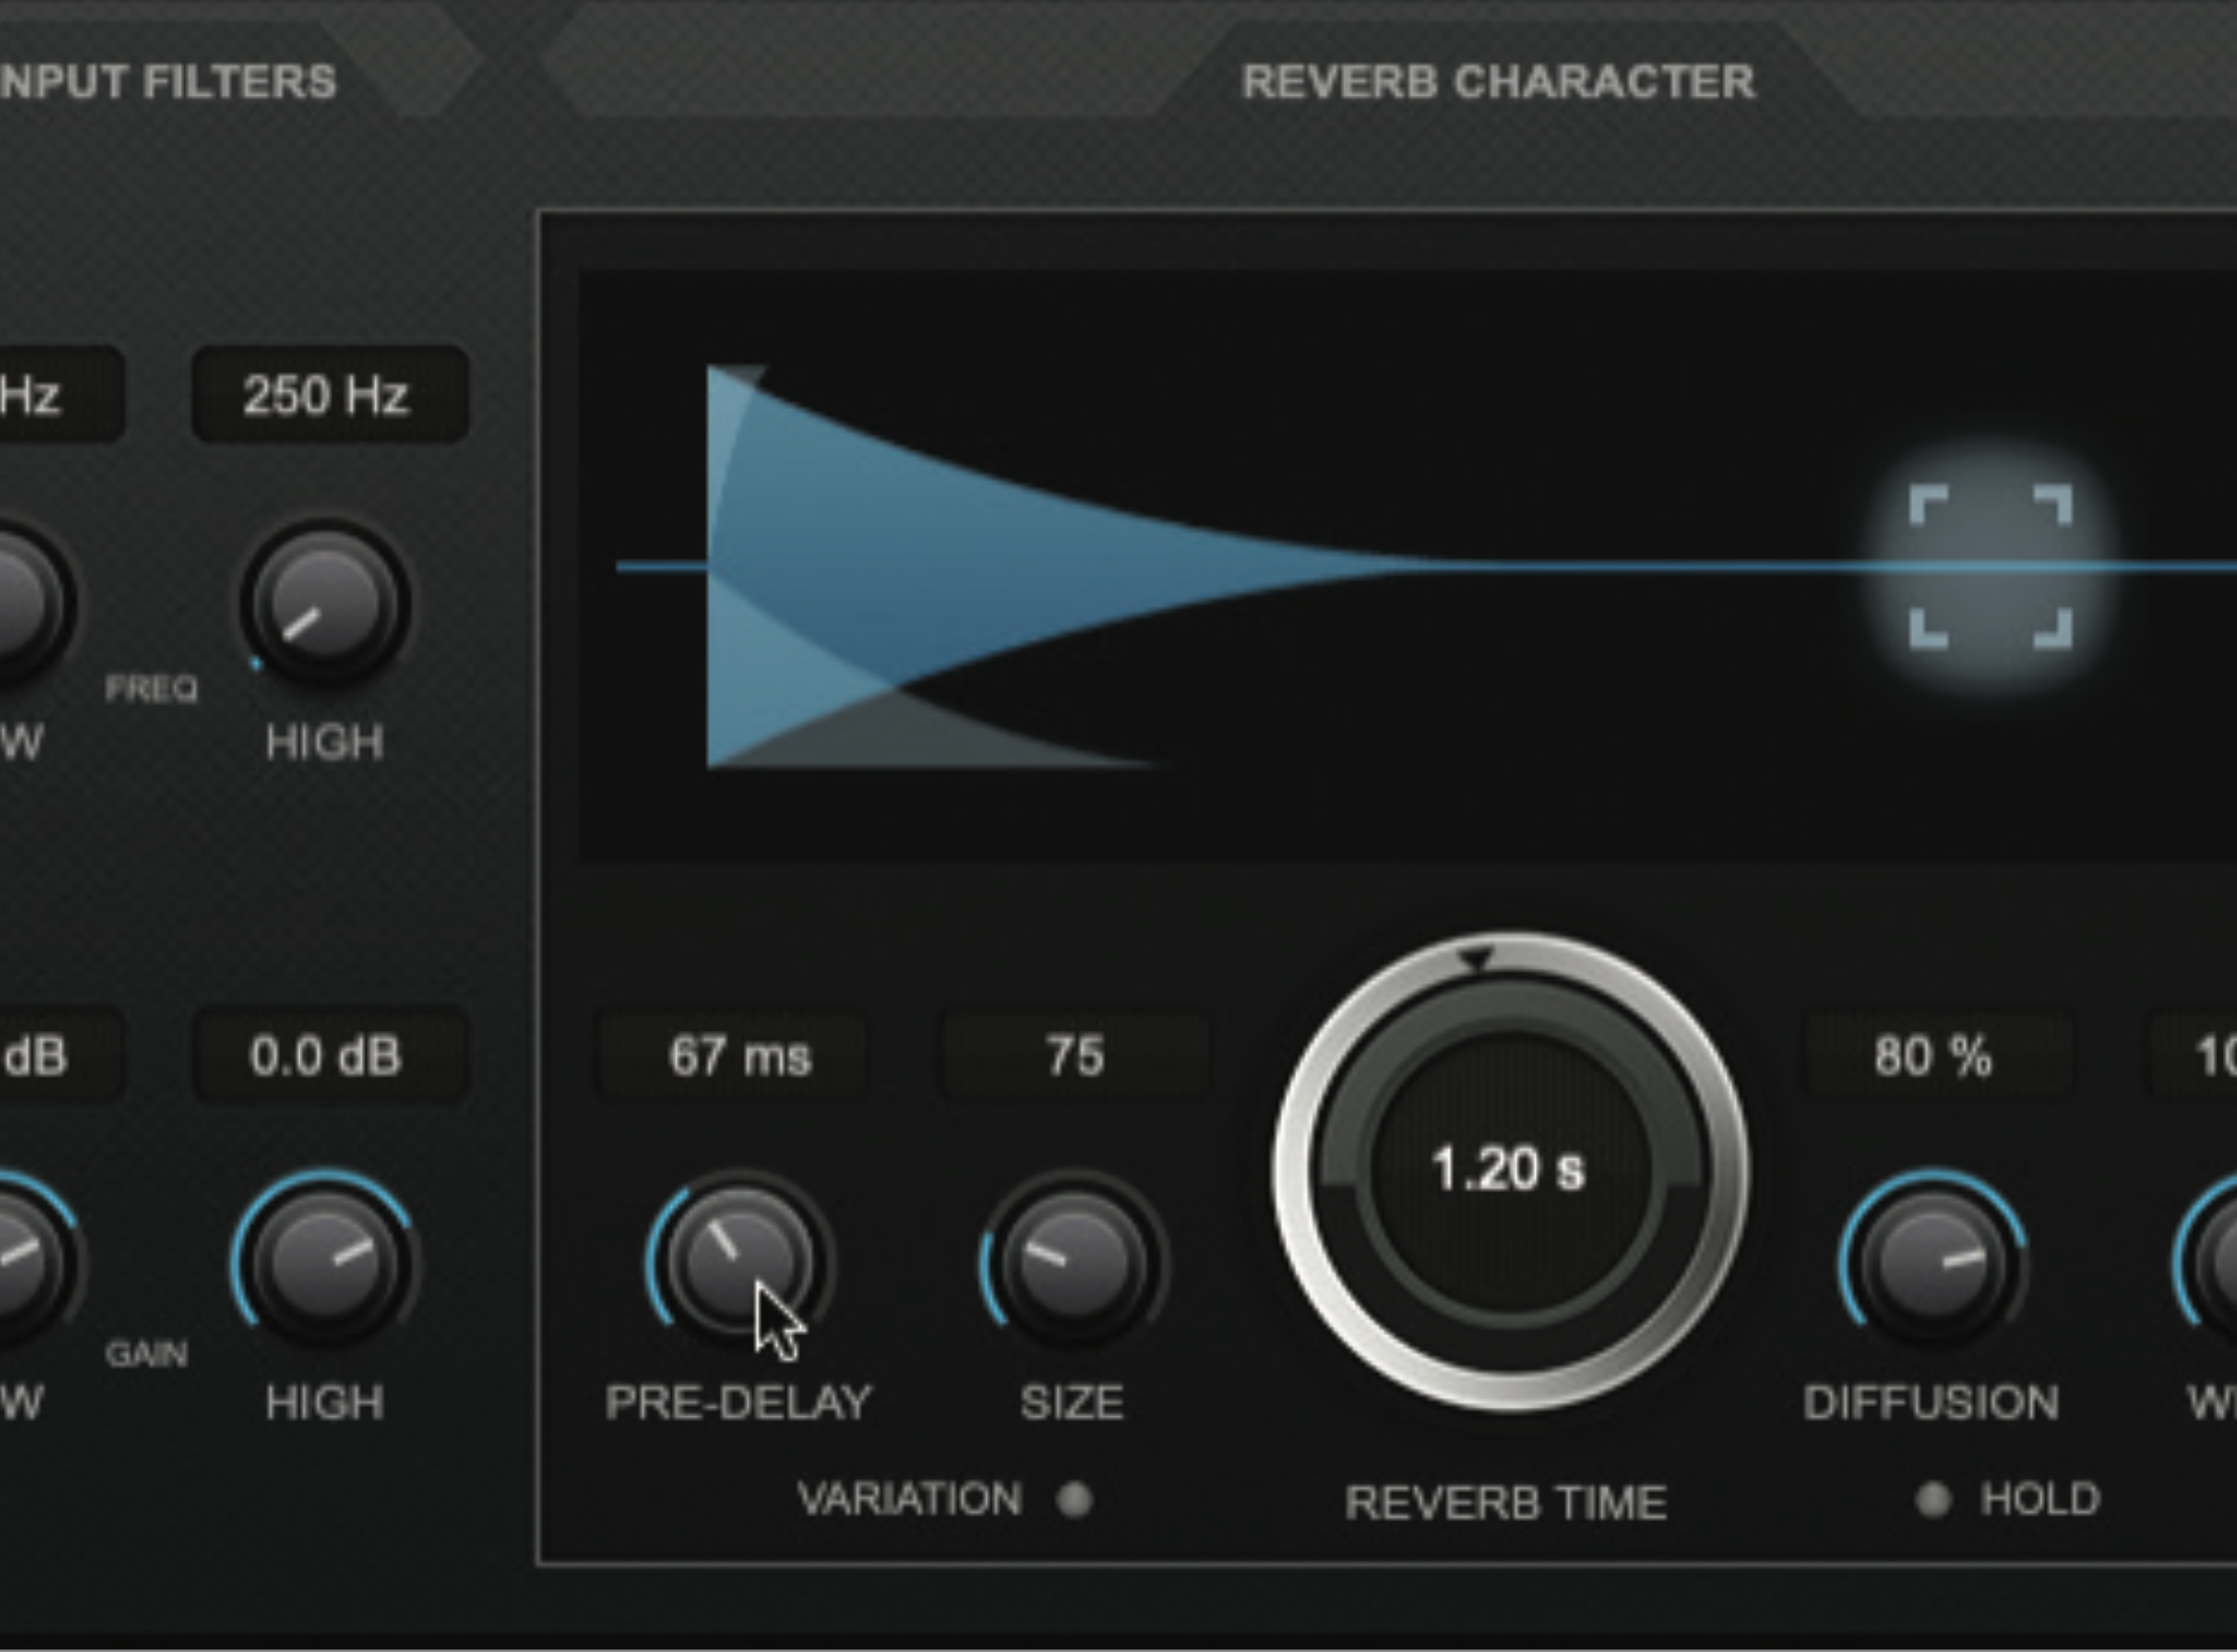
Pre-delay affects the perception of room size, and of distance between sound source and listener. It also has the happy side effect of creating separation between the direct signal and the reverb it creates, improving clarity and left-right positional accuracy lost to the smeariness of reverb. Adjust the pre-delay, aiming for space and clarity whilst avoiding any echoey slap-back effects.
Want all the hottest music and gear news, reviews, deals, features and more, direct to your inbox? Sign up here.
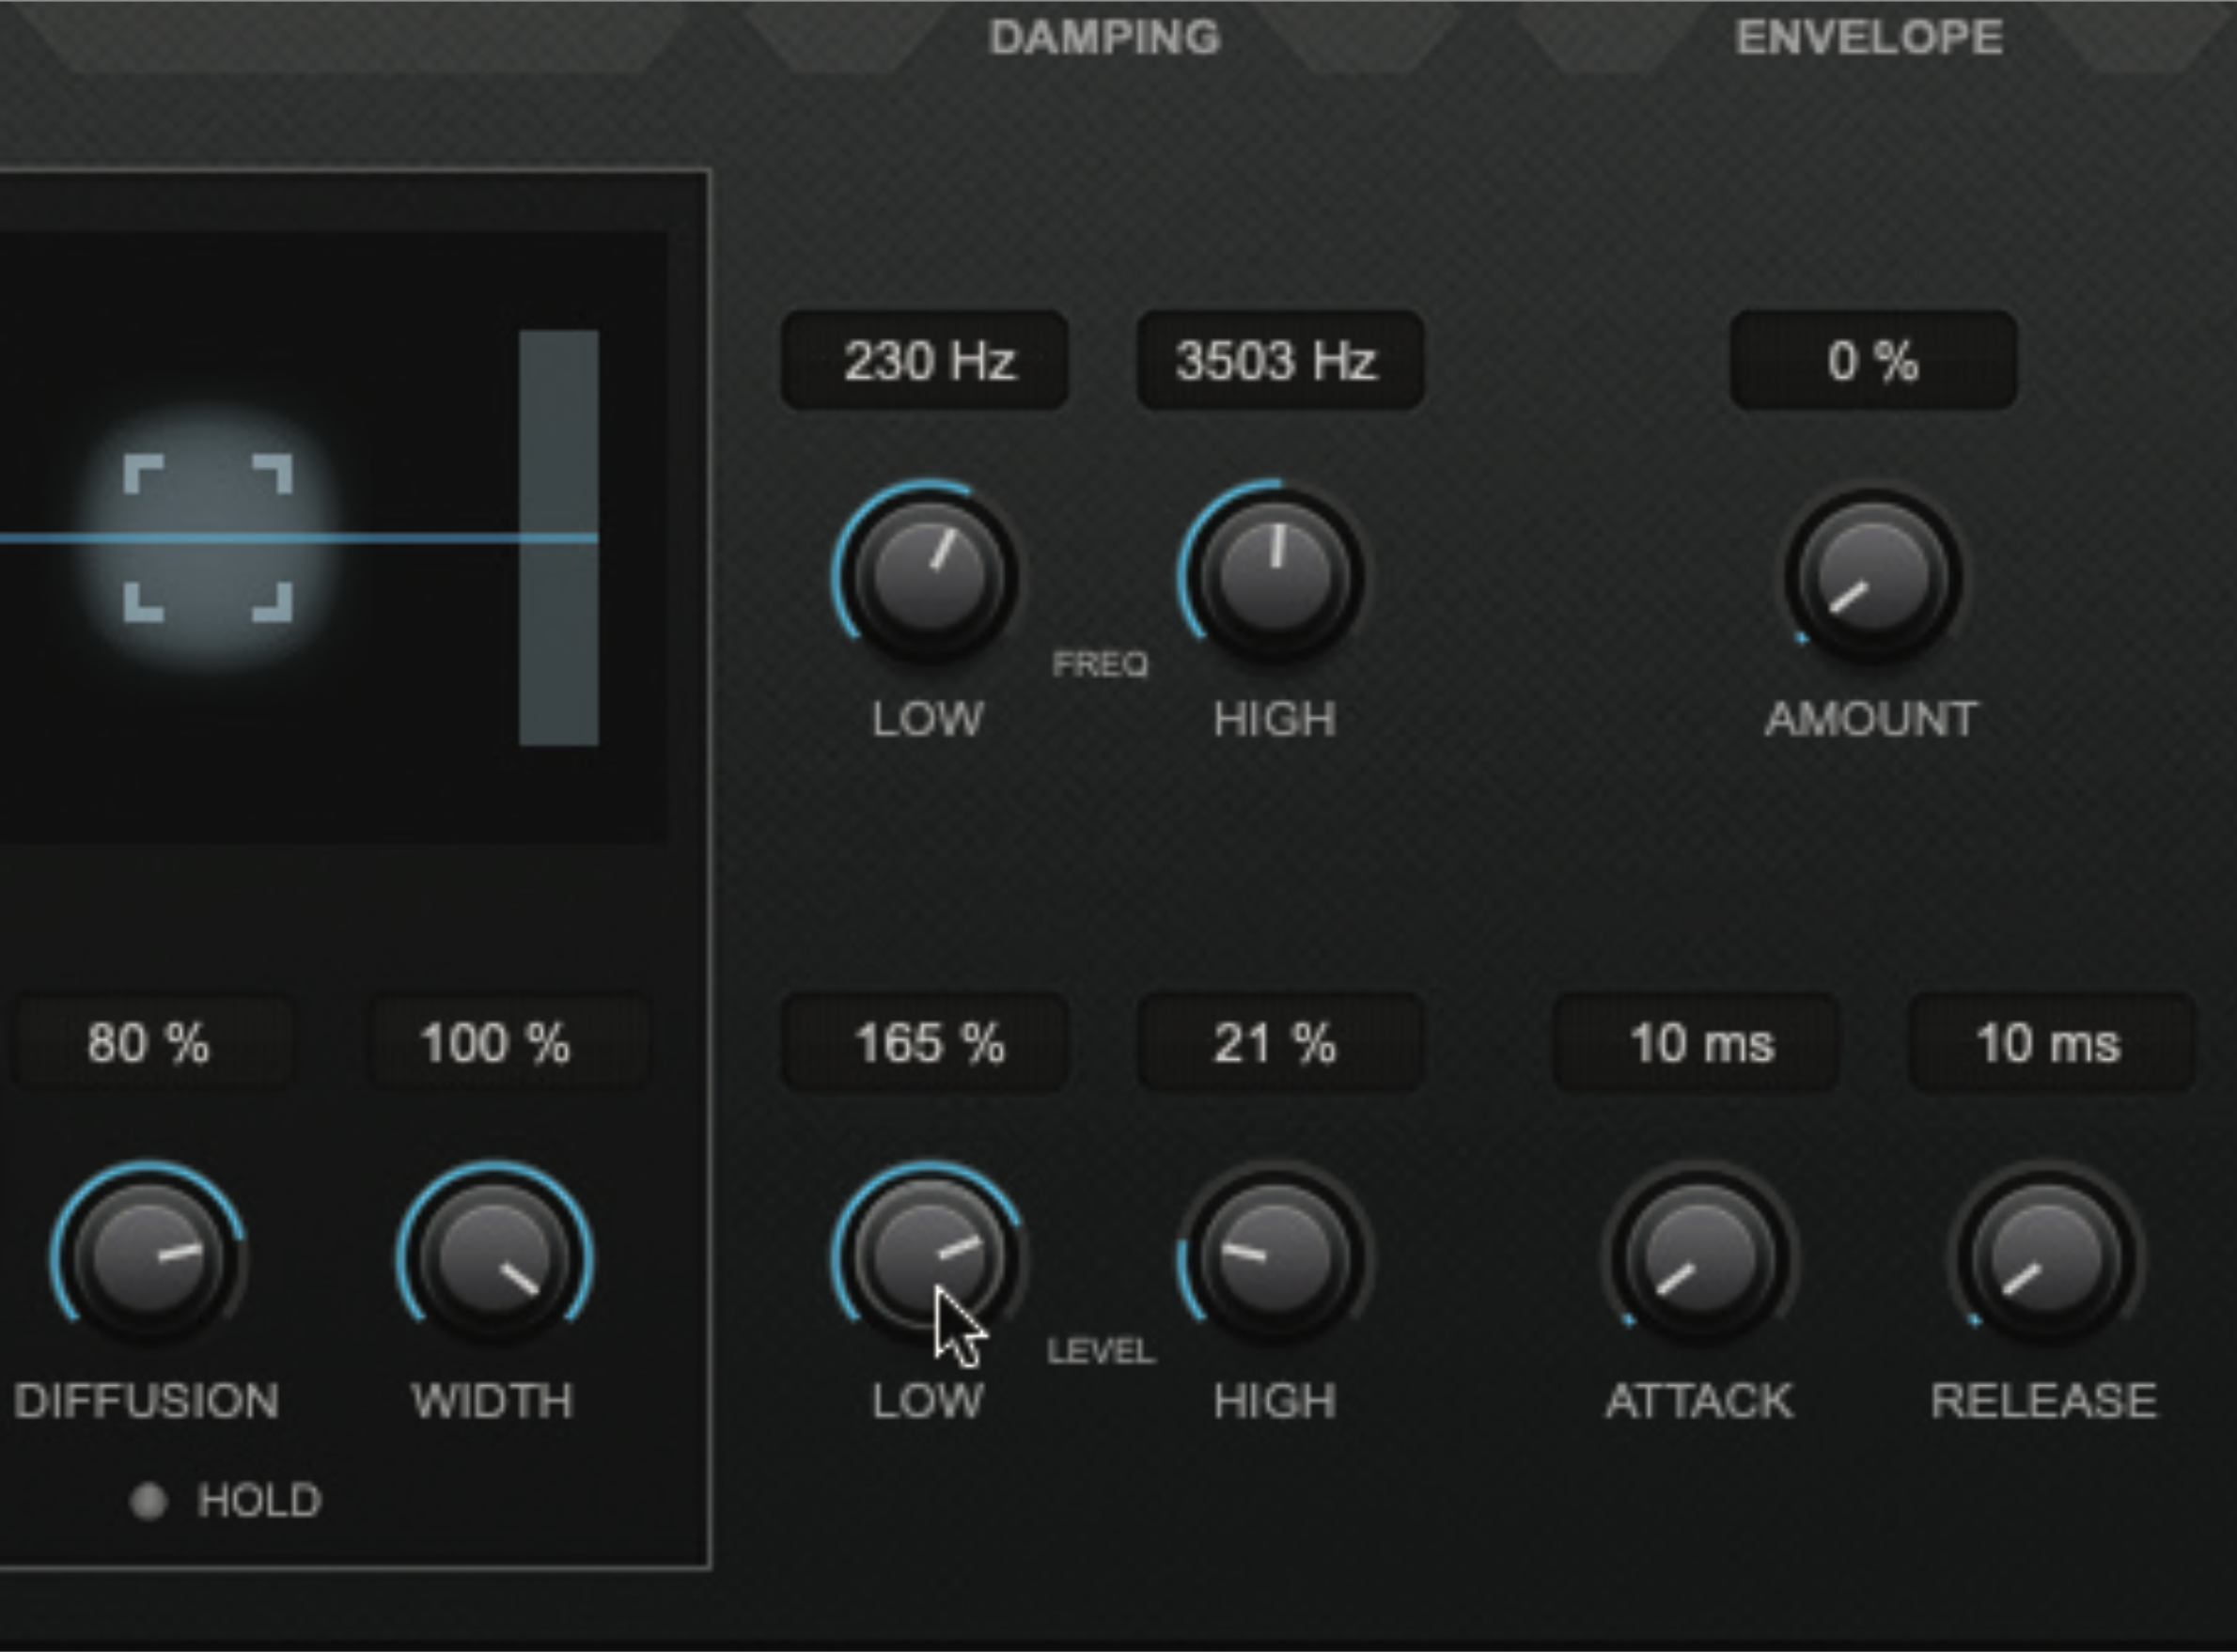
Applying EQ to the reflections being generated by the plugin helps us simulate different wall materials – this is typically called ‘damping’, but may also be presented as conventional EQ or filters. Our imaginary club’s textured walls are more absorbent at higher frequencies, so we’re damping high frequencies above 3.5kHz. It also has lots of bass-boosting corners, so we’re boosting low frequencies below 230Hz.
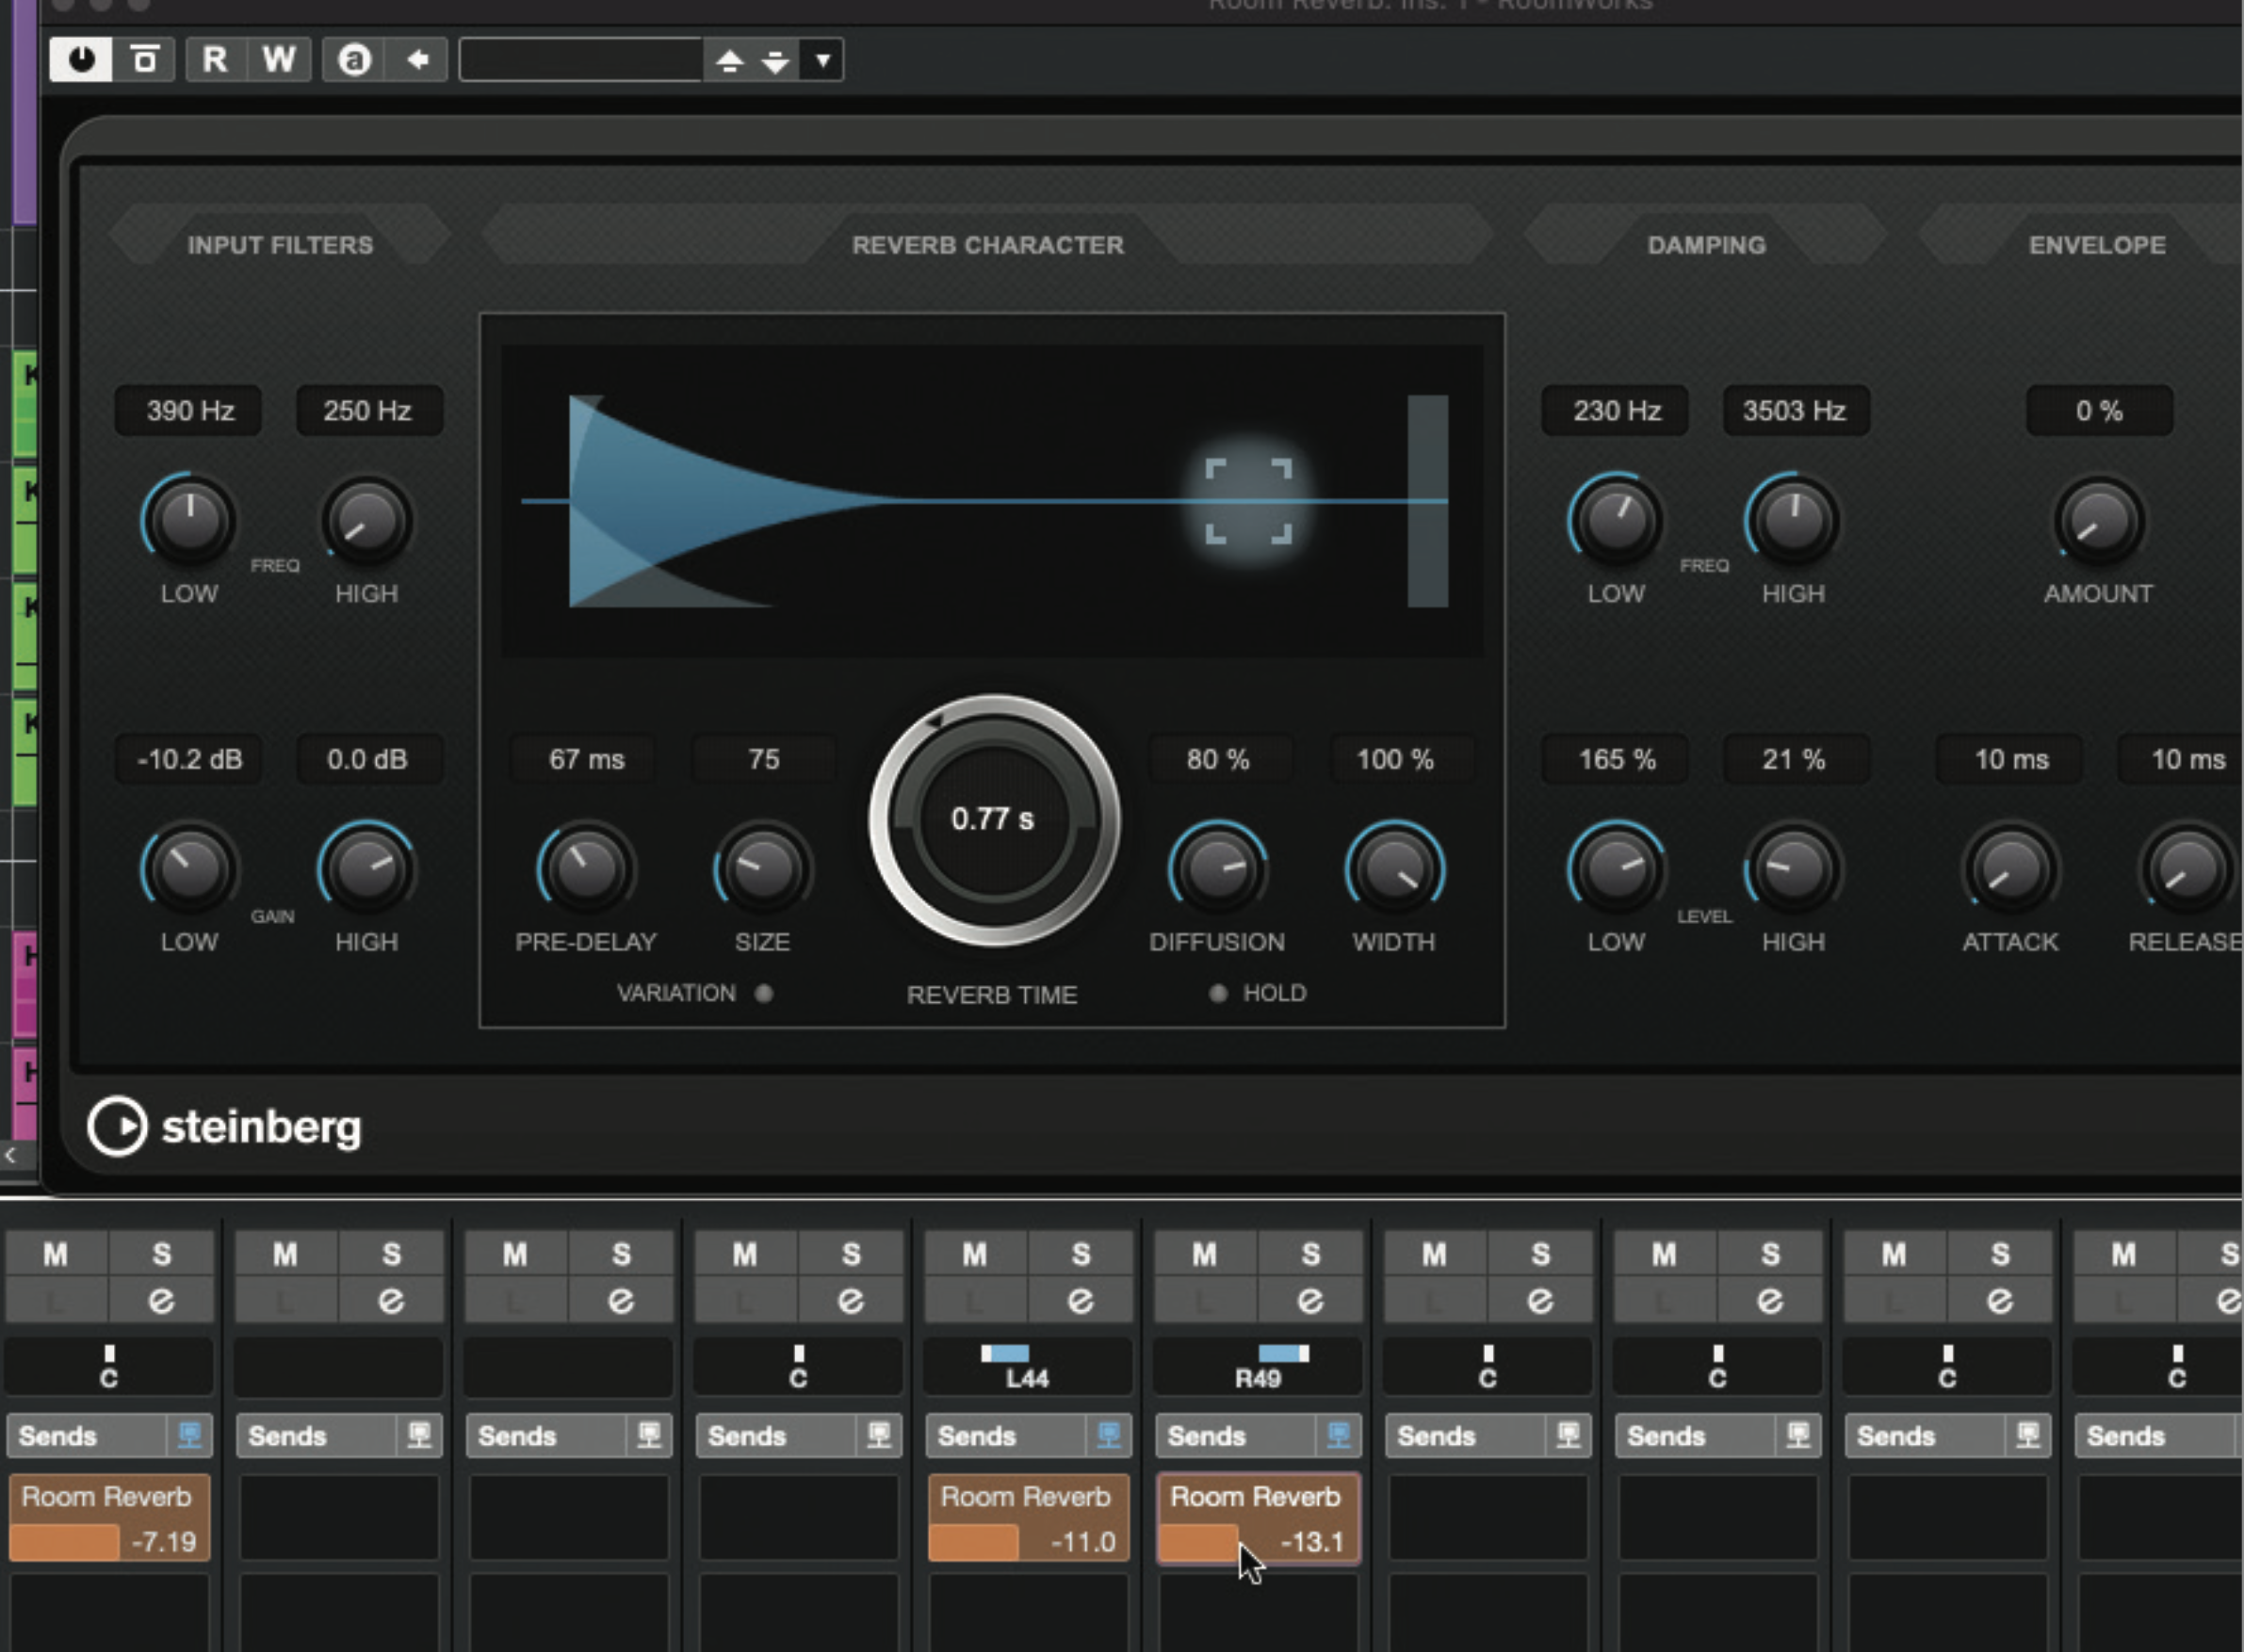
The low damping boost has made things a bit muddy – fix this with an input filter/EQ cut below 350Hz-ish (insert an EQ plugin before the reverb plugin if needed). Adjust the reverb/decay time to get things just right. Work through the channel send levels, adjusting how much each contributes to the reverb (more reverb equals more apparent distance).
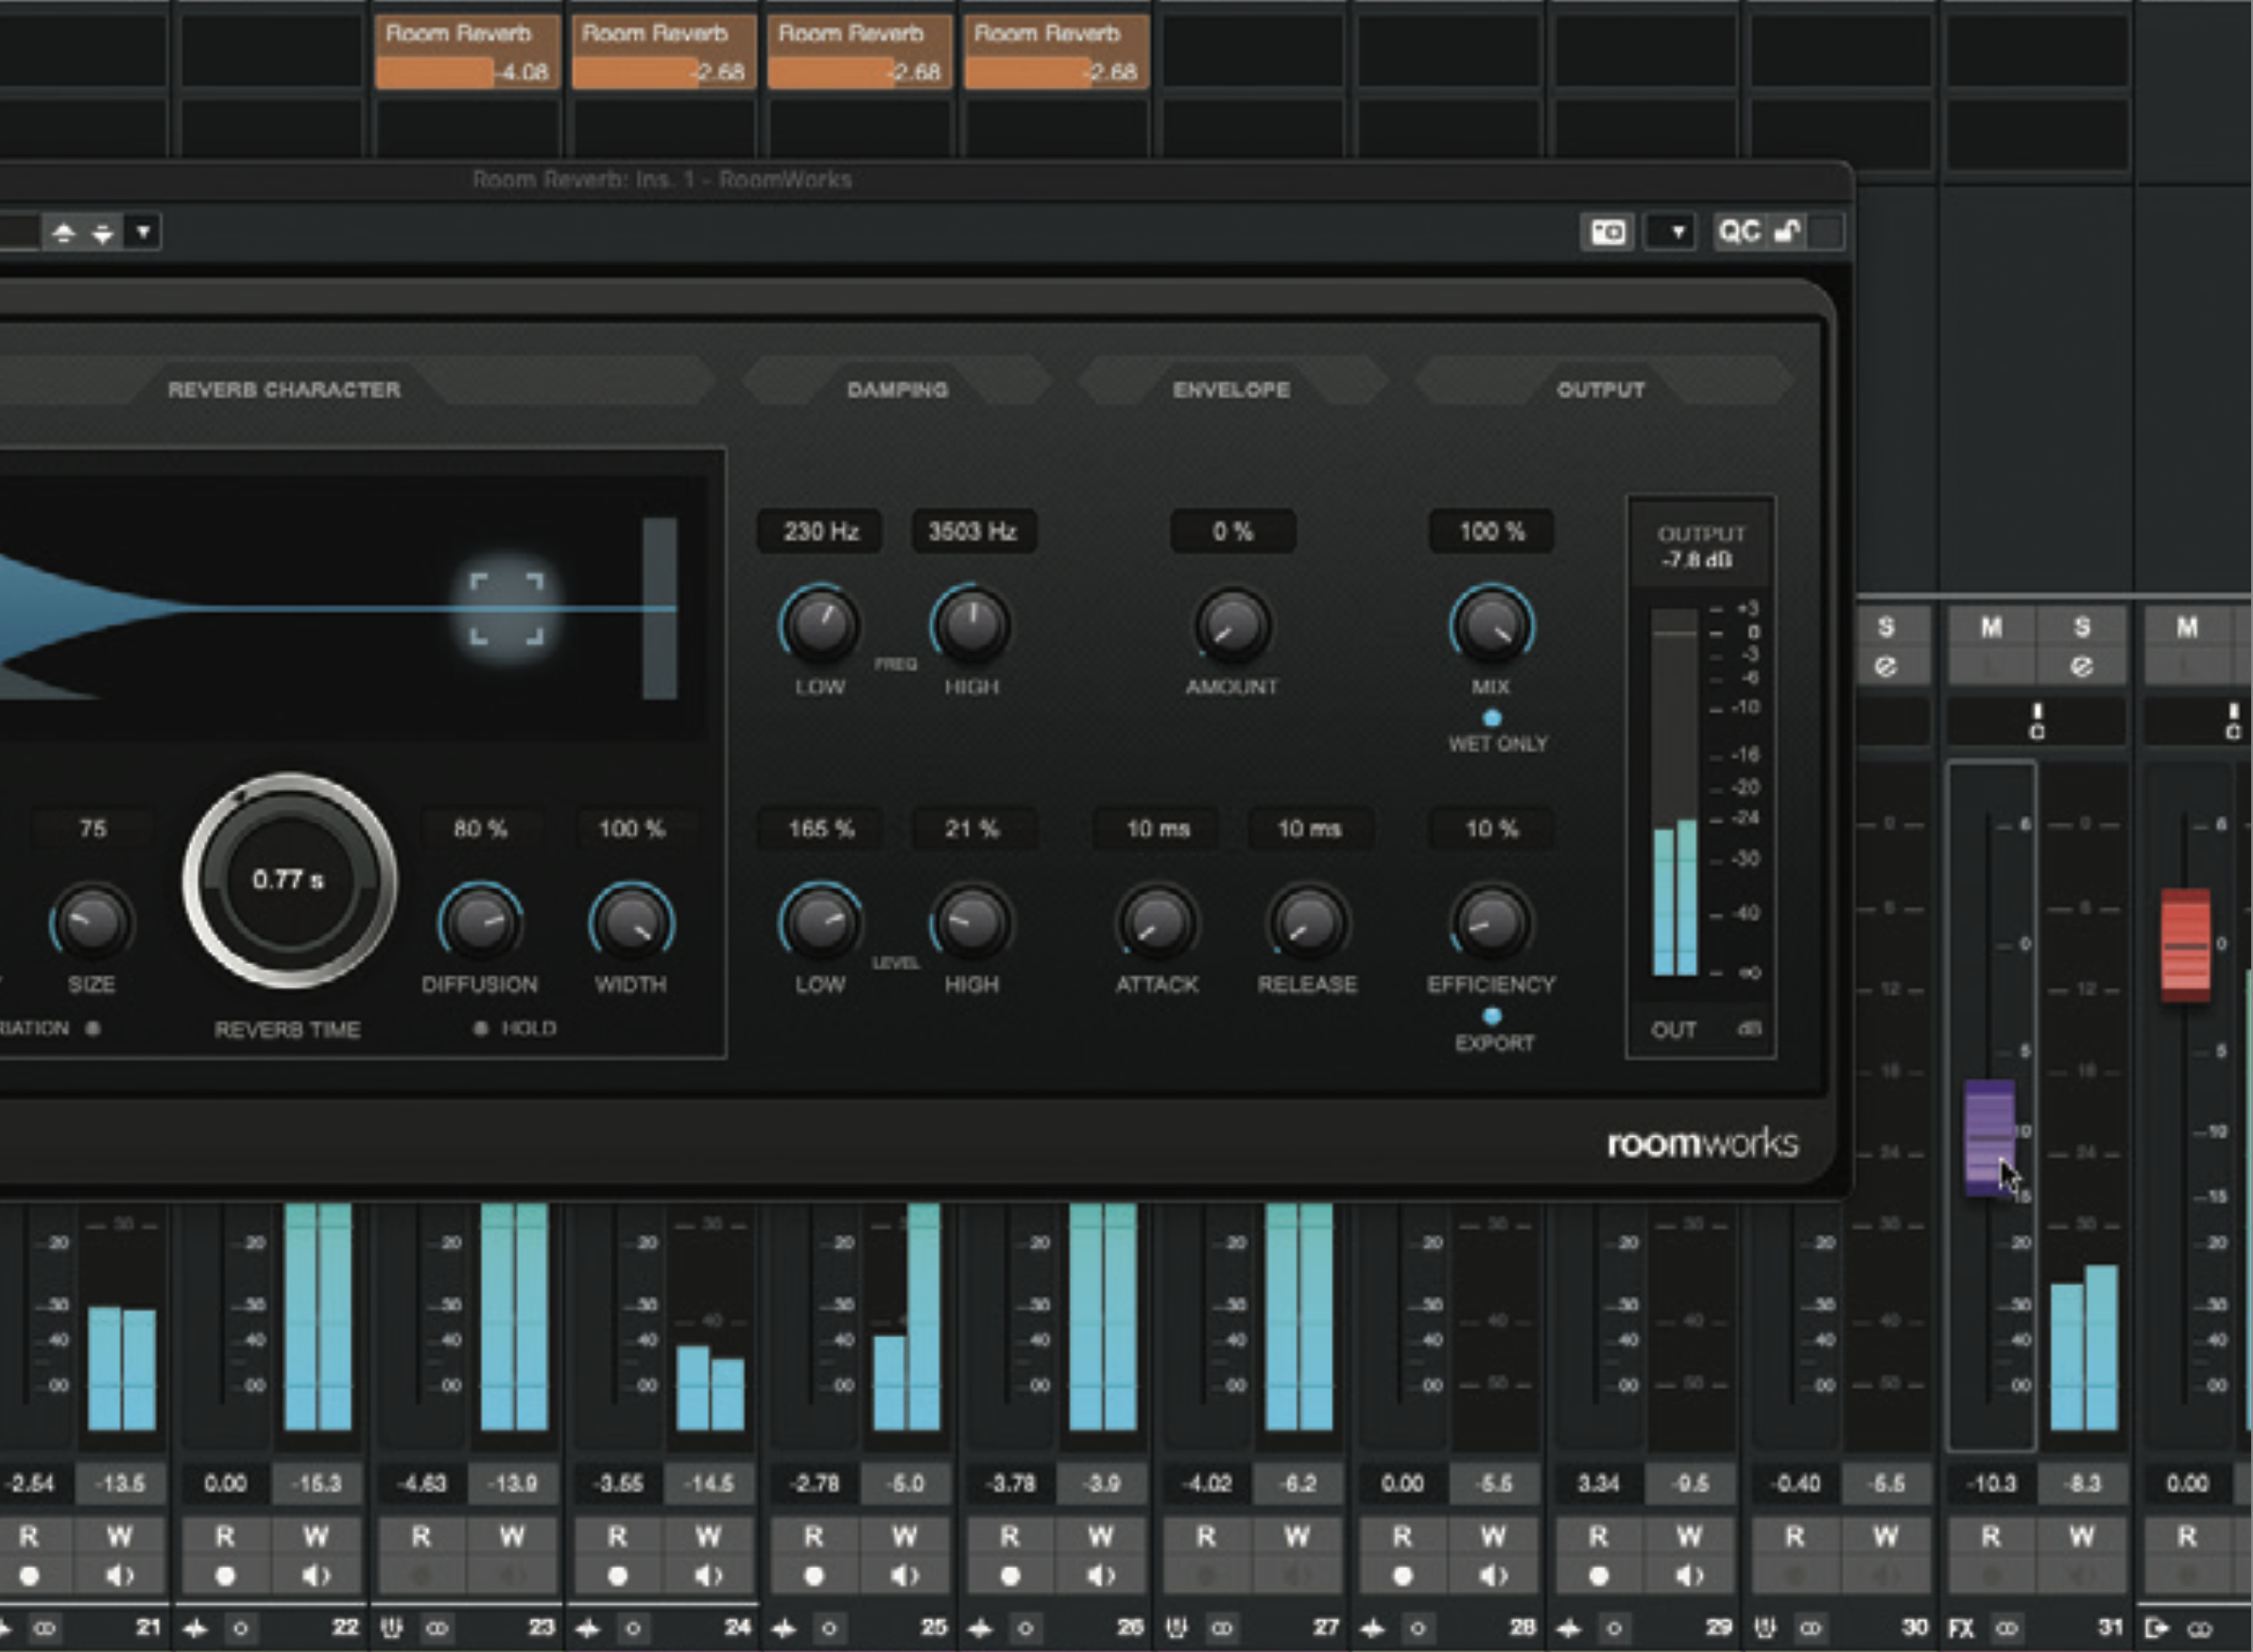
Go to the Room Reverb channel’s fader and adjust its level, balancing and blending it with the dry mix. A good way to get this balance right is to regularly mute and unmute the reverb channel for comparison. When the reverb is kind of imperceptible until it is muted, at which point you clearly notice its absence, then you have the balance about right.
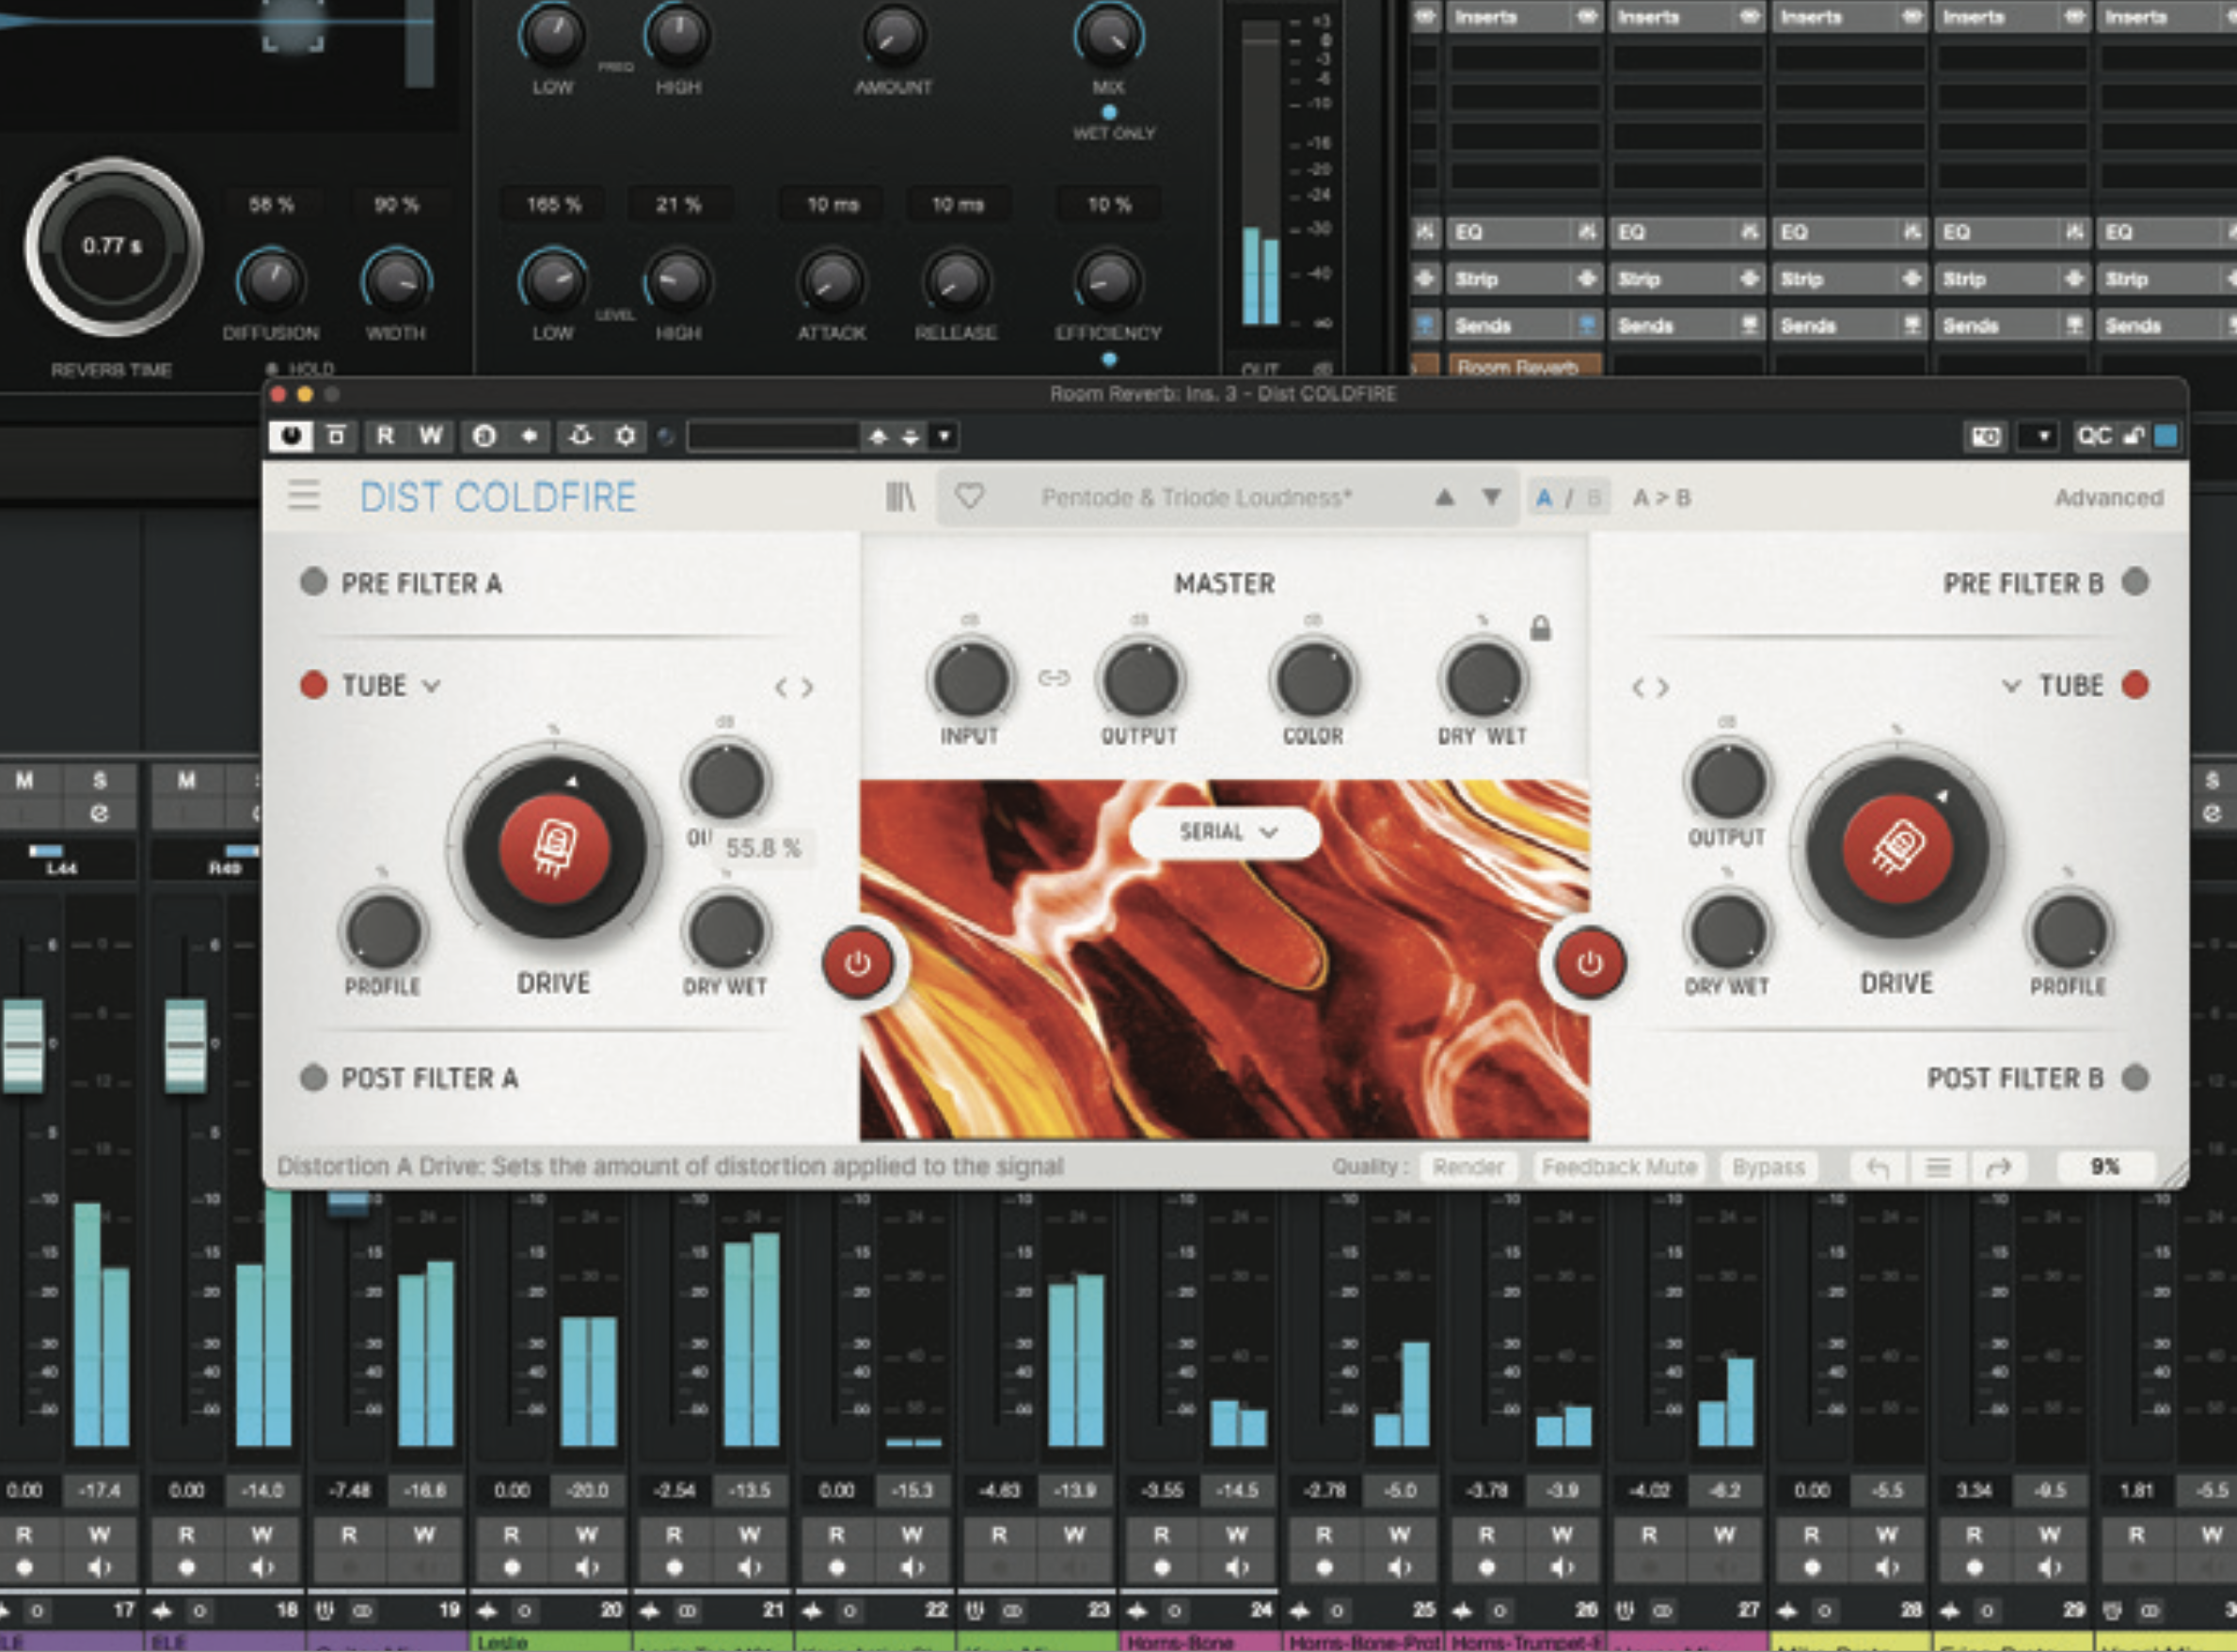
Experiment with your plugin’s parameters to help you learn what each actually does, and go ahead and add other processors to the Room Reverb’s insert chain, placing them both pre- and post-reverb to compare their sound and impact. We’ve created extra richness with some post-reverb tube overdrive to add extra harmonics and complexity.