How to recreate a classic acid house synth riff on a virtual Roland SH-101
Program a gnarly acid lead with Roland's SH-101 emulation Plug Out

The 101 was more than capable of holding its head high in the acid arena. Here we recreate a classic riff with Roland’s Plug Out synth – just add an 808 or 909 for pure Acid House nirvana!
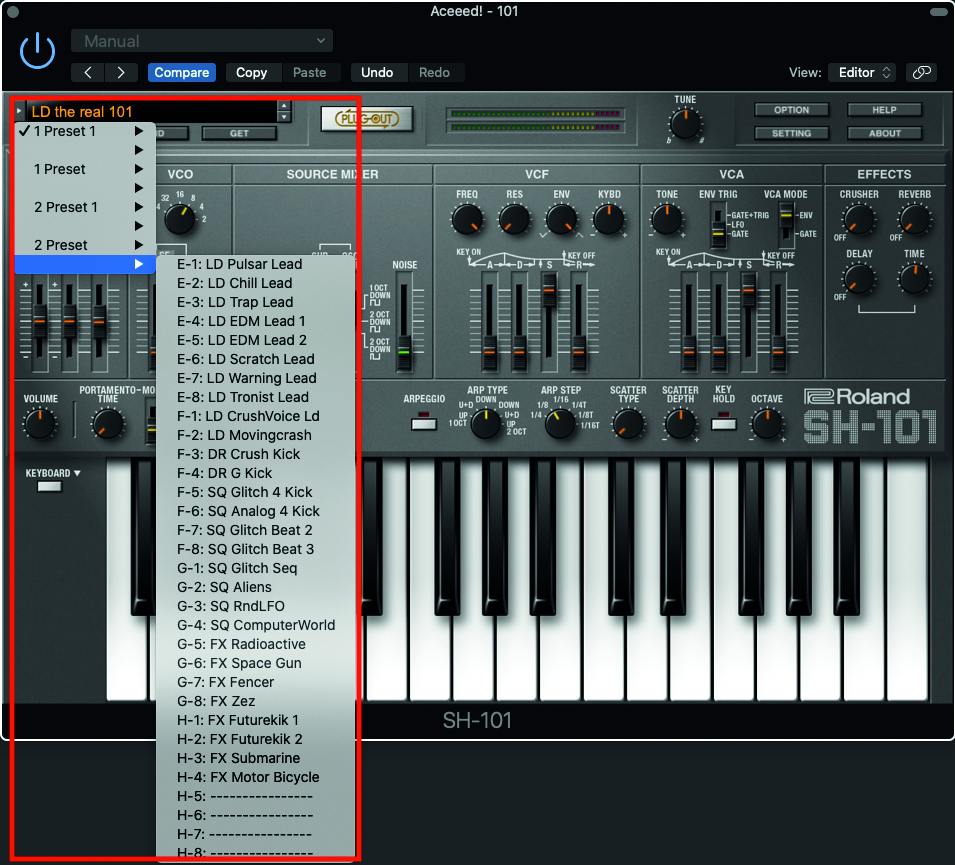
Step 1: We need a point of initialisation for creating our patch, and while Roland have helpfully equipped their software SH-101 with plenty of great patches, there are also empty patch locations. Select any available slot, which will also make light work of saving the patch at the end of proceedings, if desired.
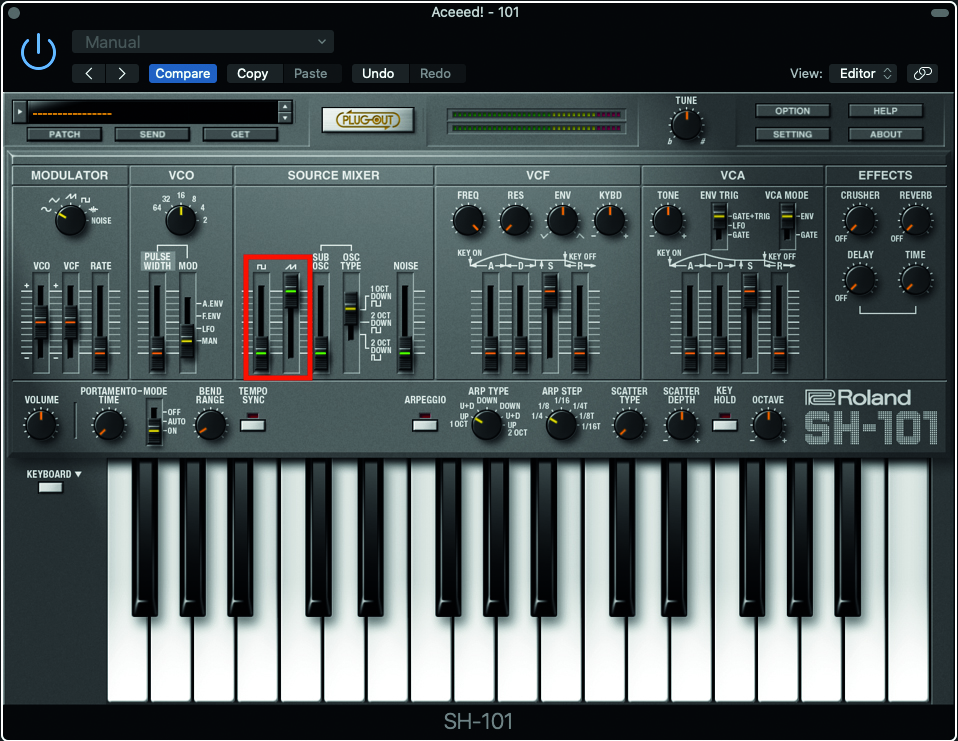
Step 2: Now we have a simple single oscillator, reproducing a square wave. We want to decrease the volume of this completely in order to effectively replace the square with a sawtooth. Within the Source Mixer section, increase the saw to its maximum volume, by dragging the Volume fader fully north.
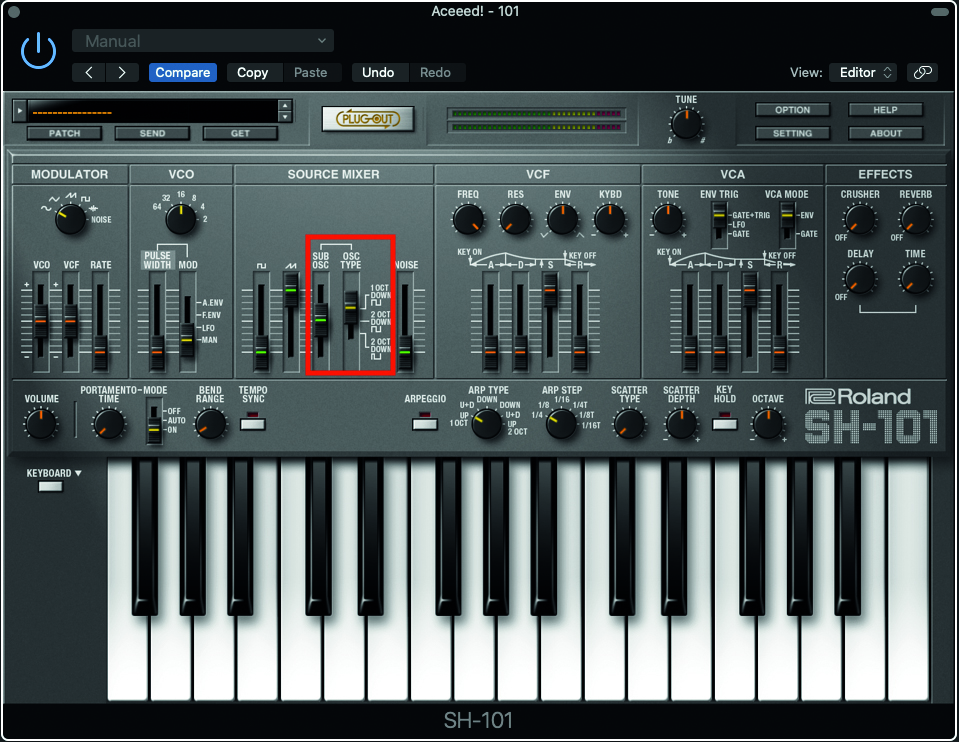
Step 3: Within the Source Mixer, we now want to add some sub oscillator. Too much can be overwhelming, so turn this up to around halfway. The default is for the sub to be one octave below, which is what we want for the moment, but experiment with the two-octave-lower setting, for a different tonal colour.
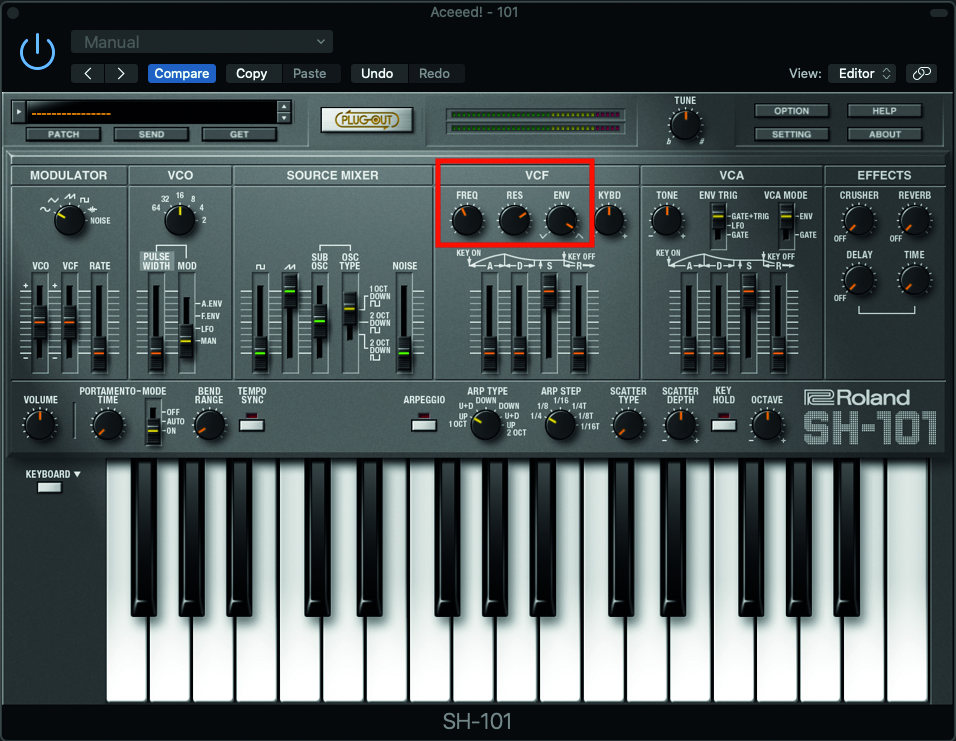
Step 4: We need to make three alterations to the pots to get our resonant sound. Move the Freq pot to 11 o’clock to make the sound less bright. Move the Res control to 2 o’clock, and the Env pot to 4 o’clock to specify the amount of filter envelope to be applied to the Cutoff control.
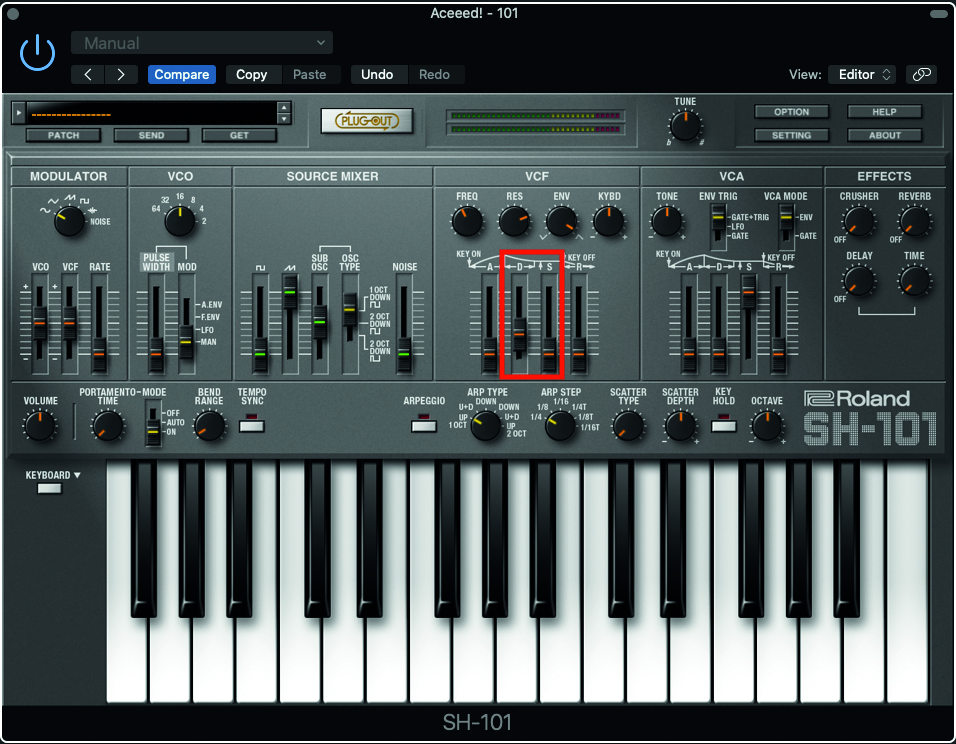
Step 5: The filter envelope plays a pivotal role as we aim to mimic the envelope controls on the TB-303. Reduce the Sustain fader to zero and move the Decay fader 1/3rd up. The decay phase will indicate the swiftness of the filter sweep. Adjust to suit the speed of your track.
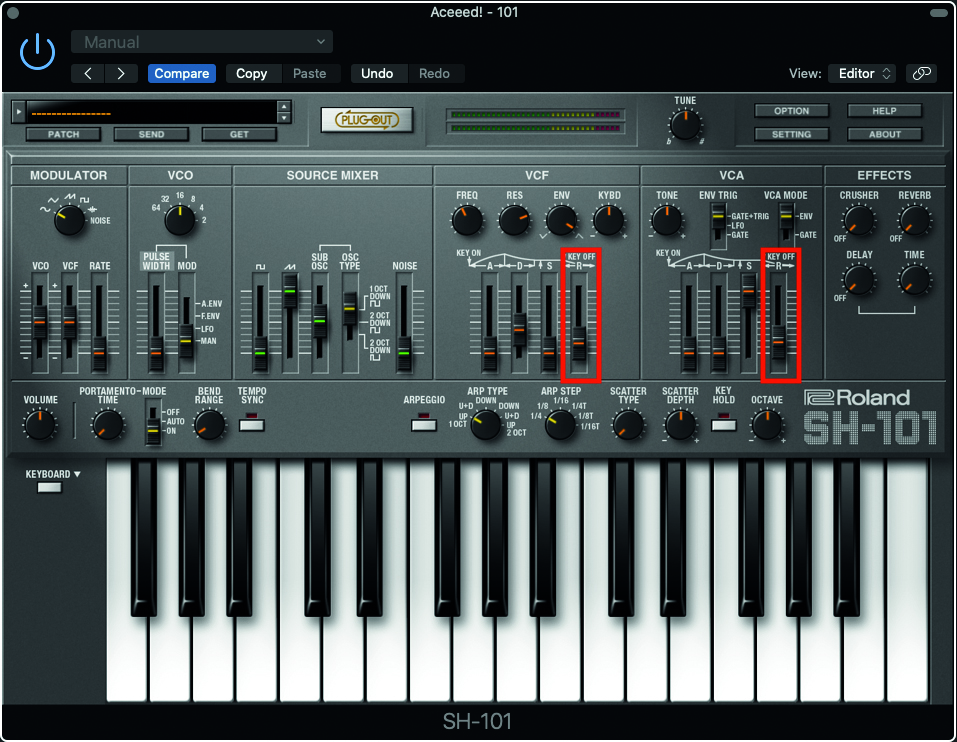
Step 6: If you start to play a little sequence now, it may well sound clipped at the end of each note. This is down to the shortness of any form of release phase. Both release phases for the VCF and VCA envelopes can be adjusted. Keep these short, or we’ll lose the clipped nature.
Get the MusicRadar Newsletter
Want all the hottest music and gear news, reviews, deals, features and more, direct to your inbox? Sign up here.
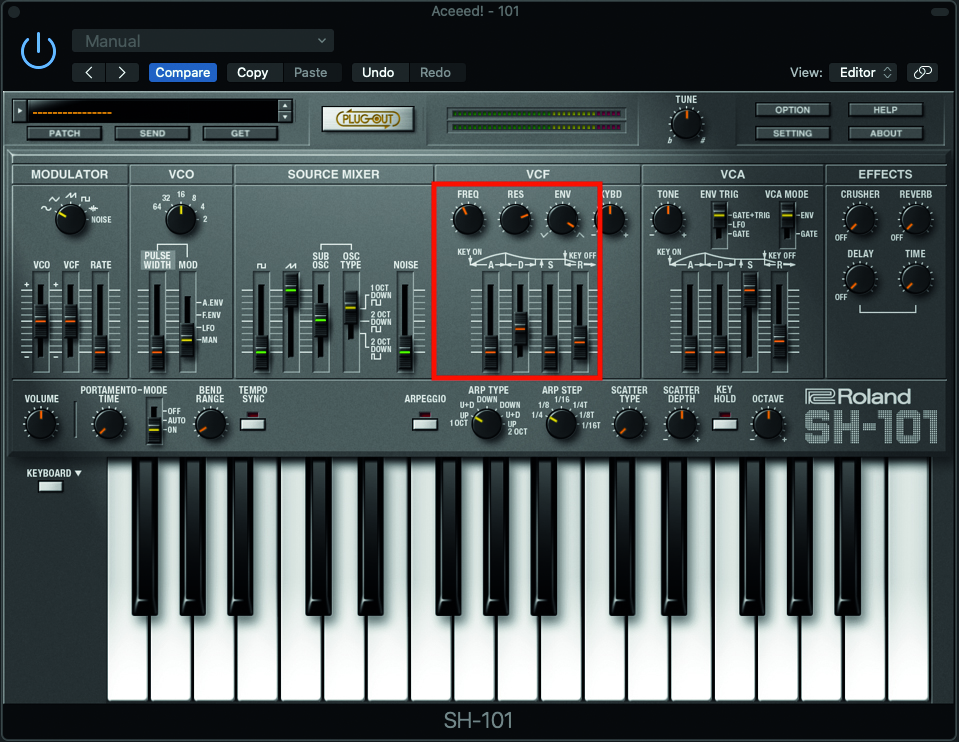
Step 7: There is subtle interplay between the Filter and Envelope Amount controls, as well as the VCF envelope. A small adjustment is vital to get the sound to sit in a track. Program up your track in your DAW and begin to get a feel. The VCF Cutoff control is vital for creating build and best applied using automation.
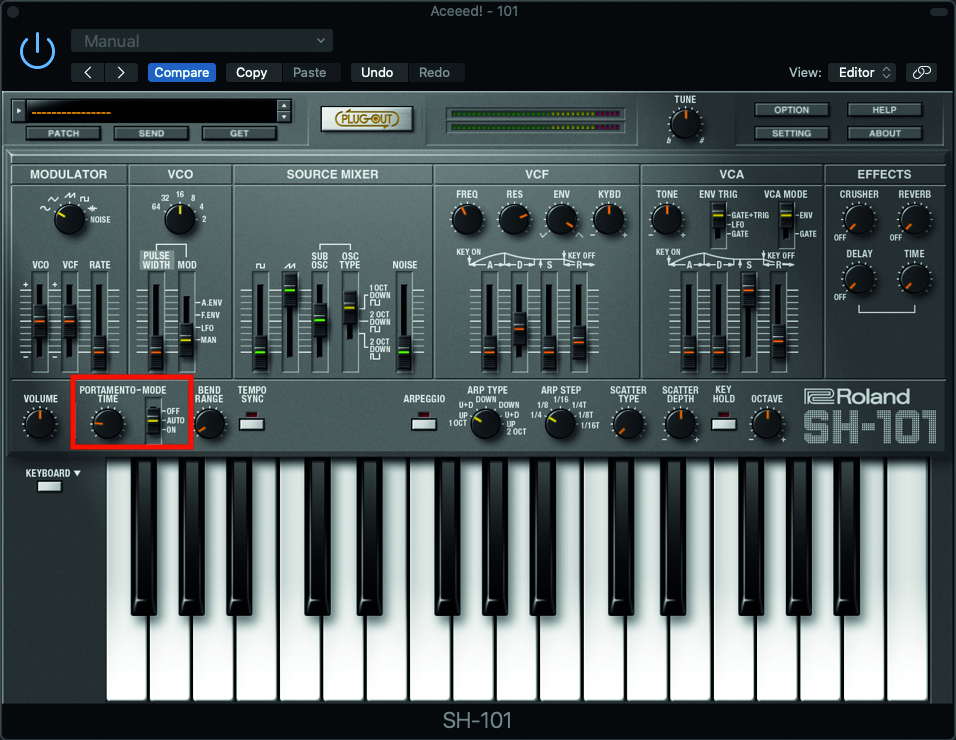
Step 8: Another important element from the 303 was portamento, and can be done using the Auto function within the portamento section. Move the Mode switch to Auto, and set the Speed to 9 o’clock. It is applied between two notes if they overlap, so simple to play from the keyboard or program in an editor.
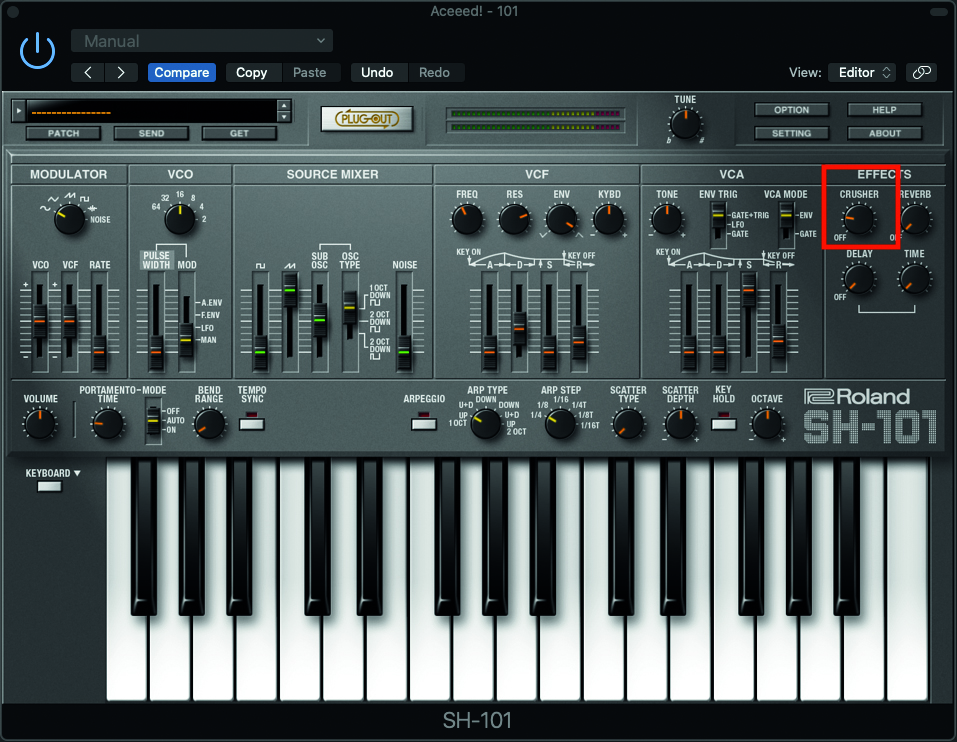
Step 9: The final important part is the use of overdrive distortion. Roland have built in a bit-crusher distortion, which sounds great. For a more nostalgic Acid effect, try applying DAW based overdrive distortion, with plenty of upper harmonic colour. Those high frequencies will be great for cutting through a mix.
Computer Music magazine is the world’s best selling publication dedicated solely to making great music with your Mac or PC computer. Each issue it brings its lucky readers the best in cutting-edge tutorials, need-to-know, expert software reviews and even all the tools you actually need to make great music today, courtesy of our legendary CM Plugin Suite.


