Music theory basics: why diminuendo and crescendo still mean something in modern music production
Dynamics are just as important as they always were
When dealing with the twin subjects of diminuendo and crescendo, there’s not really that much theory to get your head around. Simply put, diminuendo means ‘getting quieter’, while crescendo means ‘getting louder’.
In the context of modern music production, crescendo and diminuendo crop up pretty regularly, and there are several ways that these gradual shifts in level can be achieved.
When using a MIDI keyboard controller to play or program your parts, the most natural way to control the dynamics, or loudness, of your performance is by exploiting your keyboard’s velocity sensitivity - the harder you strike the keys, the louder the resulting notes.
Speaking purely digitally, it’s the notes’ velocity values that determine loudness. Each note you play can have a velocity of anywhere between 0 (almost inaudible) and 127 (as loud as possible), and most soft synths and multisampled instruments are programmed to respond accordingly.
Yet aside from making piano parts sound more realistic, this feature can be used to great creative effect with drum and synth parts, too.
In the steps that follow, we’ll be demonstrating a few techniques that you can use in your tracks to liven up the overall dynamics, while showcasing the fact that diminuendo and crescendo don’t always need to work with volume alone.
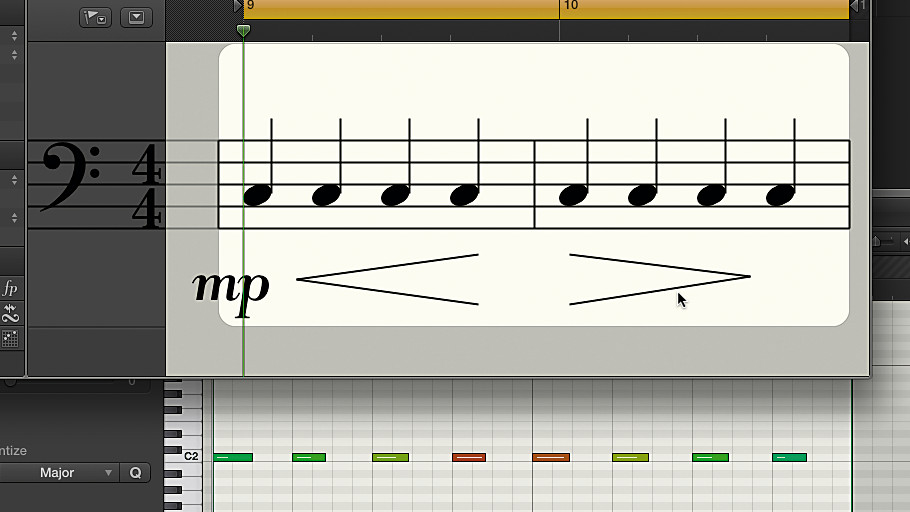
Step 1: Let’s kick off with a pinch of traditional theory. The symbols used to denote crescendo and diminuendo on a musical score are called hairpins. They ‘hairpin’ to look like the ones shown above. If the two lines are joined on the left, that’s a crescendo (getting louder) - if they’re joined on the right, that’s a diminuendo (getting quieter).
Get the MusicRadar Newsletter
Want all the hottest music and gear news, reviews, deals, features and more, direct to your inbox? Sign up here.
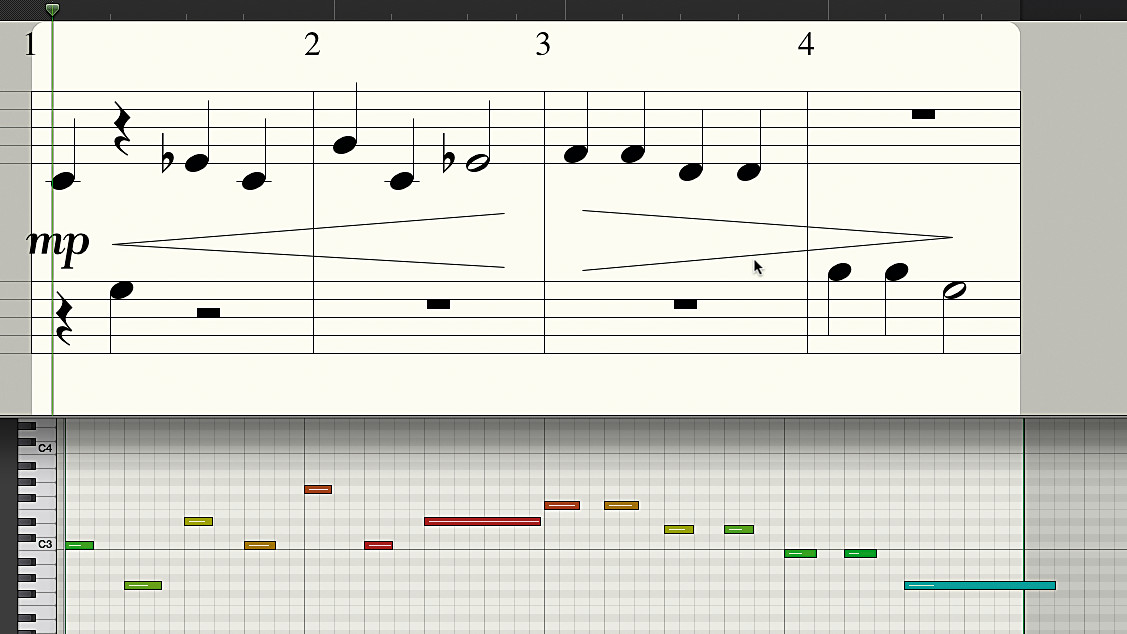
Step 2: Here are a few bars of solo piano to illustrate the basic idea. Usually, there’s some sort of marker to denote the starting loudness level - here, we have mp, or mezzo-piano, meaning moderately soft. From that level, the first two bars get progressively louder, after which bars 3 and 4 get quieter. OK, that’s enough notation.
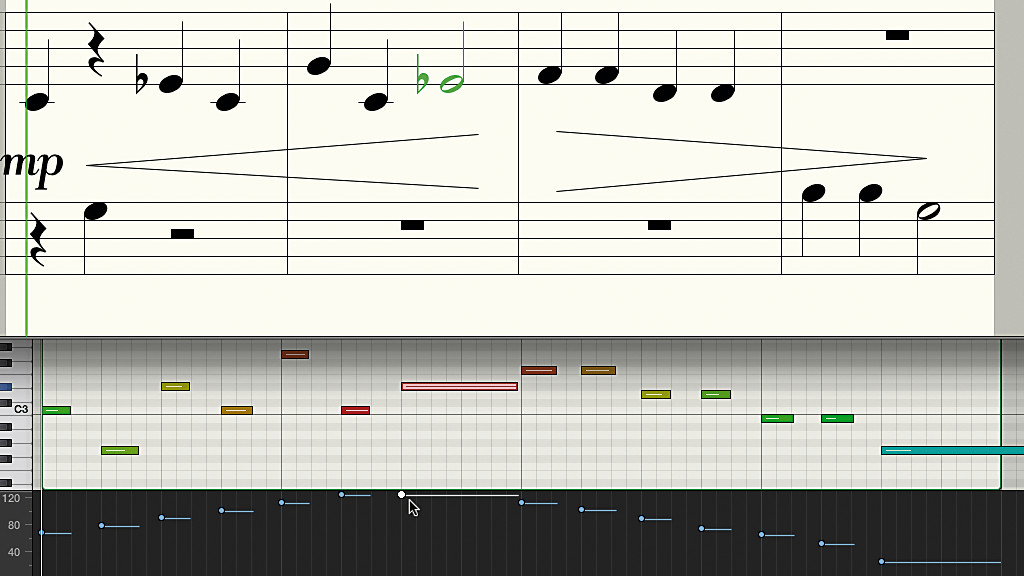
Step 3: Looking at the velocity display in the piano roll editor, we can see how this is achieved. Thanks to the realistic velocity sensitivity of our Modartt Pianoteq 4 piano patch, lower-velocity notes are reproduced more softly, as if played that way on a real piano. Meanwhile, increasing the velocity value results in louder notes.
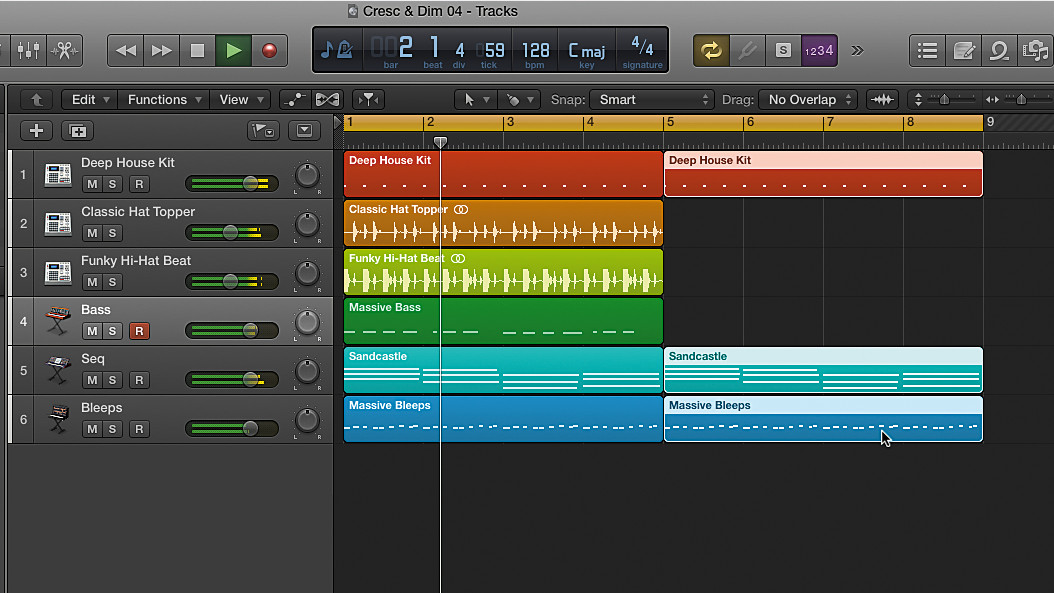
Step 4: So how can we exploit this feature? A common thing to do in modern dance tracks is to tail off into a breakdown section. Here’s a track consisting of drums, bass and a couple of synth parts. We’re going to add a breakdown. We’ll first copy the whole section, then drop the bass and percussion parts out of the copy.
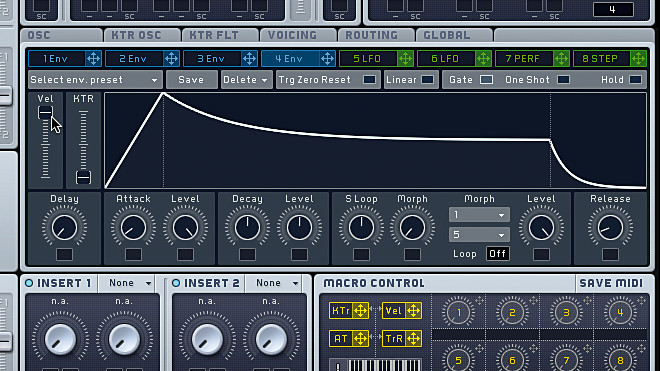
Step 5: This leaves the kick drum and the two synth parts running. We want to use velocity to fade the bleepy synth out and back in again, so first we check that the sound responds correctly to changes in velocity. In this case, turning the Vel slider in Massive’s Env4 tab up to maximum does the trick. This is the envelope that governs the sound’s amplitude (loudness).
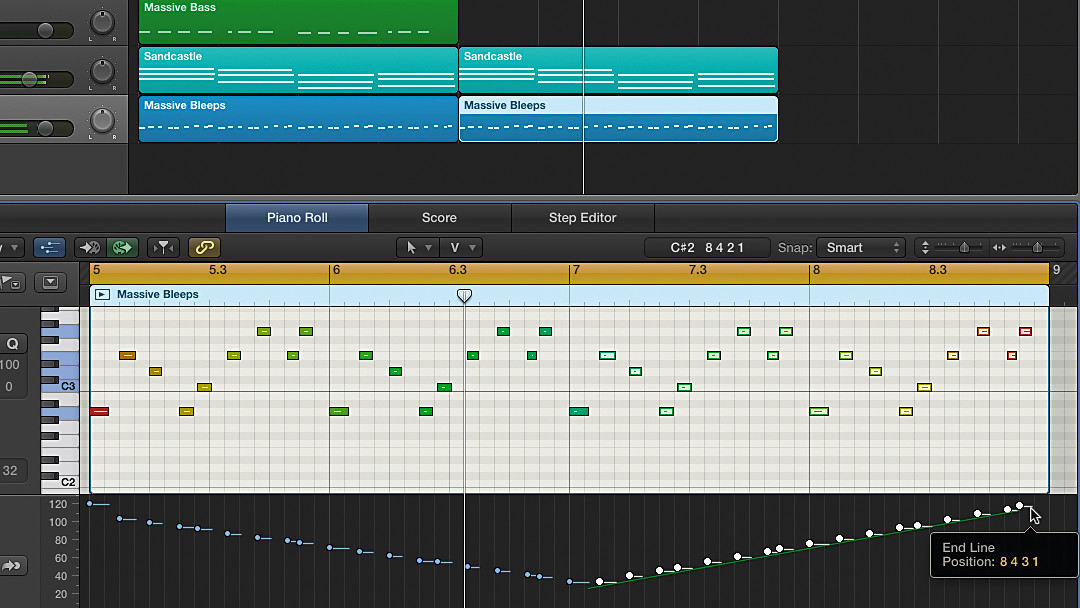
Step 6: Going back to the velocity display in our DAW’s piano roll editor, we draw a diagonal line across the first half of the region to bring the velocity values down gradually, forming a diminuendo (ie, fading the notes out). In the second half, we do the reverse to create a build - crescendo - increasing the velocity of each successive note to make them progressively louder.
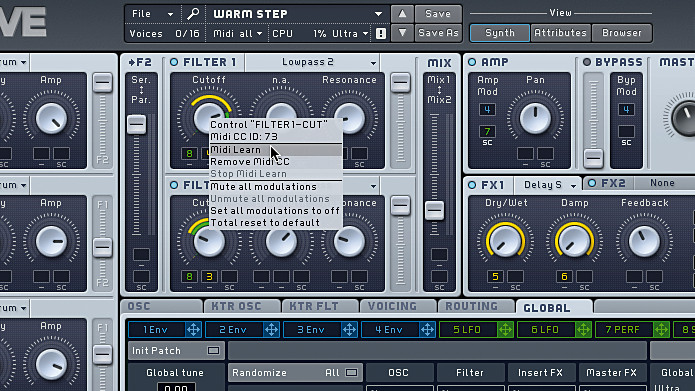
Step 7: As an alternative to velocity-controlled volume, for the second keyboard part we’ll move the filter cutoff instead. First, we’ve set up Massive’s filter cutoff parameter to respond to a controller on our MIDI keyboard (CC74). This means that we can record our diminuendo and crescendo curves in manually as the track plays.
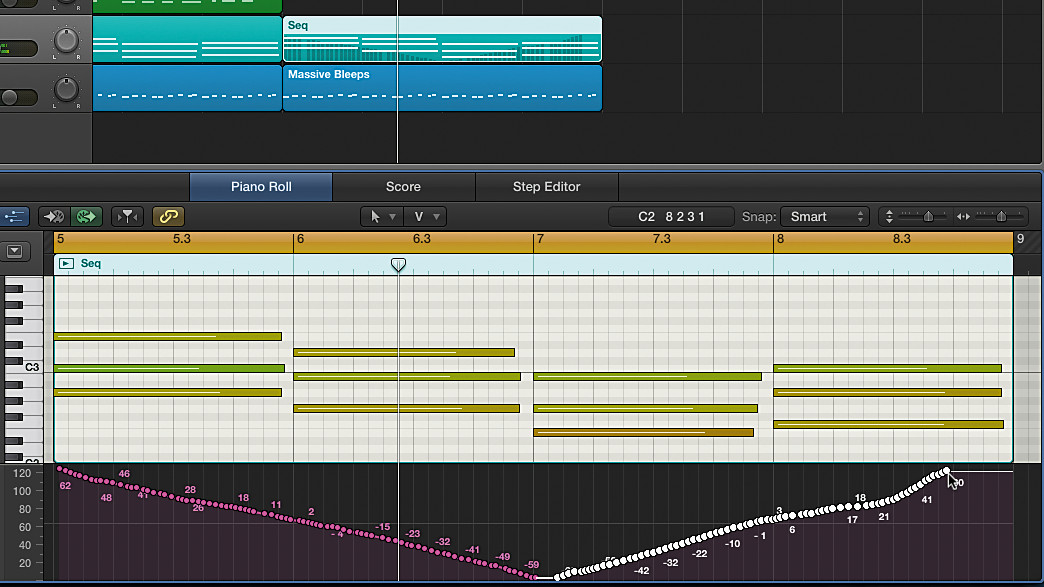
Step 8: The result is similar to a volume diminuendo, but the sound gets duller as well as quieter, as the high frequencies are removed. Winding them back in towards the end of the region brings the character of the sound gradually back up to normal ready for the following section.
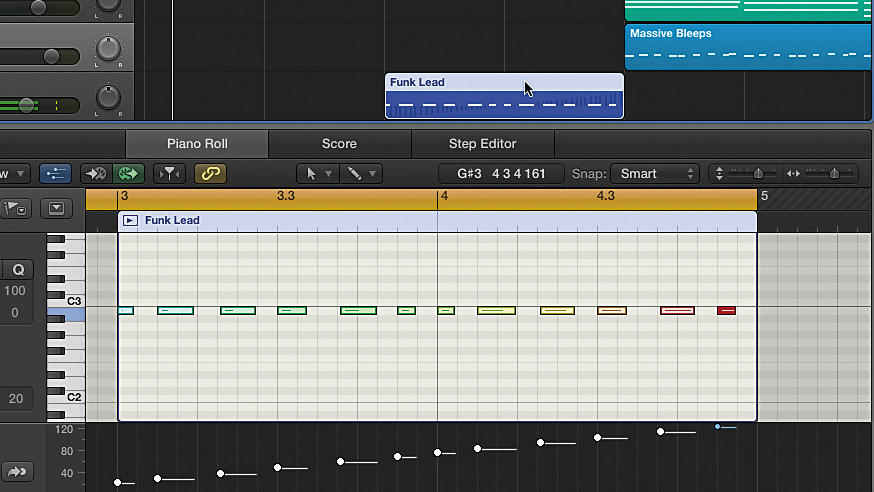
Step 9: The classic dance build and drop is another good illustration of contemporary crescendo usage. Here, we begin with just a solo bass part, joined after two bars by a high monophonic synth that not only rises in volume level but also in pitch, so that by the end of the four-bar section, you know that something good is going to happen.
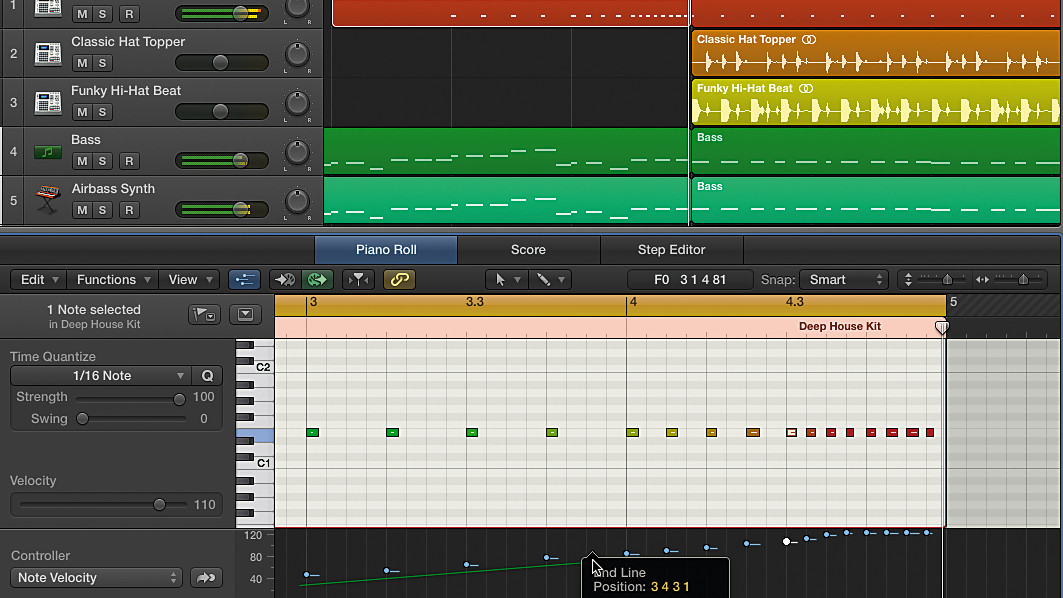
Step 10: To build the tension even more, we program a classic snare drum roll, doubling in intensity and volume over the last two bars. For the effect to work, we need to use a velocity-sensitive drum sound, in this instance from Logic’s Ultrabeat drum synth. we usually find it easier to program the notes in at any old velocity level, then use the line tool to trim them later.
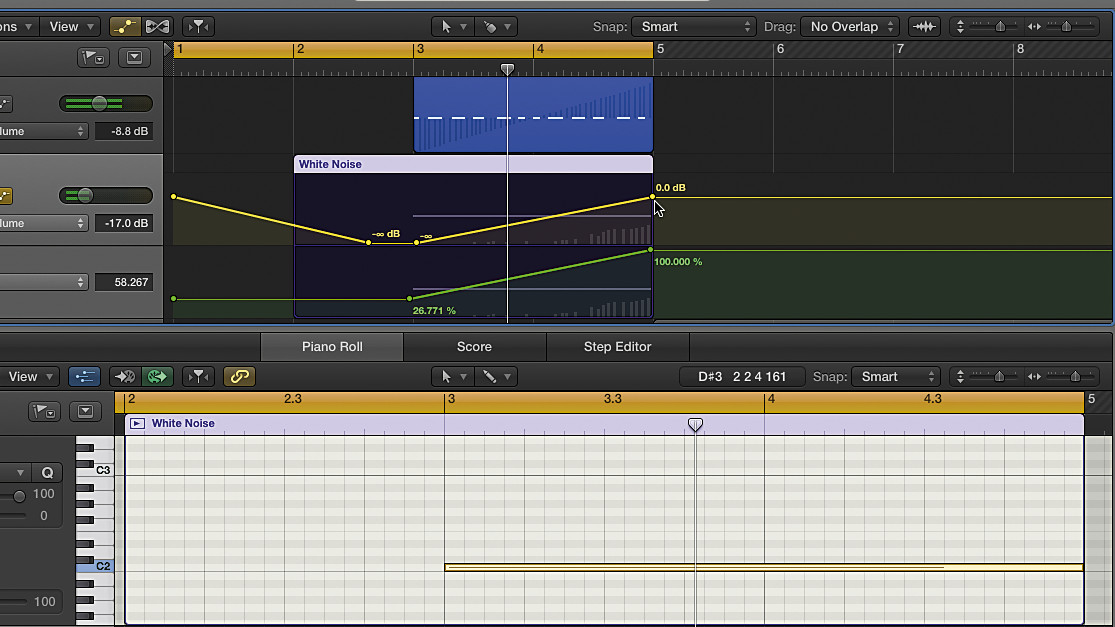
Step 11: You can also create an effective crescendo or diminuendo using your DAW’s automation system to draw volume curves. For example, to emphasise the crescendo effect in the build even further, we add a white noise sweep that increases in volume as the filter opens out, peaking at the end of the region. We’ve automated both the filter cutoff and the volume here.
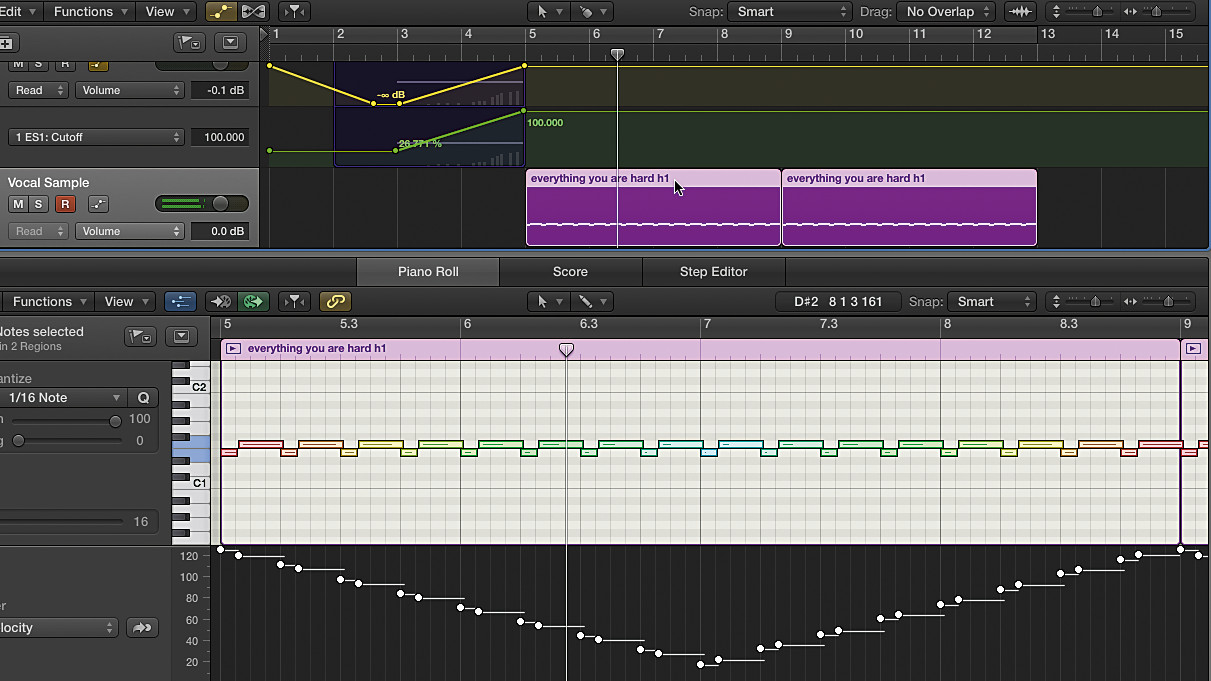
Step 12: Here’s a looped, filtered ‘ah’ vocal sample that repeats throughout the track. We’ve simply programmed the velocity to fade the level in and out across a repeated four-bar section. In the context of a whole song, this results in a ‘back and forth’ kind of feel, just like in Armand Van Helden’s classic mix of Tori Amos’ Professional Widow.
Computer Music magazine is the world’s best selling publication dedicated solely to making great music with your Mac or PC computer. Each issue it brings its lucky readers the best in cutting-edge tutorials, need-to-know, expert software reviews and even all the tools you actually need to make great music today, courtesy of our legendary CM Plugin Suite.
“How daring to have a long intro before he’s even singing. It’s like psychedelic Mozart”: With The Rose Of Laura Nyro, Elton John and Brandi Carlile are paying tribute to both a 'forgotten' songwriter and the lost art of the long song intro
“The verse tricks you into thinking that it’s in a certain key and has this ‘simplistic’ musical language, but then it flips”: Charli XCX’s Brat collaborator Jon Shave on how they created Sympathy Is A Knife


