How to focus your equalization with sweeping and filtering
We give you the lowdown on some basic EQ techniques that can help get things moving with your mix
Want all the hottest music and gear news, reviews, deals, features and more, direct to your inbox? Sign up here.
You are now subscribed
Your newsletter sign-up was successful
Equalisation (EQ) is one of the most important mixing tools, yet also one that’s quite easy to get wrong. But there are a few simple methods that can really improve your chances of success.
Let’s assume you already understand that an EQ includes various different shaped filters that allow you to boost and cut selected frequencies or frequency ranges. You’ll typically find a pretty flexible EQ pre-assigned to all channels in your DAW and that in itself is a big invitation to get EQing. Even so, there is no requirement to EQ everything, and many would argue that you should use the minimum amount of EQ you can.
As ever in music production, there is no ‘one size fits all’ approach. Sometimes raw recorded sounds such as a multi-miced drum kit benefit from quite extensive EQ, whereas other raw sounds such as a solo violin need little or no EQ. Meanwhile, pre processed samples may be production ready and sound great on their own but still need specific frequencies cutting or boosting.
Article continues belowWhatever the target, we usually use EQ in a corrective or enhancing capacity, and at the mixing stage we combine it with level balancing to help everything fit together. In this tutorial, I’ll be looking at two core techniques – sweeping and filtering – that can help you focus your EQing by finding the frequencies you actually want to process. Read on and we’ll get started,
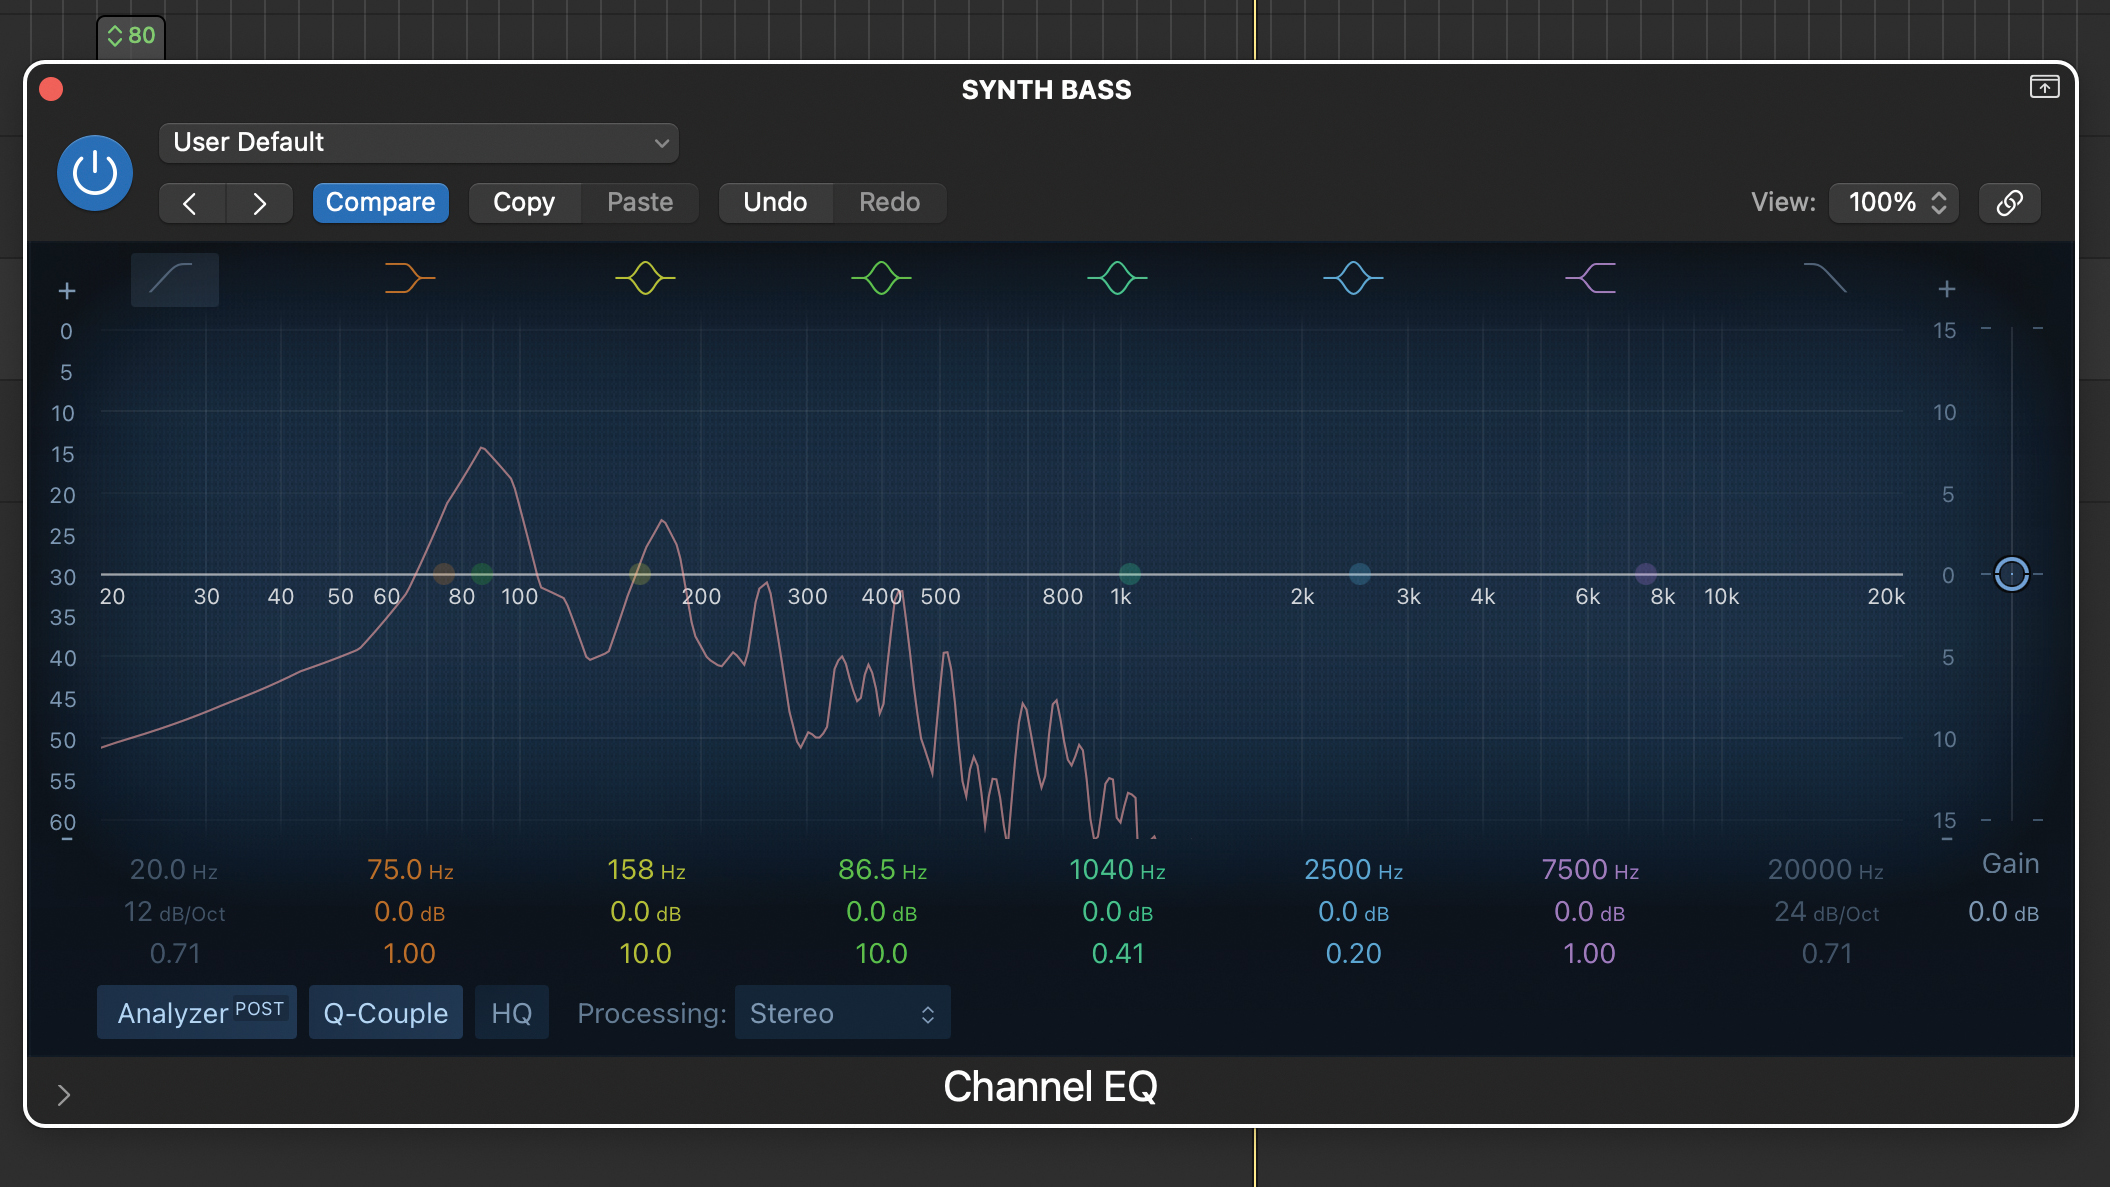
Even though we have plenty of visual tools to analyse signals and pinpoint certain frequencies (see the Pro Tip below), it’s important to learn how to hear these frequencies, and one of the best techniques for this is boost and sweep. This allows us to zone in on specific frequencies easily and quickly.
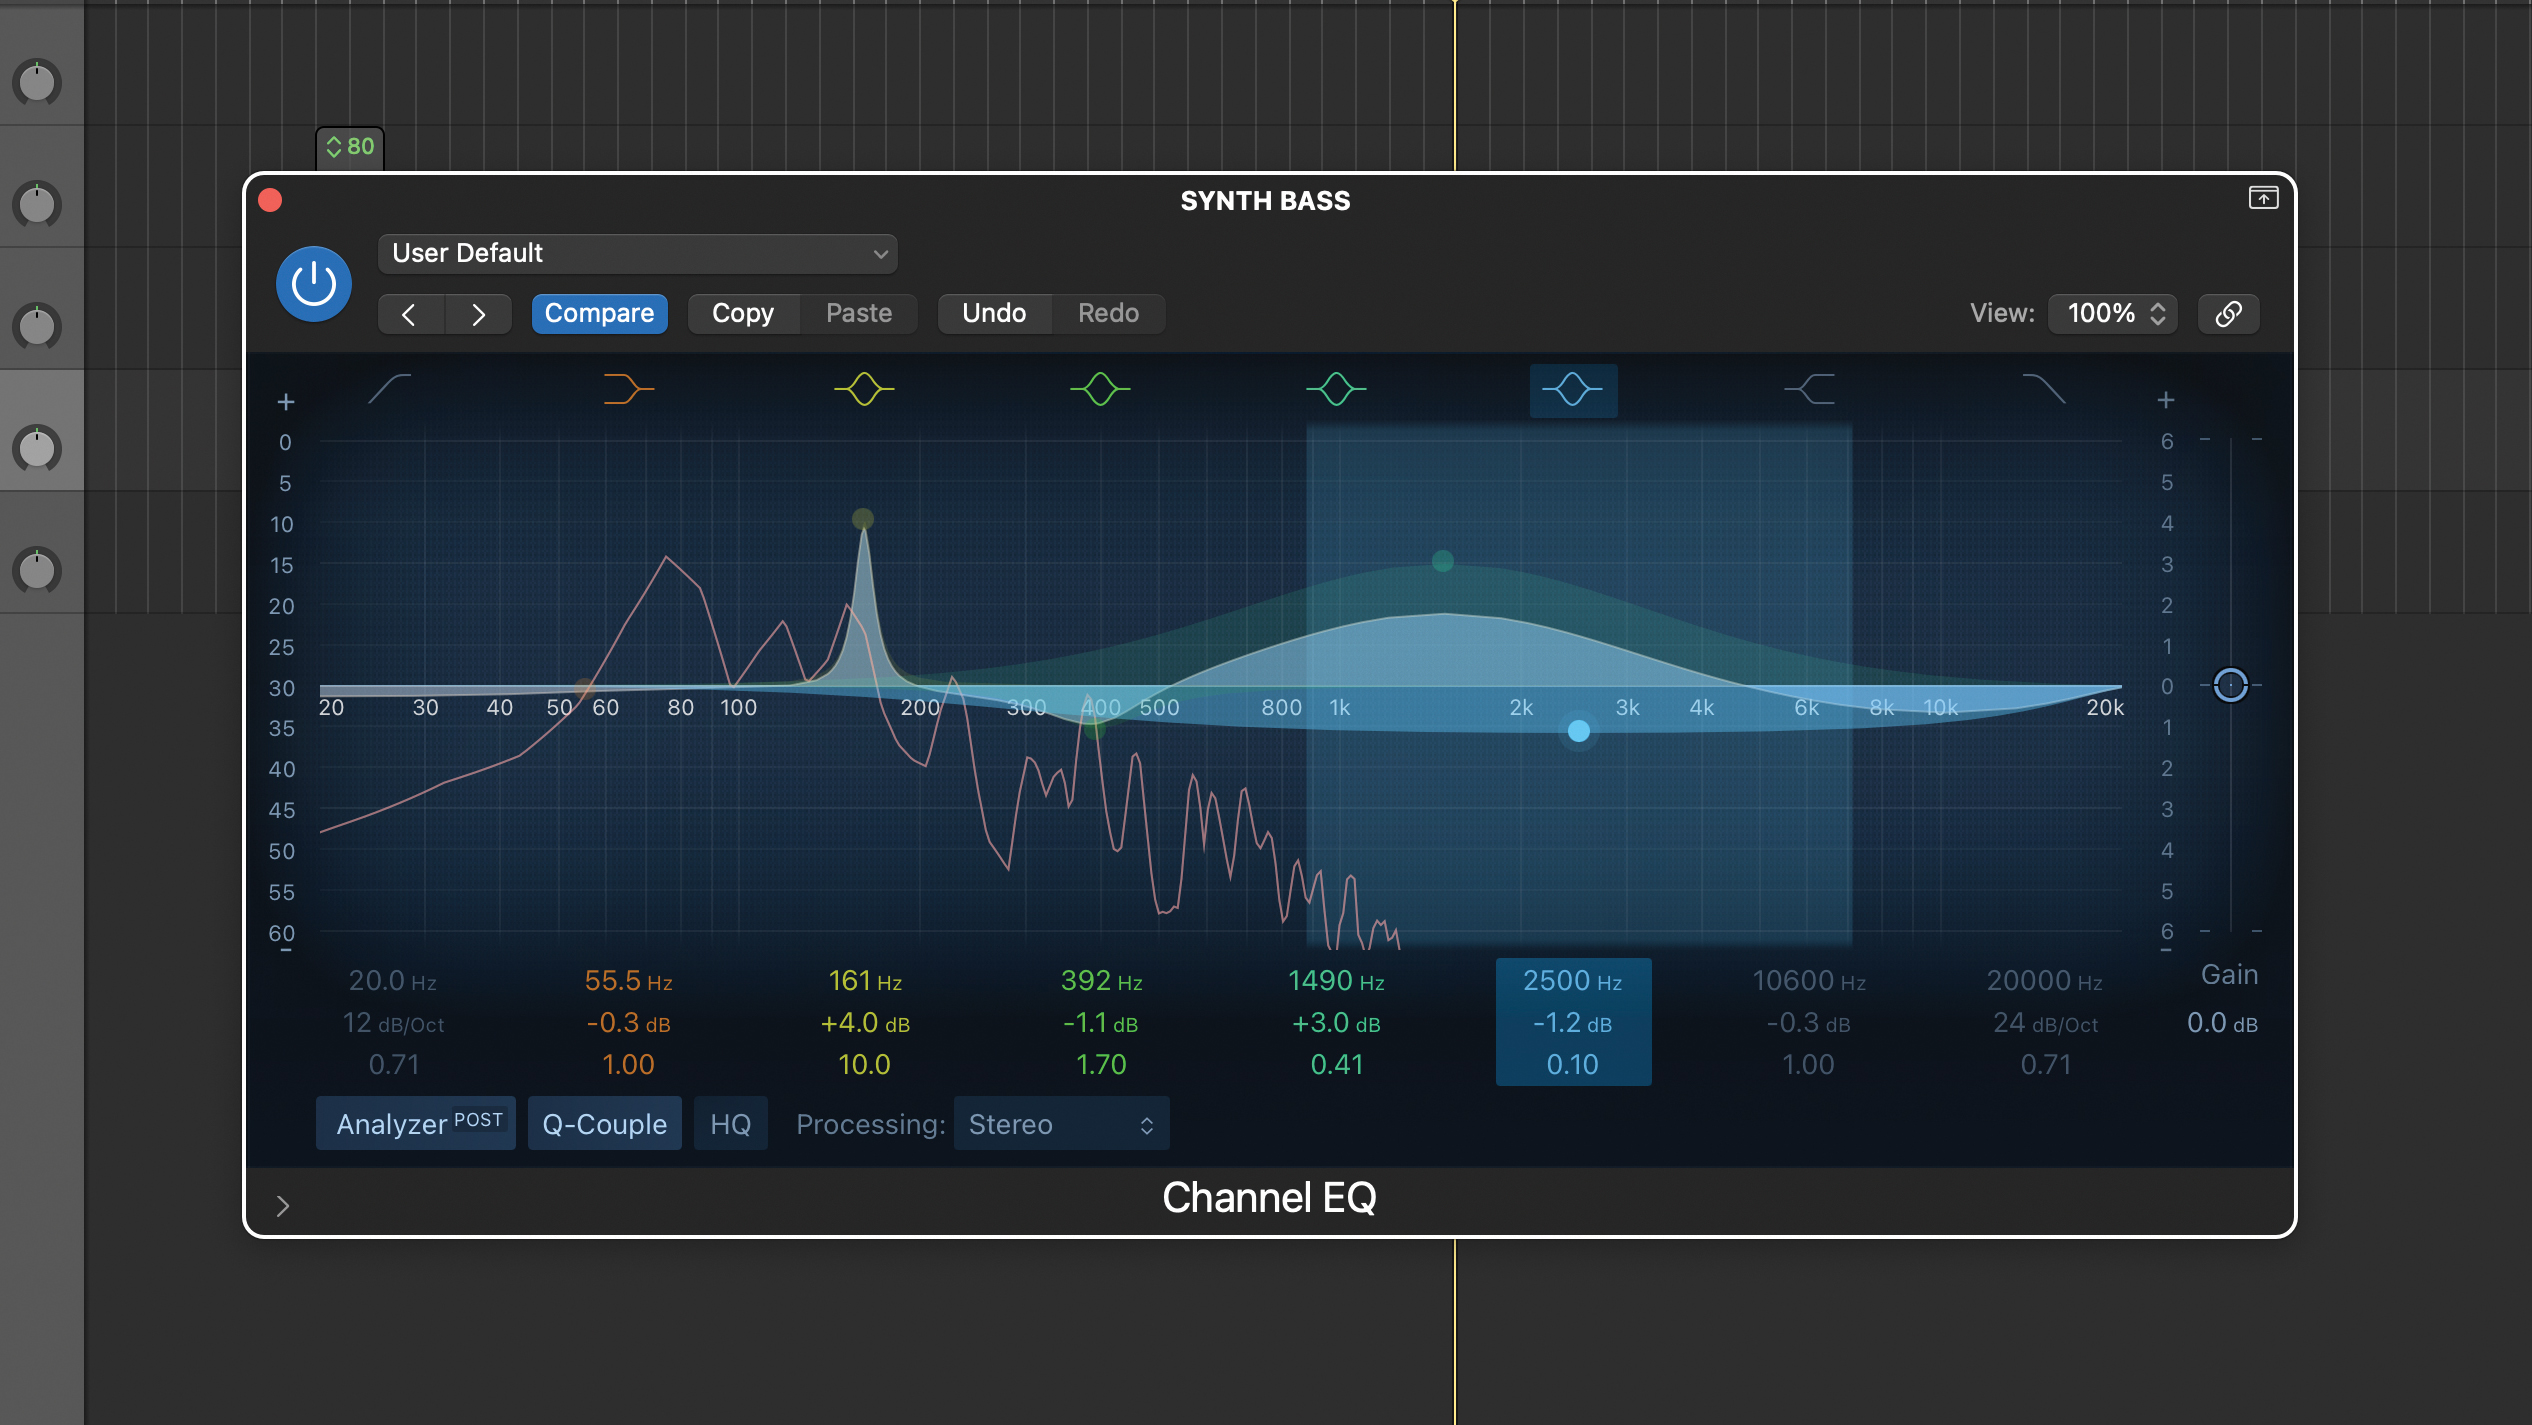
The technique requires a parametric EQ with a peak shape band and an adjustable Q. It relies on the fact that we find it much easier to distinguish a narrow band of boosted frequencies and we can use this phenomenon to pinpoint areas and frequencies we want to boost or cut.
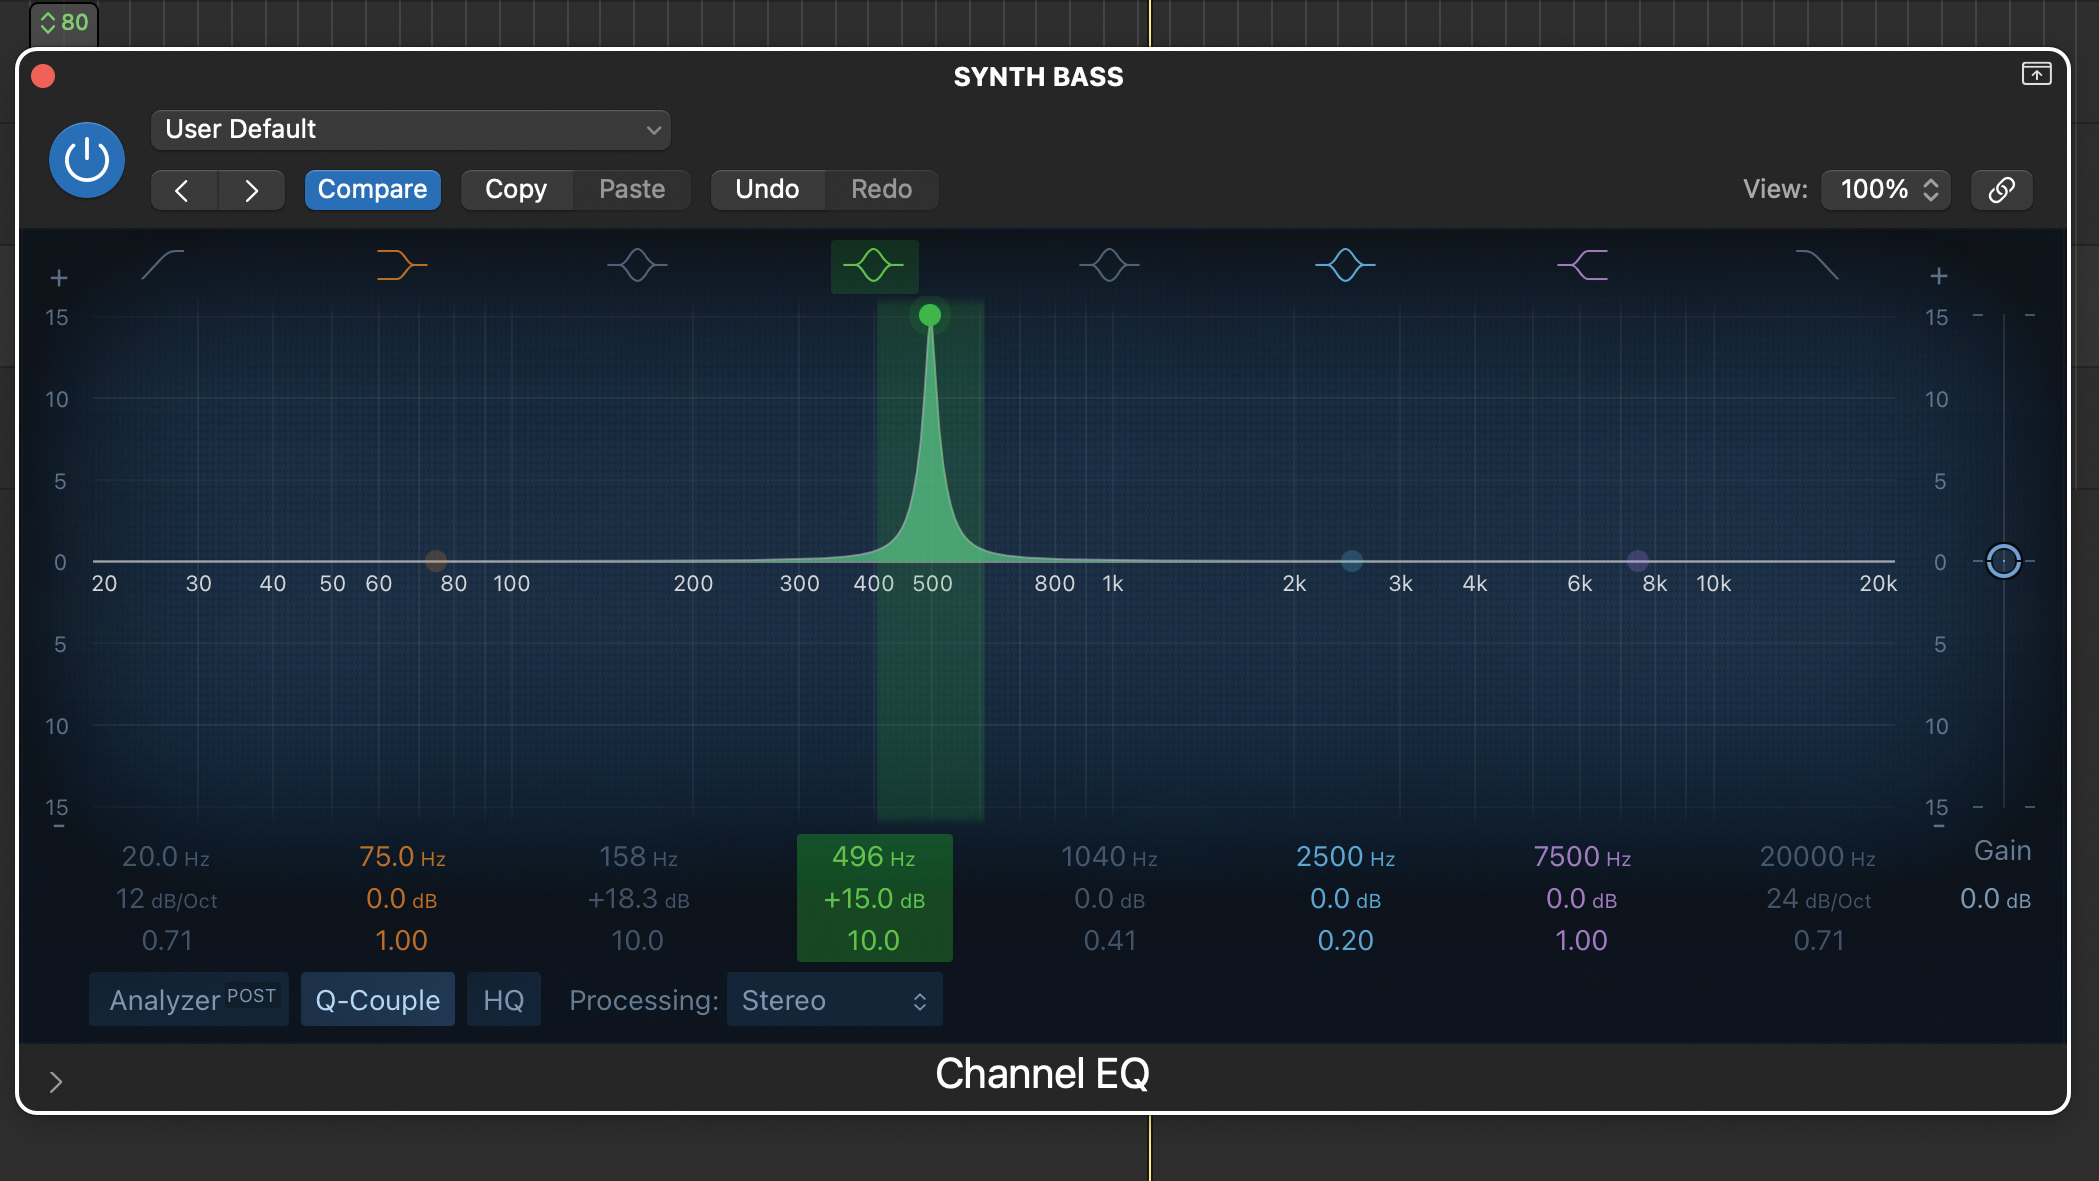
We’ve inserted a suitable EQ plugin across our bass part, activating a parametric band and set the bandwidth quite narrow (ours is set to 10). Bear in mind some EQs allow very narrow bandwidth settings and these may be too narrow for the technique. Now add plenty of gain – here we’ve boosted by about 15dB.
Want all the hottest music and gear news, reviews, deals, features and more, direct to your inbox? Sign up here.
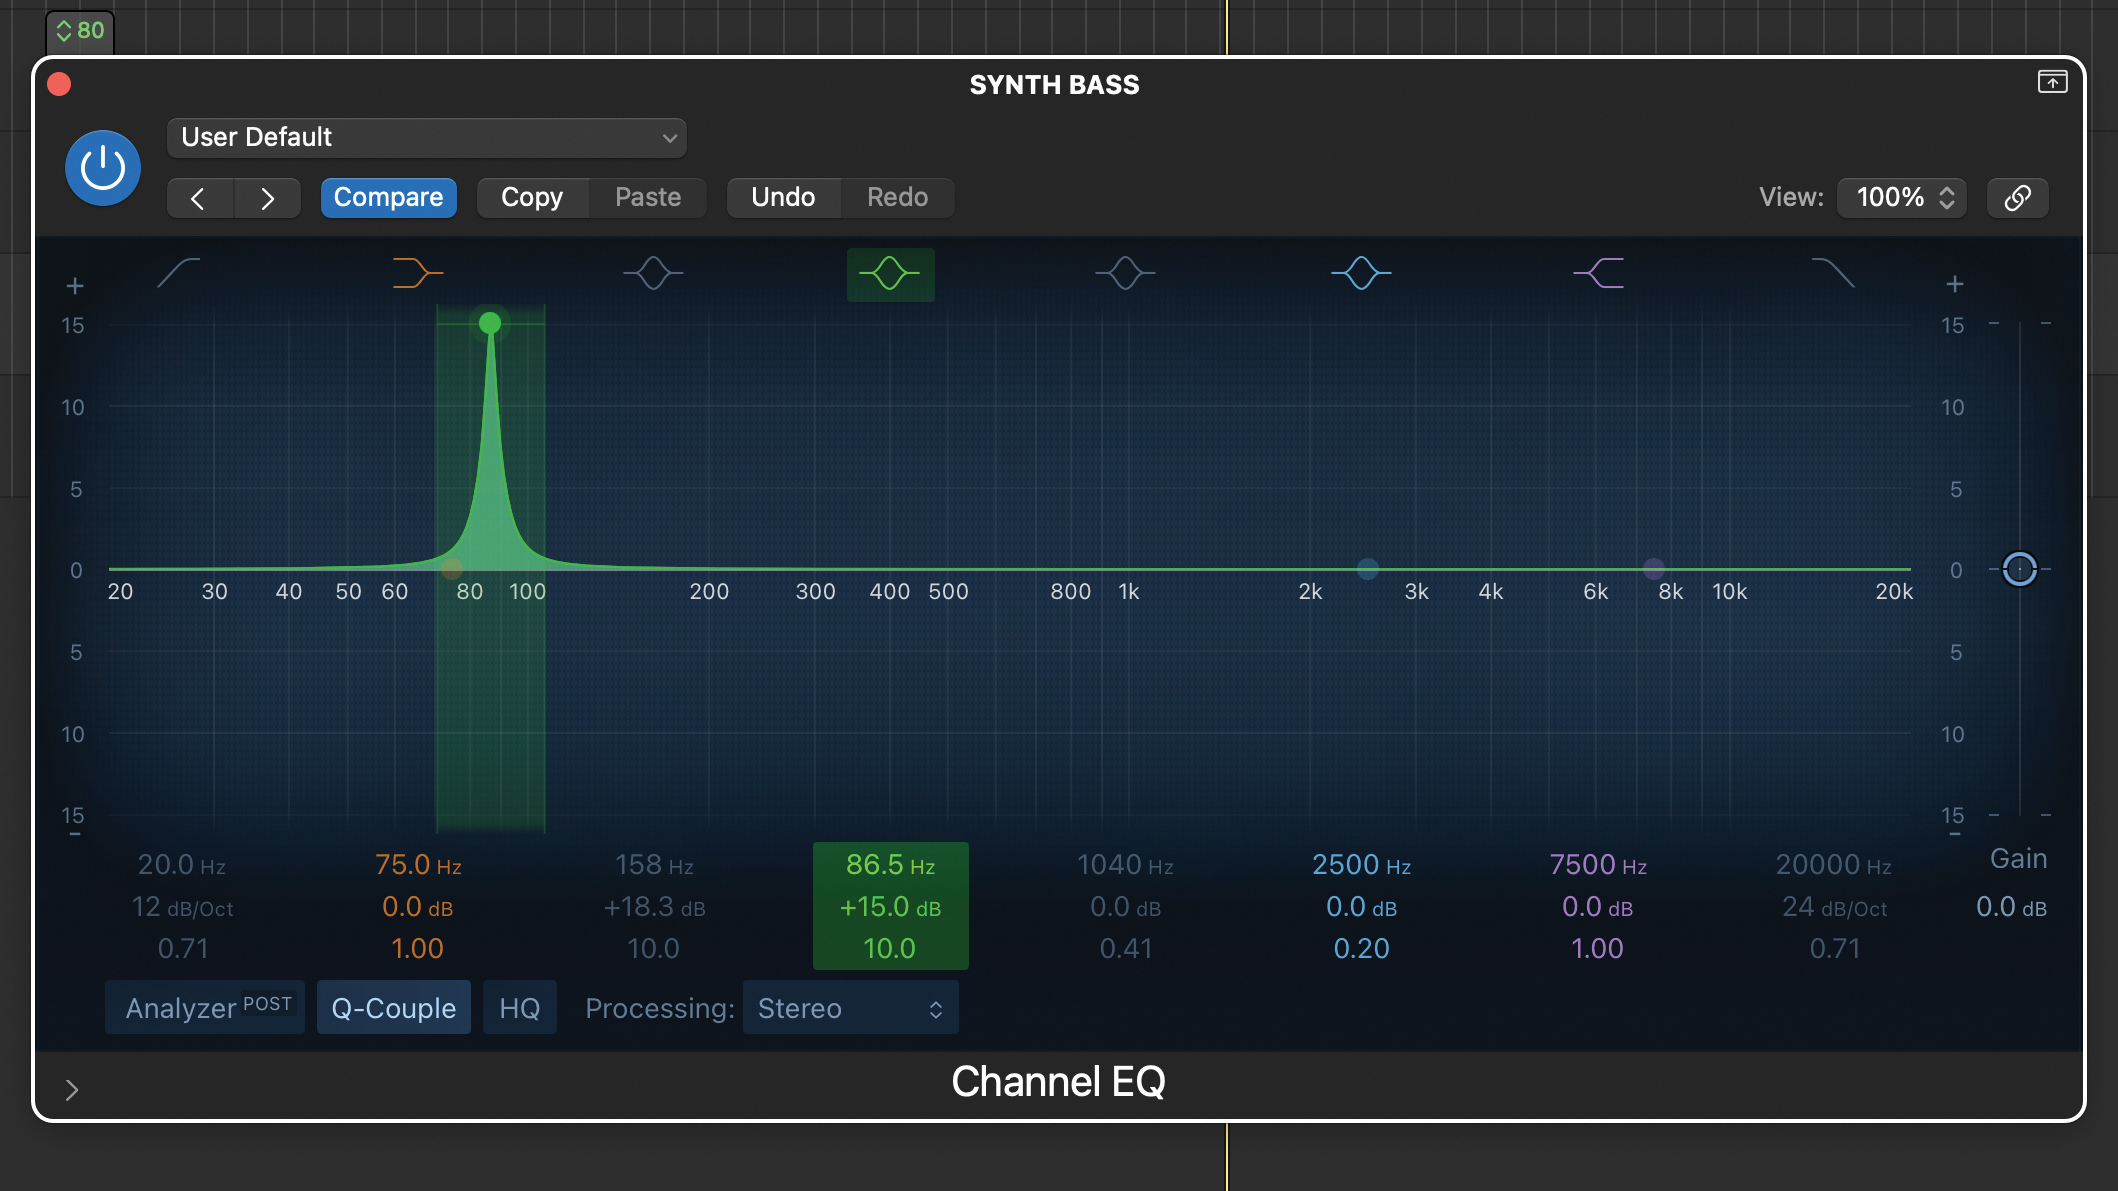
Our EQ includes a visual representation of the curve which clearly shows the boosted peak. We can easily see its width and the potential impact on the centre frequency and surrounding frequencies. Now by adjusting or ‘sweeping’ the frequency as we listen to the part we can zone in on its significant frequencies.
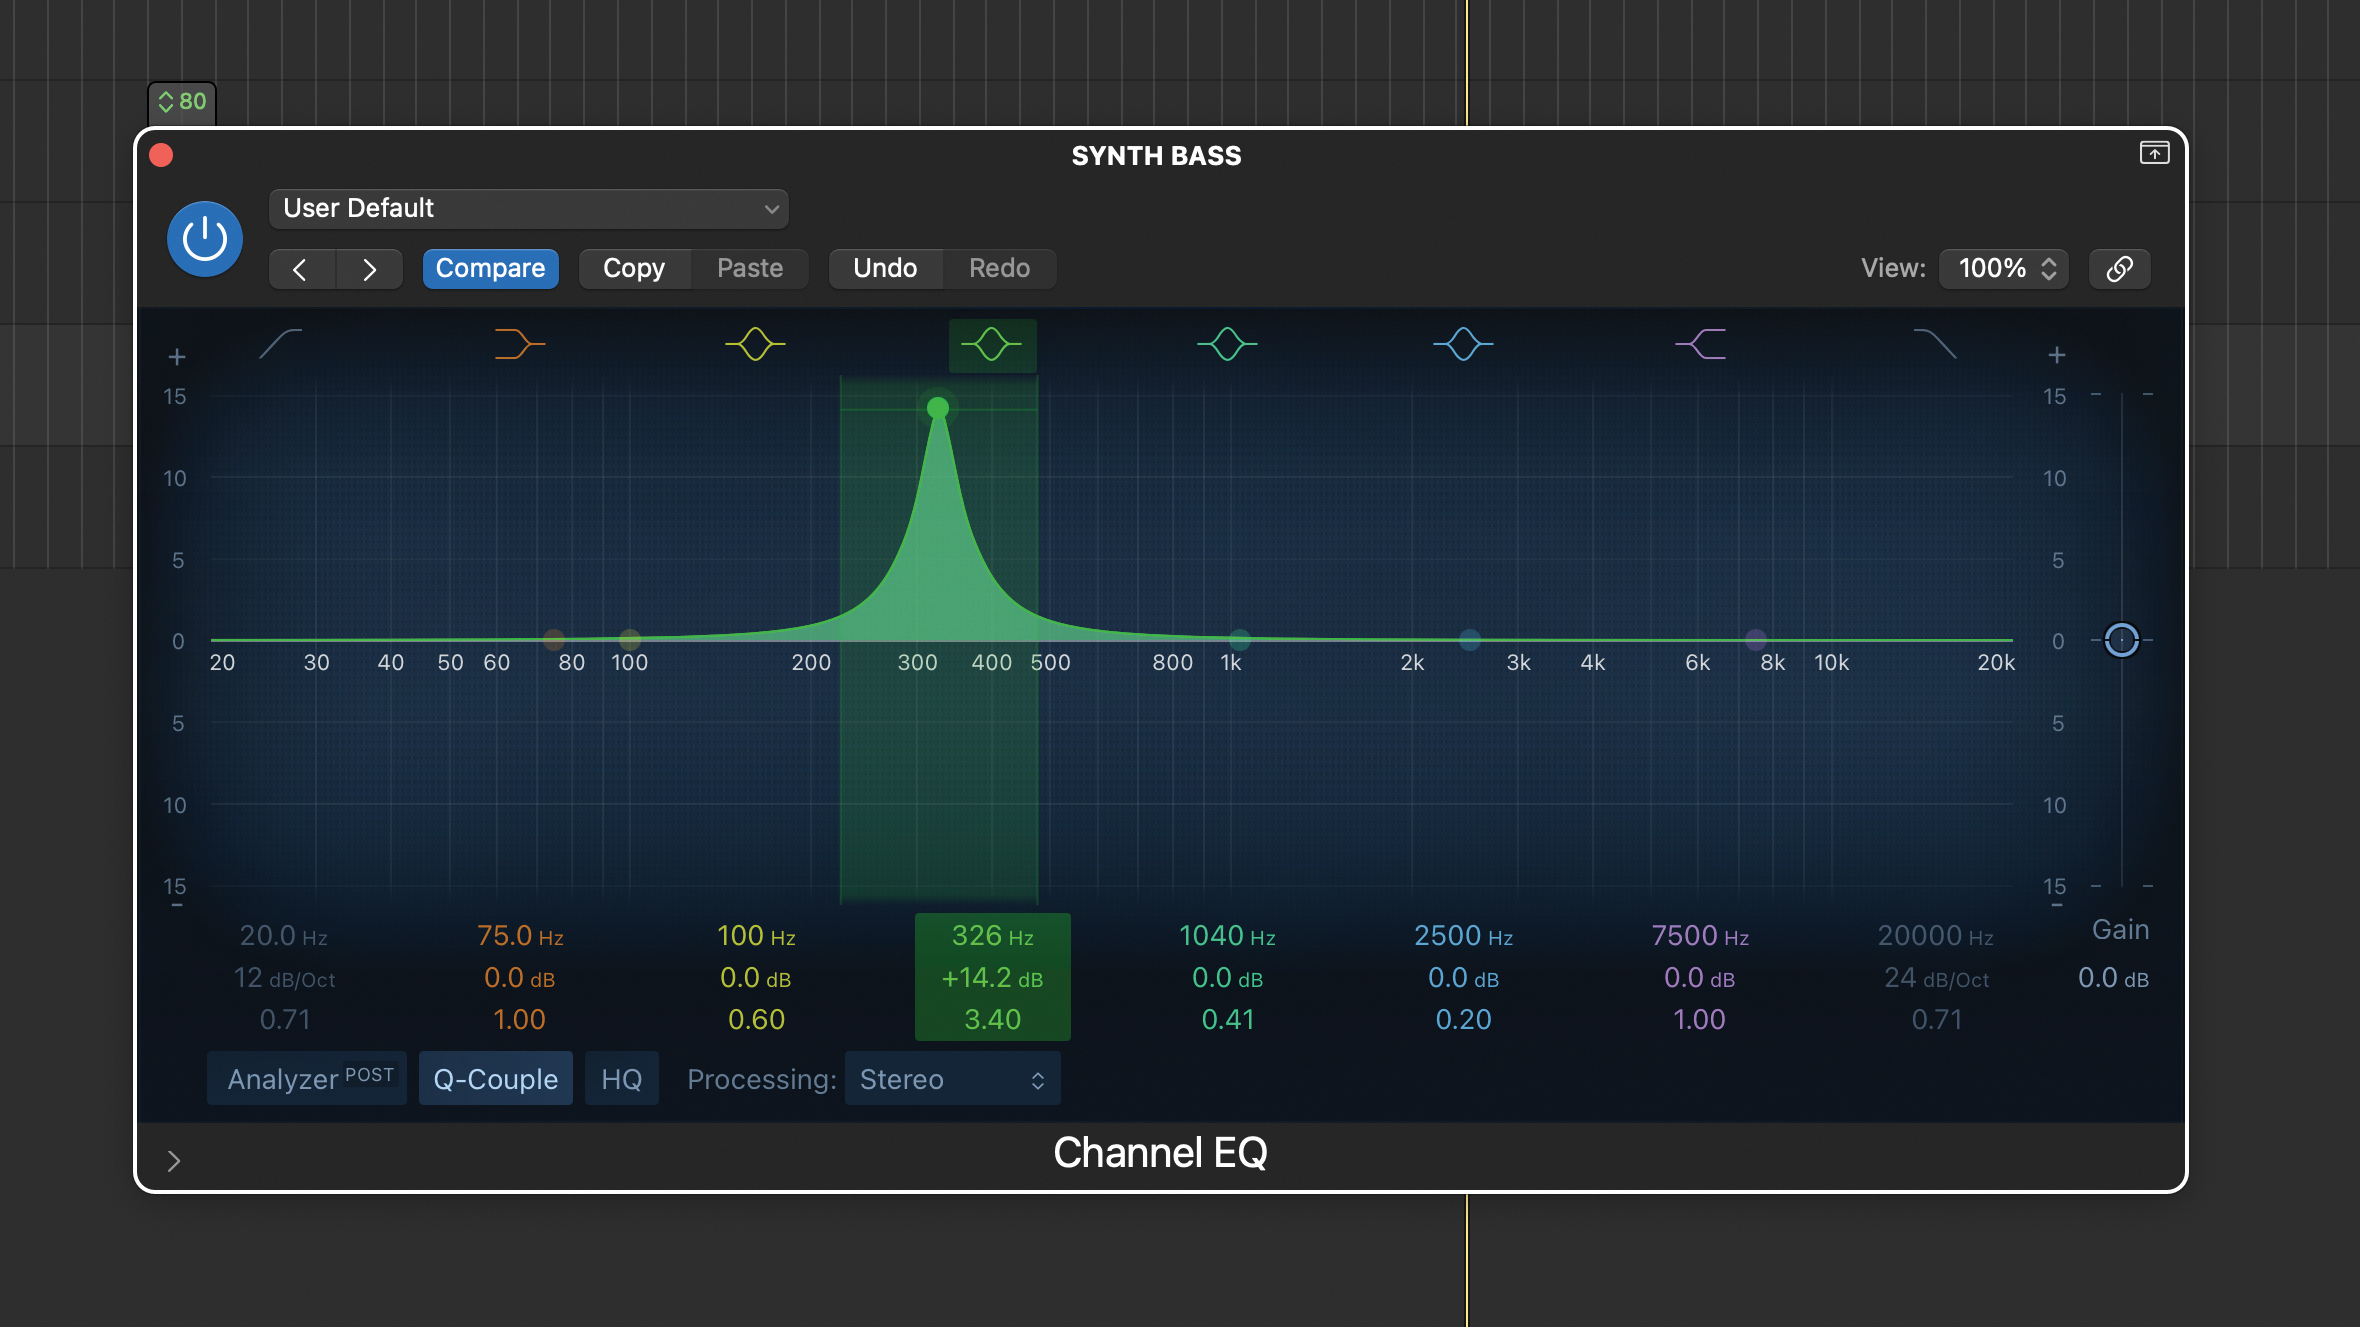
You can do this quite quickly initially, and if you find that it’s hard to pick out important frequencies, try widening the bandwidth until you find roughly the right frequencies. Once you have the right zone, narrow the bandwidth again to really focus on a specific area.
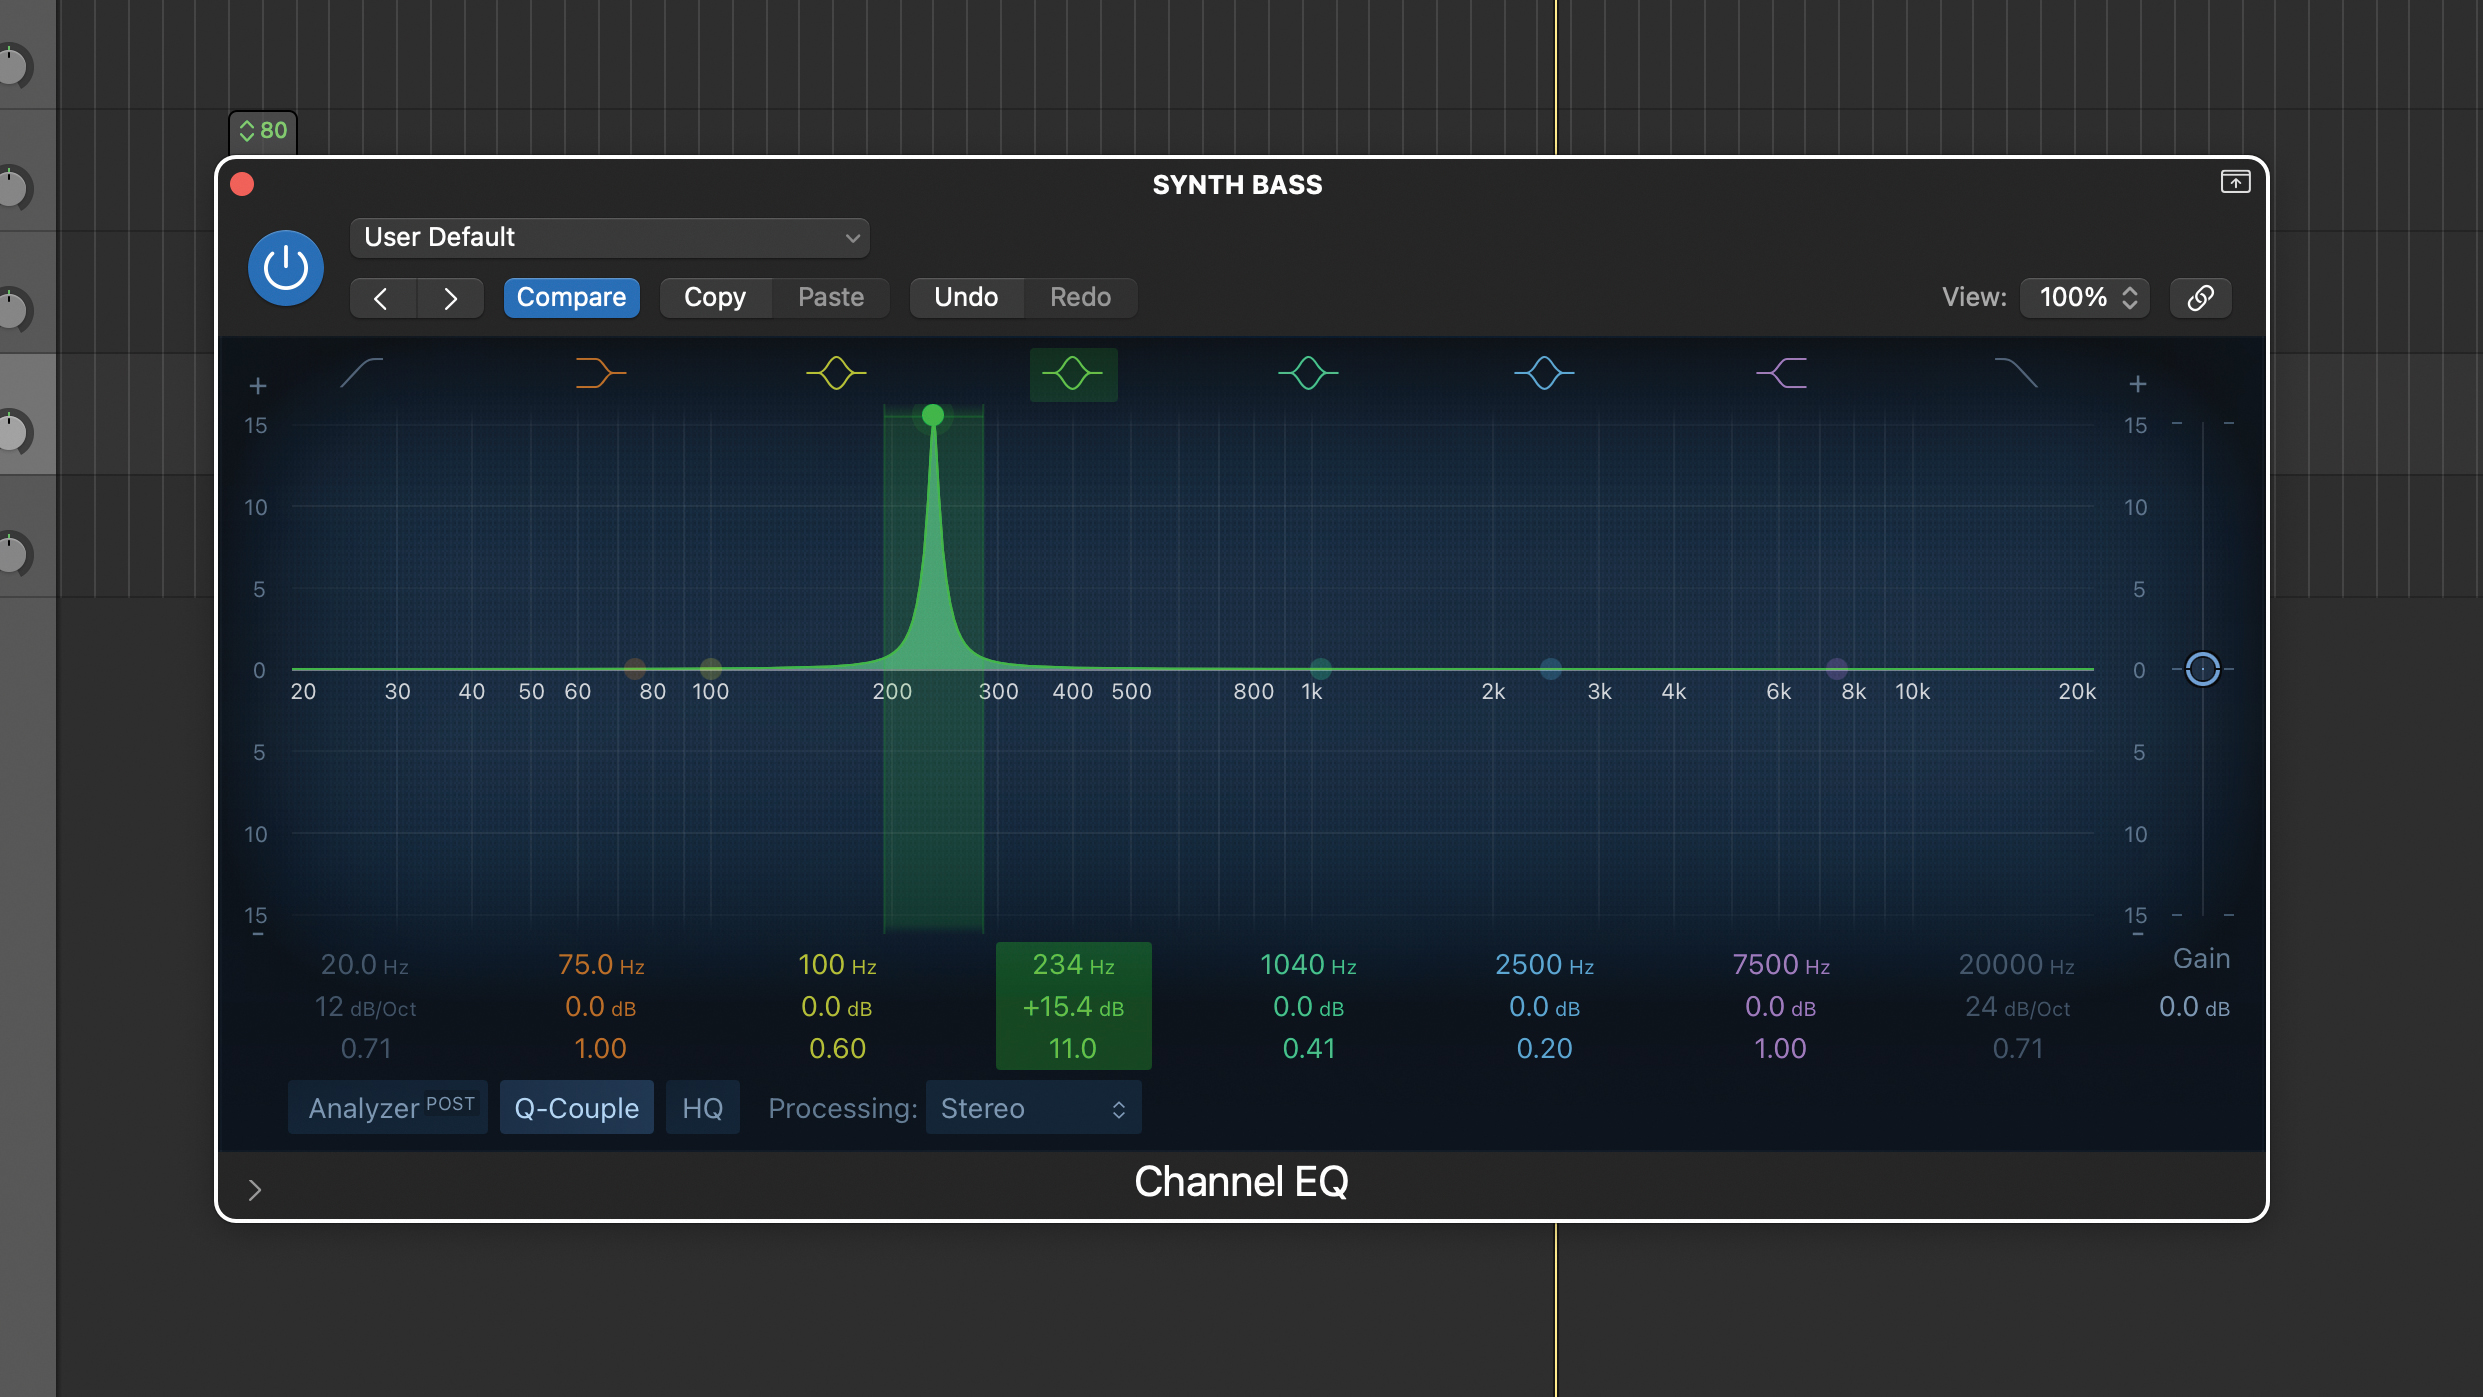
Listening to our bass part, this has well defined notes and should be quite easy to process. Nevertheless, one high note in particular sticks out too much. By boosting and sweeping we should be able to enhance the relevant area, zone in on the frequency and use a narrow filter to notch it out.
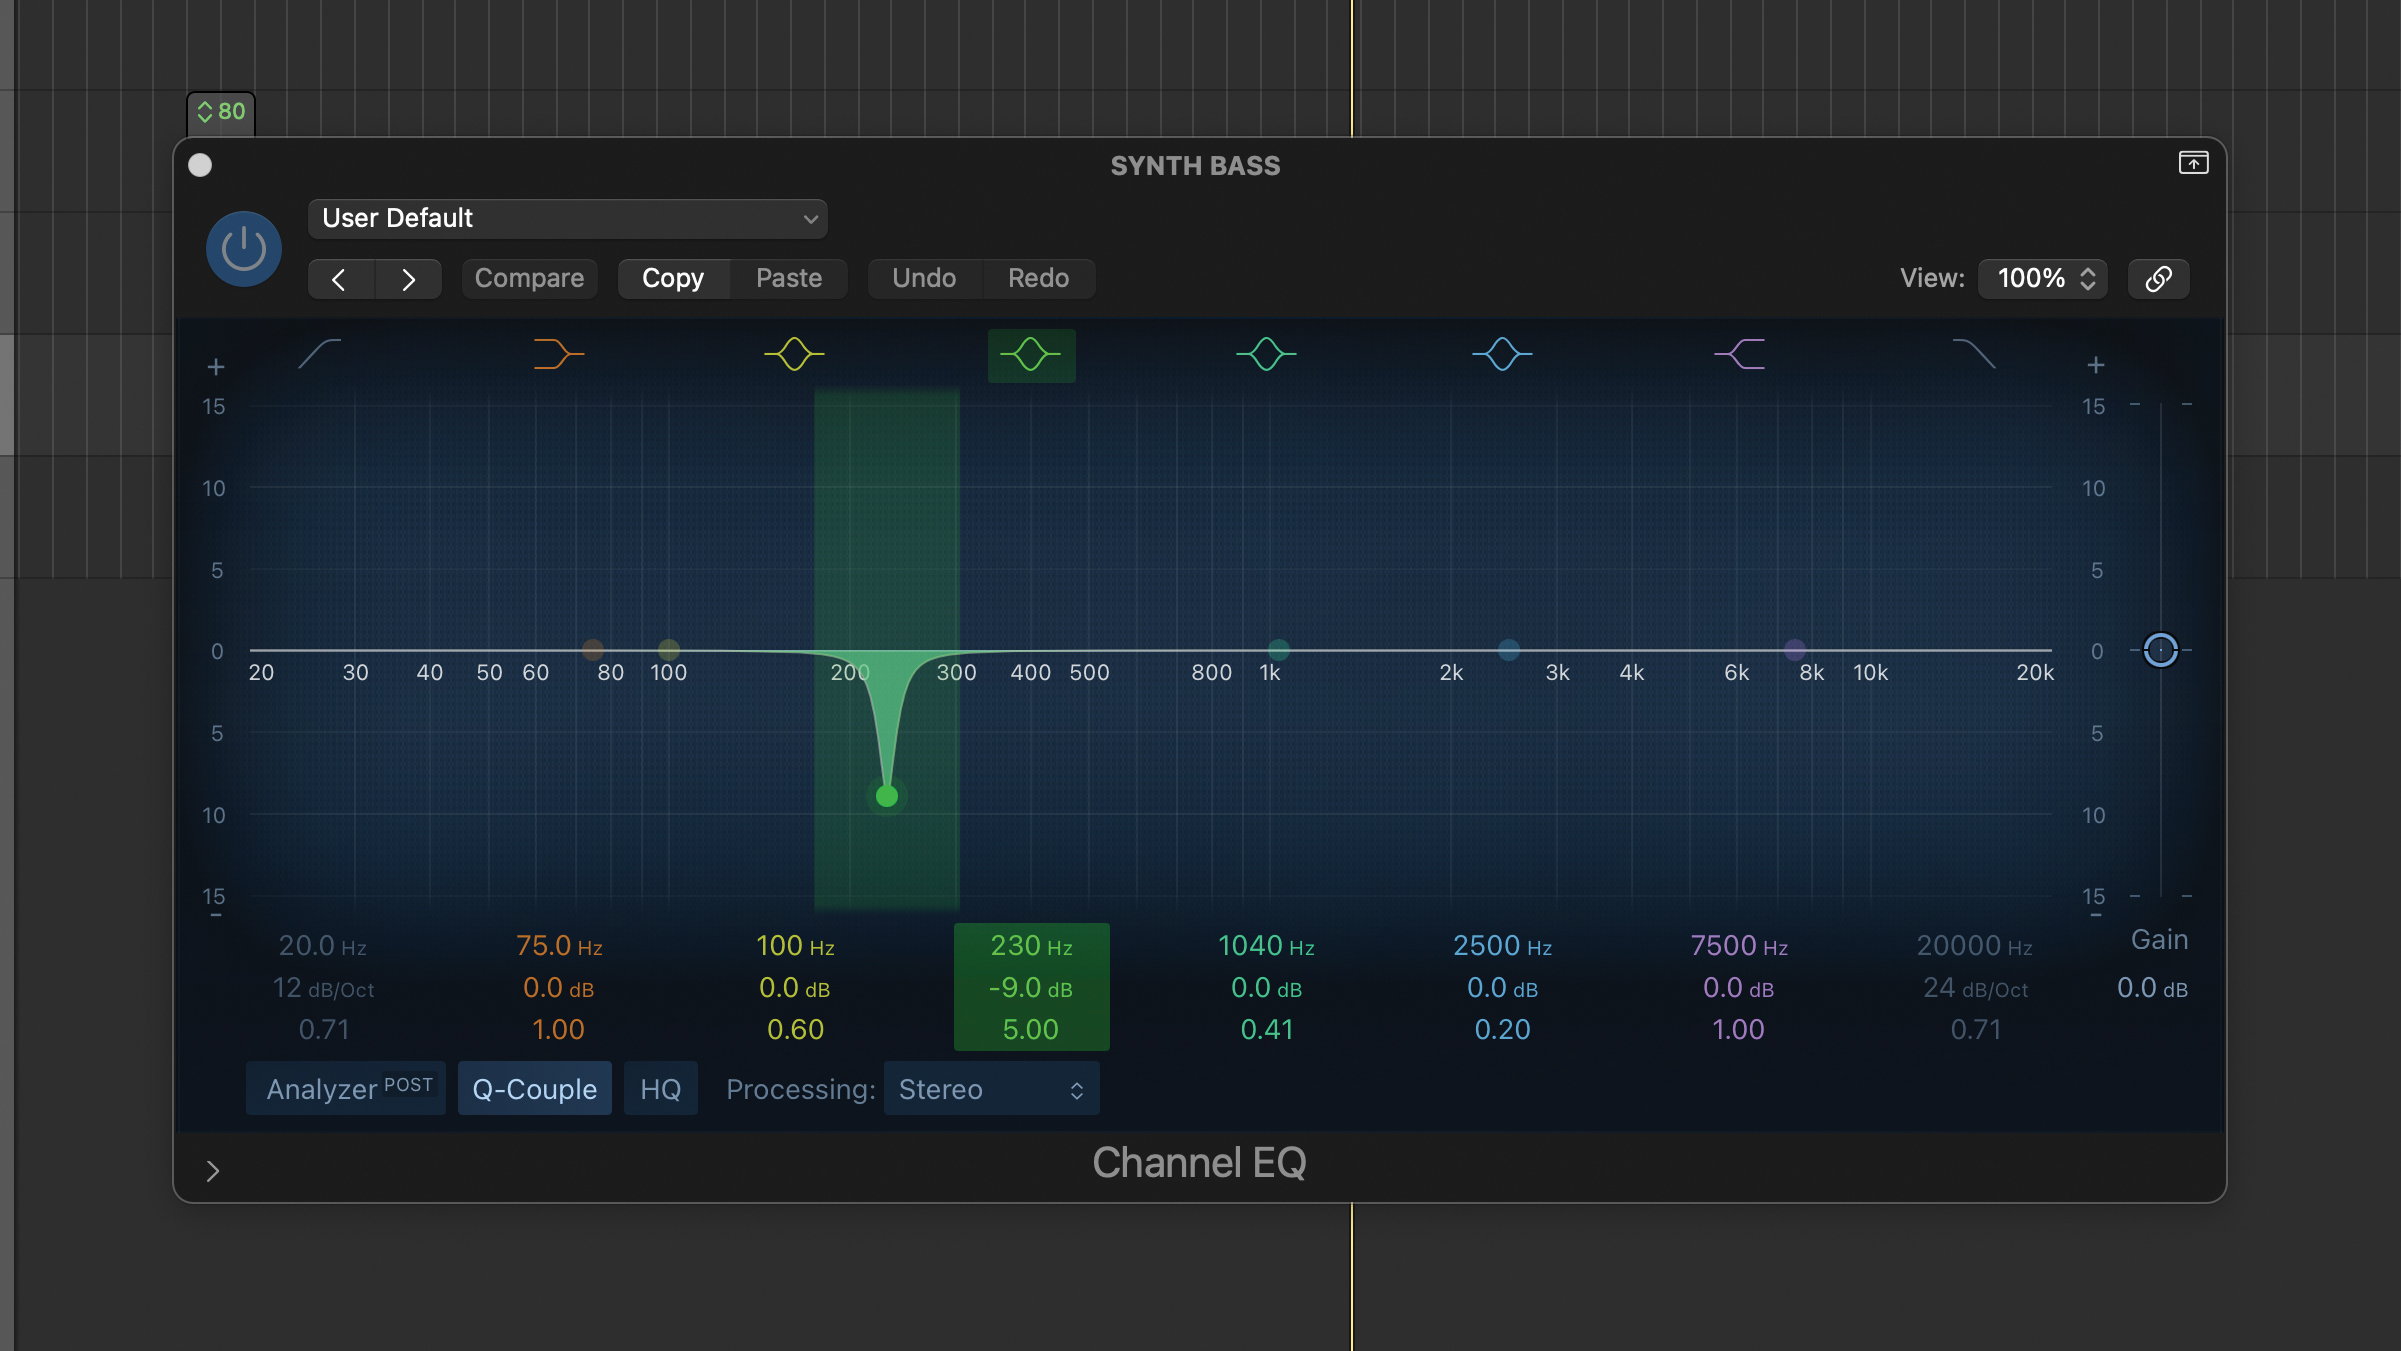
It sounds like the one problem note we spotted has a quite dominant frequency between 200Hz and 250Hz and by more precise boosting with a narrow bandwidth we’ve settled on 230Hz. In this instance we’ve decided to apply a -9dB cut at this frequency with a broader bandwidth (Q is 5.00).
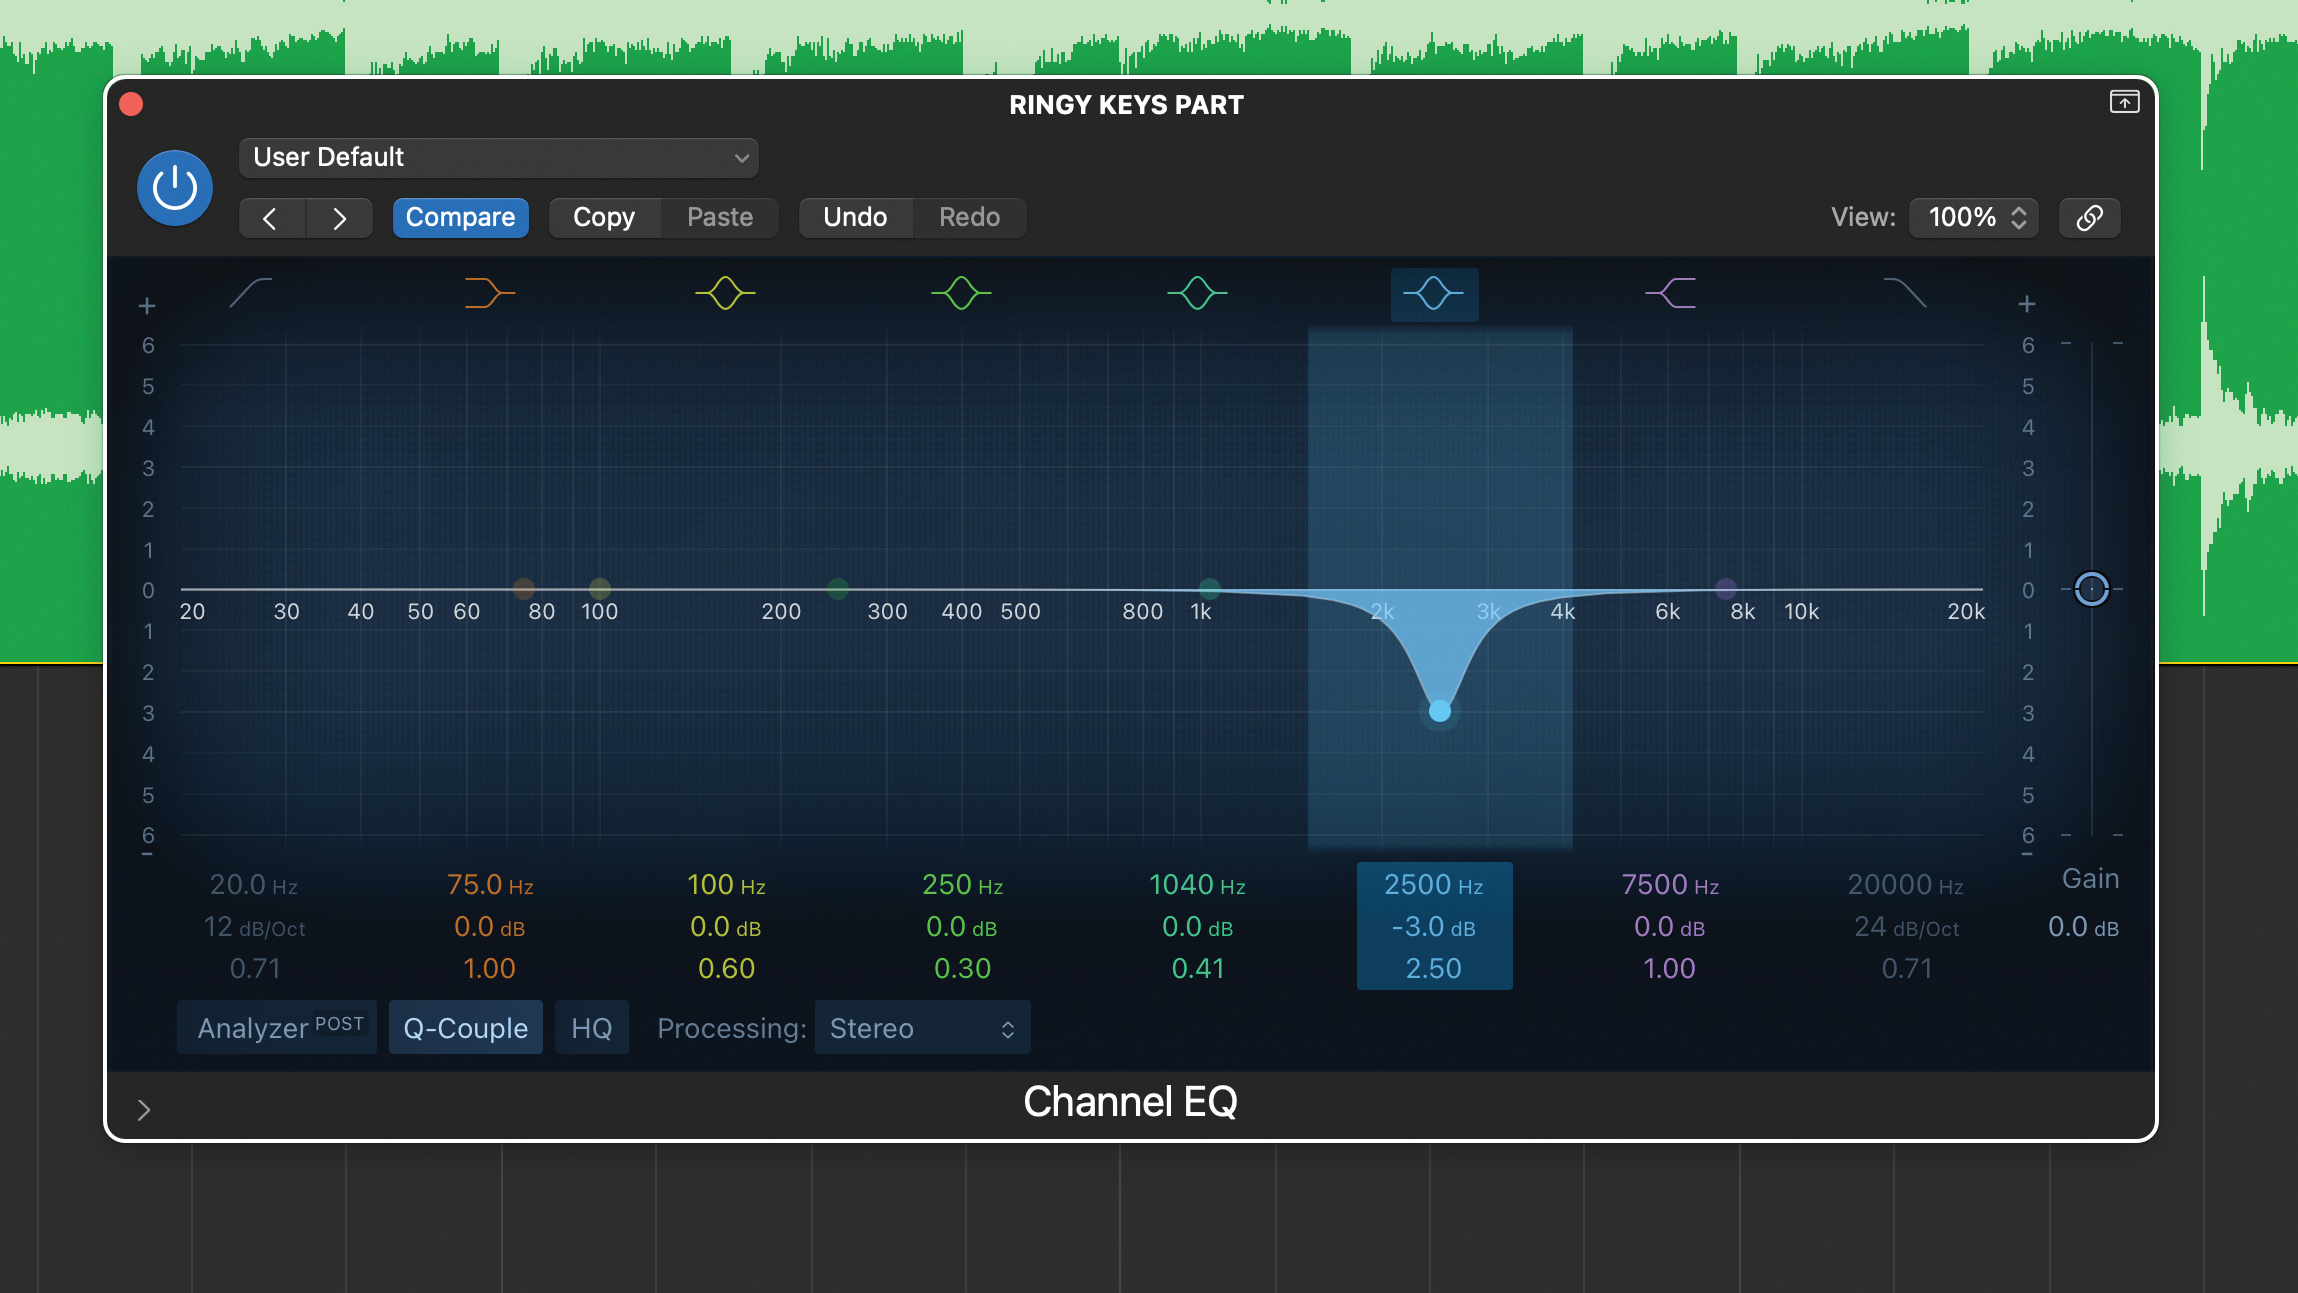
Next we have a ringy synth part with a bunch of different gnarly harmonics. By sweeping the mid to high frequencies the unpleasantness is at its worst in the 2kHz to 3kHz area. Rather than try and pick out specific harmonics, we’ve applied a broad cut of a few dB, leaving the higher and lower frequencies as they were.
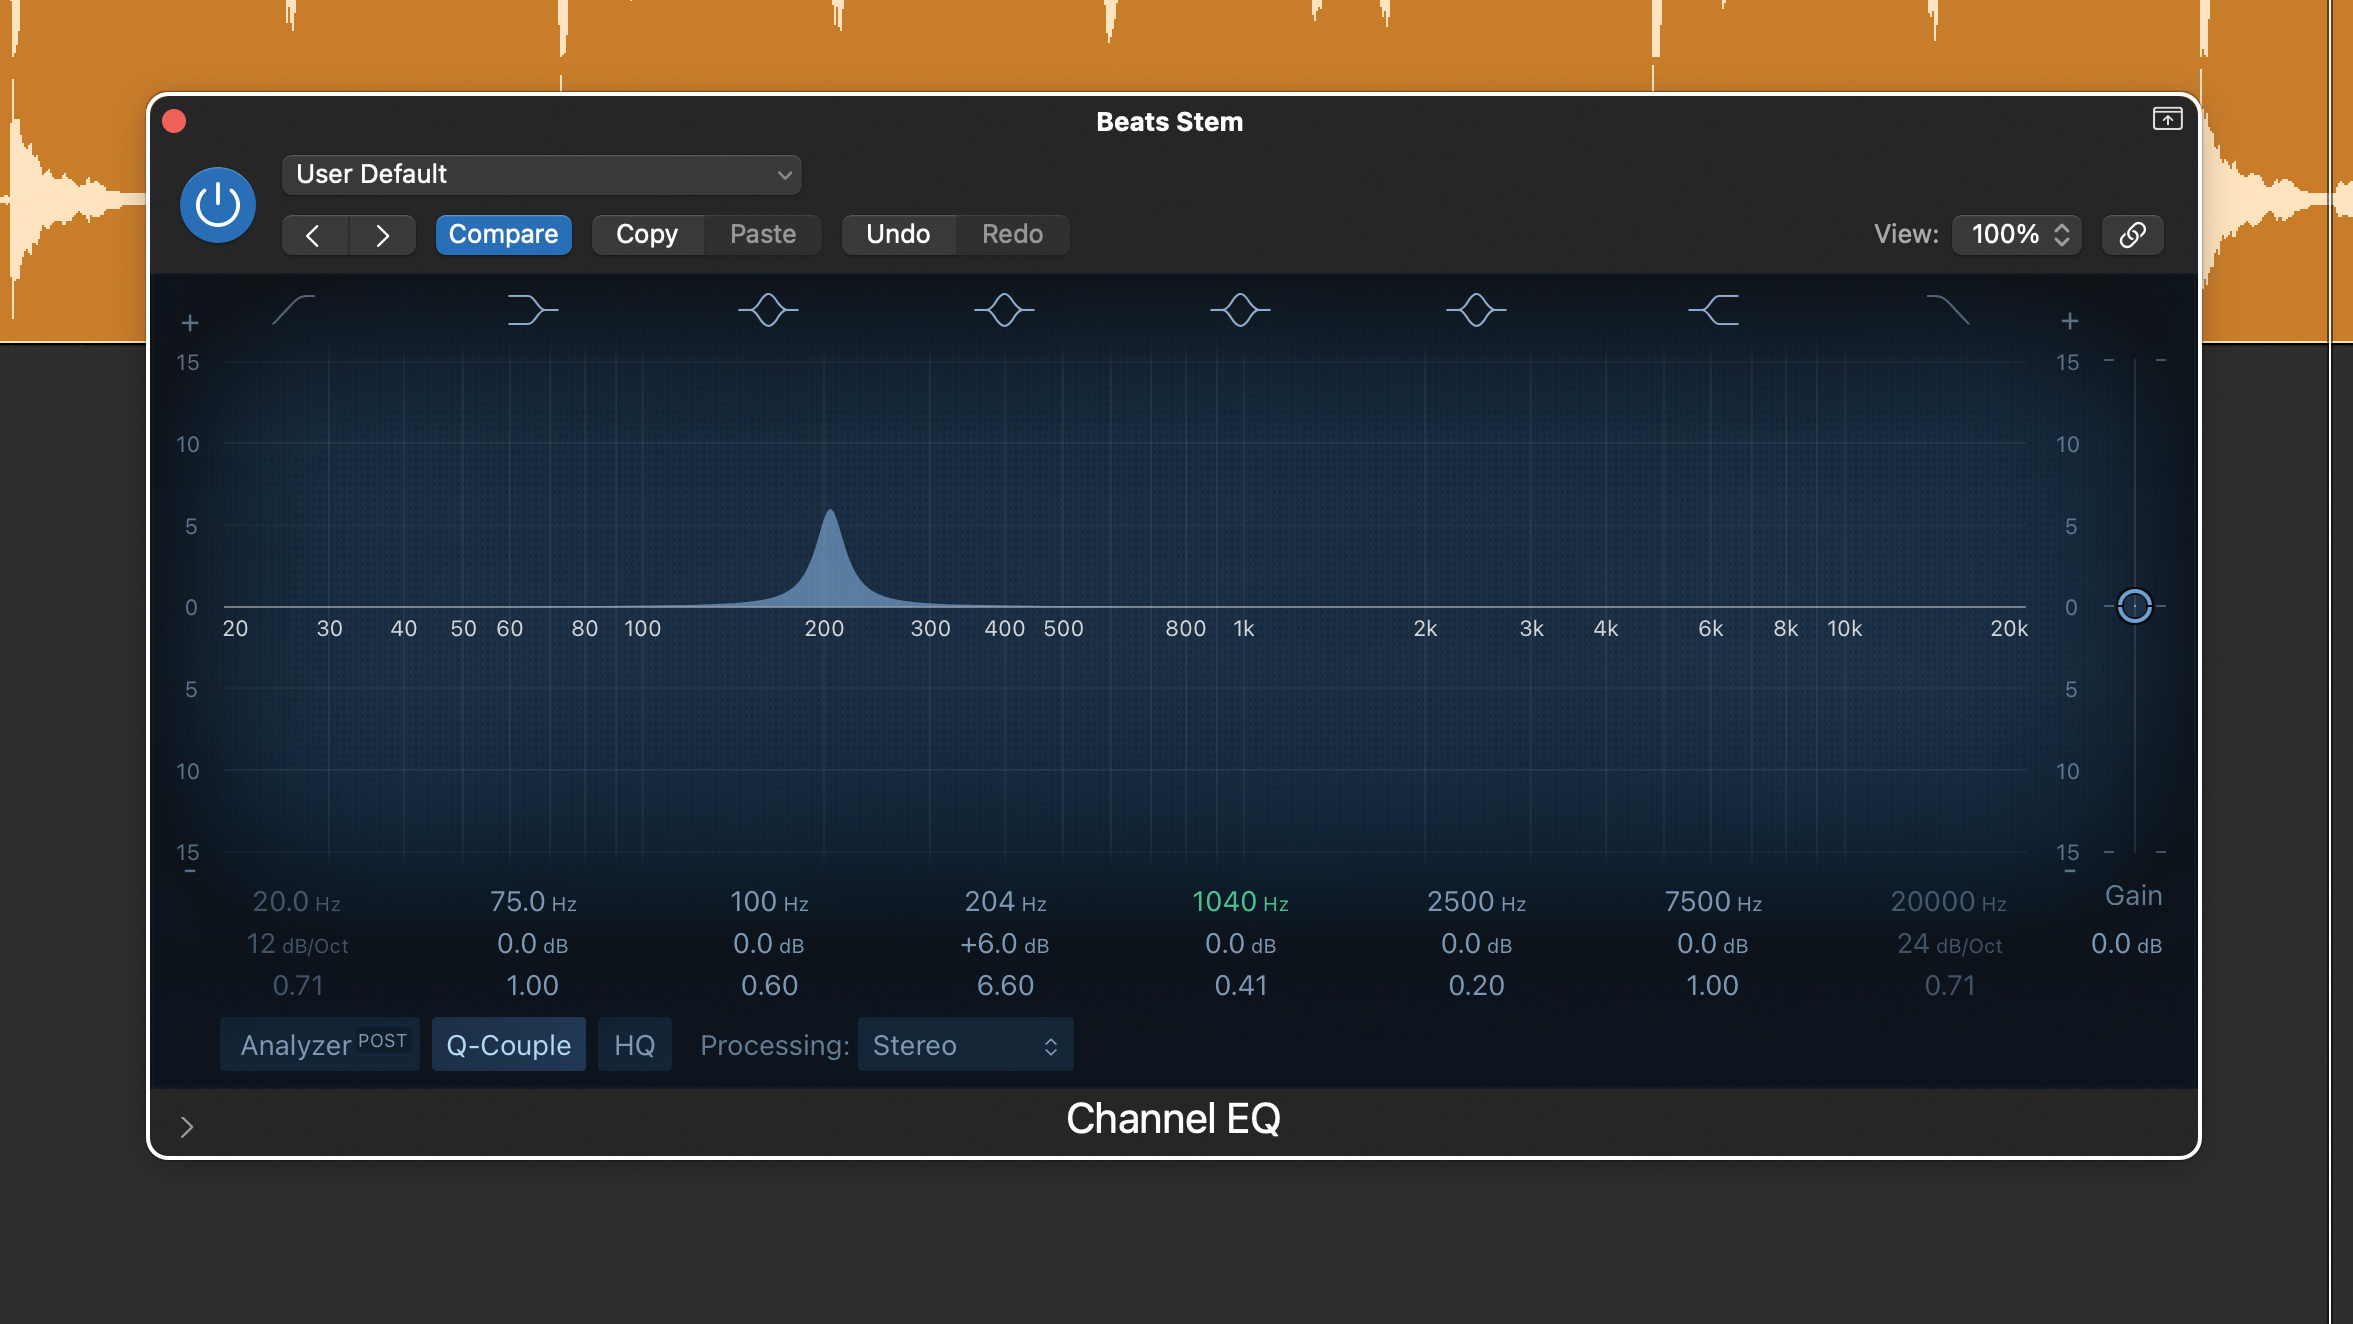
Now on our blended drum stem we’ve swept the low frequencies and found the body of the snare at about 205Hz and the snare knock at around 338Hz. On this occasion we’re going to boost just the body and have set a wider more natural shape peak (Q is about 7) with about 6dB boost.
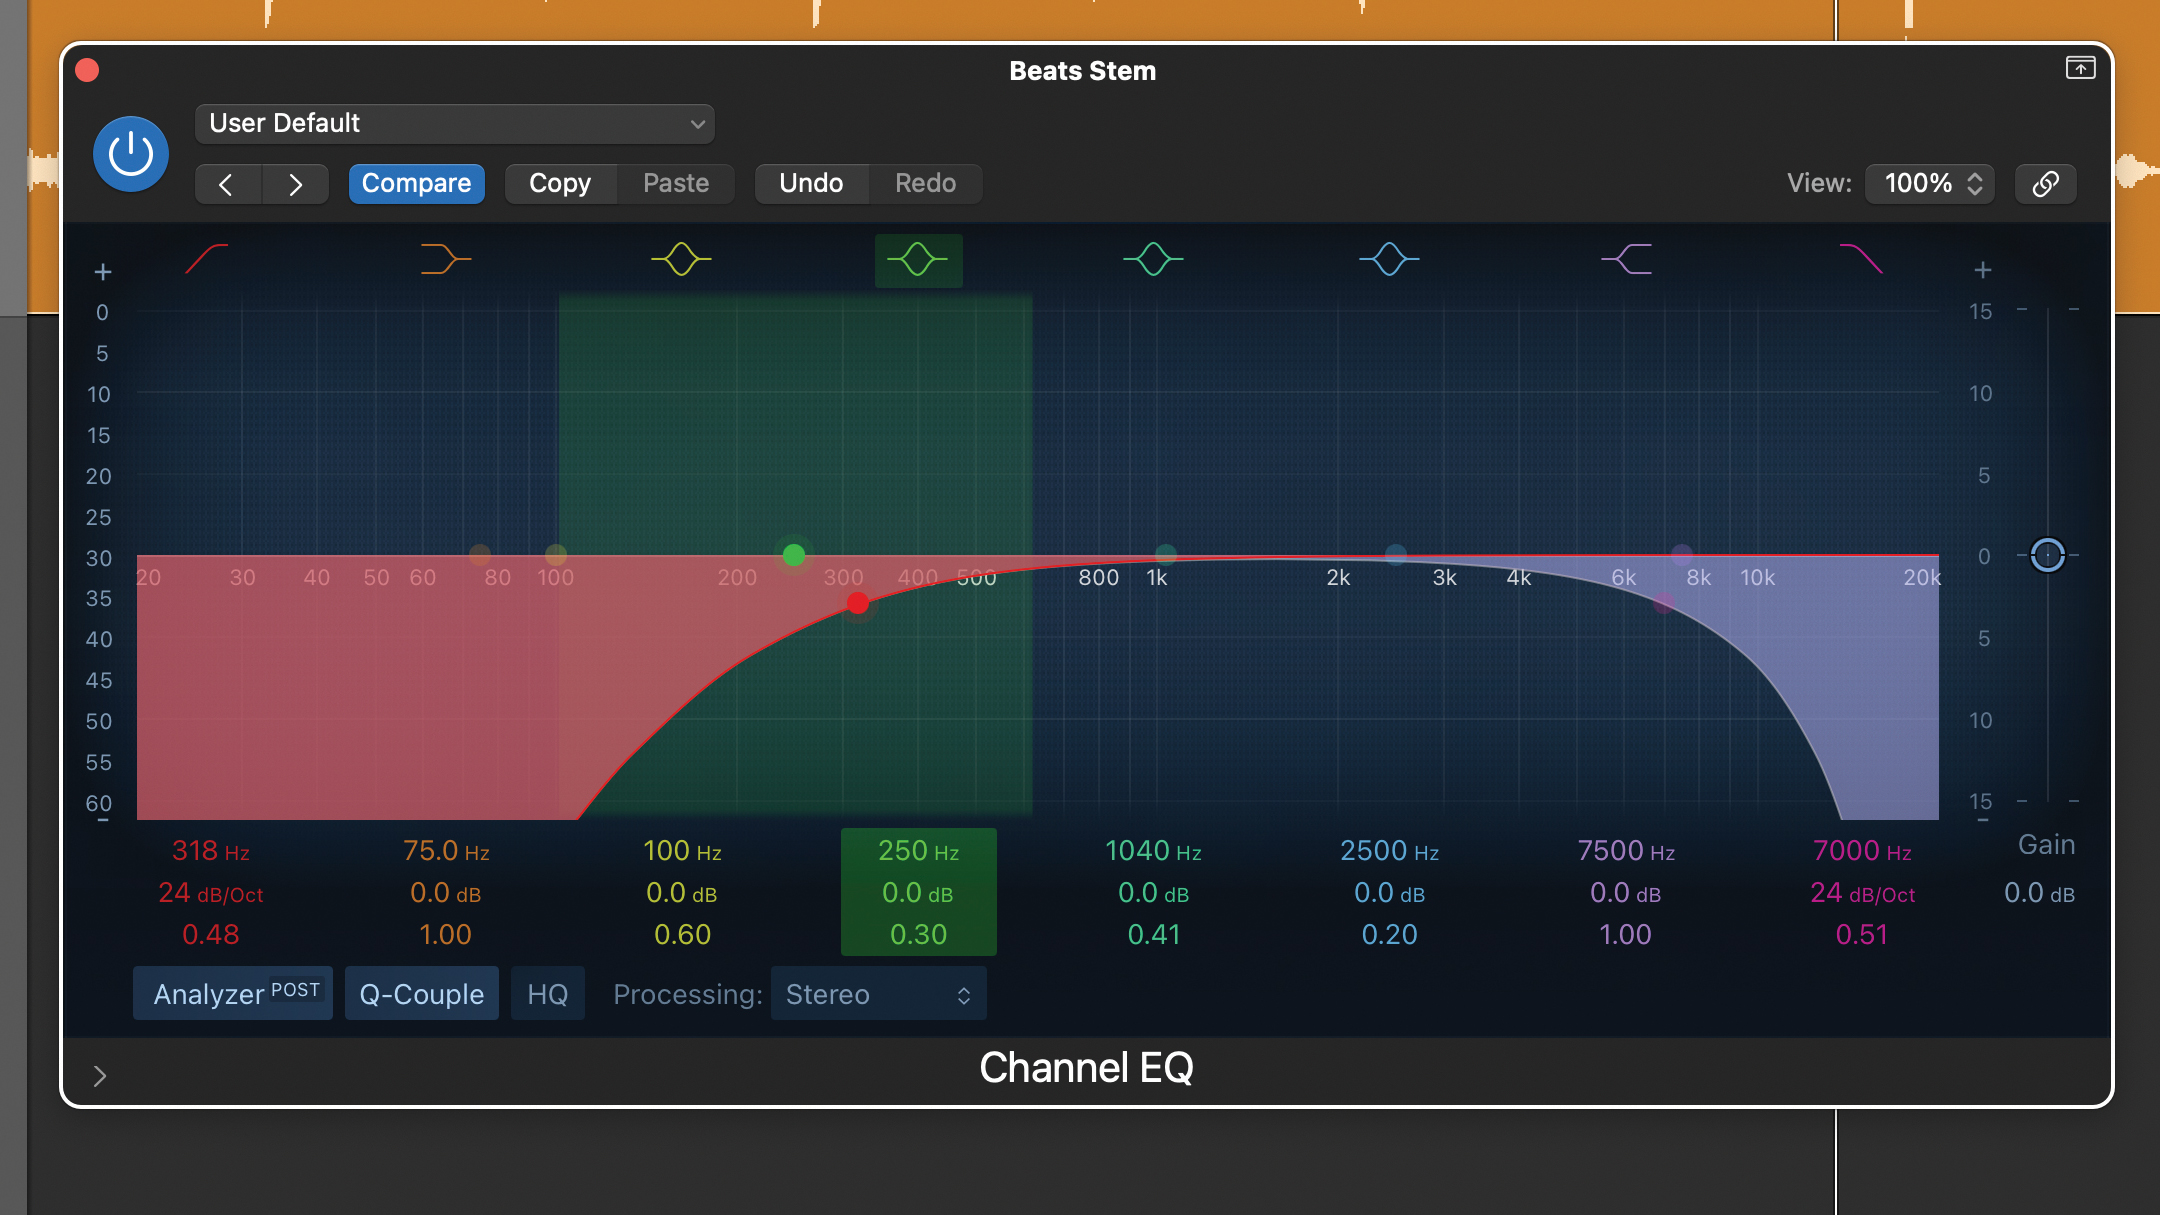
The sweeping technique uses an exaggerated boost to help us focus our EQ. In contrast the filtering technique relies on temporarily removing frequencies so you can better hear a specific frequency range. You’ll need regular low pass and high pass filters which you can use individually or together.
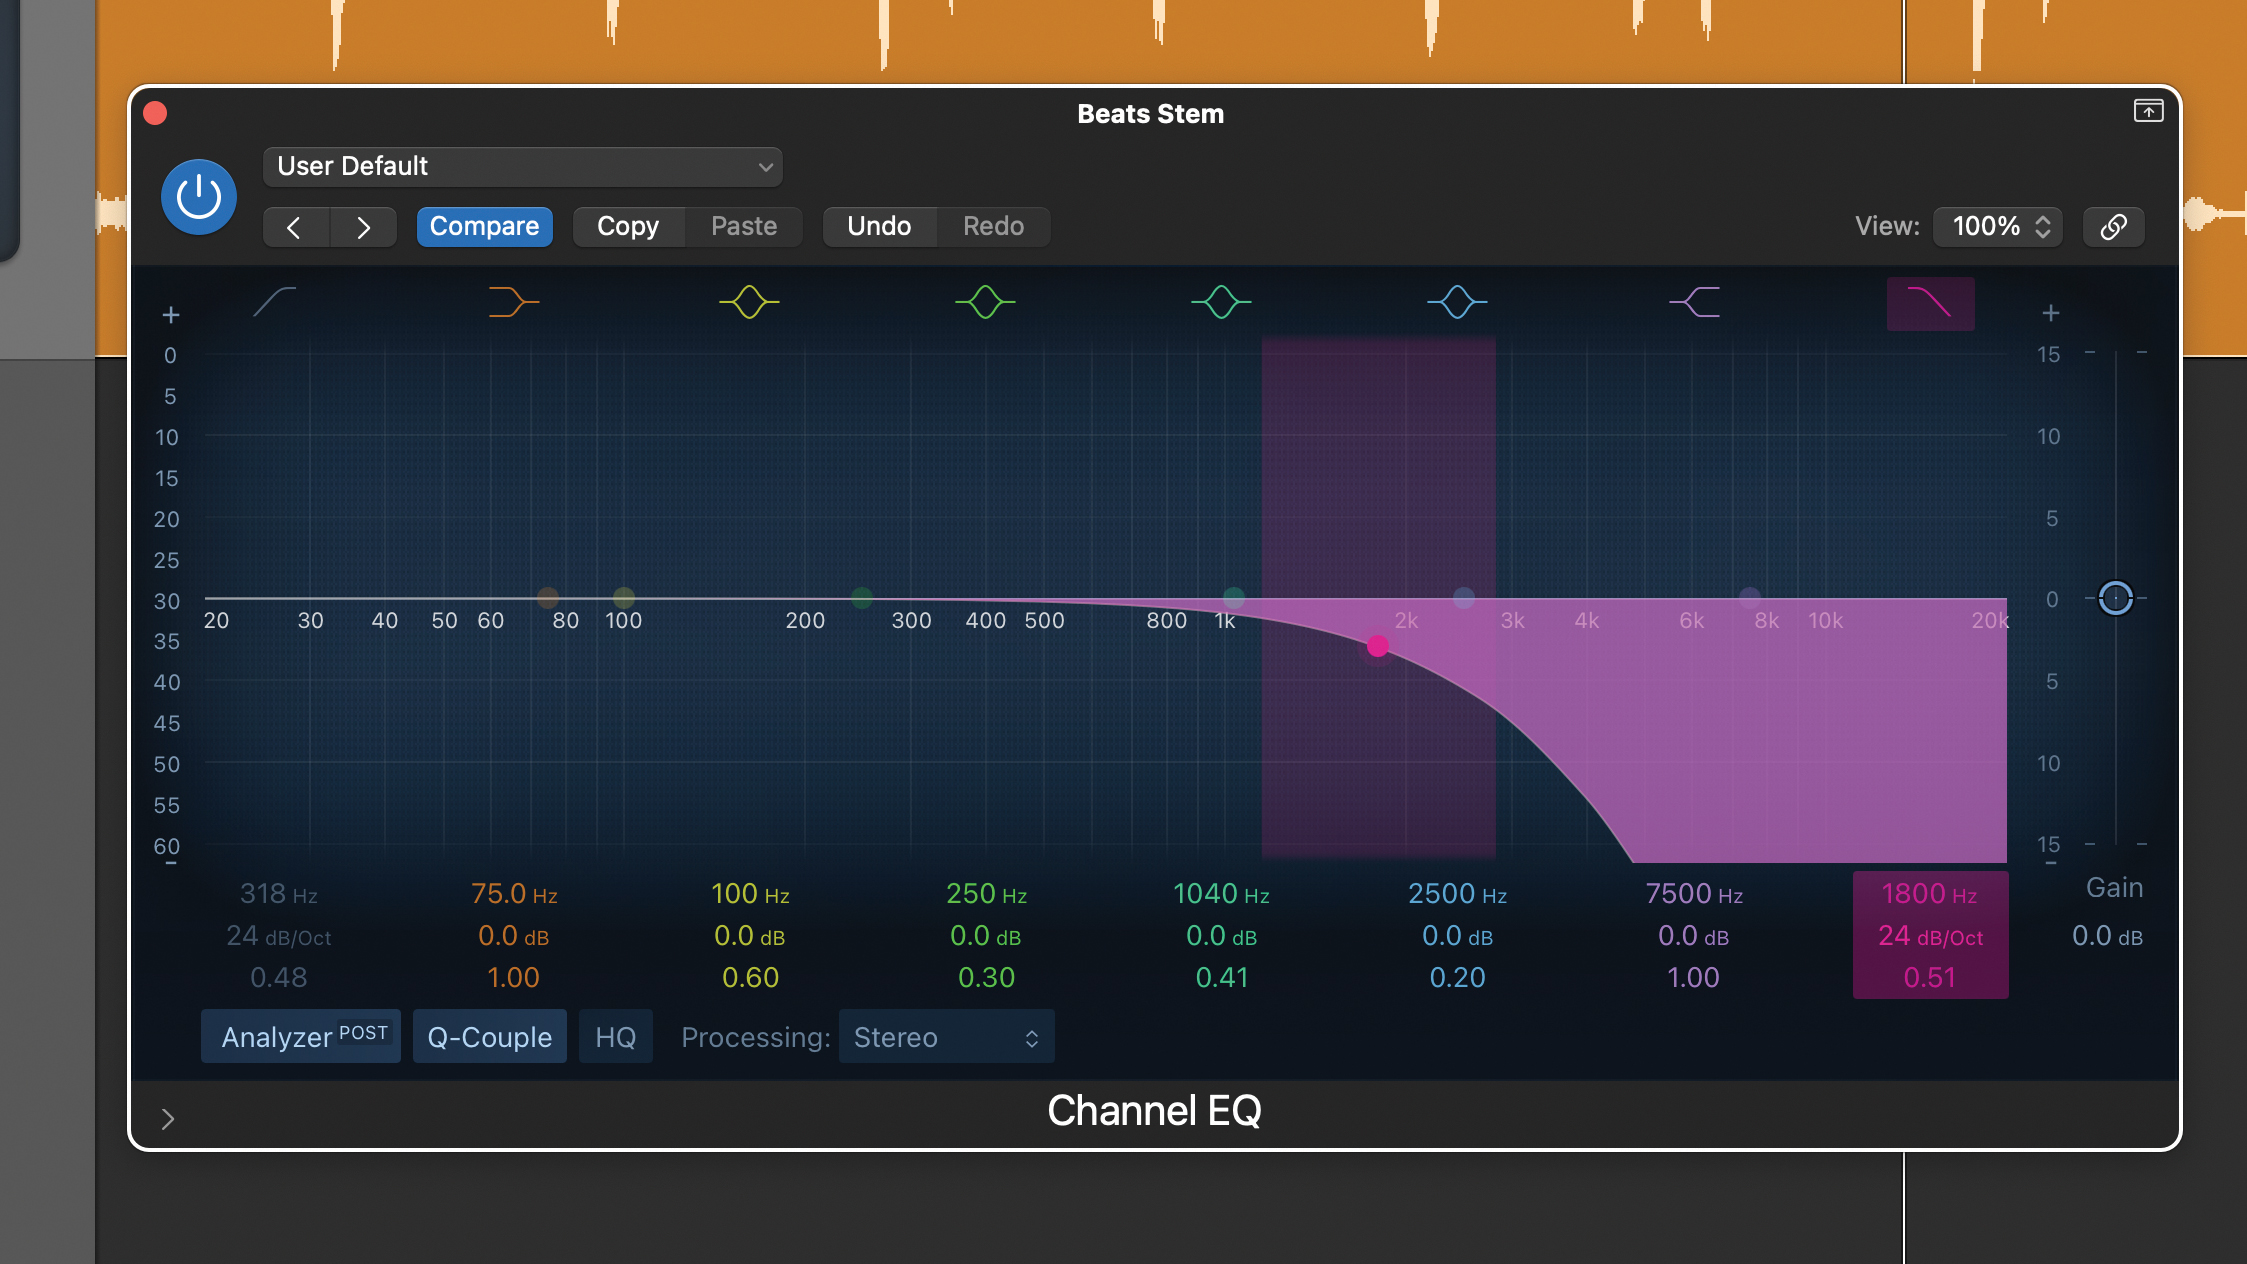
The technique is particularly effective when you’re EQing more complex sounds or pre blended stems or submixes, like our blended beats stem. Here we’ve activated a low pass filter with a medium slope (24dB/octave) and low Q (about 0.5) so the filter shouldn’t add any misleading resonance.
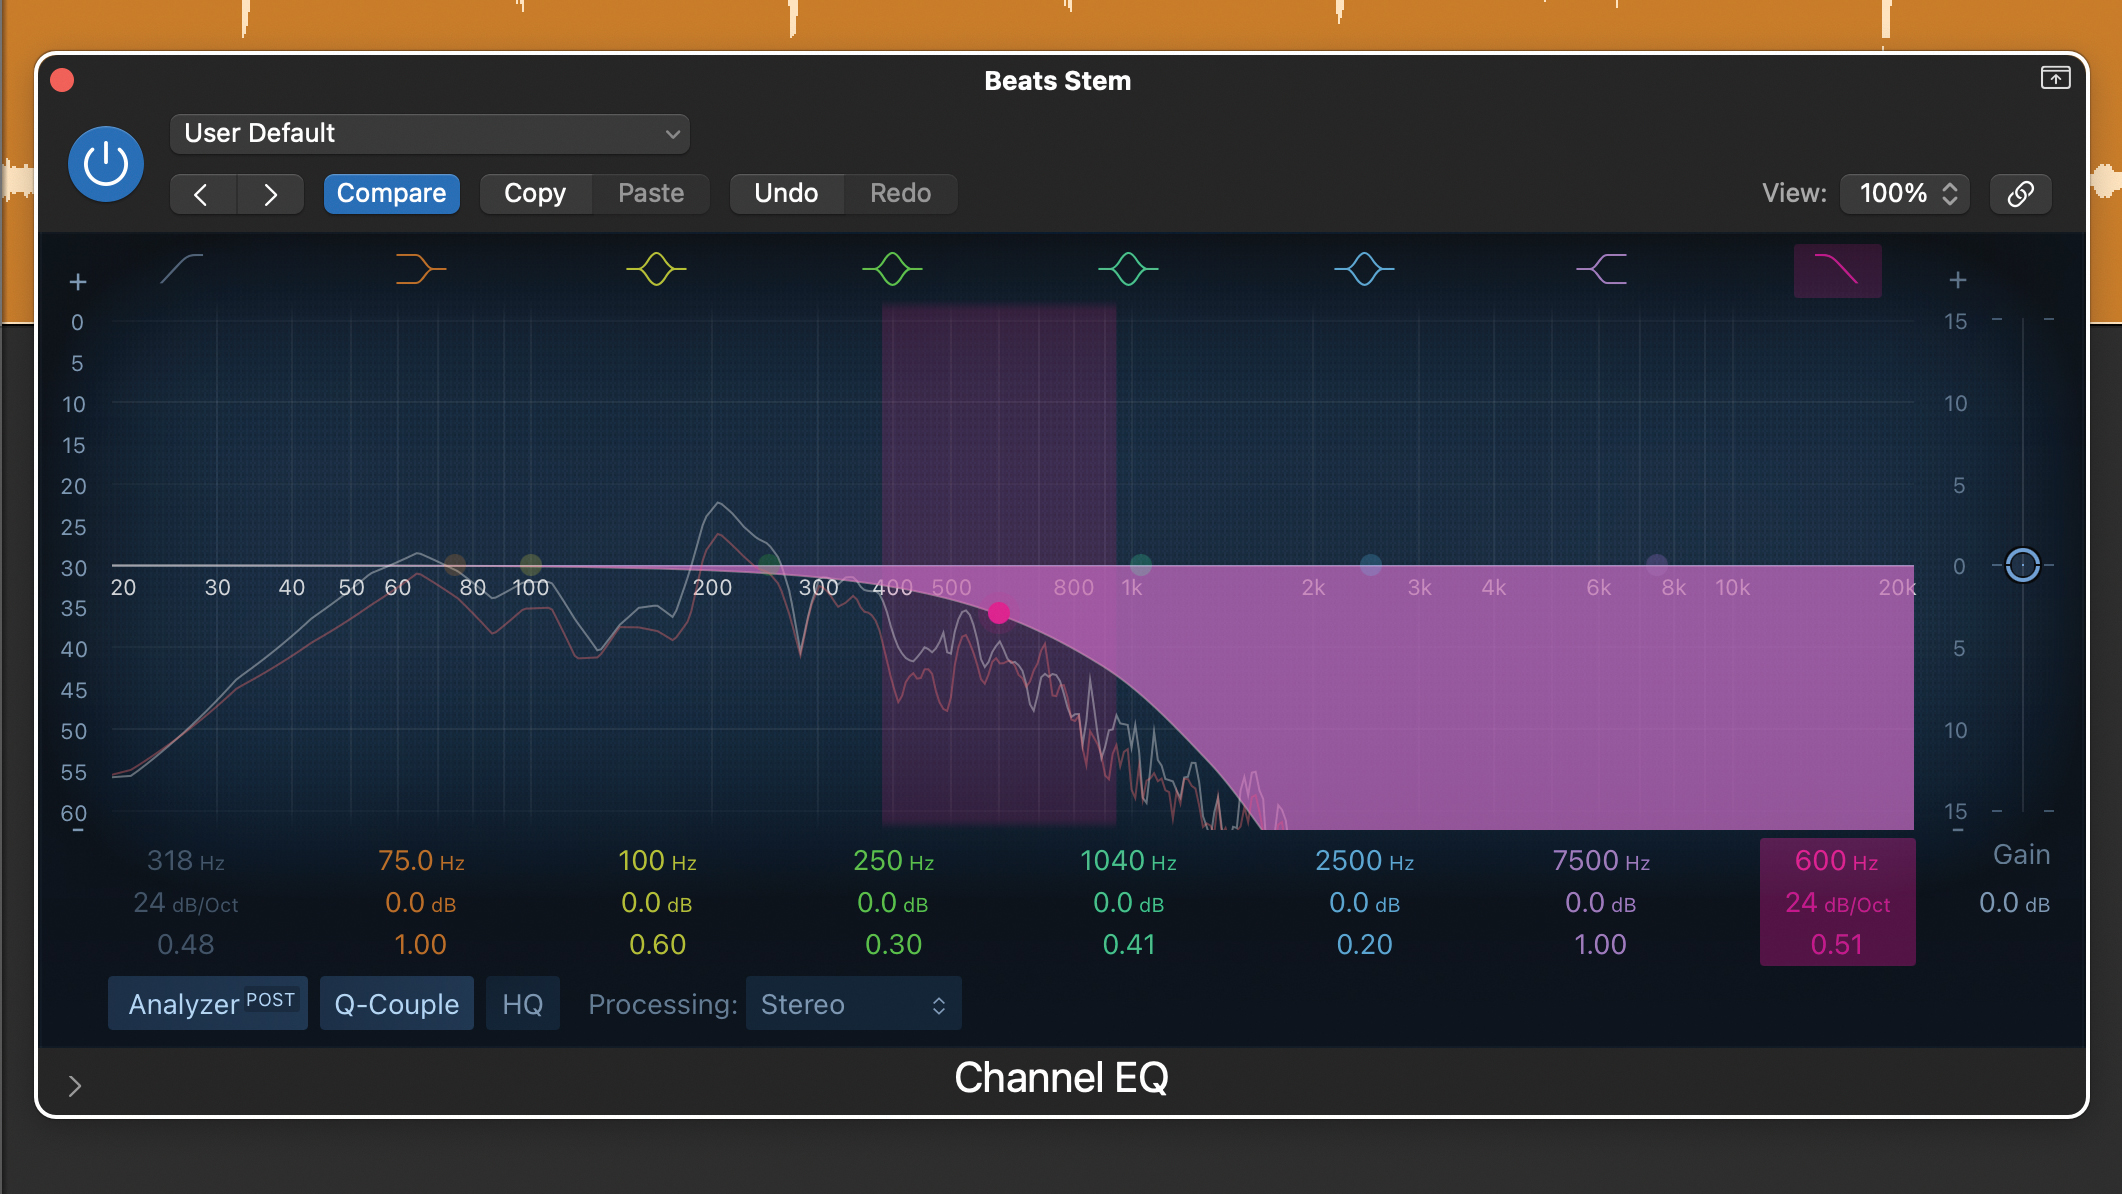
By lowering the cut off frequency we’re not distracted by the mid and upper frequencies. With the cutoff at about 600Hz we can hear the body frequencies for the kick, snare, congas and cowbell and even start EQing them. Once you’re happy, simply bypass or remove the low pass filter.
Pro Tip: using the analyser
One of the greatest benefits of mixing in a DAW is the plethora of available analysis tools, and EQs with their own in-built frequency spectrum analysers are a perfect example.
At their best, these will show you a graphic representation of your EQ curve superimposed on a real time analysis curve. This combo not only helps you EQ but also provides a great way to learn and understand the frequency make up of different sounds.
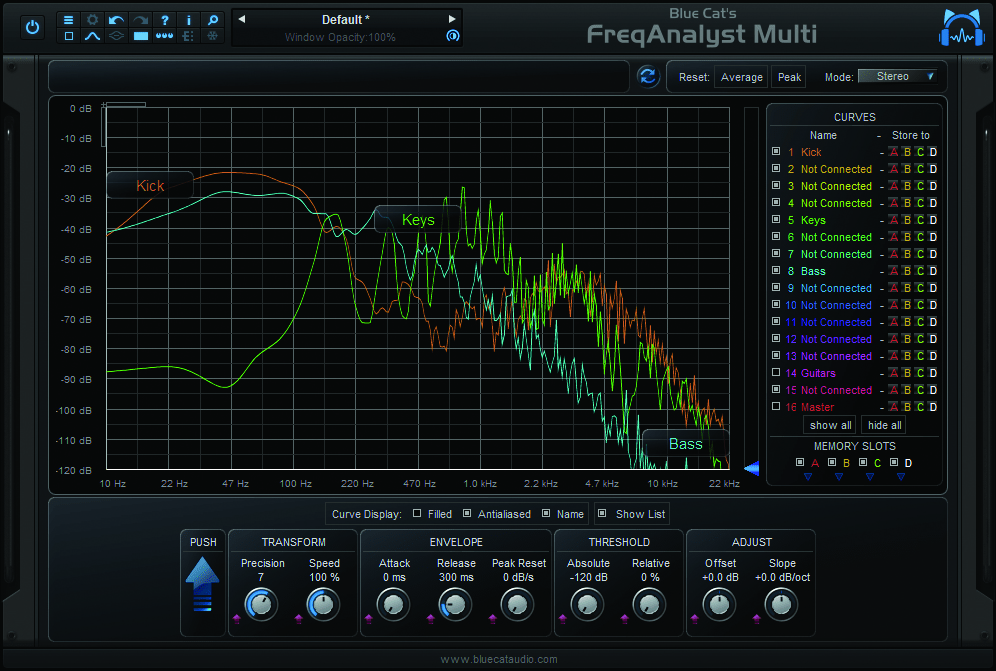
Of course, the visual feedback is only useful if we can interpret it properly. On the horizontal axis you’ll find frequency, with amplitude on the vertical axis. The frequency scale is logarithmic, and each doubling of frequency, so each octave, is evenly spaced out.
This puts 500Hz roughly in the middle, and means we’ll often be viewing fundamental frequencies to the left hand side and higher harmonics to the right. Lower frequencies generate more obvious curves, and here you should be able to distinguish individual notes in a bass part.
Recommended listening
1. Drake - God's Plan
When you’ve got multiple 808s to handle, pinpointing specific frequencies can be vital.
2. Armin Van Buuren - Another You (feat. Mr. Probz)
EQ is a key tool when mixing the many competing elements and layers in a trance track.
Jon is a London based platinum award winning mixer, producer, composer and club remixer with a diverse CV that spans dance, pop, rock and music for media. He’s also a long term contributor to MusicRadar's music technology tutorials and reviews. Whether working alone or collaborating he usually handles final mixdowns, so you’ll also find MusicRadar peppered with his handy mixing tips.
