How to use mid/side EQ in Ableton Live: "When we split mid and sides, we can take the opportunity to adjust the levels of these elements individually, and even apply different effects to them"
Mid/side EQ is a mixing technique that can be put to practical or creative use, and Live has what we need to apply it
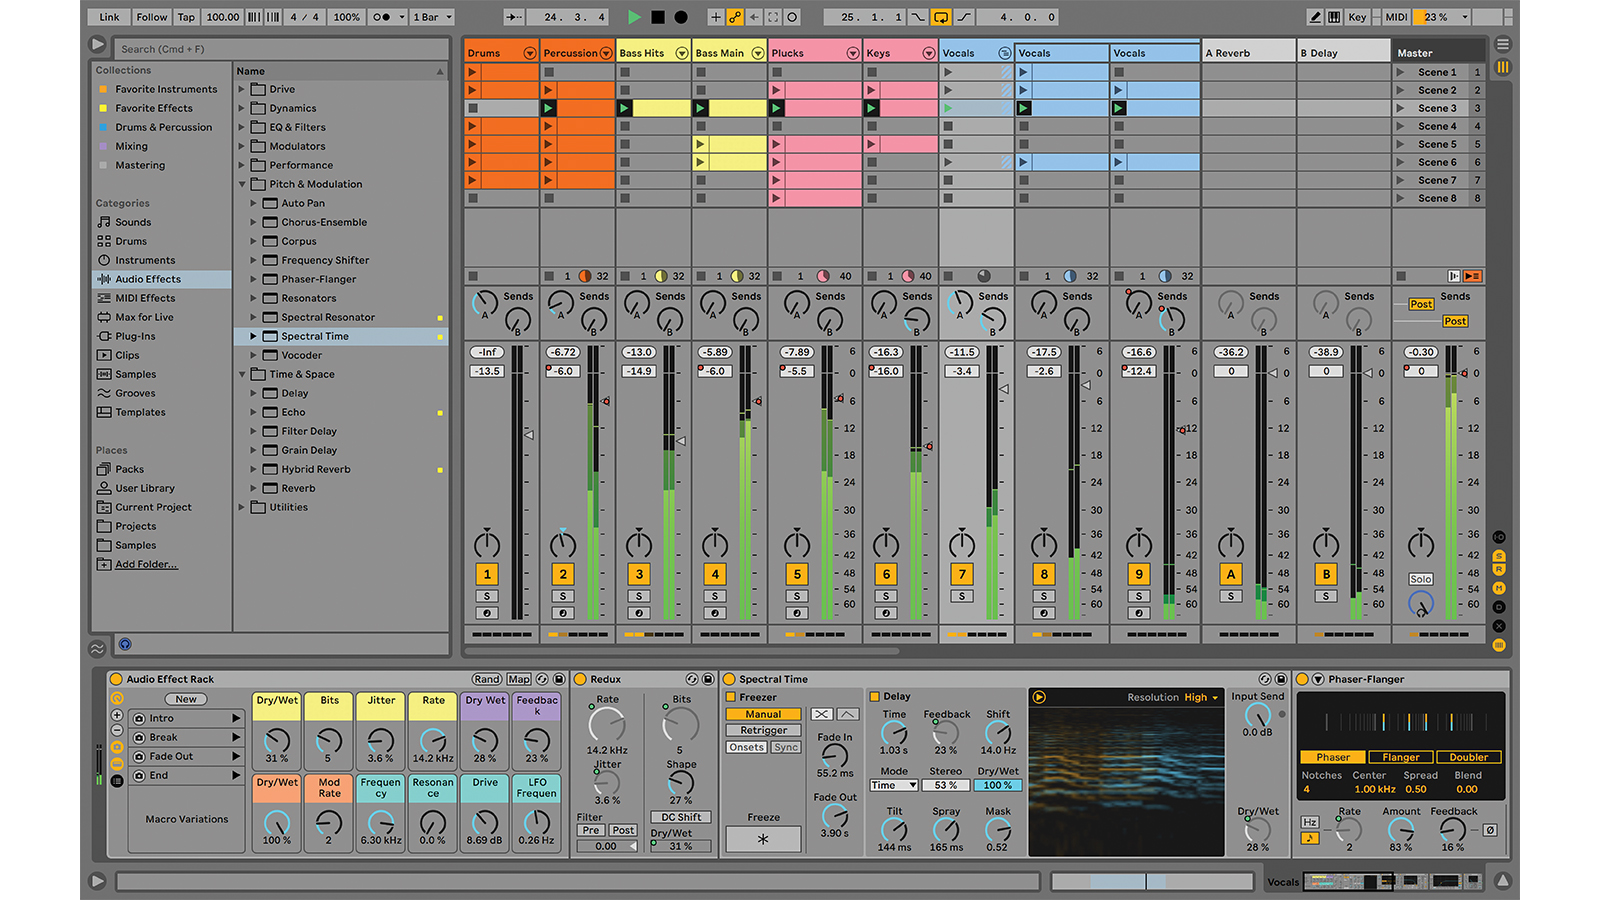
Mid/side EQ is a mixing technique that can be put to practical or creative use, and Live has what we need to apply it, via the EQ Eight and Utility audio effect devices (if using Live Intro which doesn’t include EQ Eight, keep reading, we’ve got you covered).
EQ, or equalisation, is the science and art of cutting and boosting selected frequencies to improve the sound of individual tracks or an entire mix. Mid/side EQ is when we break down the elements of a stereo track signal and EQ them differently – the mid being the sounds common to both left and right stereo tracks, and the sides being the sounds that appear differently on the left and right sides of the stereo spectrum.
Another benefit is that when we split mid and sides like this, we can take the opportunity to adjust the levels of these elements, and even apply different audio effects to them. It’s something we’ve used to clean up stereo field recordings, and also enhance stereo files without affecting the centre, when mastering other people’s music and the stereo files are all we have.
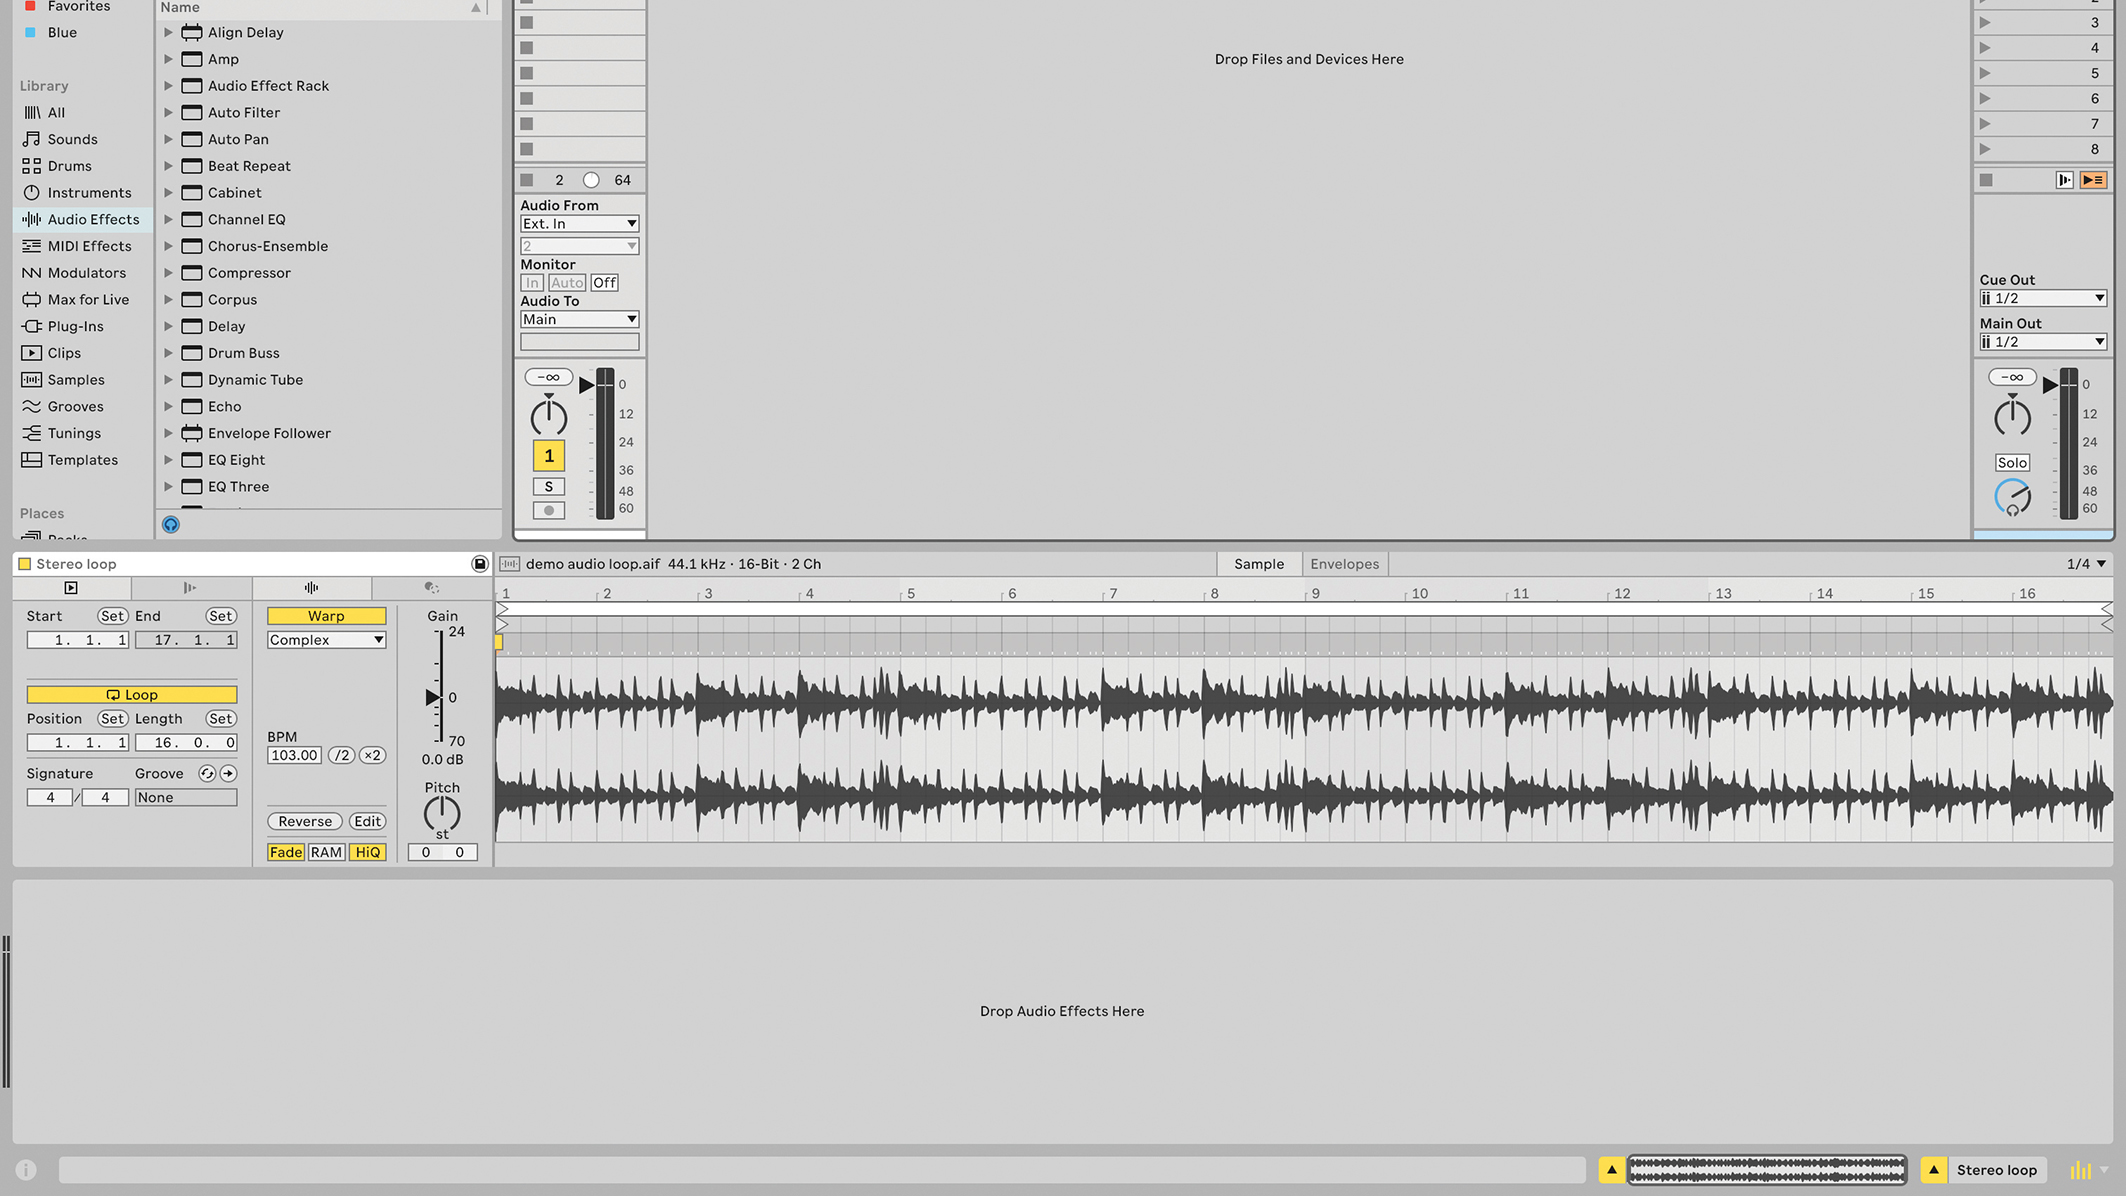
Open Ableton Live and import or create a stereo source; it could be a stereo mix of a song, or even a MIDI part made with one of Live’s factory instruments, anything that you want to experiment with. It could even be one of those fat bass synth sounds that sounds great alone, but swamps the other tracks in a mix. We want some stereo to interact with.
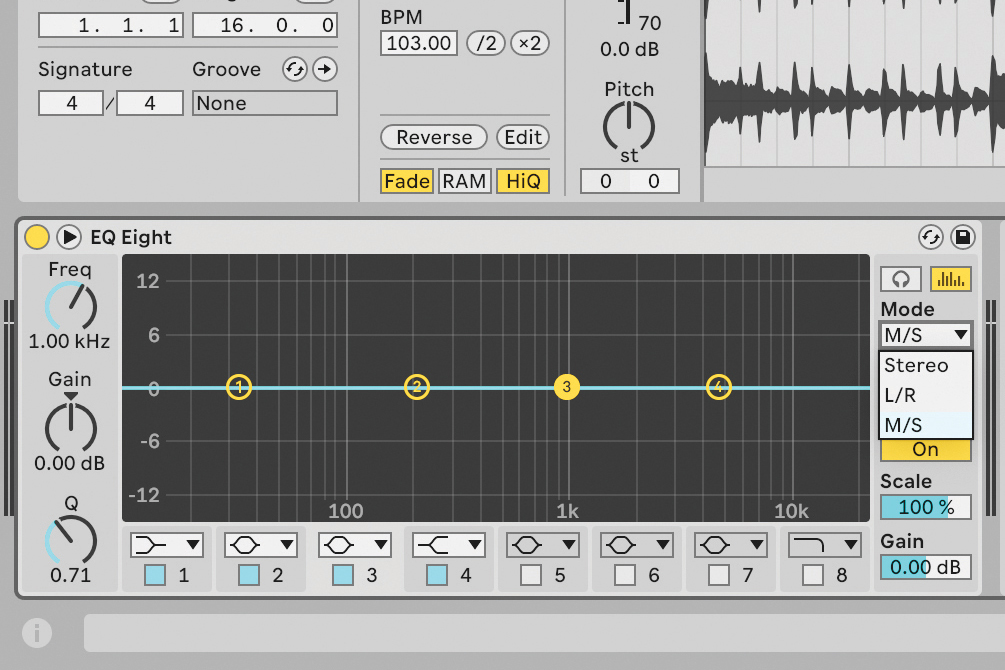
Load the default EQ Eight preset from the Audio Effects section in Live’s Browser, and locate the Mode button towards the right side of the interface. There are three options here: Stereo (the default, where left and right channels in a stereo signal are jointly affected by EQ changes), L/R (which separates the left and right channels in a stereo signal), and the third option, M/S.
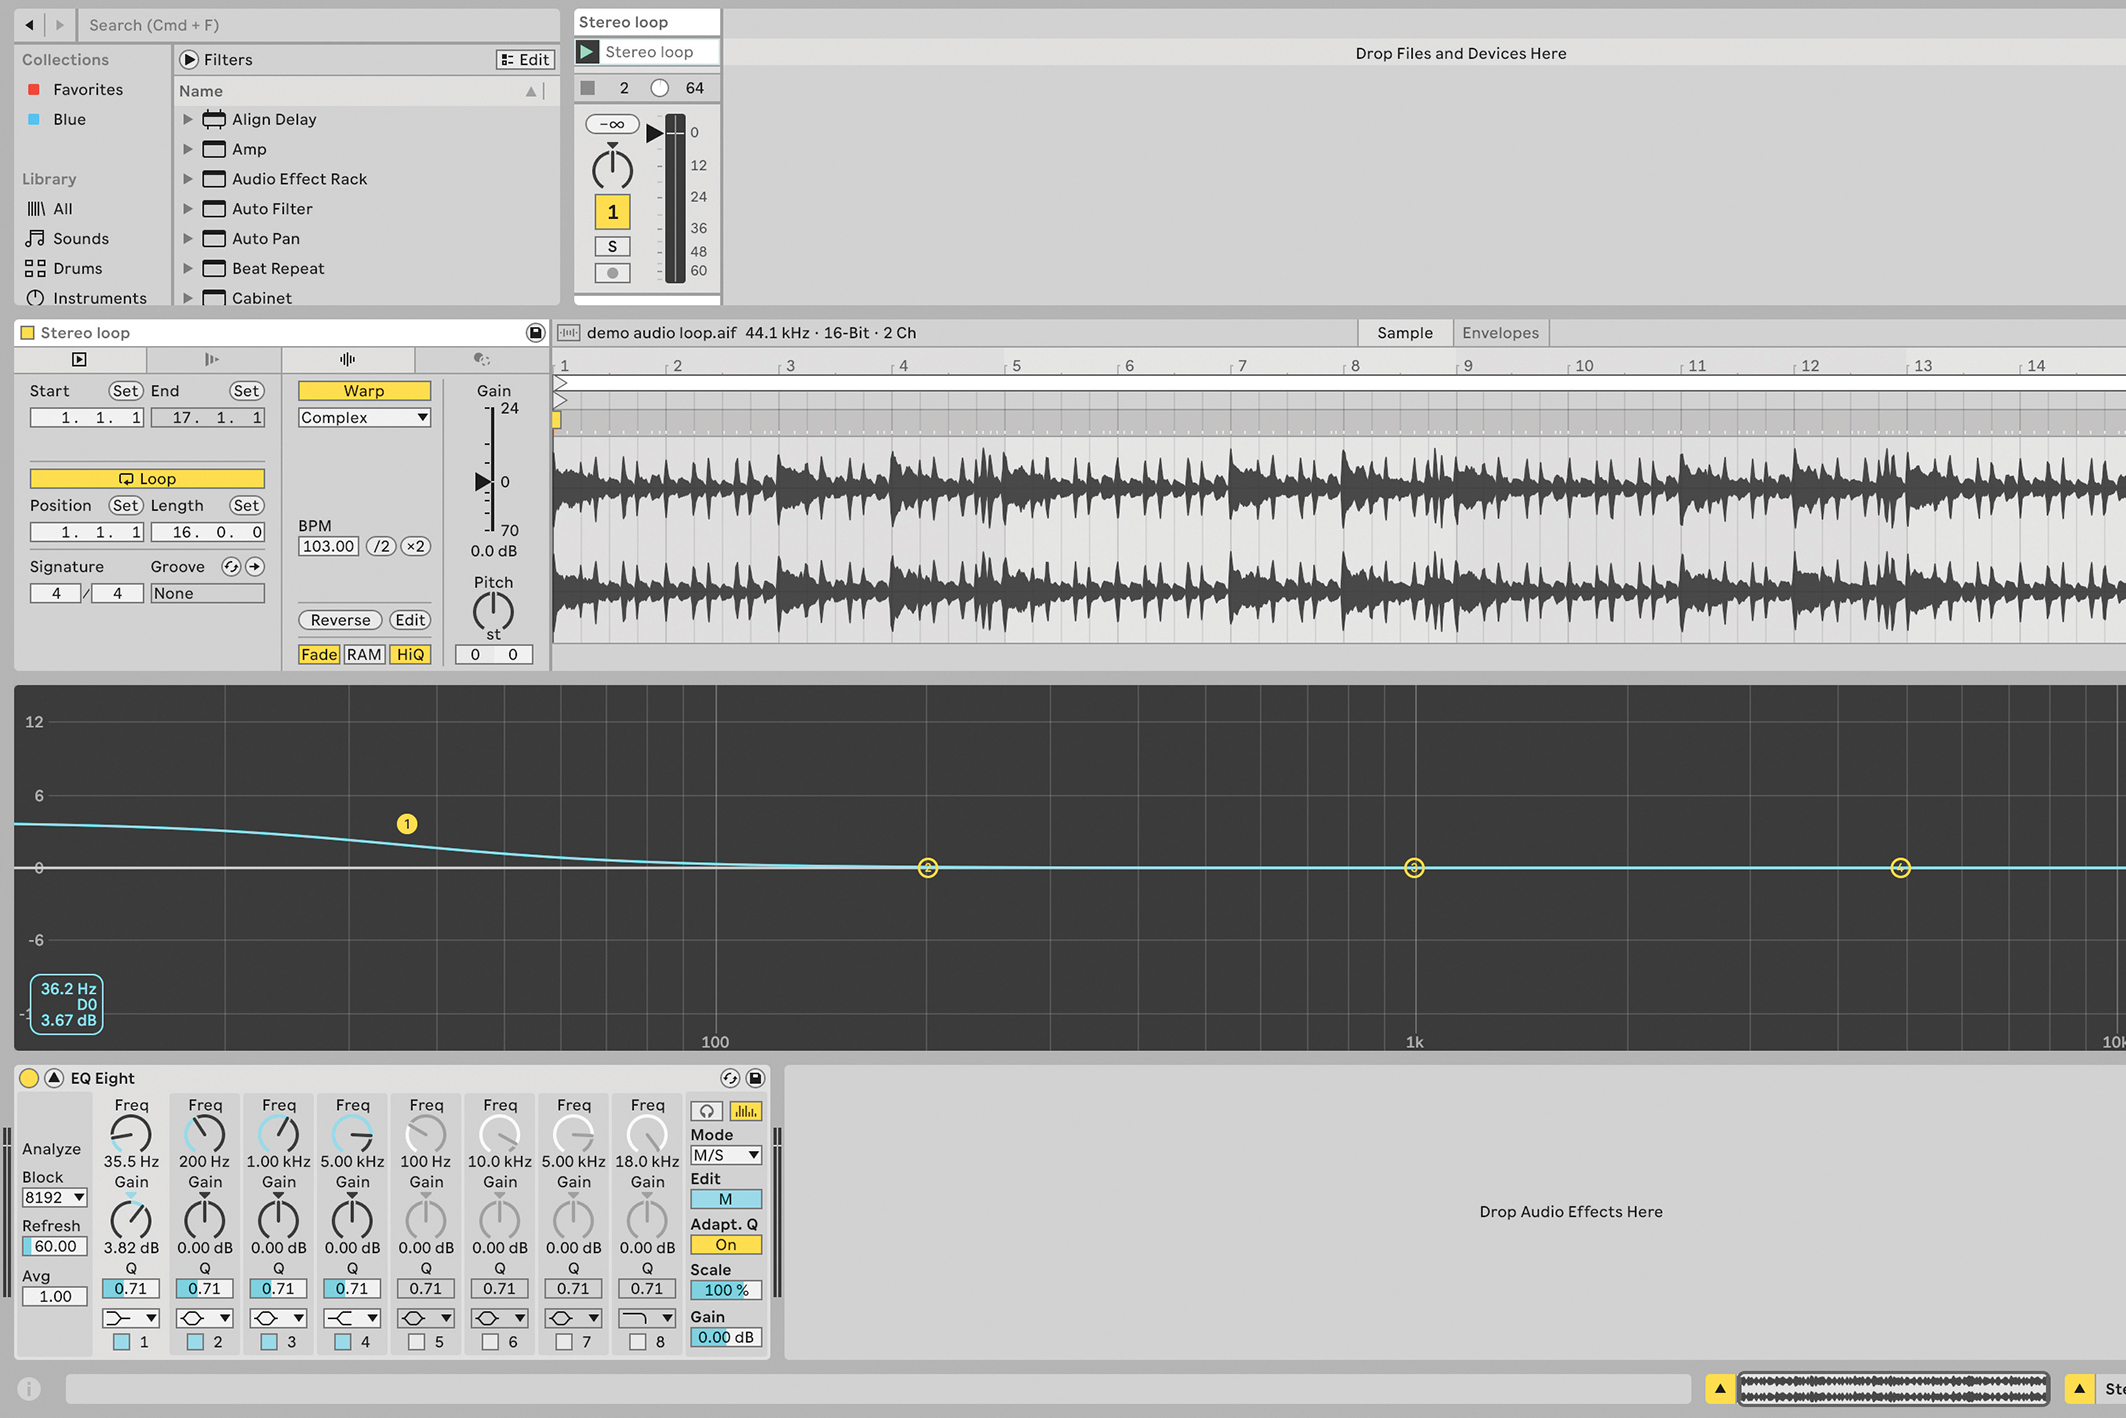
The Edit button below that will now show alternately S or M as you click it, and at the same time, the central display with the default four filters (up to eight should you need them) will update according to the current mode. Now you can apply different EQ values to each. Use the EQ Eight’s triangular toggle button to expand the view for more detail.
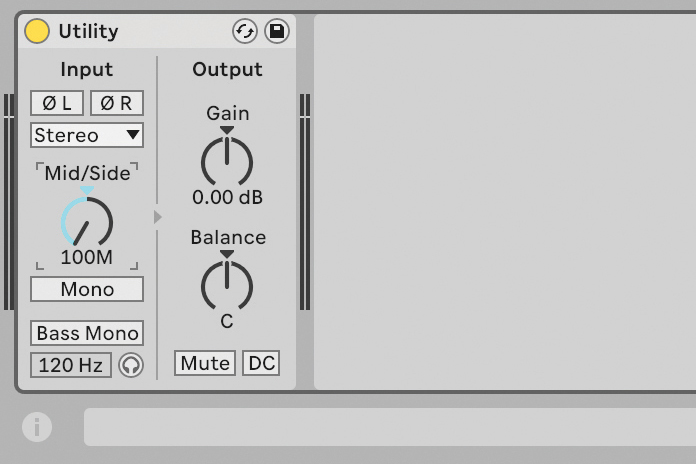
As mentioned in our intro, the EQ Eight effect is not included in Live Intro. But we can get round this thanks to audio effect racks. Instead of EQ Eight, load Utility. Right-click/control-click on Utility’s Width control, and choose Mid/Side Mode. Set the control all the way to the left, so it says 100M. Now you’ll only hear the common middle part of the stereo signal.
Get the MusicRadar Newsletter
Want all the hottest music and gear news, reviews, deals, features and more, direct to your inbox? Sign up here.
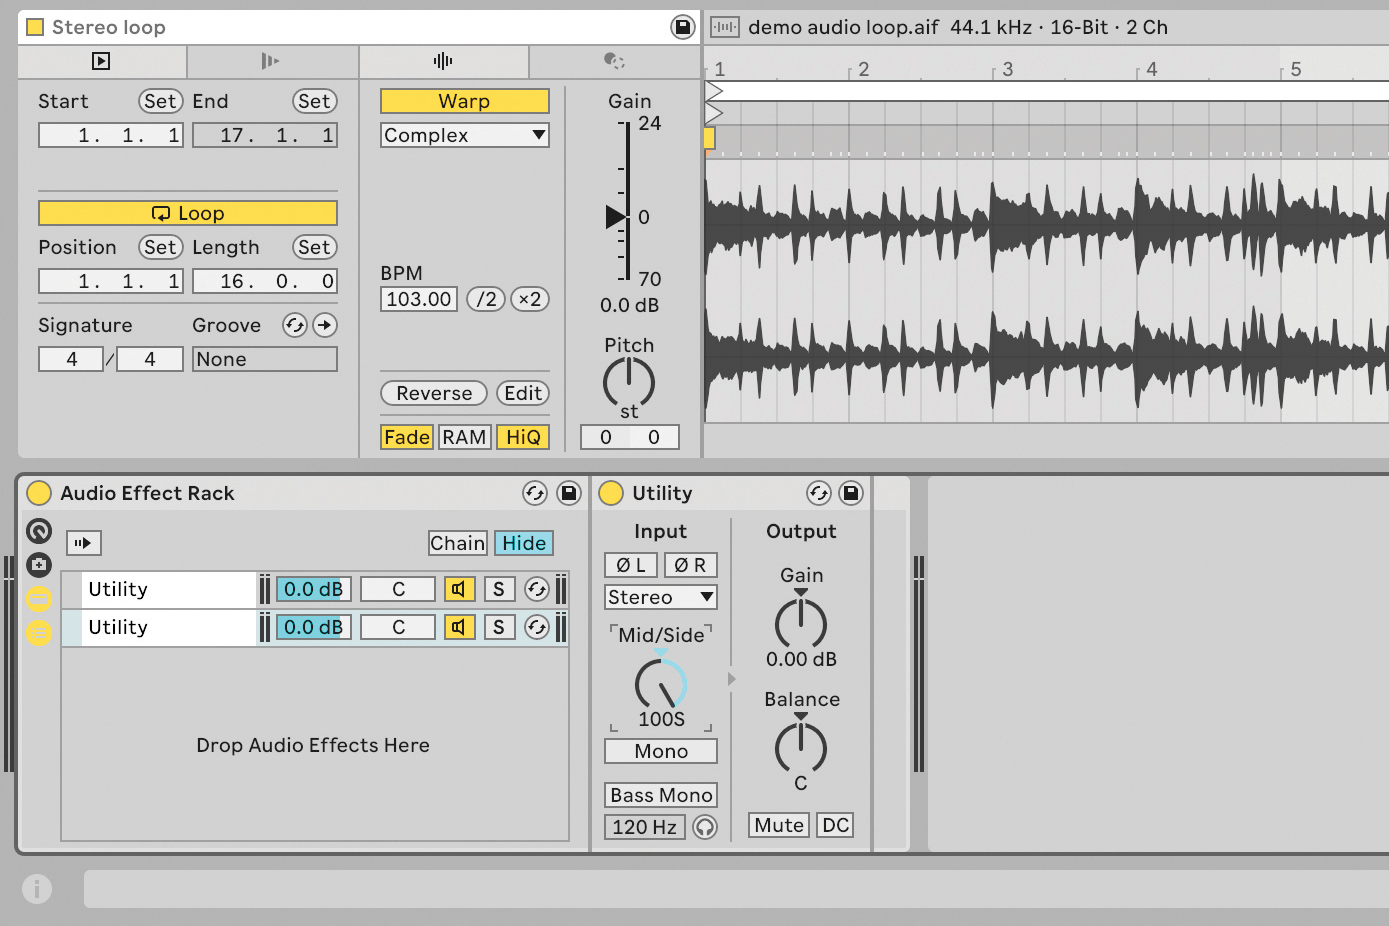
Right-click/control-click on the Utility effect that you’ve loaded, and choose Group, creating an audio effect rack containing Utility. Click the small Chain List button at the left of the rack, and you’ll see the Utility chain. Click the chain, and type cmd-d to duplicate. In that new chain, change the Utility M/S setting so it says 100S. Your stereo source should sound normal.
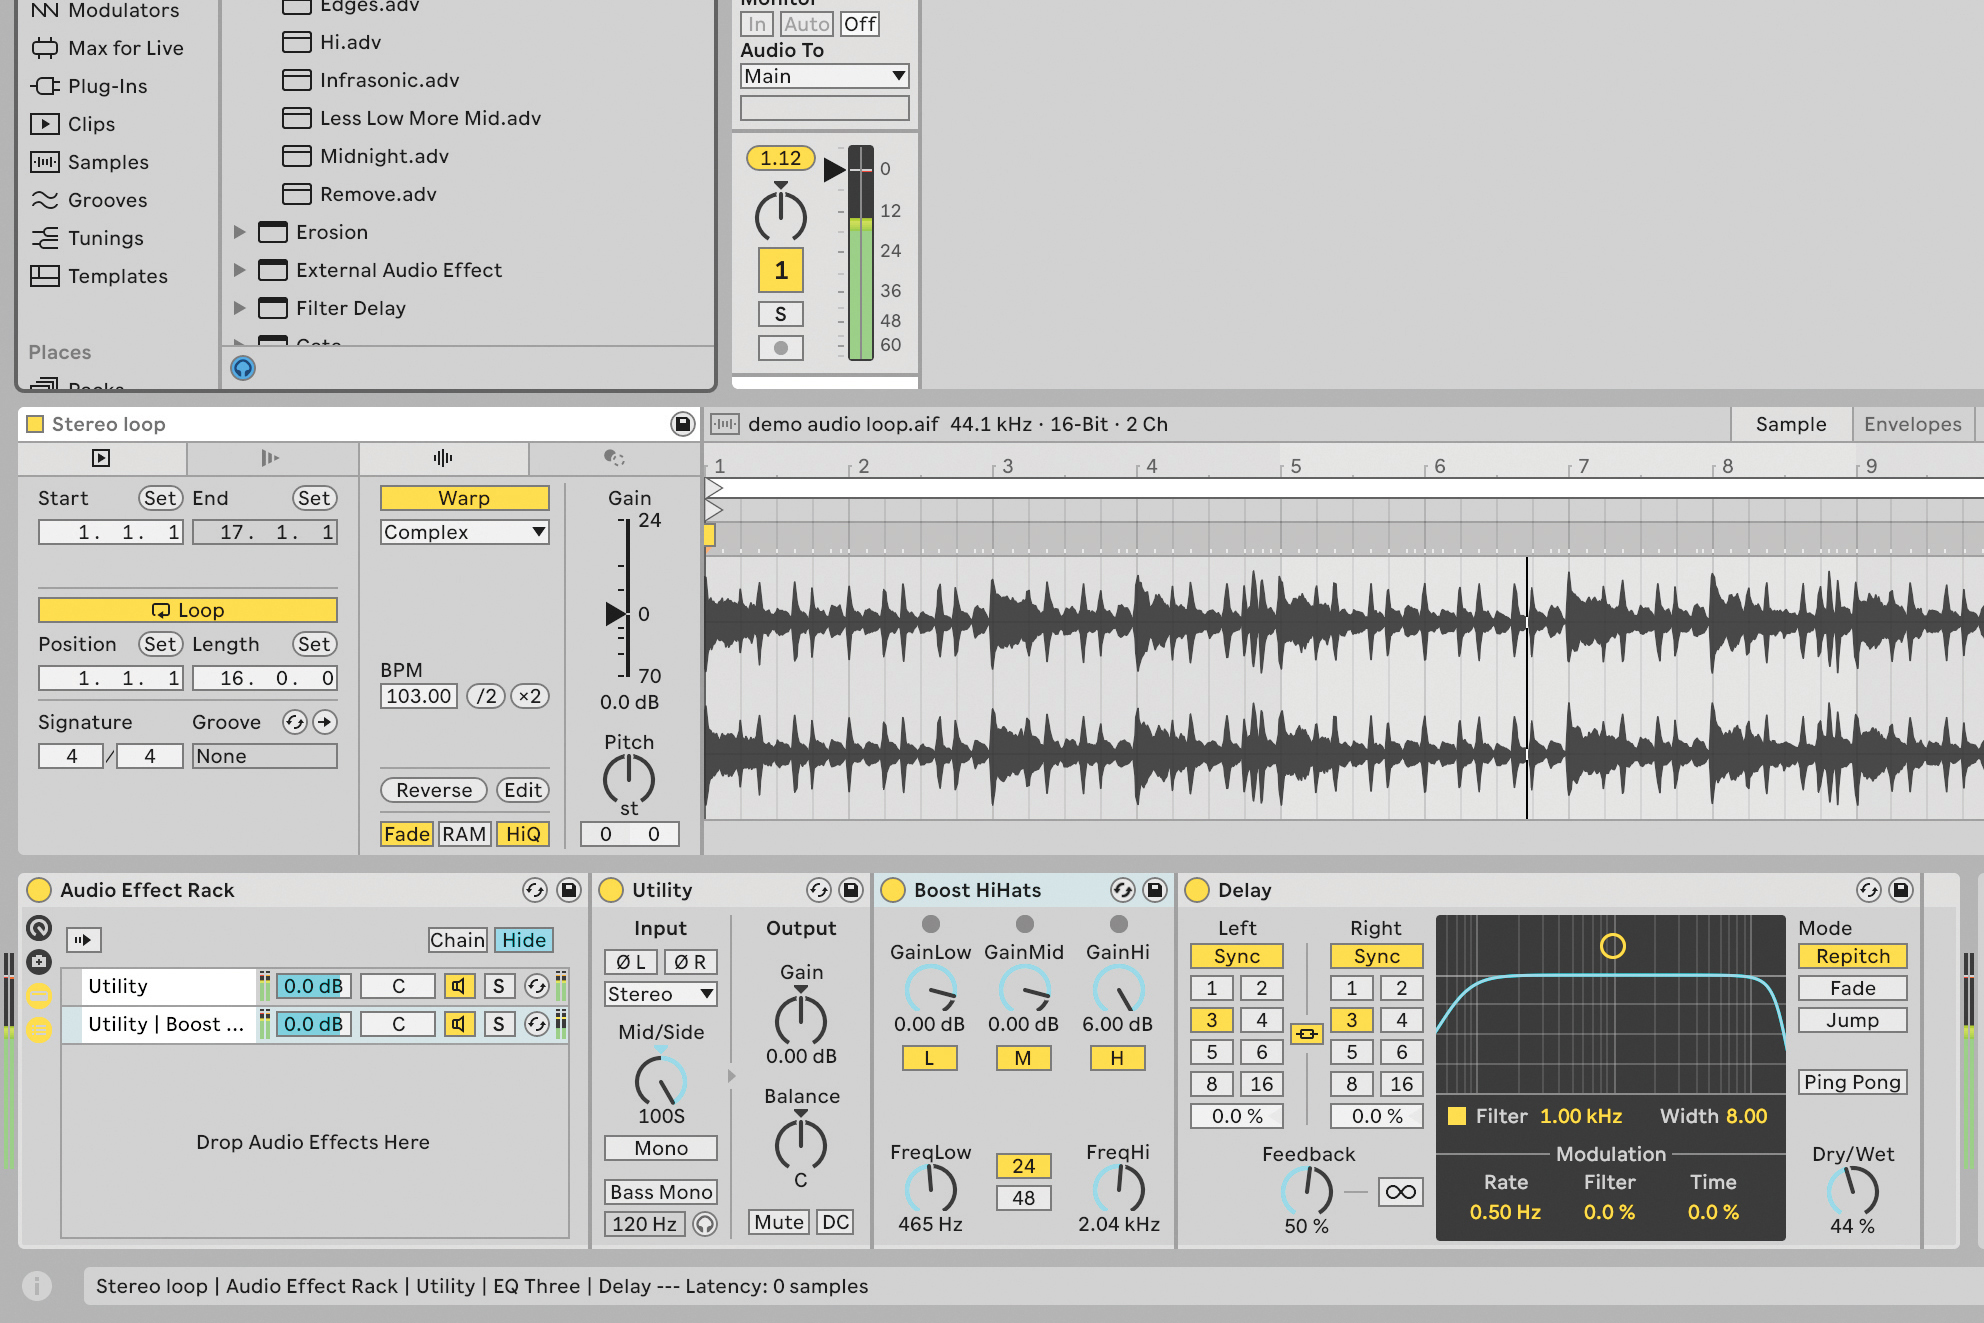
This technique works with any version of Live. Now we’re free to use the rack mixer to adjust levels of the mid/side signals. We can also insert a Channel EQ on each chain, and set them differently. Imagination is the only limit, because of course we’re also free to drop any audio effects we want onto the individual chains; compress the mids, add reverb to the sides, and so on.

Martin Delaney was one of the UK’s first Ableton Certified Trainers. He’s taught Ableton Live (and Logic Pro) to every type of student, ranging from school kids to psychiatric patients to DJs and composers. In 2004 he designed the Kenton Killamix Mini MIDI controller, which has been used by Underworld, Carl Craig, and others. He’s written four books and many magazine reviews, tutorials, and interviews, on the subject of music technology. Martin has his own ambient music project, and plays bass for The Witch Of Brussels.
"If I wasn't recording albums every month, multiple albums, and I wasn't playing on everyone's songs, I wouldn't need any of this”: Travis Barker reveals his production tricks and gear in a new studio tour
“My management and agent have always tried to cover my back on the road”: Neil Young just axed premium gig tickets following advice from The Cure’s Robert Smith


