How to add level rides to a mix
Riding the faders can be a vital way to control a mix. Here’s when and why your levels should react with super-fast dexterity
Want all the hottest music and gear news, reviews, deals, features and more, direct to your inbox? Sign up here.
You are now subscribed
Your newsletter sign-up was successful
We typically use compression to iron out undesirable level differences but usually this is coupled with level rides both to add drama and to finesse our mix levels.
Once upon a time, level rides would have been performed live as the mix was printed. Then desk automation and DAW automation made these moves that bit more repeatable, recallable and much easier to execute. Indeed, the ability to draw and edit fader levels to quickly achieve incredibly accurate moves is without a doubt one of the biggest successes of DAW-based mixing.
Nevertheless, knowing when to use that flexibility is a skill, and if you start adding complex automated level changes to multiple tracks at the early stages of your mix, you’ll more often than not end up in a mess. A good rule of thumb is to start by getting the mix sounding as good as possible with no level rides, but, at the same time, think ahead to where and when level rides will be needed. As could be said for the progression of a mix in general, when it comes to adding rides, initial changes are quite broad but become more focused and precise as the mix progresses.
Article continues belowOf course, not every track will need rides, and techniques range from very precise word specific changes on a vocal, to broader section by section moves on instrumentation, and finessing fades on effect tails. In this tutorial we’ll look at various scenarios. Let’s get to it.
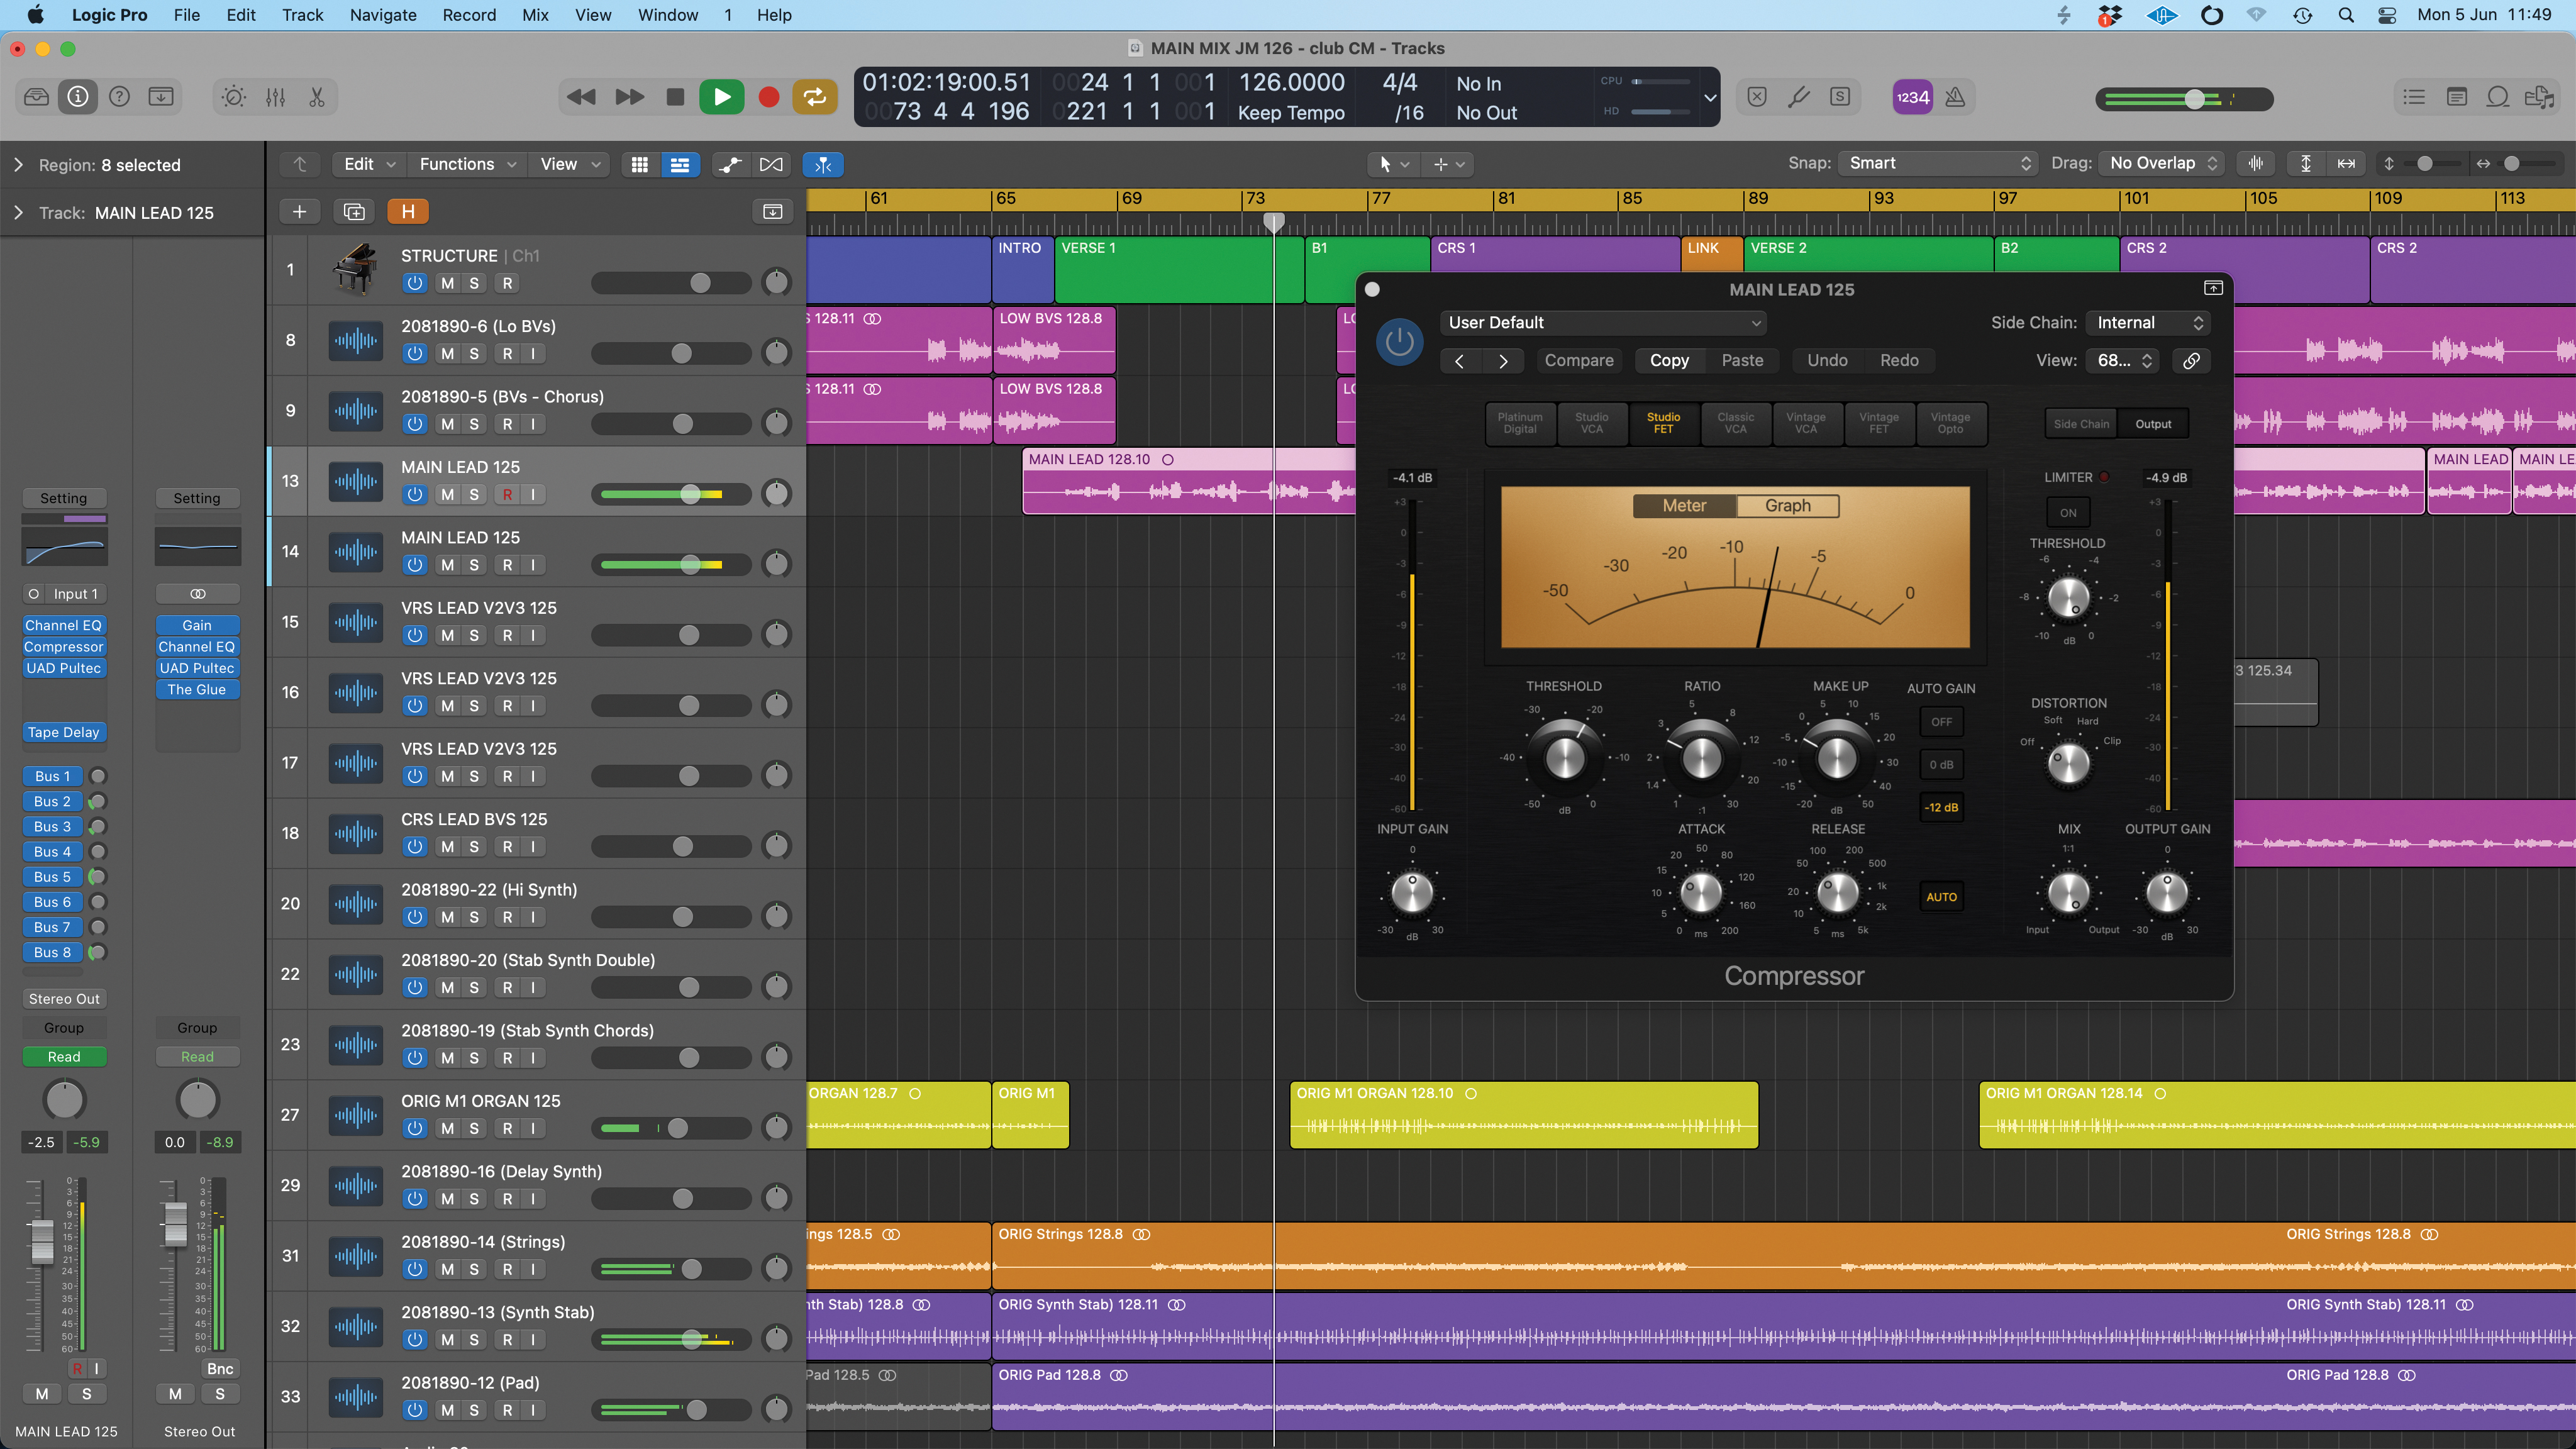
Compression can go a long way towards levelling out our audio and making multiple tracks easier to balance. Let’s start by assuming that you’ve already done this and have a good balance in place, but that some elements won’t sit throughout, or sometimes get lost. This is a good point to start adding level rides.
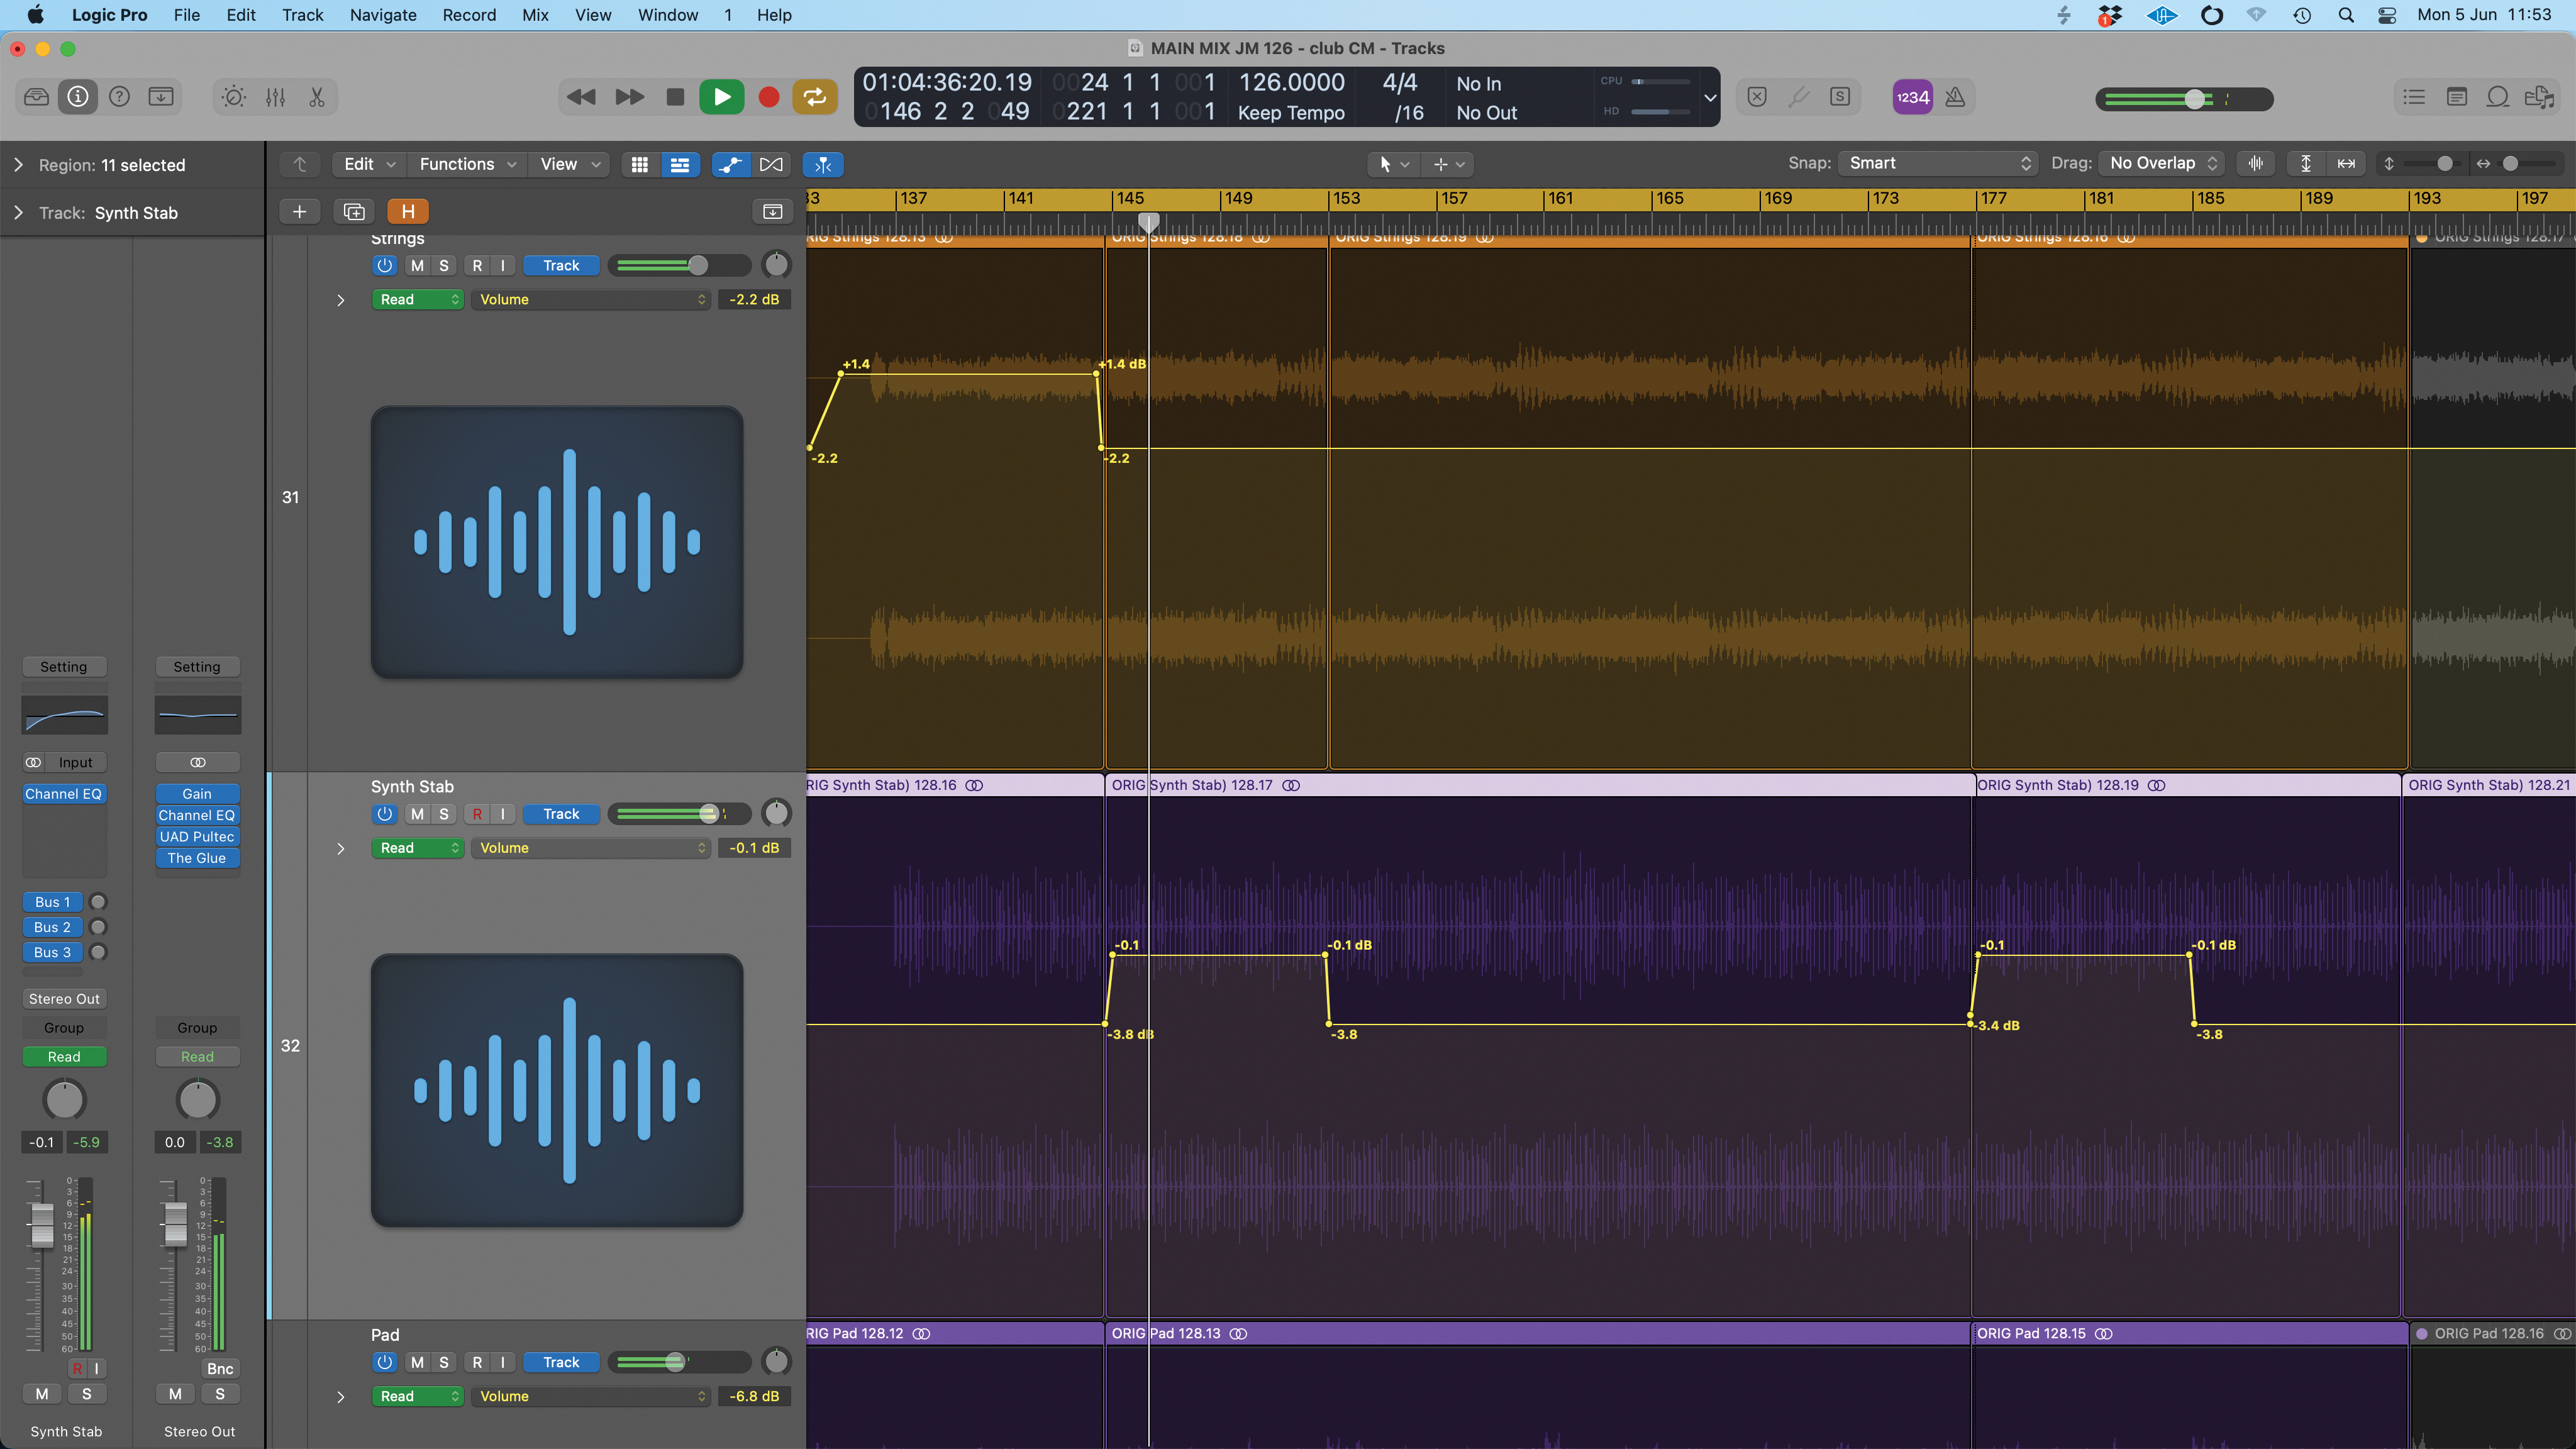
Initial moves are often quite basic and could simply be modifying levels for specific sections of track. A good example would be boosting specific instrumentation in a chorus section and bringing it back down in verse sections. Or we could use some basic level rides to even out inconsistent section levels of a lead vocal.
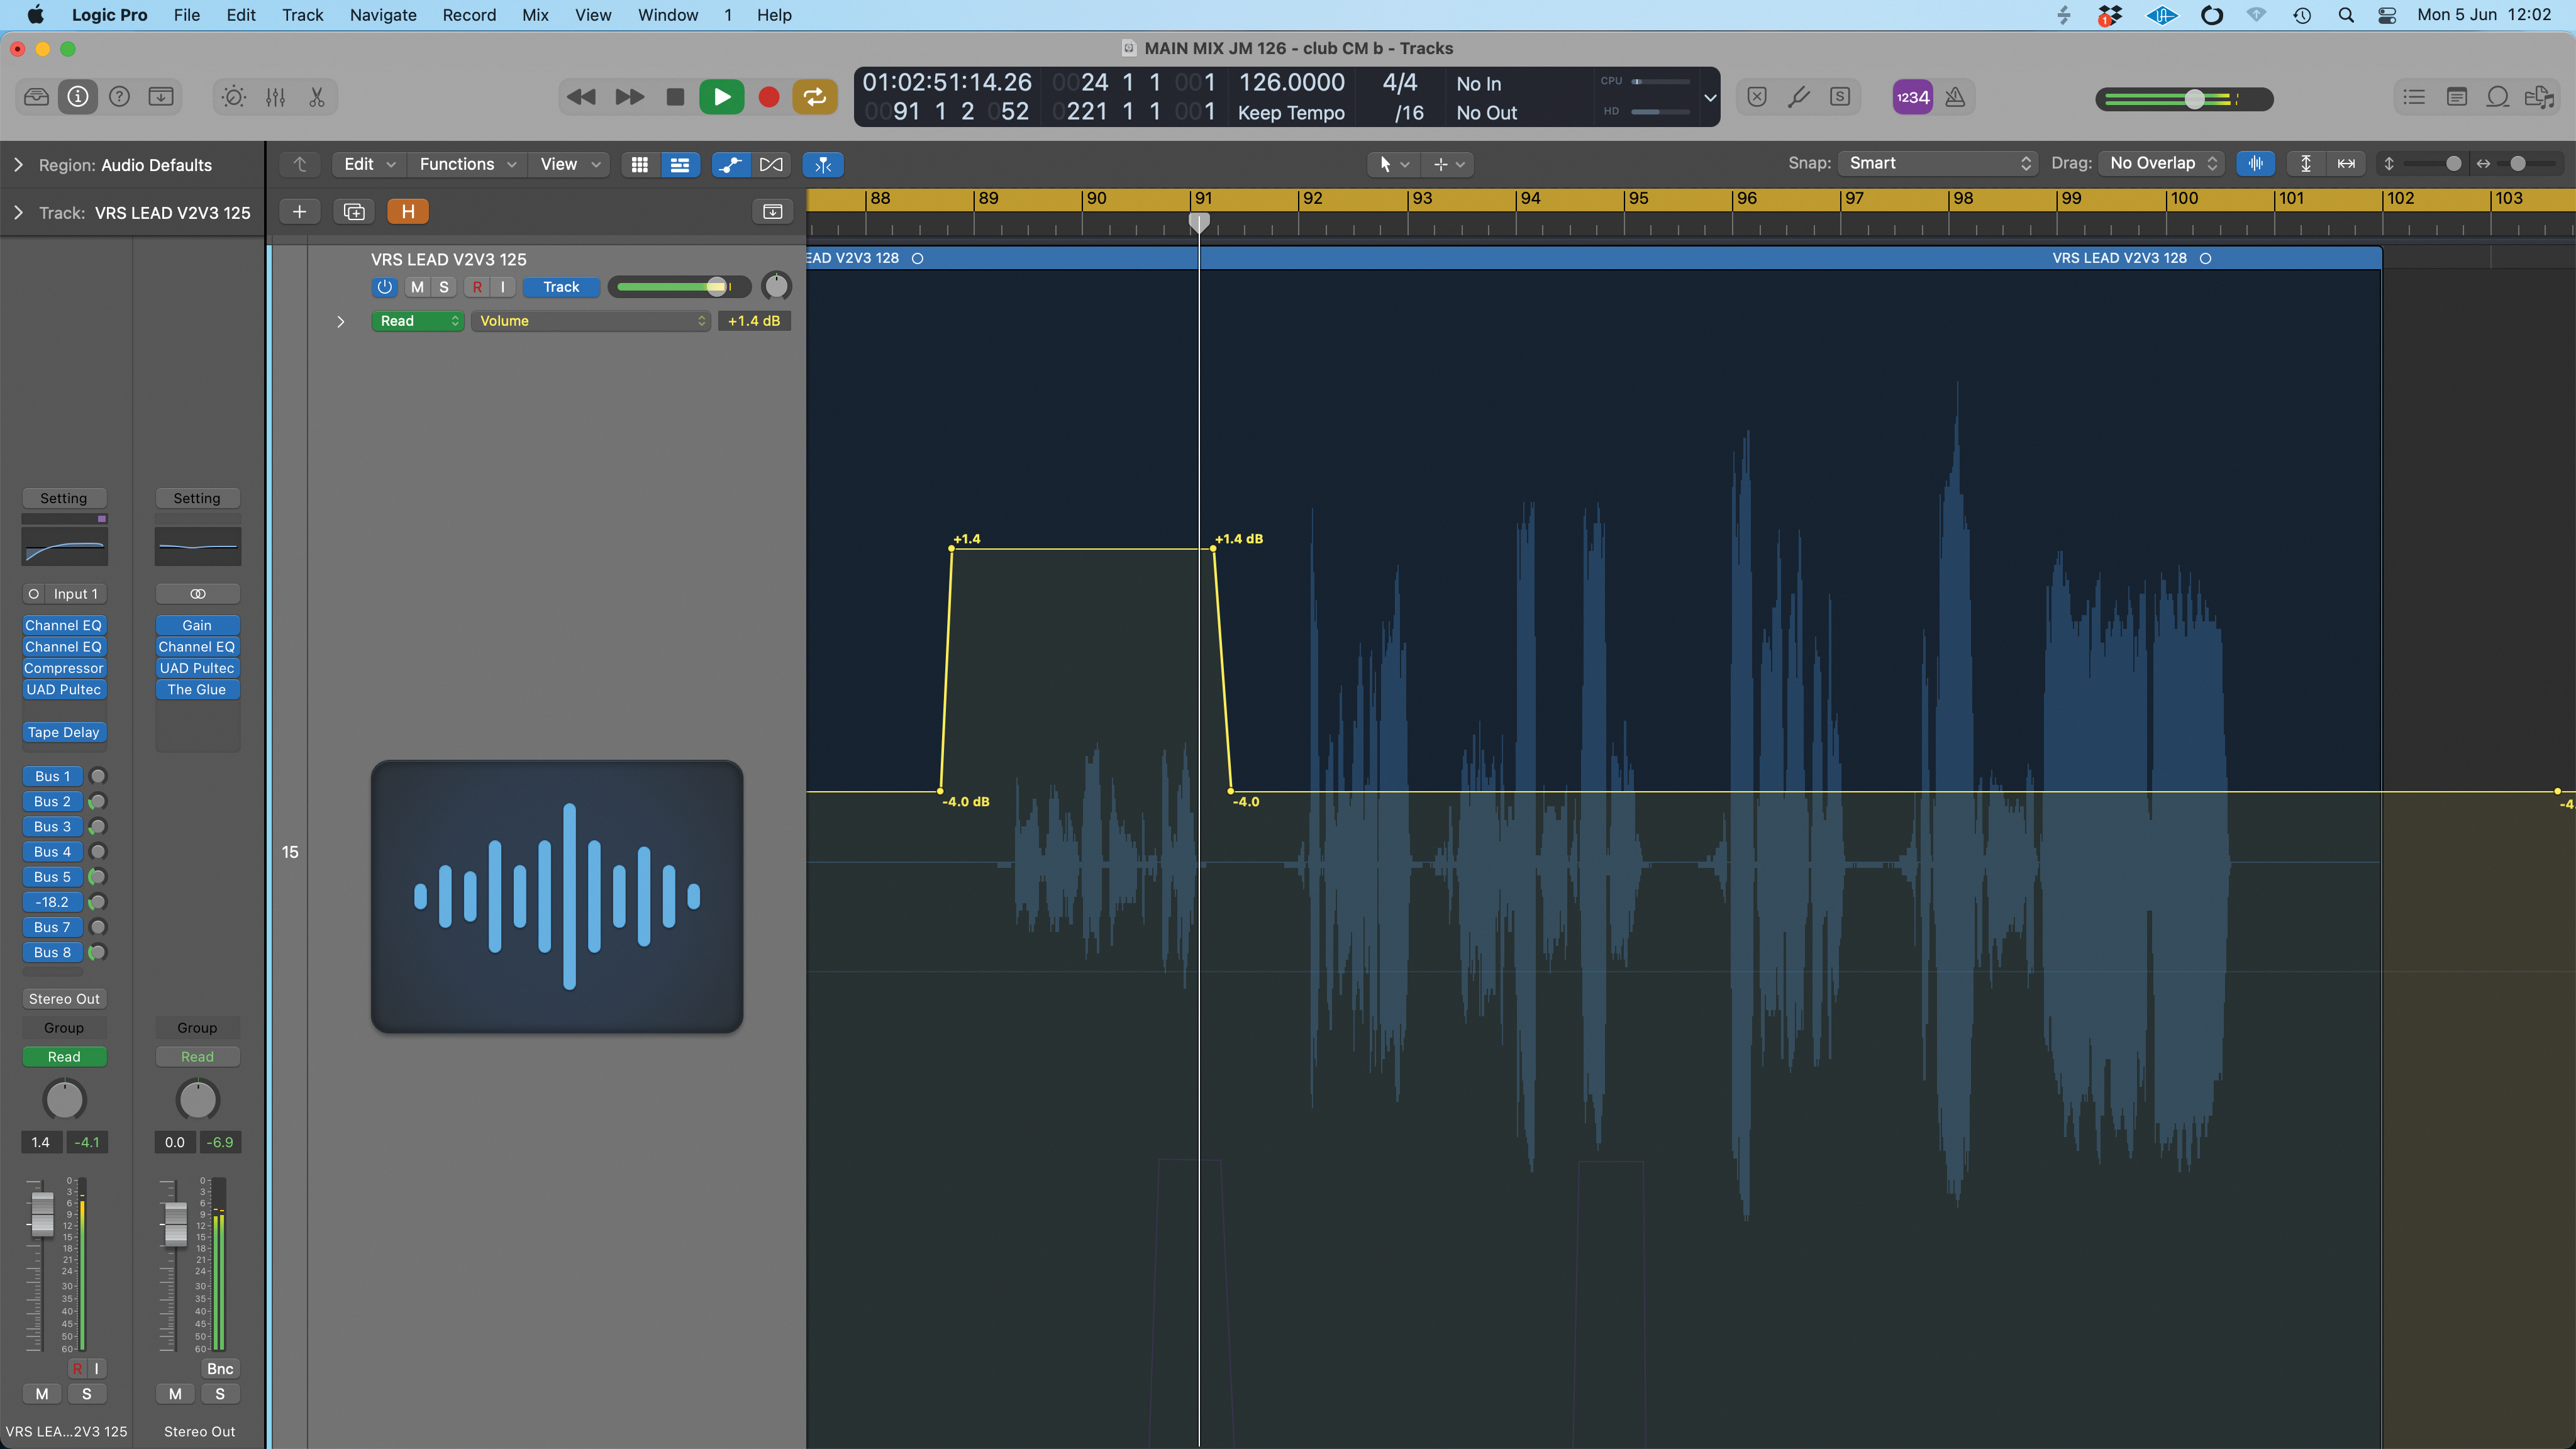
Here we have a vocal part where one section has been recorded at a lower level than the rest. We could tackle this right at the start of our mix (see the clip gain section of the pro tip). But if we’ve reached this stage of the mix and still need to resolve an unusually quiet or loud section, simply apply a sectional level adjustment.
Want all the hottest music and gear news, reviews, deals, features and more, direct to your inbox? Sign up here.

In a second example, we have a synth part that plays in most of the mix. It has quite a lot of high frequency content which should help lift the chorus. However, with other sounds coming in at the chorus, the effect isn’t as dramatic. Here, a modest push of just a couple of dB restores the effect.
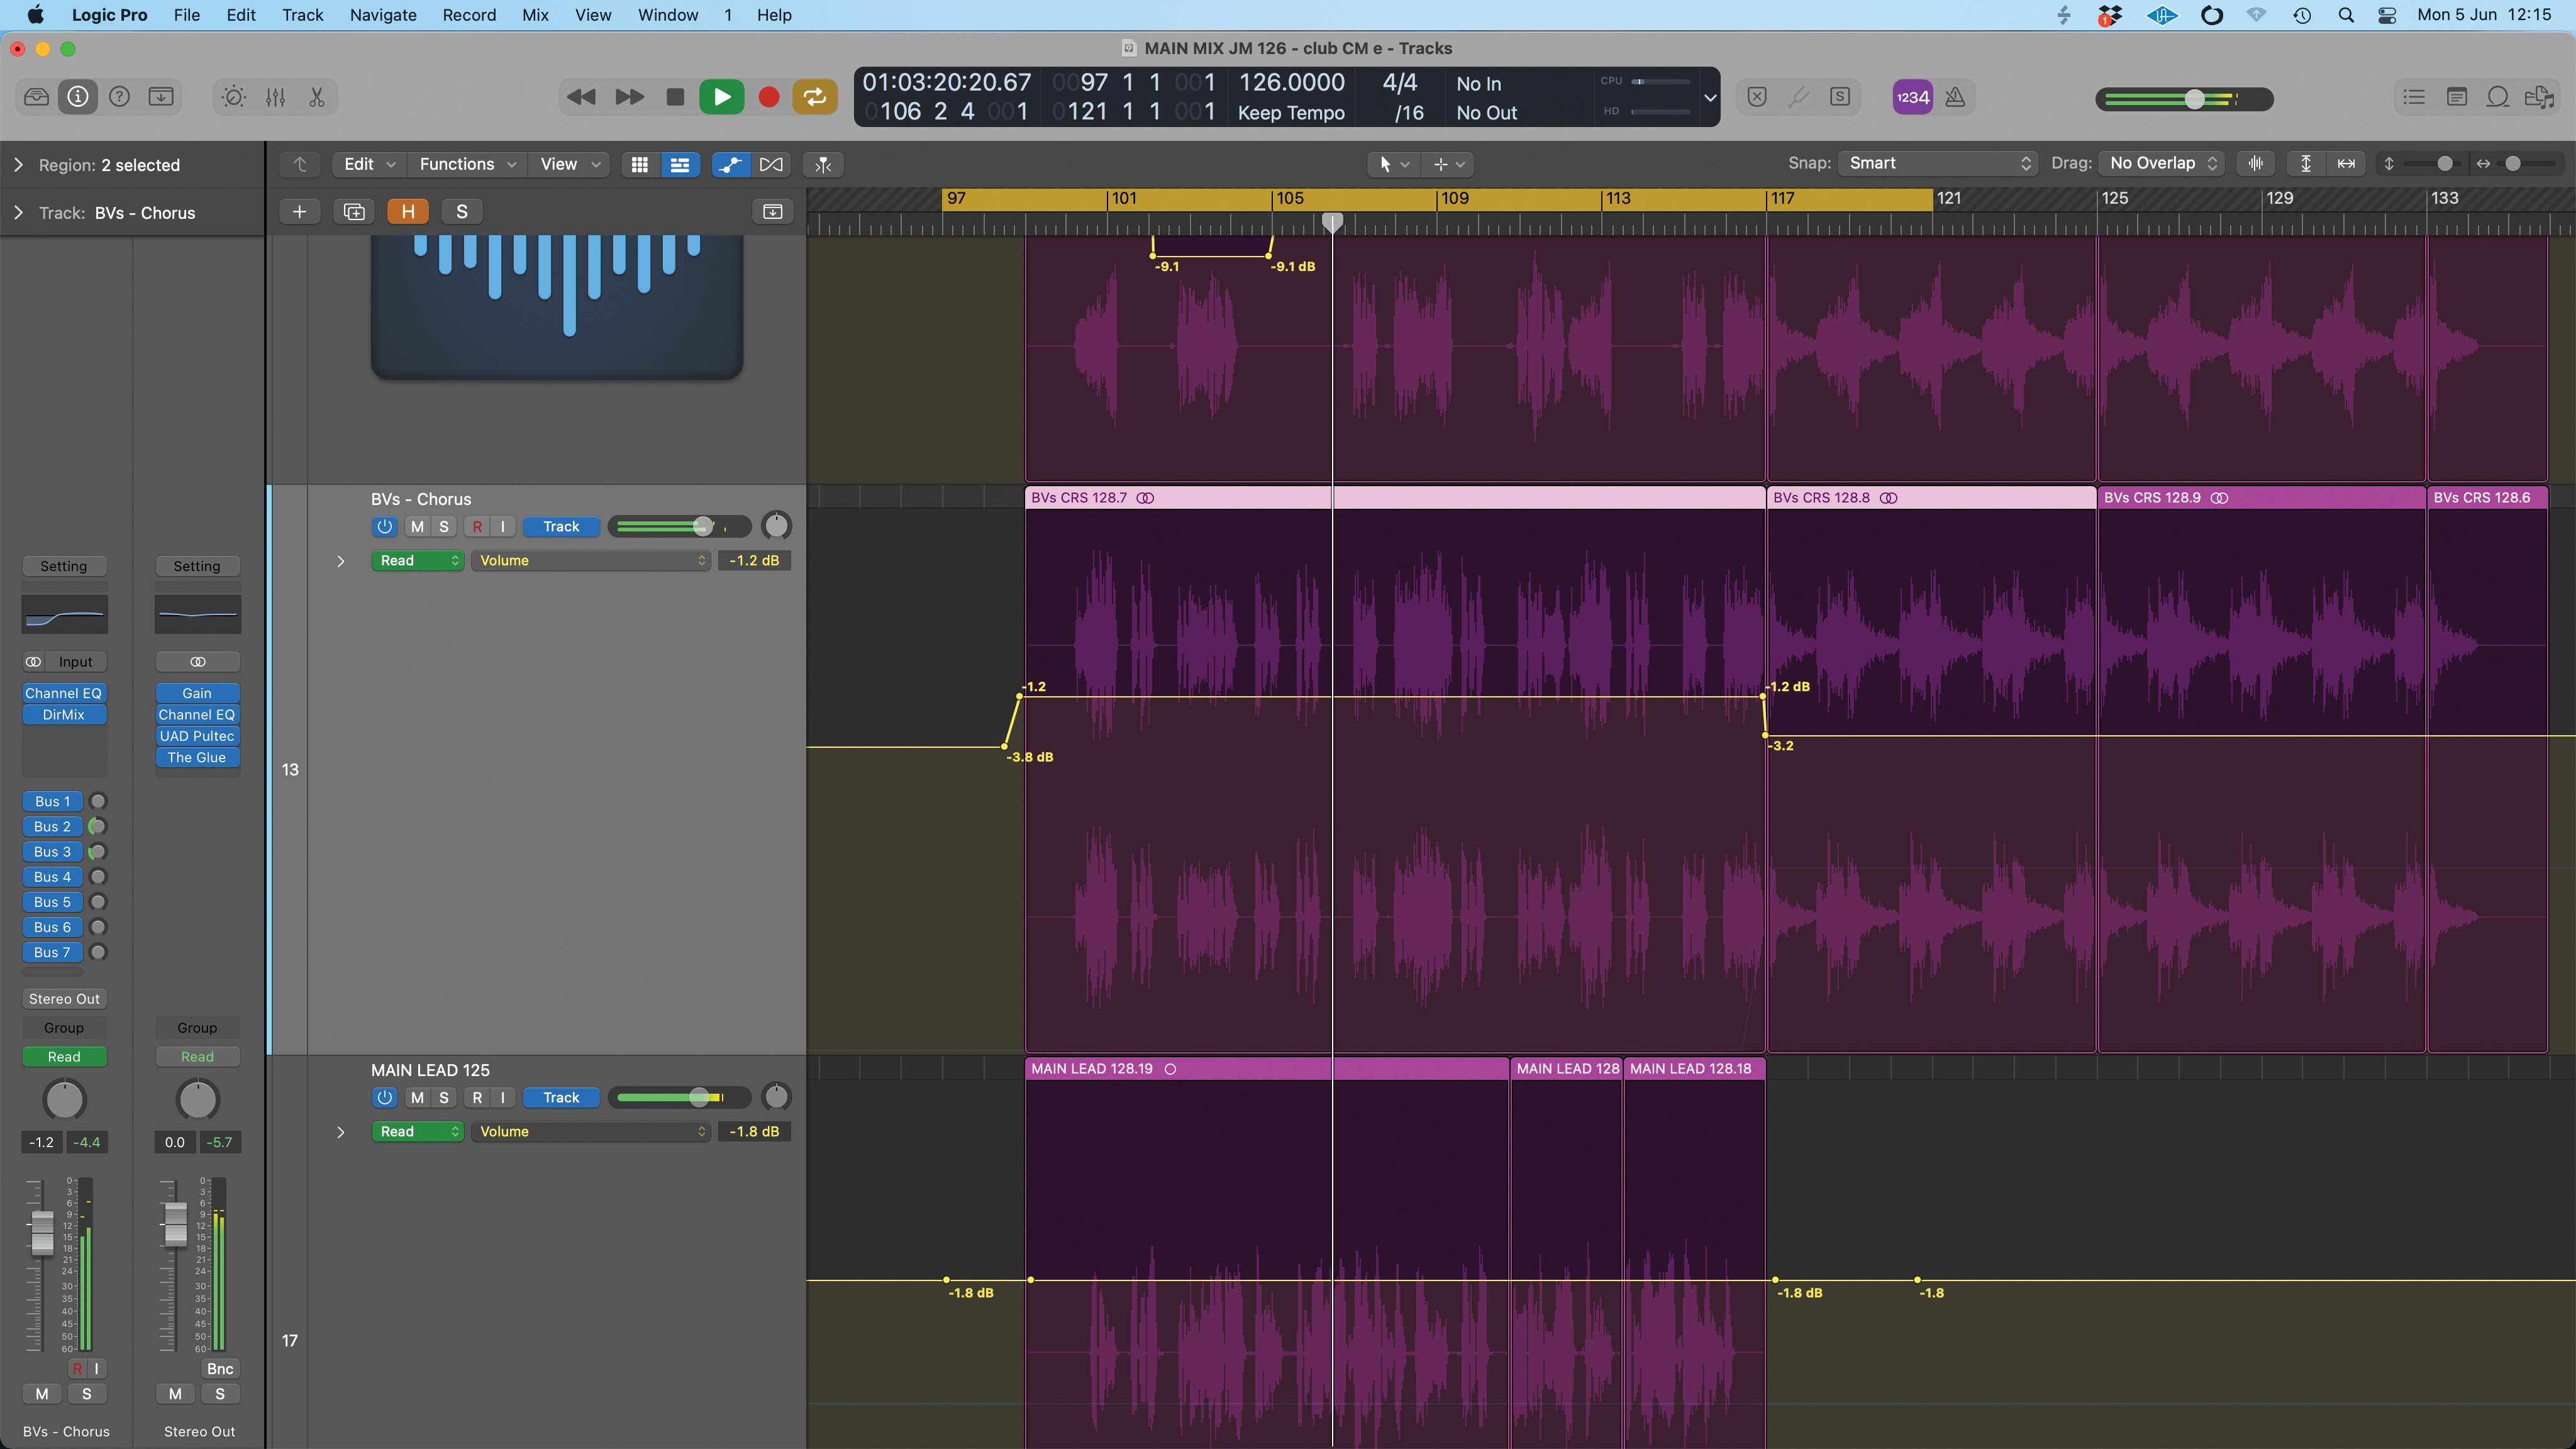
If you work on tracks with full vocals, it’s likely you’ll spend quite a bit of time riding the vocal levels. It’s not unusual to need to ride blocks of backing vocals either to add weight in a chorus or to pick out a specific phrase or word.
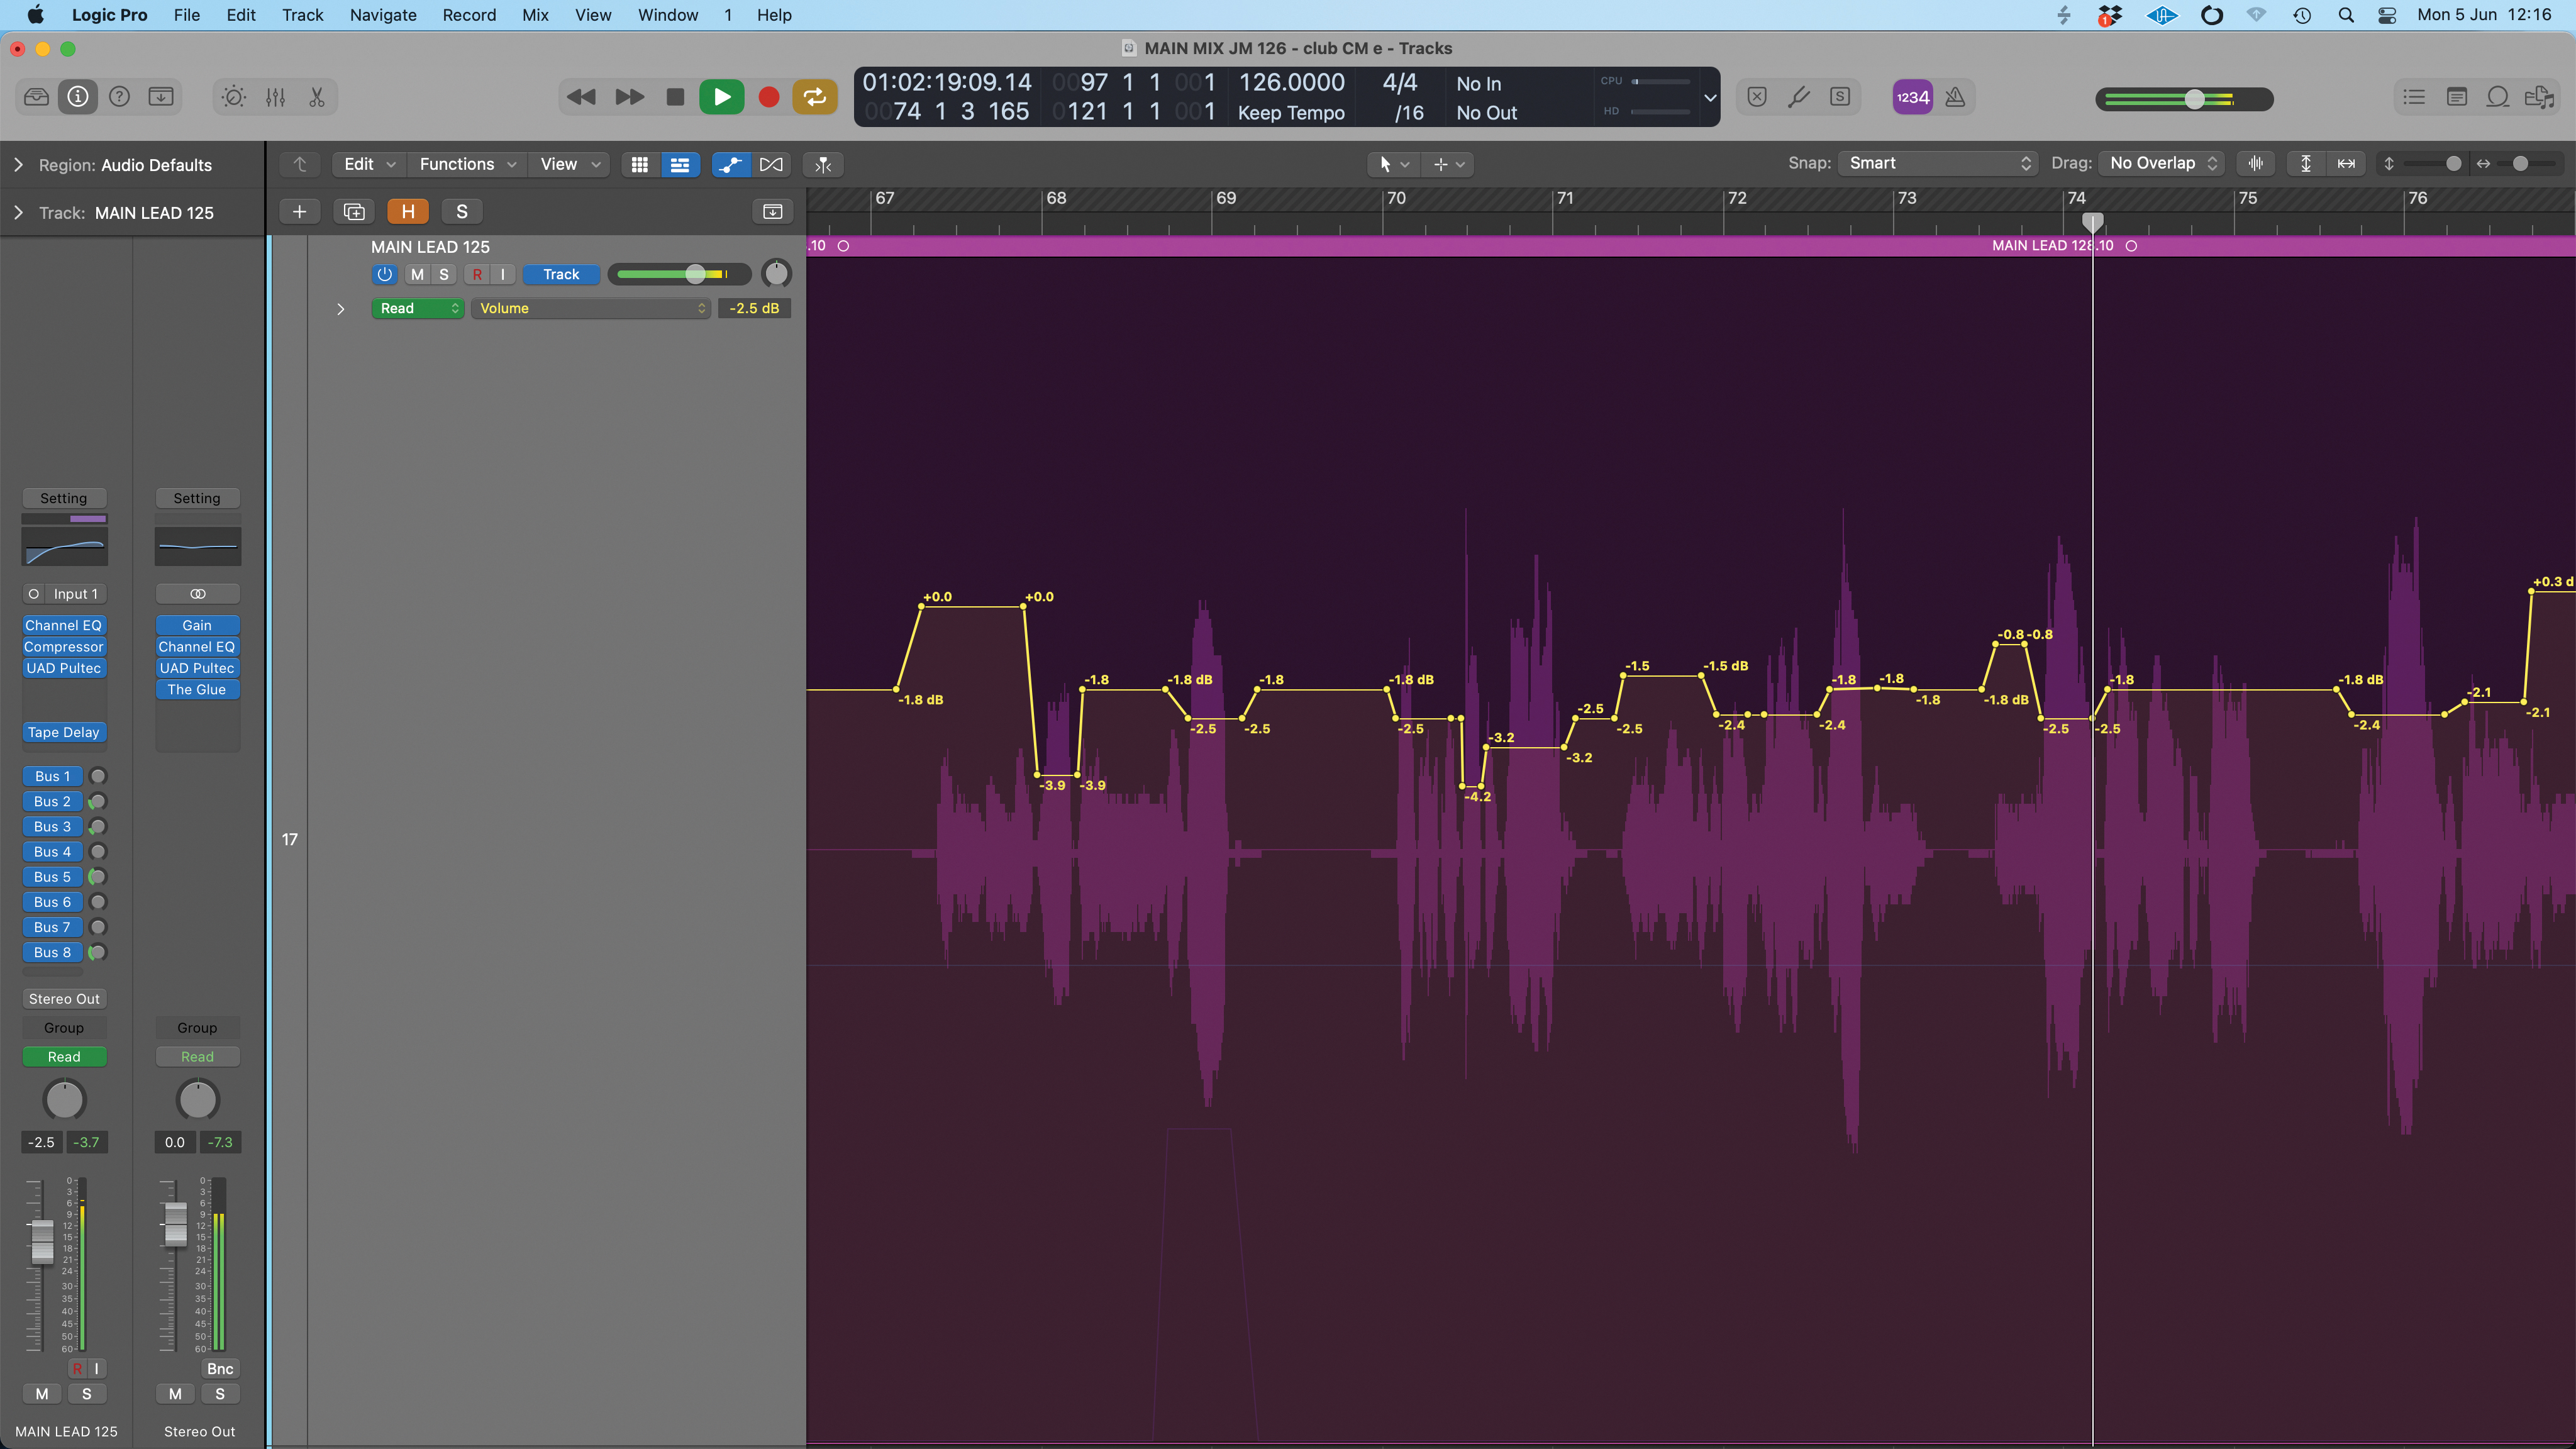
With lead vocals, intelligibility is often important and this means we may have to ride individual words or syllables even to achieve the desired outcome. This level of automation may look busy or unnecessary, but for vocals in particular it can be better than using extreme compression.
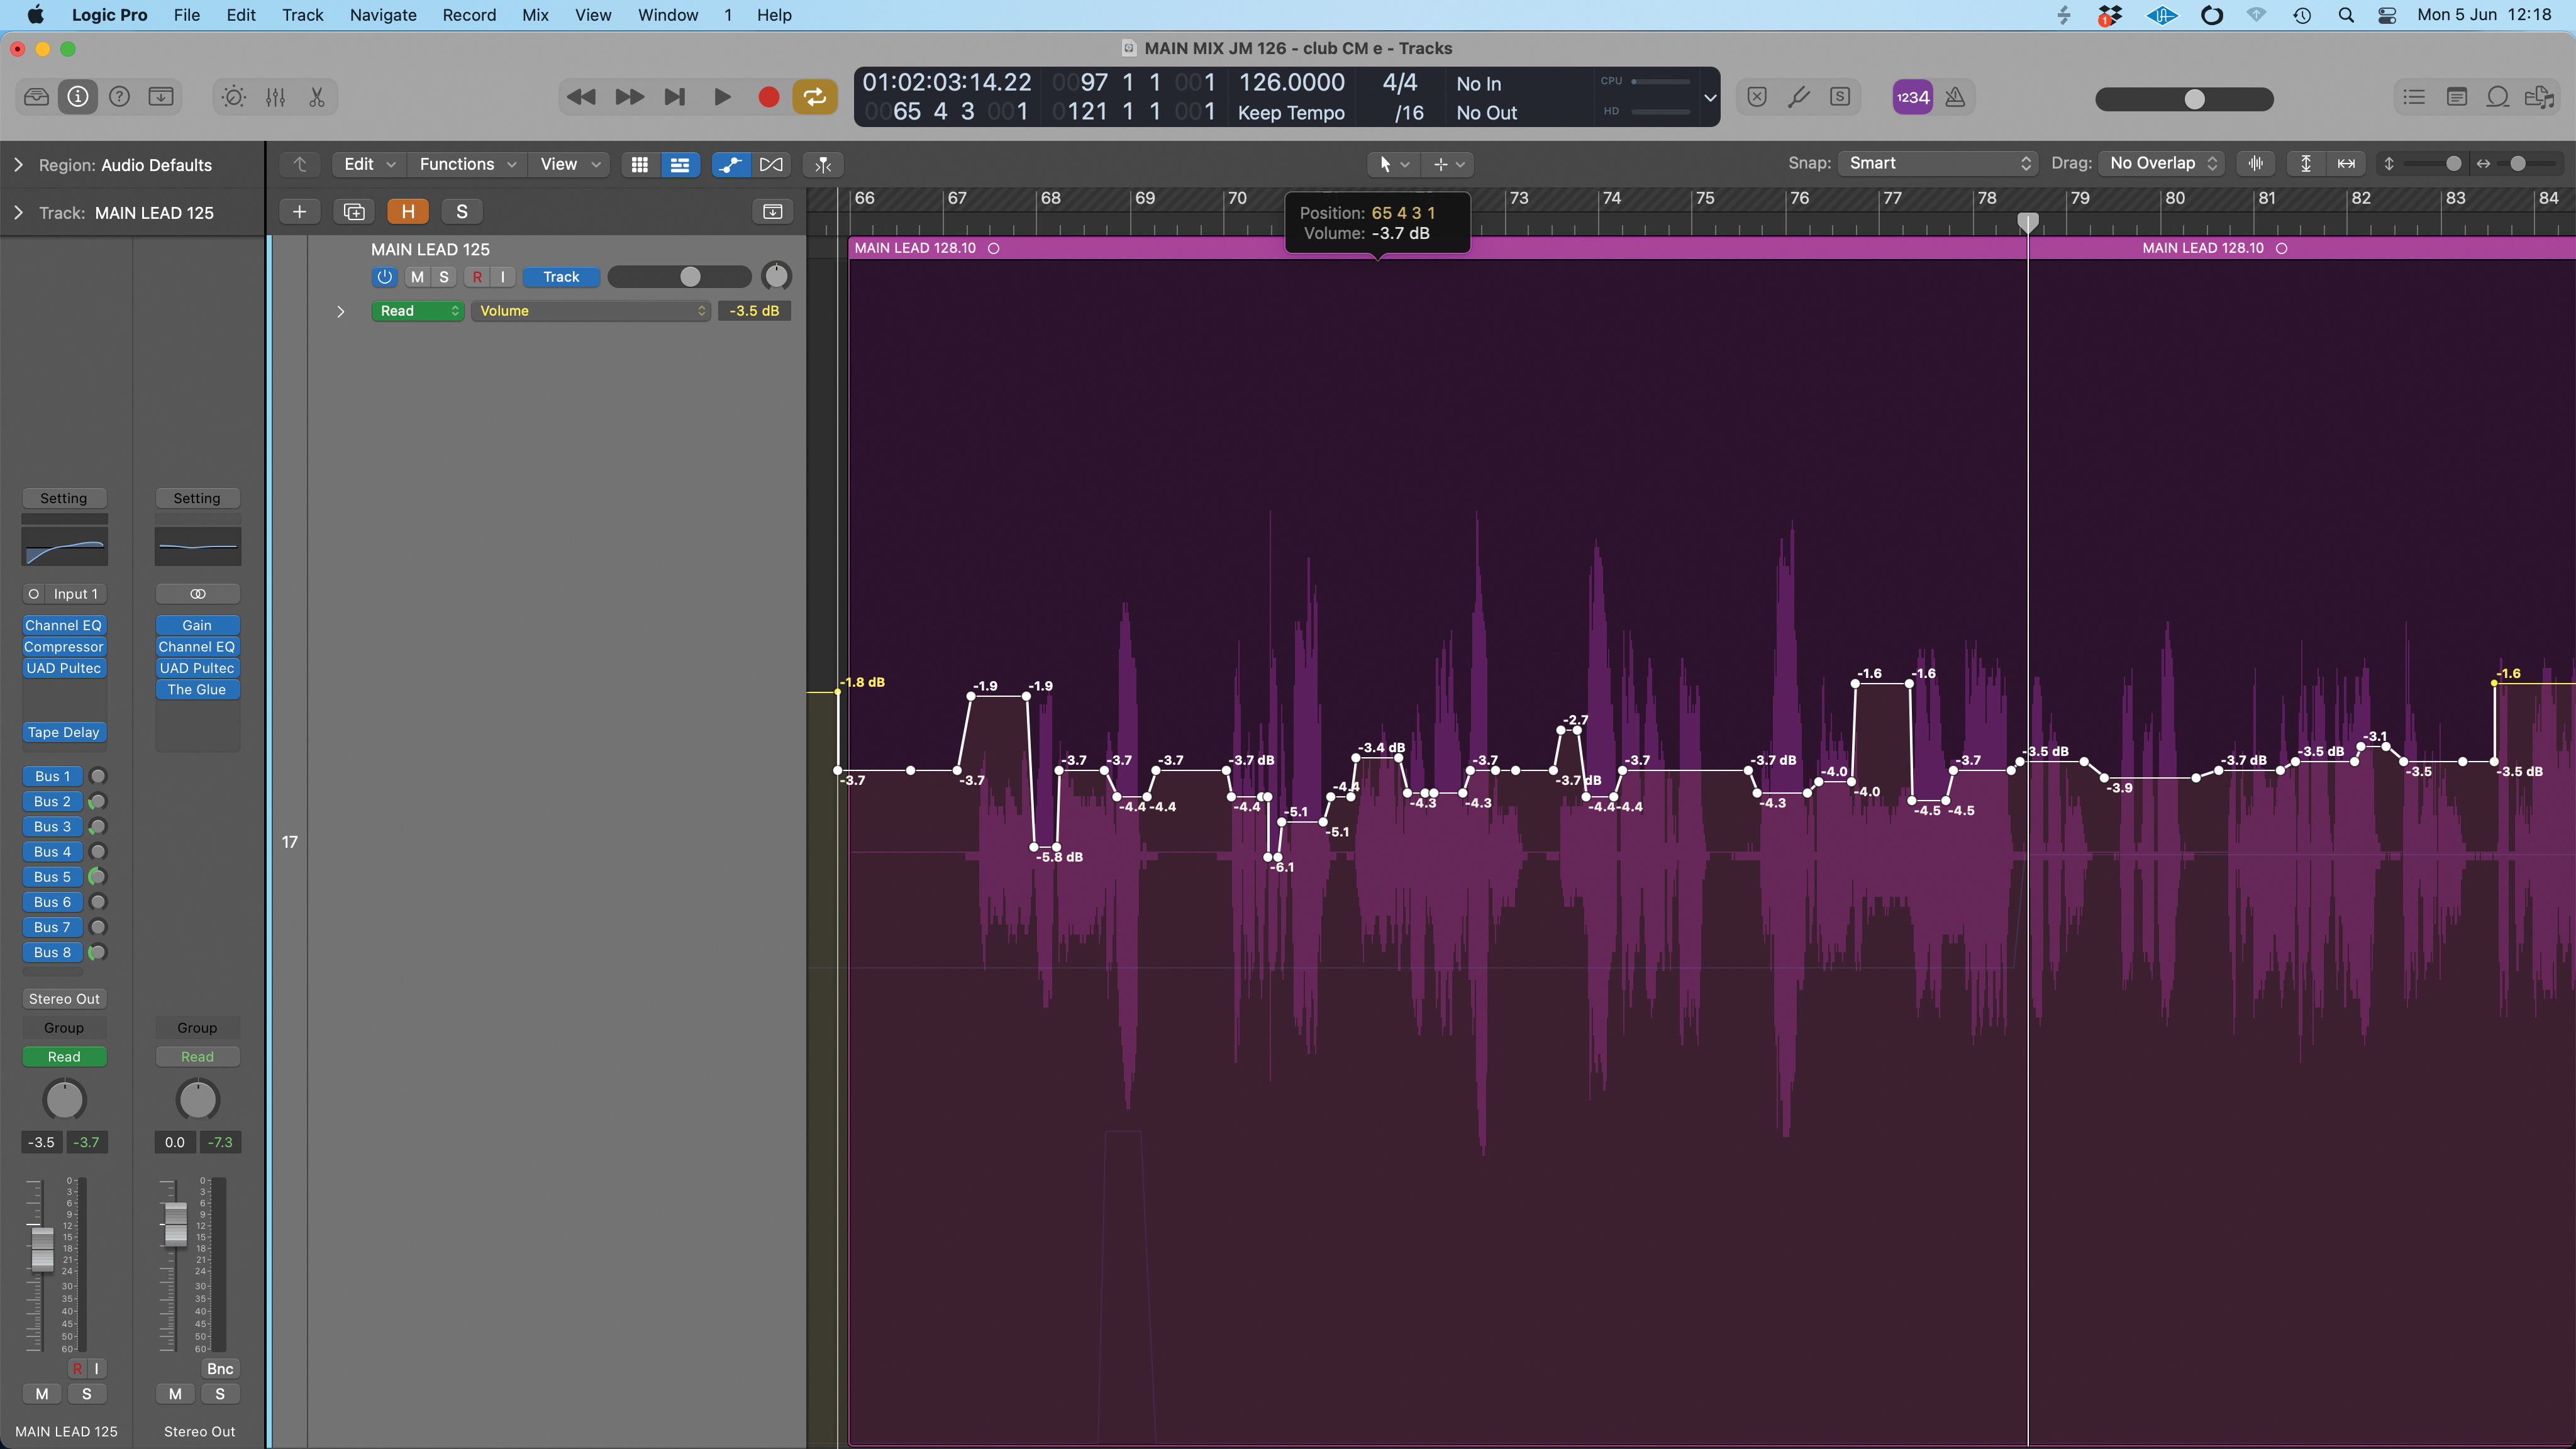
Finally, if you go through the process of adding intricate rides to help your vocal sit, but then decide that the overall vocal is either too loud or too quiet on this particular section, then rather than tweaking individual moves, your DAW should allow you to lasso the section and apply an overall offset.
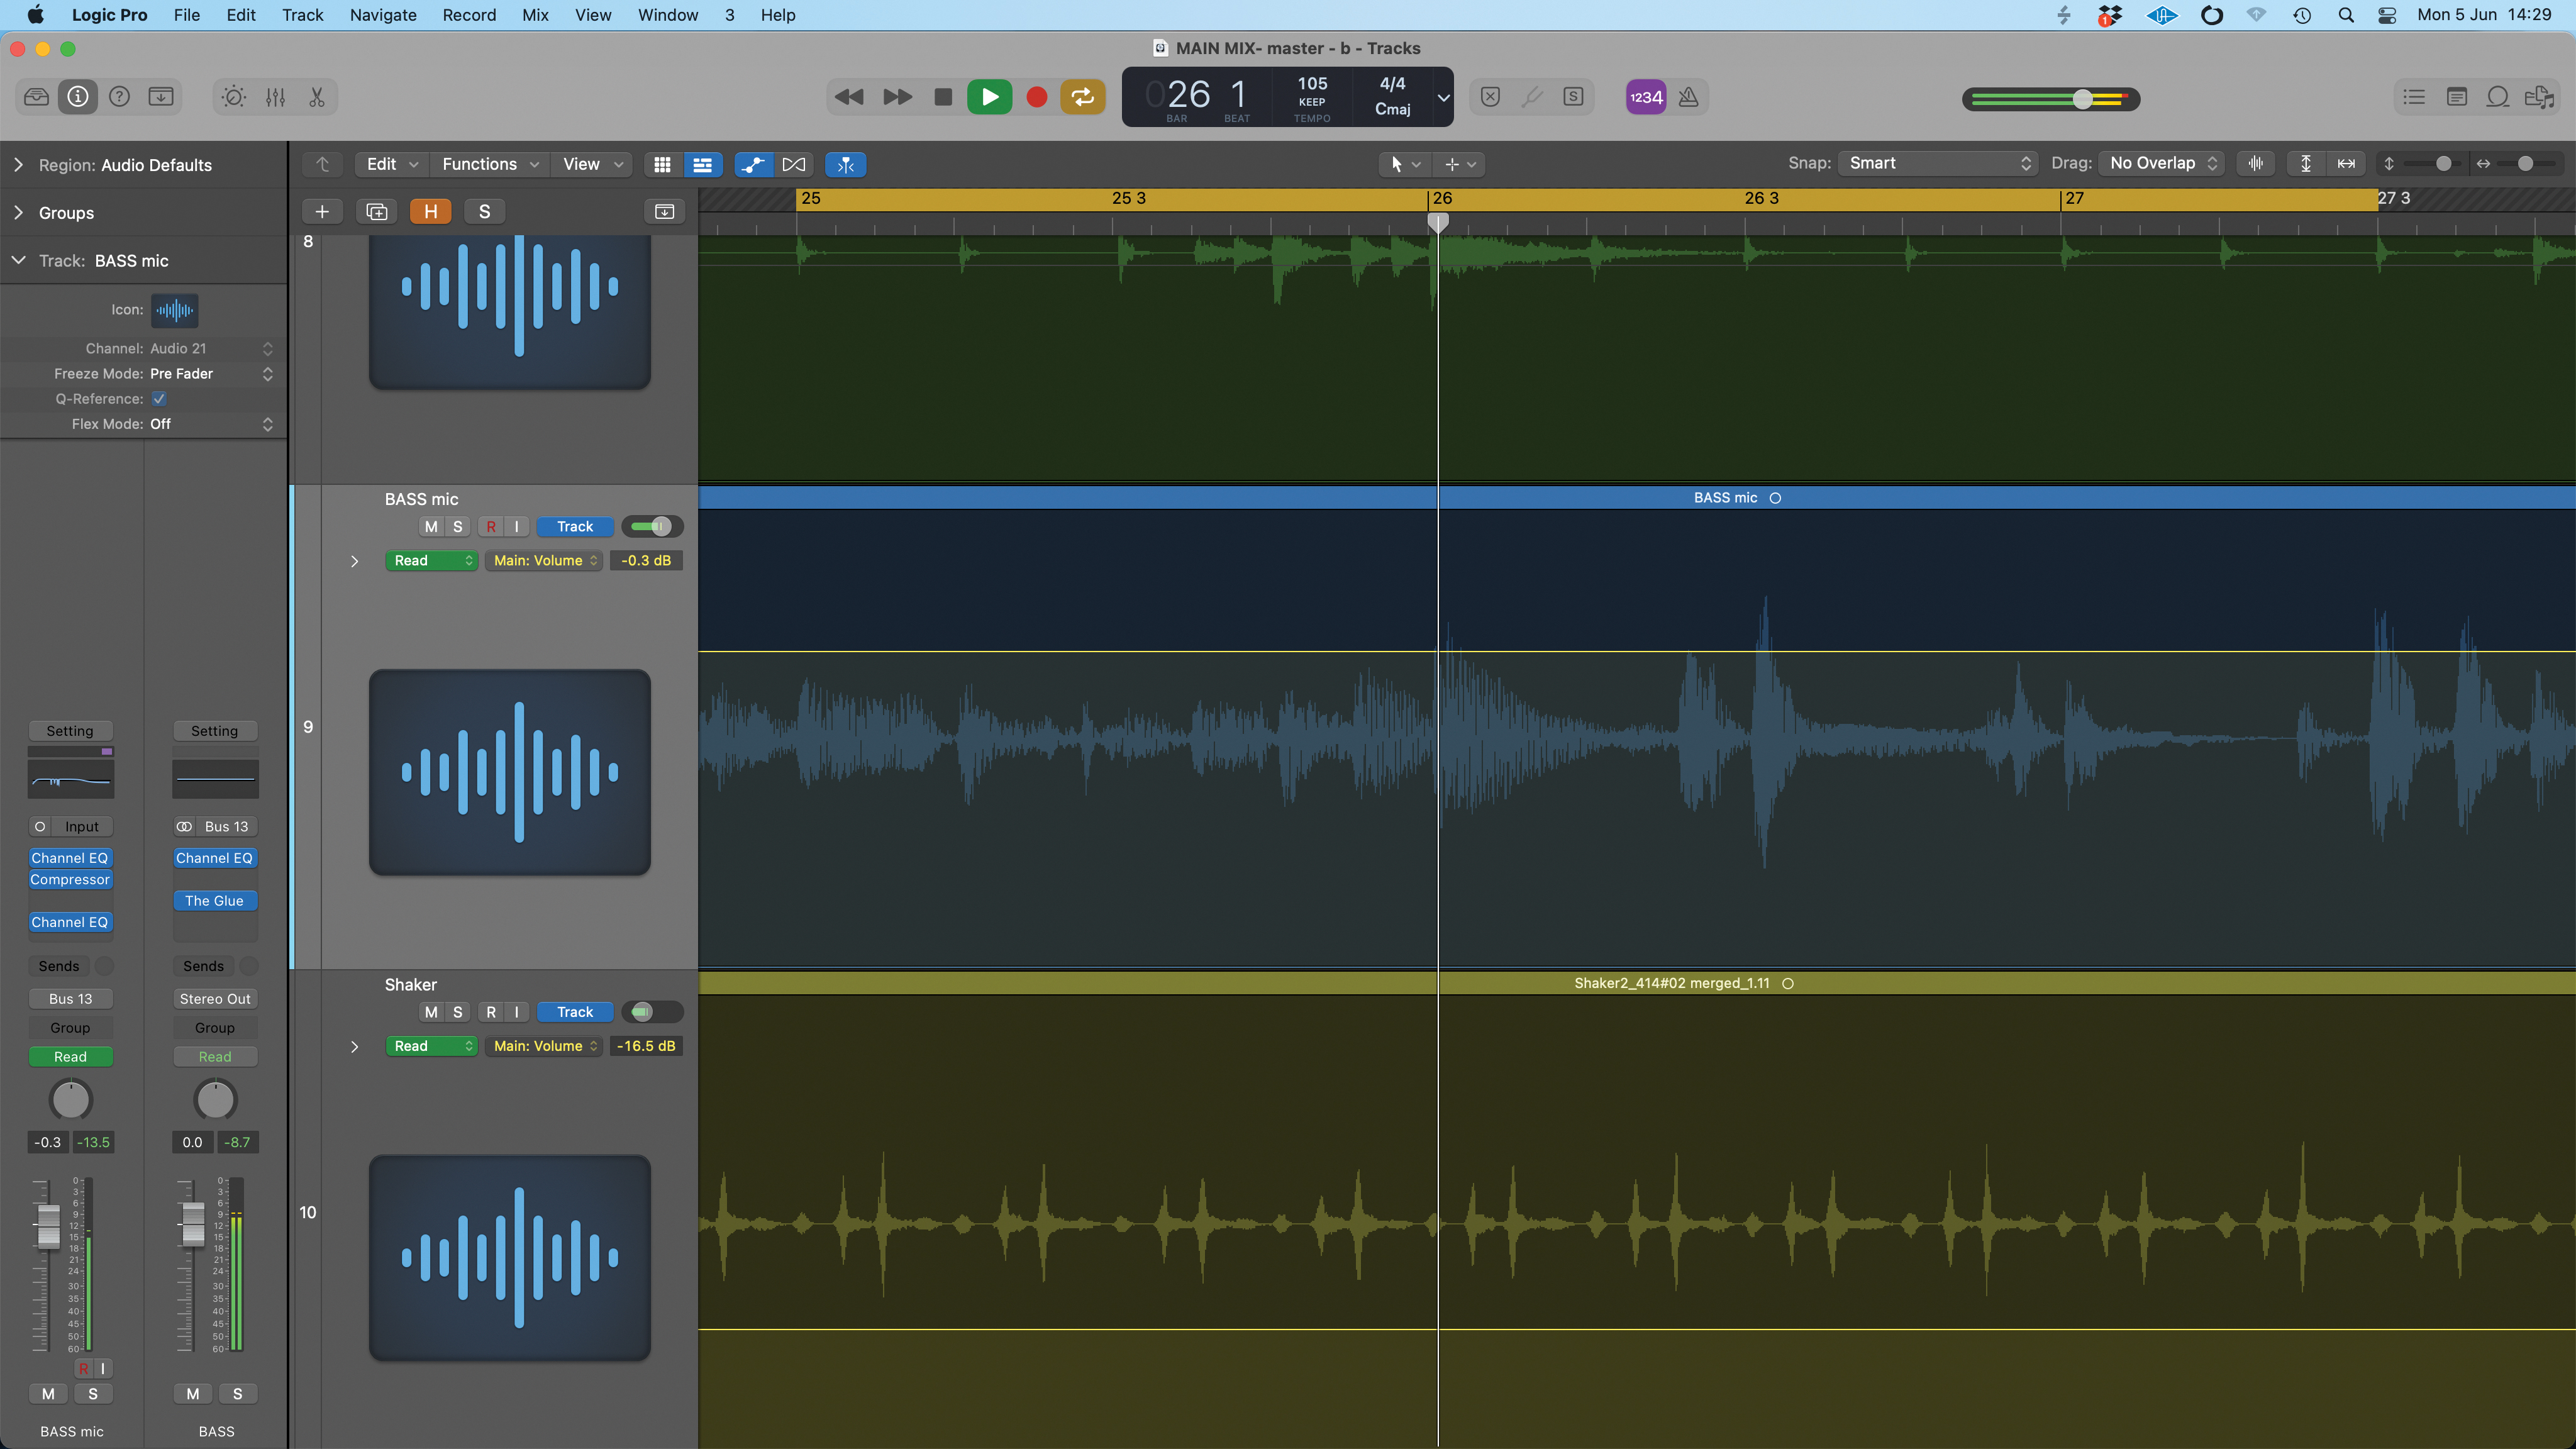
Bass sounds are often quite inconsistent in level from note to note and we can usually achieve some improvement using a combination of compression and precise EQ. That said, and this seems particularly true with bass guitars, using automated level rides is often the best finessing option.
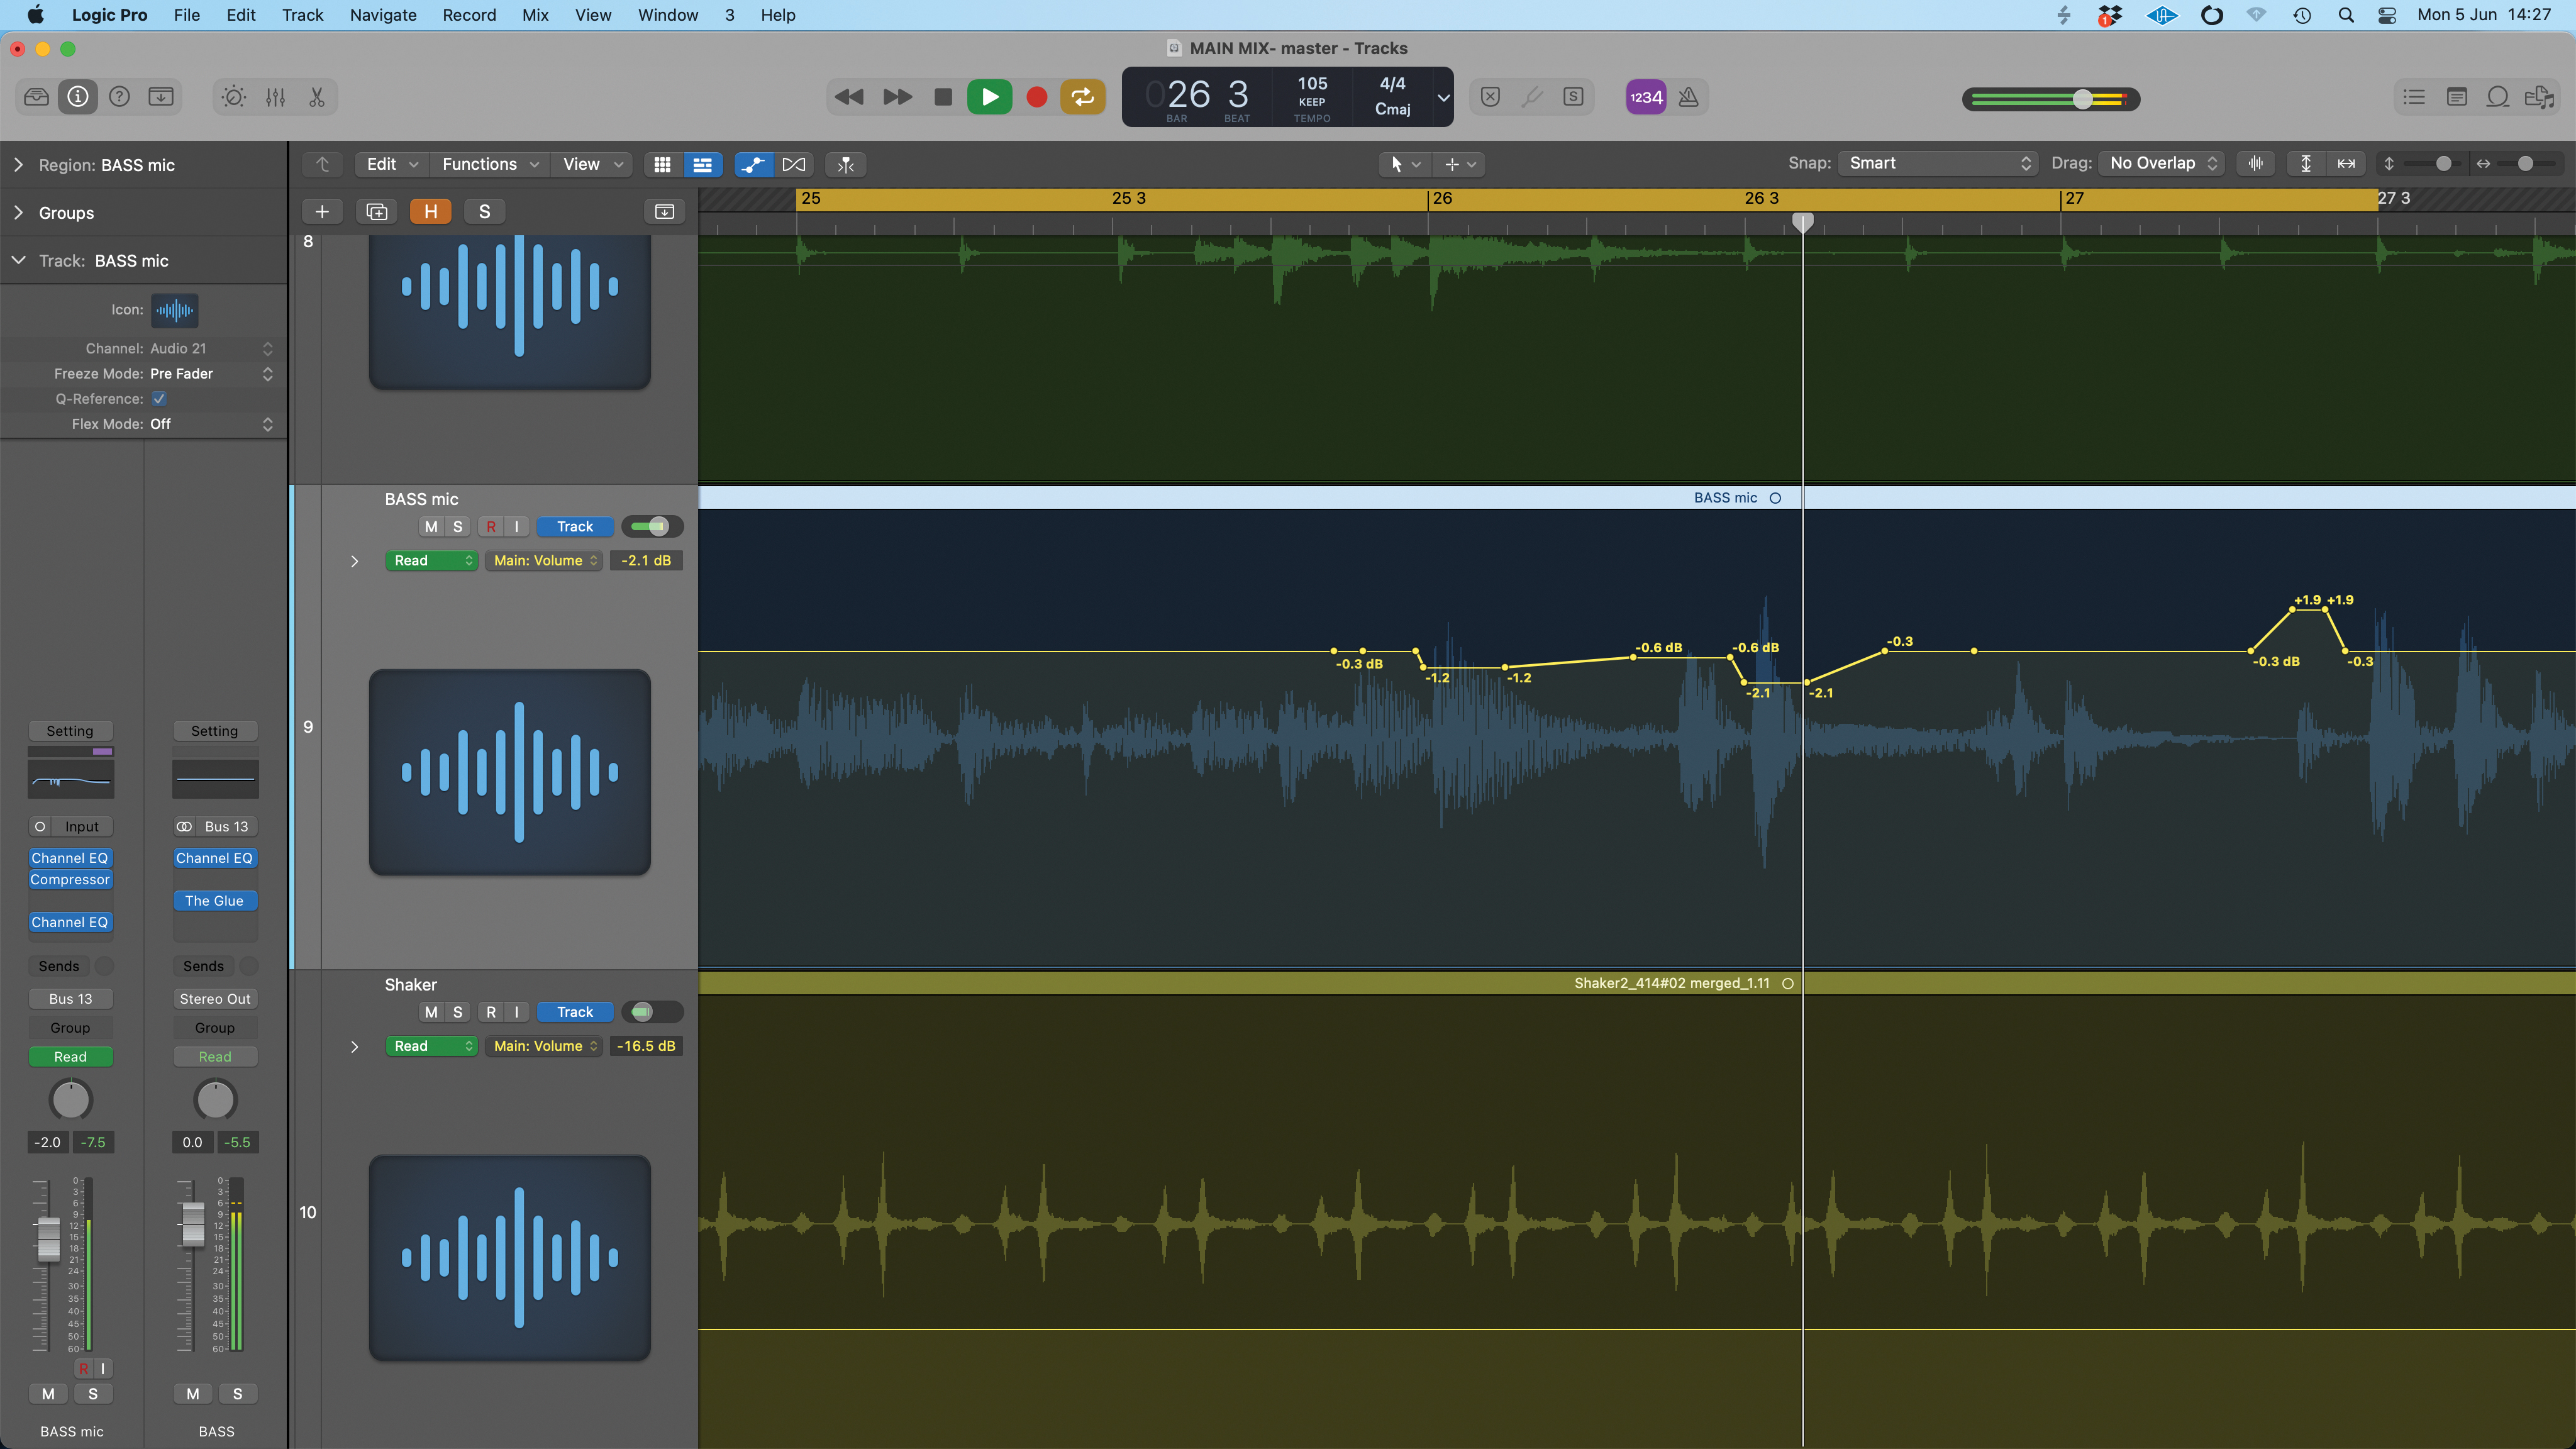
Here we have a bass part and a few of the notes are problematic at a specific point. A couple pop out way too much and one is too quiet. Rather than compromise the sound with excess compression, we’ve used a few targeted level rides to achieve what we want.
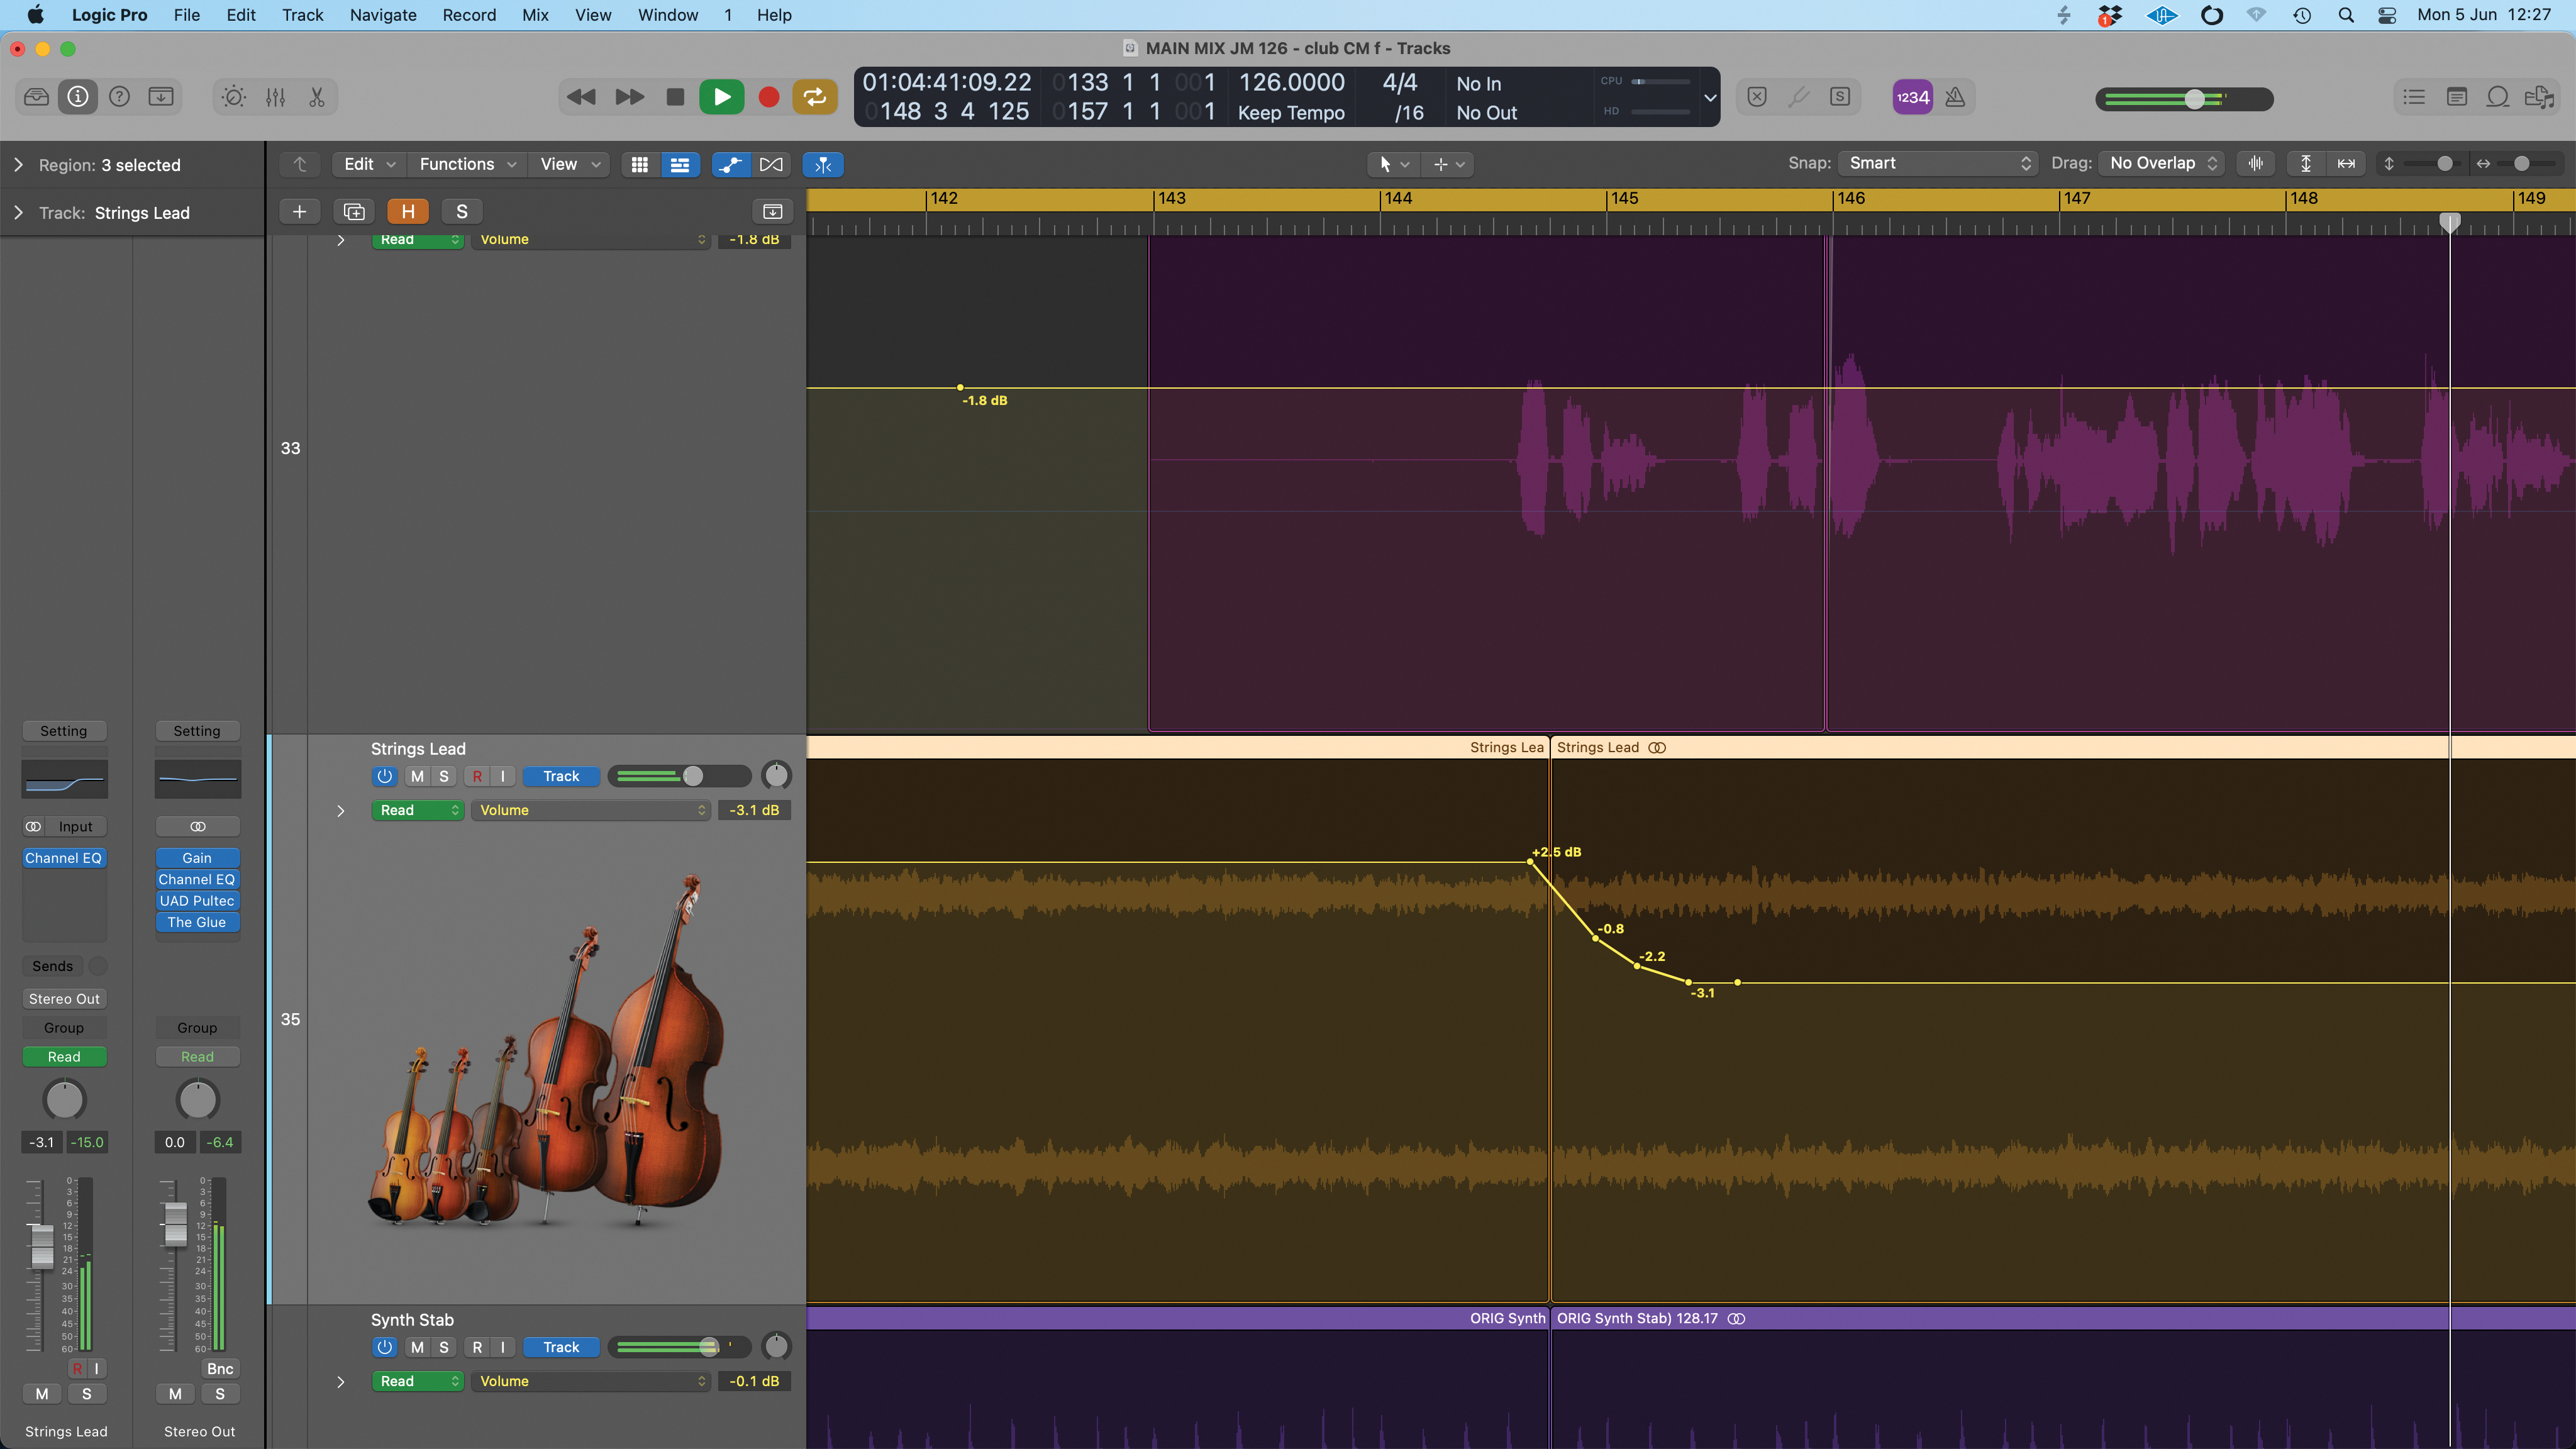
Instrumental lead parts can be hard to slot into a balance, particularly if they overlap with other significant aspects such as vocals. This is a perfect excuse for some careful level riding. In our example, we have a lead synth riff that needs to make way for the vocal, but not suddenly disappear as that would sound odd.
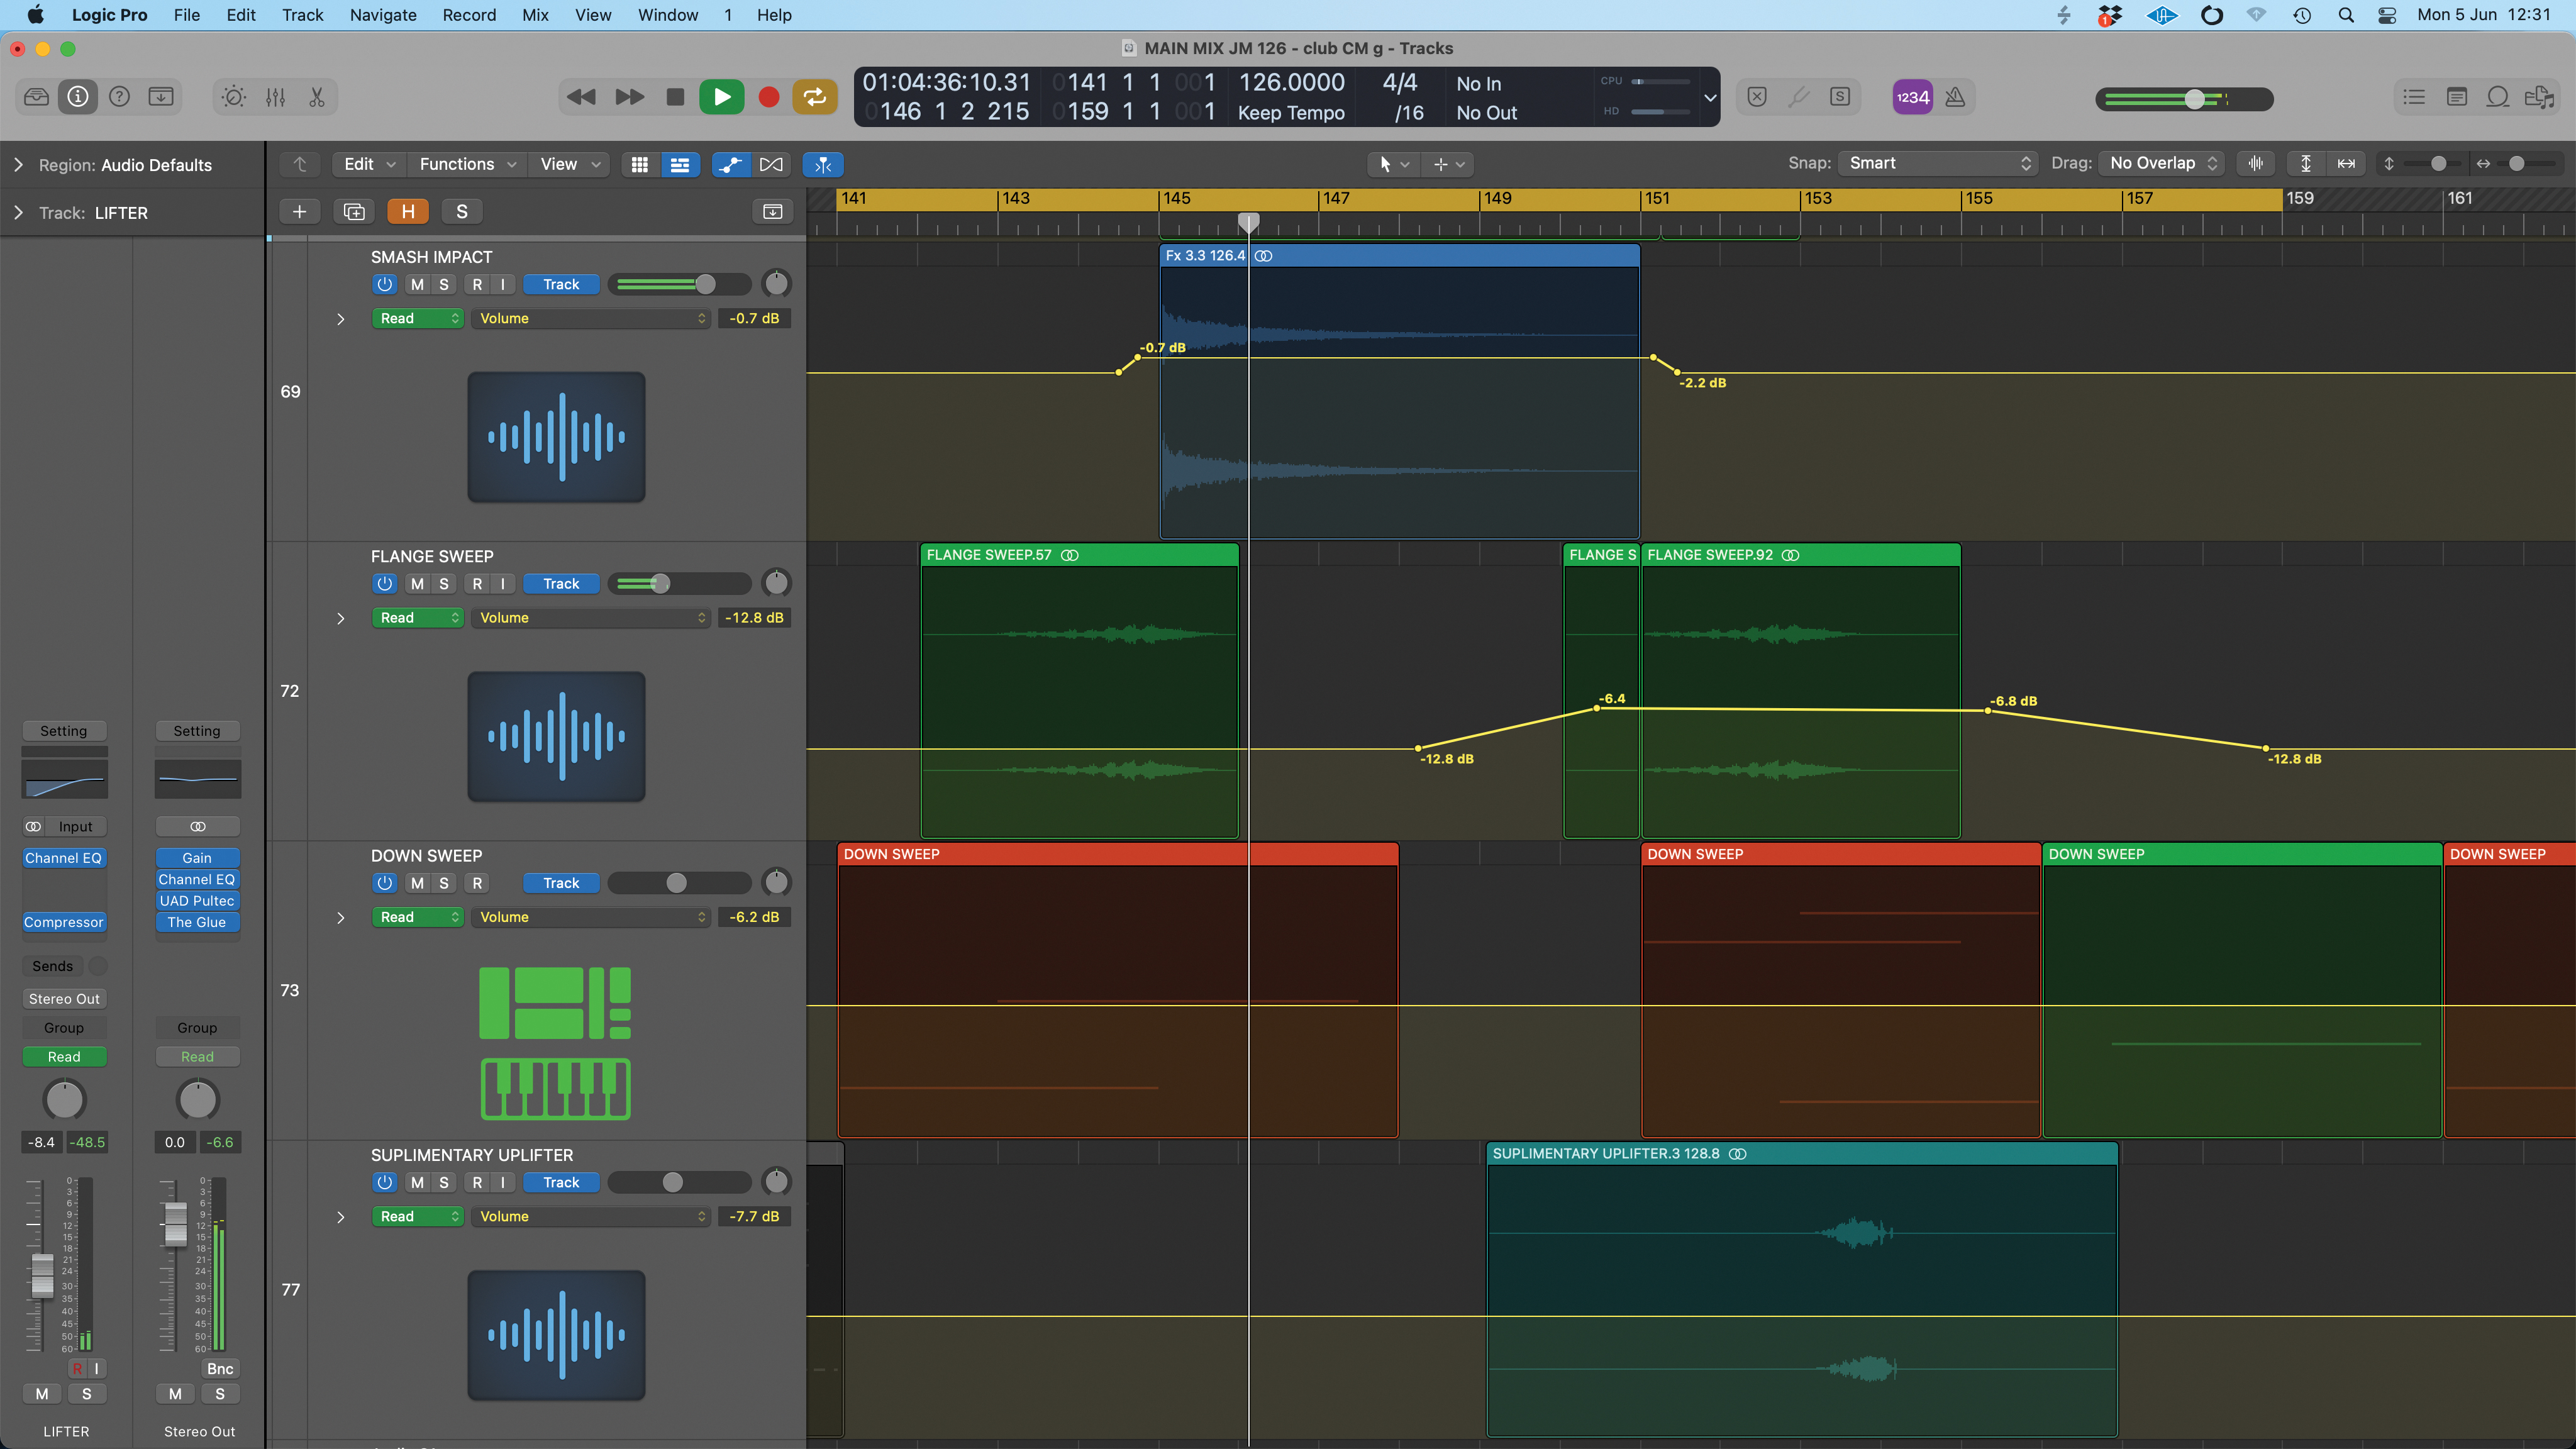
On a similar tip, sometimes we have a special effect that needs an extra boost to make itself known. We find this is not unusual in a club track, where you may have an array of spot effects that blend nicely with the track, but at a specific point, one effect needs to be featured. This is our example here.
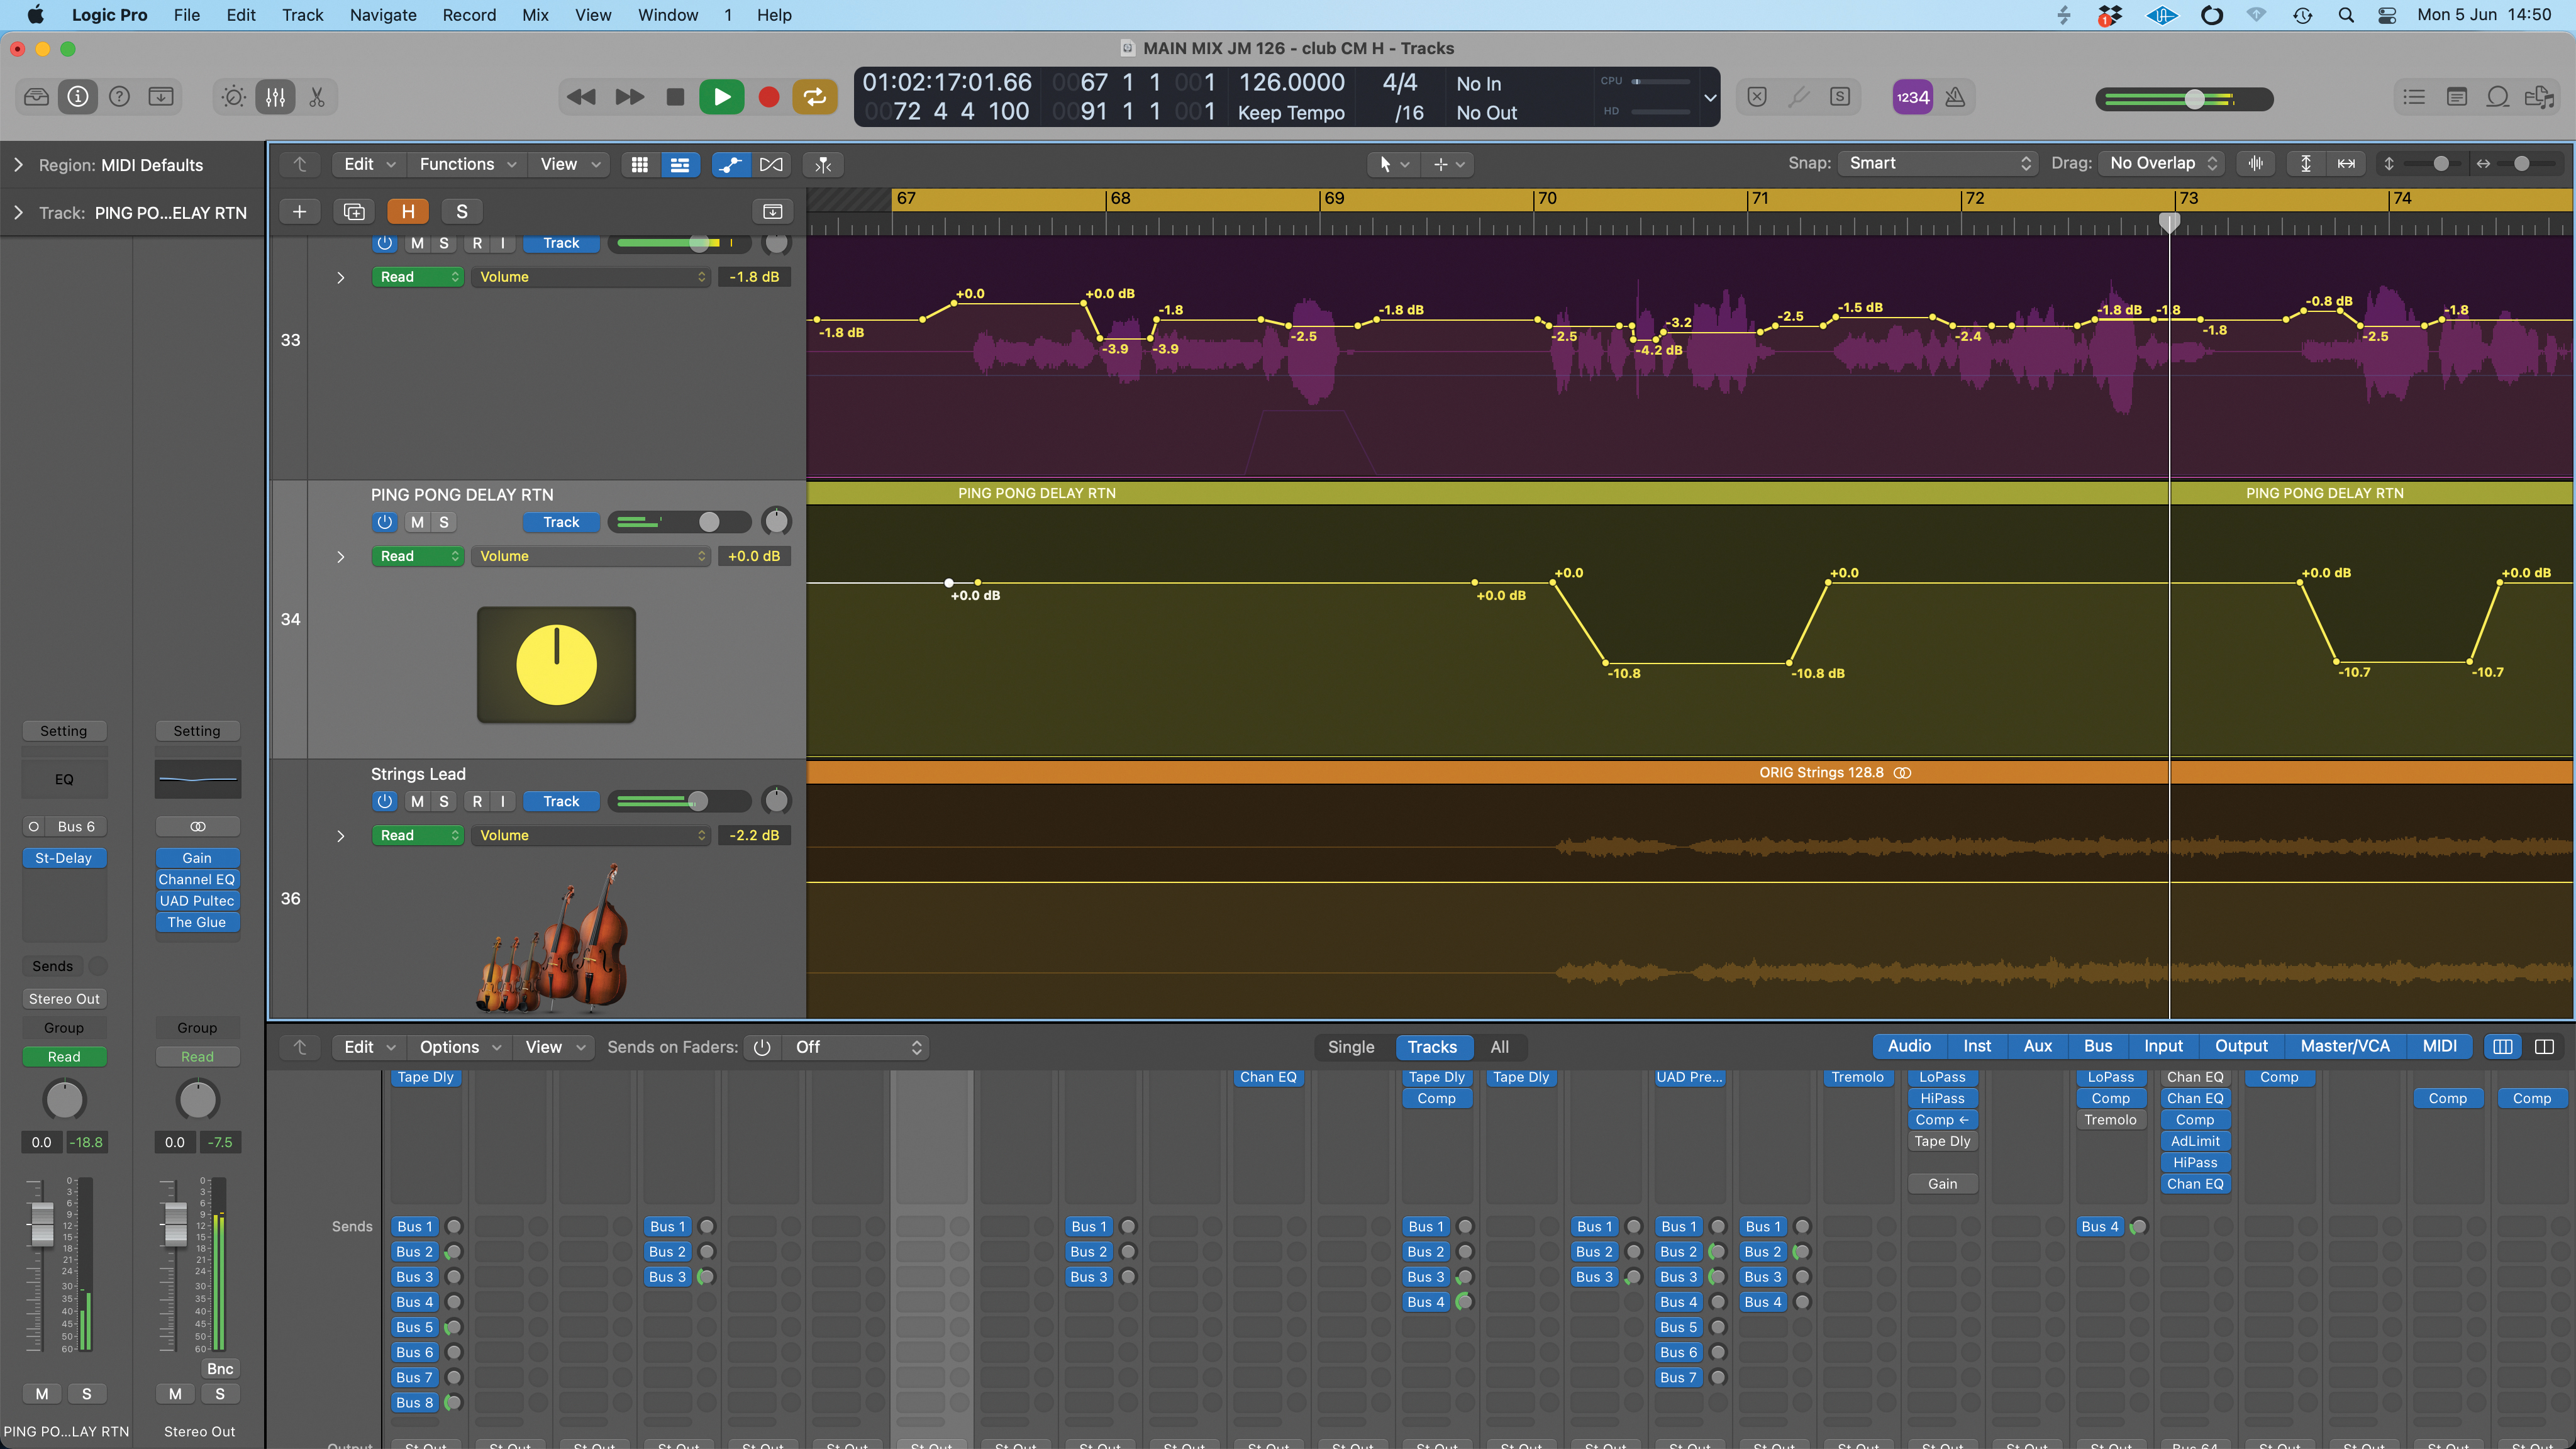
Finally, fades. Pretty obviously, level rides are the best way to fade sounds in and out in your track and you’ll often find handy curve shapes to finesse these. But we can also use fades to tailor delays and reverbs. Here we’ve tailored our delay auxiliary return level so that we hear the required delays clearly.
Pro tips
1. Ride the machines
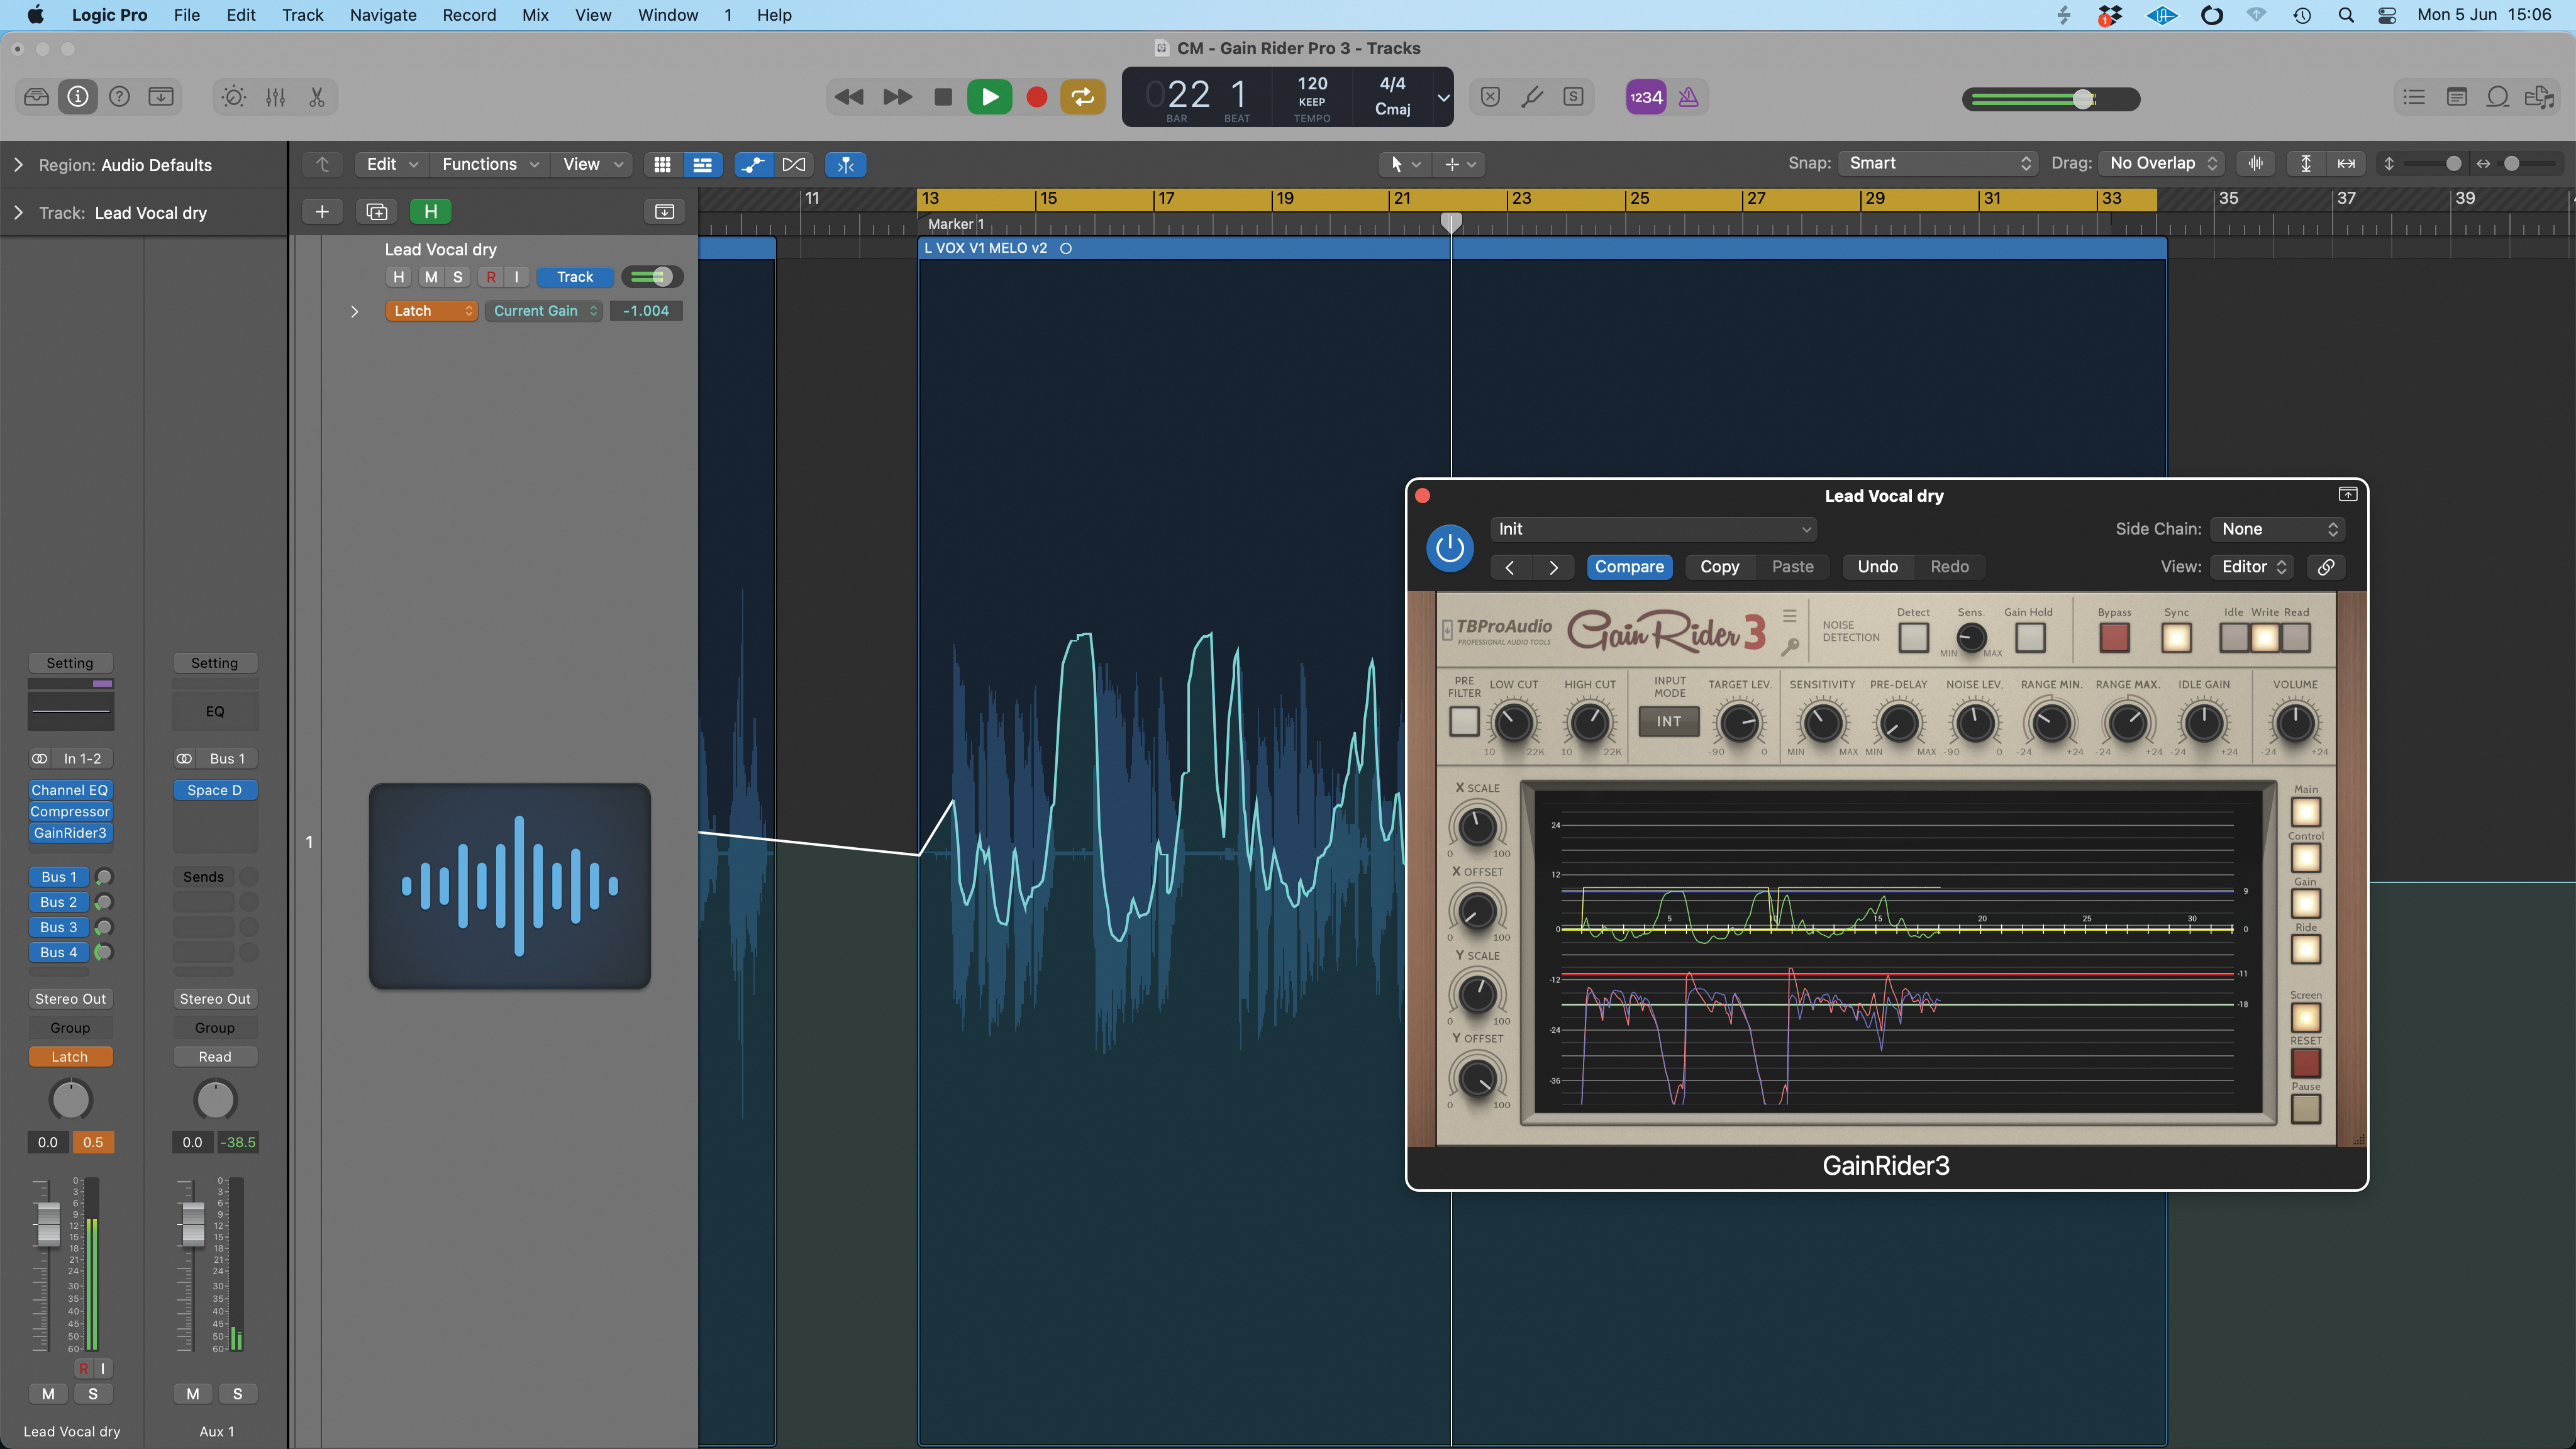
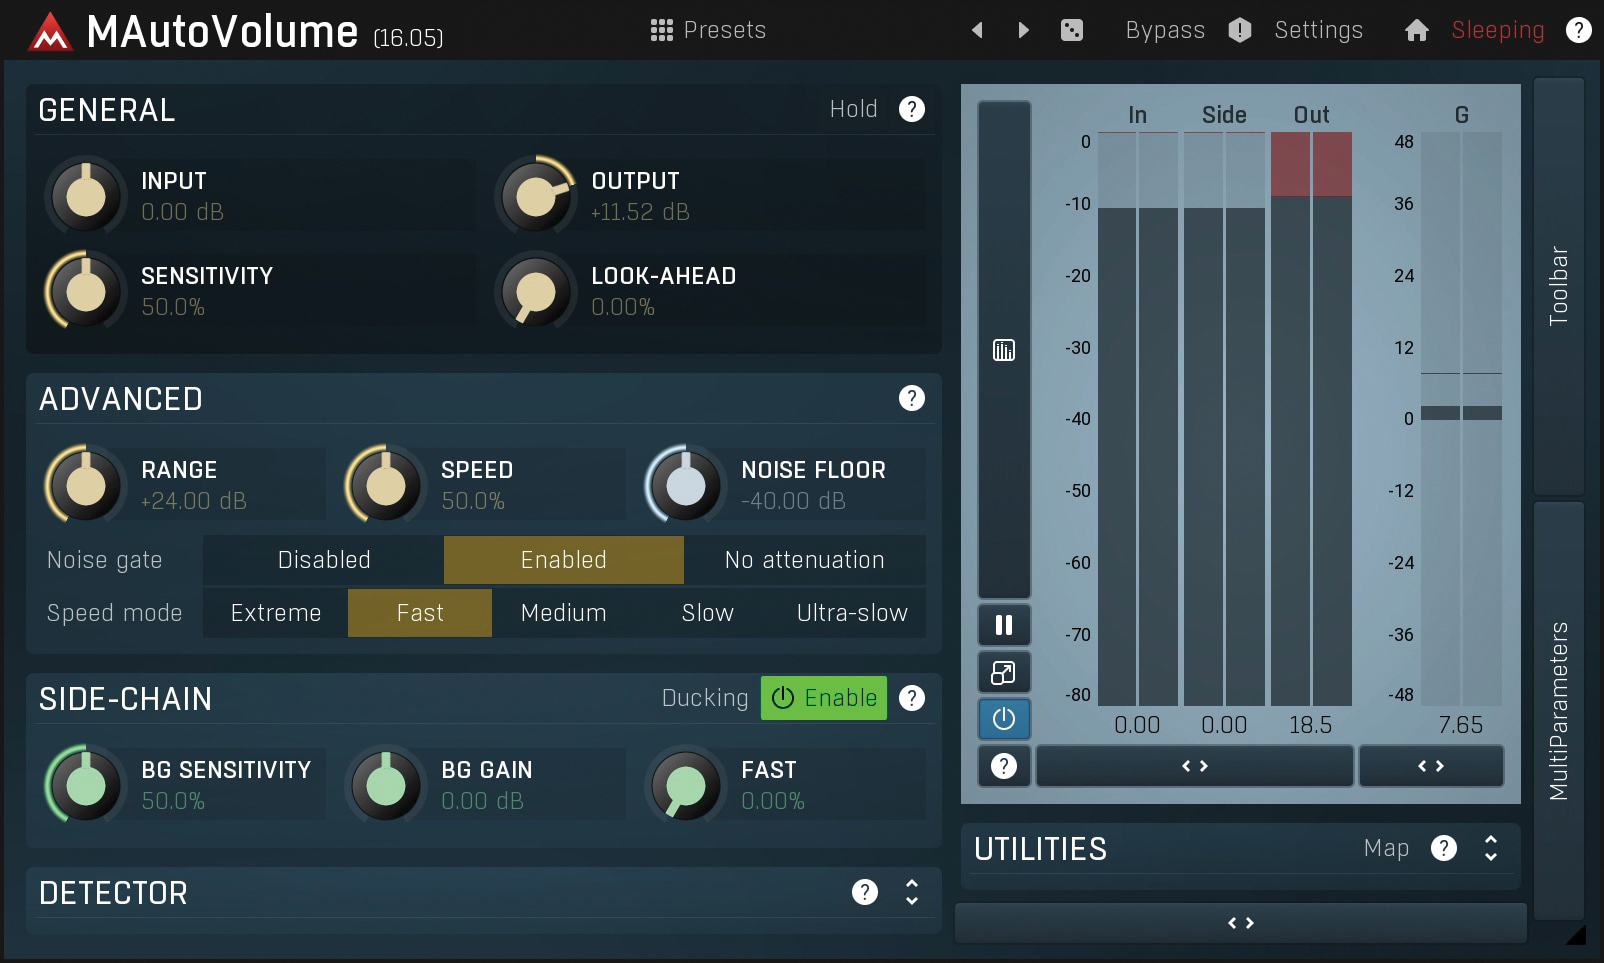
There are a few plugins that tackle level rides in a more automated way. Example plugins include Waves Vocal Rider and Bass Rider, TB Pro Audio Gain Rider 3, Melda Production mAutoVolume, and WA Production Outlaw. These processors work towards a user-selectable target level, but can also work to a sidechain, such as a bussed track mix. They may also output automation data to record into your DAW.
2. Don't touch that dial
Most DAWs feature additional control over individual clips, often including clip-specific gain. On the face of it, this offers another way to tweak your mix levels, but changes made to the clip may affect levels prior to any inserts and thus influence any level-dependent plugins like compressors.
In this regard, clip gain typically isn’t suitable for rides. However, something that works well when you have source audio that is poorly levelled in the first place, is to use clip gain right at the start of the mix to make broad brush adjustments.
Jon is a London based platinum award winning mixer, producer, composer and club remixer with a diverse CV that spans dance, pop, rock and music for media. He’s also a long term contributor to MusicRadar's music technology tutorials and reviews. Whether working alone or collaborating he usually handles final mixdowns, so you’ll also find MusicRadar peppered with his handy mixing tips.
