How to vocode a drum loop
Vocoders aren’t just for robot vocals, as we're about to demonstrate…
Despite the obvious implication of the name, the vocoder is an ideal signal processor for transforming all kinds of source material, not just vocals.
A vocoder works its magic by sending separate ‘carrier’ and ‘modulator’ signals through parallel banks of band-pass filters, then modulating the levels of the carrier’s filters with the output levels of the modulator’s filters to impose the rhythmic and harmonic character of the latter on the former. While the carrier is usually a sustained melodic/harmonic sound such as a synth pad, the modulator just needs to be something heavy on transients and with an interesting dynamic profile - ie, vocals, for the classic ‘singing robot’ effect, or… drums! Mixing a parallel vocoded signal in with a dry drum part imbues it with sense of pitched placement that, while not something you’ll want to use too often, can be very effective in the right musical context - as a special effect, for example.
In this tutorial, we’ll show you how to turn a regular drum loop into something far more harmonically interesting using Ableton Live’s built-in Vocoder. Similar results can be achieved, of course, using any alternative vocoder plugin; and for perhaps the most well-known mainstream example of vocoded drums in action, check out Röyksopp’s Remind Me, from their classic Melody AM album.
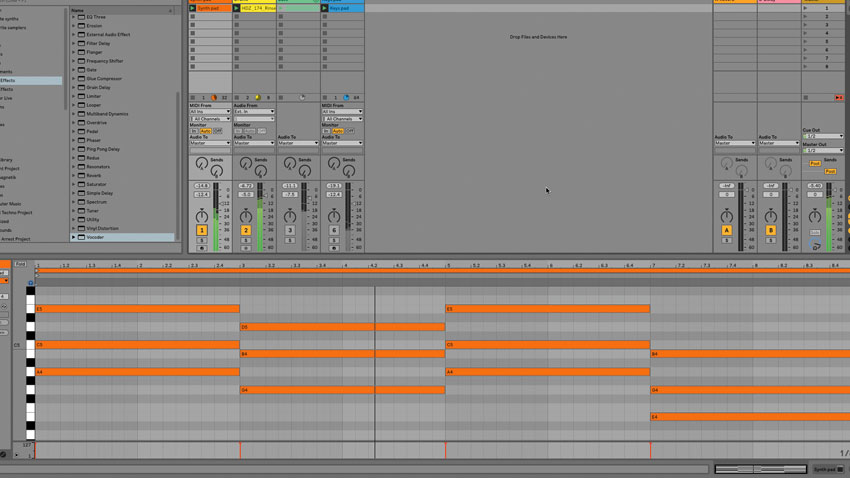
Step 1: Here’s a drum ’n’ bass beat loop with a bassline and keys/pad part. We're going to vocode the drums using another synth pad as the carrier. First, we load a synth (Dmitry Sches’ Thorn) onto a MIDI track and call up the PAD Airy preset; then we program a chord progression that fits the rest of the tune.
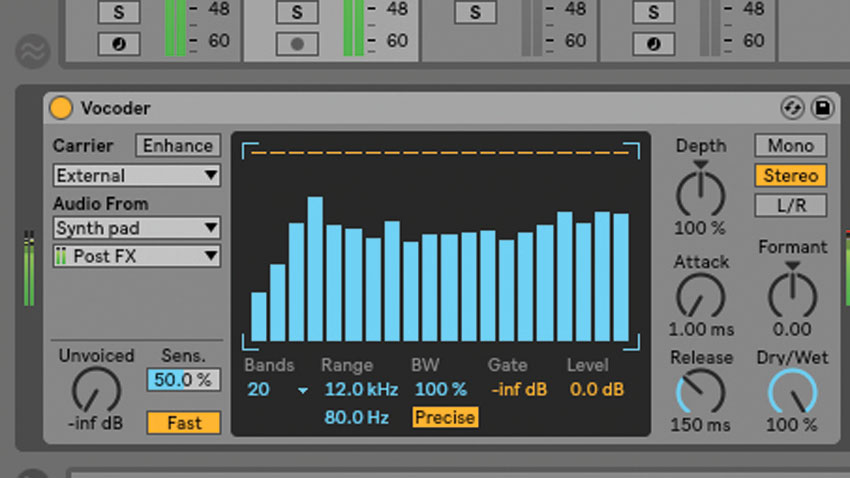
Step 2: Next, we load Live’s Vocoder device onto the drum track. By default, it’s set to use its internal Noise generator as the carrier, so we change this to External and route the synth pad signal in via the menu. Immediately, we hear the filtered pad sound modulated by the drum loop - that’s your basic vocoded drums.
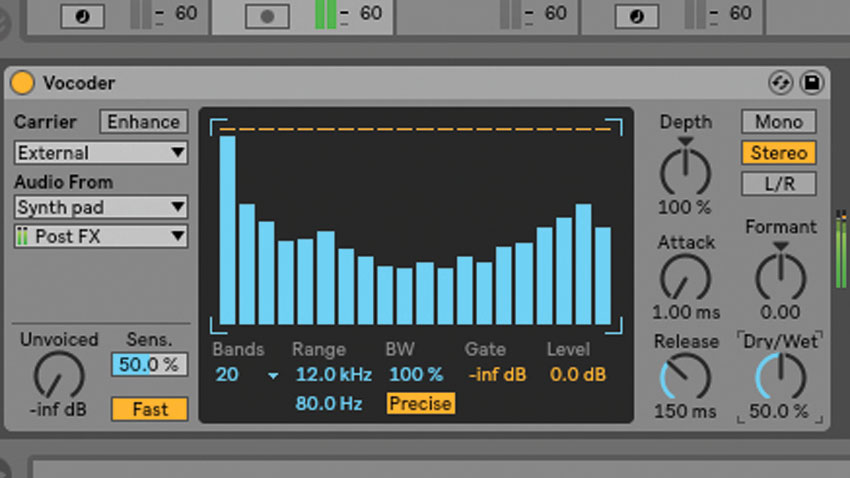
Step 3: Muting the synth track in the mixer takes it out of the mix without affecting its carrier input into the Vocoder, and lowering the Dry/Wet mix reintroduces the dry signal - we set this to 50% for now, to keep the vocoded beat recognisable as a drum loop.
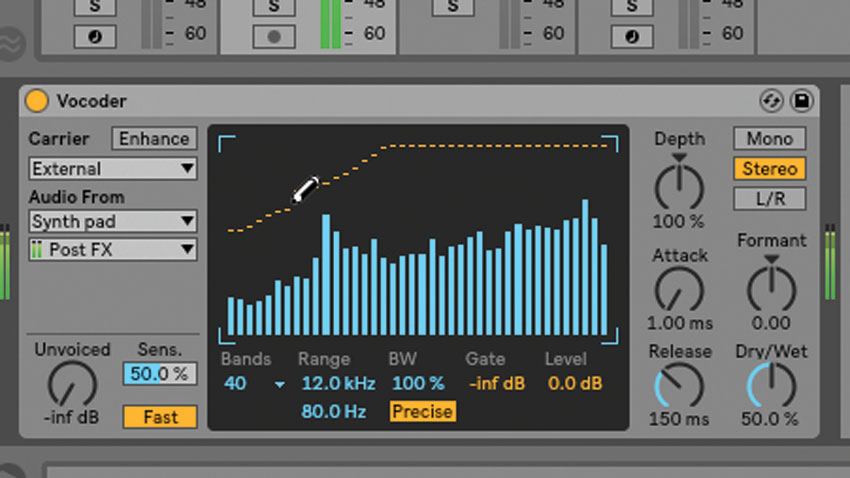
Step 4: The Bands menu sets the number of filters used in the vocoding process. The more bands you use, the higher the resolution of the modulator frequency analysis. We set it to 40, for max fidelity. The level of each band is adjustable in the graph - we draw a curve to gently attenuate low end, for a slightly thinner sound.
Want all the hottest music and gear news, reviews, deals, features and more, direct to your inbox? Sign up here.
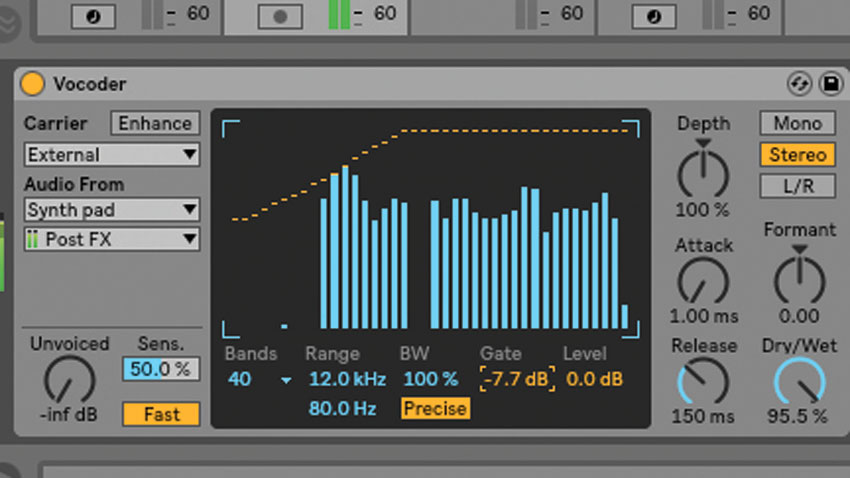
Step 5: The Gate setting determines the level above which the output of individual filters has to rise for them to be heard. The higher this goes, the spikier the loop becomes - we settle on a point where the transient definition is emphasised without the whole thing sounding overtly gated.
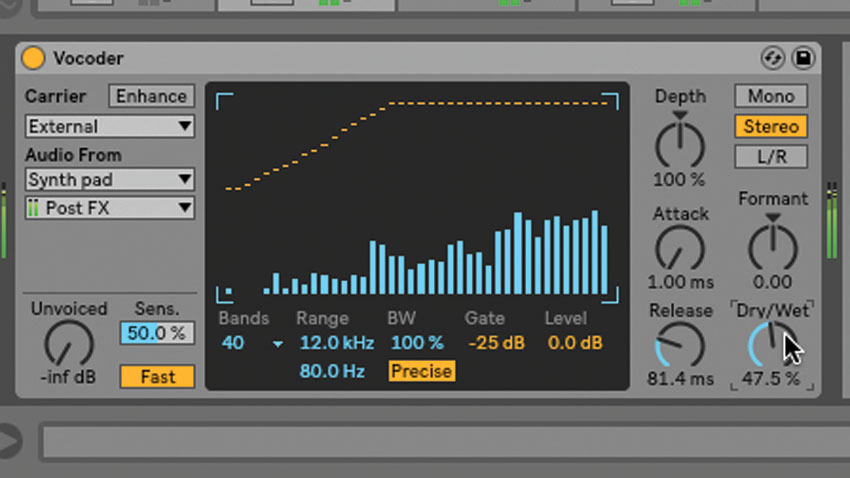
Step 6: The Attack, Release and Formant controls affect the response speed of the vocoder, and shift the filter frequencies up/down - after a few tweaks, we set them back to their defaults. All that remains is to bring in the rest of the track and play with the Dry/Wet control to get the right blend of drums and synth.
Computer Music magazine is the world’s best selling publication dedicated solely to making great music with your Mac or PC computer. Each issue it brings its lucky readers the best in cutting-edge tutorials, need-to-know, expert software reviews and even all the tools you actually need to make great music today, courtesy of our legendary CM Plugin Suite.
