How to use VPS Avenger's multitimbral architecture to build a complete groove
Vengeance-Sound's amazing synthesis and sampling workstation really can do it all - beats, basslines, the lot…
Vengeance-Sound’s VPS Avenger is a hybrid instrument in the truest sense of the word, combining analogue, wavetable and sample-based synthesis in an epic workstation, supplemented by an enormous modulation system and 32 high-quality effects. It even includes a decent drum machine, complete with its own pattern sequencer.
As well as being a first-call synth for individual basses, leads, pads and all the other essential dance music ingredients, VPS Avenger’s multitimbral architecture means it can be used to produce complete grooves - and even entire tracks! - on its own. In this walkthrough, we'll show you how.
For more out-there synth-related action, pick up the April edition of Computer Music.
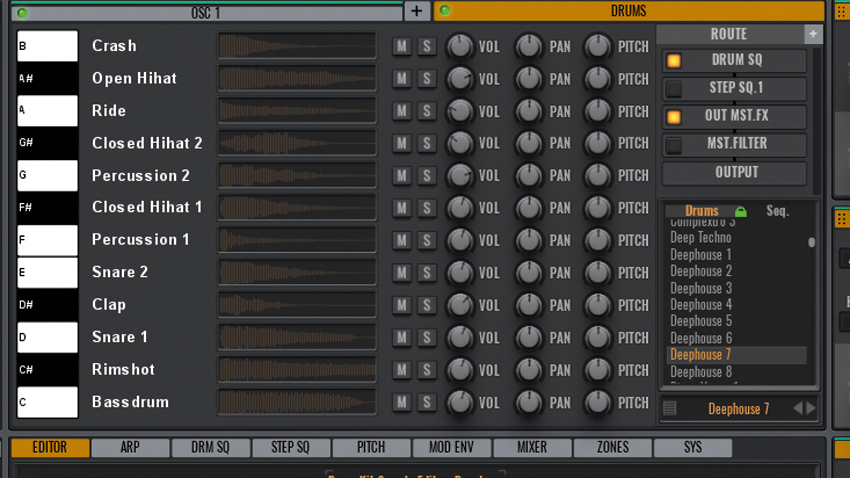
Step 1: VPS Avenger’s multitimbral architecture lets you create complete grooves comprising multiple parts - drums, bass, lead, etc - in one instance of the synth, all triggered by a single MIDI note. Let’s start with the drums: in a new patch, load the DeepHouse 7 kit and pattern into the Drums Oscillator, and create a MIDI clip containing a four-bar-long C2 note.
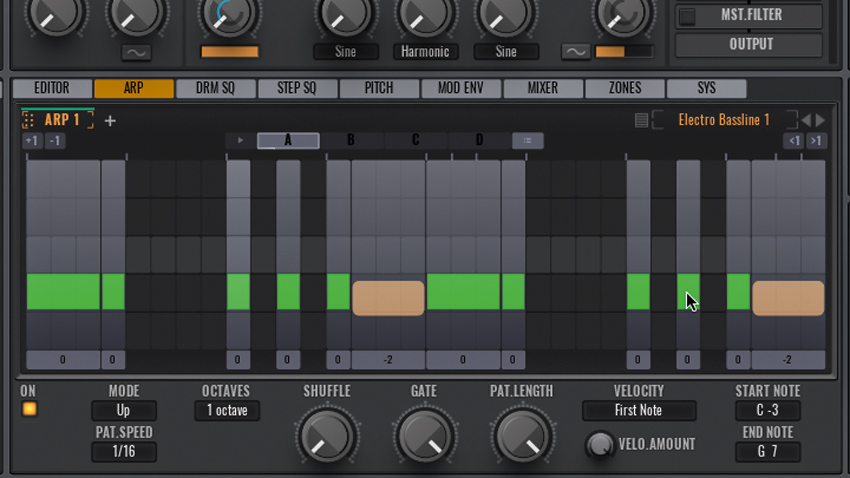
Step 2: The MIDI note triggers the Drum Sequencer in a continuous four-bar loop, and blasts out a constant tone from Oscillator 1. Let’s turn that into a bassline. Activate Arp1 in the Route panel and load the Electro Bassline 1 preset in the Arp panel. Extend the arpeggio’s Pattern Length from 16 to 32 to double the length of the pattern, and move the four high offset blocks down two octaves.
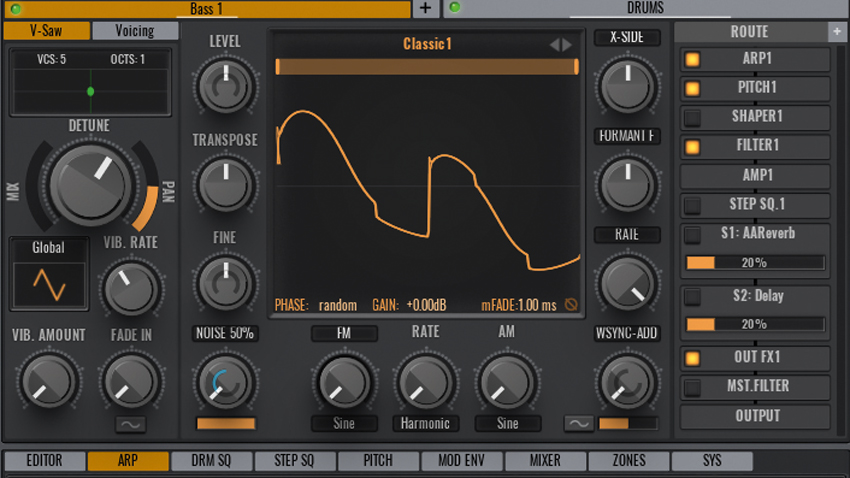
Step 3: Switch the Oscillator to the Classic1 wave from the Factory Bass Shapes menu and name it ‘Bass 1’. Kill the Delay and Reverb sends, and raise Amp 1’s Release to about 1000ms. Back in the Arp panel, copy and paste Pattern A to Pattern B, then right-click Pattern B to turn it on, and activate the Pattern Play button.
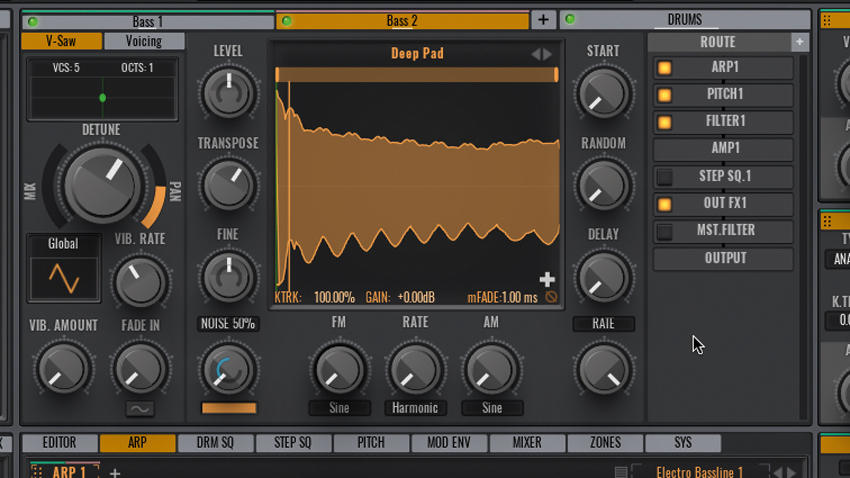
Step 4: The arp now cycles between the two patterns over four bars. Move the fifth-to-last note of Pattern B up one octave to create a variation. Let’s thicken the bass with the addition of a second layer. Create a new Oscillator, name it ‘Bass 2’, and load the Factory Bass Raw > Deep Pad sample. Transpose the oscillator up an octave and activate Arp 1 in the Route panel to assign it to the bassline arpeggiator.
Get the MusicRadar Newsletter
Want all the hottest music and gear news, reviews, deals, features and more, direct to your inbox? Sign up here.
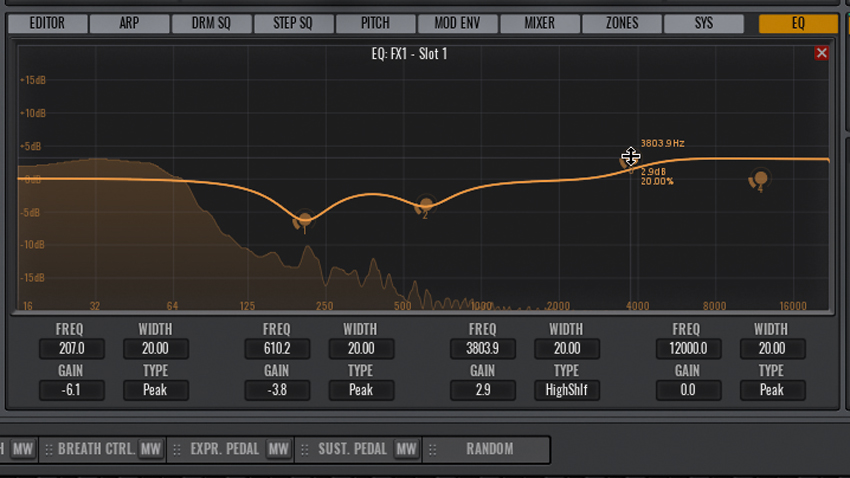
Step 5: Both bass sounds are already assigned to the Out FX 1 bus - as indicated by the coloured bars on the FX1 tab - so we can process them together right away. Insert an EQ, and cut 6dB at 208Hz and 4dB at 610Hz. Create a high-shelf boost of +3dB at 2210Hz. Follow that with a Compressor: load the A Good Starting Point preset and set the Ratio to 1:3 and Attack to 6ms.

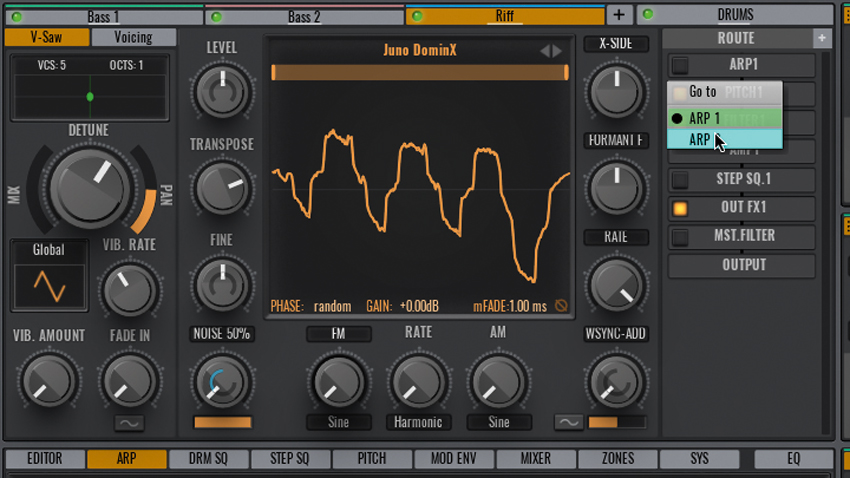
Step 6: Now to add a semi-melodic riff. Make a third Oscillator, name it ‘Riff’ and load it with the Juno DominX wavetable. Transpose it up two octaves. Make a second Arpeggiator in the Arp page of the central display, load the CM Riff Arp preset into it from Tutorial Files (or sequence a pattern of your own), and assign Oscillator 3 to it by changing Arp 1 to Arp 2 in the Route panel and activating it.
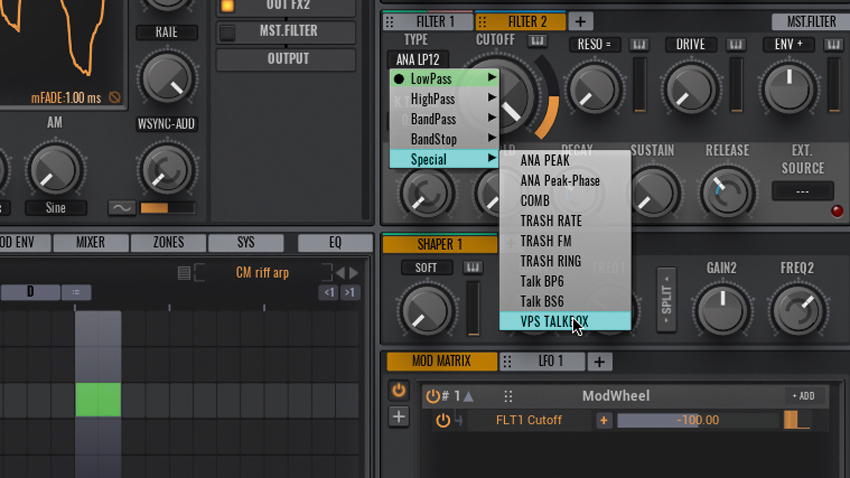
Step 7: We want to shape Osc 3 separately from the two Bass oscillators, which means routing it through its own filter, amp and effects. Create a second Amp, Filter and FX rack, and send Oscillator 3 to them in the Route panel. In Amp 2, raise Spike to about 20% and Release to about 2100ms. Set Filter 2 to VPS Talkbox, with a Cutoff of 3100Hz, and Vowel at 55%.
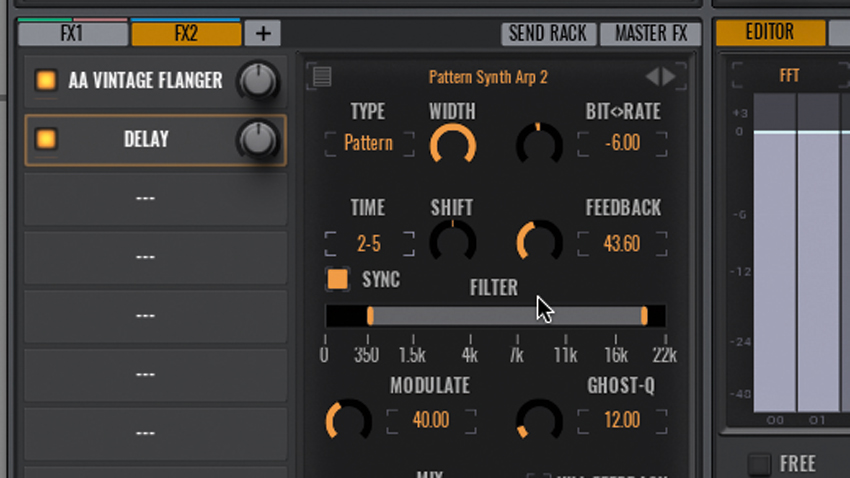
Step 8: Add Shaper 1 in the Route panel and set it to the Smooth distortion type at 75% Drive. Assign LFO 1 to Filter 2 Cutoff at full depth for movement. In the FX 2 tab, load AA Vintage Flanger’s Roaring Flanger preset into Slot 1 and the Delay’s Pattern Synth Arp 2 preset into slot 2. Reduce the Flanger’s Wet Gain to -5.5, and the Delay’s Feedback and Mix to 27 and 10. Boost the Flanger slot’s Gain knob to 150%.
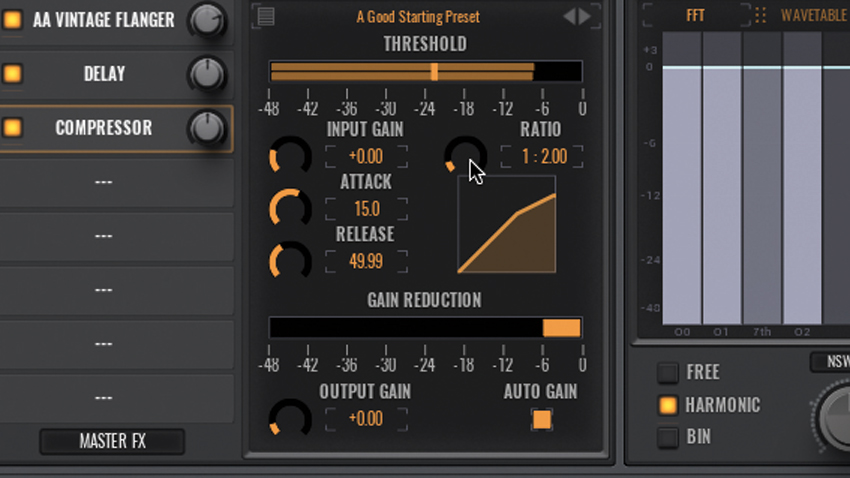
Step 9: Finish the chain with a Compressor, again using the A Good Starting Point preset, with the Ratio upped to 1:5, Attack at 7, Auto Gain disabled and Output Gain at +5. Now all that remains is to balance the levels in the Mixer, insert a Limiter and EQ into the Master output, and draw in a MIDI note sequence to create a melodic progression.
Computer Music magazine is the world’s best selling publication dedicated solely to making great music with your Mac or PC computer. Each issue it brings its lucky readers the best in cutting-edge tutorials, need-to-know, expert software reviews and even all the tools you actually need to make great music today, courtesy of our legendary CM Plugin Suite.

