How to use virtual analogue synthesis in Audiaire's Zone
Synthesise dense, virtual analogue sounds in Audiaire's Zone
Boasting a powerful sequencer and a host of built in effects, Zone is an unique sofsynth from Audiaire, a new company from Sample Magic's head honcho Sharooz Raoofi.
Receiving a glowing four and a half stars from us here at Computer Music this “parameter sequencer synthesiser” (as Audiaire themselves put it) is also capable of rich virtual analogue synthesis.
Here we've created a handy step by step guide to help you create warm analogue sounds all without leaving the comfort of your DAW.
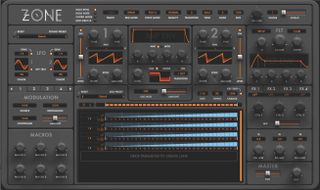
Step 1: Let’s create a simple sawtooth patch. Set both Osc 1 and 2 to Saw, then Fine tune both apart by around 2.6 cents for a detuned effect. To shape the amplitude, set the Amp Env up with minimum Attack, maximum Decay and Sustain, and Release at 0.08.
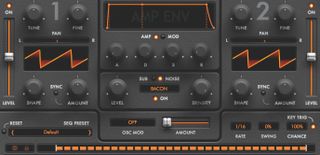
Step 2: Time to bolster and tweak our synth’s tone for maximum density and power. Turn the Sub Oscillator on, raise Level to 0.5, and swap it to a Sine shape for some clean weight; then flip to the Noise tab and turn up the Bacon noise type to halfway, giving the overall tone a crispy, fizzy top end.
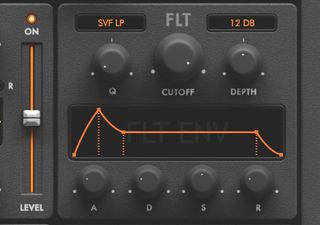
Step 3: The Filter’s Cutoff is half-closed by default, so quickly push that up to max to open out the patch’s full range of frequencies. Now to the top-right Unison section: call up 2 Voices, push Unison detune to 0.080, then Spread the two voices out to around 0.5 for stereo flavour. Lush indeed!
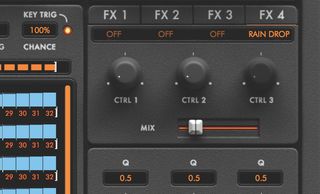
Step 4: Next, head to the synth’s four-slot FX section for some reverb-like ambience. In the final FX 4 slot, call up the Rain Drop effect, then set Delay Time to the minimum 0.025s, Feedback to 1% and Mix to 0.15. While we’re here, slightly push up the three-band EQ’s High and Low gain knobs for more fizz and weight.
Get the MusicRadar Newsletter
Want all the hottest music and gear news, reviews, deals, features and more, direct to your inbox? Sign up here.
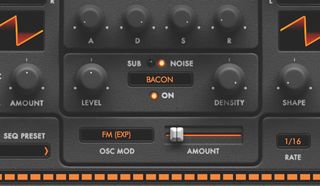
Step 5: Let’s spice up our saw patch. Head to the Osc Mod section and choose the FM (Exp) mode, which is exponential FM – ie, cross modulation, as found on classic synths like the Roland Jupiter-8. High values give unmusical dissonance, but a subtle Amount below 0.1 results in lush, detuned-style thickness.
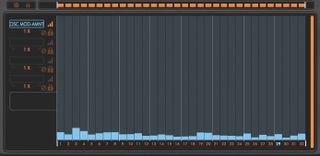
Step 6: Sequencing is Zone’s speciality. Drag the Osc Mod Amount’s header bar to the main Sequencer lane and drop it there, creating a sequencer lane to control the parameter. After expanding this lane, draw in slight changes in Osc Mod Amount to create analogue-style fluctuation and drifting – subtle but effective.
Computer Music magazine is the world’s best selling publication dedicated solely to making great music with your Mac or PC computer. Each issue it brings its lucky readers the best in cutting-edge tutorials, need-to-know, expert software reviews and even all the tools you actually need to make great music today, courtesy of our legendary CM Plugin Suite.

