How to use Studio One's Arranger Track to speed up your workflow
Divide your song into sections then move them around
Like other top-flight DAWs such as Logic Pro and Cubase, PreSonus' Studio One has its own Arranger Track, which makes it easy to move entire song sections around and experiment with your track's structure.
Here's how it works, and how it can speed up your workflow and even help you to come up with ideas.
For much advice on arrangement, pick up the December 2018 edition of Computer Music.
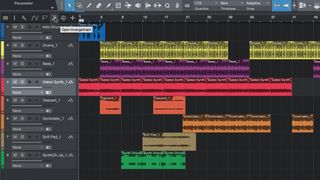
Step 1: The Arranger Track in PreSonus Studio One is a bit like a hybrid of the versions found in Logic Pro and Cubase. The first step to using it is to call it up by clicking its activation button in the toolbar. This makes it visible above the timeline.

Step 2: To create an Arranger region, select the Paint tool and drag from the start point to the end point of the section of your song. A new region will be created with a default name that you can change to whatever you like.

Step 3: To change the name of the region, click the Arranger Track’s header to reveal the inspector panel on the left of the screen. You’ll see your new region at the top of the event list. Double-click its name and type a new one.

Step 4: Continue creating regions to fit the structure of your project in its current state. You can drag the edges of an existing region to resize it without affecting the content in the tracks area, but don’t try to drag them around at this point, as any content below will also move.
Get the MusicRadar Newsletter
Want all the hottest music and gear news, reviews, deals, features and more, direct to your inbox? Sign up here.

Step 5: Once you’ve built up a trackful of Arranger regions, there are two ways to move them around. The first is to drag them to new positions within the Arranger track. A helpful tag appears to let you know whether you’re about to replace an existing section or insert the one you’re moving before or after it.
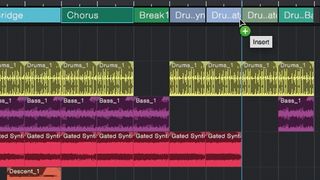
Step 6: When a region is moved, all the content below it moves to the corresponding location. In order to copy a region instead of moving it, simply hold down the Option key while dragging. Hitting the Backspace key deletes the selected region but not its associated content.

Step 7: The second method of rearrangement involves the Event List in the Inspector. You can rearrange the order in which the regions that appear here are played back by moving and copying them in a similar way to how you would usually do it in the Arranger Track.

Step 8: Studio One has a final trick up its sleeve in the form of Scratch Pads, which allow you to try out new ideas in a separate area without affecting the main project. Create a new one by hitting this button in the upper-right corner.
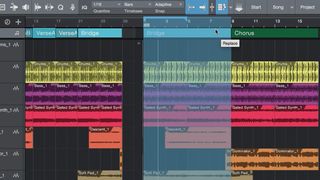
Step 9: Drag sections from the main area’s Arranger track into the Scratch Pad’s Arranger Track to copy them into it. These can be messed around with however you like without affecting anything in the main area, giving you free rein to experiment.
Computer Music magazine is the world’s best selling publication dedicated solely to making great music with your Mac or PC computer. Each issue it brings its lucky readers the best in cutting-edge tutorials, need-to-know, expert software reviews and even all the tools you actually need to make great music today, courtesy of our legendary CM Plugin Suite.

"If I wasn't recording albums every month, multiple albums, and I wasn't playing on everyone's songs, I wouldn't need any of this”: Travis Barker reveals his production tricks and gear in a new studio tour

“My management and agent have always tried to cover my back on the road”: Neil Young just axed premium gig tickets following advice from The Cure’s Robert Smith


