How to use multiband devices in your DAW
Learn how to divide up the frequency spectrum for advanced processing
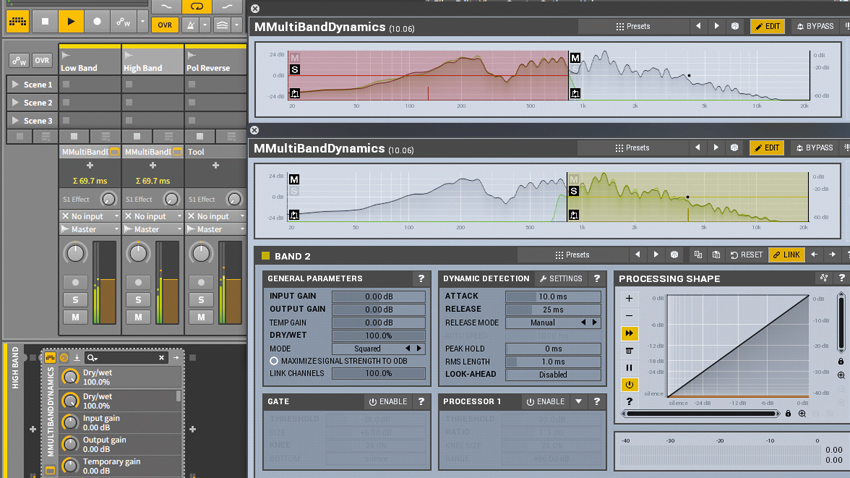
Once relevant solely for dynamics processing, the multiband concept has been taken much further by ambitious software developers.
Multiband versions of almost every effect you can think of have been attempted - some more successfully than others. Multiband delays, for example, can leave the low-end clear while presenting alternate patterns in higher ranges; bitcrushers can provide interesting degradation across the frequency spectrum, and transient processors expand on the multiband dynamics devices of the past in a modern setting.
The basic principle of multiband processing are simple enough: the frequency spectrum is split into bands by filtering, and the resulting signals are processed separately. Those filters and processors already exist in our DAWs, so what’s to stop us having a go at creating our own multiband devices? Even the most stylish plug-in effects almost always stick to one thing - a multiband distortion unit may offer different flavours of distortion per-band, but it only offers distortion for each. With a custom multiband setup, the sky’s the limit. We’re free to process and manipulate any band we like with any processor we care to call on. Saturation in the low band and flanging in the tops? Go for it. Heavy compression on the low-mids and a sprinkling of delay higher up? Feel free. And in the modern DAW, you get even more tools to help make your set-ups count - anything with a ‘rack’ system can save and recall settings and routing for later use, for example.
Here, we’re going to take you through some basic multiband setups in various DAWs and provide a few more general multiband processing tips along the way.
1. How to go multiband in Bitwig Studio
Bitwig Studio has its own Multiband container devices, called Multiband FX-2 and Multiband FX-3. One of these gives you two bands and the other gives you three, but we’re not telling you which is which…
The idea here is that you drop components into the ‘windows’ at the top of the devices to create custom processing chains in each band, before setting the crossovers. We tested these devices using polarity-inverted duplicate tracks (see below), and found that the filters weren’t so clean, so you might find it best to use these containers for creative processing only.
2. Distortion differential
Distortion sounds great in low bands but less so in high bands. For a different take on the effect, split higher bands after distortion is applied, so you can use them to process the distorted signal higher up the frequency spectrum.
Get the MusicRadar Newsletter
Want all the hottest music and gear news, reviews, deals, features and more, direct to your inbox? Sign up here.
3. How to go multiband in Cubase
Steinberg’s DAW isn’t the best kitted-out for DIY multiband action, but it is flush with dedicated multiband devices: the Envelope Shaper, Expander and Compressor. These devices can be co-opted for your own uses - if you add one to a track, bypass all its processing, then set bands up with the crossovers where you want them, you can then duplicate the track, soloing the correct band on each. Of course, you can also make use of a good linear-phase EQ for the same purpose. And by assigning the crossover cutoffs to a MIDI CC, you can even control corresponding bands together.
4. Out of the rack
We’re putting multiband setups together in racks here, but doing the same on individual mix channels can be really powerful too, giving you all the advantages of a channel - such as insert effects, faders, mid/side controls - for each band. Group the channels to their own buss for mix-channel control over the output signal.
5. How to go multiband in Logic Pro X
Logic doesn’t have a racking system, so you’ll have to create a separate channel for each band. Co-opt Logic’s Multipressor if you don’t have your own linear-phase-capable EQ - add it to the first band, set the crossover splits, disable all processing, then duplicate it onto the other band channels before soloing the correct band on the plugin for each channel. Logic’s Smart Controls are pre-mapped and thus unlikely to be a good solution for connecting two crossover filters into one control. You can change Smart Control presets using its Inspector, though. Like in Cubase, map the cutoff frequencies to a MIDI CC to change more at once.
6. Sibling rivalry
Ableton Live users can get more power out of their Racks with siblings - ie, the same controls on different devices inside a Rack. You can copy or map items to multiple siblings at once by right-clicking. This feature may need to be activated in Ableton’s options.txt file in your OS’s file browser.
7. How to go multiband in Reason
No multiband devices here, unless you pay some cash in the Prop Shop. It gets worse when you try setting the SSL mixer EQ accurately, and then the MClass Equalizer only has shelving filters!
There is one way to multiband heaven in Reason, though: you can create clean crossover filters using the MClass Stereo Imager, which has dedicated outputs around the back for its low- and high-band signals. Use the Separate Out output jacks, and Solo the Lo Band at the front.
Once you’ve got everything wired right round the back and have tested it out, be sure to save your multiband splits inside a Combinator to grab again later.
8. Using the right filters
Unfortunately, multiband crossover networks are a little more nuanced than they may appear at first, and slapping any old filter over a signal can throw your material off-balance. A generic filter might not have a consistent behaviour or response, and this is especially so with your DAW’s ‘stock’ filter. For this reason, it’s best to reach for a plugin… but don’t just call up any old filter.
To check your crossover network thoroughly, duplicate your original track and phase-invert it against your multiband network (with its processing bypassed). If any sound comes out out (even at a low level), your crossover isn’t set properly.
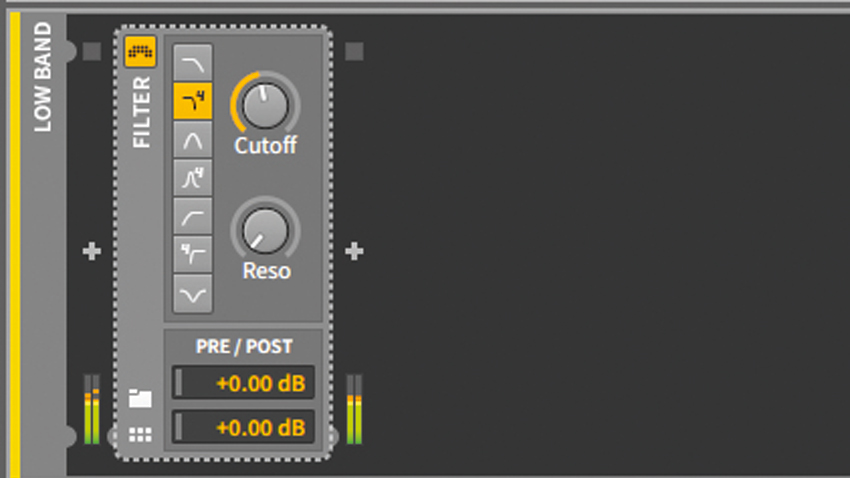
Step 1: A standard, analogue-style filter does its thing by adding tiny delays to the signal. At frequencies around the cutoff, a filter changes the phase of the audio - especially problematic at low frequencies.
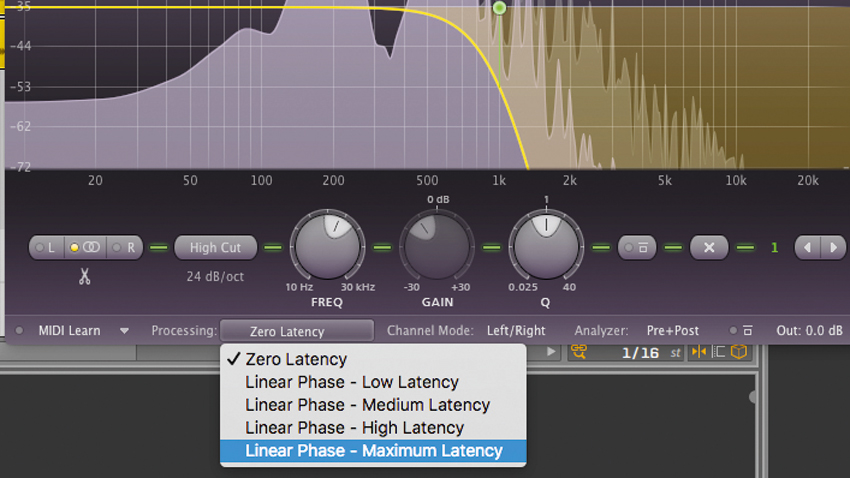
Step 2: To combat this, you need a linear-phase filter, but these come with their own problems: they can add a ringing tone to the material. If you’re hoping to process transient material like drums, be sure to proceed with caution.
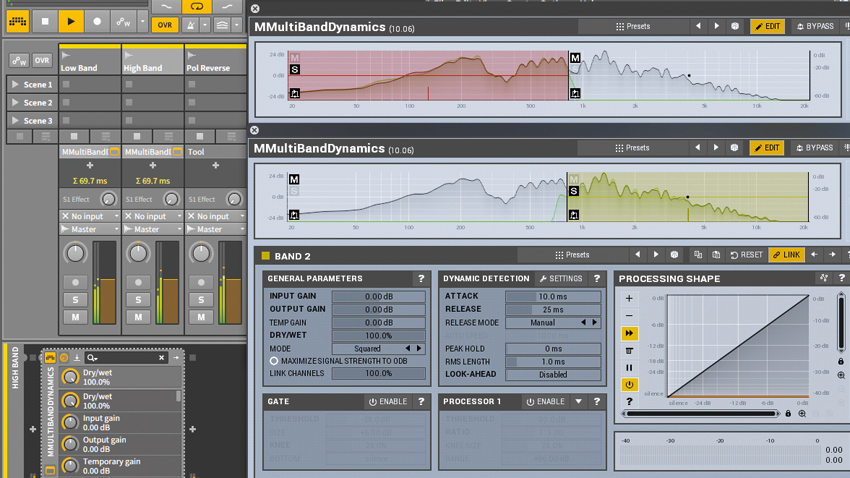
Step 3: Another way to guarantee clinical results is to co-opt a full multiband plugin with its processing bypassed for each band. With the individual bands soloed, you’ll be using the plugin’s crossover networks for your own effects.
Future Music is the number one magazine for today's producers. Packed with technique and technology we'll help you make great new music. All-access artist interviews, in-depth gear reviews, essential production tutorials and much more. Every marvellous monthly edition features reliable reviews of the latest and greatest hardware and software technology and techniques, unparalleled advice, in-depth interviews, sensational free samples and so much more to improve the experience and outcome of your music-making.

