How to use modulation effects on drums
Take your drums to unexpected places with chorus, phasing and flanging
While modulation effects aren’t the first things that come to mind when processing drums - if, indeed, they come to mind at all - the likes of chorus, phasing and flanging can work wonders in terms of stereo widening, imbuing a sense of movement and adding spectral interest to beats of all kind.
All three of these staple studio effects involve the duplication (several times in the case of chorus ) and delaying of the input signal by very small amounts, with the delay time modulated by an LFO to produce their characteristic sounds. Chorus is all about thickening and making it appear as if several differently pitched versions of the source material are playing together, while phasing and flanging deliver two similar styles of psychedelic frequency sweeping, differentiated by the use of all-pass filters in the former. Probably the most famous (and certainly the most historic) examples of flanging in action can be heard on The Beatles’ Tomorrow Never Knows and the Small Faces’ Itchycoo Park, while phasing was a favourite of Queen guitarist Brian May, and the ubiquitous chorus is perfectly showcased by the guitar in Nirvana’s Come As You Are.
Having established, then, that these aren’t standard issue tools for hyping up drum sounds by any means, let’s use them to hype up some drum sounds…
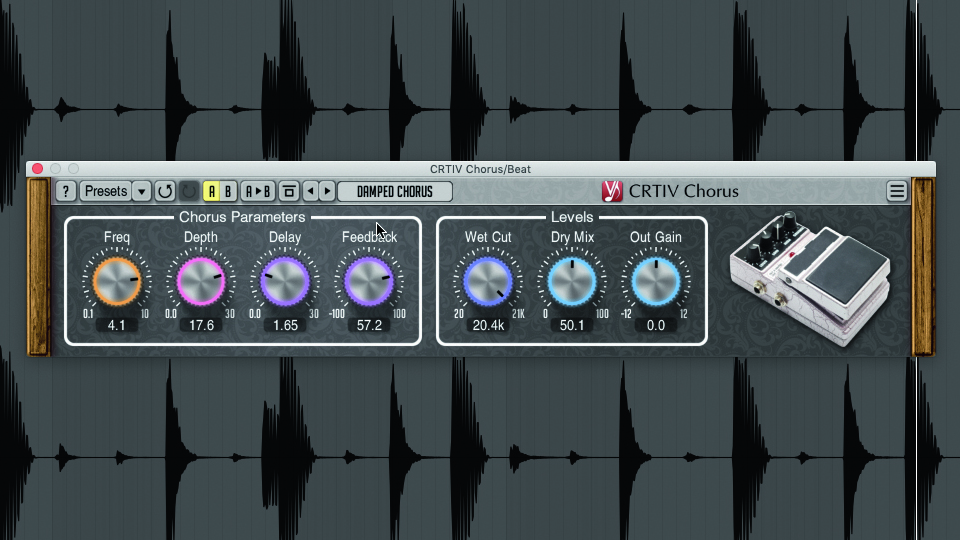
Step 1: Here’s what a full drum loop sounds like with chorus applied. It’s wider than without, but that width is actually to the detriment of the bass drum, which sounds phasey and unfocused. It needs to be put back at the centre of the stereo field. What we need to do is filter the kick drum out of the effect somehow.
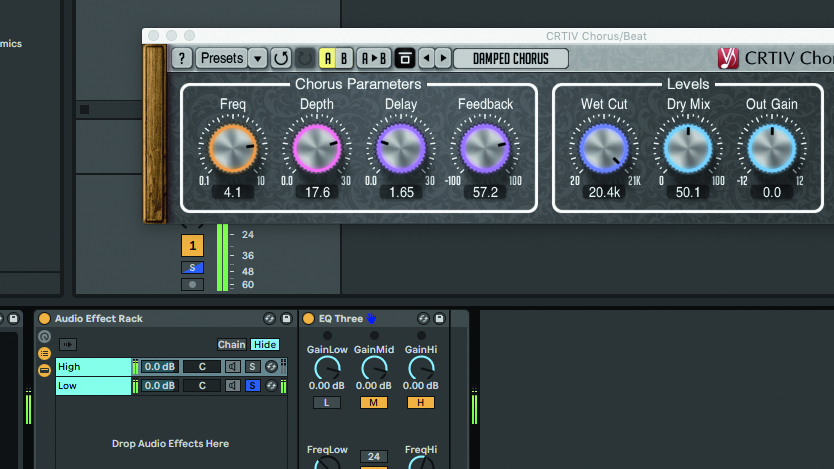
Step 2: There are various ways this can be done, depending on your DAW, but in Live, the easiest method is to set up two Chains in an Audio Effect Rack, each with an EQ Three inserted, then mute the Mid and High bands on one, and the Low band on the other, making sure that the FreqLow setting is identical for both.
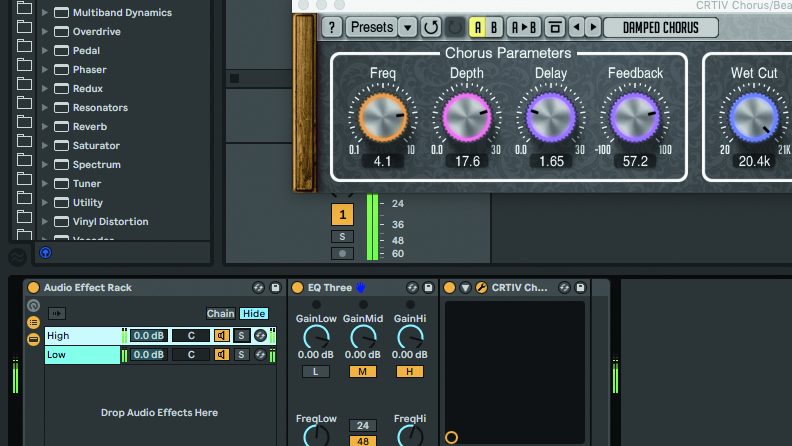
Step 3: Insert your chorus plugin of choice into the Low-muted Chain. Now, only the mid and high elements – ie, the snare and hi-hats – are processed, while the kick drum comes through unaffected on the High/Mid-muted Chain. The end result is a wider, more interesting sound that doesn’t sacrifice low-end punch and clarity.
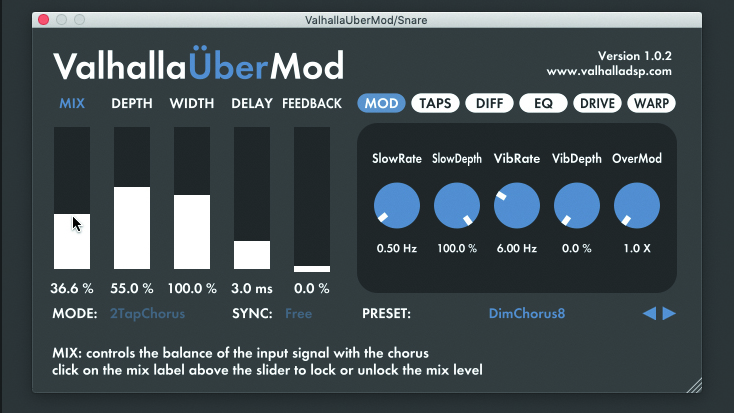
Step 4: The drum that benefits most from chorus is the snare, and if your drums are routed to separate channels, processing it on its own becomes much easier, of course. Hear how much wider and more exciting my snare/clap combo becomes when the chorus is switched in – getting the dry/wet mix right is crucial.
Get the MusicRadar Newsletter
Want all the hottest music and gear news, reviews, deals, features and more, direct to your inbox? Sign up here.

Step 5: Like chorus, phasing isn’t a process you’ll want to apply to the whole kit, except perhaps as a spot effect. For adding stereo spread and frequency-based movement to hi-hats and percussion, though, it can be hugely effective. Playing with the modulation rate has a profound effect on the sound.
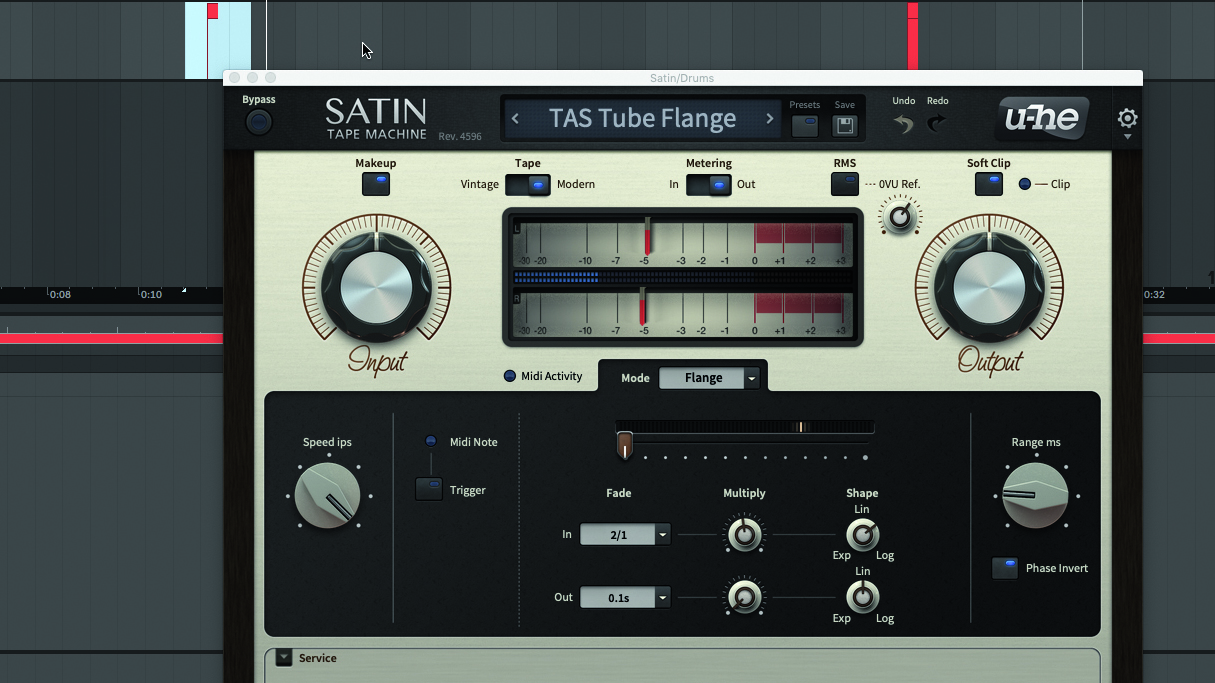
Step 6: Finally, flanging, which is similar in effect to phasing but less complex. The classic flanger sweep – as first used by The Beatles and The Small Faces – is always a winner dropped on drums at the end of a phrase, and here, u-he’s amazing Satin tape deck emulation makes it easy with its triggered automation.
Computer Music magazine is the world’s best selling publication dedicated solely to making great music with your Mac or PC computer. Each issue it brings its lucky readers the best in cutting-edge tutorials, need-to-know, expert software reviews and even all the tools you actually need to make great music today, courtesy of our legendary CM Plugin Suite.


