How to use digital synthesis techniques to create metallic sounds
Frequency modulation has long been a popular choice for metal noises. Find out why with our guide
Before the advent of sampling, synthesists turned to analogue hardware and effects to create unusual timbres. But even the most complex analogue waveforms were too simple to build up any timbral complexity - no matter how you process it, an analogue waveform always sounds like an analogue waveform.
However, a Stanford professor (and percussionist) by the name of John Chowning came up with idea of synthesising more complex waveforms by modulating the frequency of a sine wave with another sine wave. Sound familiar? That’s because this is the same frequency modulation (or FM) synthesis that’s relatively common today. Chowning’s technique didn’t rely on unstable analogue oscillators, instead taking place in the digital domain, enabling far more precision in its operation and programming.
As we'll demonstrate in the walkthrough below, FM synthesis (unlike additive synthesis) is equally useful for creating harmonic and inharmonic sounds, which is why so many sound designers choose it as a basis for metallic effects.
To read more about making metallic sounds, grab the February 2018 edition of Computer Music.
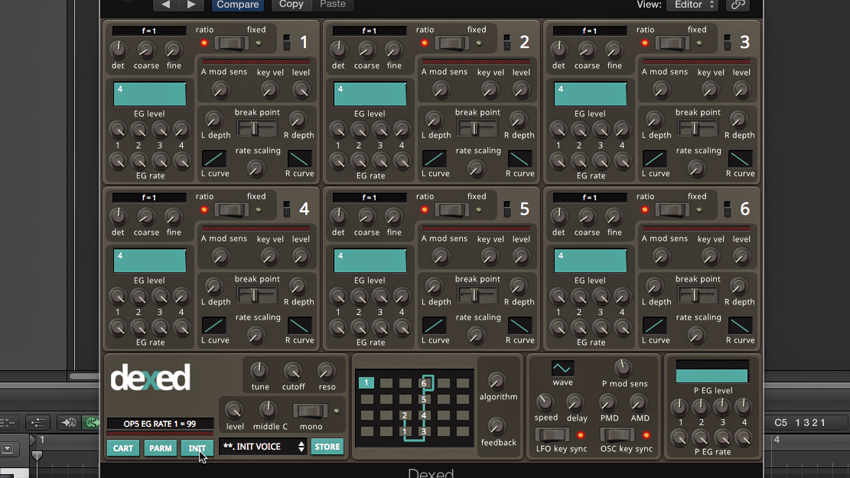
Step 1: FM synthesis is one of the most effective ways to create clangorous tones, and Yamaha’s DX7 was rightly famous for its tuned and untuned metallic percussion patches. We’re going to use the free Dexed from Digital Suburban to make a typical DX-style percussion sound. Call it up and hit the INIT button to wipe the slate clean.
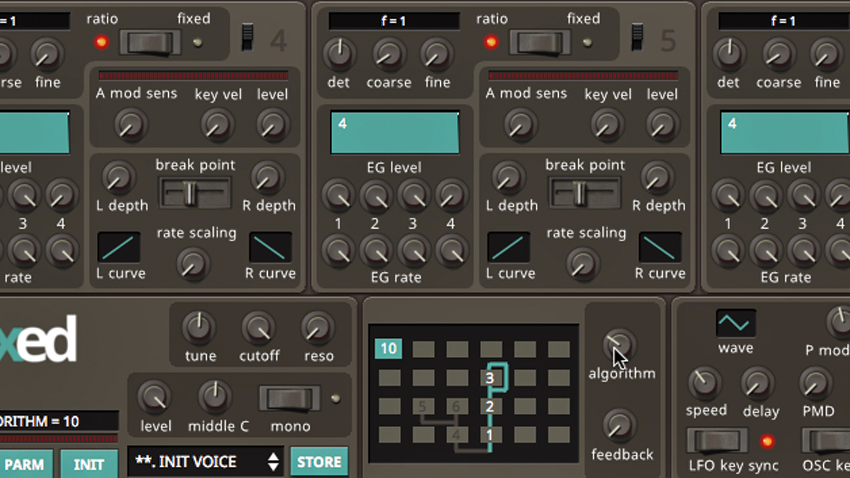
Step 2: The initialised patch doesn’t sound like much. To keep things simple, we’re only going to use three operators. Shut oscillators 4, 5, and 6 off using the switches at the top-right of each. Next, use the Algorithm knob to select algorithm 10. Currently, this makes no difference to the sound, as only Operator 1 has any level dialled in.
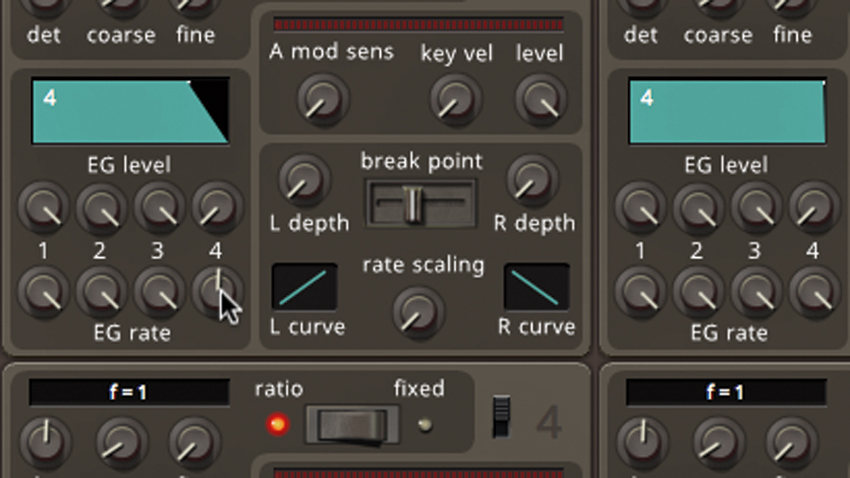
Step 3: As you can see by the grid representing the algorithm, Operator 1 is being modulated by Operator 2, which in turn is being modulated by Operator 3. Operator 3 is also feeding back into itself. Let’s start shaping Operator 1 by adjusting its envelope. Set its EG Rate 4 knob - which acts like release time - to around 12 o’clock.
Get the MusicRadar Newsletter
Want all the hottest music and gear news, reviews, deals, features and more, direct to your inbox? Sign up here.
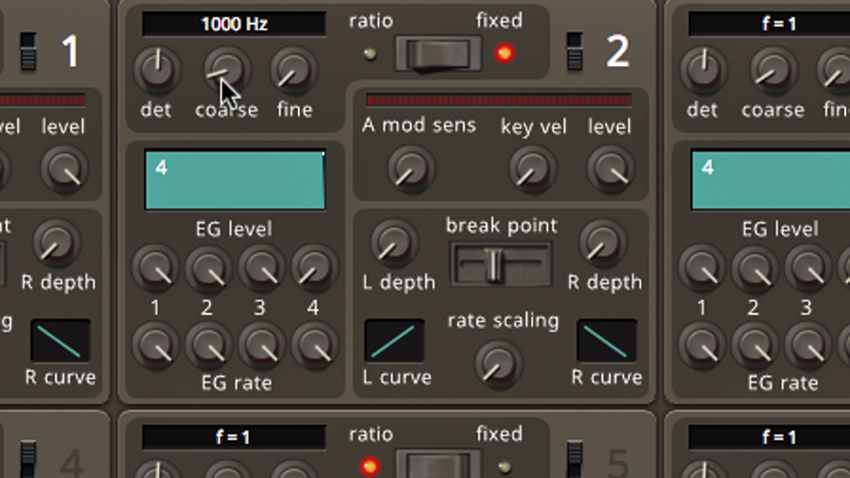
Step 4: The sound rings out a little bit. Next, increase Operator 1’s Coarse tuning to f=2 for a higher-pitched base tone. Now Crank up the Level of Operator 2. The results are not pleasant! Click the Ratio/Fixed switched over to Fixed so that Op 2 isn’t keyboard controlled. That’s not much better! Try increasing its Coarse tuning to 1000Hz.
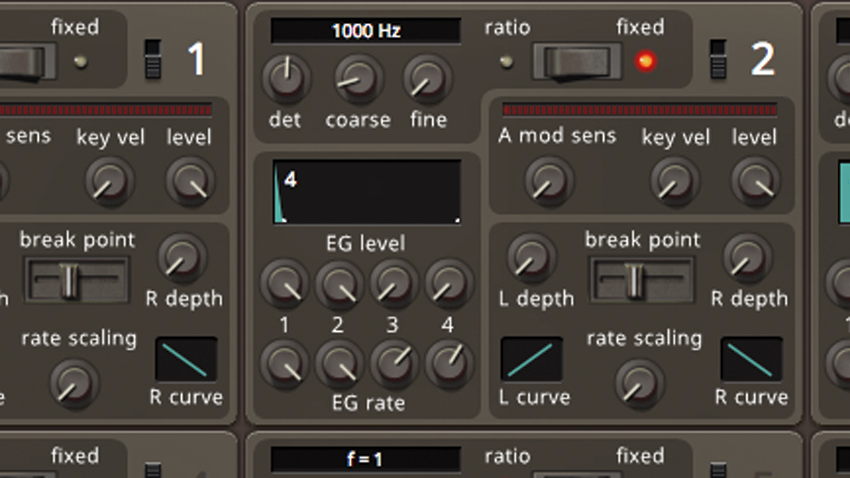
Step 5: Adjust Operator 2’s envelope, setting EG Level 3 to 0 and EG Rate knobs 3 and 4 to about 1 o’clock. This provides a short burst of gain from Operator 2, so it only modulates the start of Op 1. Bring Operator 3’s Level up nearly full and set its Coarse tuning quite high - maybe f=13.
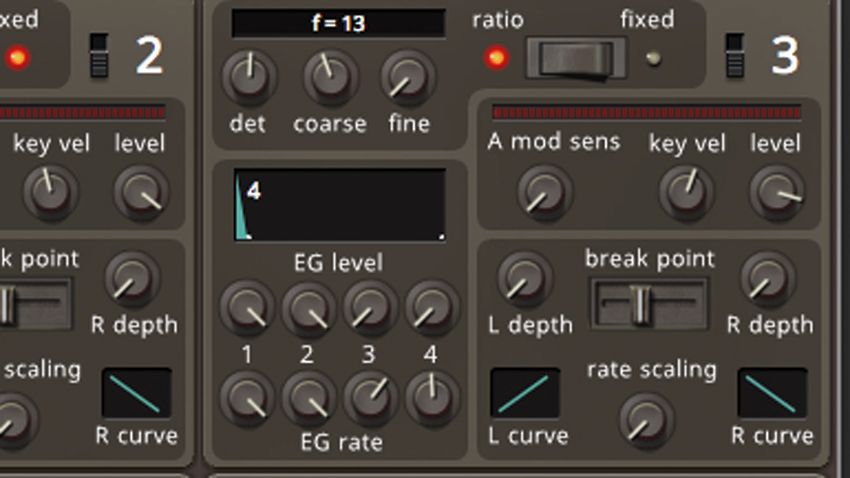
Step 6: Set Operator 3’s EG Level 3 to 0, EG Rate 3 to 1 o’clock and EG Rate 4 to 12 o’clock. This modulates our modulation! The results are quite metallic. We can make the sound more lively by adjusting each Operator’s Key Velocity. Try experimenting with other Algorithms for variations on the patch. Algo 21 sounds great!
Computer Music magazine is the world’s best selling publication dedicated solely to making great music with your Mac or PC computer. Each issue it brings its lucky readers the best in cutting-edge tutorials, need-to-know, expert software reviews and even all the tools you actually need to make great music today, courtesy of our legendary CM Plugin Suite.


