Understand the notes on a piano or MIDI keyboard
How to learn the layout and start playing

If you're looking at a piano or MIDI keyboard for the first time then it can seem bewildering, but take a little time to understand it, and all of those black and white notes start to make sense.
Here's a complete beginner's guide that explains the layout, one step at a time...
How to navigate the keyboard
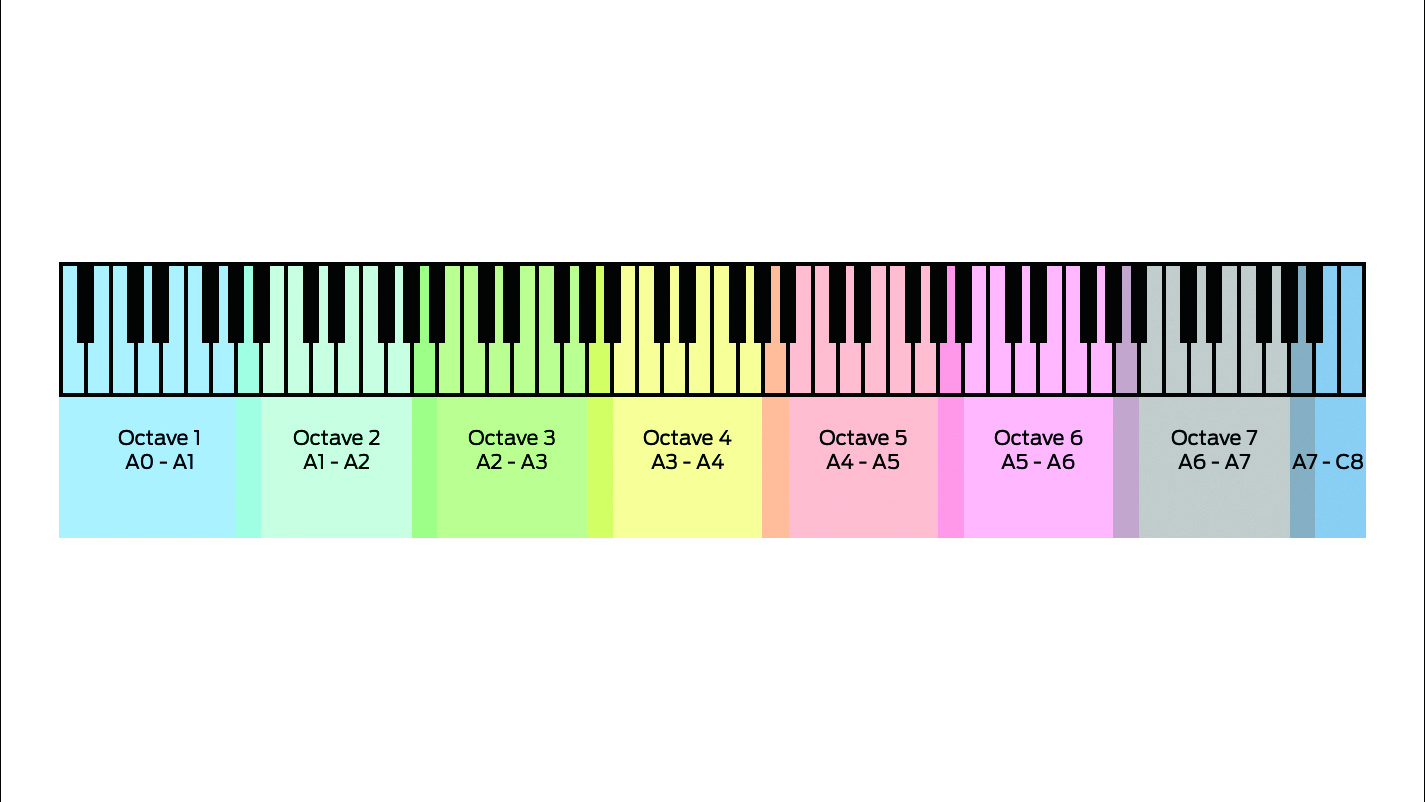
Step 1: The layout of black and white keys has been standard on most piano and keyboard instruments for centuries, but how do you find your way around it? With 88 keys, a full-size piano keyboard might look intimidating, but it’s really just the same group of 12 notes – or octave – repeated seven times, with a few extra thrown in at the top.
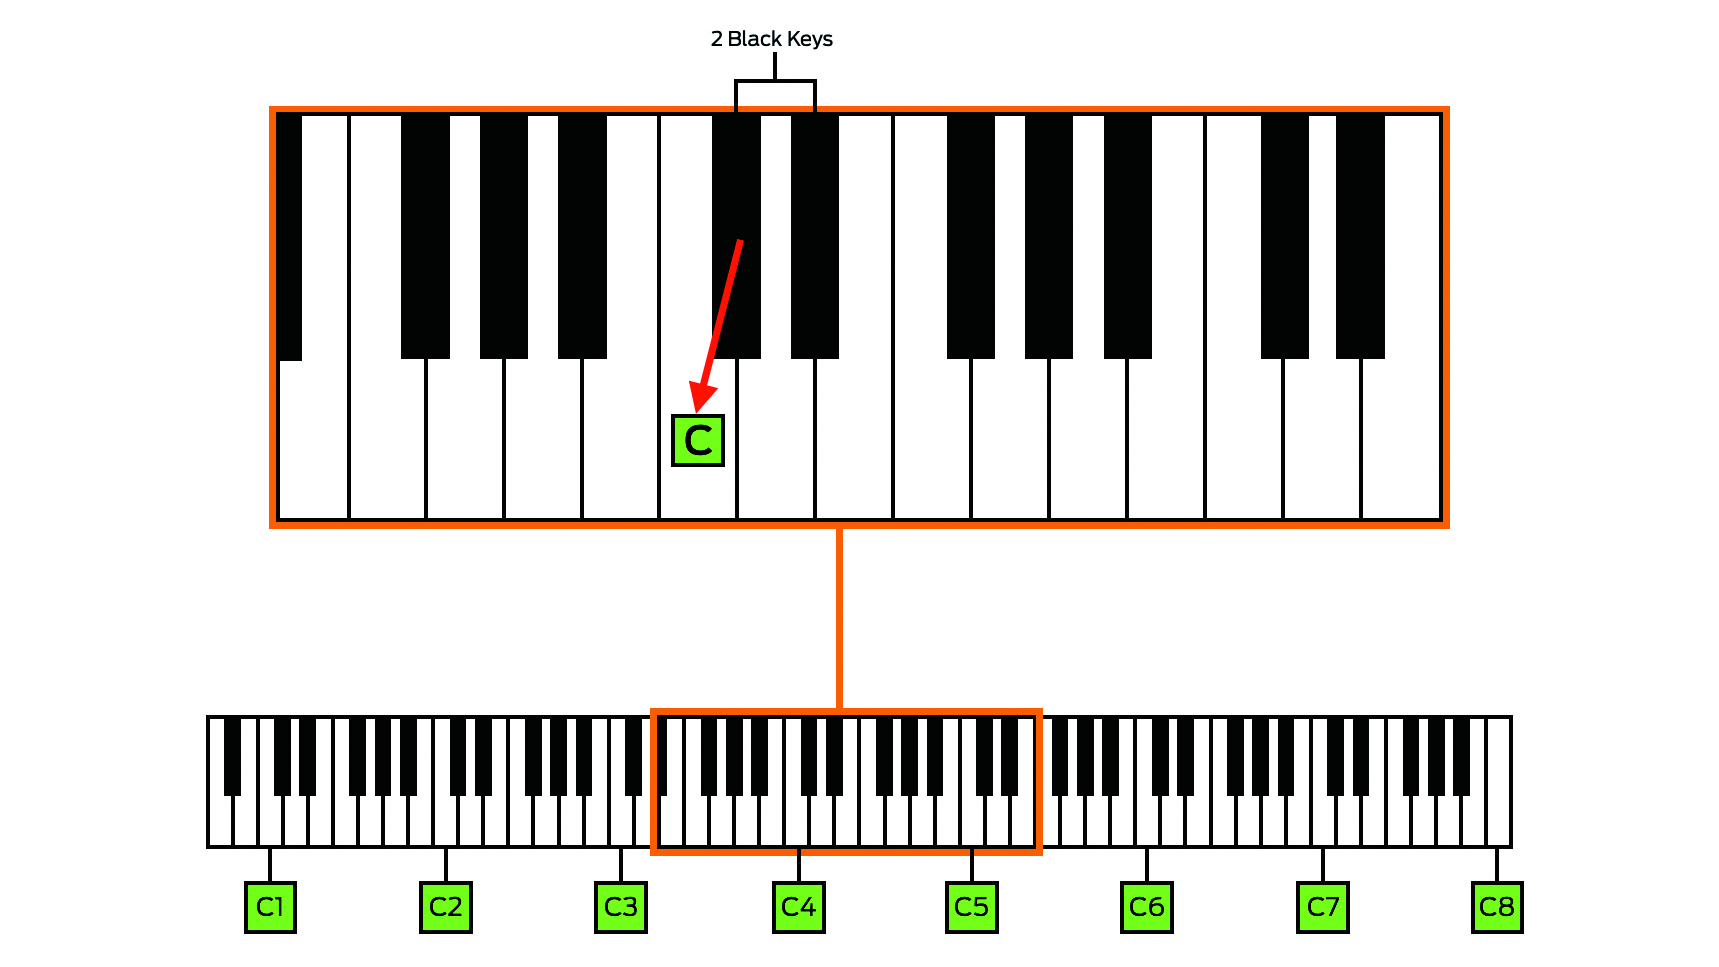
Step 2: If we examine the keyboard, we can see that the black notes are arranged in alternating two and three-note clusters. If you zoom in on a section of the keyboard and find any cluster of two black notes, the white note immediately to its left will be a C. On an 88-note keyboard, there will be eight C-notes in total, with C8 at the very top.
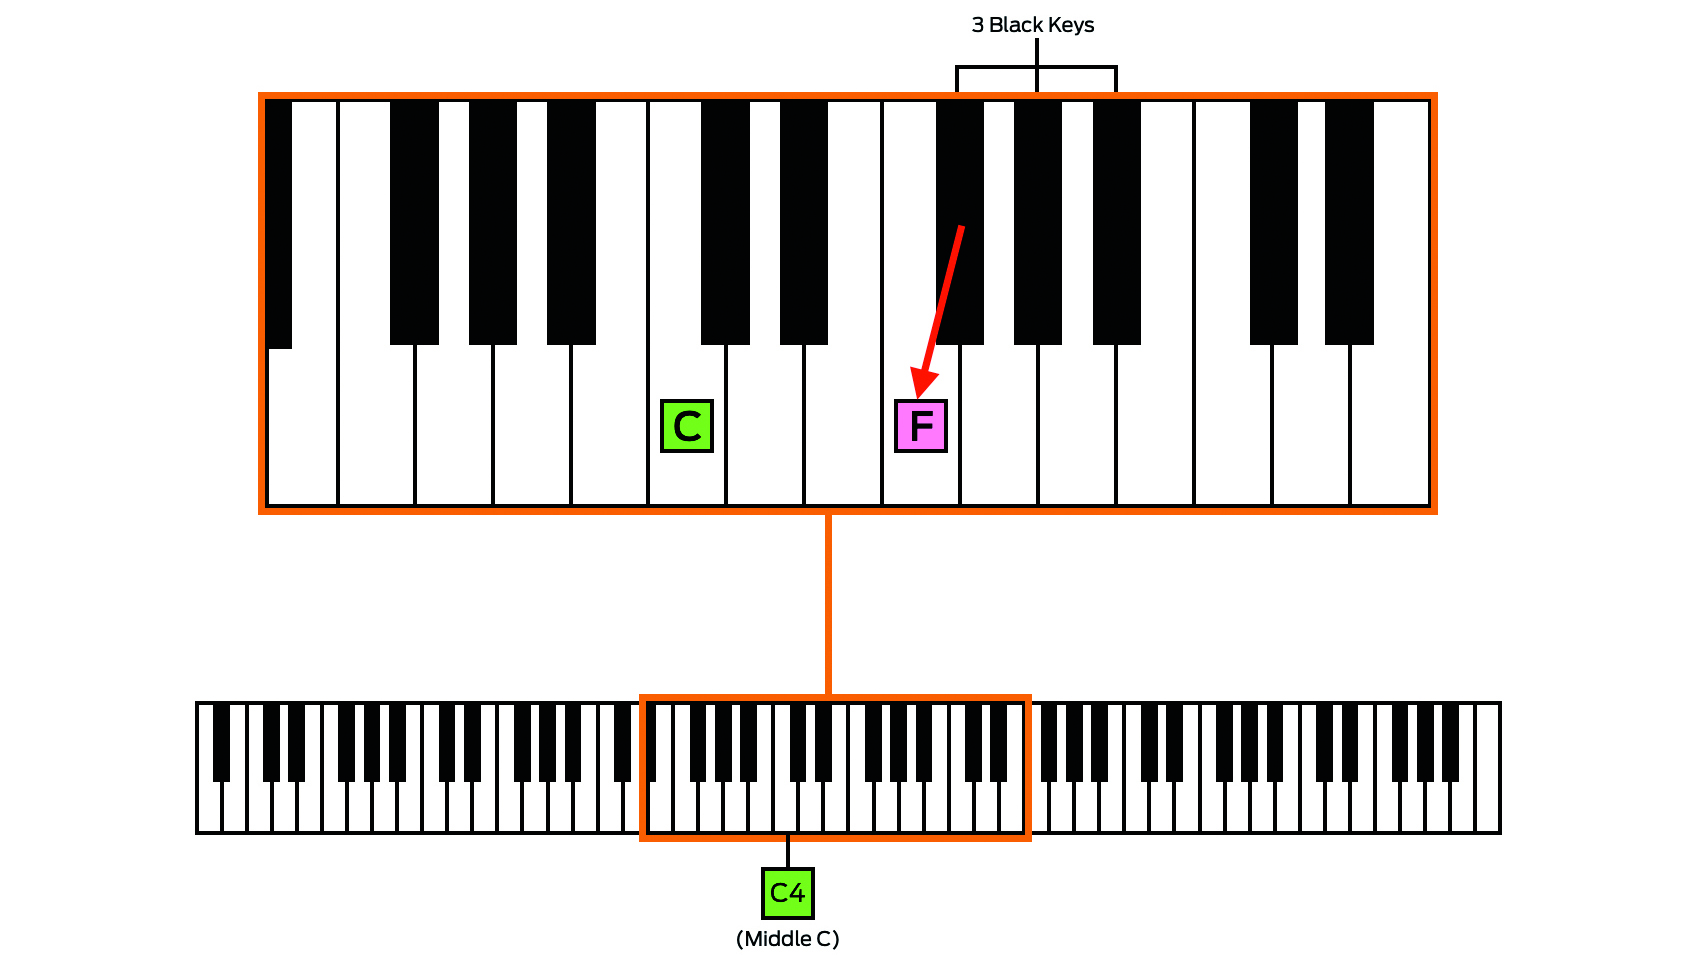
Step 3: This works anywhere on the keyboard to be able to find any C-note. The note known as middle C will, naturally, be the one in the very centre of the keyboard. If we do the same thing, but this time homing in on a cluster of three black notes instead of two, the white note immediately to the left will be the note F.
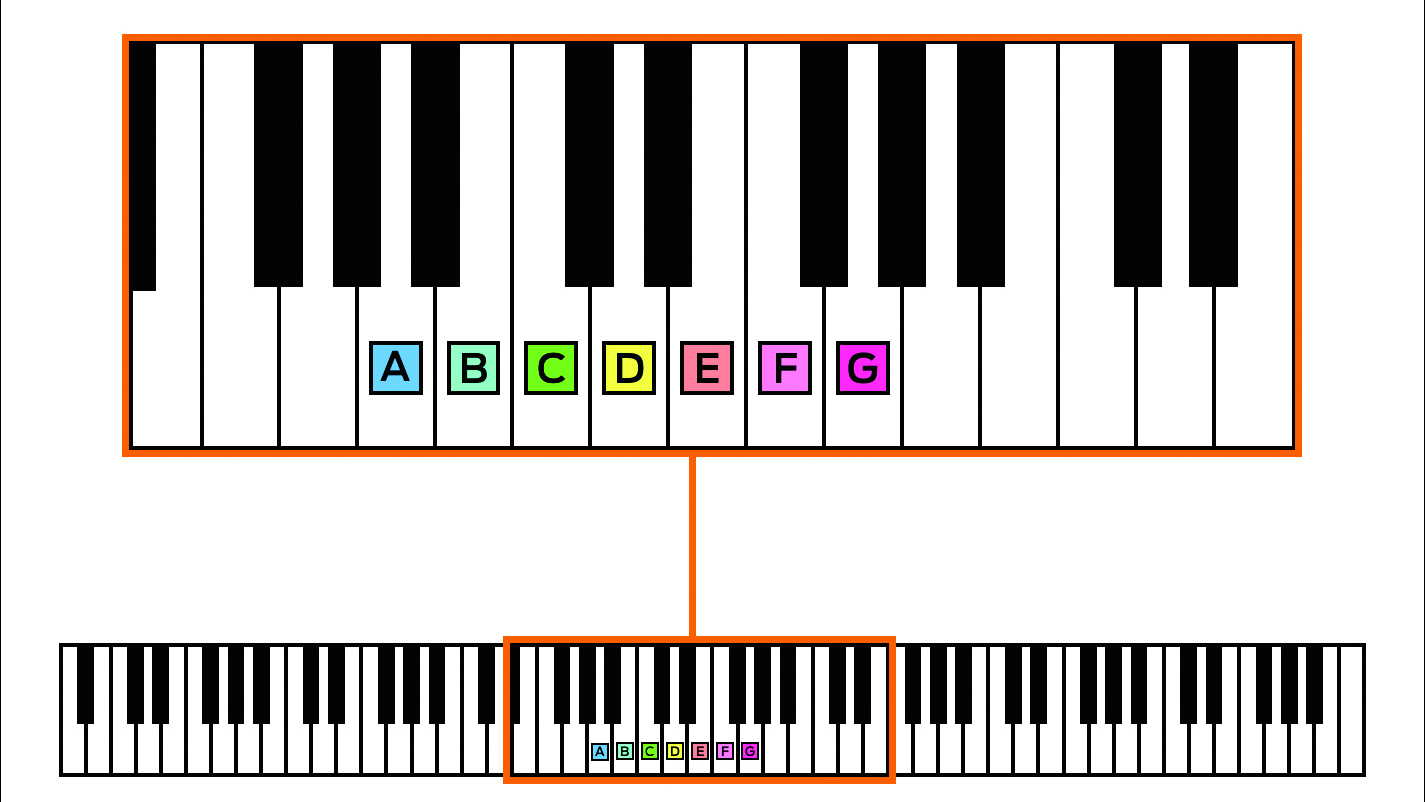
Step 4: Counting two white notes down the keyboard from a C gets us to the note A. From there, it’s just a question of filling in the gaps to get the names of the other white notes in between. Once we get to G, we start again at A (there’s no H, except in the German system, which replaces the ‘B’ we use in the UK/US with ‘H’). We get A, B, C, D, E, F, G.
Naming the black keys
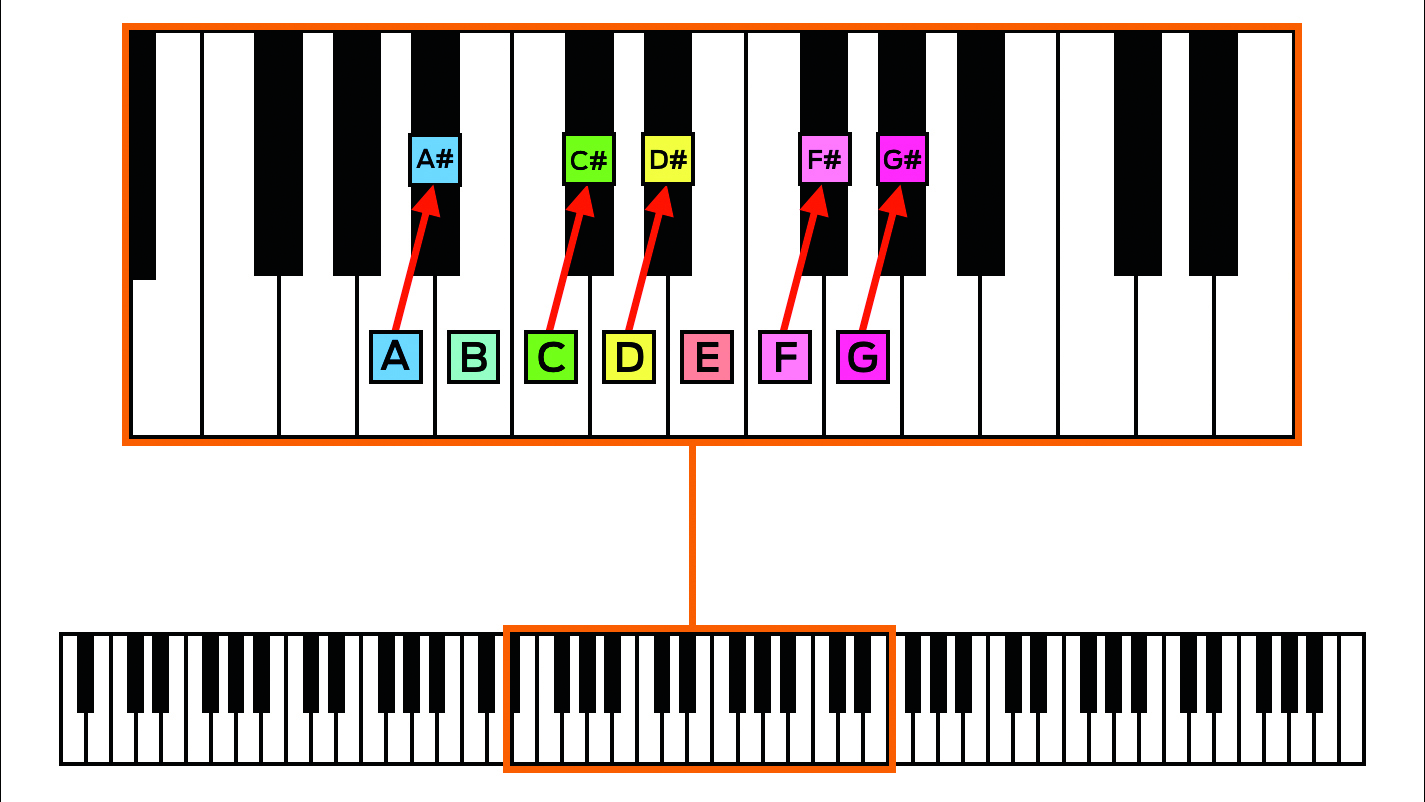
Step 1: To name any black key, start with the white key just to the left of it, then just add a sharp sign (#) to the note name. So, for example if we start on C, the black key to the right of it will be C#, from D it’ll be D# and so on. There is no black key to the right of E, but there is one next to F, so that’s F#. Same goes for G# and A#.
Get the MusicRadar Newsletter
Want all the hottest music and gear news, reviews, deals, features and more, direct to your inbox? Sign up here.
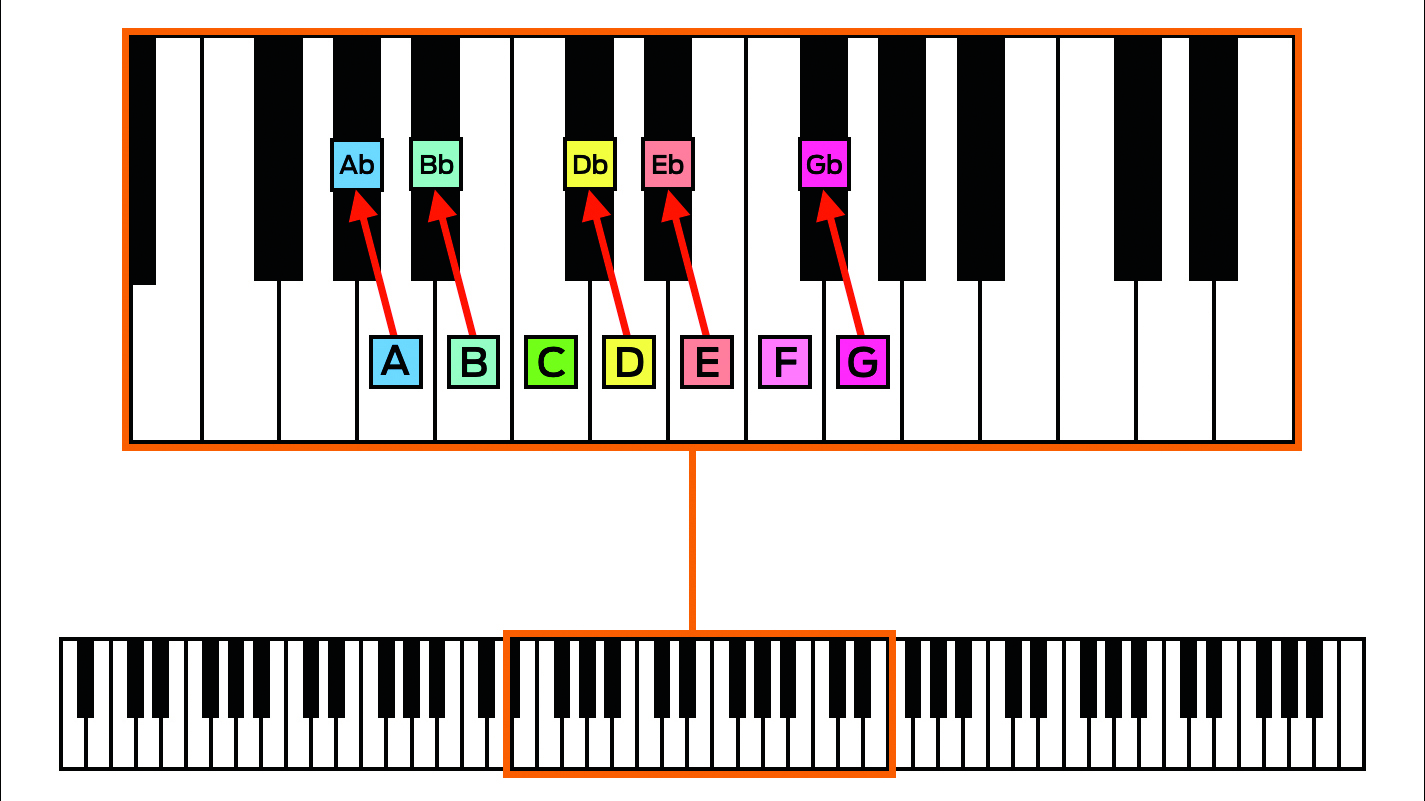
Step 2: Hang on though – if you start from the white key immediately to the right of a black key and step down the keyboard to it instead of up, you add a flat sign (b) to the name. So starting from A we’d go down to Ab, from G down to Gb, and so on. There are no black keys to the left of C or F.
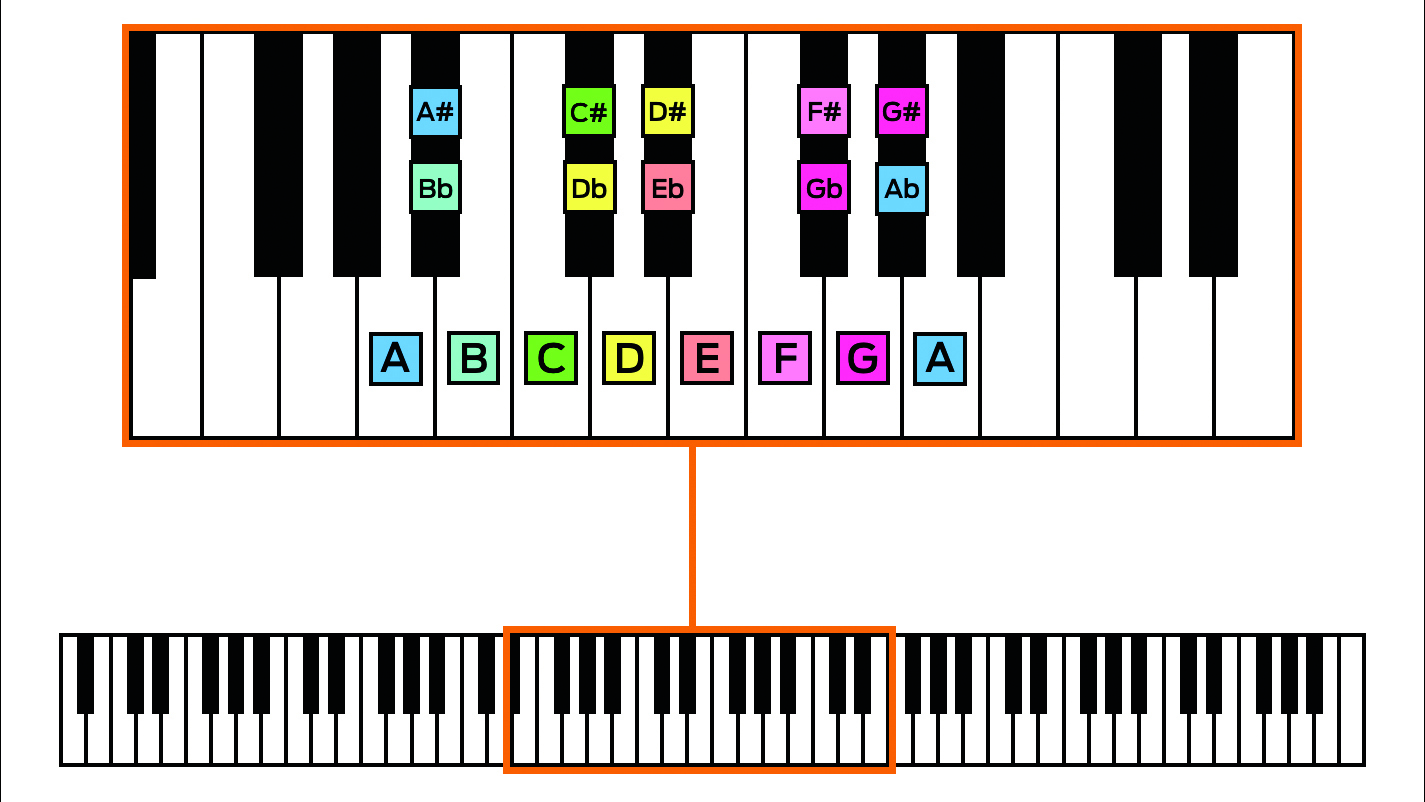
Step 3: So each black key actually has two names, as black notes can either be referred to as sharps or flats, depending on which key you’re in. These pairs of names are known as enharmonic equivalents, for example C# and Db, which are the two names for the key on the keyboard that lives between the white keys C and D.
Things to avoid when practising
Once you know the pattern, identifying notes on the keyboard becomes second nature after a bit of practise – one good exercise is to have a friend call out random note names for you to find and play. As with any learning process, though, there are a few do’s and don’ts to try and keep in mind when starting out on keyboards. These include:
Bad posture
Try not to slouch! Instead, focus on keeping your back straight, shoulders relaxed, with your arms forming a series of gentle arcs from the shoulder through the elbow to the forearm and wrist. Also, make sure your keyboard is at a sensible height – for reference, the average grand piano keyboard is set at a height of around 72cm – and that you’re not sitting too close to it.
Sticky-out fingers
It’s important to adopt the proper hand posture right from the off, so when you position your fingers on the keys to play, make sure they’re nicely curved and relaxed instead of sticking out flat – imagine resting your fingers across the top of an orange, and you’ll get an idea of the shape you’re after.
Going too fast
The old ‘don’t run before you can walk’ adage definitely applies here – many budding players try to play too quickly too soon, only to run into trouble and give up. Playing things slowly to start with can take almost superhuman patience, but it’s important to build accuracy without overwhelming your muscle memory.
Not using a metronome
Building a good sense of timing is crucial for any musician, so make time in your regime to practise playing against a regular beat, be it a traditional metronome or a pre-programmed beat or loop in your DAW. It’s fun too!
Not practising
To get into the habit of practising, try and set aside a regular slot of at least 30 minutes in your daily routine. At the same time, however, don’t forget to keep it fun – if things get boring or frustrating, take a break and come back later on.
- Explore our pick of the best digital pianos
Computer Music magazine is the world’s best selling publication dedicated solely to making great music with your Mac or PC computer. Each issue it brings its lucky readers the best in cutting-edge tutorials, need-to-know, expert software reviews and even all the tools you actually need to make great music today, courtesy of our legendary CM Plugin Suite.
Who Wants To Live Forever? The composer still creating music from beyond the grave
“How daring to have a long intro before he’s even singing. It’s like psychedelic Mozart”: With The Rose Of Laura Nyro, Elton John and Brandi Carlile are paying tribute to both a 'forgotten' songwriter and the lost art of the long song intro


