How to understand and use inverted chords
Turn your chords on their heads and get them sitting where you want them
When you need to bring overly wild and far-ranging harmonic progressions into line, chord inversions should be among your first ports of call.
In this walkthrough, we'll take a series of chords spanning two octaves between them and narrow them down to just over one, making them far more musically coherent and easy to work with in a production sense.
For more practical music theory advice, pick up the Autumn 2018 edition of Computer Music.
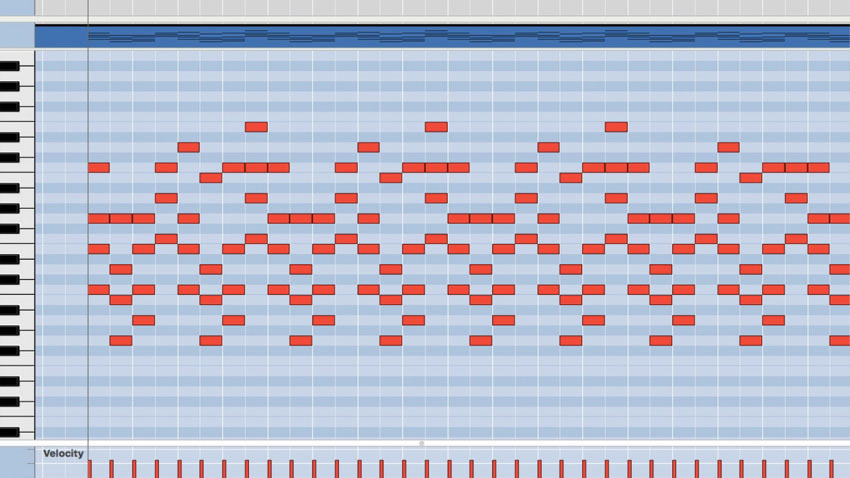
Step 1: Our chords cover a broad range from note to note on the piano keyboard (about two octaves), and they lurch from high to low and back. Let’s tidy this up for a smoother effect…
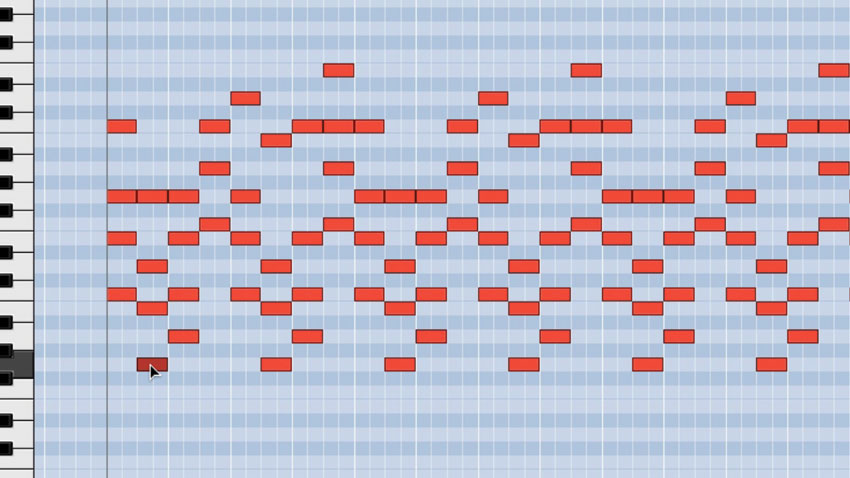
Step 2: We’re going to aim to bring them into just one octave range, from C to C, matching the C chord at the start. For our second chord (G major), we’d like to move the lowest G note up an octave to the higher G… but there’s already a G note playing up there. Instead, then, we’ll delete this lowest G note.
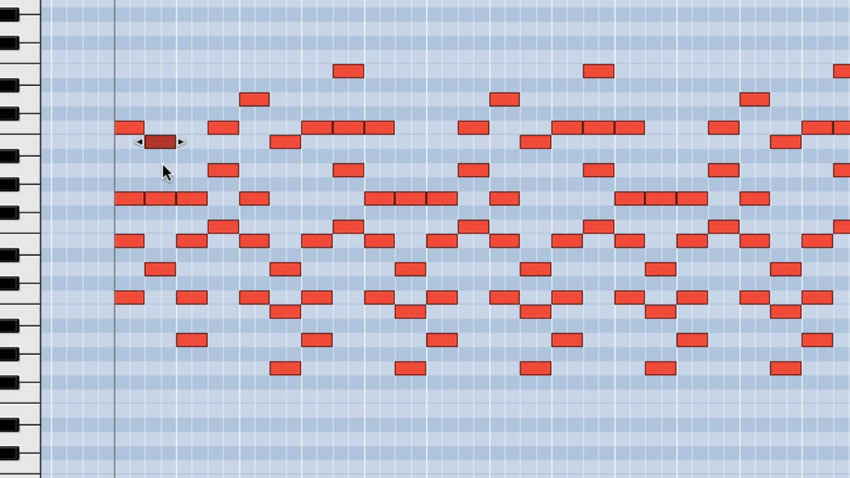
Step 3: Now the lowest note of the chord is a B. We move this to the B an octave up, bringing it into the C-to-C range we’re shooting for. Moving one note up or down doesn’t actually change the nature or character of the chord – what defines this is which notes are present, not where they fall.
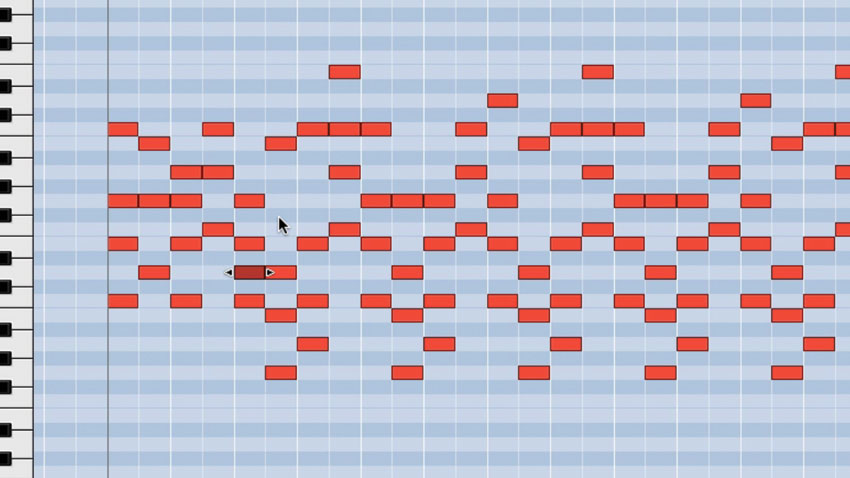
Step 4: We continue by moving the low A in the A minor chord up higher, and the extended D in the next C major chord down lower. Already, we can see that our chords are more closely grouped than the originals playing after them. Now we’ve brought the notes closer together, the chords sound a lot smoother.
Get the MusicRadar Newsletter
Want all the hottest music and gear news, reviews, deals, features and more, direct to your inbox? Sign up here.
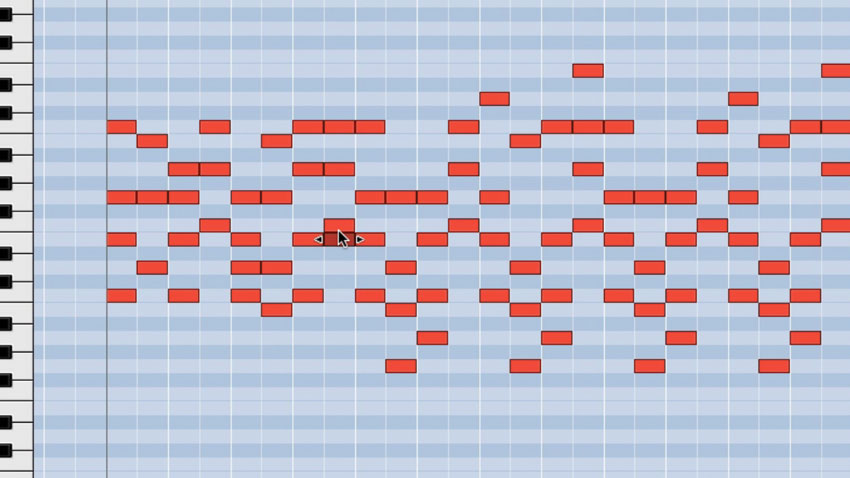
Step 5: Moving on, we move a G up an octave, an A up an octave, and an E down an octave. This E (the extension from the F major chord) has landed right next to the F above it, though - that sounds a little worse than before. Move that new E down to the D below it, then duplicate these inverted versions of the chords throughout the rest of the track.
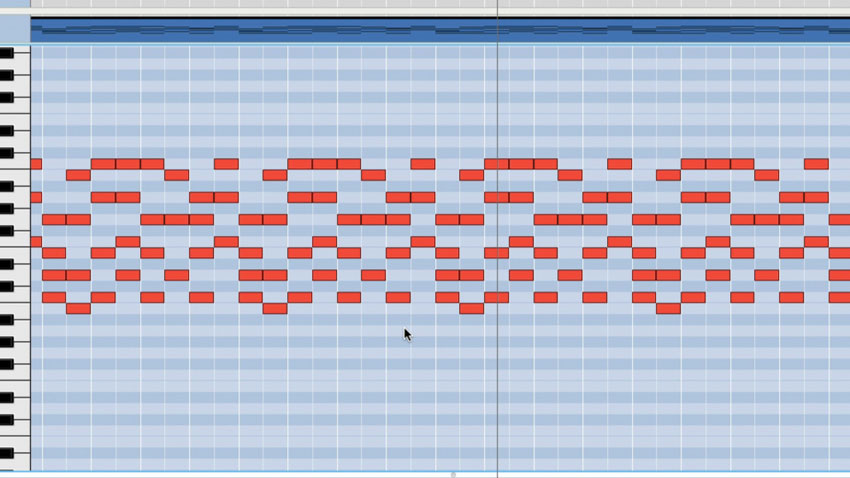
Step 6: So why does this work, exactly? Well, it stops ‘lurching’ between higher and lower notes (imagine playing such far-apart notes on a real keyboard!), as the jump from note to note is smaller. If this was a four-voice sung chord progression, and you were singing the second highest note, you wouldn’t need to move your voice very far between each note.
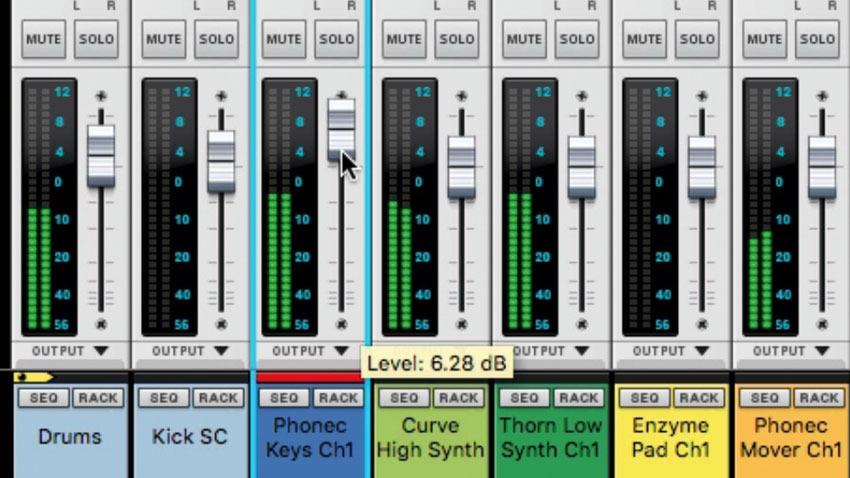
Step 7: Here’s a more technical reason: when chord notes fall within a similar octave range, more space is created for other instruments in terms of frequency content, meaning you may be able to push the level of your inverted chords up a bit higher in the mix.
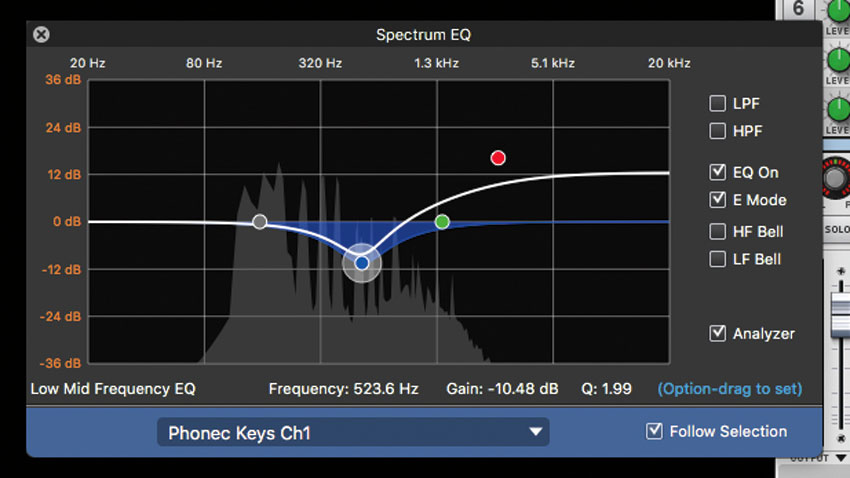
Step 8: Also, when chord notes lie in the same octave range, the job of EQing becomes easier. You’ll have more mix space to work with, as the chords’ harmonics will lie in a similar frequency range. This helps you pocket your musical parts more effectively within a busy track.
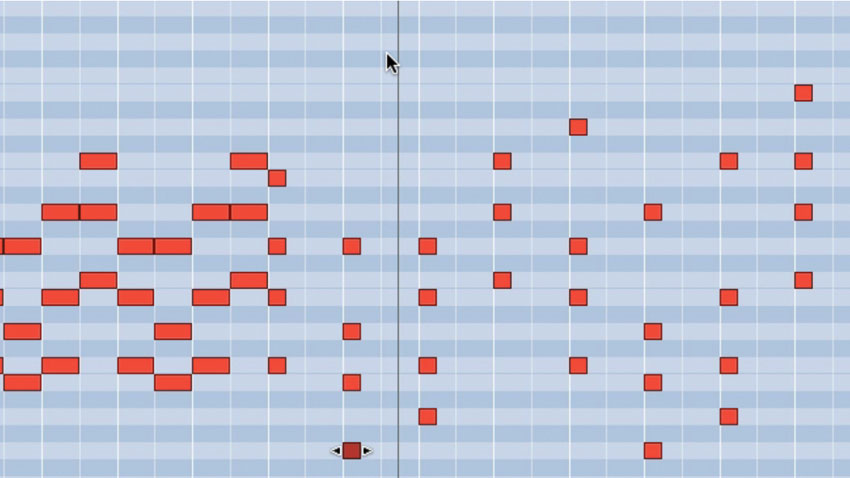
Step 9: However, not all chords need to be inverted. We’ve left our extended chords in their original orders for our breakdown and build-ups, where fewer instruments compete for space. At these points, we can let the original chords shine through for a change of feeling.
Computer Music magazine is the world’s best selling publication dedicated solely to making great music with your Mac or PC computer. Each issue it brings its lucky readers the best in cutting-edge tutorials, need-to-know, expert software reviews and even all the tools you actually need to make great music today, courtesy of our legendary CM Plugin Suite.


