How to turn a dishwasher door sound into a cinematic texture
Top sound designers find ways to use the sounds around them. Here's how it's done…

With today's processing power and huge choice of diverse software, almost any sound can be turned into something useable.
In this tutorial, we're going to show you the sounds you can tease out of a common household dishwasher. It may not be an 'instrument' as such, but with its moving parts and cavernous space, bringing its sound into the digital world gives us plenty of scope for forging interesting results.
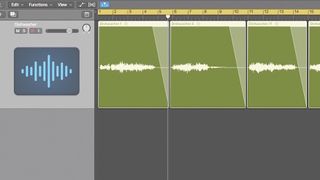
Step 1: We’re starting by making recordings of an old dishwasher. Its hinges and springs are rusty, so it creaks if you open the door slowly, with an amazing resonance. These are the raw recorded files of the doors opening and closing.

Step 2: We start by importing one of the dishwasher sounds into Iris 2. Here, we use the Radius RT pitch mode and shift the pitch down to create a deep drone. We use LFOs to flutter a low-pass filter treatment and set up Distortion as a master effect, also with some modulation via an LFO.
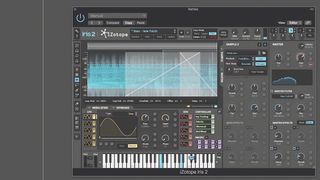
Step 3: Next, we import the clanking sounds of the dishwasher springs into Iris 2 as a separate audio file. We use a band-pass filter treatment, using Resample as the Pitch mode. We play the sample on two keys lower down, so that we hear these rusty springs almost as clanking chains.

Step 4: We layer three drum sounds to create an impactful hit at the end of our texture. These come from Spitfire Audio’s Percussion Redux and Albion Tundra libraries, alongside a Taiko hit from NI’s Action Strikes library. They’re treated to a number of reverbs to create a long, hollow thump at the end.

Step 5: This ending hit provides a ‘target’ point. We select three slices of our Dishwasher recording and reverse them. We increase their Gain and then select the ‘moment’ we want these to arrive at the hit point, fading them up and adding EQ, filtering and multiple reverbs.
Get the MusicRadar Newsletter
Want all the hottest music and gear news, reviews, deals, features and more, direct to your inbox? Sign up here.

Step 6: Lastly, we add parallel distortion, setting up Soundtoys’ Decapitator on an Auxiliary and increase Gain considerably. We adjust Low and High Cuts, before making the overall Tone bright. We use the send dials from each channel to select the right amount of distortion for each sound.
For more inspirational sound design articles with a cinematic bent, check out issue 322 of Future Music, available in print or digital formats.
Future Music is the number one magazine for today's producers. Packed with technique and technology we'll help you make great new music. All-access artist interviews, in-depth gear reviews, essential production tutorials and much more. Every marvellous monthly edition features reliable reviews of the latest and greatest hardware and software technology and techniques, unparalleled advice, in-depth interviews, sensational free samples and so much more to improve the experience and outcome of your music-making.
"If I wasn't recording albums every month, multiple albums, and I wasn't playing on everyone's songs, I wouldn't need any of this”: Travis Barker reveals his production tricks and gear in a new studio tour
“My management and agent have always tried to cover my back on the road”: Neil Young just axed premium gig tickets following advice from The Cure’s Robert Smith


