How to set up a cue mix for monitoring
Learn how to set up both software and hardware cue mixes
RECORDING WEEK: When recording, it’s important for your performers to be able to hear themselves, each other and the guide track or click they’re playing to. In a live gig situation, this would be achieved with wedges and/or in-ear monitors. In a studio space, the same method can work, but it’s easiest to opt for headphones or in-ear monitoring for everyone. This helps you get the cleanest recording, without sound from the monitors getting into the microphones.
Regular mixing desks are well designed to handle headphone mixes, either via auxiliary busses or dedicated cue mix busess, which is why they’re popular for recording bands. This is called ‘hardware monitoring’, and the DAW (via a multichannel audio interface) is used simply as a multichannel recorder.
However, when it comes to recording into a computer DAW with a simpler setup and no desk, you have to find another way to achieve a headphone mix that combines the mic inputs and the track. Conveniently, many interfaces include hardware monitoring, either using a physical input/output balance control, or within the interface itself via a software-controlled hardware circuit.
The first option is pretty basic, and is enough to enable the input mic or mics and the existing track or click playing back from the DAW to be heard. The second can – depending on interface – serve up multiple different mixes and route them to multiple headphone outputs.
Both of those options tap the input signal off before it reaches the computer, but monitoring via the DAW can also work if you set a very small buffer size (64 samples or less, ideally), so that the round trip delay (latency) added to the input signal isn’t too offputting. Be aware, though, that a very short buffer size will tax your computer and can cause audio glitching. Also bear in mind that most vocalists will find any noticable delay unworkable, and this is why hardware monitoring is always the better option.
• Recording Week is brought to you in association with Universal Audio
Hardware and software cue mixes
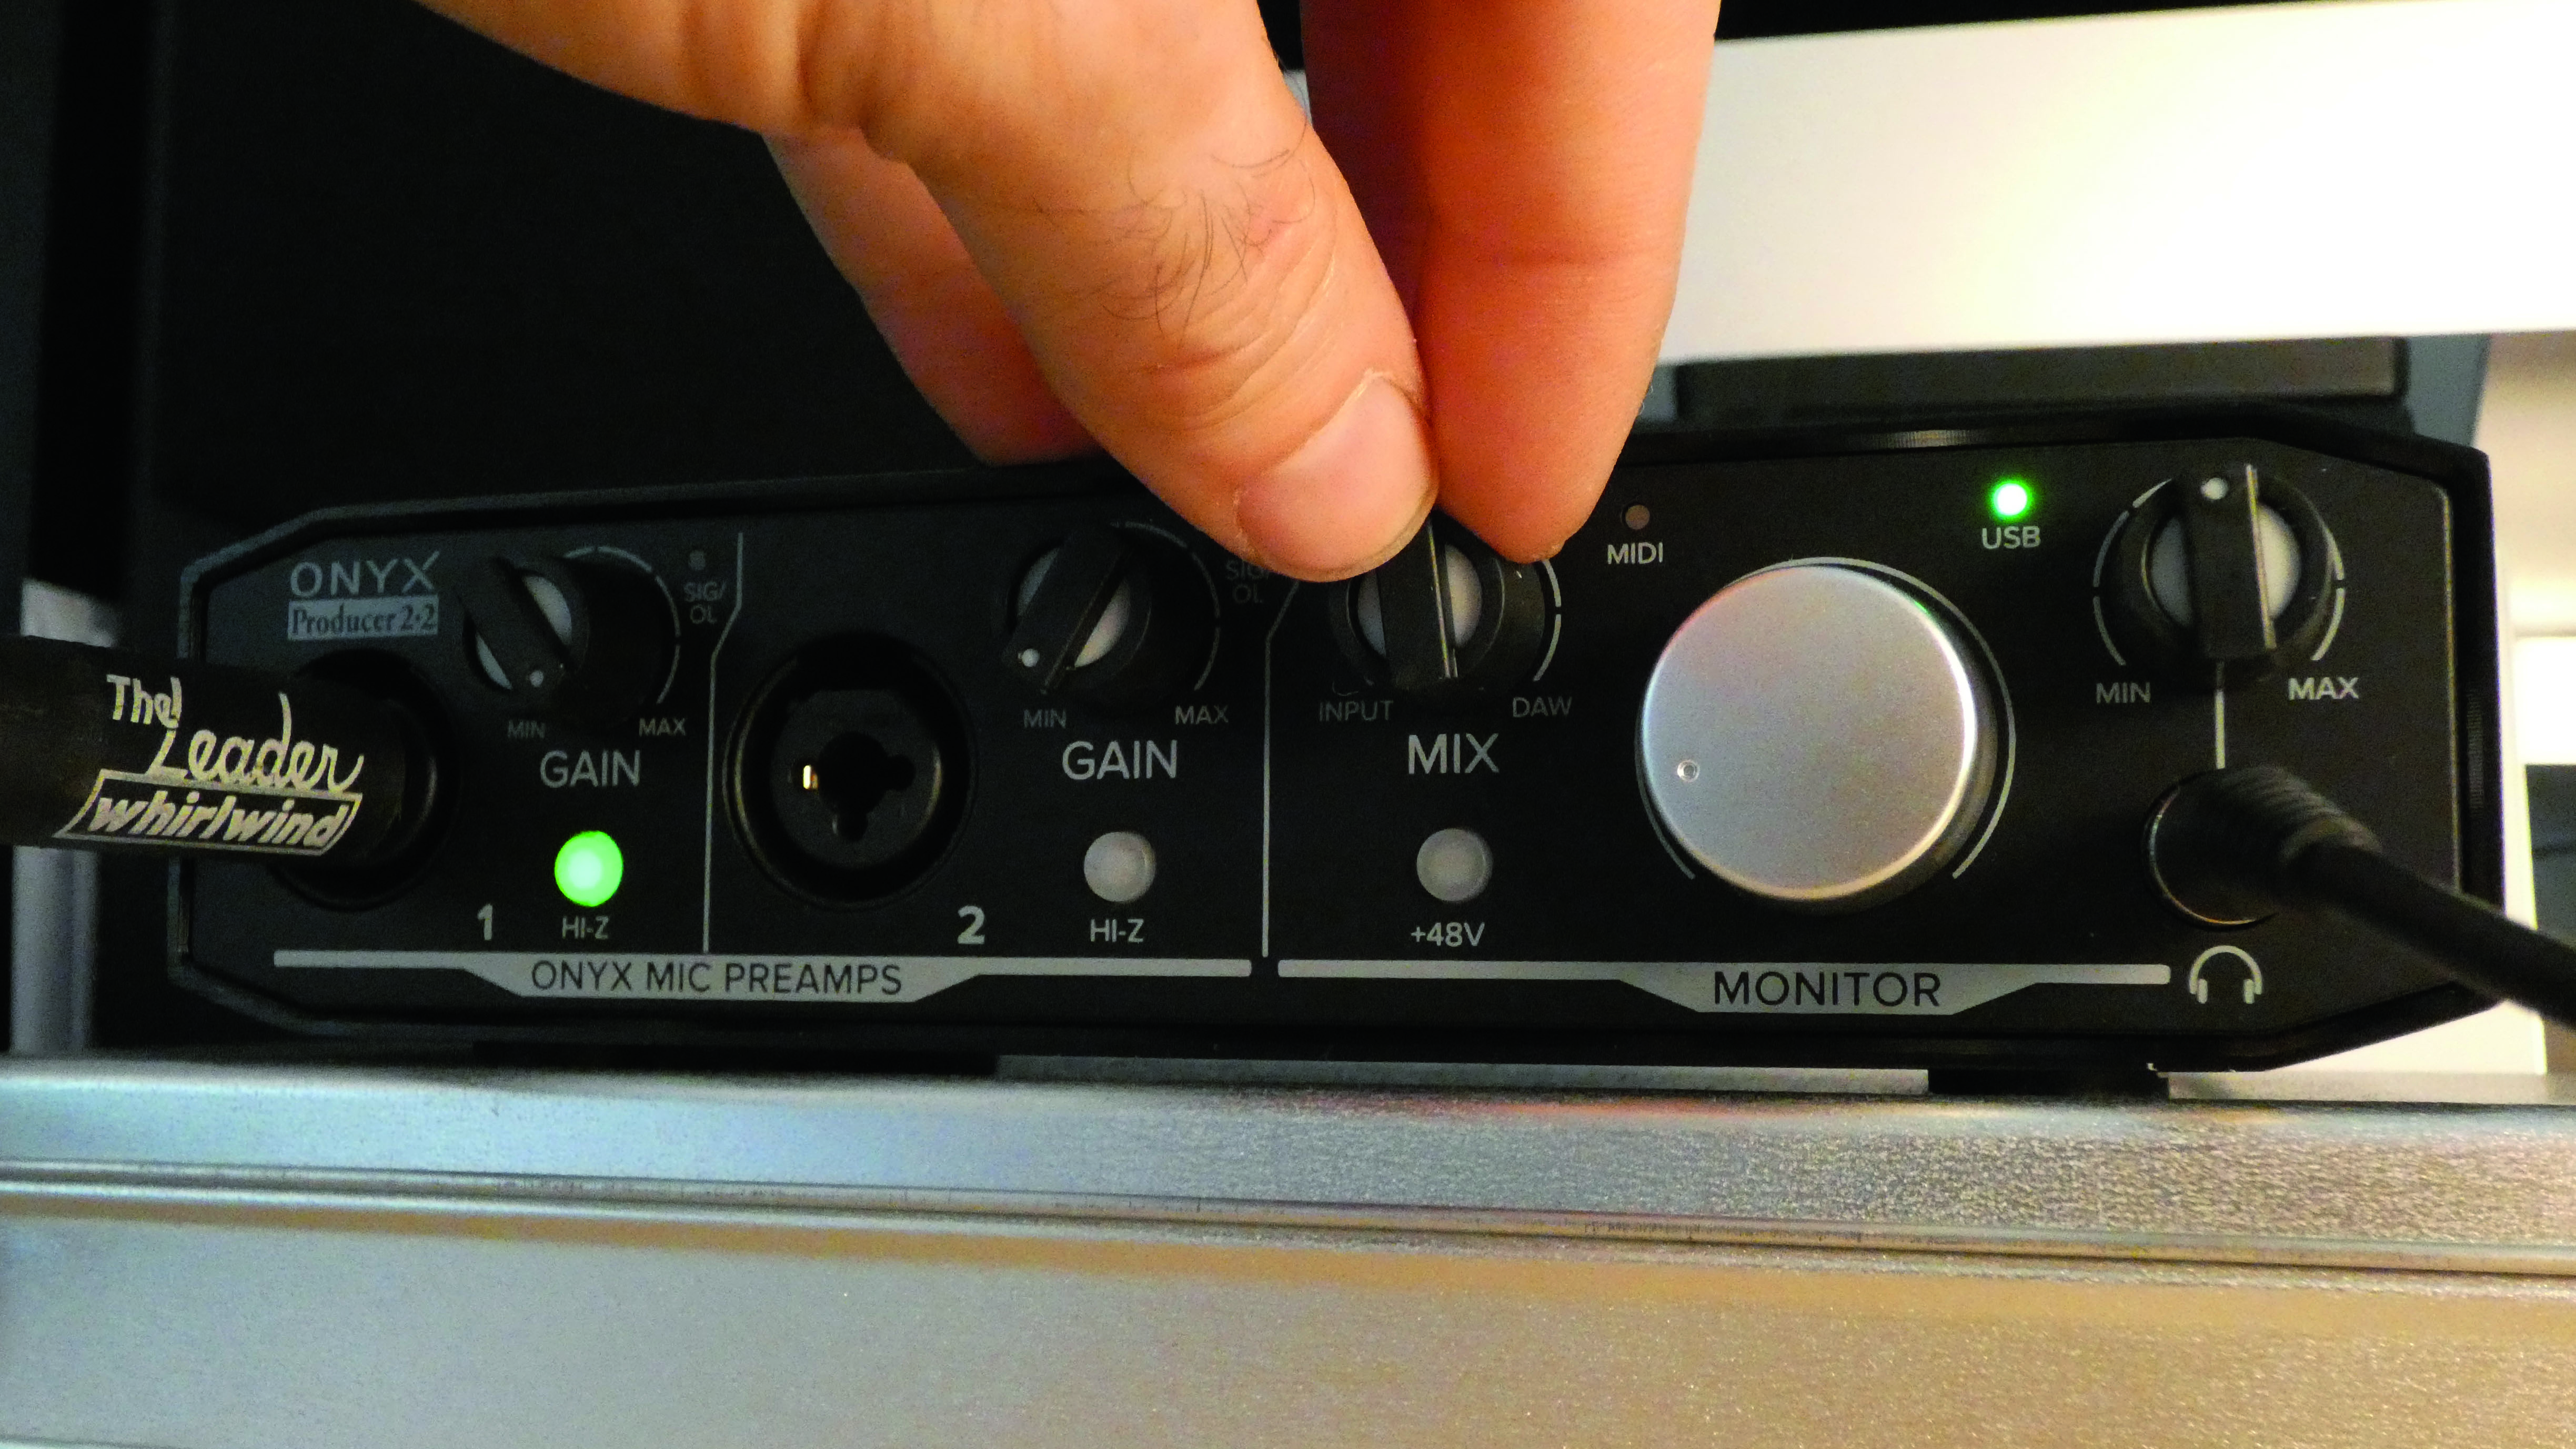
Step 1: With a zero-latency balance control, setting up a cue mix is simple. Set your mic gain first, adjust the playback output level in your DAW, then adjust the balance control. Your interface might also have a ‘mono/stereo’ option for spreading or monoing the mic inputs.
Get the MusicRadar Newsletter
Want all the hottest music and gear news, reviews, deals, features and more, direct to your inbox? Sign up here.
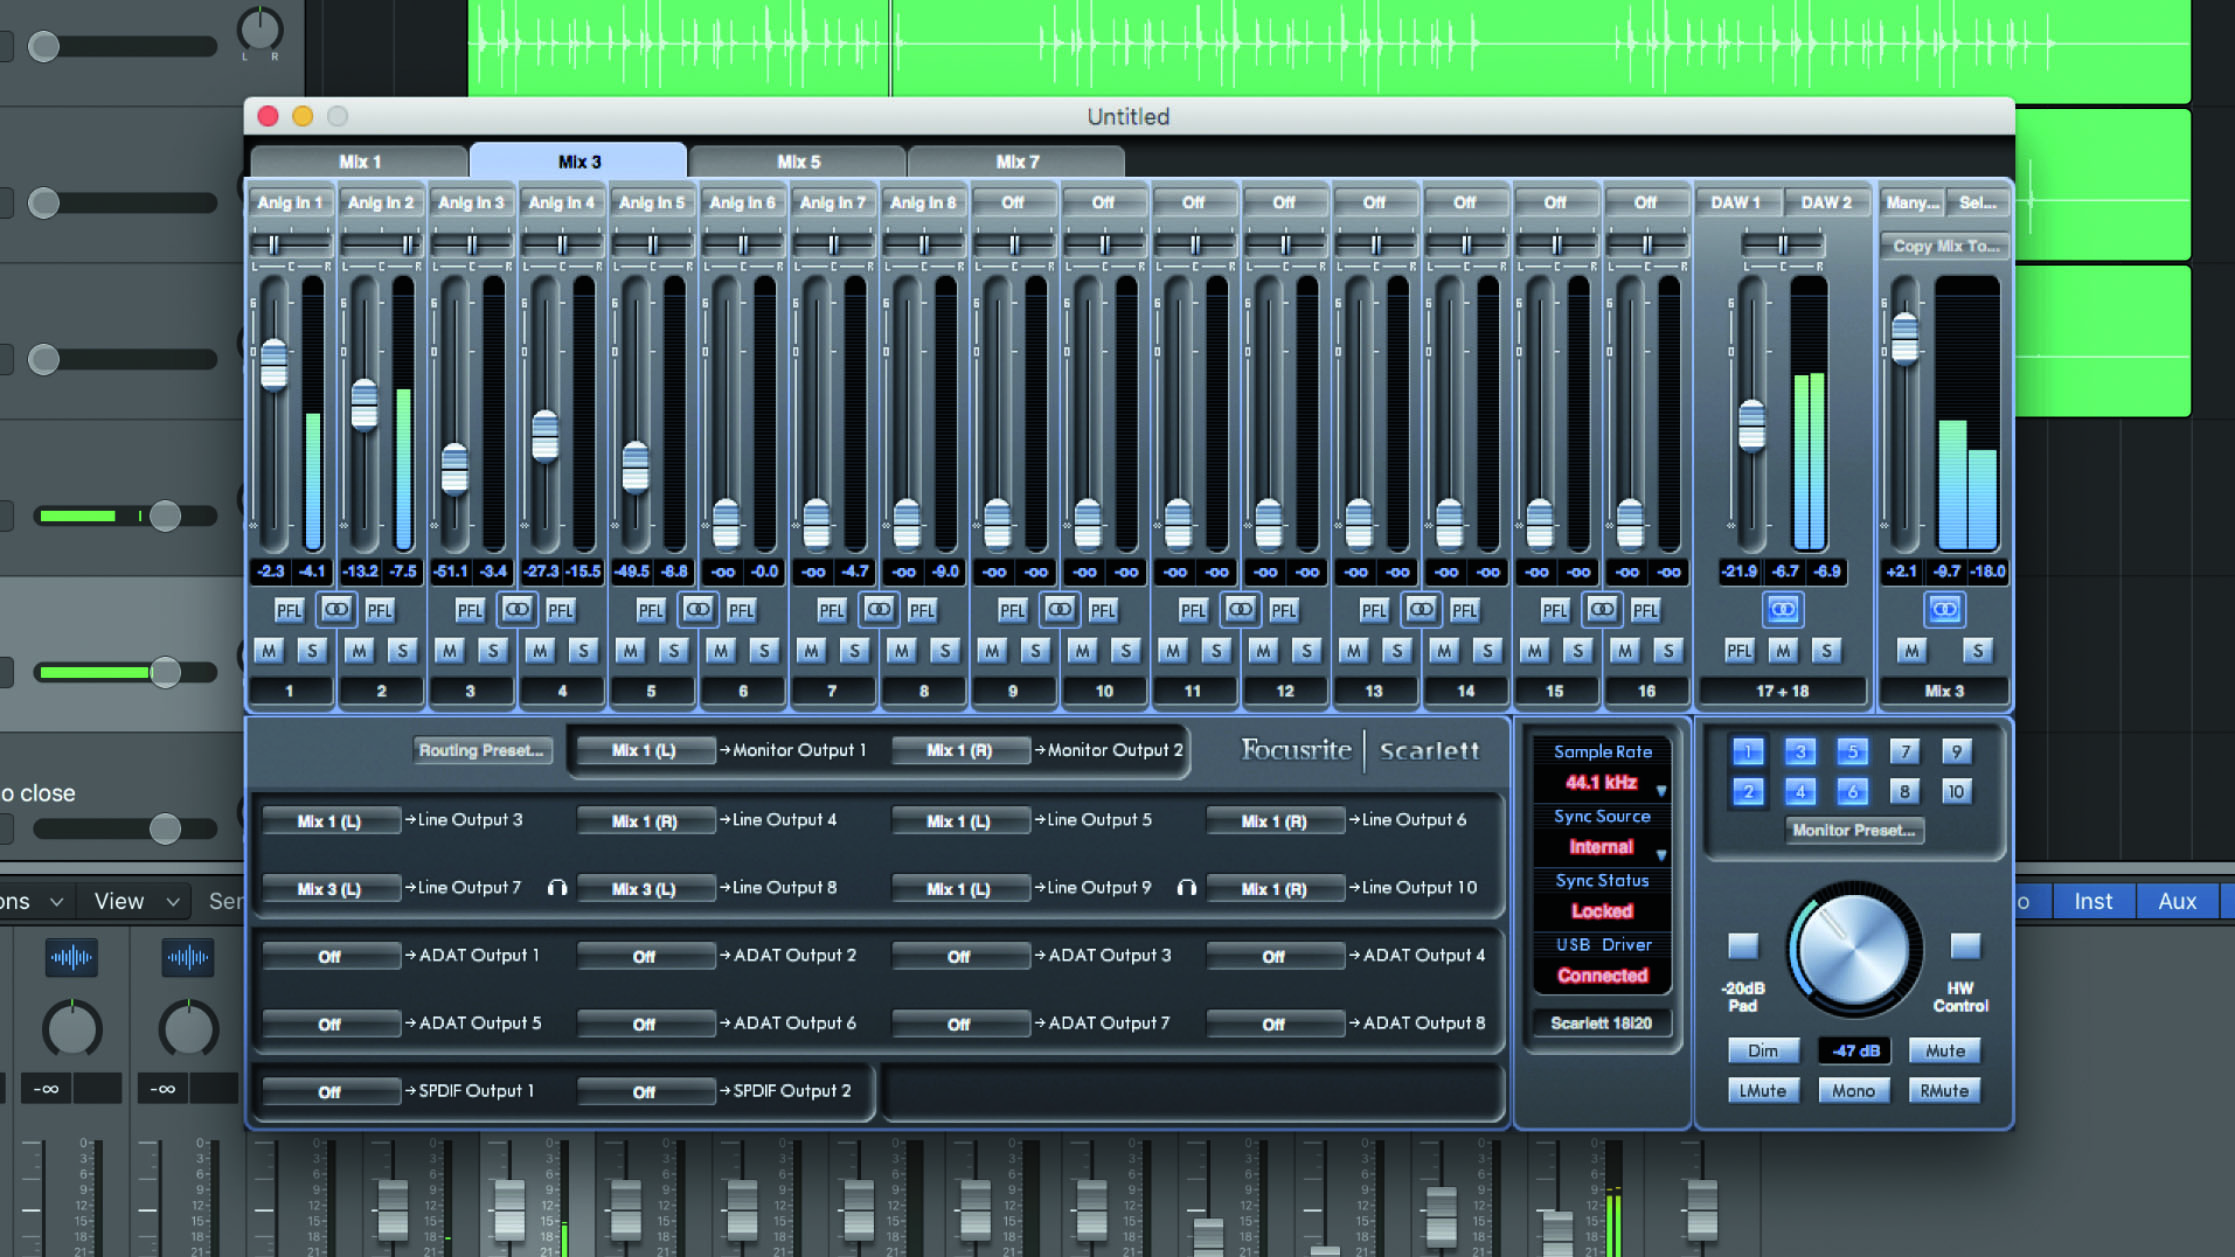
Step 2: With software-controlled hardware monitoring, we can create a headphone mix by balancing each of the inputs accordingly against the DAW’s output. Remember, these are just monitoring levels, and although they are dependent on preamp gain, they can be set without affecting it, which is precisely what you want for a headphone mix.
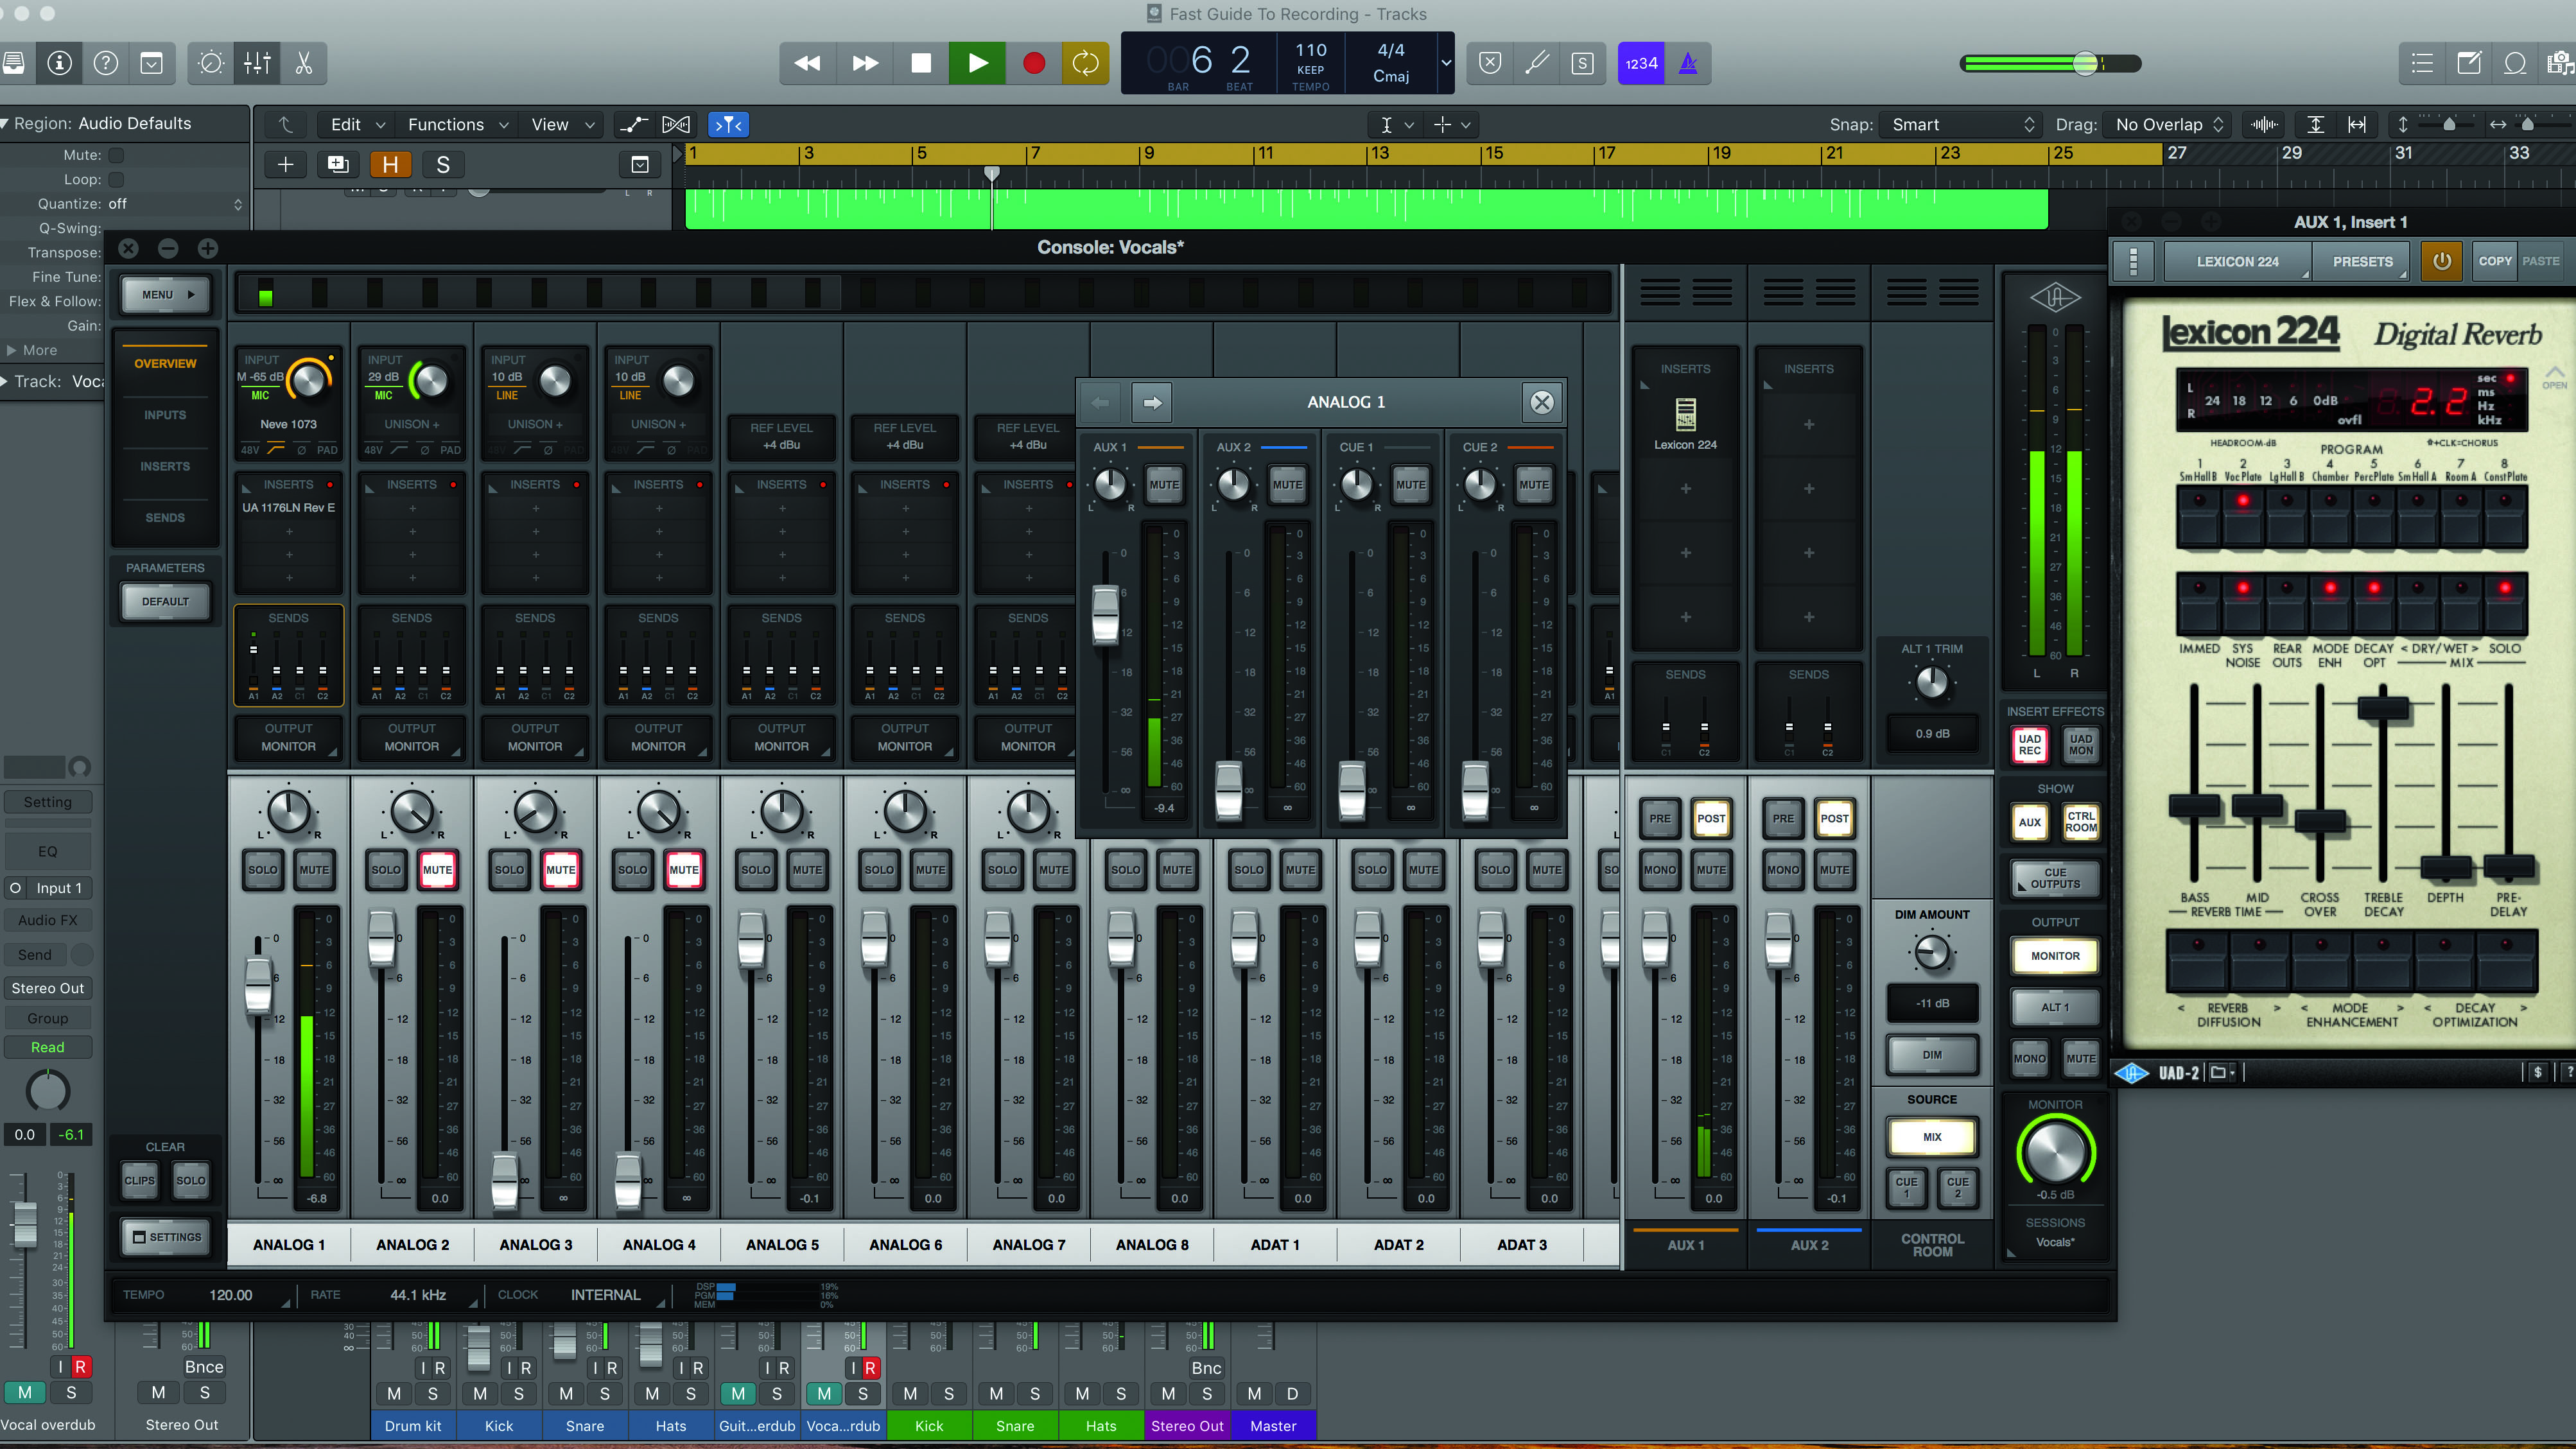
Step 3: Some software-controlled hardware monitoring systems also incorporate DSP effects, and one of the most capable is Universal Audio’s Apollo line of interfaces. Here, we’ve set up a mix of input sources and the DAW output, and incorporated a DSP reverb into the headphone cue mix – all without touching the host CPU.
Software cue mixes and latency
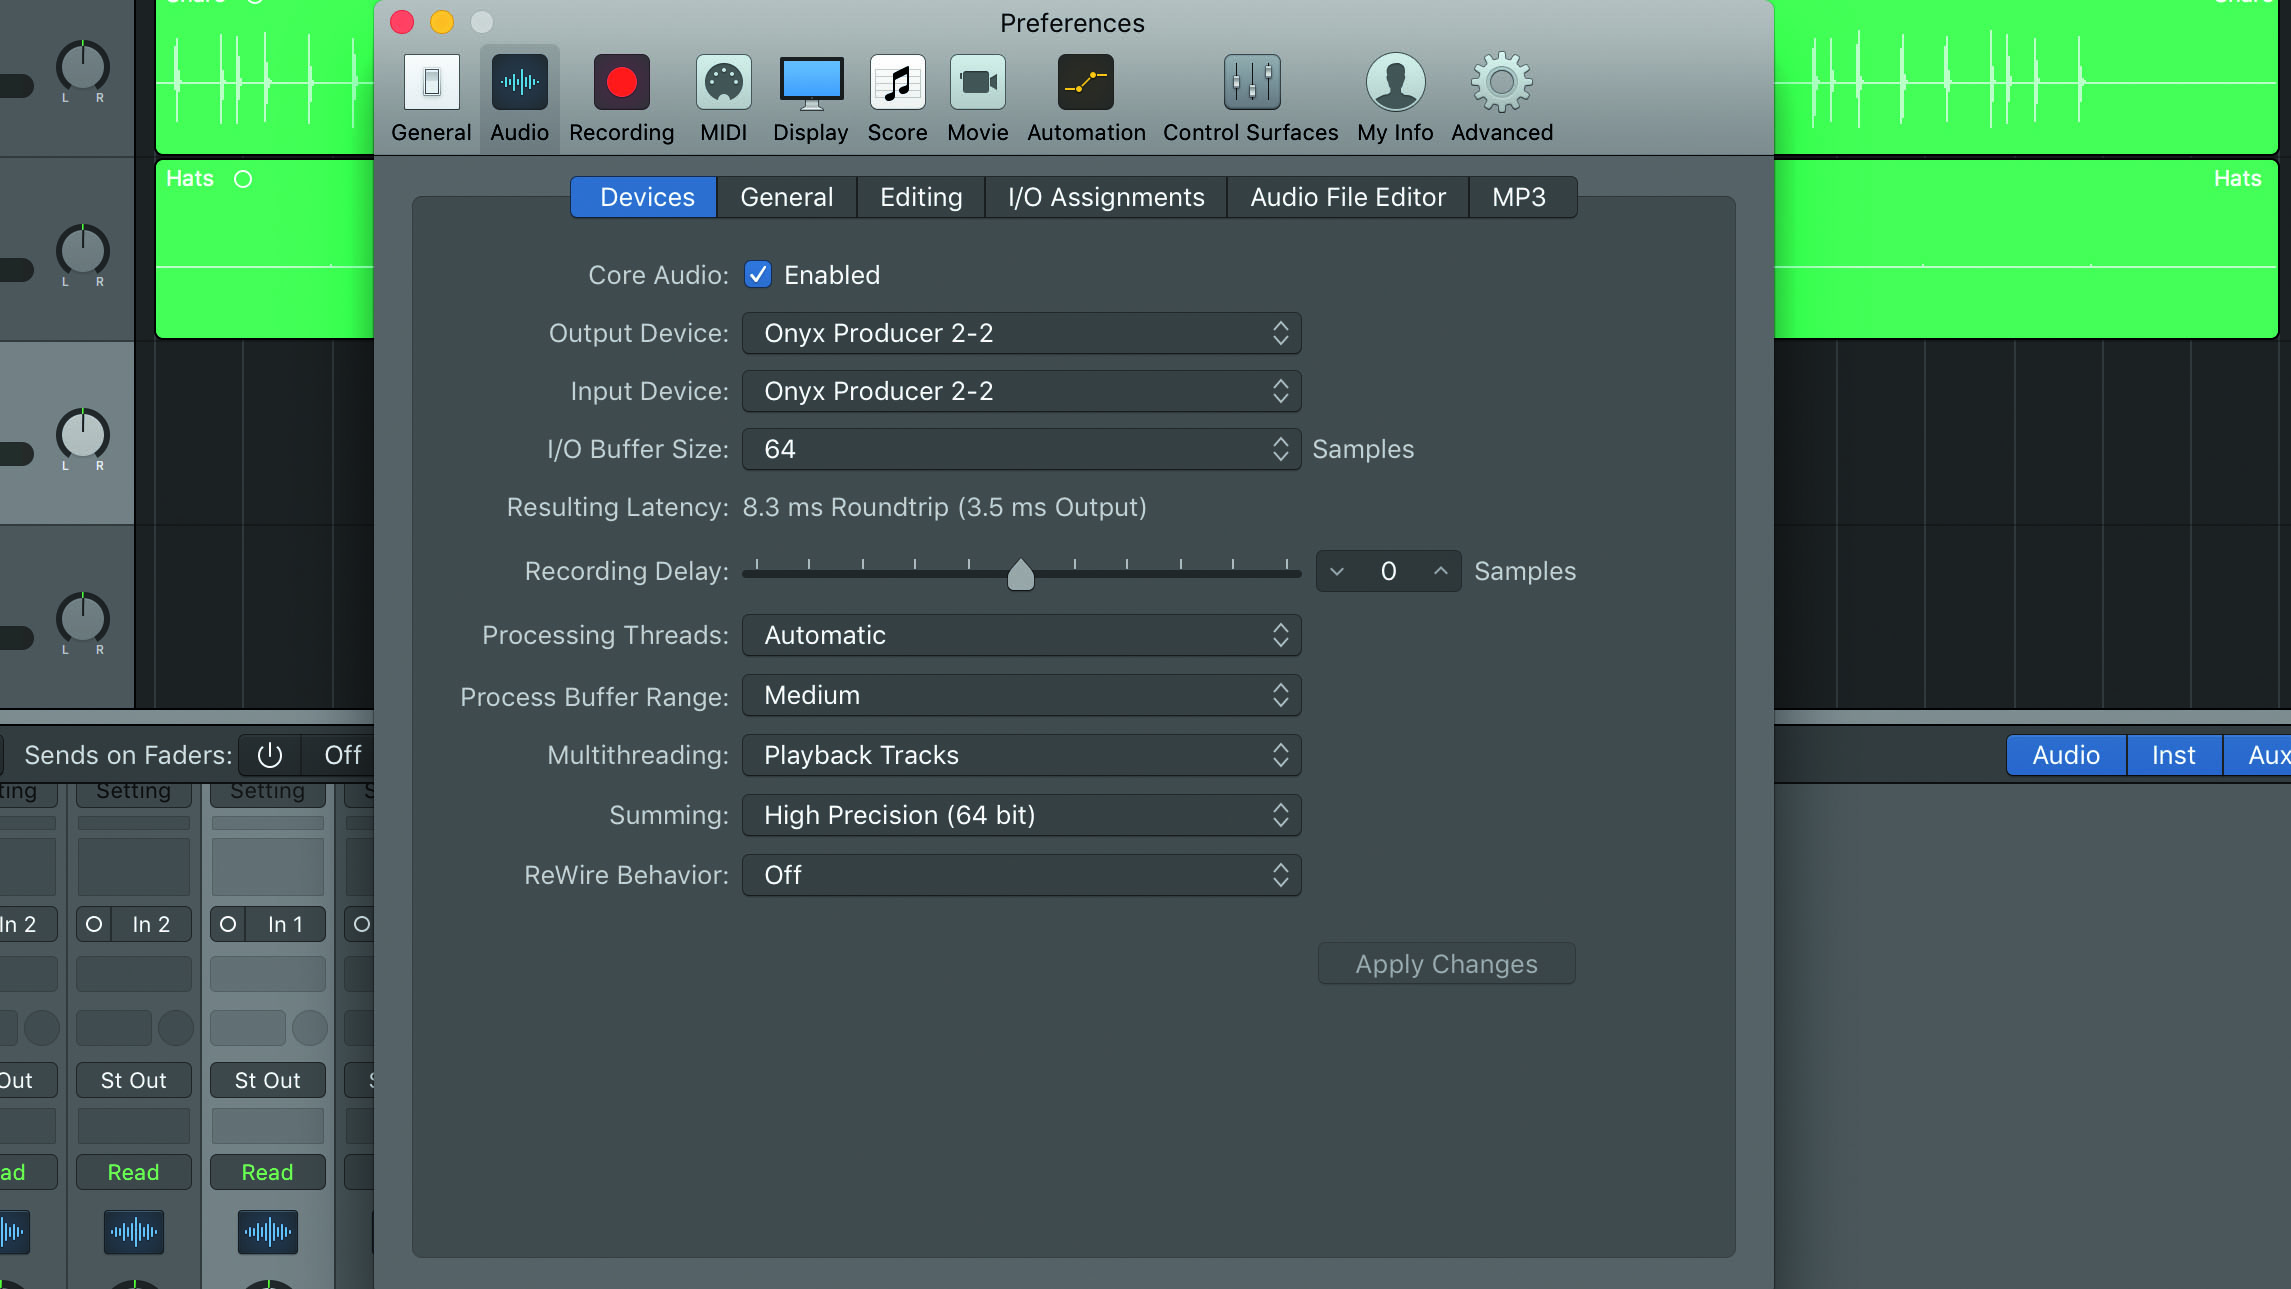
Step 1: If you can set your audio interface to a small buffer size in your DAW, you can monitor via software, which has a couple of advantages over hardware. First, head to the audio driver settings and see how well each one works. Here we can see that with a buffer size of 64 samples we get a latency (input to output round trip delay) of 8.3ms.
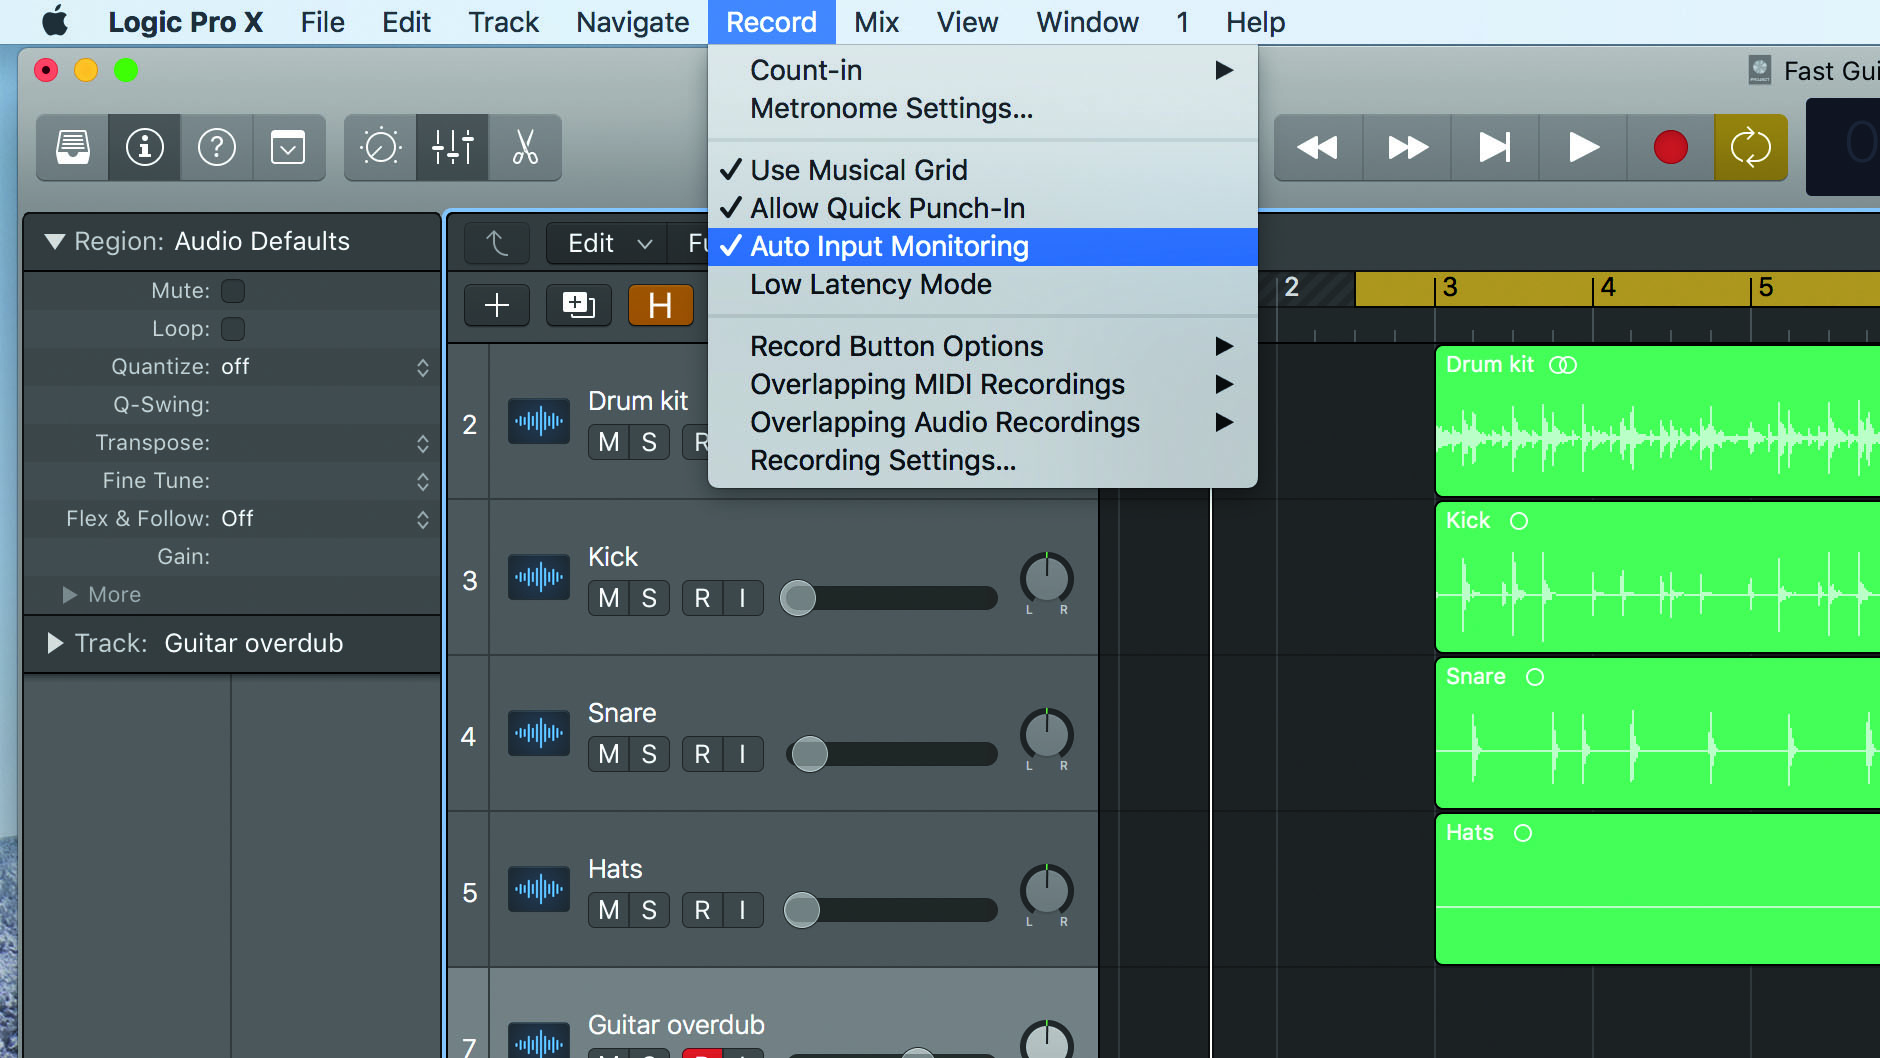
Step 2: Software monitoring makes setting up for recording one step simpler, and enables dropping in on existing tracks. In your DAW, look for the ‘auto input’ (or similar) record monitoring option, then simply arm the track you want to record to. Hit play and you’ll hear anything recorded on the track; hit record and you’ll hear the input assigned to it.
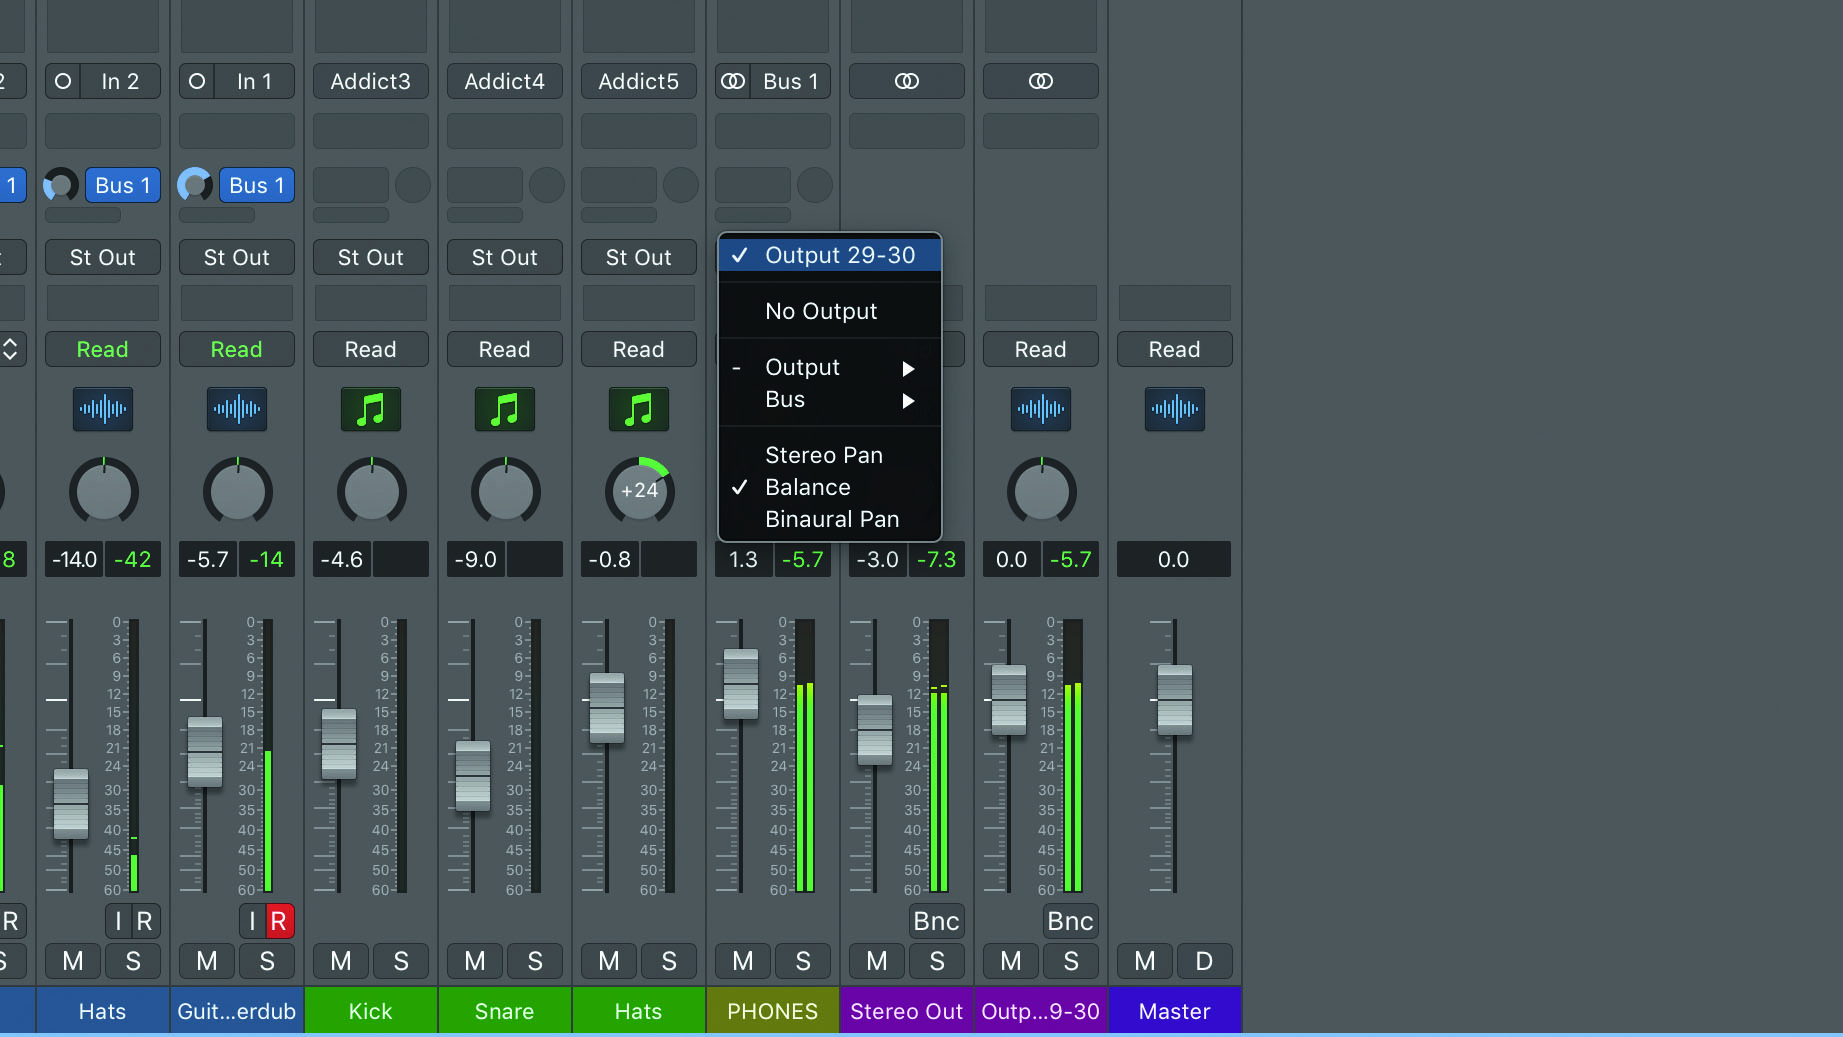
Step 3: Software monitoring also makes it quite easy to create a separate headphone mix. Here, we’ve set aside an auxiliary input on our DAW for just this purpose. Use pre-fader sends to make the levels independent of the main monitor balance, then, if possible, route the bus to a separate main or headphone output on your interface.
Computer Music magazine is the world’s best selling publication dedicated solely to making great music with your Mac or PC computer. Each issue it brings its lucky readers the best in cutting-edge tutorials, need-to-know, expert software reviews and even all the tools you actually need to make great music today, courtesy of our legendary CM Plugin Suite.


