How to sequence a bass riff from one note
Come up with something new by getting a different perspective on MIDI programming
When you sit down at a blank project in your DAW, how do you get started? You might pull up an instrument or two, grab a ready-made synth patch (or one that you’ve designed previously yourself), and start jabbing away at your MIDI controller or programming notes into the piano roll.
If that works for you every time, then great! But for most people, working like this leads to stale results; tracks can end up with the same old chords, the same note values, and the same twists of your imagination as it works on the now-habitual task of ‘making MIDI happen’ in the same way it always has done.
What you need is a new approach. Your DAW probably came with a few MIDI plugins, that process incoming MIDI notes and spit them out in a different form. In this walkthrough, we'll show you how to use just such a plugin to generate a bassline using a single MIDI note, coming up with results we never would’ve arrived at using our usual methods. For more creativity-boosting tutorials, pick up the June 2018 edition of Computer Music.

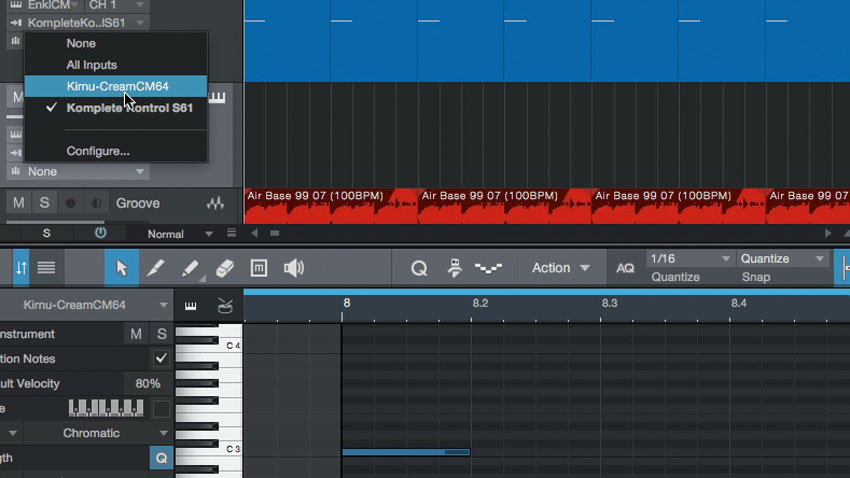
Step 1: We have Enkl CM loaded up, ready to make a bassline. With a single quarter-note C3 playing every bar, we turn to Kirnu’s Cream CM - a hugely powerful arpeggiator, free with every issue of Computer Music. Load it onto a new instrument track, and route its MIDI output to the Enkl CM channel’s input. Check your DAW’s manual if you’re not sure how to do this.

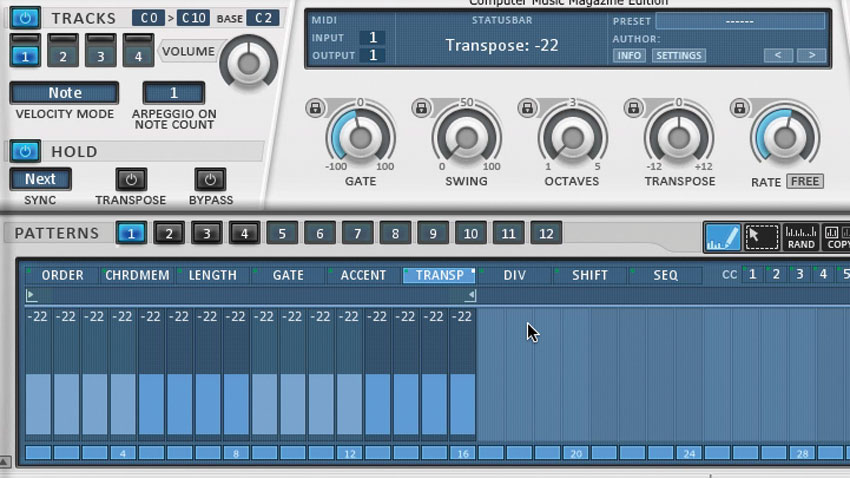
Step 2: Cream CM is currently only affecting one octave, so tweak its octave range to lie between C0 and C9. Activate the Hold section to keep the C3 note looping for the entire bar. Now head for the Transpose tab and set the first 16 steps to -22, giving us a repeated low D note. Bring Cream CM’s loop end bracket back to the 16th step rather than the default 32nd.

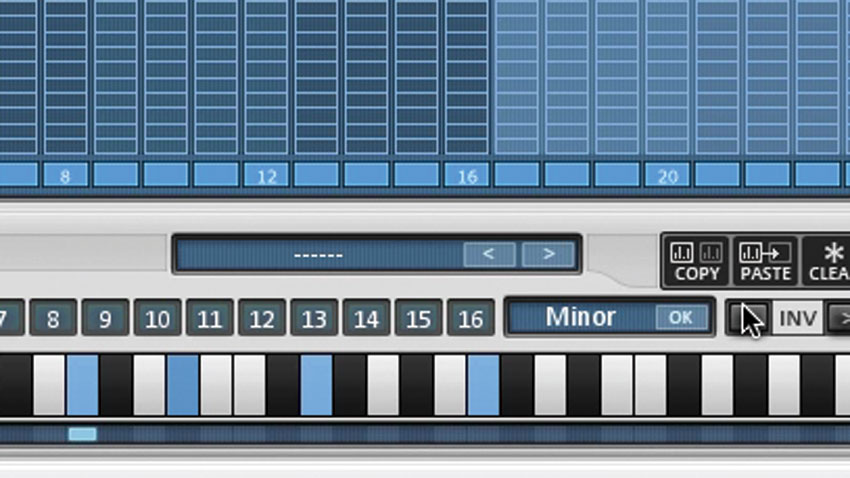
Step 3: In the Chord Memory panel, select a key for the first slot and click OK. We’ve gone for a basic Minor. We delete the lowest note, then use the left Inv button to move the chord lower on the onscreen keyboard. Next, we repeat the process, choosing different chords for slots 2, 3 and 4.

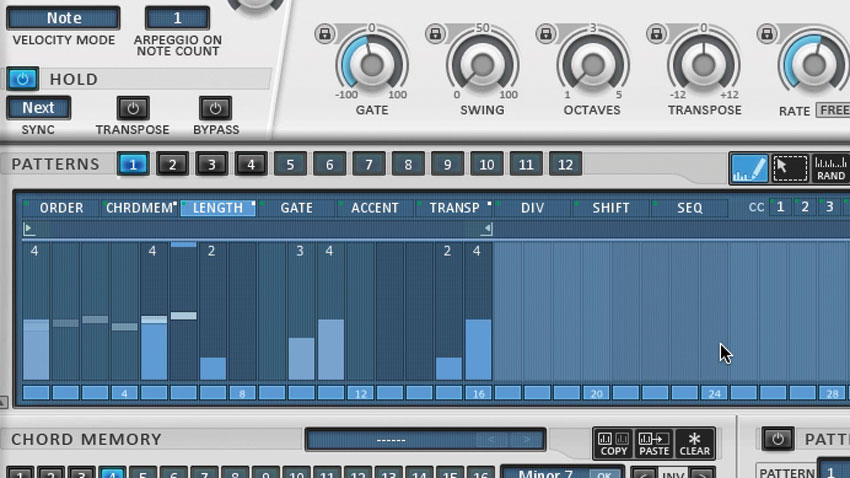
Step 4: Select the Chrdmem tab in the main sequencer, reduce the loop bracket to 16 again, and select between the four lowest rows to choose a chord for each step. Heading to the Length and Accent tabs, we can hold certain steps (notes) for longer, and play around until we’re left with an inspiring bassline that we can record to MIDI and tweak further.
Get the MusicRadar Newsletter
Want all the hottest music and gear news, reviews, deals, features and more, direct to your inbox? Sign up here.
Computer Music magazine is the world’s best selling publication dedicated solely to making great music with your Mac or PC computer. Each issue it brings its lucky readers the best in cutting-edge tutorials, need-to-know, expert software reviews and even all the tools you actually need to make great music today, courtesy of our legendary CM Plugin Suite.


