How to record any room sound
Turn your room into a live chamber with these recording tricks

Back in days of yore, when the term “digital” referred to a caveman’s fingers, the only way to add a sense of space to one’s recordings was by, well… recording in the space. Spring and plate reverbs were still a few thousand years off and homo-Neanderthal musicians could barely dream of hardware digital room simulators, let alone their software counterparts. Audio engineers eventually developed methods for generating a sense of space in a recording, some of which are not only still used, but still sound great.
Converting an empty room into a reverb “chamber” was one of the earliest methods of creating ambient effects. Audio pioneers like Les Paul and Bill Putnam designed reverb chambers for Capitol Studios and Universal Recording (respectively), the sound quality of which remains legendary today. You can emulate their efforts with surprisingly good results by using a room at home as a chamber. You’ll need two microphones (for stereo), an amplifier, and at least one speaker (or powered speaker). Using two speakers will dramatically increase the sense of stereo but the size of the speakers is really not critical. Bookshelf-type speakers work very well.
Start by choosing a room, preferably one that is relatively empty and does not have a lot of absorptive material in it. The room doesn’t need to be large; it’s more about how lively it is. The more reflective the room’s surfaces, the more dramatic the results. Place a pair of speakers at one end of the room. Aim them toward the side walls to generate tangential reflections, as opposed to facing them directly toward the opposite wall. At the other end of the room, set up a pair of microphones. The mics can face the speakers, but pointing them away from the speakers will allow them to capture more reflected sound and less direct sound. Facing the mics away from the speakers lengthens the path that sound waves travel from speaker to microphone, enabling you to vary the perceived room size.
Next patch an aux send (stereo if possible) from your DAW or mixer to the amp or powered speakers. Use a post-fader send so that the room effect stays proportionate to the level of the “dry” sound. For example, if you are treating a vocal, you want the amount of effect applied to follow the fader level when you raise or lower it. The mics are patched back into your DAW or mixer, providing you with a “return” from your reverb chamber. You can return the mics to an aux track in the DAW, or record them to audio tracks so that the effect becomes part of your session. (I recommend the latter.) If you are using a hardware mixer, return the mics to a pair of input channels so you can use the mic preamp. You probably can’t use the effect return on a hardware mixer for this purpose because effect return inputs are almost always line level and never provide phantom power. (I’m sure somewhere there’s an exception…)
The nice thing about generating room sound in this manner is that you don’t need high-ticket mics and speakers. Room sound isn’t necessarily about having a frequency response from 20 Hz to 20 kHz, and I’d argue that room sound shouldn’t be full bandwidth. I typically roll off the high-frequency response of a reverb around 4 or 5 kHz to prevent it from getting splashy. A lot of low end in your ’verb muddies the mix, so cut the bottom end around 100 to 200 Hz using a highpass filter.
To capture a solid stereo image, use cardioid microphones; omni mics make the image more diffuse. Most engineers use condenser mics for this purpose but you can try dynamics as well. I’ve used everything from AKG C414s to Shure SM57s. Experimentation is key. Some rooms sound better when the speakers are played louder to excite more of the room resonance, other rooms not so much. You can also compress the “return” from your chamber or, if you’re looking for that ’80s snare sound gate the return.
A typical living room probably won’t work very well as a live chamber because stuffed furniture and carpets don’t create a lot of nice reflections. A tiled bathroom, on the other hand, is a much more interesting space. Try placing the speakers on the floor facing up, and put the mics near the ceiling to increase the path between speaker and mic. A garage can be an interesting place to record, though you may hear noise from the outside world.
Get the MusicRadar Newsletter
Want all the hottest music and gear news, reviews, deals, features and more, direct to your inbox? Sign up here.
Heroic ambience
As much as I wish I could take credit for this next idea, it was producer/engineer Tony Visconti who orchestrated the radical vocal recording method used on David Bowie’s “Heroes” from the album of the same name. Bowie begins singing the song at a relatively low level, giving the first verse vocal an intimate, dry sound. As the song progresses, his voice gets louder (eventually rising an octave) and the room ambience creeps into the vocal sound. As Bowie’s dynamics become more intense, so does the proportion of room sound. While it might seem that someone is simply turning up a reverb return, the reality (and the result) is far different.
Visconti recorded Bowie’s voice using three microphones placed in different locations. (The track was recorded at Hansa Studios in Berlin.) In the modern era, we’d have simply recorded each mic to its own track, but this was in the day of analogue tape and limited track availability. Visconti had track for the lead vocal, so recording each mic to a separate track was not an option. His solution was to place one microphone, a tube Neumann U47, up-close to capture the dry vocal sound. A Neumann U87 was set approximately 15 feet from the first mic, and another U87 was placed at the opposite end of the room. Visconti then gated the two U87s, setting the gates so that they would open only when Bowie sang progressively louder. The opening vocal lines were sung softly and did not open the gates so the U87s are muted. As Bowie sings louder, the gate on the first U87 opens, adding some room tone. At his loudest volume, the gate on the distant U87 opens as well. In the loudest sections, all three mics contribute to the track, creating the vocal sound that’s heard on the recording.
This trick can be accomplished much more easily in modern times by recording each mic to a separate track and gating the two ambient tracks after the fact—giving you the ability to fine-tune the threshold at which the room sound opens up. You may notice that until you get the gate’s threshold at just the right setting, the gate will “chatter” (open briefly when it should not); filtering a bit of the bottom out of the gated tracks may help this. It’s important not to compress the ambient tracks because doing so will change the perception of ambience. (Of course, if you have a singer of Bowie’s calibre, a Fisher-Price Mr. Microphone would probably suffice.)
A variation of this concept can be used to add room sound to a snare drum without affecting the kick and toms. This method was common in the ’80s when reverbs were almost as big as musicians’ hair. Close-mic the snare using one of the tried-and-true mics: Shure SM57, Audix i5, AKG C451, etc. Add a second mic pointing straight down toward the centre of the snare and set it as high as the ceiling allows. The second mic can be a condenser mic with a cardioid or supercardioid pattern. Record the mics to separate tracks. When it comes time to mix, insert a gate on the distant snare mic track. Of course, it will be difficult to get the gate to open and close reliably on the snare hits because the distant snare mic will have recorded leakage from toms and cymbals.
To solve this problem, set up a trigger or key for the gate from the close snare track. The close snare mic makes a good key signal because it will have a better ratio of snare-to-everything-else, and will enable you to set the gate to open only on snare hits. On the left is the Snare Close track (blue), on the right is the Snare Far track (red). A gate is inserted on the Snare Far track. The Snare Close track is routed pre-fader to Bus 1, and the Key Source in the gate is set to Bus 1. (That last part is critical.) Every time the snare is hit, the Snare Close signal on Bus 1 opens the gate on the Snare Far track, allowing the room sound to be heard. The room sound will last as long as the hold and decay times you set on the gate. Start with 100–200 ms each and see if you like the way the decay works with the tempo of the song. The key filter in the example is set at 200 Hz for the low cut and 3 kHz for the high cut, which increases the reliability of the trigger by reducing the effects of bleed in the close microphone. This filter applies to audio in the key signal only, not the audio path [Note: using a pre-fader send for the key signal means that the gate will trigger reliably even if you move the fader on the Snare Close track].
Recording with boundaries
A completely different approach to capturing room sound can be obtained using a boundary microphone or a Pressure Zone Microphone (PZM). Both employ a flat plate near which the capsule is mounted but work a little differently. A boundary mic is intended to be placed on a flat surface such as a table, lectern, floor, or wall. Most boundary mic capsules are oriented so that the diaphragm is perpendicular to the plate and thus the boundary. Other boundary mics fit into holes drilled into conference tables and mount flush with the tabletop.
Boundary mics do not pick up sound the way typical microphones do. Despite their directionality, typical microphones receive sound that travels directly from the source to the capsule, as well as sounds that bounce off a boundary before reaching the capsule. When the direct and reflected sounds meet at the diaphragm, they arrive at different times because the path of reflected sound is longer than the path for direct sound. This difference causes comb filtering and anomalies in the frequency response. Now, let’s say that you lay a Shure SM57 on the floor. The difference in the path length for direct and reflected sound is much smaller. The smaller we can make the diaphragm, and the closer we can get it to the boundary, the less the difference in these paths, even at high frequencies. The result is that phase cancellation between direct and reflected sounds is minimized. That’s the concept of a boundary microphone.
A PZM is a type of boundary mic, but not all boundary mics are PZMs. The diaphragm of a PZM is mounted parallel to the plate and separated from the plate by a very small air space or slit called the pressure zone. This thin slit is where direct and reflected sounds are in-phase. The smaller the pressure zone, the higher the frequency response is extended (up to a point). Because direct and reflected sounds are in phase here, you get a 6dB increase in the mic’s sensitivity at no extra charge. PZMs produce a wide, smooth frequency response, even when sounds are off-axis.
An important point when using a PZM or boundary mic is that their low-frequency response is affected by the size of the plate. Hanging a PZM mid-air is likely to produce a thin, bright sound. But taping it to a wall, ceiling, or floor is another story. Placement of two PZMs should be one on either side of a drum kit, approximately four feet high and two feet from the wall behind the kit. The stereo image of this setup is stunningly realistic. Add some compression for a bit of crush and you are off and running. If you’d rather not worry about tape pulling the paint from your walls when it’s time to remove the mics, you can mount the mics on 4x4-foot pieces of plywood or Plexiglas™ and set the panels alongside the kit. For a variation on the ORTF stereo-miking technique, the mics can be centred at the edges of two panels, and the panels angled 60 to 70 degrees in a V-shape.
I’ve seen a lot of engineers lay a boundary mic or PZM inside a kick drum, but that will probably produce a lot of attack and not much low end; I would not use this as the primary kick mic. Placing a PZM on the floor in front of the kick is another story. Since the floor becomes the boundary mic’s plate, the frequency response of the mic will extend way lower than if the mic is laid inside the drum, and can deliver some booty-shaking bottom. If you’re really adventurous, you can try something that producer/engineer Terry Brown did when recording Rush’s song “Vital Signs” from Moving Pictures. Look up the video for this song, and you’ll see that there’s a PZM strapped to drummer Neil Peart’s chest, facing the kit. How much of this mic made it into the final mix, I cannot say, but it certainly delivers the drummer’s perspective.
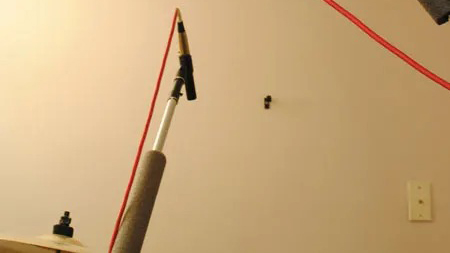
If you don’t own a boundary microphone, you can test the waters by placing a traditional mic (A small-diaphragm condenser is the best bet for this placement; you can also try cardioid or omni patterns). The mic looks like its front is touching the wall or ceiling, but in reality, there’s a small gap between the front grille and the wall, which creates the pressure zone. You can use a few business cards as spacers while adjusting the mic stand so that the mic is extremely close to the wall but not touching it. When choosing a mic, be conscious of the position of the diaphragm inside the head of the microphone: just because the grille is at the front does not mean that the diaphragm is directly behind it, and in fact a lot of mics have capsules set back behind the grille.
It’s worth a mention that Mid-Side (or M/S) stereo is a great technique for capturing room sound. The “side” signals represent room reflections, which are separate from the “mid” (dry) signal. This method gives you the ability to dial the room sound up or down by raising or lowering the side channels relative to the mid signal. It’s a technique that can add a lot of personality to your recordings.
Electronic Musician magazine is the ultimate resource for musicians who want to make better music, in the studio or onstage. In each and every issue it surveys all aspects of music production - performance, recording, and technology, from studio to stage and offers product news and reviews on the latest equipment and services. Plus, get in-depth tips & techniques, gear reviews, and insights from today’s top artists!
"A classic compressor for free on Valentine's Day – it must be love!": Universal Audio is giving away an 1176 plugin as a Valentine's gift - here's how to get it and use it
“A magical part is this sidechain with the bass”: Lady Gaga breaks down Disease in new studio video


