How to program the perfect drum roll: part 2
Let's put that noise to use!
In part 1, we showed you how to program a ‘classical’ drum roll of the kind you might hear accompanying a circus act or leading into a national anthem.
That was all well and good, of course, but hardly essential information for the producer of actual, you know, music.
Really, though, that was just a primer for this, the main event, in which we’ll show you how to apply what you learnt to your programmed drum kit grooves.
As mentioned in part 1, a deeply multisampled virtual snare - ideally at the heart of an equally deeply multisampled kit! - is critical to the successful programming of any drum roll. We're using Toontrack’s incredible Superior Drummer 3, but other equally viable options include FXpansion BFD3, XLN Audio Addictive Drums, and numerous libraries for Native Instruments’ Kontakt.
To recap briefly on part 1, when programming any roll, remember to turn snap off in your MIDI editor when placing the hits for human timing variation; and alternate the velocity slightly between pairs of hits, representing the double-strokes in each successive hand that string together to constitute the final percussive ‘blur’. And if your virtual drum kit has any humanising features of its own - such as SD3’s Use Adjacent Layers option and Smoothing control - be sure to give them a try.
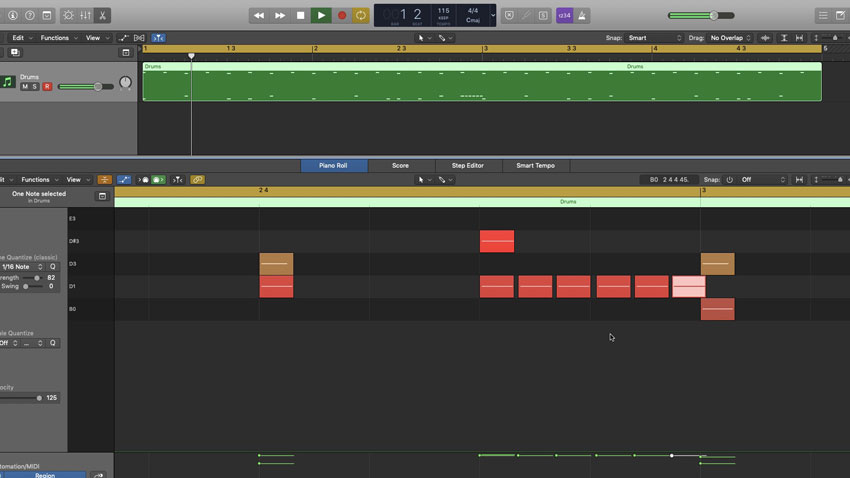
Step 1: Here’s a simple four-bar groove, which we’ll embellish with various roll-related fills and flourishes. First, throw in a short snare press roll. With Snap turned off (see part 1), I draw in six loosely spaced hits, representing three very fast double-strokes (L, L, R, R, L, L), and followed by the right hand moving back to the hi-hats.
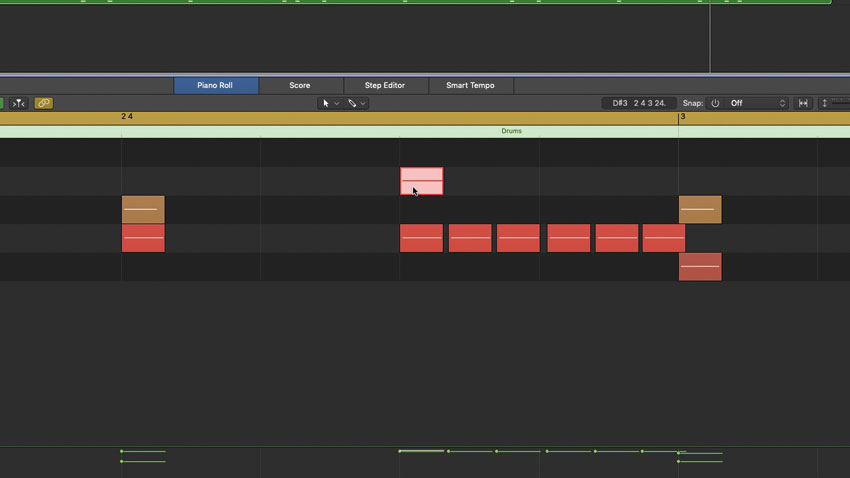
Step 2: The drummer would be likely to drop the hi-hat hit coinciding with the first note of the roll, as their right hand would be moving rapidly towards the snare at that point - so we make sure to delete that MIDI note. Now all that remains to be done here is to emulate realistic sticking using MIDI velocity.
Get the MusicRadar Newsletter
Want all the hottest music and gear news, reviews, deals, features and more, direct to your inbox? Sign up here.
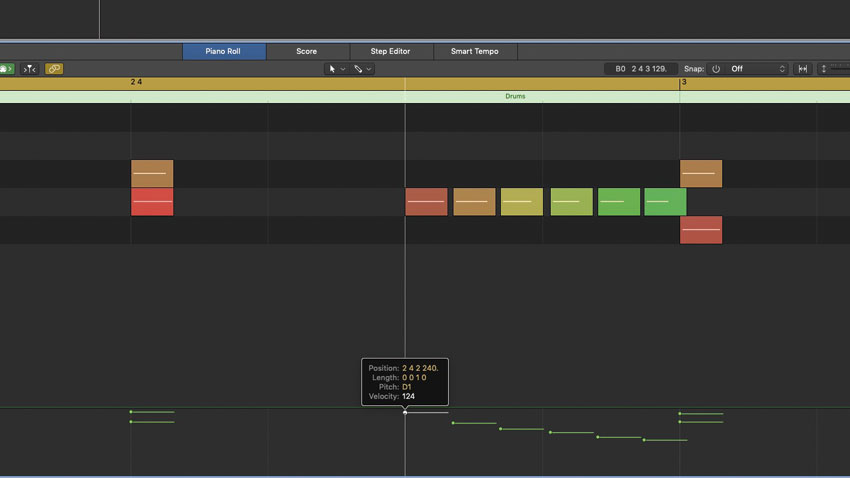
Step 3: What we want is the whole roll to be a lot quieter than the main snare hits, but with a slight initial accent. Therefore, after a fairly loud first double-stroke, the second one, played with the stronger right hand, should be made a touch heavier than the following and final left hand double-stroke.
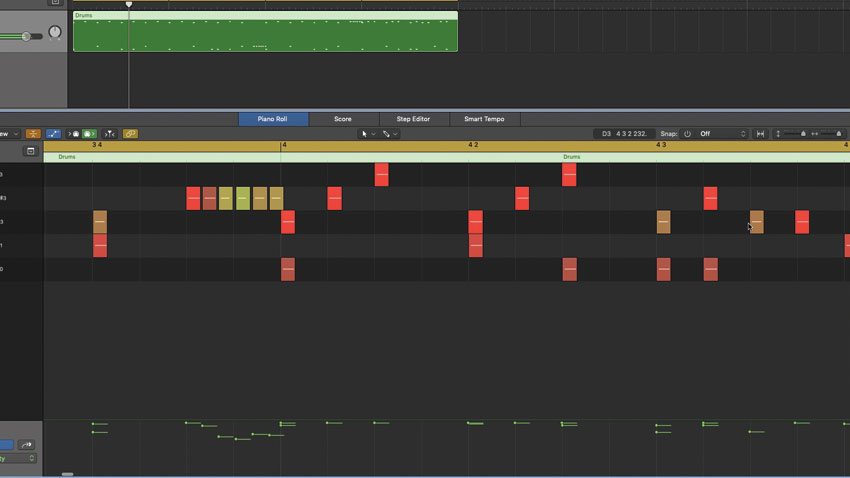
Step 4: Rolls aren’t just for the snare - they can work well on hi-hats, too. Here, we’ve copied/pasted the snare roll from the previous step to the hi-hat tip articulation (it’s not really possible to play a roll using the shoulder of the stick), changed velocities to emulate right, left, right sticking, and used it as the basis for a more expressive line.
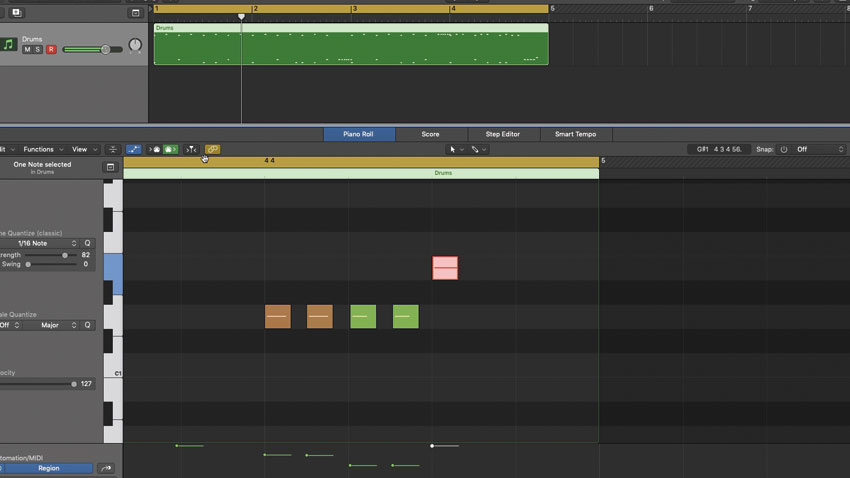
Step 5: A single accented note on the end of a roll gives it finality. If we draw in a series of two double-strokes at the end of the phrase, followed by a full-strength hit, the result is known as a five-stroke roll, which - along with its self-explanatory seven- and nine-stroke siblings - is a ‘rudiment’ that every drummer learns. Very useful.
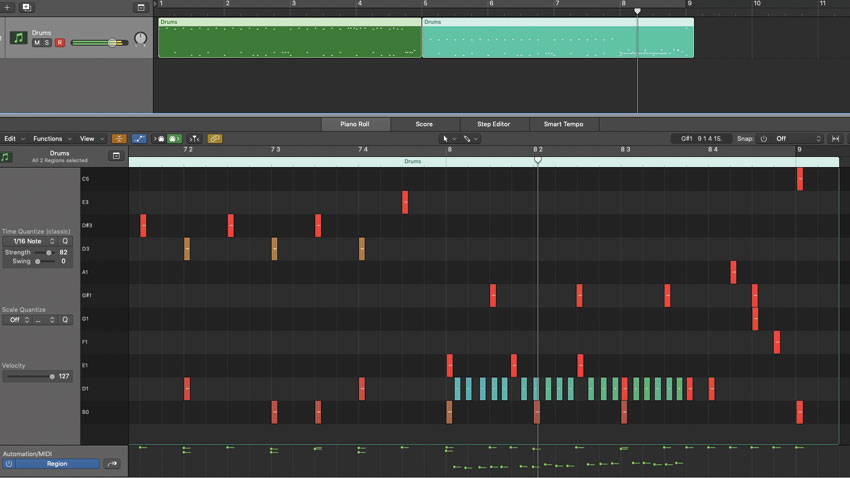
Step 6: Finally, let’s go for a full-on multi-accented roll, as might be found in an extended drum fill or solo. First, draw a low-velocity roll and remove other sticked elements that coincide with it. Then max out velocity on your accented hits, and move some to a rimshot articulation, if your kit has one, for realistic variation.
Computer Music magazine is the world’s best selling publication dedicated solely to making great music with your Mac or PC computer. Each issue it brings its lucky readers the best in cutting-edge tutorials, need-to-know, expert software reviews and even all the tools you actually need to make great music today, courtesy of our legendary CM Plugin Suite.


