How to program the perfect drum roll: part 1
The tension mounts
The term ‘drum roll’ is often used inaccurately by dance music producers to describe any series of regular eighth-, 16th- or 32nd-note snare drum hits leading into a drop or other significant point in the arrangement, but it’s actually a very specific technique.
You know the sound, no doubt: that building or undulating wash of snare noise used to build tension as a circus trapeze artist or cheesy stage magician does their thing, culminating in a full-strength hit on the snare or crash cymbal as the event reaches its climax.
A drummer plays a drum roll by rapidly pressing the tip of each stick alternately into the head of the snare drum, so that they bounce twice (ideally) to generate a short buzzing sound – for this reason, the drum roll is also known as a press or buzz roll. There’s an inevitable degree of randomness to the spacing between each bounce and their volume levels, which gives the drum roll its slightly chaotic feel.
When creating a drum roll in your DAW, the ‘machine gun’ effect (hearing the same sample repeat over and over) is your enemy, so a good, deeply multisampled virtual snare drum is essential. Beyond that, it’s simply a matter of getting the notes right, which is exactly what I’ll show you in the walkthrough below. In next month’s second part, we’ll look at some ways in which drum rolls can be used within grooves.
Here's how to program a typical crescendoing drum roll. Be sure to check back soon for part two, where we'll be looking at embellishing a groove with roll-esque flourishes.
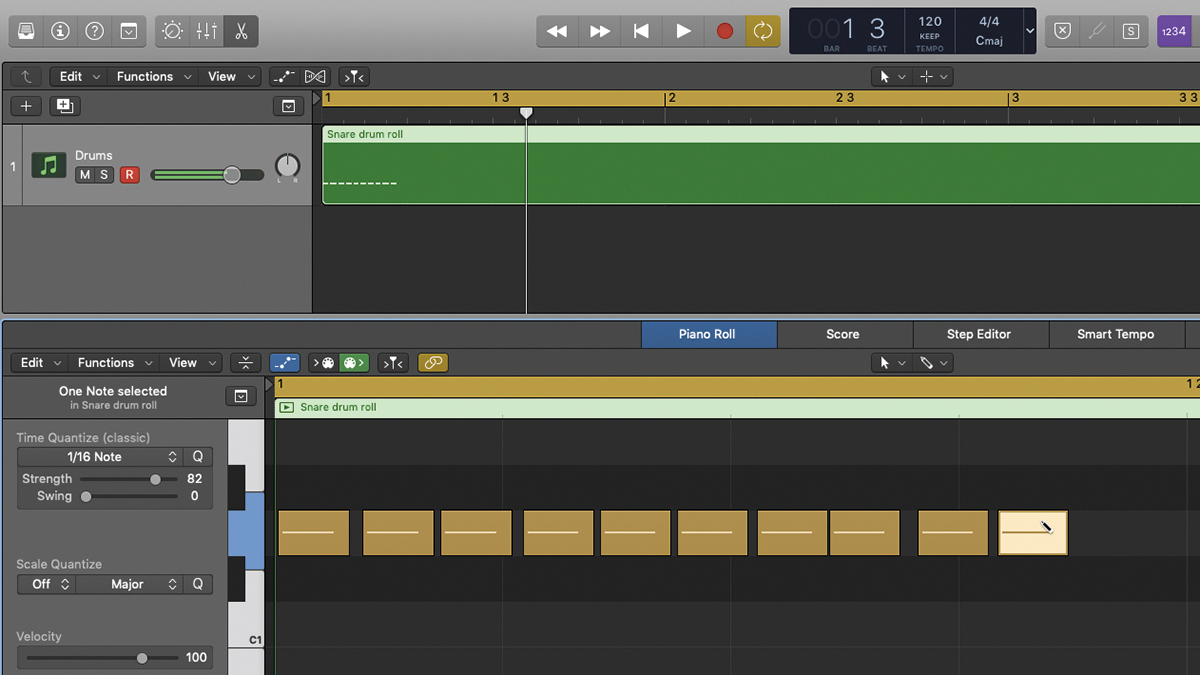
Step 1: With your multisampled snare drum loaded, start by drawing in a series of very fast notes over, say, two bars with snap turned off – don’t worry about the timing grid or keeping the spacing even. A press roll doesn’t have any meaningful rhythm to it, and each hit will inevitably be slightly fluctuant in terms of timing.
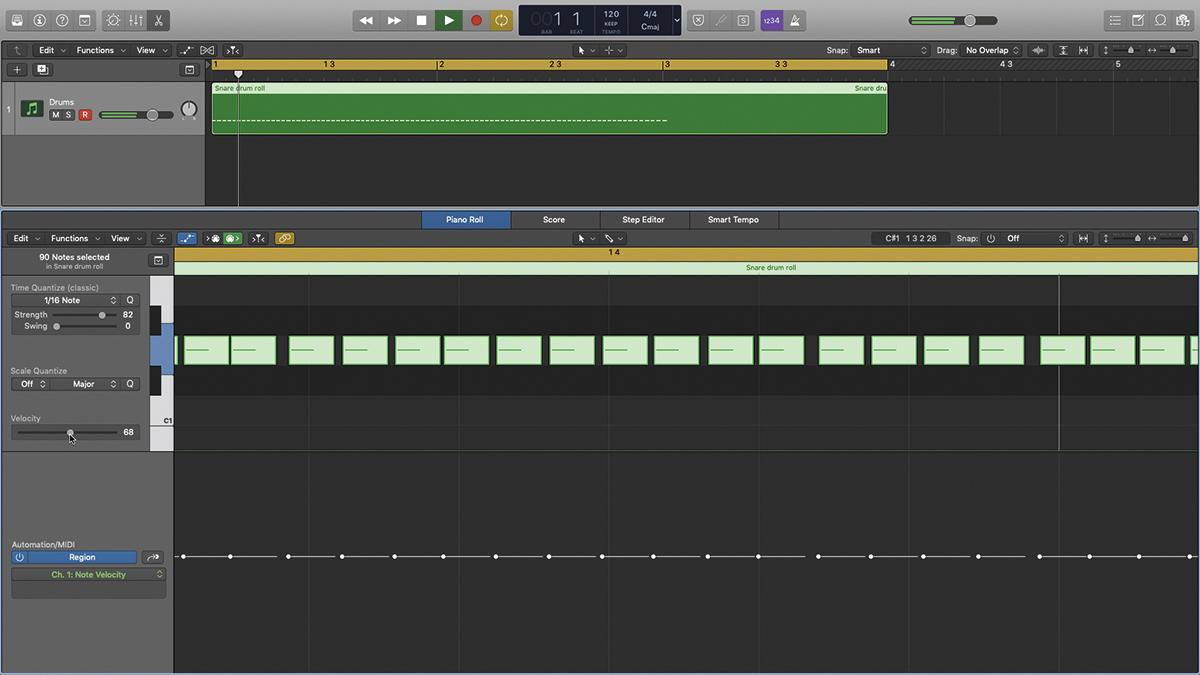
Step 2: The idea is for the hits to sort of ‘blur’ into each other, so if you are able to still hear each one as a discrete stroke, try and move them closer to each other. If it isn’t already, set the velocity of the notes to somewhere around 60-70 – drum rolls are very rarely played with the maximum amount of force.
Get the MusicRadar Newsletter
Want all the hottest music and gear news, reviews, deals, features and more, direct to your inbox? Sign up here.
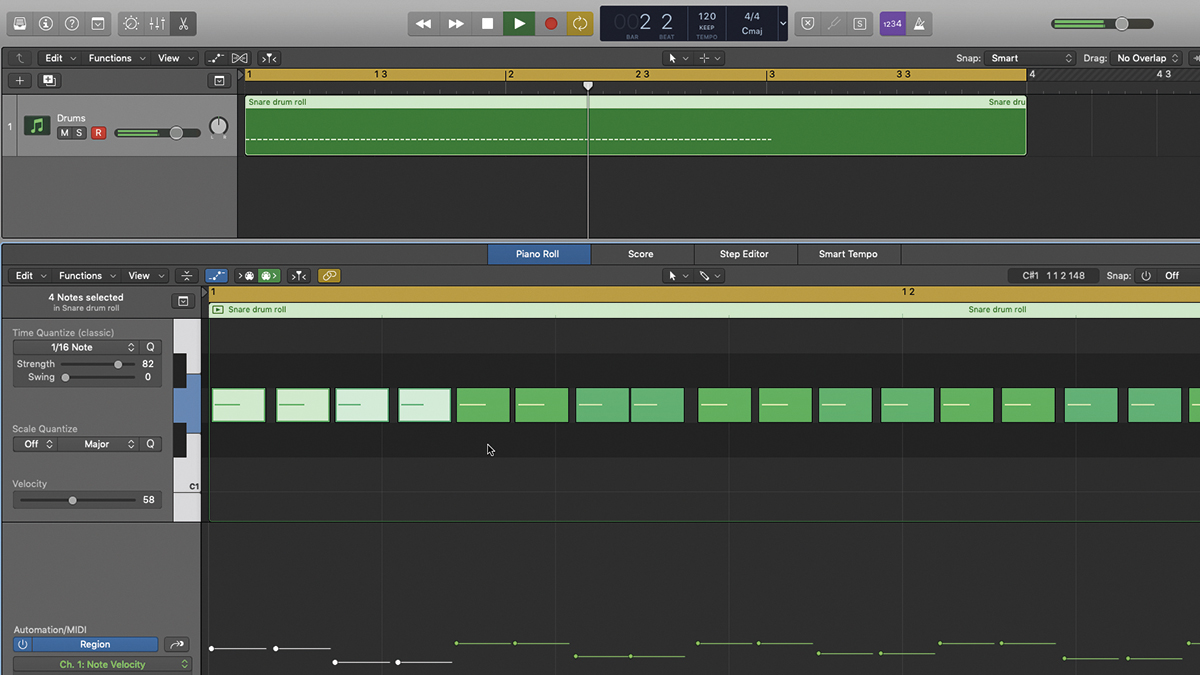
Step 3: If your sampler has separate left and right hand samples, switch between them every two strokes. If not, lower the velocity of every other pair of notes slightly. Either way, shift overall velocity level (keeping the spacing of each pair) up and down slightly as the roll progresses, for a touch of human variation.
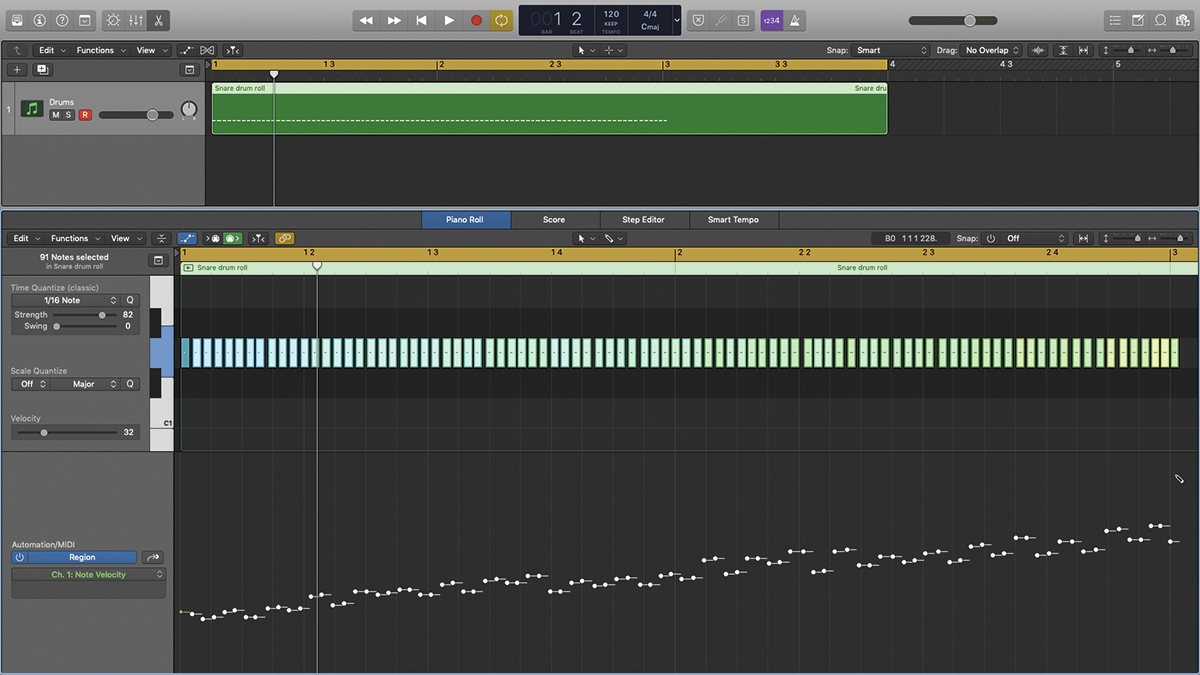
Step 4: To create the crescendo, we need to apply an upward ramp to the sequence, again without breaking the carefully programmed relative velocity positioning of our double-strokes. Logic Pro makes this easy with the Cmd- modified pencil tool, but if your DAW doesn’t, you’ll have to do it by hand.

Step 5: Assuming your sampled snare has sufficient multisampled velocity layers, your roll should already sound realistic. However, many virtual drum kits include humanising features, like Superior Drummer’s Randomise Hits and Use Adjacent Layers. Turning these on adds even more ‘real drummer’ authenticity.
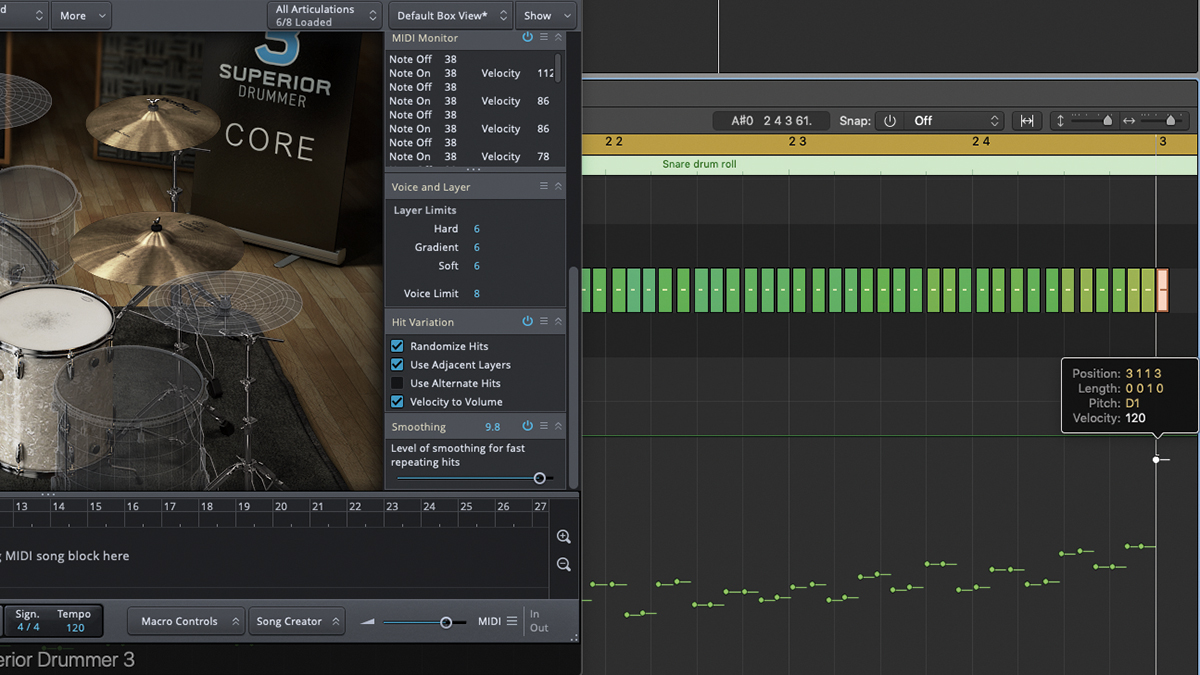
Step 6: If you are using Superior Drummer 3, the Smoothing control provides further realism by softening the attack of rapidly repeated hits – ie, drum rolls. And for that final conclusive flourish, simply whack the velocity of the very last note, which should fall on the first beat of the bar, all the way up.
A music and technology journalist of over 30 years professional experience, Ronan Macdonald began his career on UK drummer’s bible, Rhythm, before moving to the world’s leading music software magazine, Computer Music, of which he was editor for over a decade. He’s also written for many other titles, including Future Music, Guitarist, The Mix, Hip-Hop Connection and Mac Format; written and edited several books, including the first edition of Billboard’s Home Recording Handbook and Mixing For Computer Musicians; and worked as an editorial consultant and media producer for a broad range of music technology companies.


