How to position your right hand when you're playing the keyboard
Wanna learn how to play the keyboard properly? Let's start at the very beginning…
When starting to learn the keyboard, it’s a good idea to get basic hand positions nailed early on, as it’ll make playing easier in general, and prevent you from falling into bad habits in the long run
In terms of simple ergonomics, it might seem obvious, but you need to be sat (or standing) facing your keyboard, positioned roughly in line with the centre - around middle C. If you’re sitting, make sure the seat is high enough that your wrist and elbow are slightly higher than the level of the keyboard when your fingertips are on the keys. Similarly, if you’re standing, adjust the height of your keyboard to achieve the same result.
Generally speaking, if you’re playing two-handed, you’ll be focusing your right hand on the area of the keyboard around middle C and above, and your left hand will be positioned mainly in the lower area of the keyboard to the left of middle C, taking care of the bass notes. This will often be played in octaves, using your thumb and pinky an octave apart.
For more, check out the Play Keyboard Like a Pro cover feature in the May 2018 edition of Computer Music.
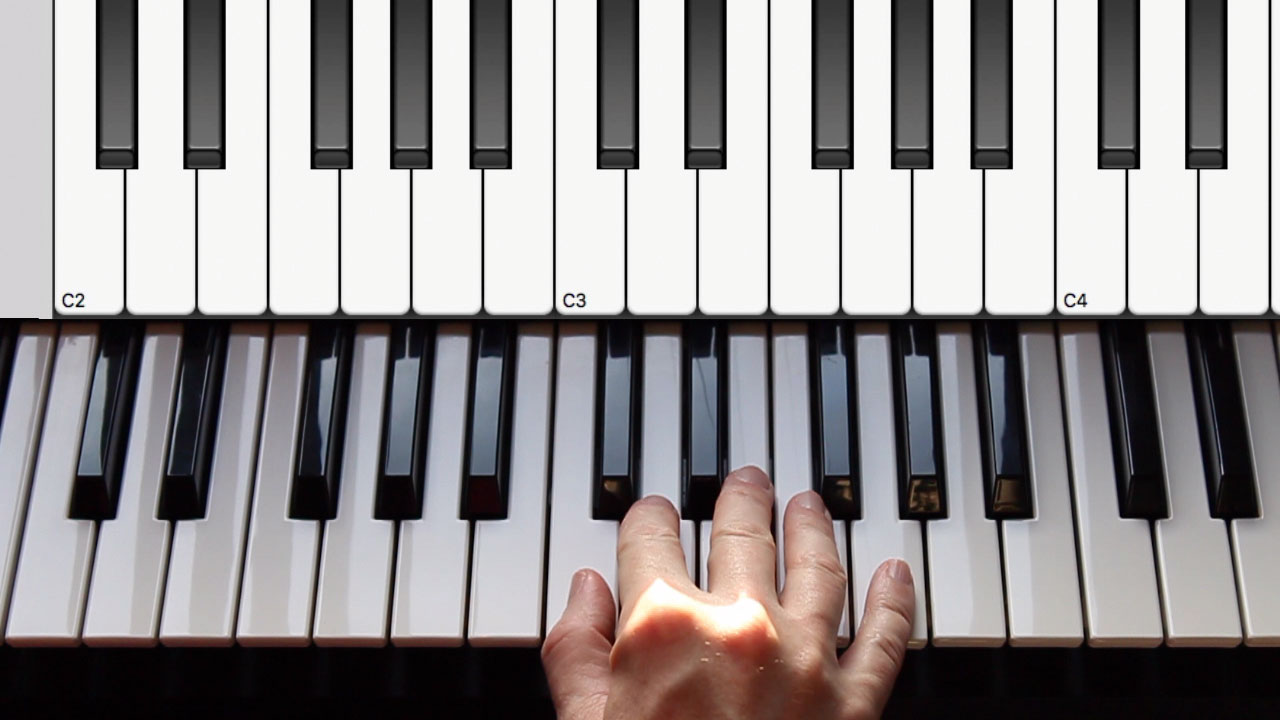
Step 1: To begin with, start with your right hand. Keeping your hand and fingers relaxed, place your right hand lightly on the keys, with the left side of your thumb on middle C and the tips of your fingers resting on the next four white keys (that’s D, E, F and G) to the right.
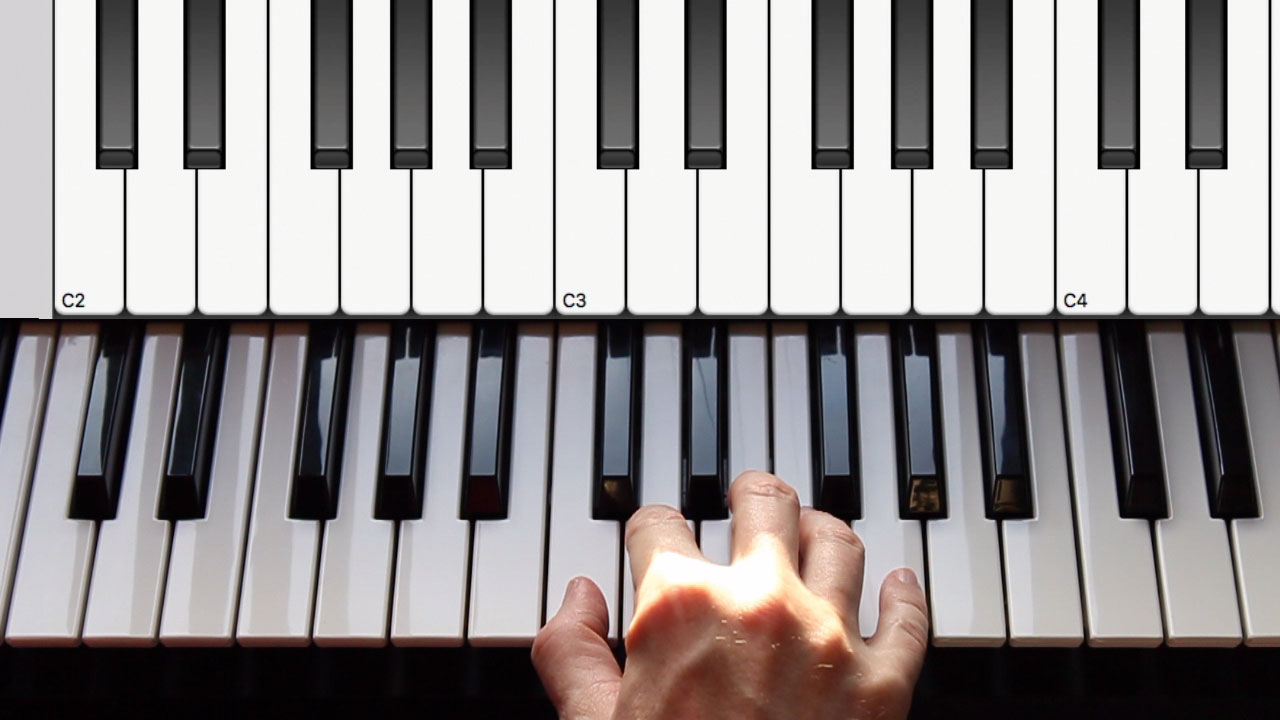
Step 2: Draw your fingers back a little so that they’re slightly bent, keeping each fingertip resting lightly on its own key, positioned equally between the left and right edges of each key. Make sure your wrist is relaxed, but not so much that it’s completely drooping down below the level of the keys. Keep it raised slightly.
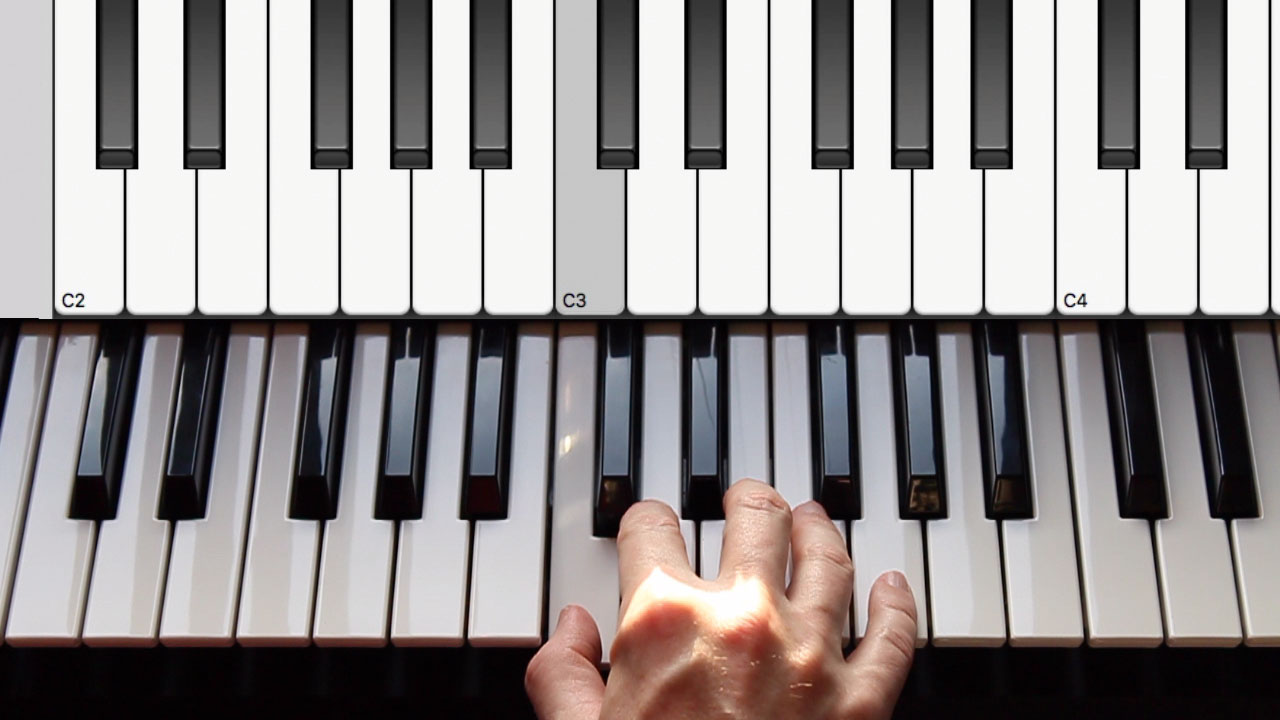
Step 3: Maintaining this position, press down with just your thumb to play middle C. Keep the other fingers as still as you can, and avoid sticking your fingers out straight in weird directions as you play. Lift up and press down again to play the note a few more times, getting used to not moving the rest of your hand as you do so.
Get the MusicRadar Newsletter
Want all the hottest music and gear news, reviews, deals, features and more, direct to your inbox? Sign up here.
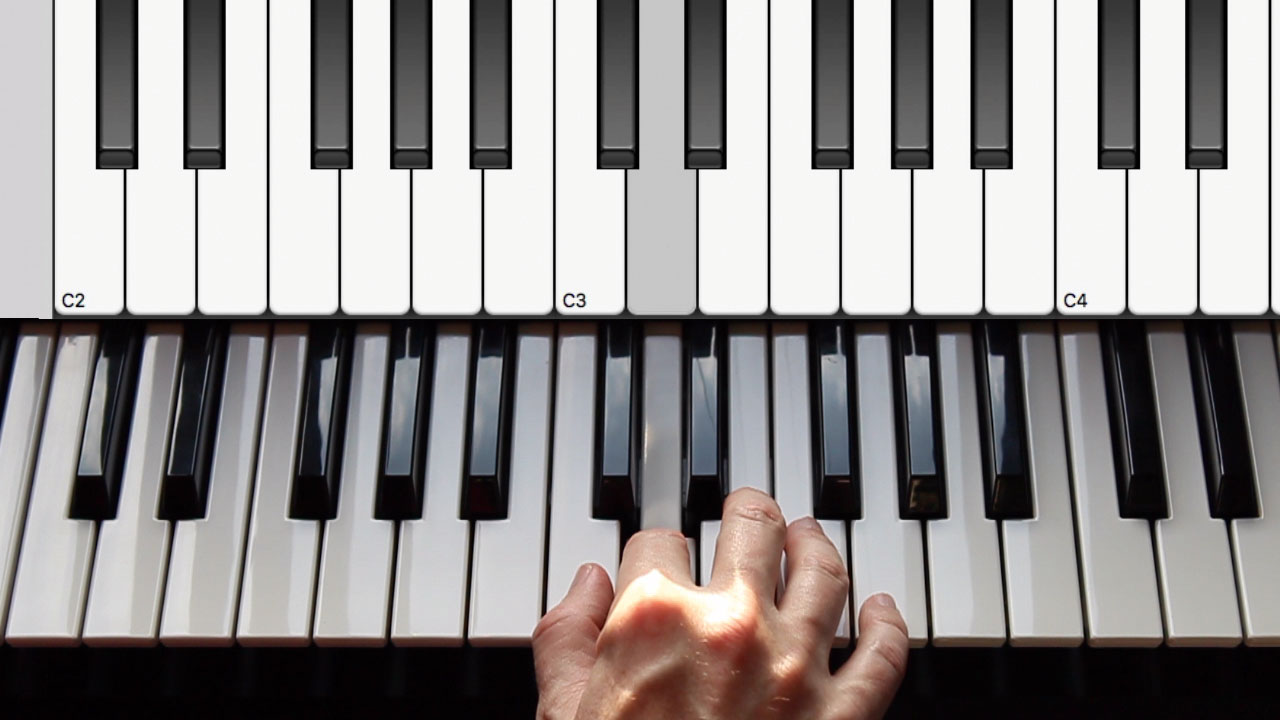
Step 4: Next, as you release your thumb up from middle C and let the key rise up again, press down with your index finger to play D. To avoid the notes overlapping, think of it as like how you’d use the pedals when changing gear in a car - C is the clutch, and D is the accelerator. As the clutch comes up, the accelerator goes down, and vice versa.
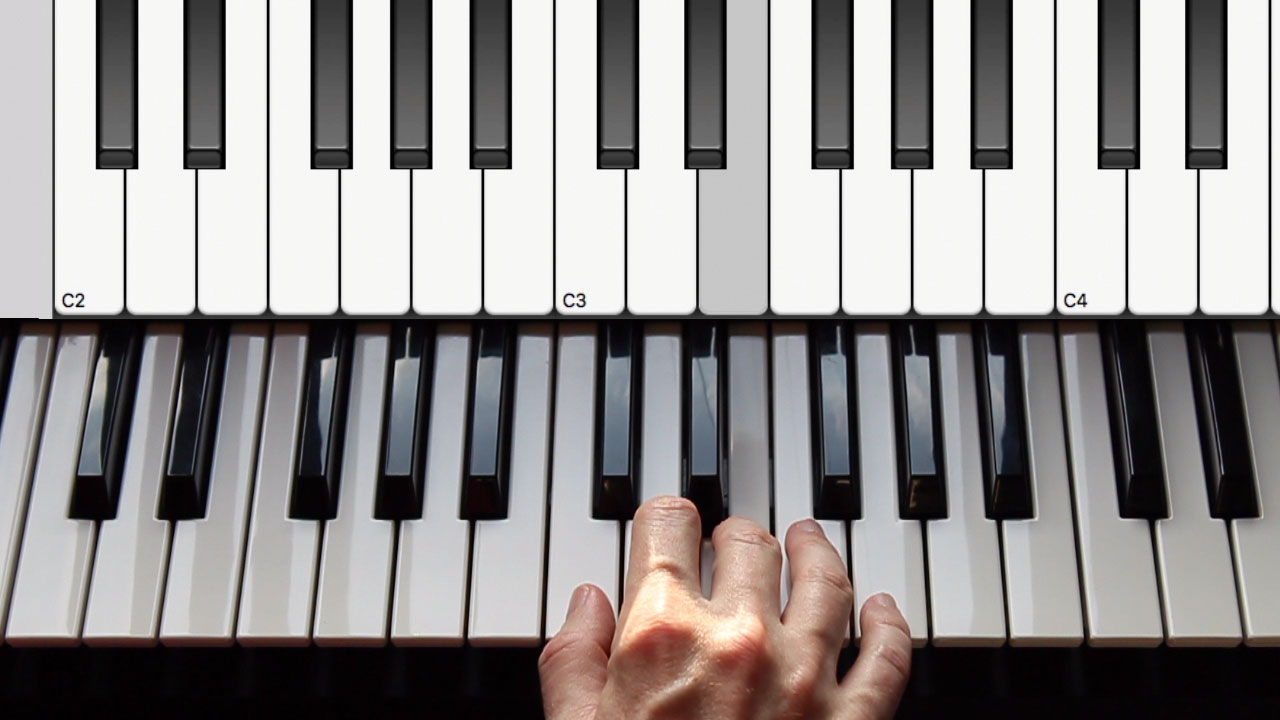
Step 5: Now try the same thing going from D to E, lifting the D up as you press down on the E with your middle finger, again keeping the rest of your hand as still as possible. Then go from E back to D again, then down to C, in reverse order. Keep playing slowly up and down through C-D-E-D-C a few times to try and get the feel of it.
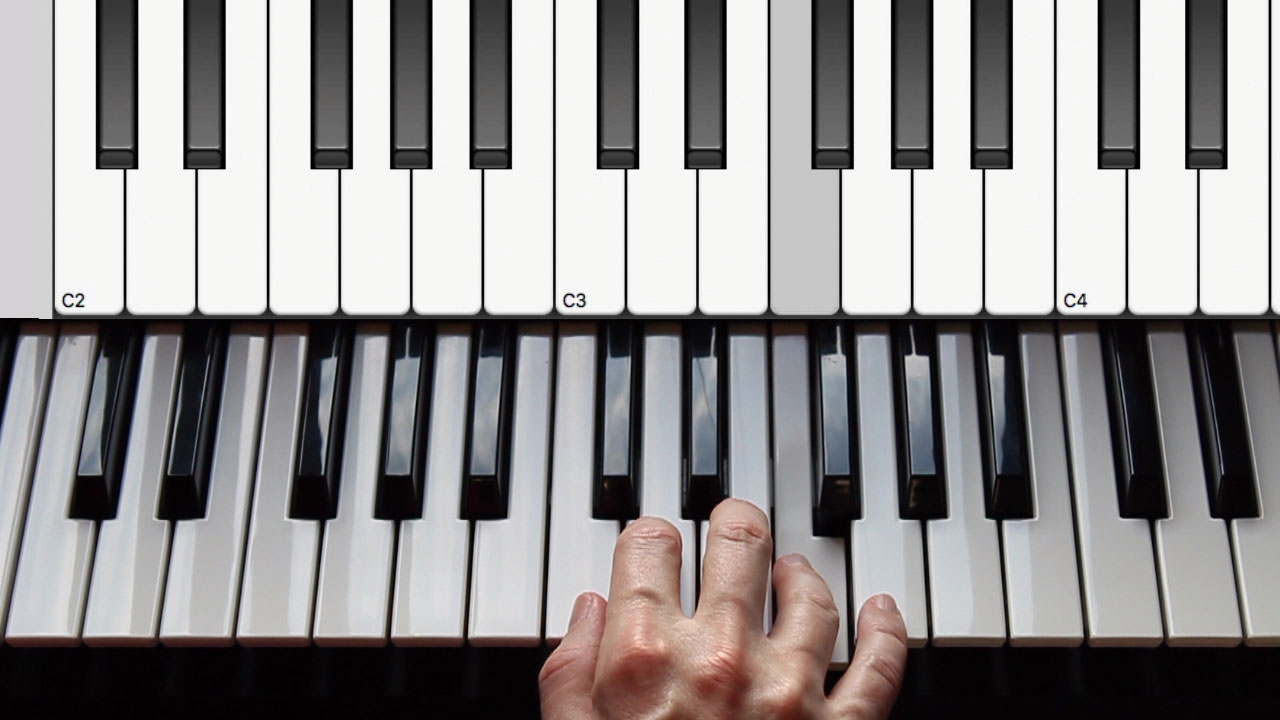
Step 6: As you get more confident, add the notes F and G into the equation, playing them with your ring and little fingers. As you play up and down the five notes C-D-E-F-G-F-E-D-C, try to make your fingers ‘walk’ from one key to the next, so that the notes transition together smoothly. Keep things really slow and even to start with.
Computer Music magazine is the world’s best selling publication dedicated solely to making great music with your Mac or PC computer. Each issue it brings its lucky readers the best in cutting-edge tutorials, need-to-know, expert software reviews and even all the tools you actually need to make great music today, courtesy of our legendary CM Plugin Suite.
"Yamaha has achieved an extraordinary level of immersiveness and realism, crafting an instrument that sounds closer to an acoustic piano and feels like one under your fingers": Yamaha Clavinova CLP-885 digital piano review
"Despite its size, it delivers impressive audio quality and premium functions as well as featuring a good selection of inspired sounds": Roland GO:Piano 88PX review


