How to perfect your polyrhythms in Ableton Live
A groove is always more interesting when it comprises more than one rhythm. Here's how it's done…
If your beats are feeling a little stale or predictable, polyrhythms can be a great way to inject some colour.
Taken from the Greek word ‘poly’ - meaning ‘more than one’ - a polyrhythm is a rhythm made up of two or more different, conflicting rhythms played at the same time. In this context, conflicting rhythms are just patterns that aren’t directly derived from one another (for example, 2/4 and 4/4, or 6/8 and 12/8). Traditional African, Latin American and Indian music all make plentiful use of complex polyrhythms. The thinking behind them is based on the idea of different note groupings - each containing a different number of notes, say 3, 5 or 7 - all fitting into the same amount of time.
So what you’re doing is dividing the beat within each bar into different numbers of evenly-spaced subdivisions, then combining at least two of these together to form a new, more complex rhythm of the sort that makes you go cross-eyed when you try to work out what’s going on! Sounds easy, eh? Let’s find out…
For more out-there beat programming tutorials, pick up the August edition of Computer Music.
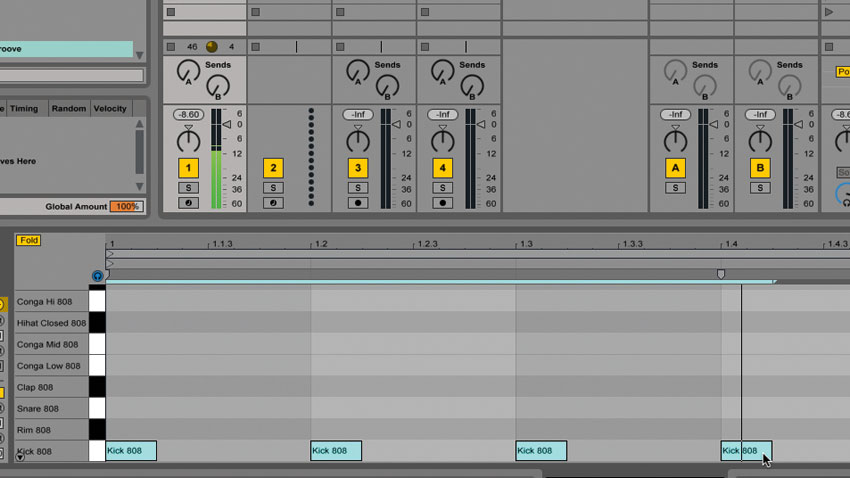
Step 1: The 4:3 polyrhythm is one of the more common polyrhythms. To create one in Live, begin by making a new MIDI clip. Insert a Drum Rack and open the Clip Editor, then enter MIDI Draw mode and place a kick drum on every quarter-note beat of the bar.
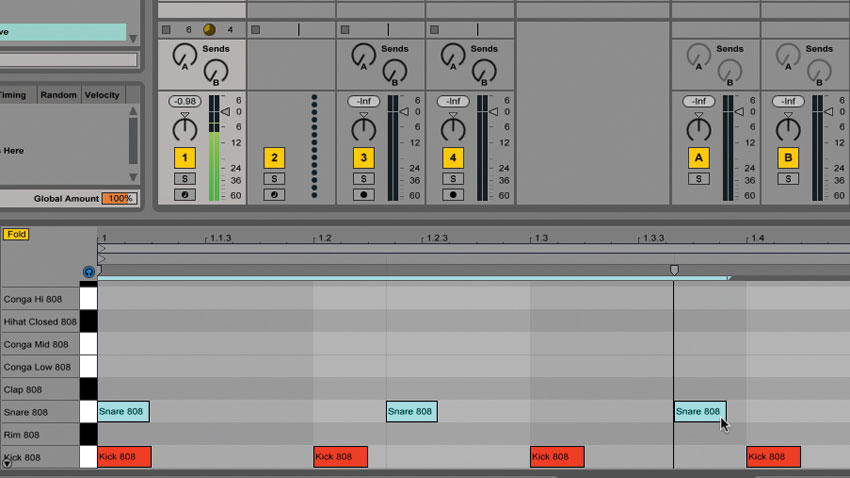
Step 2: This gives us a basic 4/4 beat, over which we’re going to lay down a 3/4 snare pattern. Switch the grid to half-note triplets (1/2T), which will display three evenly-spaced grid lines within the bar to act as anchor points. Place a snare drum note on each of these to produce the pattern shown.
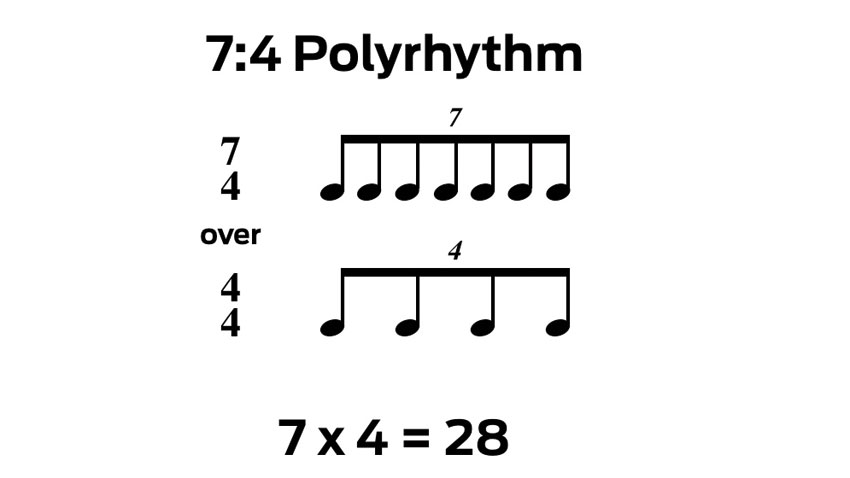
Step 3: For any polyrhythm, you can work out where to place the notes on the beat grid in advance, which helps when creating more advanced examples. Say we want to make a 7:4 polyrhythm: to get your grid resolution, multiply the two numbers together, then divide the beat into that number of segments.
Get the MusicRadar Newsletter
Want all the hottest music and gear news, reviews, deals, features and more, direct to your inbox? Sign up here.
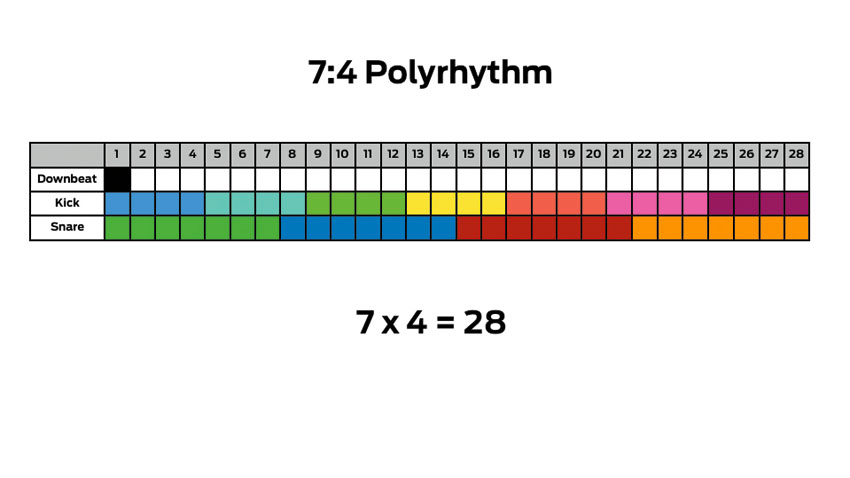
Step 4: So, a 7:4 polyrhythm would get 28 segments (7x4=28). This gives us a bar full of 28 16th-notes, which we can subdivide into both seven and four equal parts. The downbeat goes in the first slot of our grid. We can emphasise this in our DAW with a crash cymbal or similar sonic punctuation.
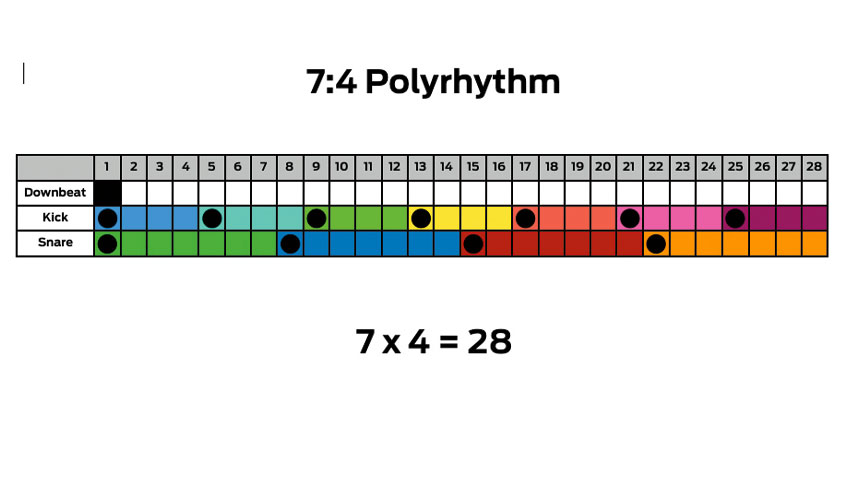
Step 5: Then, to work out the placement of the beats in our polyrhythm, we can place a kick drum note on every fourth 16th-note beat, and a snare on every seventh 16th. This means the kicks fall on beats 1, 5, 9, 13, 17, 21 and 25, and snares happen on beats 1, 8, 15 and 22.
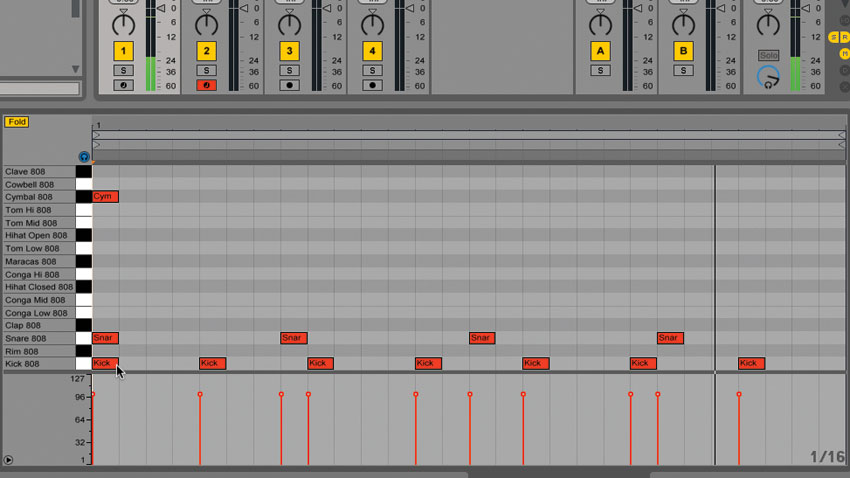
Step 6: In Live, we need to set our clip’s time signature to 28/16 by altering the numbers in its Signature field. If we then transfer the pattern from our grid of 28 slots to the MIDI Editor, we get seven evenly-spaced kick drums and four evenly-spaced snares, all in a single bar: a 7:4 polyrhythm!
Computer Music magazine is the world’s best selling publication dedicated solely to making great music with your Mac or PC computer. Each issue it brings its lucky readers the best in cutting-edge tutorials, need-to-know, expert software reviews and even all the tools you actually need to make great music today, courtesy of our legendary CM Plugin Suite.


