How to optimize your PC for music production
Follow our top tips to refresh your PC and improve your production workflow - all without spending a penny
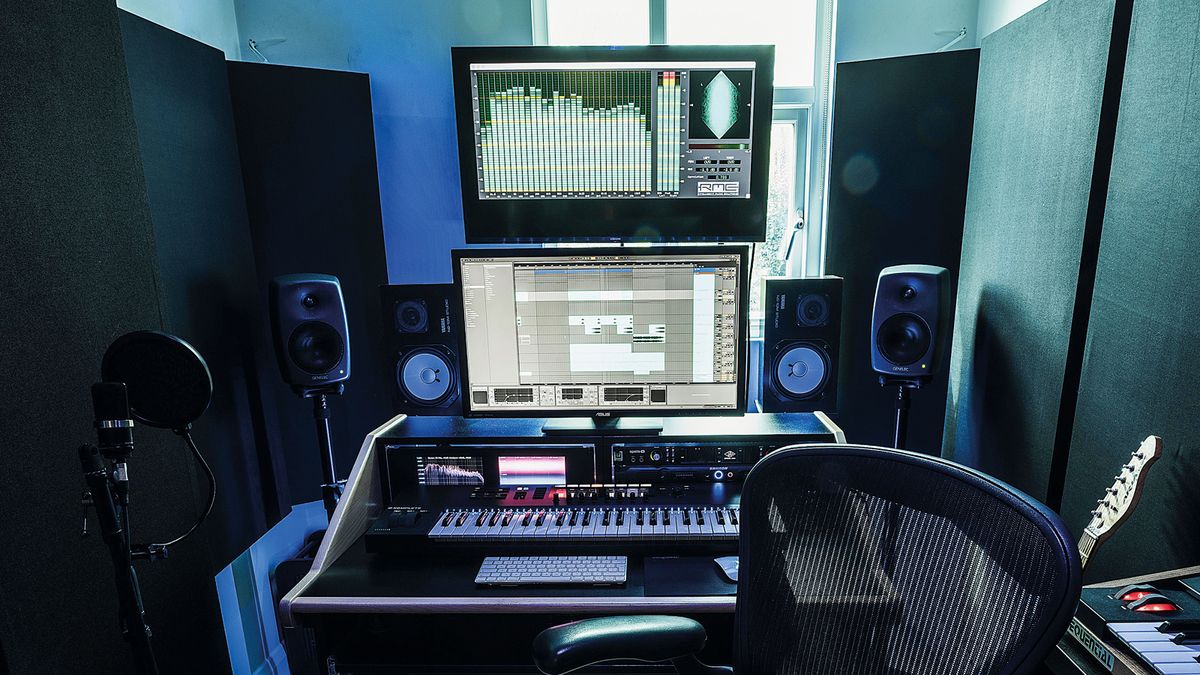
It’s every producer’s worst nightmare. You’re putting the finishing touches on that dense mix with loads of tracks, VSTs, and plugins only for playback to be ruined by pops, glitches, and dropouts from your PC. But hold off on financing that expensive new machine prematurely, because with a bit of digging into the backend of your system and some spring cleaning, there’s every chance you can get your PC back in the game. In this article, we're going to show you step-by-step how to optimize your PC for music production.
Hitting the limitations of your machine can be a painful feeling, but many musicians - and most general users - never fully utilize the desktop machines they already have. When that bloated, tired PC stops performing, many users assume it’s beyond saving and a new one is required. But speaking from personal experience, we’ve had the same music production PC for coming up to ten years now, and it’s still performing just as well as the day we got it. Why? Because we regularly clean, update, and maintain it.
So if you want to bring your PC back to life, or just make sure you’re taking the best possible care of a new machine, you’re in the right place. A lot of these tips will work on laptops for music production too, so any Windows user can benefit here. We'll be using our trusty desktop running Windows 10 64-bit, with an Intel Core i7-4790K CPU @ 4.00GHz, 16GB RAM, and an NVIDIA GeForce GTX 970. Let’s get started…
1. Start with a fresh installation of Windows
Probably the most powerful method of sprucing up your PC, a fresh installation will do wonders for any machine whether it’s two or ten years old. We’re not talking about one of those half-baked ‘resets’ either. We mean a full-on reinstall, proper scorched earth treatment. Delete everything! Of course, you should be sure to back up all your important project files first because once you perform this process there's no way of getting them back.
Doing a clean installation is a long haul as you’ll have to reinstall your programs again but trust us, the effort is worth it. Just don’t do it before you’ve got a big project deadline. We do a clean install on a yearly basis, taking a day out to give everything a total refresh, which is likely why our current PC has lasted so long. By getting rid of all the accumulated detritus your computer has picked up from the internet, installed programs, and downloaded files, you’ll free up valuable hard drive space as well as get rid of any malware running in the background and harvesting precious resources away from your music-making.
The best way to do this is to perform a clean reinstall of Windows using installation media. You’ll need a USB drive to do it, and for someone performing a reinstall for the first time it can be quite daunting, but it’s one of those things that will come so easily after you’ve plowed through it. You can find the details of how to do this on the Microsoft support site, so just follow those instructions to get your PC feeling squeaky clean again.
2. Adjust your performance & power options
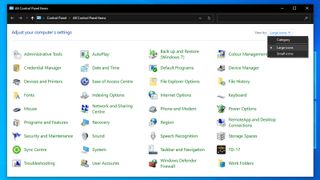
Once you’ve freshly installed Windows and re-installed your software, you can look to optimizing your PC settings for music production. The first step is looking at the performance and power options that will ensure all your system's resources are geared in the right direction. To make life easier for you here, first search ‘Control Panel’ in the start menu, and in the top right hit the ‘View by’ button and set it to ‘Large icons.
Get the MusicRadar Newsletter
Want all the hottest music and gear news, reviews, deals, features and more, direct to your inbox? Sign up here.
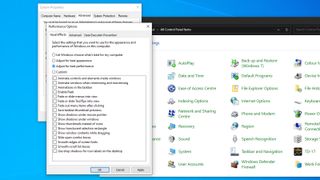
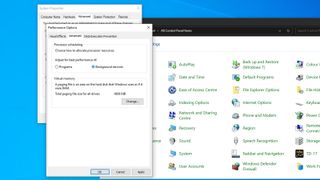
Now we’re going to adjust some of the PC's performance parameters to get a more efficient Windows experience. Go into your Start Menu and search ‘Advanced system settings’ and then in the ‘Advanced’ tab under the ‘Performance’ section hit the ‘Settings’ button. You’ll want to adjust the following settings:
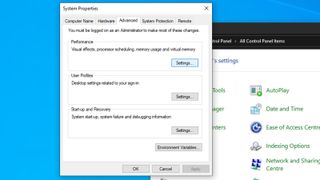
Visual Effects > Adjust for best Performance
Advanced > Processor Scheduling > Background Services.
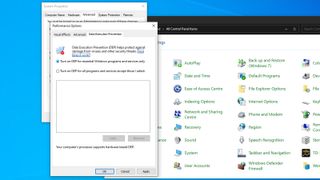
Data Execution Prevention > Turn on DEP for essential Windows programs and services only.
Once this is done, we’re going to ensure your PC is operating at maximum capacity by changing some power settings. Depending on your version of windows this is called different things, on our edition of Windows it’s called ‘Power Options’ on others it may be in ‘Power & Sleep settings’ so try searching both of these in your Start menu or find it in your Control Panel.
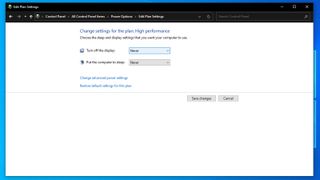
There are two things we’ll want to change here, first, you want to ensure your performance plan is set to ‘High performance’.
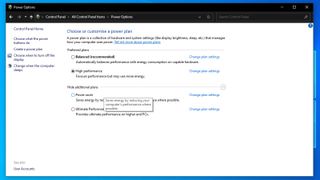
Then hit ‘Change plan settings’ to the right and ensure that both options are set to ‘Never’. Make sure to save changes before you move on to the next step.
3. Ensure good USB management
USB devices are a necessity for musicians, whether it’s your audio interface or MIDI keyboard, so we want to make sure they’re performing their best. Your system will sometimes try to be more power efficient by cutting power to USB ports that aren’t currently active, which can lead to issues with your hardware and delay in your workflow, so let’s remedy that.
Start by typing ‘Device Manager’ into the Start menu or finding it in your Control Panel, then scroll down to 'Universal Serial Bus controllers'. Note that your device will need to be plugged in to show here, so make sure you’ve got your controllers and interface plugged in at both ends before doing this. Click the arrow to the left of the device name which will open up a list of your USB devices.
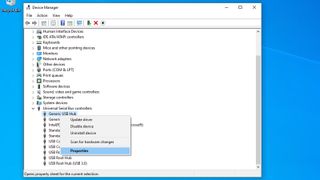
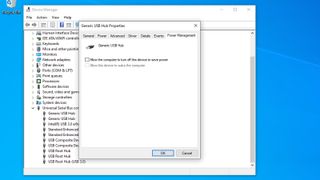
Then you’ll need to right-click on one, hit ‘Properties’ then go to the ‘Power Management’ tab, and deselect the tick box that states ‘Allow the computer to turn off this device to save power’. Once you’re done repeat the process for all of the USB devices present and you’re good to move on to the next step.
4. Kill greedy background apps
Apps running in the background hog up resources that could be going to your DAW, so we’re going to get rid of these so both you and your PC can focus on what’s important. Annoyingly Windows starts these every time you load the computer, and many apps that you install will be set to automatically start with Windows, which increases the time it takes for your computer to start up and takes valuable CPU and memory resources whilst it's running.
We’re going to kill these apps at the source by preventing them from starting up in the first place. Just hit Ctrl+Shift+Esc on your keyboard to bring up the Task Manager. Navigate to the ‘Startup’ tab and have a look at the programs listed. Click on any programs you don’t want starting up with your computer and hit the ‘Disable’ button in the bottom right. This will prevent the program from starting up until you actually ask it to do so.
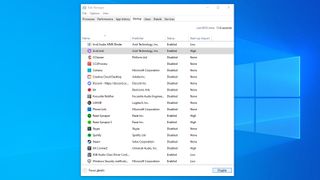
You won’t harm your computer by disabling all of these programs either, as all the important backend parts that make your computer work aren’t located here. As a Pro Tools user, we let our Avid Link program start up automatically to ensure we’re always up to date, but for everything else, we disable it. Doing this isn’t just good for music production either, it’ll make your PC run smoother in general, so well worth doing for any Windows user.
5. Optimize your hard drives
You know how they say a clean desk equals a clean mind? Well in the PC world, a clean disk equals a fast drive. Not only does removing potentially distracting programs like Steam or Discord leave you freer to focus on your productions, but it can also have a marked impact on the performance of your PC.
A full hard drive affects how fast your computer can run, and it’s recommended that you have at least 15-20% of your main hard drive completely free to ensure maximum efficiency. So start by searching ‘add or remove programs’ in your Start menu and uninstall anything that doesn’t really need to be there.
If you’re not already using one, an external hard drive is an incredibly useful tool for a music producer. As well as allowing you to store your project files and samples in a transportable format, it also helps free up valuable space on your main hard drive, which you can leave for essential software like your DAW, VSTs, and plugins.
As well as freeing up space there are a couple of other tricks you can perform, although these will only work on older non-SSD drives, known as ATA and SATA hard drives.
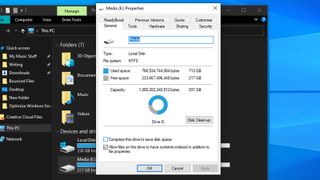
First up, head to File Explorer or This PC (both accessible by searching in the Start menu if you’re not sure where they are) and find your non-SSD hard drives. Right-click the drives in question, hit ‘Properties’ then head to the ‘General’ tab and make sure that ‘Compress this drive to save disk space’ is unchecked.
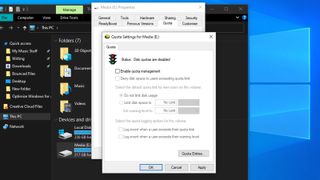
Then head to the ‘Quota’ tab and make sure ‘Do not limit disk usage’ is checked, but that everything else on this page remains unchecked.
Lastly, we will want to defragment our hard drives. Once again this isn’t necessary on an SSD drive, but should be part of your regular maintenance for any ATA or SATA hard drive. Defragging is especially important for large audio and multimedia files, and this is because as your data is written to the disk, it’s placed in the first available location. If there’s not enough space between this location and the next file occupying the drive, the file will be ‘split’ into a different location, resulting in a delay when recalling the file.
If you’ve ever found one of your hard drives is much slower than the other despite being the same in every way, this is likely the reason why. Defragging rearranges the files so that they are no longer split across the drive but placed in the same location, enhancing the speed of your drive and increasing the stability of your machine overall. There is a built-in defragment tool in Windows which you can call up by hitting Start and typing ‘Defragment’. There’s also a useful article on the Microsoft website if you want more info on how to perform a defrag.
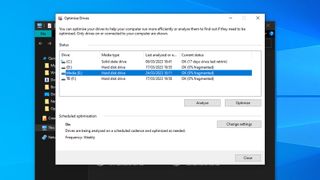
It’s worth noting that if a drive hasn’t been defragged recently, this process can take a long time. So it’s probably best to do it when you don’t have any pressing projects or tasks that need undertaking. We like to leave ours on a schedule that allows it to run at a time we're not using the computer, while many third-party defrag apps like Smart Defrag and Defraggler have an option to automatically shut down your computer once the defrag is completed.
6. Optimize the performance of your audio interface
Your PC is the major player in your workflow when it comes to music production, but there are also a couple of things you can do to eke better performance out of your audio interface as well.
Try a third-party audio driver
Many audio interfaces come with their own drivers, and most companies put a lot of effort into their drivers to ensure they’re regularly updated, but some don’t. First of all, it’s always good practice to intermittently check that there hasn’t been an update for your audio interface driver, but if you find you’re not getting the performance you require, you can always try a third-party driver.
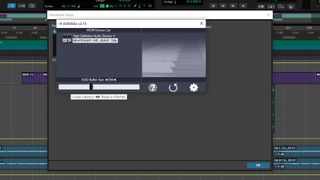
ASIO4ALL has proven to be a lifesaver for us on a number of occasions over the years, and in many instances works much better than the manufacturer's own driver. So if you’re struggling with poor performance or you want to troubleshoot an issue, it offers a greater depth of options and functionality than some native drivers which can be useful in certain circumstances. Installing ASIO4ALL is a super fast process and once it’s done, you just need to select it as your main audio driver in your DAW in order to start using it.
Adjust your buffer size and sample rate
If you’ve got a big project on the go and you’re getting clicks or pops, make sure you’ve got your buffer size set correctly. Buffer size is the number of samples (i.e. the amount of time) with which your computer processes audio signals. It goes hand in hand with something called sample rate, which is how many times a second the sample (i.e. your audio) is captured.
A low buffer size means decreased latency, especially important during the recording phase, whilst a high sample rate increases the quality of the audio captured. The problem with low buffer size and high sample rate is that it’s very taxing on your CPU, so if you’ve not got a PC that’s powerful enough, you may see your computer struggle to play back, resulting in those horrible clicks, pops, and dropouts.
Your audio interface isn’t directly responsible for these issues, as it's also hamstrung by the limitations of your PC, but you can attempt to alleviate the strain in a couple of ways.
First of all, you’ll need to get the buffer size as low as possible for recording. A higher buffer size means a higher latency, so for example, recording with a buffer size of 64 at a sample rate of 44.1kHz means a delay of around 1.5ms. This isn’t really noticeable for most musicians, but increase your buffer to 1024 and your delay will be around 23ms, which you’ll definitely notice. Increasing the sample rate will lower this delay, but unfortunately, that also means more stress on your computer’s resources.
You’ll need to play around with your settings to find the sweet spot, and on resource-limited PCs, you will likely need to resort to disabling tracks, plugins, and VSTs that aren’t in use if you can’t get your buffer size down low enough during recording. It’s good practice to stay away from CPU-intensive plugins when recording because you can always add these in later during the mixing phase. For most musicians, you can get up to a buffer size of around 256 before you start to really notice the latency when recording.
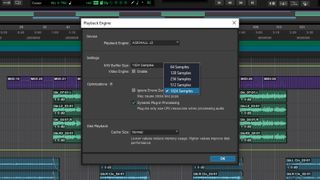
Once you’ve recorded your part you can then raise your buffer size to alleviate the strain on your computer. This will allow you to add in more plugins and effects without causing the clicks and pops that make mixing impossible. All you’ll notice with a higher buffer size during recording is that there may be a short delay between pressing play and your mix playing back, but you’ll reap the benefits of being able to add more to your mix.
Related buyer's guides
- Check out the best budget PCs for music production
- See clear with the best computer monitors for music production
- Get yourself the best mouse for music production
- Save money with the best budget laptops for music production

Matt is a Junior Deals Writer here at MusicRadar. He regularly tests and reviews music gear with a focus on audio interfaces, studio headphones, studio monitors, and pretty much anything else home recording-related. Matt worked in music retail for 5 years at Dawsons Music and Northwest Guitars and has written for various music sites including Guitar World, Guitar Player, Guitar.com, Ultimate Guitar, and Thomann’s t.blog. A regularly gigging guitarist with over 20 years of experience playing live and producing bands, he's currently studying Sound Engineering and Music Production at Spirit Studios in the UK.

