How to obtain a successful live sound with the correct speaker placement
Location is everything
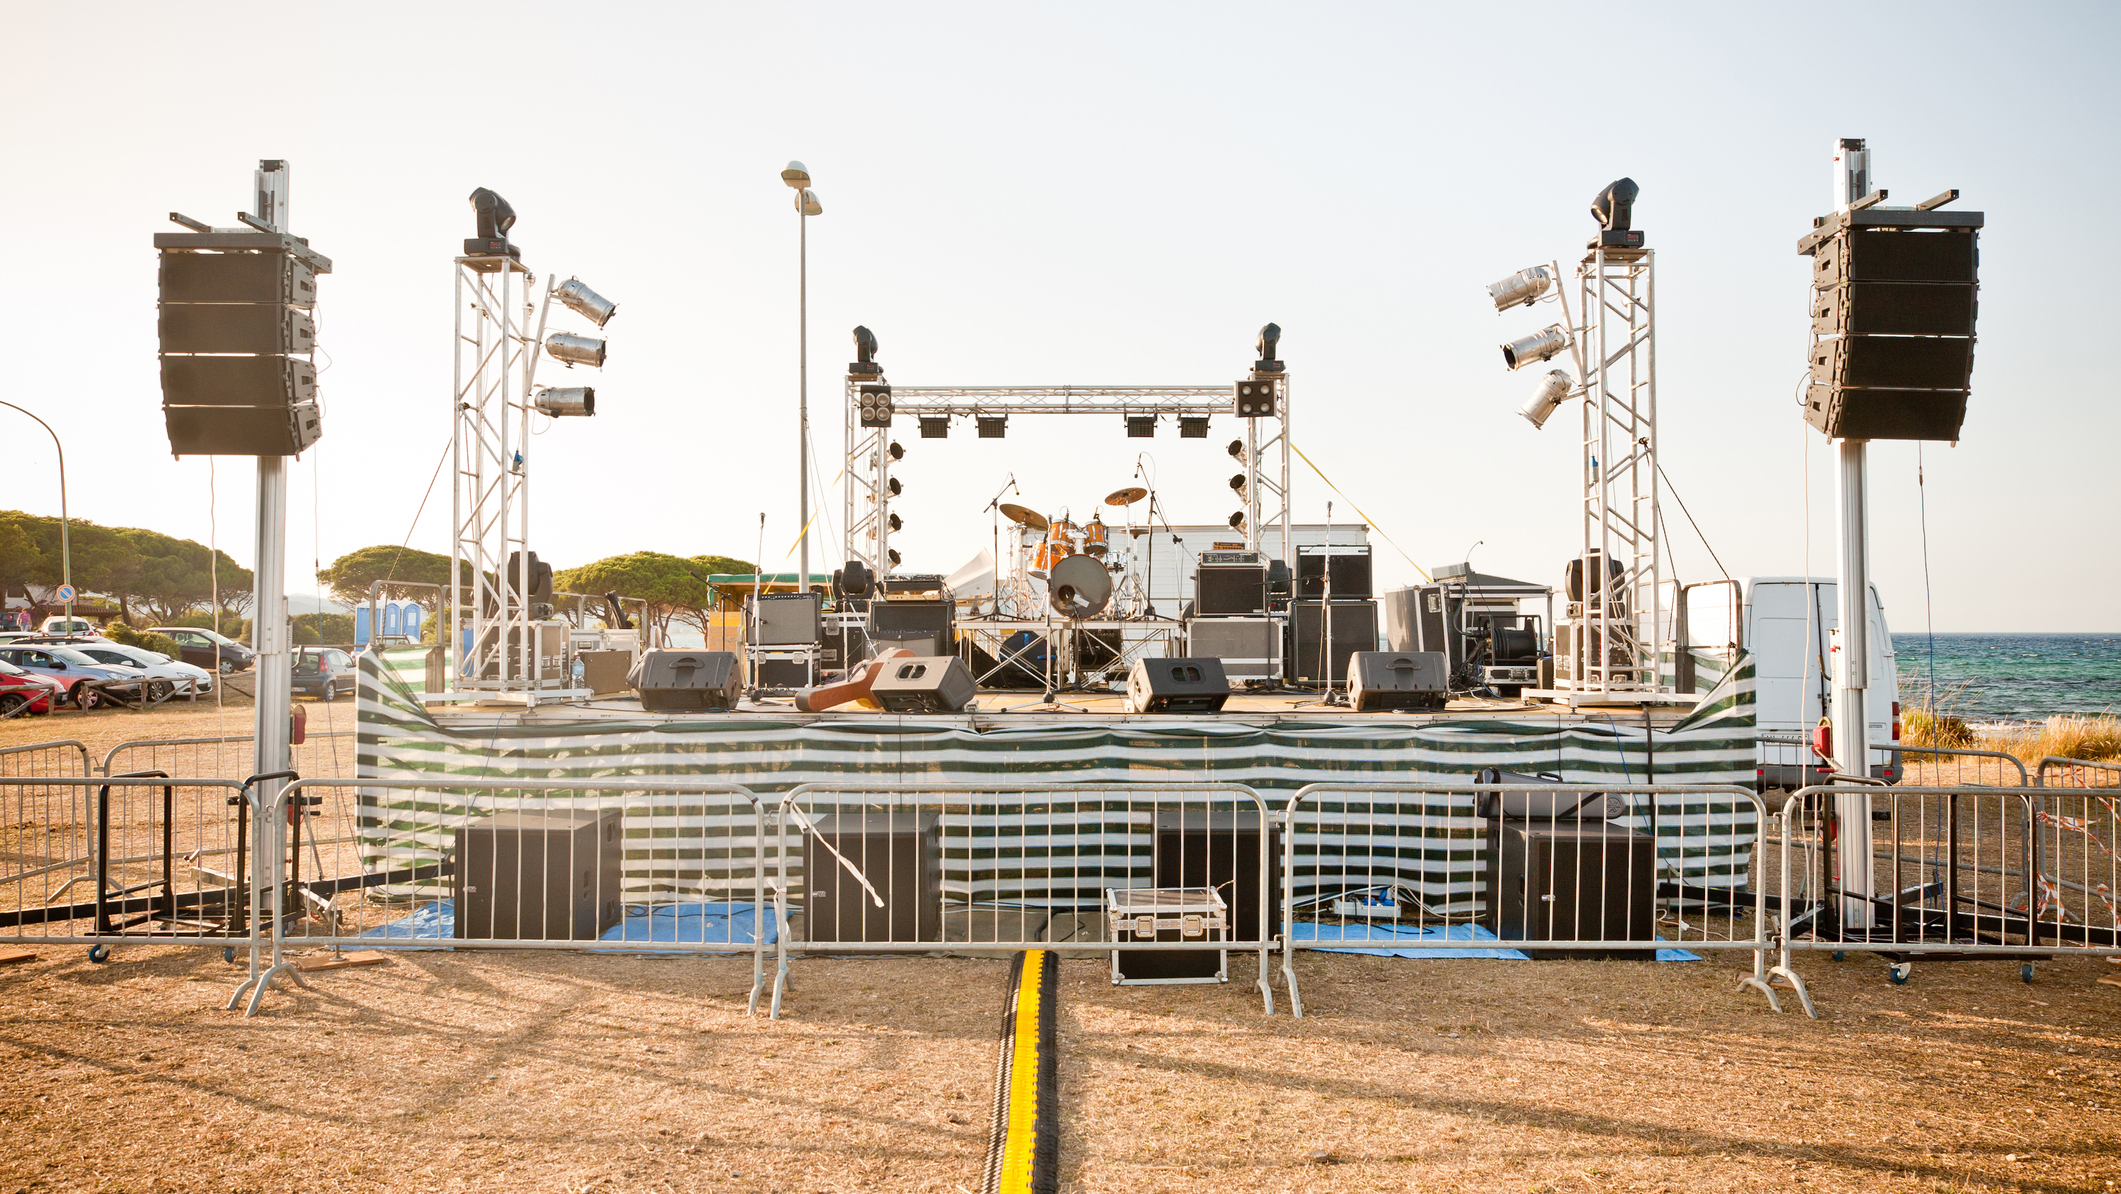
Some gigs are a real breeze, there's no feedback, the instruments and vocals are balanced, and the sound levels are comfortable for listeners in both front and rear rows. But other times you run into an audio nightmare, your speakers are belching pure feedback, the folks up front are sustaining permanent ear damage while those in the back hear only mud, the club manager is steamed, and you may not get an invitation to come back.
These two strikingly different scenarios can occur in the same venue with exactly the same audio gear. What's the difference? In the first instance, performers adhere to the basic principles of speaker placement; in the second, they don't. When you violate those elementary audio rules, no sound system will perform optimally.
• The best in-ear monitors: IEMs to suit all budgets
• The best studio microphones for instruments, vocals and podcasts
Most small bars and “critter clubs”, as local bands call Moose, Elk, and Eagle lodges, were never designed for the acoustic onslaught of rock 'n' roll. Start with some bad panelling, a linoleum floor, and a tin ceiling, then add a local garage band blasting away in the corner, and you've got a recipe for aural mayhem. Club owners typically don't spend much time or money on acoustic enhancements. They might build an 18-inch-high stage in the corner of the room, with a few dedicated 20-amp AC circuits, but beyond that, you're often on your own.
The better you understand how PA speaker systems work, the better your sound will be. All the advanced signal processors, compressors, and limiters in the world won't help if placement errors leave your sound system with inherent flaws. Here are a few simple speaker and microphone placement rules that will help you transform a potential gig from hell into a great-sounding show.
I can't count the number of times I've seen P.A. speakers placed right down on the dance floor, effectively putting the horns at waist level for the dancers. While bass frequencies behave a lot like water, flowing around most obstacles, midrange and high frequencies act more like light beams — objects in their path interrupt and absorb them. When you place speakers down low, the people sitting in the front rows not only get an earful of high frequencies but also absorb and disperse them. Meanwhile, listeners in back hear lows without the midrange presence and high-frequency sizzle that make vocals stand out.
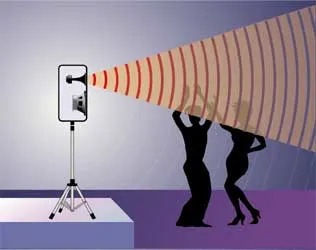
Figure 1: Elevate speaker cabinets so that the high frequencies project over the heads of the audience members closest to the stage.
Get the MusicRadar Newsletter
Want all the hottest music and gear news, reviews, deals, features and more, direct to your inbox? Sign up here.
What to do? Elevate! Most of the time you just need a pair of speaker stands (see Fig. 1). Many P.A. cabinets have an integral stand socket that allows you to mount them, raising that all-important horn above the crowd. I like to get my speakers as high as reasonably possible, with the horns at least 7 to 8 feet above dance-floor level. This has two desirable effects: it leaves high-frequency sounds unmuzzled, and it beams less sound directly at fans upfront. You get less volume in the front of the room, where you don't need it, and more in the back of the room, where it makes a critical difference.

The best PA speakers: the best compact live sound systems for bands and buskers
However, keep in mind that only mid and high cabinets belong up in the air. For single cabinets containing, say, a 15-inch speaker and a 1-inch horn, your only alternative is to elevate the whole enclosure. But if you have separate subwoofers, they should remain on the floor. Subwoofers actually operate more efficiently (and get louder) at floor level. Whenever you put a bass speaker up in the air, you instantly lose half of its power, and most of the time you need all the bass you can get.
Caution: remember to use proper speaker stands and mounting hardware when you elevate speaker cabinets. Be smart, don't put heavy enclosures on folding chairs or light furniture. Make sure you have the speaker stand's legs splayed properly, and never exceed load limits. Use sandbags or old gym weights on the legs so that wind (at outdoor events) or jostling from crowds won't tip the stands over. Tape down cables and route foot traffic away from stands to avoid injuries. You can never play it too safe.
The right direction
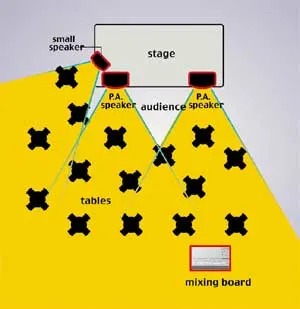
Figure 2: This typical speaker arrangement shows high-frequency dispersion patterns and includes a small speaker that's been added to cover tables at one side of the stage.
Like microphones, speakers have a directional pattern and tend to beam mid- and high-frequency sounds in specific directions at varying angles. You can group speaker patterns into two general categories: long-throw and short-throw. Long-throw speakers, which have projection patterns as narrow as 20 degrees, are used exclusively for concert sound systems targeting crowds hundreds of feet away. By comparison, most club speakers are short-throw, with dispersion patterns of 60 by 40 degrees or wider. This means most of the midrange and high frequencies project out in a cone about 60 degrees wide by 40 degrees high. If the audience strays outside this range, they'll mostly hear booming bass sounds and miss the vocals.
As a general rule, if you can't see the throat of the horn, you can't hear it. Try to aim speakers toward the most important part of the room. If you need to cover a group of listeners seated directly beside the stage, you may have to aim an additional set of small speakers to the side so everyone can hear (see Fig. 2). These speakers don't require a lot of bass response, but they should have a wide dispersion pattern if possible. I keep a set of Bose 800 cabinets in my trailer for just such contingencies. They have a very wide dispersion pattern and are not as loud as a horn-loaded cabinet, making them perfect for covering tables directly to the side of a stage.
Ge thee behind me, feedback!
You must place speakers in front of the band to eliminate the speaker-to-mic path, the primary cause of feedback. All stage microphones have a directional pickup pattern, typically called unidirectional or cardioid, designed to pick up sounds right in front of the mic while rejecting the sounds at the sides and rear.
A microphone's pickup pattern acts like a flashlight beam: any sound present where the beam points is going to be picked up and amplified. Of course, some mics, like floodlights, have a wide pattern, and others, like penlights, have a very narrow pattern. A narrower pattern curbs feedback.
If you place the P.A. speakers right behind the band, the microphones point directly at the speakers. This means the mics will pick up speaker sounds and feed them back into the amplifier; the sounds come back out through the speakers and into the mics, completing the feedback loop. Each time the sound cycles through the loop, it gets amplified, resulting in a screech that forces all the amplifiers to clip and overdrives the speakers. Feedback is not just hard on the ears, it's hard on your gear, and it can destroy speakers and amplifiers.
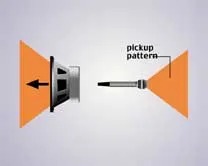
To combat feedback, always place your P.A. speakers as far downstage as possible and point your microphones in the opposite direction. Simply put, you should place the speakers between you and the audience, and the mics between the back of the P.A. cabinets and the band. This puts more distance between the mic and speaker and aligns the cancellation action of the mic pattern with the back of the speaker pattern, where you'll find the fewest midrange and high frequencies (see Fig. 3).
Monitors are speakers too
Monitor wedges are like little P.A. speakers, so you can't ignore monitor placement in relation to microphones, or feedback will likely result. Since you must aim a monitor at a player, the most effective placement is directly in front of the mic stand. Most wedges are constructed so that you can place them at two different angles: straight up directly in front of the mic, or at a shallower angle that covers the back of the stage. It is important to point the monitor's horn right at the ears of the target musician while keeping it behind the microphone's pickup pattern; this cancels out the speaker's sound as much as possible.
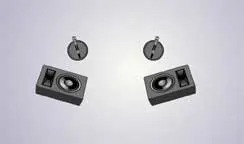
Figure 4: A typical monitor setup using supercardioid microphones. Note that the mics are placed 15 degrees off-axis to best utilize their rear-rejection characteristics.
Purists will note that supercardioid mics like the venerable Shure Beta 58A have a very narrow front-pickup pattern, but they achieve this by sacrificing some of the rejection pattern directly behind the mic. Supercardioid mics are designed to work well with either a pair of floor wedges split 15 degrees off the center rear of the mic, or a single floor wedge slightly offset from the rear of the mic. If you point the back of a supercardioid mic directly at a monitor speaker, it will feed back more easily than if you offset it by 15 degrees or so (see Fig. 4).
Dead sources tell no tales
Switch off extra sound sources when you don't need them. Leaving your acoustic guitar “hot” while setting it on a stand next to a monitor speaker can lead to disaster. The whole body of the instrument will vibrate passively like a drumhead, channeling stage noise into the pickup and producing howling feedback. Even if the unattended guitar doesn't feed back, just having the extra sound from the pickup mixed into the P.A. can cause echo and phase-related problems. Savvy acoustic guitar players use a kill switch on each guitar line, muting the instrument whenever it is out of their hands. Also, always zero your main and monitor outputs before powering up your system to avoid jarring (and unprofessional) feedback from an unexpected open source.
Rules to live by
You simply can't control a lot of things at gigs, obnoxious musicians who refuse to turn down, unforgiving rooms with hard surfaces and massive slap-back echo, or just plain bad equipment. It's a jungle out there!
By applying these basic speaker and microphone placement techniques, you can maximise P.A. output, get better room coverage, reduce feedback, and achieve a cleaner mix. Fewer complaints, more compliments, and additional work will soon follow, and that is the bottom line.
Electronic Musician magazine is the ultimate resource for musicians who want to make better music, in the studio or onstage. In each and every issue it surveys all aspects of music production - performance, recording, and technology, from studio to stage and offers product news and reviews on the latest equipment and services. Plus, get in-depth tips & techniques, gear reviews, and insights from today’s top artists!
